JVC GR-DA20EK User manual

GR-DA20EK
LYT1780-001A
EN
ENGLISH
Dear Customer,
Thank you for purchasing this
digital video camera. Before use,
please read the safety information
and precautions contained in
pages, 2 – 6 to ensure safe use
of this product.
INSTRUCTIONS
DIGITAL VIDEO CAMERA
GR-DA20EK.book Page 1 Thursday, August 2, 2007 12:08 PM

2 EN
MasterPage: Left
●Before recording important video, be sure
to make a trial recording.
Play back your trial recording to make sure the
video and audio have been recorded properly.
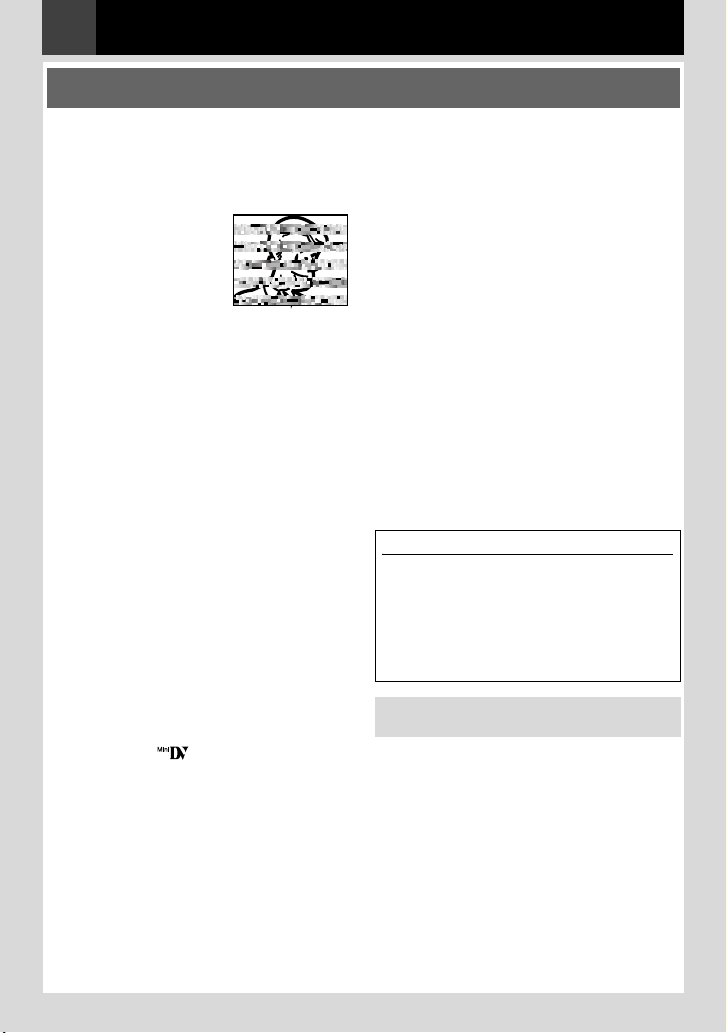
●We recommend cleaning your video heads
before use.
If you haven’t used
your camcorder for
awhile, the heads may
be dirty. We
recommend
periodically cleaning
the video heads with a
cleaning cassette
(optional).
●Be sure to store your cassette tapes and
camcorder in the proper environment.
Video heads can become dirty more easily if
your cassette tapes and camcorder are stored
in a dusty area. Cassette tapes should be
removed from the camcorder and stored in
cassette cases. Store the camcorder in a bag
or other container.
●Use SP (Standard Play) mode for important
video recordings.
LP (Long Play) mode lets you record 50%
more video than SP (Standard Play) mode, but
you may experience mosaic-like noise during
playback depending on the tape characteristics
and the usage environment.
So, for important recordings, we recommend
using SP mode.
●For safety and reliability.
It is recommended only genuine JVC batteries
and accessories are used in this camcorder.
●This product includes patented and other
proprietary technology and will operate
only with JVC Data Battery. Use the JVC
BN-VF808U/BN-VF815U/BN-VF823U battery
packs. Using generic non-JVC batteries can
cause damage to the internal charging
circuitry.
●Make sure you only use cassettes with the
Mini DV mark .
●Remember that this camcorder is not
compatible with other digital video formats.
●It is recommended that you use JVC brand
cassette tapes.
Your camcorder is compatible with all brands of
commercially available cassette tapes
complying with the MiniDV standard, but JVC
brand cassette tapes are designed and
optimised to maximise the performance of your
camcorder.
●Remember that this camcorder is intended
for private consumer use only.
Any commercial use without proper permission
is prohibited. (Even if you record an event such
as a show, performance or exhibition for
personal enjoyment, it is strongly
recommended that you obtain permission
beforehand).
●DO NOT leave the unit
- in place of over 50°C.
- in place where humidity is extremely low
(below 35%) or extremely high (80%).
- in direct sunlight.
- in a closed car in summer.
- near a heater.
●The LCD monitor is made with high-
precision technology. However, black spots or
bright spots of light (red, green or blue) may
appear constantly on the LCD monitor. These
spots are not recorded on the tape. This is not
due to any defect of the unit.
(Effective dots: more than 99.99%)
●Do not leave the battery pack attached when
the camcorder is not in use and check the
unit regularly whether it is working or not.
Also read “Cautions” on pages 35 - 37.
Read This First !
About Batteries
DANGER! Do not attempt to take the batteries
apart, or expose them to flame or excessive
heat, as it may cause a fire or explosion.
WARNING! Do not allow the battery or its
terminals to come in contact with metals, as
this can result in a short circuit and possibly
start a fire.
To deactivate the demonstration, set
“DEMO MODE” to “OFF” (墌21, 24).
GR-DA20EK.book Page 2 Thursday, August 2, 2007 12:08 PM

EN 3
MasterPage: Start_Right
ENGLISH
Safety Precautions
IMPORTANT (for owners in the U.K.)
Connection to the mains supply in the
United Kingdom.
DO NOT cut off the mains plug from this
equipment.
If the plug fitted is not suitable for the power
points in your home or the cable is too short to
reach a power point, then obtain an
appropriate safety approved extension lead or
consult your dealer.
BE SURE to replace the fuse only with an
identical approved type, as originally fitted,
and to replace the fuse cover.
If nonetheless the mains plug is cut off be sure
to remove the fuse and dispose of the plug
immediately, to avoid possible shock hazard by
inadvertent connection to the mains supply.
If this product is not supplied fitted with a mains
plug then follow the instructions given below:
DO NOT make any connection to the Larger
Terminal coded E or Green.
The wires in the mains lead are coloured in
accordance with the following code:
If these colours do not correspond with the
terminal identifications of your plug, connect as
follows:
Blue wire to terminal coded N (Neutral) or
coloured black.
Brown wire to terminal coded L (Live) or
coloured Red.
If in doubt - consult a competent electrician.
WARNING: TO PREVENT FIRE OR SHOCK
HAZARD, DO NOT EXPOSE THIS UNIT TO
RAIN OR MOISTURE.
CAUTIONS:
●To prevent shock, do not open the cabinet.
No user serviceable parts inside. Refer
servicing to qualified personnel.
●When you are not using the AC Adapter for a
long period of time, it is recommended that
you disconnect the power cord from AC
outlet.
Blue to N (Neutral)
or Black
Brown to L (Live)
or Red
CAUTION:
To avoid electric
shock or damage
to the unit, first
firmly insert the
small end of the
power cord into the
AC Adapter until it
is no longer
wobbly, and then plug the larger end of the
power cord into an AC outlet.
CAUTIONS:
●This camcorder is designed to be used with
PAL-type colour television signals. It cannot
be used for playback with a television of a
different standard. However, live recording
and LCD monitor playback are possible
anywhere.
●This product includes patented and other
proprietary technology and will operate only
with JVC Data Battery. Use the JVC
BN-VF808U/BN-VF815U/BN-VF823U
battery packs and, to recharge them or to
supply power to the camcorder from an AC
outlet, use the provided multi-voltage AC
Adapter. (An appropriate conversion adapter
may be necessary to accommodate different
designs of AC outlets in different countries.)
NOTES:
●The rating plate (serial number plate) and
safety caution are on the bottom and/or the
back of the main unit.
●The rating information and safety caution of
the AC Adapter are on its upper and lower
sides.
WARNING:
Batteries shall not be exposed to excessive
heat such as sunshine, fire or the like.
CAUTION:
The mains plug shall remain readily operable.
GR-DA20EK.book Page 3 Thursday, August 2, 2007 12:08 PM

4 EN
MasterPage: Left
When the equipment is installed in a cabinet or
on a shelf, make sure that it has sufficient
space on all sides to allow for ventilation
(10 cm or more on both sides, on top and at
the rear).
Do not block the ventilation holes.
(If the ventilation holes are blocked by a
newspaper, or cloth etc. the heat may not be
able to get out.)
No naked flame sources, such as lighted
candles, should be placed on the apparatus.
When discarding batteries, environmental
problems must be considered and the local
rules or laws governing the disposal of these
batteries must be followed strictly.
The apparatus shall not be exposed to dripping
or splashing.
Do not use this equipment in a bathroom or
places with water.
Also do not place any containers filled with
water or liquids (such as cosmetics or
medicines, flower vases, potted plants, cups
etc.) on top of this unit.
(If water or liquid is allowed to enter this
equipment, fire or electric shock may be
caused.)
Do not point the lens directly into the sun. This
can cause eye injuries, as well as lead to the
malfunctioning of internal circuitry. There is
also a risk of fire or electric shock.
CAUTION!
The following notes concern possible physical
damage to the camcorder and to the user.
When carrying, be sure to always securely
attach and use the provided strap. Carrying or
holding the camcorder by the LCD monitor can
result in dropping the unit, or in a malfunction.
Take care not to get your finger caught in the
cassette holder cover. Do not let children
operate the camcorder, as they are particularly
susceptible to this type of injury.
Do not use a tripod on unsteady or unlevel
surfaces. It could tip over, causing serious
damage to the camcorder.
CAUTION!
Connecting cables (Audio/Video, S-Video, etc.)
to the camcorder and leaving it on top of the TV
is not recommended, as tripping on the cables
will cause the camcorder to fall, resulting in
damage.
GR-DA20EK.book Page 4 Thursday, August 2, 2007 12:08 PM

EN 5
MasterPage: Start_Right
ENGLISH
Information for Users on Disposal of
Old Equipment
[European Union]
This symbol indicates
that the electrical and
electronic equipment
should not be
disposed as general
household waste at its
end-of-life. Instead,
the product should be
handed over to the
applicable collection
point for the recycling
of electrical and
electronic equipment
for proper treatment,
recovery and recycling
in accordance with
your national legislation.
By disposing of this product correctly, you will
help to conserve natural resources and will
help prevent potential negative effects on the
environment and human health which could
otherwise be caused by inappropriate waste
handling of this product. For more information
about collection point and recycling of this
product, please contact your local municipal
office, your household waste disposal service
or the shop where you purchased the product.
Penalties may be applicable for incorrect
disposal of this waste, in accordance with
national legislation.
(Business users)
If you wish to dispose of this product, please
visit our web page www.jvc-europe.com to
obtain information about the take-back of the
product.
[Other Countries outside the European
Union]
If you wish to dispose of this product, please
do so in accordance with applicable national
legislation or other rules in your country for
the treatment of old electrical and electronic
equipment.
Attention:
This symbol is
only valid in the
European Union.
Dear Customer, [European Union]
This apparatus is in conformance with the
valid European directives and standards
regarding electromagnetic compatibility and
electrical safety.
European representative of Victor Company of
Japan Limited is:
JVC Technology Centre Europe GmbH
Postfach 10 05 52
61145 Friedberg
Germany
GR-DA20EK.book Page 5 Thursday, August 2, 2007 12:08 PM

6 EN
MasterPage: Left
SOME DO’S AND DON’TS ON THE SAFE
USE OF EQUIPMENT
This equipment has been designed and
manufactured to meet international safety
standards but, like any electrical
equipment, care must be taken if you are to
obtain the best results and safety is to be
assured.
DO read the operating instructions before you
attempt to use the equipment.
DO ensure that all electrical connections
(including the mains plug, extension leads and
interconnections between pieces of equipment)
are properly made and in accordance with the
manufacturer’s instructions. Switch off and
withdraw the mains plug when making or
changing connections.
DO consult your dealer if you are ever in doubt
about the installation, operation or safety of your
equipment.
DO be careful with glass panels or doors on
equipment.
DON’T continue to operate the equipment if you
are in any doubt about it working normally, or if it
is damaged in any way - switch off, withdraw the
mains plug and consult your dealer.
DON’T remove any fixed cover as this may
expose dangerous voltages.
DON’T leave equipment switched on when it is
unattended unless it is specifically stated that it is
designed for unattended operation or has a
standby mode. Switch off using the switch on the
equipment and make sure that your family knows
how to do this. Special arrangements may need
to be made for infirm or handicapped people.
DON’T use equipment such as personal stereos
or radios so that you are distracted from the
requirements of road safety. It is illegal to watch
television whilst driving.
DON’T listen to headphones at high volume, as
such use can permanently damage your hearing.
DON’T obstruct the ventilation of the equipment,
for example with curtains or soft furnishings.
Overheating will cause damage and shorten the
life of the equipment.
DON’T use makeshift stands and NEVER fix legs
with wood screws - to ensure complete safety
always fit the manufacturer’s approved stand or
legs with the fixings provided according to the
instructions.
DON’T allow electrical equipment to be exposed
to rain or moisture.
ABOVE ALL
●NEVER let anyone especially children push
anything into holes, slots or any other opening
in the case - this could result in a fatal
electrical shock;
●NEVER guess or take chances with electrical
equipment of any kind — it is better to be safe
than sorry!
GR-DA20EK.book Page 6 Thursday, August 2, 2007 12:08 PM

MasterPage: TOC_Heading0_Right
EN 7
ENGLISH
Accessories ........................................ 8
Attach The Lens Cap................................. 8
Attach The Core Filter................................ 8
Attach The Shoulder Strap ........................ 9
Grip Adjustment ......................................... 9
Tripod Mounting......................................... 9
Index ...............................................10
LCD Monitor Indications ........................12
Power ..............................................13
Language Settings ...............................14
Date/Time Settings ..............................14
Brightness Adjustment Of The Display........15
Loading/Unloading A Cassette .................15
16:9 Wide Mode ..................................15
Basic Recording ..................................16
Tape Remaining Time............................. 16
Quick Review .......................................... 16
Zoom ....................................................... 17
Time Code............................................... 17
Recording From The Middle
Of A Tape................................................ 17
Normal Playback .................................18
Still Playback ........................................... 18
Variable Shuttle Search........................... 19
Blank Search ........................................... 19
Connections To A TV Or VCR ...................20
Menus For Detailed Adjustment ...............21
Changing The Menu Settings ...................21
Recording Menus.................................22
Playback Menus ..................................25
Features For Recording...................26
Manual Focus.....................................26
Exposure Control .................................26
Iris Lock............................................27
Backlight Compensation ........................27
Spot Exposure Control ...........................27
White Balance Adjustment......................28
Manual White Balance Adjustment............28
Wipe Or Fader Effects ...........................29
Program AE, Effects And Shutter Effects......29
Editing .......................................30
Dubbing To A VCR................................30
Dubbing To A Video Unit Equipped With A DV
Connector (Digital Dubbing).................31
Connection To A Personal Computer ..........32
Troubleshooting ..................................33
Cautions ...........................................35
User Maintenance................................37
Specifications ....................................38
Terms ..............................................39
Control Lever (墌11)
There are two kinds of operation using the
control lever.
Getting Started 8
Recording & Playback 16
Advanced Features 21
References 33
Regarding This Manual
Operation To select
4/9FOCUS Move the control lever up.
8Move the control lever down.
516:9 Move the control lever right.
3QUICK
REVIEW Move the control lever left.
Contents
AMove the control lever towards up/down/
left/right to select.
BPress down the control lever to select
SET.
1
6
:
9
1
6
:
9
SET
GR-DA20EK.book Page 7 Thursday, August 2, 2007 12:08 PM

8 EN
MasterPage: Left
To protect the lens, attach the provided lens cap to the camcorder as shown in the illustration.
Attach the core filter to the cable. The core filter reduces interference.
Accessories
Attach The Lens Cap
Attach The Core Filter
Shoulder Strap
(墌
9)
Battery Pack
BN-VF808U
AC Adapter
AP-V14E
Audio/Video Cable
(Ø3.5 mini-plug to RCA plug)
or
Power Cord
Note:
Make sure to use the provided cables for connections. Do not use any other cables.
Core Filter for Cables
Large (A): Audio/Video Cable
Small (B): AC Adapter
Lens Cap
(A) (B)
Place here during recording.
Release the stopper 3 cm
Wind once (Audio/Video Cable)
Wind twice (AC Adapter)
Getting Started
GR-DA20EK.book Page 8 Thursday, August 2, 2007 12:08 PM

EN 9
MasterPage: Start_Right
Getting Started
ENGLISH
Open the pad and make grip adjustments.
●Before making the adjustment, remove any security tags that may be attached to the velcro.
To attach the camcorder to a tripod, align the direction stud and screw to the mounting socket and
stud hole on the camcorder. Then tighten the screw clockwise.
●Some tripods are not equipped with studs.
Attach The Shoulder Strap
Strap Guide
Peel off the pad and thread
the end of the strap through
the eyelet.
Thread the strap through the
buckle, adjust its length, and use
the strap guide to fix it in place.
Position the buckle near
the eyelet and reattach the
pad.
Buckle
Eyelet
Grip Adjustment
Tripod Mounting
BATT
GR-DA20EK.book Page 9 Thursday, August 2, 2007 12:08 PM

10 EN Getting Started
Index
PLAY
REC
OFF
DV
1
2K34
57
8
6
9
L
M
T
O
R
S
W
VZ
Q
P
a
U
N
BATT
0
XY
Note:
Coloured bright spots may appear all over the LCD monitor.
However, this is not a malfunction.
How To Adjust The LCD Monitor
Slide the LCD monitor in the most convenient position.
It can slide 30° (15°downward, 15° upward).
30˚
GR-DA20EK.book Page 10 Thursday, August 2, 2007 12:08 PM

EN 11
MasterPage: Start_Right
Getting Started
ENGLISH
aControl Lever (墌7)
: Left / Rewind [
3
] (墌18) /
Quick Review [QUICK REVIEW] (墌16)
: Right / Fast-Forward [
5
] (墌18) /
16:9 Wide Screen Button [16:9] (墌15)
: Up / Play / Pause [4/9] (墌18) /
Manual Focus [FOCUS] (墌26)
: Down / Stop [8] (墌18) /
Backlight Compensation (墌27) /
Spot Exposure (墌27)
Press down: SET
BMenu Button [MENU] (墌21)
CAuto Button [AUTO] (墌11)
DData Battery Button [DATA] (墌14)
ERecording Start/Stop Button [START/STOP]
(墌16)
FZoom Lever [T/W] (墌17) /
Speaker Volume Control [VOL. +, –] (墌18)
GPower Switch [PLAY, OFF, REC]
HLock Button
ICassette Open/Eject Switch [OPEN/EJECT]
(墌15)
JBattery Release Button [BATT.] (墌13)
The connector is located beneath the LCD
monitor.
KDigital Video Connector [DV OUT] (i.LINK*)
(墌31, 32)
* i.LINK refers to the IEEE1394-1995 industry
specification and extensions thereof. The logo
is used for products compliant with the i.LINK
standard.
The connectors are located beneath the cover.
LAudio/Video Output Connector [AV] (墌20)
MDC Input Connector [DC] (墌13)
NPOWER/CHARGE “ ” Lamp (墌13)
OLCD Monitor (墌10)
PShoulder Strap Eyelet (墌9)
QGrip Strap (墌9)
RCamera Sensor
(Be careful not to cover this area, a sensor
necessary for shooting is built-in here)
SStereo Microphone
TLens
USpeaker (墌18)
VBattery Cover (墌13)
WCassette Holder Cover (墌15)
XStud Hole (墌9)
YTripod Mounting Socket (墌9)
ZBattery Pack Mount (墌13)
aConnector Cover
Controls
Connectors
Indicator
Other Parts
Power Switch Position
PLAY:
To play back a recording on the tape.
OFF:
To switch off the camcorder.
REC:
To perform recording on the tape.
Auto/Manual Mode
PLAY
REC
OFF
Press AUTO button repeatedly to switch to
auto/manual recording mode. When manual
mode is selected, the indicator “M” appears
on the LCD monitor.
Auto Mode : A
You can record using no special effects or
manual adjustments.
Manual Mode : M
Recording is possible by setting various
functions manually.
M
Set the power switch while
pressing down the lock button.
GR-DA20EK.book Page 11 Thursday, August 2, 2007 12:08 PM

12 EN Getting Started
aBattery Remaining Power Indicator (墌34)
BOperation Mode (墌11)
A: Auto Mode
M: Manual Mode
C: Night-Scope Indicator (墌29)
: Gain Up Mode (墌22)
DShutter Speed (墌30)
EWhite Balance Indicator (墌28)
FSelected Effect Indicator (墌30)
GSelected Program AE Indicator (墌29)
HSOUND 12BIT/16BIT: Sound Mode
Indicator (墌23) (Appears for approx. 5
seconds after turning on the camcorder.)
IDigital Image Stabiliser (“DIS”) (墌22)
(only indicator is displayed)
JTime Code (墌23)
KManual Focus Adjustment Indicator (墌26)
LDate/Time (墌23)
MWind Cut Indicator (墌22)
NSelected Wipe/Fader Effect Indicator (墌29)
O: Spot Exposure Control Indicator (墌27)
: Backlight Compensation Indicator
(墌27)
±: Exposure Adjustment Indicator (墌26)
: Iris Lock Indicator (墌27)
PREC: (Appears during recording.) (墌16)
QTape Running Indicator
(Rotates while tape is running.)
RTape Remaining Time (墌16)
SRecording Speed Mode (SP/LP) (墌23)
(only LP indicator is displayed)
TSelected Wide Mode Indicator (墌15)
(only 16:9 indicator is displayed)
UZoom Indicator (墌17)
VApproximate Zoom Ratio (墌17)
aBattery Remaining Power Indicator (墌34)
BSound Mode Indicator (墌25)
CBlank Search Indicator (墌19)
DTape Speed (SP/LP)
(only LP indicator is displayed)
EVariable Search Speed Indicator: x-10, x-3,
x3 and x10 (墌19)
F4: Playback
5
: Fast-Forward/Shuttle Search
3
: Rewind/Shuttle Search
9: Pause
GDate/Time (墌25)
HVOLUME: Volume Level Indicator (墌18)
ITime Code (墌25)
LCD Monitor Indications
During Video Recording
3
10
x
M
1
2
3
4
5
6
7
8
SOUND
12
BIT
15:55
9
0q
11:13
12. 6. 2007
REC
i
w
r
t
y
u
e
W
H
LP
– – –min
16:9
ao
p
s
During Video Playback
L
2
0
:2
V
1
O
:
L
2
1
2
.
.
200
7
x3
6
U
5
M
E
11:13
21 3465
7
8
9
12 BIT
LP
BLANK SEARCH
PUSH "STOP" BUTTON
TO CANCEL
GR-DA20EK.book Page 12 Thursday, August 2, 2007 12:08 PM

EN 13
MasterPage: Start_Right
Getting Started
ENGLISH
Set the Power Switch to “OFF” (墌11).
Open the battery cover.
Press “ OPEN” and slide the battery
cover off the camcorder in the direction as
illustrated below.
Attach the battery pack.
With the “ ” (arrow) on the battery pack
pointing at the correct direction, insert the
battery pack until it locks in place.
●Re-attach the battery cover.
(For BN-VF808U only)
Connect the AC Adapter.
●“ ” blinks to indicate charging has
started.
●When the lamp goes out, charging is
finished. Unplug the AC Adapter from the
AC outlet and disconnect the AC Adapter
from the camcorder.
Slide and hold battery release button, BATT.
(墌11), then remove the battery pack.
Charging / Recording time (approx.)
Notes:
●If a fully charged battery pack is attached to the
unit, “”lamp will blink for approx. 10
seconds before it turns off.
●Since the AC Adapter processes electricity
internally, it becomes warm during use. Be sure
to use it only in well-ventilated areas.
●After 5 minutes have elapsed in Record-
Standby mode with the cassette inserted, and
no operation is performed, the camcorder will
automatically turn off its power supplied from
the AC Adapter. In this case, the battery charge
starts if the battery is attached to the camcorder.
●Please do not pull or bend the AC Adapter plug
and cable. This may damage the AC Adapter.
Perform steps – in “Charging The
Battery Pack”.
Notes:
●Recording time is reduced significantly under
the following conditions:
•Zoom or Record-Standby mode is engaged
repeatedly.
•The playback mode is engaged repeatedly.
●Before extended use, it is recommended that
you prepare enough battery packs to cover
3 times the planned shooting time.
A
ttention:
Before detaching the power source, make sure
that the camcorder’s power is turned off. Failure to
do so can result in a camcorder malfunction.
Power
Charging The Battery Pack
1
1
1
1
2
2
2
2
3
3
3
3
AV
DC
Arrow
4
4
4
4
To AC Outlet
(110V to 240V)
AC Adapter
DC
connector
Power Cord
To detach the battery pack
Battery
pack
Required
charging time
Maximum
Continuous
Recording
Time
BN-VF808U
(Provided)
1 hr. 30 min. 1 hr. 55 min.
BN-VF815U 2 hrs. 40 min. 3 hrs. 45 min.
BN-VF823U 3 hrs. 50 min. 5 hrs. 40 min.
Using The Battery Pack
2
2
2
2
3
3
3
3
GR-DA20EK.book Page 13 Thursday, August 2, 2007 12:08 PM

14 EN Getting Started
You can check the remaining battery power
and the recordable time.
Set the Power Switch to “REC” or “PLAY”
(墌11).
Press DATA, and the battery status screen
appears.
●Press DATA again to return to the normal
screen.
●Data battery status cannot be displayed
during playback or while recording is in
progress.
●If “COMMUNICATION ERROR” appears
instead of the battery status even though
you tried to press DATA several times, there
may be a problem on the battery. In such a
case, consult your nearest JVC dealer.
Perform step in “Charging The Battery
Pack” (墌13).
The language on the display can be changed.
(墌24)
Set the Power Switch to “REC” or “PLAY”
(墌11).
●If set to “REC”, the recording mode
should be set to “M” (墌11).
Press MENU.
Select “SYSTEM”, press SET or .
Select “LANGUAGE”, press SET or .
Select the desired language, press
SET
or .
Press MENU.
Press whenever you want to return to the
previous menu screen.
The date/time is recorded onto the tape at all
times, but its display can be turned on or off
(墌23, 25).
Perform steps –in “Language Settings”.
Select “DISPLAY”, press SET or .
Select “CLOCK ADJ.” press SET or .
Select the desired date display format,
press SET or .
●Repeat this step to input time display format
(Select from “24h” or “12h”), month, date,
year, hour and minutes.
Press MENU.
Press whenever you want to return to the
previous menu screen/setting.
Data Battery System
Using AC Power
1
1
1
1
2
2
2
2
LEVEL
MAX TIME
115min
100%
50
0
BATTERY CONDITION
4
4
4
4
Language Settings
Date/Time Settings
LANGUAGE
ENGLISH
FRANCAIS
NEDERLANDS
ITALIANO
ESPAÑOL
2
A
SET
Select
1
1
1
1
2
2
2
2
3
3
3
3
4
4
4
4
5
5
5
5
6
6
6
6
CLOCK ADJ.
DATE. MONTH. YEAR
24
h
2 : 26
6 . 2007
9 .
A
B
Select
SET
1
1
1
1
2
2
2
2
1
1
1
1
2
2
2
2
3
3
3
3
4
4
4
4
GR-DA20EK.book Page 14 Thursday, August 2, 2007 12:08 PM

EN 15
MasterPage: Start_Right
Getting Started
ENGLISH
Perform steps –in “Language Settings”
(墌14).
Select “DISPLAY”, press SET or .
Select “BRIGHT”, press SET or .
Select the appropriate brightness,
press SET or .
Press MENU.
Press whenever you want to return to the
previous menu screen/setting.
The camcorder needs to be powered up to load
or eject a cassette.
Slide and hold OPEN/EJECT in the direction
of the arrow, then pull the cassette holder
cover open until it locks.
Insert or remove a tape and press the
“PUSH” close the cassette holder.
●Be sure to press only the section labelled
“PUSH” to close the cassette holder;
touching other parts may cause your finger
to get caught in the cassette holder,
resulting in injury or product damage.
●Once the cassette holder is closed, it
recedes automatically. Wait until it recedes
completely before closing the cassette
holder cover.
●When the battery pack’s charge is low, you
may not be able to close the cassette
holder cover. Do not apply force. Replace
the battery pack with a fully charged one or
use AC power before continuing.
Close the cassette holder cover firmly until
it locks into place.
Notes:
●If you wait a few seconds and the cassette
holder does not open, close the cassette holder
cover and try again. If the cassette holder still
does open, turn the camcorder off then on
again.
●If the tape does not load properly, open the
cassette holder cover fully and remove the
cassette. A few minutes later, insert it again.
●When the camcorder is suddenly moved from a
cold place to a warm environment, wait a short
time before opening the cassette holder cover.
You can record videos at 4:3 size and 16:9
size. By default, the camera is set to record
videos at the 4:3 size.
Set the Power Switch to “REC” (墌11).
Each press 16:9 switches the screen size.
Note:
If you record videos in 16:9 size, the image may
appear to be slightly vertically stretched when
playing back on TV with the 4:3 screen.
(墌23, 25)
Brightness Adjustment Of The
Display
Loading/Unloading A Cassette
BRIGHT
±
0
A
2SET
Select
1
1
1
1
2
2
2
2
1
1
1
1
2
2
2
2
3
3
3
3
4
4
4
4
1
1
1
1
2
2
2
2
16:9 Wide Mode
Make sure the window
side is facing out.
Erase
protection
tab
Cassette holder
OPEN/
EJECT
Cassette
holder
cover
3
3
3
3
1
1
1
1
2
2
2
2
16:9
4 : 3
16 : 9
GR-DA20EK.book Page 15 Thursday, August 2, 2007 12:08 PM

16 EN
MasterPage: Left
Before continuing, perform the procedures
listed below:
●Power (墌13).
●Loading A Cassette (墌15).
●Remove the lens cap (墌8).
●
Select videos at 4:3 size of 16:9 (wide) size
(
墌
15).
Set the Power Switch to “REC” (墌11).
Press START/STOP button to start
recording. “REC” appears on the display
while recording is in progress. To stop
recording press START/STOP again.
Approximate recording time
Notes:
●If the Record-Standby mode continues for 5
minutes and no operation is performed, the
camcorder’s power shuts off automatically.
●When a blank portion is left between recorded
scenes on the tape, the time code is interrupted
and errors may occur when editing the tape. To
avoid this, refer to “Recording From The Middle
Of A Tape” (墌17).
●To record in LP (Long Play) mode (墌23).
Approximate tape remaining time appears on
the display. “---min” means the camcorder is
calculating the remaining time. When the
remaining time reaches 2 minutes, the
indication starts blinking.
●The time required to calculate and display the
remaining tape length, and the accuracy of the
calculation, may vary according to the type of
tape used.
Enables to check the end of the last recording.
Press QUICK REVIEW during the Recording-
Standby mode.
●Tape is rewound for about several seconds and
played back automatically, then pauses in the
Recording-Standby mode for the next shot.
Notes:
●Distortion may occur at start of playback. This is
normal.
●Slide the Zoom lever repeatedly to change the
sound setting to on/off.
Basic Recording
Tape Recording mode
SP LP
30 min. 30 min. 45 min.
60 min. 60 min. 90 min.
80 min. 80 min. 120 min.
Recording Start/Stop Button
Power
Switch Zoom
Lever
1
1
1
1
2
2
2
2
TAPE!
Appears if a tape is not loaded when the
Recording Start/Stop Button is pressed while
the Power Switch is set to “REC”.
USE CLEANING CASSETTE
Appears if dirt is detected on the heads during
recording. Use an optional cleaning cassette.
(墌2)
Tape Remaining Time
Quick Review
62 min
QUICK REVIEW
Recording & Playback
GR-DA20EK.book Page 16 Thursday, August 2, 2007 12:08 PM

EN 17
MasterPage: Start_Right
Recording & Playback
ENGLISH
●You can zoom in up to 34X by using the optical
zoom.
●Zoom magnification over 34X is done through
digital image processing, and is therefore called
digital zoom. Digital zooming is possible up to
800X. Set (ZOOM) to [68X] or [800X]. (墌22)
Notes:
●Macro shooting is possible as close as approx.
5 cm to the subject when the zoom lever is set
all the way to “W”.
●When you zoom into a subject close to the lens,
the camera may automatically zoom out
depending on the distance to the subject. In this
case, set “TELE MACRO” to “ON”. (墌22)
During recording, a time code is recorded on
the tape. This code is to confirm the location of
the recorded scene on the tape during
playback.
* Frames are not displayed during recording.
If recording starts from a blank portion, the time
code begins counting from “00:00:00”
(minute:second:frame). If recording starts from
the end of a previously recorded scene,
the time code continues from the last time code
number. If during recording a blank portion is
left partway through the tape, the time code is
interrupted. When recording is resumed, the
time code starts counting up again from
“00:00:00”. This means the camcorder may
record the same time codes as those existing
in a previously recorded scene. To prevent this,
perform “Recording From The Middle Of A
Tape” (墌17) in the following cases;
●When shooting again after playing back a
recorded tape.
●When power shuts off during shooting.
●When a tape is removed and re-inserted during
shooting.
●When shooting using a partially recorded tape.
●When shooting on a blank portion located
partway through the tape.
●When shooting again after shooting a scene
then opening/closing the cassette holder cover.
Notes:
●The time code cannot be reset.
●During fast-forwarding and rewinding, the time
code indication does not move smoothly.
●The time code is displayed only when “TIME
CODE” is set to “ON”. (墌23)
Play back a tape or use Blank Search
(墌19) to find the spot at which you want to
start recording, then engage the Still
Playback mode (墌18).
Set the Power Switch to “REC” (墌11),
then start recording.
Zoom
Time Code
– VOL.+
T
W
Zoom out Zoom in
T: Telephoto
W: Wide angle
80
0
34
Optical zoom (up to 34X)
Digital zoom (up to 800X)
12:34:24
Minutes
Seconds
Frames*
(25 frames = 1 second)
Display
Recording From The Middle Of A Tape
1
2
GR-DA20EK.book Page 17 Thursday, August 2, 2007 12:08 PM

18 EN
MasterPage: Left
Load a cassette (墌15).
Set the Power Switch to “PLAY” (墌11).
●The above screen (referring to the control
lever (墌7)) will be displayed for approx. 3
seconds on the LCD Monitor.
To start playback, press 4/9.
To stop playback, press 8.
●During Stop mode, press 3to rewind, or
5to fast-forward the tape.
●Press SET to display the guide operation
screen.
To control the speaker volume
Slide the Zoom Lever (VOL. +/–) towards “+”
to turn up the volume, or towards “–” to turn
down the volume.
Notes:
●The playback picture can be viewed in the LCD
monitor, or on a connected TV. (墌20)
●If Stop mode continues for 5 minutes when
power is supplied from a battery, the camcorder
shuts off automatically.
●When a cable is connected to the AV connector,
the sound is not heard from the speaker.
Pauses during video playback.
Press 4/9during playback.
To resume normal playback, press 4/9
again.
●If still playback continues for more than
about 3 minutes, the camcorder’s Stop
mode is automatically engaged.
Normal Playback
– VOL.+
T
W
35
MENU
4/9
8
VOL. +/–
SET
Power Switch
1
1
1
1
2
2
2
2
SET
3
3
3
3
4
4
4
4
HDV
Appears when pictures recorded in the HDV
format are detected. The pictures in the HDV
format cannot be played back with this
camcorder.
Still Playback
1
2
Recording & Playback
GR-DA20EK.book Page 18 Thursday, August 2, 2007 12:08 PM

EN 19
MasterPage: Start_Right
Recording & Playback
ENGLISH
Allows variable-speed search in either direction
during video playback.
During playback, press 5once or twice
for forward search, or 3once or twice for
reverse search.
To resume normal playback, press 4/9.
●During playback, press and hold 5or
3. The search continues as long as you
hold the button. Once you release the
button, normal playback resumes.
●A slight mosaic effect appears on the
display during Shuttle Search. This is not a
malfunction.
Helps you find where you should start
recording in the middle of a tape to avoid time
code interruption (墌17).
Set the Power Switch to “PLAY” (墌11).
Press MENU.
Select “TAPE”, press SET or .
Select “BLANK SEARCH”, press SET or .
Select “EXECUTE”, press SET or .
●The “BLANK SEARCH” indication appears and
the camcorder automatically starts reverse or
forward search, then stops at the spot which is
about 3 seconds of tape before the beginning
of the detected blank portion.
●To cancel Blank Search, press 8.
Notes:
●Before starting Blank Search, if the current
position is at a blank portion, the camcorder
searches in the reverse direction. If the current
position is at a recorded portion, the camcorder
searches in the forward direction.
●If the beginning or end of the tape is reached
during Blank Search, the camcorder stops
automatically.
●A blank portion which is shorter than 5 seconds
of tape may not be detected.
●The detected blank portion may be located
between recorded scenes. Before you start
recording, make sure there is no recorded
scene after the blank portion.
Variable Shuttle Search
35
x-10 x-3 x3 x10
1
2
During Shuttle Search,
parts of the picture may
not be clearly visible,
particularly on the left
side of the screen.
During Shuttle Search,
parts of the picture may
not be clearly visible
across the screen.
A
ttention:
Blank Search
1
2
3
4
5
GR-DA20EK.book Page 19 Thursday, August 2, 2007 12:08 PM

20 EN
MasterPage: Left
Recording & Playback
aYellow to VIDEO IN (Connect when your
TV/VCR has only A/V input connectors).
bRed to AUDIO R IN.
cWhite to AUDIO L IN.
Make sure all units are turned off.
Connect the camcorder to a TV or VCR as
shown in the illustration.
If using a VCR, go to step .
If not, go to step .
Connect the VCR output to the TV input,
referring to your VCR’s instruction manual.
Turn on the camcorder, the VCR and the
TV.
Set the VCR to its AUX input mode, and set
the TV to its VIDEO mode.
Start playback on the camcorder (墌18).
●Please set “16:9 OUTPUT” of Playback
Menus so that the image may suit your TV
(16:9 TV or 4:3 TV) (墌23, 25).
To choose whether or not the following
displays appear on the connected TV
●Date/Time
Set “DATE/TIME” to “ON” or “OFF” (墌25).
●Time Code
Set “TIME CODE” to “ON” or “OFF” (墌25).
●On Screen
Set “ON SCREEN” to “OFF”, “LCD” or “LCD/
TV” (墌25).
Notes:
●It is recommended to use the AC Adapter as the
power supply instead of the battery pack
(墌13).
●To monitor the picture and sound from the
camcorder without inserting a tape, set the
camcorder’s Power Switch to “REC”, then set
your TV to the appropriate input mode.
●Make sure you adjust the TV sound volume to
its minimum level to avoid a sudden burst of
sound when the camcorder is turned on.
●Conversion lens and AV Cable may not be used
at the same time depending on the type of
conversion lens you are using.
●It is recommended to use JVC conversion lens.
Some conversion lens may not be compatible
with this camcorder.
Connections To A TV Or VCR
123
TV VCR
Audio/Video
cable
(provided)
To AV
connector
or
1
1
1
1
2
2
2
2
3
3
3
3
4
4
4
4
3
3
3
3
4
4
4
4
5
5
5
5
6
6
6
6
GR-DA20EK.book Page 20 Thursday, August 2, 2007 12:08 PM
Table of contents
Other JVC Camcorder manuals

JVC
JVC GR-FXM16EG User manual

JVC
JVC GC-PX10 User manual

JVC
JVC GR-DVM1DU User manual

JVC
JVC GR-AX958EG User manual

JVC
JVC GZ HD5 - Everio Camcorder - 1080i Instruction Manual

JVC
JVC Everio GZ-V500BUA User manual

JVC
JVC GR-AXM236UC User manual

JVC
JVC Everio GZ-MG750BEK Operating and maintenance manual

JVC
JVC GR-AXM670 User manual

JVC
JVC GR-D370UCM User manual

JVC
JVC GR-AX920 User manual

JVC
JVC GZ-HD3U User manual

JVC
JVC GY-HM180U User manual

JVC
JVC GR-SXM745 User manual

JVC
JVC GR-DVP7U User manual

JVC
JVC Everio R GZ-RX670 Operating and maintenance manual

JVC
JVC GR-SXM935 User manual

JVC
JVC Everio GZ-MC200US User manual

JVC
JVC ProHD GY-HM600 User manual

JVC
JVC GR-AXM220 User manual