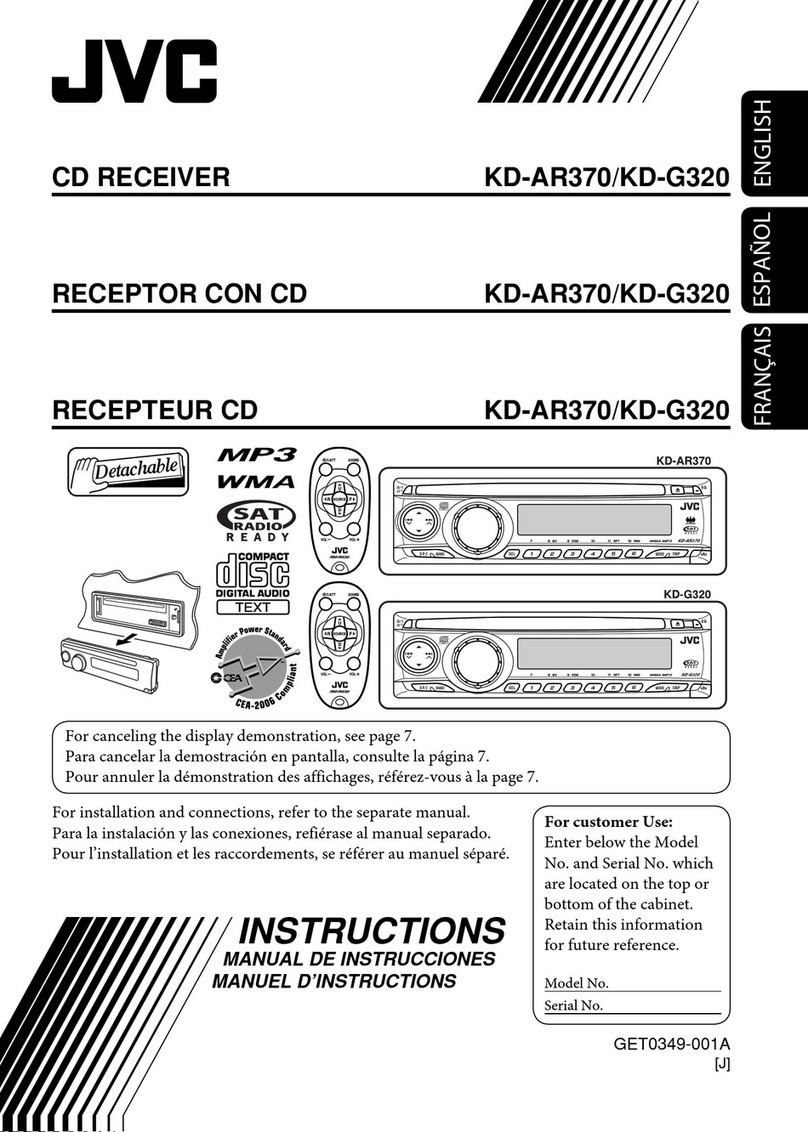
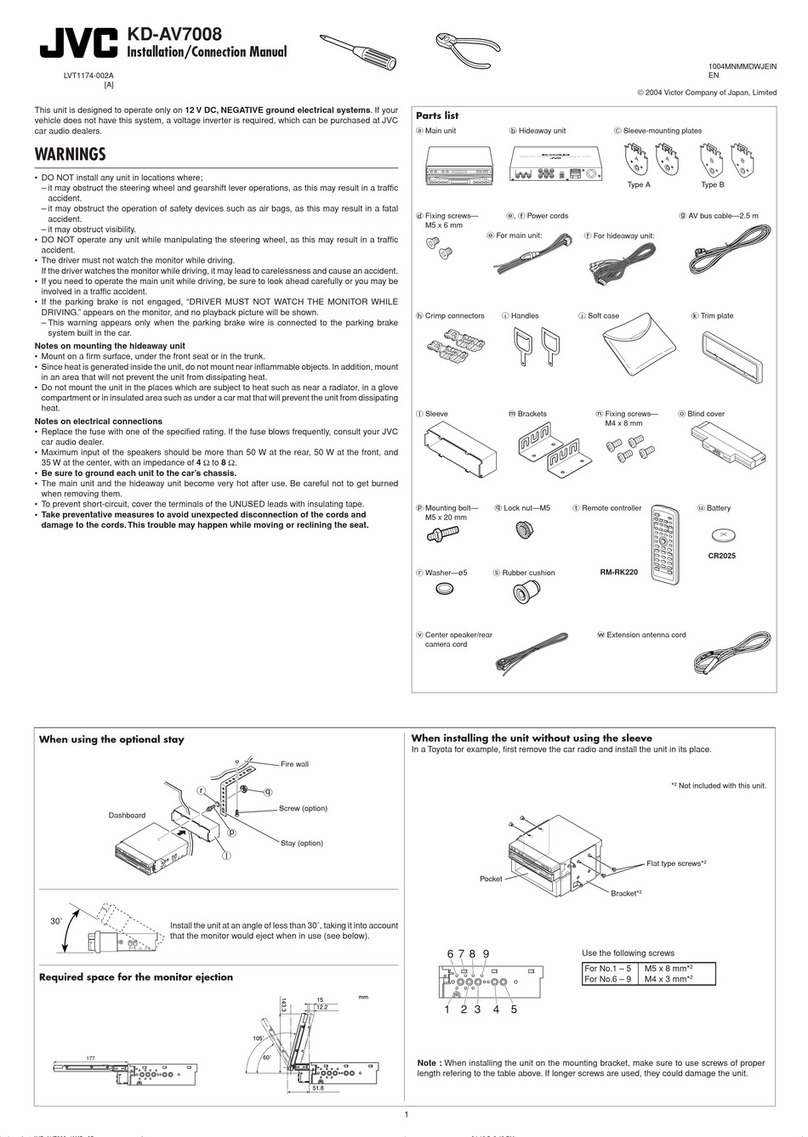
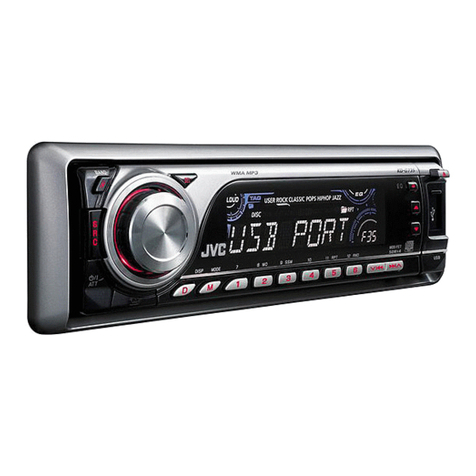
JVC KD-R425 User manual

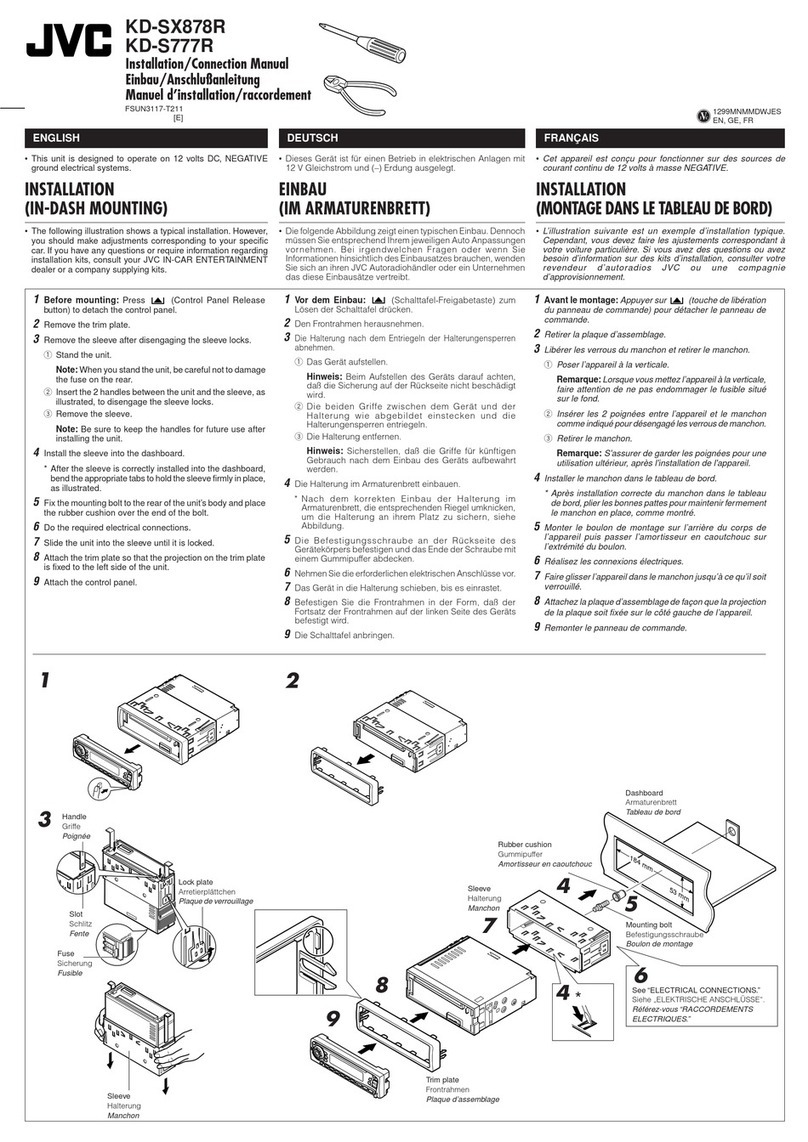
ENGLISH
EN, PE
0911DTSMDTJEIN© 2011 JVC KENWOOD Corporation
KD-R425/KD-R426
GET0702-011A
[UK]
KD-R426/KD-R425
CD RECEIVER
For canceling the display demonstration, see page 4.
INSTRUCTIONS
For installation and connections, refer to the separate manual.
CoverRear_KD-R426_011A_1.indd 1-2CoverRear_KD-R426_011A_1.indd 1-2 9/6/11 2:09:13 PM9/6/11 2:09:13 PM

2ENGLISH
IMPORTANT FOR LASER PRODUCTS
1.CLASS 1 LASER PRODUCT
2.CAUTION: Do not open the top cover. There are no user serviceable parts inside the unit; leave
all servicing to qualified service personnel.
3.CAUTION: Visible and/or invisible class 1M laser radiation when open. Do not view directly with
optical instruments.
4.REPRODUCTION OF LABEL: CAUTION LABEL, PLACED OUTSIDE THE UNIT.
[European Union only]
WARNING:
Stop the car before operating the unit.
Caution:
Adjust the volume so that you can hear sounds
outside the car. Driving with the volume too
high may cause an accident.
Thank you for purchasing a JVC product.
Please read all instructions carefully before operation, to ensure your complete understanding and
to obtain the best possible performance from the unit.
Caution on volume setting:
Digital devices (CD/USB) produce very little
noise compared with other sources. Lower the
volume before playing these digital sources to
avoid damaging the speakers by the sudden
increase of the output level.
Caution for DualDisc playback:
The Non-DVD side of a “DualDisc” does not
comply with the “Compact Disc Digital Audio”
standard. Therefore, the use of Non-DVD side
of a DualDisc on this product may not be
recommended.
EN02-17_KD-R426_011A_1.indd 2EN02-17_KD-R426_011A_1.indd 2 9/8/11 3:18:42 PM9/8/11 3:18:42 PM

3ENGLISH
How to attach/detach the control
panel
How to reset your unit
Your preset adjustments will
also be erased.
How to forcibly eject a disc
• Be careful not to drop the disc when it ejects.
• If this does not work, reset your unit.
Maintenance
Cleaning the unit
Wipe off the dirt on the panel with a dry silicon
or soft cloth. Failure to observe this precaution
may result in damage to the unit.
Cleaning the connector
Wipe off dirt on the connector of the unit and
panel. Use a cotton swab or cloth.
Make sure all important data has been backed
up. We shall bear no responsibility for any loss
of data in USB mass storage class device while
using this system.
CONTENTS
3 How to attach/detach the control
panel
3 How to reset your unit
3 How to forcibly eject a disc
3 Maintenance
4 Canceling the display
demonstration
4 Setting the clock
5 Preparing the remote controller
5 About discs
6 Basic operations
7 Listening to the radio
8 Listening to a disc
9 Connecting the other external
components
9 Listening to the other external
components
10 Listening to a USB device
11 Selecting a preset sound mode
12 Menu operations
14 Troubleshooting
16 Using Bluetooth® devices
17 Specifications
Condensation : When the car is air-
conditioned, moisture may collect on the
laser lens. This may cause disc read errors. In
this case, remove the disc and wait for the
moisture to evaporate.
Temperature inside the car : If you have
parked the car for a long time in hot or cold
weather, wait until the temperature in the car
becomes normal before operating the unit.
[Hold]
Microsoft and Windows Media are either
registered trademarks or trademarks of
Microsoft Corporation in the United States
and/or other countries.
EN02-17_KD-R426_011A_1.indd 3EN02-17_KD-R426_011A_1.indd 3 9/8/11 3:18:43 PM9/8/11 3:18:43 PM

4ENGLISH
1 Turn on the power.
2
3
Setting the clock
1 Turn on the power.
2
3 Select <CLOCK>.
4 Select <CLOCK SET>.
5 Adjust the hour.
6 Adjust the minute.
7 Finish the procedure.
4 Select <DEMO OFF>.
5
6 Finish the procedure.
Canceling the display demonstration
(Initial setting)
(Initial setting)
[Hold]
[Hold]
[Hold]
(Initial setting)
(Initial setting)
[Hold]
EN02-17_KD-R426_011A_1.indd 4EN02-17_KD-R426_011A_1.indd 4 9/8/11 3:18:43 PM9/8/11 3:18:43 PM

5ENGLISH
Caution:
• Danger of explosion if battery is incorrectly
replaced. Replace only with the same or
equivalent type.
• Battery shall not be exposed to excessive heat
such as sunshine, fire, or the like.
Warning (to prevent accidents and
damage):
• Do not install any battery other than CR2025
or its equivalent.
• Do not leave the remote controller in a place
(such as dashboards) exposed to direct
sunlight for a long time.
• Store the battery in a place where children
cannot reach.
• Do not recharge, short, disassemble, heat the
battery, or dispose of it in a fire.
• Do not leave the battery with other metallic
materials.
• Do not poke the battery with tweezers or
similar tools.
• Wrap the battery with tape and insulate when
throwing away or saving it.
Preparing the remote controller
About discs
When you use the remote controller for the first
time, pull out the insulation sheet.
If the effectiveness of the remote controller
decreases, replace the battery.
Replacing the lithium coin battery
CR2025
Insulation sheet
This unit can only play the CDs with:
Discs that cannot be used:
• Discs that are not round.
• Discs with coloring on the recording surface
or discs that are dirty.
• You cannot play a Recordable/ReWritable
disc that has not been finalized. (For the
finalization process refer to your disc writing
software, and your disc recorder instruction
manual.)
• 8 cm CD cannot be used. Attempt to insert
using an adapter can cause malfunction.
Handling discs:
• Do not touch the recording surface of the
disc.
• Do not stick tape etc. on the disc, or use a disc
with tape stuck on it.
• Do not use any accessories for the disc.
• Clean from the center of the disc and move
outward.
• Clean the disc with a dry silicon or soft cloth.
Do not use any solvents.
• When removing discs from this unit, pull them
out horizontally.
• Remove the rims from the center hole and
disc edge before inserting a disc.
EN02-17_KD-R426_011A_1.indd 5EN02-17_KD-R426_011A_1.indd 5 9/8/11 3:18:43 PM9/8/11 3:18:43 PM

6ENGLISH
Basic operations
Control dial Ejects the disc
Loading slot
Remote sensor
• DO NOT expose to
bright sunlight.
Display window
Front auxiliary
input jack
Detaches the panel
When you press or hold the following button(s)...
Main unit
Remote
controller
General operation
/ SOURCE
— Turns on/off [Hold].
SOURCE
Selects the sources (FM, CD, USB, F-AUX, BT AUDIO or R-AUX or
BT PHONE, AM).
• “CD” or “USB” is selectable only when a disc is loaded or a USB
device is connected.
Control dial
(turn)
VOL – / + Adjusts the volume level.
— Selects items.
Control dial
(press)
Mutes the sound during playback. If the source is “CD” or “USB”
playback pauses.
• Press the button again to cancel muting or resume playback.
— Confirms selection.
EQ SOUND
Selects the sound mode.
• Hold the EQ button on the main unit to enter tone level
adjustment directly. (page 11)
BRIGHTNESS — Enters <BRIGHTNESS> menu directly. (page 12)
BACK —• Returns to the previous menu.
• Exit from the menu [Hold].
DISP —• Changes the display information.
• Scrolls the display information [Hold].
USB (Universal Serial
Bus) input terminal
EN02-17_KD-R426_011A_1.indd 6EN02-17_KD-R426_011A_1.indd 6 9/8/11 3:18:43 PM9/8/11 3:18:43 PM

7ENGLISH
Improving the FM reception
1
2
]
<TUNER>
]
<MONO>
]
<MONO ON>
Reception improves, but stereo effect
will be lost.
To restore the stereo effect, repeat the same
procedure to select <MONO OFF>.
Automatic presetting (FM)—
SSM (Strong-station Sequential Memory)
You can preset up to 18 stations for FM.
While listening to a station...
1
2
]
<TUNER>
]
<SSM>
]
<SSM 01 – 06 / 07 – 12 / 13 – 18>
“SSM” flashes and local stations with the
strongest signal are searched and stored
automatically.
To preset another 6 stations, repeat the
above procedure by selecting one of the other
SSM setting ranges.
Manual presetting (FM/AM)
You can preset up to 18 stations for FM and 6
stations for AM.
1
]
Tune in to a station you want to
preset.
2[Hold]
“PRESET MODE” flashes.
3
]
Selects preset number.
Preset number flashes and “MEMORY”
appears.
Selecting a preset station
or
1
2
Changing the display information
Frequency
j
Clock
Using the remote controller
5
/
∞
: Changes the preset stations.
2
/
3
: [Press] Searches for stations
automatically.
[Hold] Searches for stations manually.
Listening to the radio
[Hold]
[Hold]
~
]
“FM” or “AM”
Ÿ• [Press] Searches for stations automatically.
• [Hold] Searches for stations manually.
“M” flashes, then press the button
repeatedly.
“ST” lights up when receiving an FM stereo broadcast with sufficient signal strength.
EN02-17_KD-R426_011A_1.indd 7EN02-17_KD-R426_011A_1.indd 7 9/26/11 5:30:25 PM9/26/11 5:30:25 PM

8ENGLISH
Listening to a disc
Stopping playback and ejecting
the disc
If the ejected disc is not
removed within 15 seconds, it is
automatically inserted into the
loading slot.
Basic operations
Selects folder of the MP3/WMA.
[Press]Selects track.
[Hold] Fast-forwards
or reverses the track.
Using the remote controller
5
/
∞
: Selects folder of the MP3/WMA.
2
/
3
: [Press] Selects track.
[Hold] Fast-forwards or reverses the
track.
Changing the display information
Disc title/Album name/performer (folder
name)*
=
Track title (file name)*
=
Current
track number with the elapsed playing time
=
Current track number with the clock time
=
(back to the beginning)
* “NO NAME” appears for conventional CDs or if
not recorded.
Selecting a track/folder from the
list
• If the MP3/WMA disc contains many tracks,
you can fast search (±10, ±100) through the
disc by turning the control dial quickly.
• To return to the previous menu, press BACK.
Selecting the playback modes
You can use only one of the following playback
modes at a time.
1
2
]
“REPEAT”
j
“RANDOM”
3
REPEAT
TRACK RPT : Repeats current track
FOLDER RPT : Repeats current folder
RANDOM
FOLDER RND : Randomly plays all tracks
of current folder, then
tracks of next folders
ALL RND : Randomly plays all tracks
To cancel repeat play or random play, select
“RPT OFF” or “RND OFF.”
[Hold]
Playback starts automatically.
All tracks will be played repeatedly until you change the
source or eject the disc.
EN02-17_KD-R426_011A_1.indd 8EN02-17_KD-R426_011A_1.indd 8 9/8/11 3:18:44 PM9/8/11 3:18:44 PM

9ENGLISH
Connecting the other external components
Listening to the other external components
3.5 mm stereo mini plug
(with “L” shaped connector)
(not supplied)
You can connect an external component to the auxiliary input jack on the control panel (F-AUX)
and/or on the rear side of the unit (R-AUX).
Summary of using the external components through the auxiliary input jacks:
External component Auxiliary
input jack
Preparation Source
name
Connecting
cable/device
(not supplied)
Menu setting
item
Sub-
item Setting
Portable audio
player
Front SRC SELECT F-AUX ON F-AUX See below.
Rear SRC SELECT R-AUX ON R-AUX
Bluetooth device Rear SRC SELECT R-AUX BT ADAPTER BT AUDIO/
BT PHONE*
KS-BTA100
(page 16)
* ”BT PHONE” appears when a Bluetooth phone is in use.
For details, refer also to the instructions supplied with the external components.
~
]
“F-AUX” or “R-AUX”
ŸTurn on the connected component and
start playing the source.
On the control panel (F-AUX): On the rear panel (R-AUX):
Portable audio player,
etc.
Portable audio player,
etc.
3.5 mm stereo mini plug
(not supplied)
Recommended to use a 3-terminal plug head stereo mini plug for
optimum audio output.
EN02-17_KD-R426_011A_1.indd 9EN02-17_KD-R426_011A_1.indd 9 9/8/11 3:18:45 PM9/8/11 3:18:45 PM

10 ENGLISH
You can operate the USB device in the same way you operate the files on a disc. (page 8)
• This unit can play MP3/WMA files stored in a USB mass storage class device (such as a USB
memory, Digital Audio Player, etc.).
~
]
Turn on the power.
Ÿ
All tracks will be played repeatedly until you change the source or disconnect the USB
device.
Listening to a USB device
USB cable (not supplied)
USB input terminal
[Hold]
Cautions:
• Make sure all important data has been backed
up.
• You cannot connect a computer or portable
HDD to the USB input terminal of the unit.
• Avoid using the USB device if it might hinder
your safety driving.
• Electrostatic shock at connecting a USB device
may cause abnormal playback of the device.
In this case, disconnect the USB device then
reset this unit and the USB device.
• Do not leave a USB device in the car, expose
to direct sunlight, or high temperature to
avoid deformation or cause damages to the
device.
• This unit may not play back files in a USB
device properly when using a USB extension
cord.
• USB devices equipped with special functions
such as data security functions cannot be
used with the unit.
• When connecting a USB cable, use the USB
2.0 cable.
• Do not use a USB device with 2 or more
partitions.
• Depending on the shape of the USB devices
and connection ports, some USB devices may
not be attached properly or the connection
might be loose.
• This unit cannot recognize a USB device
whose rating is other than 5 V and exceeds
500 mA.
• Do not pull out and attach the USB device
repeatedly while “READING” is shown on the
display.
• This unit may not recognize a memory card
inserted into the USB card reader.
• Connect only one USB device to the unit at a
time. Do not use a USB hub.
• Operation and power supply may not work as
intended for some USB devices.
• The maximum number of characters for:
–Folder names : 63 characters
–File names : 63 characters
–MP3 Tag : 60 characters
–WMA Tag : 60 characters
• This unit can recognize a total of 65 025 files,
255 folders (255 files per folder including
folder without unsupported files), and of 8
hierarchies.
EN02-17_KD-R426_011A_1.indd 10EN02-17_KD-R426_011A_1.indd 10 9/8/11 3:18:45 PM9/8/11 3:18:45 PM

11ENGLISH
You can select a preset sound mode suitable
for the music genre.
FLAT
=
NATURAL
=
DYNAMIC
=
VOCAL
BOOST
=
BASS BOOST
=
USER
=
(back to
the beginning)
While listening, you can adjust the subwoofer
level and tone level of the selected sound
mode.
1
2
Adjust the level:
SUB.W * : 00 to 08
BASS/ MID/ TRE : –06 to +06
The sound mode is automatically stored
and changed to “USER.”
*
Subwoofer level is adjustable only when
<L/O MODE> is set to <SUB.W>. (page 13)
[Hold]
Selecting a preset sound mode
Storing your own sound mode
You can store your own adjustments in
memory.
1
2
]<PRO
EQ> ]<BASS/ MIDDLE/ TREBLE>
3
Adjust the sound elements (see table
below) of the selected tone.
4Repeat steps 2and 3to adjust other
tones.
The adjustments made is automatically
stored and changed to “USER.”
[Hold]
Frequency / Level / Q [Initial: Underlined]
BASS 60/ 80/ 100/ 200 Hz –06 to +06 [ 00 ] Q1.0/ 1.25/ 1.5/ 2.0
MIDDLE 0.5/ 1.0/ 1.5/ 2.5 kHz –06 to +06 [ 00 ] Q0.75/ 1.0/ 1.25
TREBLE 10.0/ 12.5/ 15.0/ 17.5 kHz –06 to +06 [ 00 ] Q FIX
EN02-17_KD-R426_011A_1.indd 11EN02-17_KD-R426_011A_1.indd 11 9/8/11 3:18:45 PM9/8/11 3:18:45 PM
12 ENGLISH
Menu operations
1
If no operation is done
for about 60 seconds, the
operation will be canceled.
2 3 Repeat step 2if necessary.
• To return to the previous
menu, press BACK.
• To exit from the menu, press
DISP or MENU.
[Hold]
Menu item Selectable setting, [Initial: Underlined]
DEMO
For settings, see page 4.
CLOCK
DIMMER
DIMMER SET AUTO
: Changes the display and button illumination between the Day/Night
adjustments in <BRIGHTNESS> setting when you turn off/on the car headlights.
*1
/
ON
: Selects the Night adjustments in <BRIGHTNESS> setting for the display and button
illumination. /
OFF
: Selects the Day adjustments in <BRIGHTNESS> setting for the
display and button illumination.
BRIGHTNESS DAY
[
31
] /
NIGHT
[
15
] : Selects the display and button illumination brightness level
[
00
—
31
] for day and night.
DISPLAY
SCROLL *2ONCE
: Scrolls the displayed information once. /
AUTO
: Repeats scrolling (at 5-second
intervals). /
OFF
: Cancels.
(Pressing
DISP
for more than one second can scroll the display regardless of the setting.)
TAG DISPLAY ON
: Shows the Tag information while playing MP3/WMA tracks. /
OFF
: Cancels.
PRO EQ
For settings, see page 11.
AUDIO
FADER *3, *4R06 — F06
[
00
] : Adjusts the front and rear speaker output balance.
BALANCE *4L06 — R06
[
00
] : Adjusts the left and right speaker output balance.
LOUD ON
: Boost low and high frequencies to produce a well-balanced sound at a low volume
level. /
OFF
: Cancels.
VOL ADJUST –05 — +05
[
00
] : Presets the volume adjustment level of each source (except
“FM”), compared to the FM volume level. The volume level will automatically increase or
decrease when you change the source. Before adjustment, select the source you want to
adjust. (“VOL ADJ FIX” appears on the display if “FM” is selected as the source.)
*1
The illumination control lead connection is required. (See “Installation/Connection Manual.”) This setting may not work
correctly on some vehicles (particularly on those having a control dial for dimming). In this case, change the setting to
any other than <DIMMER AUTO>.
*2
Some characters or symbols will not be shown correctly (or will be blanked) on the display.
*3
If you are using a two-speaker system, set the fader level to “00.”
*4
This adjustment will not affect the subwoofer output.
EN02-17_KD-R426_011A_1.indd 12EN02-17_KD-R426_011A_1.indd 12 9/8/11 3:18:45 PM9/8/11 3:18:45 PM
13ENGLISH
Menu item Selectable setting, [Initial: Underlined]
AUDIO
L/O MODE SUB.W
: Selects if the REAR/SW terminals are used for connecting a subwoofer (through
an external amplifier). /
REAR
: Selects if the REAR/SW terminals are used for connecting
the speakers (through an external amplifier).
SUB.W LPF* 5LOW
55Hz
/
LOW 85Hz
/
LOW
120Hz
: Frequencies lower than
55 Hz/85 Hz/120 Hz are sent to the subwoofer.
SUB.W LEVEL
* 500 —
08
[
04
] : Adjusts the subwoofer output level.
HPF ON
: Activates the High Pass Filter. Low frequency signals are cut off from the front/rear
speakers. /
OFF
: Deactivates (all signals are sent to the front/rear speakers).
BEEP ON
/
OFF
: Activates or deactivates the keypress tone.
TEL MUTING* 6ON
: Mutes the sounds while using the cellular phone (not connected through
KS-BTA100). /
OFF
: Cancels.
AMP GAIN* 7LOW POWER
: VOLUME 00 – VOLUME 30 (Selects if the maximum power
of each speaker is less than 50 W to prevent damaging the speakers.) /
HIGH POWER
: VOLUME 00 – VOLUME 50
TUNER
SSM
Displayed only when the source is “FM.” For settings, see page 7.
MONO
Displayed only when the source is “FM.” For settings, see page 7.
IF BAND AUTO
: Increases the tuner selectivity to reduce interference noises between adjacent
stations. (Stereo effect may be lost.) /
WIDE
: Subject to interference noises from adjacent
stations, but sound quality will not be degraded and the stereo effect will remain.
SRC SELECT
AM* 8ON
/
OFF
: Enable or disable “AM” in source selection.
F-AUX* 8ON
/
OFF
: Enable or disable “F-AUX” in source selection.
R-AUX* 8ON
/
OFF
: Enable or disable “R-AUX” in source selection. /
BT ADAPTER
: Selects if
the rear auxiliary input jack is connected to the Bluetooth adapter, KS-BTA100. (page 9)
The source name changed to “BT AUDIO.”
*5
Displayed only when <L/O MODE> is set to <SUB.W>.
*6
This setting does not work if <BT ADAPTER> is selected for <R-AUX> of the <SRC SELECT>.
*7
The volume level automatically changes to “VOLUME 30” if you change to <LOW POWER> with the volume level set
higher than “VOLUME 30.”
*8
Displayed only when any source other than “AM/ F-AUX/ R-AUX/ BT AUDIO” is selected separately.
EN02-17_KD-R426_011A_1.indd 13EN02-17_KD-R426_011A_1.indd 13 9/8/11 3:18:45 PM9/8/11 3:18:45 PM
14 ENGLISH
Troubleshooting
Symptom Remedy/Cause
General
Sound cannot be heard from the
speakers.
Adjust the volume to the optimum level. / Make sure the unit is not
muted/paused. (page 6) / Check the cords and connections.
“MISWIRING CHK WIRING THEN RESET
UNIT” / “WARNING CHK WIRING THEN
RESET UNIT” appears on the display and
no operations can be done.
Check to be sure the terminals of the speaker leads are covered with
insulating tape properly, then reset the unit. (page 3)
If the message does not disappear, consult your JVC car audio dealer
or a company supplying kits.
The unit does not work at all. Reset the unit. (page 3)
“F-AUX” or “R-AUX” cannot be selected. Check the <SRC SELECT>
=
<F-AUX / R-AUX> setting. (page 13)
Sound is sometimes interrupted while
listening to an external component
connected to the auxiliary input jack.
Check to be sure the recommended stereo mini plug is used for
connection. (page 9)
The correct characters are not displayed
(e.g. album name).
This unit can only display letters (upper case), numbers, and a
limited number of symbols.
FM/AM
SSM automatic presetting does not
work.
Store stations manually.
Static noise while listening to the radio. Connect the antenna firmly.
“AM” cannot be selected. Check the <SRC SELECT>
=
<AM> setting. (page 13)
Disc playback
Disc cannot be played back. Insert the disc correctly.
CD-R/CD-RW cannot be played back
and track cannot be skipped.
Insert a finalized CD-R/CD-RW (finalize with the component which
you used for recording).
Disc sound is sometimes interrupted. Stop playback while driving on rough roads. / Change the disc. /
Check the cords and connections.
“NO DISC” appears on the display. Insert a playable disc into the loading slot.
“PLEASE” and “EJECT“ appear
alternately on the display.
Press
0
, then insert a disc correctly.
“IN DISC” appears on the display. The disc cannot be ejected properly. Make sure nothing is blocking
the loading slot.
MP3/WMA playback
Disc cannot be played back. Use a disc with MP3/WMA tracks recorded in a format compliant
with ISO 9660 Level 1, Level 2, Romeo, or Joliet. / Add the extension
code <.mp3> or <.wma> to the file names.
Noise is generated. Skip to another track or change the disc.
“READING” keeps flashing on the
display.
A longer readout time is required. Do not use too many hierarchical
levels and folders.
Tracks do not play back in the order you
have intended them to play.
The playback order is determined when the files are recorded.
The elapsed playing time is not correct. This sometimes occurs during playback. This is caused by how the
tracks are recorded on the disc.
EN02-17_KD-R426_011A_1.indd 14EN02-17_KD-R426_011A_1.indd 14 9/8/11 3:18:45 PM9/8/11 3:18:45 PM
15ENGLISH
Additional information
• This unit can play back multi-session discs; however,
unclosed sessions will be skipped while playing.
• This unit can play back files with the extension code
<.mp3> or <.wma> (regardless of the letter
case—upper/lower).
• This unit can play back the files meeting the conditions
below:
– Bit rate: MP3: 8 kbps — 320 kbps
WMA: 32 kbps — 192 kbps
– Sampling frequency:
MP3: 48 kHz, 44.1 kHz, 32 kHz, 24 kHz, 22.05 kHz,
16 kHz, 12 kHz, 11.025 kHz, 8 kHz
WMA: 48 kHz, 44.1 kHz, 32 kHz, 22.05 kHz
• This unit can show WMA Tag and ID3 Tag Version
1.0/1.1/2.2/2.3/2.4 (for MP3).
• The search function works but search speed is not
constant.
• This unit can play back files recorded in VBR (variable
bit rate). (Files recorded in VBR have a discrepancy in
elapsed time indication.)
• The maximum number of characters for file/folder
names vary depending on the disc format used (includes
4 extension characters—<.mp3> or <.wma>).
ISO 9660 Level 1 and 2, Romeo: 64 characters, Joliet:
32 characters, Windows long file name: 64 characters
• This unit cannot play back the following files:
– MP3 files: encoded in MP3i and MP3 PRO format; an
inappropriate format; layer 1/2.
– WMA files: encoded in lossless, professional, and
voice format; not based upon Windows Media®
Audio; copy-protected with DRM.
– Files which have data such as AIFF, ATRAC3, etc.
Symptom Remedy/Cause
USB playback
“READING” keeps flashing on the
display.
A longer readout time is required. Do not use too many hierarchical
levels and folders. / Turn off the power then on again. / Reattach
the USB device again.
“NO FILE” appears on the display. Check whether the device contains playable files.
Noise is generated. Skip to another file.
“NOT
SUPPORT” appears and track skips.
Check whether the track is a playable file format.
Tracks/folders are not played back in the
order you have intended.
The playback order is determined by the file name. Folders with
numbers on the initial of their names are sorted in numerical order.
However, folders with no numbers on the initial of their names are
sorted according to the file system of the USB device.
“CANNOT PLAY” flashes on the display. /
“NO USB” appears on the display. / The
unit cannot detect the USB device.
Check whether the connected USB device is compatible with this
unit. / Reattach the USB device again.
While playing a track, sound is
sometimes interrupted.
The tracks have not been properly copied into the USB device. Copy
tracks again into the USB device, and try again.
EN02-17_KD-R426_011A_1.indd 15EN02-17_KD-R426_011A_1.indd 15 9/8/11 3:18:45 PM9/8/11 3:18:45 PM
16 ENGLISH
Using Bluetooth® devices
For Bluetooth operations, it is required to connect the Bluetooth adapter, KS-BTA100 (not supplied)
to the auxiliary input jack (R-AUX/BT ADAPTER) on the rear of the unit. (page 9)
• For details, refer also to the instructions supplied with the Bluetooth adapter and the Bluetooth
device.
• Operations may be different according to the connected device.
Preparation
1 Register (pair) a Bluetooth device with KS-BTA100.
Refer to the instructions manual supplied with KS-BTA100.
2 Change the <SRC SELECT> settings of this unit.
]
<SRC SELECT>
]
<R-AUX>
]
<BT ADAPTER>
[Hold]
[Hold]
Using the Bluetooth mobile phone
KS-BTA100
•Receiving a call
When a call comes in...
•Making a call
Making a call to the last connected number from
your phone.
•Switching between handsfree and phone
While talking...
•Ends/rejects call
•Voice dialing
Voice dialing is available only when the connected
mobile phone has the voice recognition system.
Adjusting the microphone volume
Volume level: High/ Normal (initial)/ Low
Microphone
Using the Bluetooth audio device
1
]
“BT AUDIO” 2
If playback does not start, operate the Bluetooth audio player to start playback.
[Press] Selects track.
[Hold] Fast-forwards or reverses the track.
(CD receiver)
About microphone volume:
• When you turn off the power of the CD receiver, the volume level changes to Normal.
(Low) (High)
EN02-17_KD-R426_011A_1.indd 16EN02-17_KD-R426_011A_1.indd 16 9/8/11 3:18:45 PM9/8/11 3:18:45 PM

17ENGLISH
Specifications
CD PLAYER SECTION
Type :
Compact disc player
Signal Detection System :
Non-contact optical
pickup (semiconductor laser)
Number of Channels :
2 channels (stereo)
Frequency Response :
5 Hz to 20 000 Hz
Signal-to-Noise Ratio :
98 dB
Wow and Flutter :
Less than measurable limit
MP3 Decoding Format (MPEG1/2 Audio
Layer 3) :
Max. Bit Rate: 320 kbps
WMA (Windows Media® Audio) Decoding
Format :
Max. Bit Rate: 192 kbps
USB SECTION
USB Standard :
USB 1.1, USB 2.0
Data Transfer Rate (Full Speed) :
Max. 12 Mbps
Compatible Device :
Mass Storage Class
Compatible File System :
FAT 32/16/12
Playable Audio Format :
MP3/WMA
Max. Current :
DC 5 V 500 mA
GENERAL
Power Requirement :
Operating Voltage :
DC 14.4 V (11 V to 16 V allowance)
Grounding System :
Negative ground
Allowable Operating Temperature :
0°C to +40°C
Dimensions (W × H × D) : (approx.)
–Installation Size :
182 mm × 52 mm × 159 mm
–Panel Size :
188 mm × 59 mm × 9 mm
Mass :
1.2 kg(excluding accessories)
Subject to change without notice.
AUDIO AMPLIFIER SECTION
Maximum Power Output :
50 W per channel
Continuous Power Output (RMS) :
20 W per
channel into 4 Ω, 40 Hz to 20 000 Hz at no
more than 1% total harmonic distortion.
Signal-to-Noise Ratio :
70 dB
Load Impedance :
4 Ω (4 Ω to 8 Ω allowance)
Frequency Response :
40 Hz to 20 000 Hz
Line-Out or Subwoofer-Out Level/
Impedance :
2.5 V/20 kΩ load (full scale)
Output Impedance :
≤ 600 Ω
Other Terminal :
USB input terminal, Front
auxiliary input jack, Rear auxiliary/Bluetooth
adapter input jack, Antenna terminal
TUNER SECTION
Frequency Range :
FM :
87.5 MHz to 108.0 MHz
AM :
531 kHz to 1 611 kHz
FM Tuner :
Usable Sensitivity :
9.3 dBf (0.8 μV/75 Ω)
50 dB Quieting Sensitivity :
16.3 dBf (1.8 μV/75 Ω)
Alternate Channel Selectivity (400 kHz) :
65 dB
Frequency Response :
40 Hz to 15 000 Hz
Stereo Separation:
40 dB
AM Tuner :
Sensitivity/Selectivity :
20 μV/40 dB
Having TROUBLE with operation?
Please reset your unit
Refer to page of How to reset your unit
EN02-17_KD-R426_011A_1.indd 17EN02-17_KD-R426_011A_1.indd 17 9/8/11 3:18:46 PM9/8/11 3:18:46 PM

٢ﻰﺳﺭﺎﻓ
ﺖﺳﺍ ﻢﻬﻣﺭﺰﻴﻟ ﺕﻻﻮﺼﺤﻣ ﻱﺍﺮﺑ
١ﻪﺟﺭﺩﺭﺰﻴﻟﻝﻮﺼﺤﻣ.١
ﺍﺭ ﺕﺍﺮﻴﻤﻌﺗ ﺔﻴﻠﻛ؛ﺩﺭﺍﺪﻧ ﺩﻮﺟﻭﻞﺧﺍﺩﺭﺩﺪﻨﻛﺮﻴﻤﻌﺗﺍﺮﻧﺁﺪﻧﺍﻮﺘﺑﺮﺑﺭﺎﻛﻪﻛﺍﻪﻌﻄﻗ.ﺪﻴﻨﻜﻧﺯﺎﺑﺍﺭﯽﻳﻻﺎﺑﺶﺷﻮﭘ :ﻁﺎﻴﺘﺣﺍ .٢
.ﺪﻴﻨﻛﻝﻮﺤﻣ ﺏﺮﺠﻣﺮﻴﻤﻌﺗ ﻦﻴﺼﺼﺨﺘﻣﻪﺑ
ﻥﺁ ﻪﺑ ﹰﺎﻤﻴﻘﺘﺴﻣﯽﻤﺸﭼﻡﺯﺍﻮﻟﺎﺑ.ﺩﺭﺍﺩﺩﻮﺟﻭﺭﺰﻴﻟ1M ﺱﻼﻛﯽﺋﺮﻣﺎﻧﺎﻳﻭﯽﺋﺮﻣﻊﺸﻌﺸﺗ،ﺩﺩﺮﮔﺯﺎﺑﻪﻛﯽﻣﺎﮕﻨﻫ :ﻁﺎﻴﺘﺣﺍ .٣
.ﺪﻴﻨﻜﻧﻩﺎﮕﻧ
.ﻪﺘﻓﺮﮔﺭﺍﺮﻗ ﻩﺎﮕﺘﺳﺩﺝﺭﺎﺧﺭﺩ ،ﻁﺎﻴﺘﺣﺍﺐﺴﭼﺮﺑ :ﺐﺴﭼﺮﺑﺩﺪﺠﻣ ﺪﻴﻟﻮﺗ.۴
[ﺎﭘﻭﺭﺍﻪﻳﺩﺎﺤﺗﺍﻂﻘﻓ]
:ﺭﺎﻄﺧﺍ
.ﺪﻴﻨﻛﻒﻗﻮﺘﻣ ﺍﺭﻞﻴﺒﻣﻮﺗﺍ ،ﻩﺎﮕﺘﺳﺩﻦﺘﺧﺍﺪﻧﺍ ﺭﺎﻜﺑﺯﺍﻞﺒﻗ
:ﻁﺎﻴﺘﺣﺍ
ﺍﺭ ﻞﻴﺒﻣﻮﺗﺍﺯﺍ ﺝﺭﺎﺧیﺍﺪﺻ ﺪﻴﻧﺍﻮﺘﺑﺎﺗﺪﻴﻨﻛﻢﻴﻈﻨﺗﺍﺭﻡﻮﻟﻭ
ﻦﻜﻤﻣ ﻻﺎﺑﺪﺣ ﺯﺍﺶﻴﺑیﺍﺪﺻﻡﻮﻟﻭﺎﺑﯽﮔﺪﻨﻧﺍﺭ.ﺪﻳﻮﻨﺸﺑ
.ﺩﻮﺷﻑﺩﺎﺼﺗ ﺚﻋﺎﺑﺖﺳﺍ
.ﻢﻳﺮﻜﺸﺘﻣﺪﻳﺩﺮﻛ یﺭﺍﺪﻳﺮﺧﺍﺭJVC ﻝﻮﺼﺤﻣﮏﻳﻪﻜﻨﻳﺍﺯﺍ
ﻦﻳﺮﺘﻬﺑ ﻭﻩﺩﺮﻛکﺭﺩ ﺍﺭﺎﻬﻧﺁ ﻞﻣﺎﻛﺭﻮﻄﺑ ﻪﻛﺪﻳﻮﺷ ﻦﺌﻤﻄﻣﺎﺗ ﺪﻴﻧﺍﻮﺨﺑﺖﻗﺩ ﺎﺑﻩﺩﺎﻔﺘﺳﺍ ﺯﺍﻞﺒﻗ ﺍﺭ ﺎﻫﻞﻤﻌﻟﺍﺭﻮﺘﺳﺩ ﻪﻤﻫﹰﺎﻔﻄﻟ
.ﺪﻴﻨﻛﺐﺴﻛ ﻩﺎﮕﺘﺳﺩﺯﺍ ﺍﺭﻦﻜﻤﻣ ﻪﺠﻴﺘﻧ
:ﺪﻴﺷﺎﺑ ﺍﺪﺻ ﻢﻴﻈﻨﺗ ﺐﻗﺍﺮﻣ
ﺮﻳﺎﺳ ﺎﺑﻪﺴﻳﺎﻘﻣ ﺭﺩ(USB/CD) ﯽﻟﺎﺘﻴﺠﻳﺩ یﺎﻬﻫﺎﮕﺘﺳﺩ
ﺯﺍ ﻞﺒﻗﺍﺭ ﻡﻮﻟﻭ.ﺪﻨﻨﻛ ﯽﻣﺪﻴﻟﻮﺗ ﺍﺭﯽﻤﻛ ﺭﺎﻴﺴﺑﺰﻳﻮﻧ ﻊﺑﺎﻨﻣ
ﻥﺪﻴﺳﺭ ﻪﻣﺪﺻﺯﺍ ﺎﺗﺪﻴﻨﻛ ﻢﻛﯽﻟﺎﺘﻴﺠﻳﺩ ﻊﺑﺎﻨﻣﻦﻳﺍ ﺶﺨﭘ
ﯽﺟﻭﺮﺧ ﺢﻄﺳﯽﻧﺎﻬﮔﺎﻧﺶﻳﺍﺰﻓﺍﺮﻃﺎﺨﺑﺎﻫﻮﮔﺪﻨﻠﺑﻪﺑ
.ﺪﻳﺭﻭﺁﻞﻤﻌﺑیﺮﻴﮔﻮﻠﺟ
:DualDisc ﻯﺎﻬﻜﺴﻳﺩ ﺶﺨﭘ ﺩﺭﻮﻣ ﺭﺩ ﻯﺮﻛﺬﺗ
ﺎﺑ ﺖﺴﻴﻧDVD ﻪﻛﻰﻓﺮﻃ “DualDisc” ﺎﻬﻜﺴﻳﺩﺭﺩ
ﺭﺎﮔﺯﺎﺳ “Compact Disc Digital Audio” ﺩﺭﺍﺪﻧﺎﺘﺳﺍ
ﺯﺍ ﺖﺴﻴﻧDVD ﻪﻛﻰﻓﺮﻃﺯﺍ ﻩﺩﺎﻔﺘﺳﺍ،ﻦﻳﺍﺮﺑﺎﻨﺑ .ﺪﺷﺎﺑﻰﻤﻧ
.ﺩﻮﺷﻰﻤﻧ ﻪﻴﺻﻮﺗﻩﺎﮕﺘﺳﺩ ﻦﻳﺍﺎﺑ DualDisc ﻚﺴﻳﺩﻚﻳ
PE_KD-R426_R425[UK]f.indd 2PE_KD-R426_R425[UK]f.indd 2 9/28/11 9:35 AM9/28/11 9:35 AM

٣ﻰﺳﺭﺎﻓ
ﻝﺮﺘﻨﻛ ﻞﻧﺎﭘ ﻥﺩﺮﻛ ﺍﺪﺟ/ﻞﺻﻭ ﺵﻭﺭ
ﺪﻨﻴﻛ ﻥﺍﺰﻴﻣ ﻩﺭﺎﺑﻭﺩ ﺍﺭ ﺩﻮﺧ ﻩﺎﮕﺘﺳﺩ ﻪﻧﻮﮕﭼ
ﺝﺭﺎﺧ ﺍﺭﻩﺩﺮﻛﺮﻴﮔ ﻪﻛﻰﻜﺴﻳﺩ ﺭﻮﻄﭼ
.ﺪﻴﻨﻛ
ﺪﻴﻨﻛ ﺝﺭﺎﺧ ﺍﺭ ﻩﺩﺮﻛﺮﻴﮔ ﻪﻛ ﻰﻜﺴﻳﺩ ﺭﻮﻄﭼ
.ﺪﺘﻓﺎﻴﻧﻪﻛﺪﺷﺎﺑﺐﻗﺍﺮﻣ ﻚﺴﻳﺩﻥﺪﺷﺝﺭﺎﺧﻡﺎﮕﻨﻫ
•
.ﺪﻴﻨﻛﺖﺳﺭ ﺭﺍﺭ ﻩﺪﻧﺮﻴﮔﻩﺎﮕﺘﺳﺩ ،ﺩﺮﻜﻧﻞﻤﻋ ﻦﻳﺍﺮﮔﺍ •
ﻯﺭﺍﺪﻬﮕﻧ
ﻩﺎﮕﺘﺳﺩ ﻥﺩﺮﻛ ﺰﻴﻤﺗ
ﯽﻧﻮﻜﻴﻠﻴﺳ ﮏﺸﺧﻝﺎﻤﺘﺳﺩ ﮏﻳﺎﺑ ﺍﺭﻞﻧﺎﭘ یﻭﺭکﺎﺧ ﻭﺩﺮﮔ
ﻡﺍﺪﻗﺍ ﻦﻳﺍﻡﺎﺠﻧﺍﺭﺩﺖﻠﻔﻏ.ﺪﻴﻨﻛکﺎﭘﻡﺮﻧﻪﭼﺭﺎﭘﮏﻳﺎﻳ
.ﺩﻮﺷﻩﺎﮕﺘﺳﺩ ﻪﺑﺐﻴﺳﺁ ﻪﺑﺮﺠﻨﻣ ﺖﺳﺍﻦﻜﻤﻣ ﯽﻃﺎﻴﺘﺣﺍ
ﻂﺑﺍﺭ ﻥﺩﺮﻛ ﺰﻴﻤﺗ
ﮏﻳ ﺯﺍ.ﺪﻴﻨﻛ کﺎﭘﺍﺭﻞﻧﺎﭘﻭﻩﺎﮕﺘﺳﺩﻂﺑﺍﺭیﻭﺭﺭﺎﺒﻏﻭﺩﺮﮔ
.ﺪﻴﻨﻛﻩﺩﺎﻔﺘﺳﺍ ﻪﭼﺭﺎﭘﺎﻳ ﻪﺒﻨﭘﻪﻜﺗ
USB.
ﺐﻟﺎﻄﻣ ﺖﺳﺮﻬﻓ
ﻝﺮﺘﻨﻛﻞﻧﺎﭘ ﻥﺩﺮﻛﺍﺪﺟ/ﻞﺻﻭﺵﻭﺭ ٣
ﺪﻨﻴﻛﻥﺍﺰﻴﻣﻩﺭﺎﺑﻭﺩﺍﺭﺩﻮﺧﻩﺎﮕﺘﺳﺩﻪﻧﻮﮕﭼ ٣
ﺪﻴﻨﻛﺝﺭﺎﺧﺍﺭﻩﺩﺮﻛﺮﻴﮔﻪﻛﻰﻜﺴﻳﺩﺭﻮﻄﭼ ٣
ﺭﺍﺪﻬﮕﻧ ٣
ﯽﺸﻳﺎﻤﻧ ﻪﻧﻮﻤﻧ ﺶﻳﺎﻤﻧ ﻮﻐﻟ ۴
ﺖﻋﺎﺳ ﺕﺎﻤﻴﻈﻨﺗ ۴
ﺭﻭﺩ ﻩﺍﺭ ﺯﺍ ﻝﺮﺘﻨﻛ یﺯﺎﺳ ﻩﺩﺎﻣﺁ ۵
ﺎﻬﻜﺴﻳﺩ ﺩﺭﻮﻣ ﺭﺩ ۵
ﻰﻠﺻﺍ ﻯﺎﻫﺩﺮﻜﻠﻤﻋ ۶
ﻮﻳﺩﺍﺭ ﻪﺑ ﻥﺩﺍﺩ ﺵﻮﮔ ٧
ﮏﺴﻳﺩ ﻪﺑ ﻥﺩﺍﺩ ﺵﻮﮔ ٨
ﯽﺟﺭﺎﺧ یﺎﻬﻫﺎﮕﺘﺳﺩ ﺮﻳﺎﺳ ﻪﺑ ﻝﺎﺼﺗﺍ ٩
یﺎﻬﻫﺎﮕﺘﺳﺩ ﺮﻳﺎﺳ ﻪﺑ ﻥﺩﺍﺩ ﺵﻮﮔ ٩
ﯽﺟﺭﺎﺧ
USB ﻩﺎﮕﺘﺳﺩ ﻪﺑ ﻥﺩﺍﺩ ﺵﻮﮔ ١٠
ﻢﻴﻈﻨﺗ ﺶﻴﭘ ﺯﺍ ﻯﺍﺪﺻ ﻯﺎﻫ ﺪﻣ ﺏﺎﺨﺘﻧﺍ ١١
ﻩﺪﺷ
ﻮﻨﻣ ﺕﺎﻴﻠﻤﻋ ١٢
ﻰﺑﺎﻳ ﺐﻴﻋ ١۴
Bluetooth ®یﺎﻬﻫﺎﮕﺘﺳﺩ ﺯﺍ ﻩﺩﺎﻔﺘﺳﺍ ١۶
ﺕﺎﺼﺨﺸﻣ ١٧
ﻞﻴﺒﻣﻮﺗﺍ یﺍﻮﻫﻪﻳﻮﻬﺗ ﻪﻛﯽﻣﺎﮕﻨﻫ : ﺖﺑﻮﻃﺭ ﻥﺪﺷ ﻊﻤﺟ
.ﺩﻮﺷ ﻊﻤﺟﺎﻫﺰﻨﻟ یﻭﺭﺖﺑﻮﻃﺭ ﺖﺳﺍﻦﻜﻤﻣ ،ﺪﻨﻛﺭﺎﻛ
ﮏﺴﻳﺩ ﻥﺪﻧﺍﻮﺧﺭﺩﺎﻄﺧﺚﻋﺎﺑﺖﺳﺍﻦﻜﻤﻣﺭﺎﻛﻦﻳﺍ
ﺮﺒﺻ ﻭﺪﻳﺭﻭﺎﻴﺑﻥﻭﺮﻴﺑﺍﺭﮏﺴﻳﺩ،ﺖﻟﺎﺣﻦﻳﺍﺭﺩ.ﺩﻮﺷ
.ﺩﻮﺷﺮﻴﺨﺒﺗ ﺖﺑﻮﻃﺭﺎﺗ ﺪﻴﻨﻛ
ﯽﻧﻻﻮﻃ ﺕﺪﻤﺑﺍﺭ ﻭﺭﺩﻮﺧﺮﮔﺍ : ﻭﺭﺩﻮﺧ ﻞﺧﺍﺩ یﺎﻣﺩ
ﻦﺷﻭﺭ ﺯﺍﻞﺒﻗ ،ﺪﻳﺍﻩﺩﺮﻛﻙﺭﺎﭘﺩﺮﺳﺎﻳﻡﺮﮔیﺍﻮﻫﺭﺩ
ﺮﺒﺻ ﻭﺭﺩﻮﺧﻞﺧﺍﺩ یﺎﻣﺩﻥﺪﺷیﺩﺎﻋﺎﺗﻩﺎﮕﺘﺳﺩﻥﺩﺮﻛ
.ﺪﻴﻨﻛ
[ﺪﻳﺭﺍﺩﻪﮕﻧ]
ﺖﺒﺛ ﺭﺎﺠﺗﺎﻬﺘﻣﻼﻋ ﺎﻳﺪﻣﺯﻭﺪﻨﻳﻭ ﻭﺖﻓﺎﺳﻭﺮﻜﻳﺎﻣ
ﺭﺩ ﺖﻓﺎﺳﻭﺮﻜﻳﺎﻣﺖﻛﺮﺷ ﺭﺎﺠﺗﺎﻬﺘﻣﻼﻋ ﺎﻳﻩﺪﺷ
.ﺪﺷﺎﺑﻰﻣ ﺮﮕﻳﺩﺎﻫﺭﻮﺸﻛ ﺎﻳﻭﺎﻜﻳﺮﻣﺁ ﻩﺪﺤﺘﻣﺖﻟﺎﻳﺍ
PE_KD-R426_R425[UK]f.indd 3PE_KD-R426_R425[UK]f.indd 3 9/27/11 3:37 PM9/27/11 3:37 PM

۴ﻰﺳﺭﺎﻓ
.ﺪﻴﻨﻛ ﻦﺷﻭﺭ ﺍﺭ ﻩﺎﮕﺘﺳﺩ ١
٢
٣
ﺖﻋﺎﺳ ﺕﺎﻤﻴﻈﻨﺗ
.ﺪﻴﻨﻛ ﻦﺷﻭﺭ ﺍﺭ ﻩﺎﮕﺘﺳﺩ ١
٢
.ﺪﻴﻨﻛ ﺏﺎﺨﺘﻧﺍ ﺍﺭ <CLOCK> ٣
.ﺪﻴﻨﻛ ﺏﺎﺨﺘﻧﺍ ﺍﺭ <CLOCK SET> ۴
.ﺪﻴﻨﻛ ﻢﻴﻈﻨﺗ ﺍﺭ ﺖﻋﺎﺳ ۵
.ﺪﻴﻨﻛ ﻢﻴﻈﻨﺗ ﺍﺭ ﻪﻘﻴﻗﺩ ۶
.ﺪﻴﻧﺎﺳﺭ ﻡﺎﻤﺗﺍ ﻪﺑ ﺍﺭ ﺭﺎﻛ ﻞﺣﺍﺮﻣ ٧
.ﺪﻴﻨﻛ ﺏﺎﺨﺘﻧﺍ ﺍﺭ <DEMO OFF> ۴
۵
.ﺪﻴﻧﺎﺳﺭ ﻡﺎﻤﺗﺍ ﻪﺑ ﺍﺭ ﺭﺎﻛ ﻞﺣﺍﺮﻣ ۶
ﯽﺸﻳﺎﻤﻧ ﻪﻧﻮﻤﻧ ﺶﻳﺎﻤﻧ ﻮﻐﻟ
[ﺪﻳﺭﺍﺩﻪﮕﻧ]
[ﺪﻳﺭﺍﺩﻪﮕﻧ]
(ﻪﻴﻟﻭﺍﻢﻴﻈﻨﺗ)
(ﻪﻴﻟﻭﺍﻢﻴﻈﻨﺗ)
[ﺪﻳﺭﺍﺩﻪﮕﻧ]
(ﻪﻴﻟﻭﺍﻢﻴﻈﻨﺗ)
[ﺪﻳﺭﺍﺩﻪﮕﻧ]
(ﻪﻴﻟﻭﺍﻢﻴﻈﻨﺗ)
PE_KD-R426_R425[UK]f.indd 4PE_KD-R426_R425[UK]f.indd 4 9/27/11 3:37 PM9/27/11 3:37 PM
This manual suits for next models
1
Table of contents
Other JVC Car Receiver manuals

JVC
JVC KD-G635 User manual

JVC
JVC KD-SC601 User manual

JVC
JVC GET0641-001A Parts list manual

JVC
JVC EXAD KW-AVX706 Guide

JVC
JVC KD-S25 - MP3/WMA/CD Receiver With Remote Guide

JVC
JVC KD-AR360 User manual

JVC
JVC FX-335TN User manual

JVC
JVC KD-AR400 User manual

JVC
JVC KS-FX440/FX240 User manual

JVC
JVC KD-S620 User manual
Popular Car Receiver manuals by other brands

MAC Audio
MAC Audio APM 2.16 Owner's manual/warranty document

Kenwood
Kenwood KDC-X7100DAB instruction manual

Clarion
Clarion Automobile Accessories user manual

Clarion
Clarion VX404 owner's manual

Kenwood
Kenwood KDV-7241 instruction manual

Sony
Sony CDX-1300 - Fm/am Compact Disc Player operating instructions