JVC MC-R433U User manual

MC-R433U
LST0122-001A
MC-R433U DVD-RAM/R DRIVE
INSTRUCTIONS
Thank you for purchasing the JVC MC-R433U DVD-RAM/R DRIVE.
Before you start operating this unit, please read the instructions
carefully in order to obtain the best possible performance.
For Customer Use:
Enter below the Model No. and Serial
No. which are located at the top of the
unit. Retain this information for future
reference.
Model No. MC-R433U
Serial No.
nted in Japan
T0122-001A
This instruction book is made from 100% recycled paper.
ENGLISH
DEUTSCH
FRANÇAIS
MC-R433UINSTCover 03.7.10, 2:12 PM3

E
INSTALLATION FLOW
Follow the steps below for installation.
PRECAUTIONS BEFORE USE
INSTALLATION
Page 3
●Install the MC-R433U in the CD/DVD Library.
䡵Procedure for Opening the Door of the CD/DVD Library
䡵Procedure for Opening the Drive Storage Cover of the
CD/DVD Library
䡵Procedure for Determining the Setup Position for the MC-R433U
䡵Procedure for Installing the MC-R433U in the CD/DVD Library
CONNECTION
Page 4
●Connect the MC-R433U to the CD/DVD Library.
䡵Procedure for Attaching the Provided SCSI Cable
䡵Procedure for Connecting the Cables to the Back of the MC-R433U
SETUP
Page 5
●Set the SCSI ID of the MC-R433U and close the door of the CD/
DVD Library.
䡵Procedure for Setting the DIP Switch
䡵Procedure for Setting the Slide Switch
䡵Procedure for Attaching the Drive Storage Cover of the CD/DVD
Library
䡵Procedure for Closing the CD/DVD Library Door
EXECUTION OF AUTOMATIC
DRIVE DETECTION MODE.
Page 6
●Execute the automatic drive detection mode and connect the host
computer.
䡵Procedure for Executing the Automatic Drive Detection Mode of
the CD/DVD Library
䡵Procedure for Connecting the CD/DVD Library to the Host Com-
puter
●If six drives are installed in the CD/DVD Library and it is re-
quired to connect the MC-R433U units to three or more of
those drives, please consult your dealer or JVC-authorized
service agent.
●When six MC-R433U units are installed in the CD/DVD Li-
brary, use the CD/DVD Library at an ambient temperature of
between 5˚C to 30˚C.
1. DANGER: Invisible laser radiation will occur if the unit is
open due to a failed or defective interlocking device.
2. CAUTION: Do not open the top cover.There are no user
serviceable parts inside the unit; leave all servicing to
qualified service personnel.
●The MC-R433U is a DVD-RAM/R drive designed for use with
the JVC MC-8100U/8200U/8600U “CD/DVD Library”.
●When installing this unit in a Library that is being used, please
read the instruction manual carefully.
●The MC-R433U cannot be operated on its own.
●This unit cannot be used in combination with the following
models.
• CD-ROM Library : MC-1000 series/2000 series
• DVD-RAM Library: MC-7000 series
●For the compatible discs, see the Specifications on page 8.
●Before using this unit, be sure to replace the ROM for the
"CD/DVD Library" with the ROM provided with this unit.
●For information on firmware version upgrades and replace-
ment of ROMs, please consult the retailer of the MC-R433U
or JVC service agency.
MC-R433U(E).pm6 03.7.10, 2:11 PM2

E
ENGLISH
1.
Select the [DOOR OPEN MODE] on the MENU screen of
the CD/DVD Library's LCD.
2.
Press and hold the "SELECT" switch for five seconds.
3.
Turn off the power of the CD/DVD Library when [THE DOOR
CAN BE OPENED] message is displayed on the LCD.
4.
Insert the key in the key cylinder located at the center of
the door to unlock and open the door.
*The illustration shows the CD/DVD Library with the drive storage
cover removed for ease of description.
<With the MC-8100U>
<With the MC-8200U>
1.
Remove the screws from the drive storage cover of the
CD/DVD Library.
2.
Remove the drive storage cover.
1.
Install the drives to the drive slots No.1 through No.6 (No. 1
through No. 4 in the case of the MC-8100U) sequentially.
䡵It makes the work easy if the drives are installed from
the lowest number to the highest.
<
MC-8100U drive storage section
><
MC-8200U drive storage section
>
●Install the MC-R433U in the CD/DVD Library.
Before starting installation, be sure to turn both the
host computer and peripherals off.
For information related to the CD/DVD Library, refer
to the instruction manual for the CD/DVD Library.
INSTALLATION
<With the MC-8100U>
<With the MC-8200U>
Drive locking
screw mounting
hole
Drive storage
section
Drive storage
section
Drive locking
screw mounting
hole
Drive No. 3
Drive No. 4
Drive No. 1
Drive No. 2
Drive No. 6
Drive No. 3
Drive No. 4
Drive No. 5
Drive No. 1
Drive No. 2
Screw
Screw
Drive storage
section
Drive storage
cover
Drive storage
section
Screw
Drive storage cover
Procedure for Opening the Door of the
CD/DVD Library
Procedure for Opening the Drive Storage
Cover of the CD/DVD Library
Procedure for Determining the Setup
Position for MC-R433U
MC-R433U(E).pm6 03.7.10, 2:12 PM3

E
1.
In order to remove the two blind plates, remove the four
screws from the SCSI connector installation section at the
rear of the CD/DVD Library (drive storage cover).
2.
Insert the provided SCSI cable through the installation hole
from the inside of the drive storage cover and secure it with
the four screws.
䡵Remove the connector cap of the SCSI cable for instal-
lation.
䡵Be sure that the SCSI connector is inserted in the cor-
rect direction. (It should be the same as the direction of
the SCSI connector "SCSI-A.")
3.
If the cable or the terminator are not being connected to
the OUT side of the SCSI connector ("SCSI-D"), place the
connector cap over it.
1.
Insert the MC-R433U from the rear of the CD/DVD Library
䡵Be sure not to damage the sensor slit.
䡵Make sure that the direction of the MC-R433U is correct
when inserting it.
䡵Be sure that the cables connected to the rear of the CD/
DVD Library are not caught or pinched when inserting
the MC-R433U.
2.
Insert the MC-R433U slowly until the screw installation hole
located on the side of the MC-R433U and the screw instal-
lation hole located on the drive locking section are aligned.
3.
Screw in the provided drive locking screw to the screw in-
stallation hole of the drive locking section.
䡵Tighten the screw firmly.
䡵If the drive locking screw is loose, the drive and/or Li-
brary may be damaged.
Sensor slit
MC-R433U
Drive locking
screw
MC-R433U
<MC-R433U insertion direction>
<MC-R433U locking method>
<Provided SCSI cable connection method>
* If the provided SCSI cable is not used, go to "Procedure for Con-
necting the Cables to the Back of the MC-R433U" on the next
page.
Blind plate
Connector cap
Drive storage cover
Provided SCSI cable
SCSI connector
mounting screw
Procedure for Installing the MC-R433U in
the CD/DVD Library
Procedure for Attaching the Provided
SCSI Cable
●Connect the MC-R433U to the CD/DVD Library.
When necessary, two or more SCSI bus channels
may be used by adding the provided SCSI cable.
If the DVD-R is recorded intermittently due to an in-
sufficiency in the recording transfer rate on the SCSI
bus, the recording quality may deteriorate and play-
back malfunctions may occur.
Also refer to the instruction manual for the CD/
DVD Library.
CONNECTION
MC-R433U(E).pm6 03.7.10, 2:12 PM4

E
ENGLISH
<MC-R433U connection example>
1.
Connect the power supply cable, control cable and SCSI
cable to the connectors at the rear of the MC-R433U.
䡵When using the MC-8100U, the No. of the cable must
always correspond to the No. of the drive bay to which it
is being connected. If a cable with the wrong number is
connedted, it will lead to the equipment malfunctioning.
䡵When using the MC-8200U/8600U, connect power sup-
ply and control cables, which lead from the side of the
MC-R433U drive bay to the drive.
䡵Insert all connectors firmly.
䡵SCSI cables are connected as a daisy chain connec-
tion. Each connector should be connected to the drive
positions as illustrated in the diagram.
䡵Te r min ate each point where the SCSI bus is terminated
physically.
•Setting of the built-in terminators
"Procedure for Setting the DIP Switch" on page 5
• Setting of the external terminators:
The use of active terminators is recommended.
1.
TERM: Selection of the use of built-in terminators.
䡵When using the built-in terminators:
•With the MC-R433U unit located at a point where
the SCSI bus is physically terminated set its TERM
ON.
•With other MC-R433U units, set their TERMs to OFF.
䡵When not using the built-in terminators:
•Attach external terminators to the OUT terminals of
the SCSI connector.
•When using an external terminator, set all of the
TERMs of the MC-R433U to OFF.
䡵To improve the stability of SCSI bus communications, it
is recommended to use an active external terminator.
2.
ID2, ID1, ID0: Setting of the SCSI ID No. of each drive.
䡵When setting the SCSI ID No., use a number that is not
being used by other SCSI devices on the same bus.
<MC-R433U rear panel>
<MC-R433U DIP switch settings on the rear panel>
DVD-RAM/R drive
Library SCSI board
DVD-RAM/R drive
DVD-RAM/R drive
(Terminate.)
●SCSI connector terminals
OUT 2 :Active terminator connected.
IN 2 :Connected to the host computer's
SCSI host adapter No. 2.
OUT 1 :Active terminator connected.
IN 1 :Connected to the host computer's
SCSI host adapter No. 1.
SCSI cable (Additional)
* Up to two DVD-RAM/R drives can
be connected.
SCSI cable (Standard)
Up to 6
*
1
drives can be connected.
(*1: Up to 4 with the MC-8100.)
SCSI-B
SCSI-D(F)
SCSI-C(E)
SCSI-A
OUT 2
OUT 1
IN 1
IN 2
SCSI connector
Procedure for Setting the DIP Switch
●Set the SCSI ID of the MC-R433U and close the door
of the CD/DVD Library.
Always turn the power of the CD/DVD Library off when
the dip switches are moved.
For the details of the default factory settings, please
refer to the section "SCSI ID No. SETTING" of the
instructions from the CD/DVD Library.
SETUP
<SCSI ID No. and DIP switch settings>
*: Factory setting.
SCSI ID No. Switch
ID2 ID1 ID0
0OFF OFF OFF
1*OFF OFF ON
2OFF ON OFF
3OFF ON ON
4ONOFF OFF
5ONOFF ON
6ONONOFF
7ONONON
WN
Power cable
Control cable
Slide switch DIP switch
SCSI cable
14p
3
4p
2
3
1
NW
ON
OFF
(Factory setting)
TERM
ID 2
ID 1
ID 0
ON
1234
Procedure for Connecting the Cables to
the Back of the MC-R433U
MC-R433U(E).pm6 03.7.10, 2:12 PM5

E
1.
Ensure that the slide switch is set to N.
䡵The W position is for use by service personnel only. The
user should not use this position.
1.
Secure the cover with the screws that were removed.
"Procedure for Opening the Drive Storage Cover of
the CD/DVD Library" on page 3.
1.
Close the door and lock the key cylinder.
1.
While holding the "8" key on the control panel, turn the
power of the CD/DVD Library on.
2.
When the LCD shows "DRIVE DETECTION COMPLETED,"
turn the power of the CD/DVD Library off.
3.
Tu rn the CD/DVD Library on again.
䡵The DRIVE DISPLAY of the CD/DVD Library displays
this drive as a "DVD-RAM.
䡵When using an external SCSI cable, use a SCSI-2 high-im-
pedance, shielded cable and attach the provided clamp fil-
ters.
<Clamp filter attachment method 1>
WN
WN
<Slide switch position on the MC-R433U rear panel>
●Execute the automatic drive detection mode of the
CD/DVD Library.
For the automatic drive detection mode, refer to the
instruction manual for the CD/DVD Library.
EXECUTION OF AUTO-
MATIC DRIVE DETEC-
TION MODE.
SETUP (continued)
Procedure for Setting the Slide Switch
CAUTION
䡵Be sure to close the drive storage cover and door of the
CD/DVD Library before turning it on.
䡵After installing, adding, replacing or removing the drives,
be sure to execute the automatic drive detection mode.
Otherwise, a malfunction may result.
䡵After installing, adding, removing or replacing the drives,
or changing the SCSI ID No., be sure to turn the host
computer off and then turn it on again.
Tighten until the tabs
are locked completely.
Procedure for Attaching the Drive
Storage Cover of the CD/DVD Library
Procedure for Executing the Automatic
Drive Detection Mode of the CD/DVD
Library
Procedure for Closing the CD/DVD
Library Door
Procedure for Connecting the CD/DVD
Library to the Host Computer
MC-R433U(E).pm6 03.7.10, 2:12 PM6

E
ENGLISH
Host computer
CD/DVD library
To the SCSI
connector
"IN" terminal
"SCSI-A"
To the host computer's
host adapter 2 for
controlling the CD/DVD
library
To the host computer's
host adapter 1 for
controlling the CD/DVD
library
Attach the active
terminators to the
OUT terminals.
External SCSI cable
(commercially available)
(High-impedance
specification, shielded)
To the SCSI
connector
"IN" terminal
"SCSI-C"
<Clamp filter attachment method 2>
<SCSI cable 2 system connection example>
䡵Ta ke care of the total SCSI cable length including the internal
and external SCSI cables. A malfunction may occur if the to-
tal length exceeds the following figure.
• SCSI-2, 20 Mbytes/s sync operation: 3 meters
(Up to 2 drives can be connected)
• SCSI-2, 10 Mbytes/s sync operation: 3 meters
• SCSI-2, 5 Mbytes/s async operation: 6 meters
* The length of the provided SCSI cable is 1 meter.
䡵For the length recommendations for the SCSI cable stored
inside the CD/DVD Library, refer to "CONNECTING SCSI
CABLES AND POWER CORD" in the operation manual for
the CD/DVD Library.
䡵Be sure to lock the SCSI connectors of the external SCSI
cables after being connected.
䡵Interface
SCSI-2
䡵Data transmission rate
Sustained (when the maximum sync transfer rate of the host adapter is
set to 20 Mbytes/s)
DVD-RAM 2.77 Mbytes/s (2X)
(Ver. 2.1: Single-sided 4.7 GB or double-sided 9.4 GB)
DVD-RAM 1.38 Mbytes/s (1X)
(Ver. 1.0: Single side 2.6 GB, read only)
DVD-R 2.77 Mbytes/s (2X max.) (write)
(Ver. 2.1: Single-sided 4.7 GB or double-sided 9.4 GB)
DVD-R 8.31 Mbytes/s (6X max.) (read)
(Ver. 2.1: Single-sided 4.7 GB or double-sided 9.4 GB)
DVD-ROM 10 Mbytes/s
(Single Layer, 7X max.: CAV)
CD-ROM 1.5 Mbytes/s to 4.8 Mbytes/s
(32X max.: CAV)
CD-R Max. 1.8 Mbytes/s (write)
(12X max.)
CD-RW Max. 1.2 Mbytes/s (write)
(8X max.)
Burst(when the maximum sync transfer rate of the host adapter is set to 20
Mbytes/s)
Max. 8 Mbytes/s (async transfer)
Max. 10 Mbytes/s (sync transfer)
䡵Average access time (1/3 stroke)
DVD-R (4.7 GB for General) : 145 ms
DVD-ROM (Single Layer) : 130 ms
DVD-RAM (4.7 GB) : 185 ms
DVD-RAM (2.6 GB) : 195 ms
CD-ROM : 130 ms
*The above values were measured using JVC's measure
methods.
䡵Buffer capacity
2 Mbytes
䡵Additional write count (DVD-R for General, 4.7 GB)
500 times typical (when a disc and a drive are combined)
15 times typical (when a disc and multiple drives are com bined)
䡵Dimensions
171 mm(W) x 47.5 mm(H) x 240 mm(D)
䡵Weight
1.5 kg
䡵Accessories
SCSI cable (with connector cap, 1 m length) ........................... x 1
Clamp filter (with band) ...................................................... x 2
ROM ............................................................................... x 3
Drive locking screw ........................................................x 2
Pull it hard. Cut the
unnecessary
part.
SPECIFICATIONS
Procedure for Connecting the CD/DVD
Library to the Host Computer (continued)
MC-R433U(E).pm6 03.7.10, 2:12 PM7

E
SPECIFICATIONS (continued)
䡵Applicable discs
DVD-R 4.7 GB (Ver. 2.0 for General Use)
Recommended discs: Single-sided 4.7 GB
Matsushita Electric Corp.
Mitsubishi Kagaku Media Corp.
Hitachi Maxell Ltd.
TDK Corp.
Tai yo Yu den Co., Ltd.
Recommended discs: Double-sided 9.4 GB
Mitsubishi Kagaku Media Corp.
Hitachi Maxell Ltd.
DVD-R 3.95 GB (Ver. 1.0, Disc-at-once, read only)
DVD-ROM
DVD-RAM (Ver. 2.1, single-sided 4.7 GB, double-sided 9.4 GB)
Matsushita Electric Corp.
Hitachi Maxell Ltd.
DVD-RAM (Ver. 1.0, single-sided 2.6 GB, read only)
CD-ROM (Mode-1, Mode-2, etc.)
CD-R
Ricoh Company Ltd.
Mitsubishi Kagaku Media Corp.
Hitachi Maxell Ltd.
TDK Corp.
Ta i y o Yuden Co., Ltd.
Mitsui Chemicals, Inc.
CD-RW
Ricoh Company Ltd.
Mitsubishi Kagaku Media Corp.
* Note 1: It is recommended to write and read the DVD-R,
DVD-RAM, CD-R and CD-RW discs using the drives
of the same model. If drives of different models
are used in write and read, discs of certain manu-
facturers or production lots may not manifest the
full performance.
* Note 2: Only discs with a diameter of 120 mm are appli-
cable.
* Note 3: Use DVD-R, CD-R and CD-RW discs that match the
optimal writing speed. However, even if the appro-
priate discs are used, an adequate performance
may not be achieved depending on the disc manu-
facturer or production lot compatibility.
䡵Design and specifications are subject to change without no-
tice.
MC-R433U(E).pm6 03.7.10, 2:12 PM8

DEUTSCH
MC-R433U
BEDIENUNGSANLEITUNG
MC-R433U(G).pm6 03.7.10, 2:13 PM1

G
INSTALLATIONSREIHENFOLGE
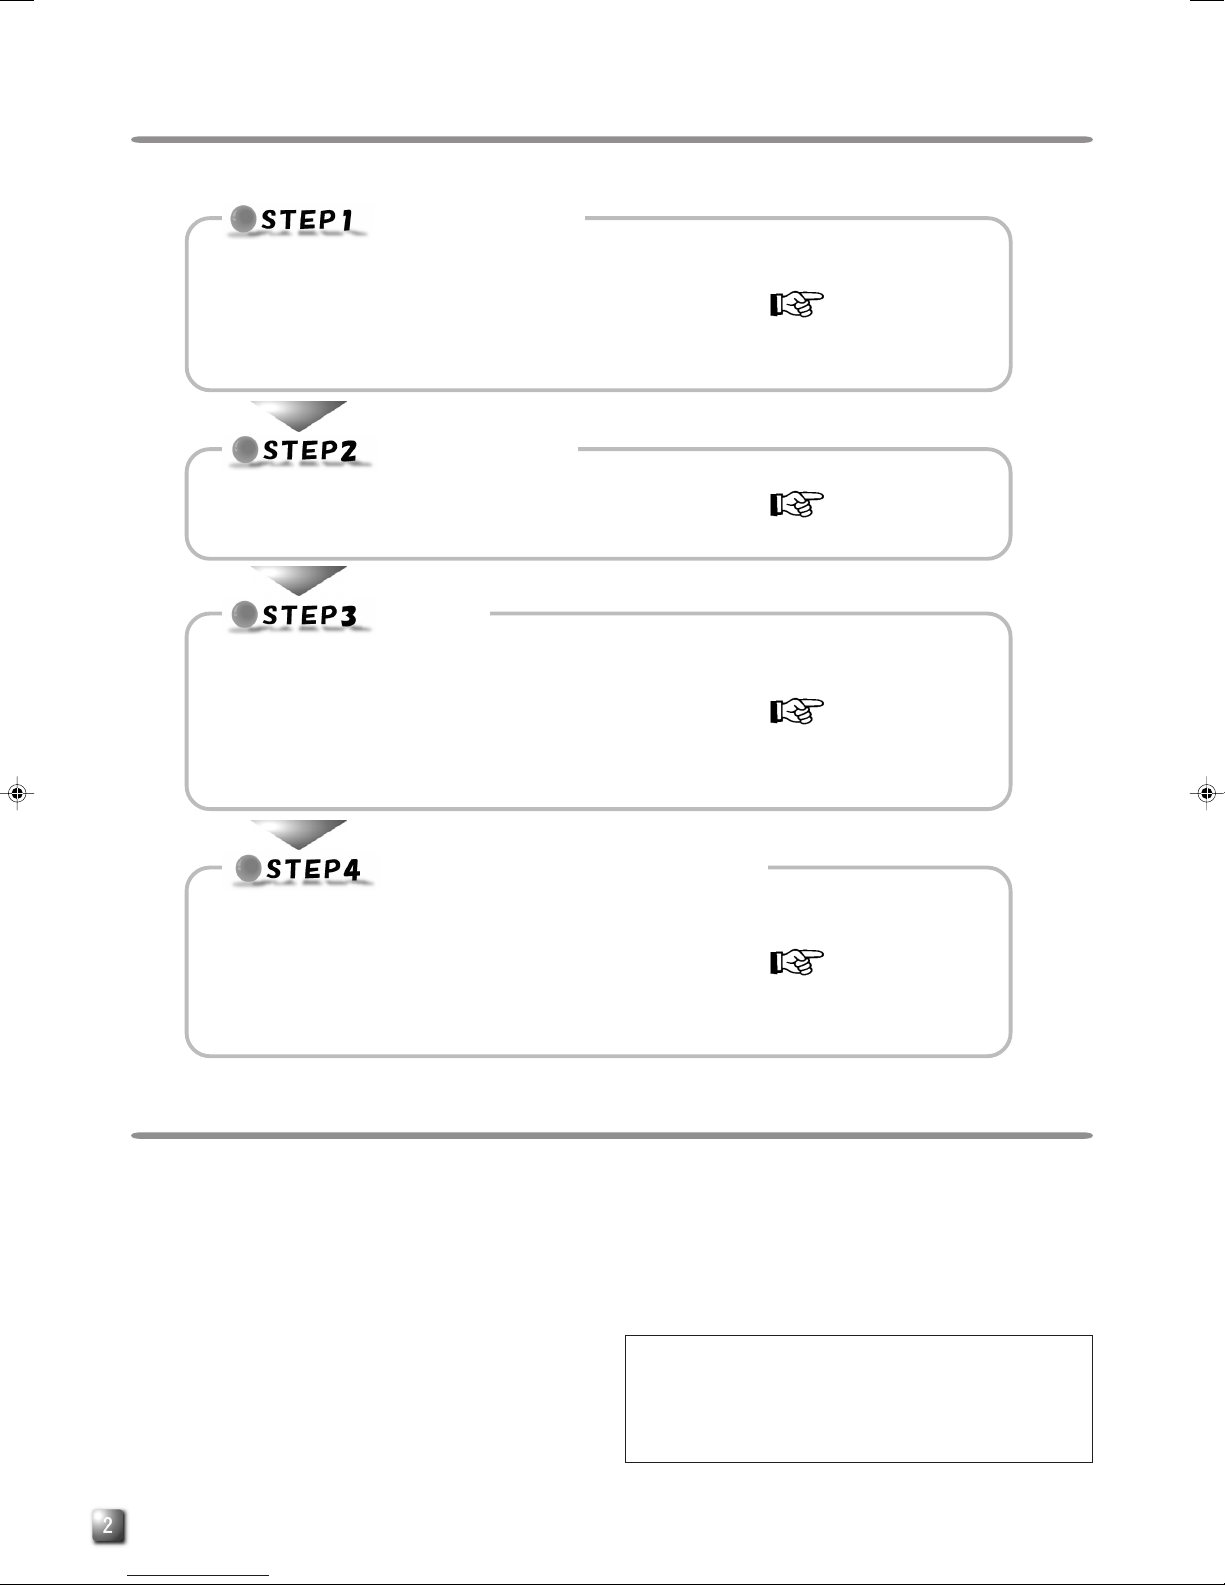
Bitte führen Sie erforderlichen Installationsschritte in der angezeigten Reihenfolge durch.
SICHERHEITSHINWEISE VOR DEM GEBRAUCH
INSTALLATION
Seite 3
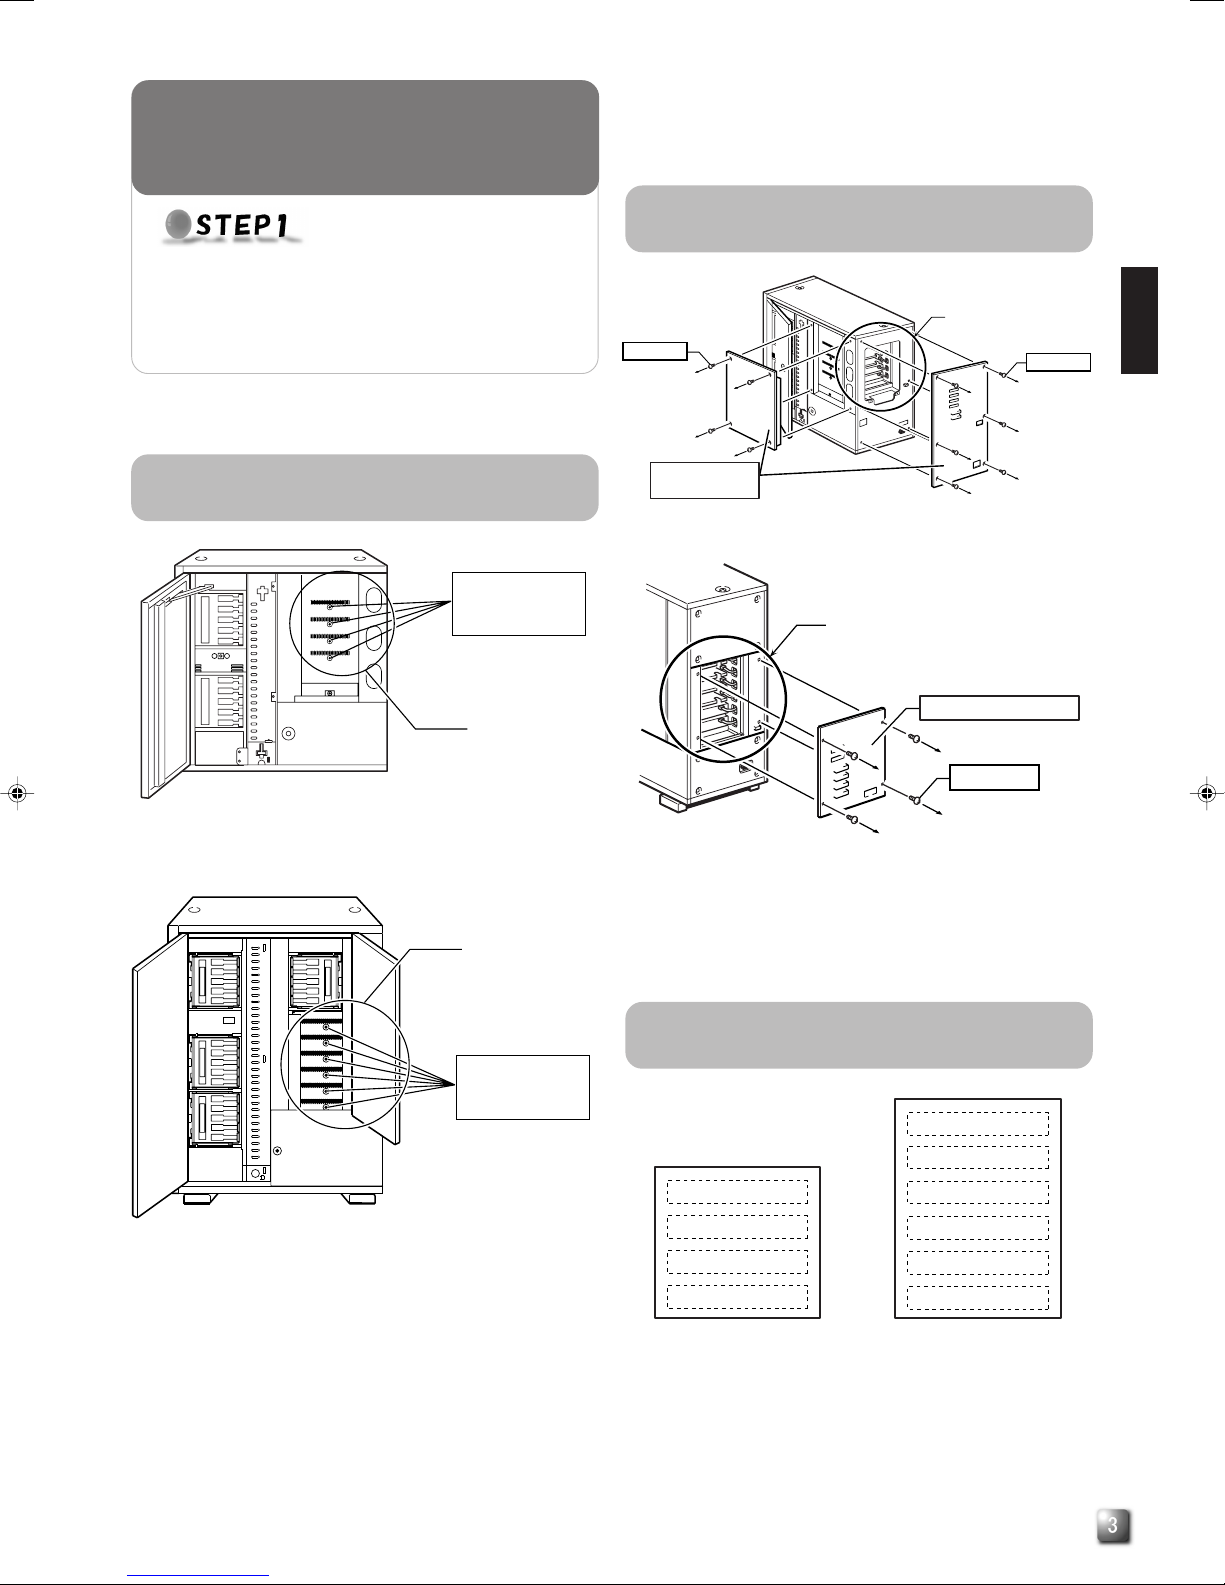
●Installieren Sie das MC-R433U in der CD/DVD-Bibliothek.
䡵So öffnen Sie die Tür der CD/DVD-Bibliothek
䡵So öffnen Sie die Einbaubuchtabdeckung der CD/DVD-Bibliothek
䡵Bestimmen der Einbaubucht für das MC-R433U
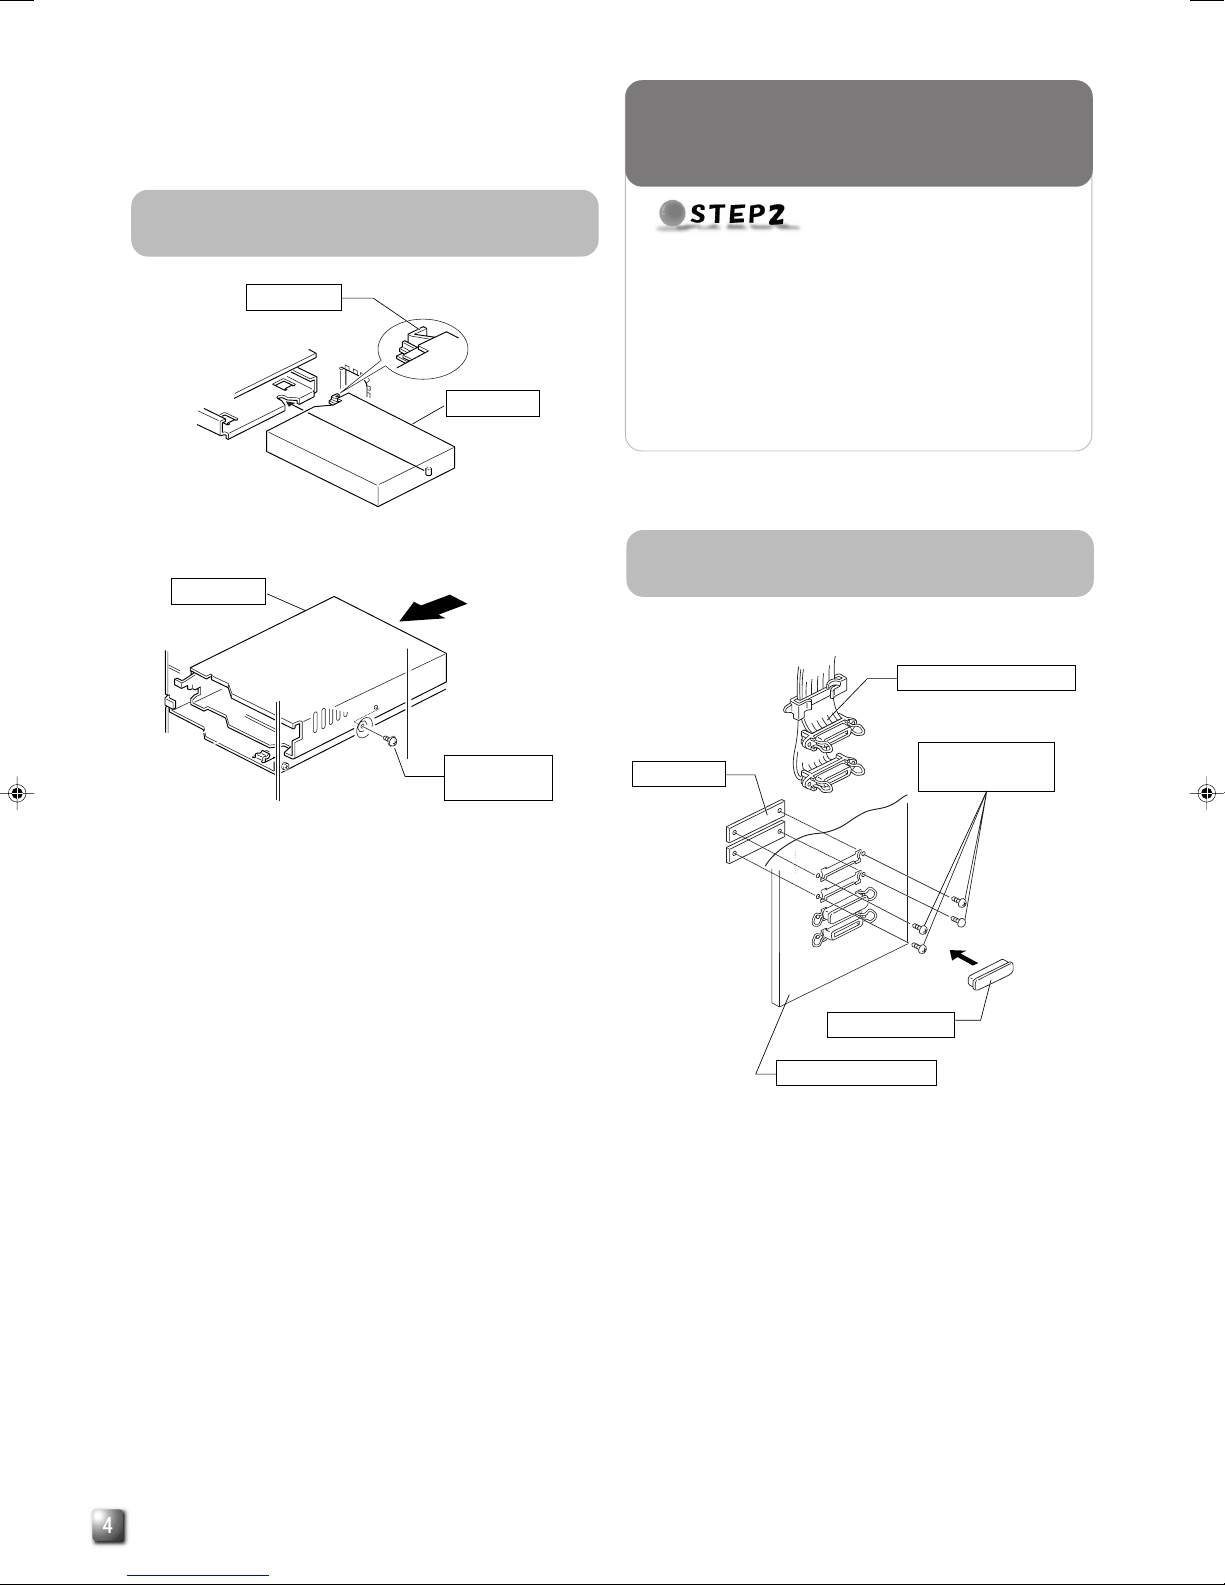
䡵So installieren Sie das MC-R433U in der CD/DVD-Bibliothek
ANSCHLÜSSE
Seite 4
●Schließen Sie das MC-R433U an die CD/DVD-Bibliothek an.
䡵So schließen Sie das mitgelieferte SCSI-Kabel an
䡵So schließen Sie die Kabel an die Rückseite von MC-R433U an
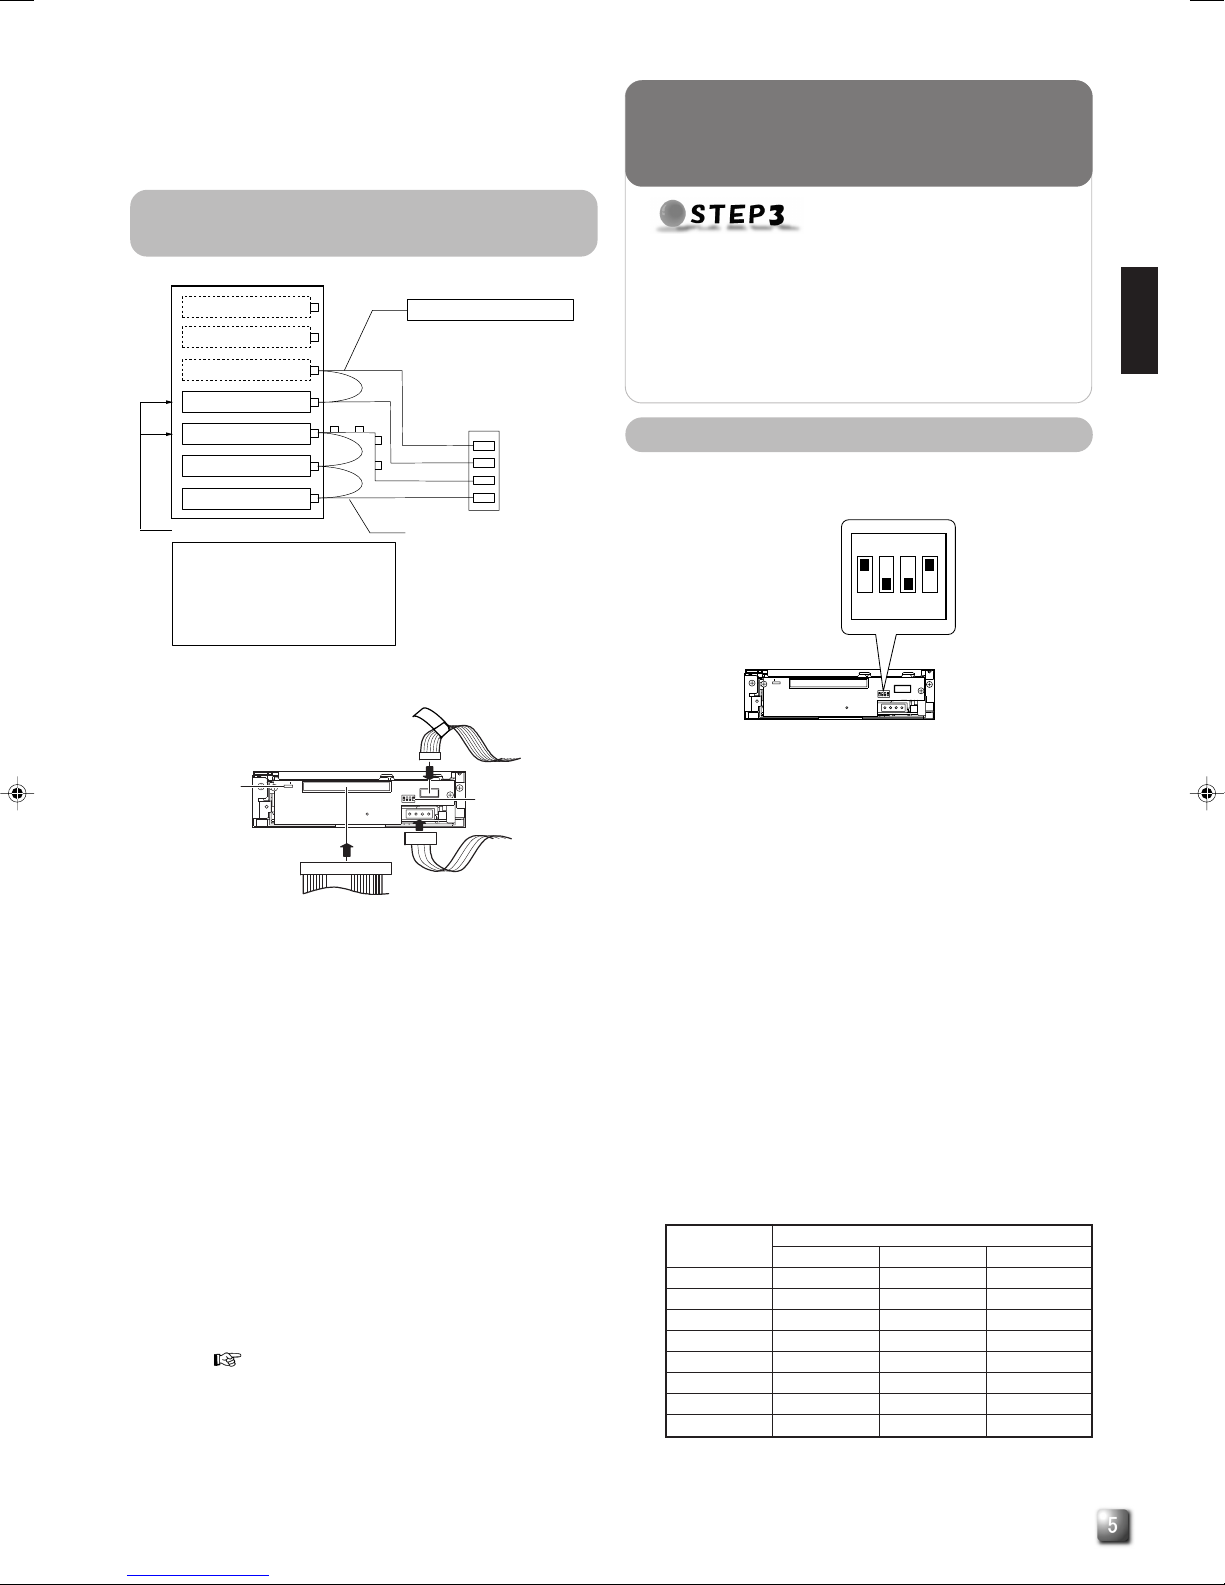
EINRICHTEN
Seite 5
●Stellen Sie die SCSI-ID-Nr. von MC-R433U ein und schließen Sie
die Tür der CD/DVD-Bibliothek
䡵So stellen Sie den DIP-Schalter ein
䡵So stellen Sie den Schiebeschalter ein
䡵So bringen Sie die Einbaubuchtabdeckung der CD/DVD-Bibliothek
wieder an
䡵So schließen Sie die Tür der CD/DVD-Bibliothek
DURCHFÜHREN DER AUTOMATISCHEN
LAUFWERKERFASSUNG
Seite 6
●Führen Sie die automatische Laufwerkerfassung durch und
schließen Sie den Hostcomputer an.
䡵So führen Sie die automatische Laufwerkerfassung für die CD/DVD-
Bibliothek durch.
䡵So schließen Sie die CD/DVD-Bibliothek an den Hostcomputer an.
●Bitte richten Sie Fragen zu Upgrades der Firmware-Version
und zum Ersetzen von ROMs an Ihren Fachhändler, der MC-
R433U führt, oder an den JVC-Kundendienst.
●Wenn in der CD/DVD-Bibliothek sechs Laufwerke installiert
sind und der Anschluss von MC-R433U Einheiten an drei oder
mehr dieser Laufwerke erforderlich wird, wenden Sie sich bitte
an einen autorisierten JVC Fachhändler oder Kundendienst.
●Wenn in der CD/DVD-Bibliothek sechs Laufwerke installiert
sind, muss die Umgebungstemperatur der CD/DVD-Bibliothek
bei Betrieb im Bereich von 5˚C bis 30˚C liegen.
1. GEFAHR: Unsichtbare Laserstrahlung, falls die
Sicherheitsverriegelung beim Öffnen versagt oder
abgestellt wird.
2. VORSICHT: Die obere Abdeckung darf nicht entfernt
werden. Im Inneren der Einheit befinden sich keine Teile, die
vom Benutzer gewartet werden können. Wartungsarbeiten
geschultem Servicepersonal überlassen.
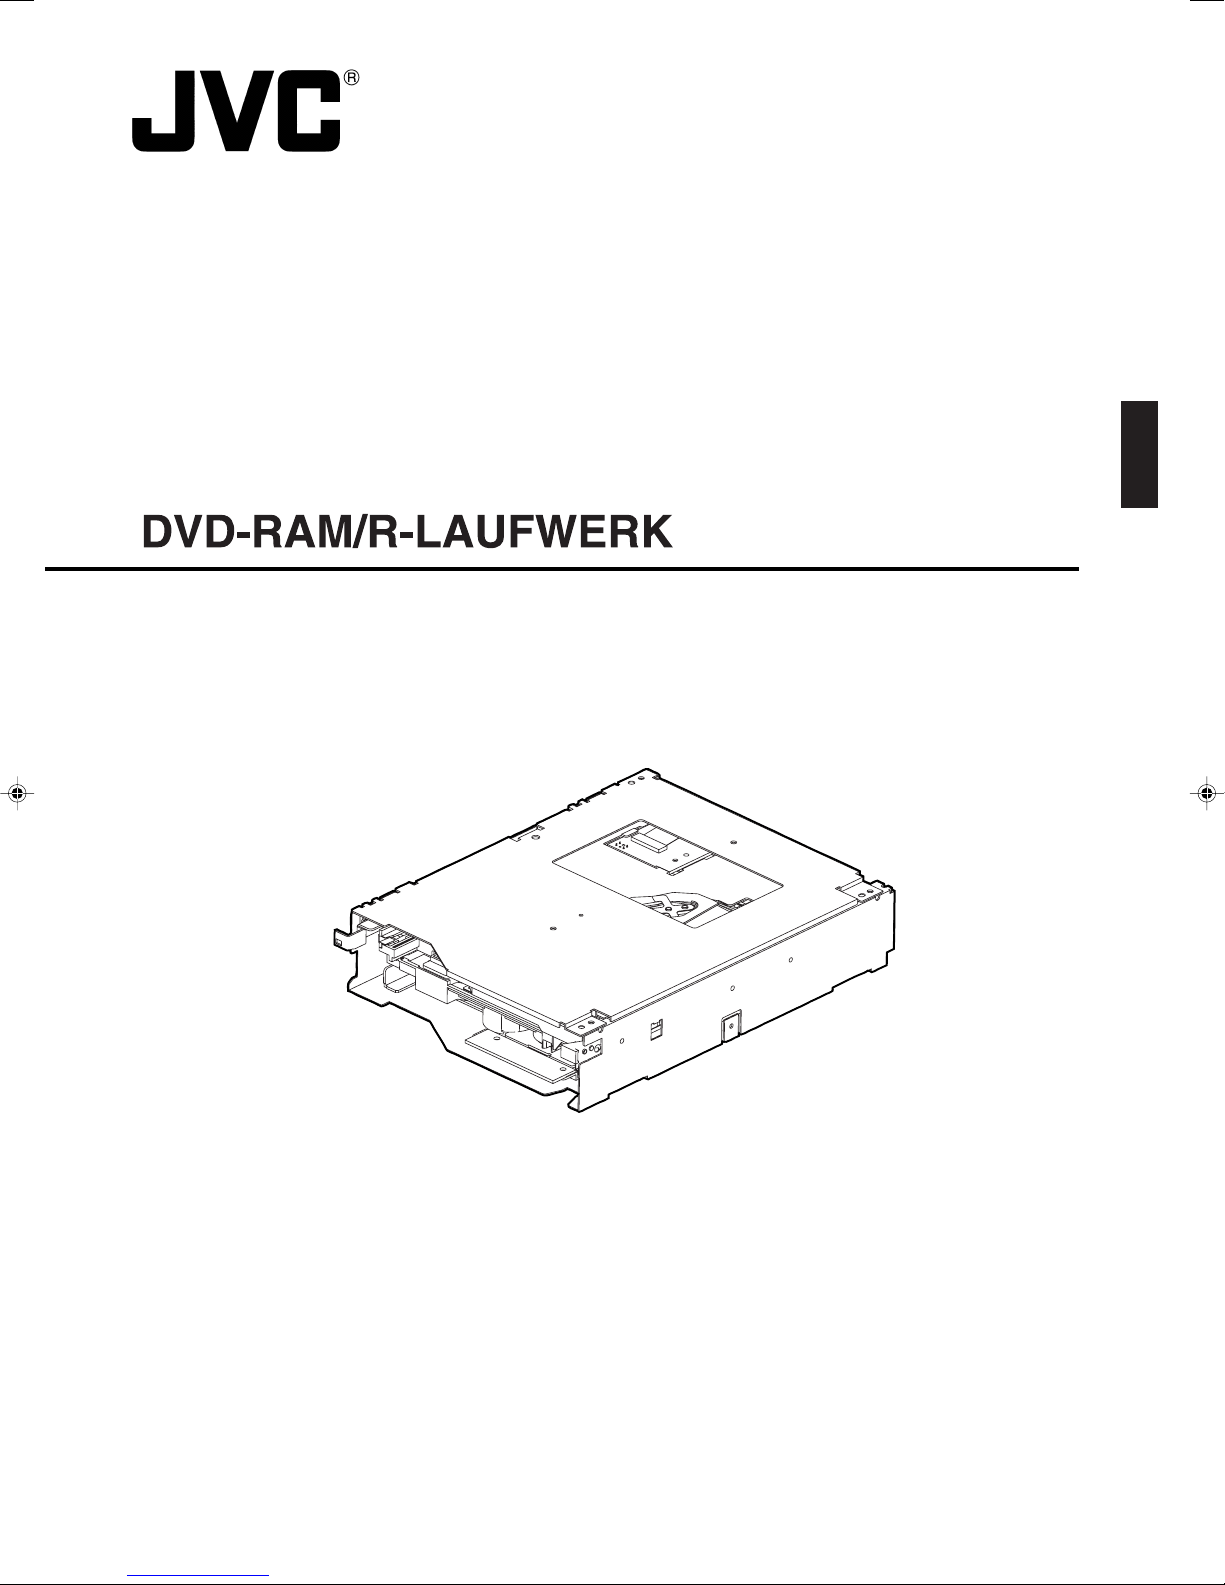
●Das MC-R433U ist ein DVD-RAM/R-Laufwerk, das für den
Einsatz mit der JVC MC-8100U/8200U/8600U "CD/DVD
Bibliothek" entwickelt wurde.
●Soll dieses Laufwerk in einer Bibliothek installiert werden, die
in Gebrauch ist, bitte unbedingt die Bedienungsanleitung
sorgfältig lesen.
●Das MC-R433U-Laufwerk kann nicht getrennt betrieben
werden.
●Dieses Laufwerk kann nicht zusammen mit den folgenden
Modellen verwendet werden
• CD-ROM-Bibliothek : MC-1000 Serie/2000 Serie
• DVD-RAM-Bibliothek : MC-7000 Serie
●Angaben zu kompatiblen Diskausführungen finden Sie in den
Technischen Daten auf Seite 8.
●Vor dem Gebrauch dieses Laufwerks müssen Sie unbedingt
die ROM der “CD/DVD-Bibliothek” gegen die zu diesem
Laufwerk mitgelieferte ROM austauschen.
MC-R433U(G).pm6 03.7.10, 2:14 PM2

G
DEUTSCH
1.
Wählen Sie in dem auf der LCD-Anzeige der CD/DVD-
Bibliothek dargestellten Menü den Eintrag [DOOR OPEN
MODE].
2.
Halten Sie den Schalter “SELECT” für fünf Sekunden
gedrückt.
3.
Schalten Sie die Stromversorgung der CD/DVD-Bibliothek
aus, sobald die Meldung [THE DOOR CAN BE OPENED]
auf der LCD-Anzeige erscheint.
4.
Zum Entriegeln und Öffnen der Tür stecken Sie den
Schlüssel in das in der Türmitte befindliche Zylinderschloss.
*In den Abbildungen wird die CD/DVD-Bibliothek zur erleichterten
Erläuterung ohne Einbaubuchtabdeckung gezeigt.
<Für MC-8100U>
<Für MC-8200U>
1.
Entfernen Sie die Schrauben von der Einbaubuchtabdeckung
der CD/DVD-Bibliothek.
2.
Nehmen Sie die Einbaubuchtabdeckung ab.
1.
Insallieren Sie die Laufwerke nacheinander in den
Laufwerkbuchten Nr.1 bis Nr. 6 (Nr. 1 bis Nr. 4 im Fall von
MC-8100U).
䡵Wenn Sie bei der untersten Einbaubuchtnummer
beginnen, vereinfachen Sie sich die Einbauarbeit.
<
MC-8100U Laufwerkbucht
><
MC-8200U Laufwerkbucht
>
<Für MC-8100U>
<Für MC-8200U>
Laufwerkbucht
Montagebohrung
für Laufwerkmonta-
geschraube
Laufwerkbucht
Montagebohrung
für Laufwerkmon-
tageschraube
Laufwerk Nr. 3
Laufwerk Nr. 4
Laufwerk Nr. 1
Laufwerk Nr. 2
Laufwerk Nr. 6
Laufwerk Nr. 3
Laufwerk Nr. 4
Laufwerk Nr. 5
Laufwerk Nr. 1
Laufwerk Nr. 2
Schraube Schraube
Laufwerkbucht
Einbaubuch-
tabdeckung
Laufwerkbucht
Schraube
Einbaubuchtabdeckung
So öffnen Sie die Tür der CD/DVD-
Bibliothek
So öffnen Sie die Einbaubuchtabdeckung
der CD/DVD-Bibliothek
Bestimmen der Einbaubucht für das
MC-R433U
●Installieren Sie das MC-R433U in der CD/DVD-
Bibliothek.
Stellen Sie vor dem Einbau sicher, dass der Hostcomputer
und alle Peripheriegeräte ausgeschaltet sind.
Sonstige Angaben zum Einbau in die CD/DVD-
Bibliothek entnehmen Sie bitte der zu der CD/DVD-
Bibliothek gehörigen Bedienungsanleitung.
INSTALLATION
MC-R433U(G).pm6 03.7.10, 2:14 PM3

G
1.
Zum Abnehmen der beiden Blindverschlüsse müssen Sie
die vier Schrauben von dem an der Rückseite der CD/DVD-
Bibliothek befindlichen SCSI-Anschlussbereich
(Einbaubuchtabdeckung) entfernen.
2.
Führen Sie das mitgelieferte SCSI-Kabel von der Innenseite
der Einbaubuchtabdeckung her durch die Montageöffnung
bringen Sie die vier Schrauben wieder an.
䡵Vor dem Anschluss müssen Sie die Schutzkappe vom
SCSI-Steckverbinder abnehmen.
䡵
Achten Sie unbedingt darauf, dass der SCSI-Steckverbinder
seitenrichtig angeschlossen wird. (In derselben Richtung
wie der SCSI-Steckverbinder “SCSI-A”).
3.
Falls das Kabel oder der Abschlusswiderstand nicht an der
Buchse OUT von SCSI-Steckverbinder “SCSI-D”
angebracht wird, muss dort die Schutzkappe angebracht
werden.
1.
Setzen Sie das MC-R433U von der Rückseite der CD/DVD-
Bibliothek ein.
䡵Achten Sie darauf, dass hierbei der Sensorschlitz nicht
beschädigt wird.
䡵Achten Sie auf die korrekte Einbaurichtung für das MC-
R433U.
䡵Achten Sie beim Einsetzen von MC-R433U darauf, dass
an der Rückseite der CD/DVD-Bibliothek befindliche
Kabel nicht eingeklemmt werden.
2.
Schieben Sie das MC-R433U langsam ein, bis die seitlich
am MC-R433U befindliche Montagebohrung auf die
Montagebohrung der Laufwerkbucht ausgerichtet ist.
3.
Befestigen Sie die mitgelieferte Montageschraube in der
Montagebohrung der Laufwerkbucht .
䡵Ziehen Sie die Schraube einwandfrei fest.
䡵Bei einer lose angebrachten Montageschraube kann es
zu Schäden am Laufwerk und/oder der Bibliothek
kommen.
Sensorschlitz
MC-R433U
MC-R433U
Laufwerkmonta-
geschraube
<Einbaurichtung von MC-R433U>
<Befestigung von MC-R433U>
<Anschlussmethode für das mitgelieferte SCSI-Kabel>
*Falls das mitgelieferte SCSI-Kabel nicht verwendet wird, weiter
bei “So schließen Sie die Kabel an die Rückseite von MC-
R433U an ” auf der nächsten Seite.
Blindverschluss
Schutzkappe
Einbaubuchtabdeckung
Mitgeliefertes
SCSI-Kabel
Montageschraube für
SCSI-Steckverbinder
So installieren Sie das MC-R433U in der
CD/DVD-Bibliothek
So schließen Sie das mitgelieferte SCSI-
Kabel an
●Schließen Sie das MC-R433U an die CD/DVD-
Bibliothek an.
Bei Bedarf können bei zusätzlicher Verwendung des
mitgelieferten SCSI-Kabels zwei oder mehr SCSI-
Busse eingesetzt werden.
Falls die Daten infolge einer unzureichenden SCSI-
Bus-Transferrate mit Unterbrechungen auf die DVD-
R geschrieben werden, kann sich die Schreibqualität
verschlechtern und es können Betriebsstörungen
beim Lesevorgang auftreten.
Siehe auch die zur CD/DVD-Bibliothek gehörige
Bedienungsanleitung.
ANSCHLÜSSE
MC-R433U(G).pm6 03.7.10, 2:14 PM4

G
DEUTSCH
<Anschlussbeispiel MC-R433U>
1.
Schließen Sie das Netzkabel, Steuerkabel und SCSI-Kabel
an die entsprechenden Anschlüsse auf der Rückseite des
MC-R433U an.
䡵Bei Benutzung des MC-8100U muß die Kabel-Nr.immer
der Nr. des Laufwerkeinschubs entsprechen, an dem es
angeschlossen ist. Wenn Laufwerke mit dem falschen
Einschub verbunden werden, kommt es zu
Fehlfunktionen.
䡵Bei Verwendung des MC-8200U/8600U die
Spannungsversorgung sowie Steuerkabel, die sich an
der Seite des MC-R433U-Einschubs befinden, an das
Laufwerk anschließen.
䡵Überprüfen Sie die Stecker auf einwandfreien Sitz.
䡵Die SCSI-Kabel müssen in Reihe angeschlossen
werden. Der Anschluss für die einzelnen Einbaubuchten
wird im Diagramm dargestellt.
䡵Der SCSI-Bus muss an jedem physischen Ende
abgeschlossen werden
• Einstellung der internen Leitungsabschlüsse:
“So stellen Sie den DIP-Schalter ein” auf Seite 5
• Einstellung der externen Leitungsabschlüsse:
Die Verwendung von aktiven SCSI- Leitungsabschlüssen
wird empfohlen.
1.
TERM:Wahl der verwendeten internen Leitungsabschlüsse.
䡵Bei Verwendung der internen Leitungsabschlüsse:
• Stellen Sie den Schalter TERM für das an das
physische Ende des SCSI-Busses angeschlossene
MC-R433U auf ON.
• Die TERM-Schalter der anderen MC-R433U-
Laufwerke müssen auf OFF gestellt werden.
䡵
Wenn die internen Leitungsabschlüsse nicht verwendet werden:
• Bringen Sie jeweils einen externen Leitungsabschluss
an die OUT-Buchse des SCSI-Busses an.
• Bei Verwendung eines externen Leitungsabschlusses
muss an allen MC-R433U-Laufwerken der Schalter
TERM auf OFF gestellt werden.
䡵Um einen stabileren SCSI-Bus-Datentransfer zu
gewährleisten, wird die Benutzung eines aktiven externen
Leitungsabschlusses empfohlen.
2.
ID2, ID1, ID0: Einstellung der SCSI-ID-Nr.für jedes Laufwerk.
䡵Achten Sie darauf, keine SCSI-ID Nr. zu verwenden, die
bereits einem anderen SCSI-Peripheriegerät des
gleichen Busses zugewiesen wurde.
<Rückseite von MC-R433U>
<MC-R433U DIP-Schalter-Einstellung an der Rückseite>
DVD-RAM/R-Laufwerk
Bibliothek-SCSI-Karte
DVD-RAM/R-Laufwerk
DVD-RAM/R-Laufwerk
(Abschließen.)
●SCSI-Anschlussbelegung
OUT 2 :Wird mit aktivem Leitungsabschluss
belegt.
IN 2 :Wird an den SCSI-Hostadapter 2
des Hostcomputers angeschlossen.
OUT 1 :Wird mit aktivem Leitungsabschluss
belegt.
IN 1 :Wird an den SCSI-Hostadapter 1
des Hostcomputers angeschlossen.
SCSI-Kabel (zusätzlich)
* Es können bis zu zwei DVD-RAM/R-
Laufwerke angeschlossen werden.
SCSI-Kabel (Standard)
Es können bis zu 6*
1
Laufwerke
angeschlossen werden.
(*1: Bis zu 4 für MC-8100U.)
SCSI-B
SCSI-D(F)
SCSI-C(E)
SCSI-A
OUT 2
OUT 1
IN 1
IN 2
SCSI-Steckverbinder
●Stellen Sie die SCSI-ID-Nr. für das MC-R433U ein
und schließen Sie die Tür der CD/DVD-Bibliothek.
Sie müssen unbedingt die Stromversorgung der CD/
DVD-Bibliothek ausschalten, bevor Sie mit der
Einstellung der DIP-Schalter beginnen.
Angaben zur Grundeinstellung ab Werk siehe den
Abschnitt “SCSI ID Nr. SETTING” in der zur CD/DVD-
Bibliothek gehörigen Bedienungsanleitung.
EINRICHTEN
<SCSI-ID-Nr.- und DIP-Schalter-Einstellungen>
SCSI ID No. Schalter
ID2 ID1 ID0
0OFF OFF OFF
1*OFF OFF ON
2OFF ON OFF
3OFF ON ON
4ONOFF OFF
5ONOFF ON
6ONONOFF
7ONONON
WN
Steuerkabel
Schiebeschalter DIP-Schalter
SCSI-Kabel
14p
3
4p
2
3
1
Spannungs-
versorgung
NW
ON
OFF
(Grundeinstellung ab Werk)
TERM
ID 2
ID 1
ID 0
ON
1234
So schließen Sie die Kabel an die
Rückseite von MC-R433U an
*: Grundeinstellung ab Werk.
So stellen Sie den DIP-Schalter ein
MC-R433U(G).pm6 03.7.10, 2:14 PM5

G
1.
Vergewissern Sie sich, dass der Schalter auf die Position
N gestellt ist.
䡵Die Position W ist ausschließlich qualifiziertem
Kundendienstpersonal vorbehalten und darf nicht
benutzerseitig verwendet werden.
1.
Bringen Sie die Einbaubuchtabdeckung mit den zuvor
entfernten Schrauben an.
“So öffnen Sie die Tür der CD/DVD-Bibliothek” auf Seite 3
1.
Schließen Sie die Tür ab.
1.
Während Sie die Taste “8” auf der Bedientafel gedrückt
halten, schalten Sie die CD/DVD-Bibliothek ein.
2.
Wenn auf der LCD-Anzeige die Meldung “DRIVE DETEC-
TION COMPLETED” erscheint, schalten Sie die CD/DVD-
Bibliothek aus.
3.
Schalten Sie die CD/DVD-Bibliothek erneut ein.
䡵Die CD/DVD-Bibliothek zeigt dieses Laufwerk unter
DRIVE DISPLAY mit “DVD-RAM” an.
䡵Bei Anschluss mittels eines externen SCSI-Kabels ist eine
hochohmige, abgeschirmte SCSI-2-Kabelausführung mit zwei
Klemmfiltern an beiden Steckerenden zu verwenden.
<Befestigung der Klemmfilter 1>
WN
WN
<
Schiebeschalterposition an der Rückseite von MC-R433U
>
EINRICHTEN
(Fortsetzung)
So stellen Sie den Schiebeschalter ein
VORSICHT
䡵Vergewissern Sie sich vor dem Einschalten der CD/DVD-
Bibliothek, dass die Einbaubuchtabdeckung befestigt
und die Tür der CD/DVD-Bibliothek geschlossen ist.
䡵Wenn Laufwerke installiert, hinzugefügt, ausgetauscht
oder entfernt wurden, muss unbedingt eine automatische
Laufwerkerfassung durchgeführt werden. Andernfalls
kann es zu Betriebsstörungen kommen.
䡵Wenn Laufwerke installiert, hinzugefügt, ausgetauscht
oder entfernt oder SCSI-ID-Nummern geändert wurden,
muss der Hostcomputer unbedingt aus- und erneut
eingeschaltet werden
Festziehen, bis die
Laschen einrasten.
So bringen Sie die Einbaubuchtabdeckung
der CD/DVD-Bibliothek wieder an
So führen Sie die automatische Laufwerkerfassung für
die CD/DVD-Bibliothek durch
So schließen Sie die Tür der CD/DVD-
Bibliothek
So schließen Sie die CD/DVD-Bibliothek
an den Hostcomputer an
●Führen Sie die automatische Laufwerkerfassung für
die CD/DVD-Bibliothek durch.
Angaben zum automatischen Lauwerks-
serkennungsmodus finden Sie in der zur CD/DVD-
Bibliothek gehörigen Bedienungsanleitung.
DURCHFÜHREN DER
AUTOMATISCHEN LAUF-
WERKERFASSUNG.
MC-R433U(G).pm6 03.7.10, 2:14 PM6

G
DEUTSCH
Hostcomputer
CD/DVD-Bibliothek
An den SCSI-
Anschluss,
“IN” Buchse
“SCSI-A”
An den Hostadapter 2
des Hostcomputers zur
Steuerung der
CD/DVD-Bibliothek
An den Hostadapter 1
des Hostcomputers zur
Steuerung der
CD/DVD-Bibliothek
An den SCSI-
Anschluss,
“IN” Buchse
“SCSI-C”
Externes SCSI-Kabel
(im Fachhandel erhältlich)
(hochohmige, abgeschirmte
Ausführung)
Die aktiven Lei-
tungsabschlüsse
an den OUT-Buch-
sen anbringen.
<Befestigung der Klemmfilter 2>
<Systemanschlussbeispiel für SCSI-Kabel 2>
䡵Achten Sie auf die SCSI-Kabelgesamtlänge, unter
Berücksichtigung der internen und externen SCSI-Kabel. Bei
Überschreitung der nachfolgend angegebenen zulässigen
Gesamtlänge kann es zu Betriebsstörungen kommen.
•SCSI-2, 20 Mbytes/Sek, synchrone Konfiguration: 3 Meter
(Anschluß von max. 2 Laufwerken)
•SCSI-2, 10 Mbytes/Sek. synchrone Konfiguration: 3 Meter
•SCSI-2, 5 Mbytes/Sek. asynchrone Konfiguration: 6 Meter
* Das zusätzlich gelieferte SCSI-Kabel ist 1 m lang.
䡵Bezüglich der Längenempfehlungen für die in der CD/DVD-
Bibliothek befindlichen SCSI-Kabel siehe den Abschnitt
“VERBINDUNG DER SCSI-KABEL UND STROMVER-
SORGUNGSKABEL” in der zur CD/DVD-Bibliothek gehörigen
Bedienungsanleitung.
䡵Nach dem Anschluss von externen SCSI-Kabel darauf achten,
dass die SCSI-Steckverbinder fixiert werden.
䡵Schnittstelle
SCSI-2
䡵Datentransferrate
Unterbrechungsfrei (wenn der Hostadapter mit der maximalen Sync-
Transferrate von 20 Mbytes/Sek. arbeitet)
DVD-RAM 2,77 Mbytes/Sek. (2X)
(Ver. 2.1: Einseitig 4,7 GB oder beidseitig 9,4 GB)
DVD-RAM 1,38 Mbytes/Sek. (1X)
(Ver. 1.0: Einseitig 2,6 GB, nur lesen)
DVD-R
2,77 Mbytes/Sek. (2X max.) (Schreiben)
(Ver. 2,1: Einseitig 4,7 GB oder beidseitig 9,4 GB)
DVD-R
8,31 Mbytes/Sek. (6X max.) (Lesen)
(Ver. 2,1: Einseitig 4,7 GB oder beidseitig 9,4 GB)
DVD-ROM 10 Mbytes/Sek.
(Einzelschicht, 7X max.: CAV)
CD-ROM
1,5 Mbytes/Sek. bis 4,8 Mbytes/Sek.
(32X max.: CAV)
CD-R Max. 1,8 Mbytes/Sek. (Schreiben)
(12X max.)
CD-RW Max. 1,2 Mbytes/Sek. (Schreiben)
(8X max.)
Burst(wenn der Hostadapter mit der maximalen Sync-Transferrate von 20
Mbytes/Sek. arbeitet)
Max. 8 Mbytes/Sek. (asynchroner Datentransfer)
Max. 10 Mbytes/Sek. (synchroner Datentransfer)
䡵Durchschn. Zugriffszeit (1/3 Takt)
DVD-R (4,7 GB für allgemeine Anwendungen) :145 ms
DVD-ROM (Einzelschicht) :130 ms
DVD-RAM (4,7 GB) :185 ms
DVD-RAM (2,6 GB) :195 ms
CD-ROM : 130 ms
*Die obigen Angaben wurden nach JVC Messverfahren
erstellt.
䡵Zwischenspeicher
2 Mbytes
䡵Zählung zusätzlicher Schreibvorgänge (DVD-R für
allgemeine Anwendungen, 4,7 GB)
Typisch 500 Vorgänge (eine Disk und ein Laufwerk kombiniert)
Typisch15 Vorgänge (eine Disk und mehrere Laufwerke kombiniert)
䡵Abmessungen
171 mm (B) x 47,5 mm (H) x 240 mm (T)
䡵Gewicht
1,5 kg
䡵Zubehör
SCSI-Kabel (mit Schutzkappe, 1 m lang) ............................... x 1
Klemmfilter (einschließlich Schnur) ....................................... x 2
ROM ...............................................................................x 3
Laufwerkmontageschraube ...........................................x 2
Kräftig ziehen.
Die überstehende
Länge abschneiden.
TECHNISCHE DATEN
So schließen Sie die CD/DVD-Bibliothek
an den Hostcomputer an (Fortsetzung)
MC-R433U(G).pm6 03.7.10, 2:14 PM7

G
TECHNISCHE DATEN (Fortsetzung)
䡵Geeignete Disks
DVD-R 4.7 GB (Ver. 2.0 für allgemeinen Gebrauch)
Empfohlene Disks: Einseitig 4,7 GB
Matsushita Electric Corp.
Mitsubishi Kagaku Media Corp.
Hitachi Maxell Ltd.
TDK Corp.
Taiyo Yuden Co., Ltd.
Empfohlene Disks: Beidseitig: 9,4 GB
Mitsubishi Kagaku Media Corp.
Hitachi Maxell Ltd.
DVD-R 3,95 GB (Ver. 1.0, Disc at once, nur lesen)
DVD-ROM
DVD-RAM (Ver. 2.1, einseitig 4,7 GB, beidseitig 9,4 GB)
Matsushita Electric Corp.
Hitachi Maxell Ltd.
DVD-RAM (Ver. 1.0, einseitig 2,6 GB, nur lesen)
CD-ROM (Modus 1, Modus 2 etc.)
CD-R
Ricoh Company Ltd.
Mitsubishi Kagaku Media Corp.
Hitachi Maxell Ltd.
TDK Corp.
Taiyo Yuden Co., Ltd.
Mitsui Chemicals, Inc.
CD-RW
Ricoh Company Ltd.
Mitsubishi Kagaku Media Corp.
* Hinweis 1: Es wird empfohlen, für DVD-R, DVD-RAM, CD-R
und CD-RW Disks stets sowohl im Schreib- als
auch im Lesebetrieb jeweils dieselbe Laufwerk-
Modellausführung zu verwenden. Werden für
den Schreib- und Lesebetrieb unterschiedliche
Laufwerk-Modellausführungen eingesetzt, kann
für Disks bestimmter Hersteller und/oder
Bauserien ggf. nicht die volle Leistung erzielt
werden.
* Hinweis 2: Es dürfen ausschließlich Disks mit einem
Durchmesser von 120 mm verwendet werden.
* Hinweis 3:
Verwenden Sie DVD-R-, CD-R- und CD-RW-Disks, die
für die optimale Schreibgeschwindigkeit ausgelegt
sind. Bitte beachten Sie, dass selbst beiVerwendung
geeigneter Disks je nach Disk-Hersteller und infolge
von Produktionsschwankungen die maximal
verfügbare Leistung ggf. nicht erreicht werden kann.
䡵Änderungen der Konstruktion und der technischen Daten
jederzeit ohne Vorankündigung vorbehalten.
MC-R433U(G).pm6 03.7.10, 2:14 PM8

FRANÇAIS
MC-R433U
MANUEL D’INSTRUCTIONS
MC-R433U(F).pm6 03.7.10, 2:12 PM1

F
INSTALLATION
Procédez comme suit pour l’installation.
PRECAUTIONS AVANT L’EMPLOI
INSTALLATION
Page 3
●Installez le MC-R433U dans la bibliothèque CD/DVD.
Ouverture de la porte de la bibliothèque CD/DVD
Ouverture du panneau de magasin des unités de la bibliothèque
CD/DVD
Détermination de l’emplacement du MC-R433U
Installation du MC-R433U dans la bibliothèque CD/DVD
RACCORDEMENTS
Page 4
●Raccordez le MC-R433U à la bibliothèque CD/DVD.
Fixation du câble SCSI fourni
Raccordement des câbles à l’arrière du MC-R433U
CONFIGURATION
Page 5
●Réglez le N˚ ID SCSI du MC-R433U et refermez la porte de la
bibliothèque CD/DVD.
Réglage des microcommutateurs
Réglage du curseur
Fixation du panneau du magasin des unités de la bibliothèque CD/DVD
Fermeture de la porte de la bibliothèque CD/DVD
EXECUTION DU MODE DE DETECTION
AUTOMATIQUE DE LECTEUR
Page 6
●Exécution du mode de détection automatique de lecteur et
raccordement de l’ordinateur hôte.
Exécution du mode de détection automatique de lecteur de la
bibliothèque CD/DVD
Raccordement de la bibliothèque CD/DVD à l’ordinateur hôte
●Contactez votre revendeur ou un centre de service JVC si six
MC-R433U sont installées dans la bibliothèque CD/DVD et
qu’il faut les raccorder à au moins trois unités.
●Si vous installez six MC-R433U dans la bibliothèque CD/DVD,
utilisez la bibliothèque CD/DVD à température ambiante en-
tre 5 et 30˚C.
1. DANGER: Rayonnement laser invisible en cas d’ouverture
avec une fermeture défaillante ou défectueuse.
2. ATTENTION: N’ouvrez pas le cache supérieur. Cet
appareil ne contient pas de pièces entretenables par
l’utilisateur; confiez tout l’entretien au personnel de ser-
vice qualifié.
●Le MC-R433U est une unité DVD-RAM/R conçue pour être
utilisée avec la bibliothèque CD/DVD JVC MC-8100U/8200U/
8600U.
●A l’installation de cette unité dans une bibliothèque, lisez
attentivement le manuel d’instructions.
●Le MC-R433U ne peut fonctionner de manière autonome.
●Cette unité ne peut pas s’utiliser en combinaison avec les
modèles suivants:
• Bibliothèque CD/ROM : Série MC-1000/série 2000
• Bibliothèque DVD-RAM : Série MC-7000
●Voir les Spécifications à la page 8 pour les disques compatibles.
●Avant d’utiliser cette unité, remplacez bien le ROM pour la
“bibliothèque CD/DVD” par le ROM fourni avec cette unité.
●Contactez le revendeur du MC-R433U ou un centre de ser-
vice JVC pour plus d’informations sur les mises à jour de
micrologiciels et le remplacement des mémoires ROM.
MC-R433U(F).pm6 03.7.10, 2:13 PM2

F
FRANÇAIS
1.
Sélectionnez [DOOR OPEN MODE] dans l’écran MENU
sur l’affichage LCD de la bibliothèque CD/DVD.
2.
Appuyez sur la commande “SELECT” pendant cinq
secondes.
3.
Mettez la bibliothèque JVC hors tension quand le message
[THE DOOR CAN BE OPENED] apparaît sur l’affichage
LCD.
4.
Insérez la clé dans la serrure au centre de la porte pour
déverrouiller et ouvrir la porte.
*L’illustration indique la bibliothèque CD/DVD avec le panneau du
magasin des unités retiré pour faciliter la description.
<Avec le MC-8100U>
<Avec le MC-8200U>
1.
Déposez les vis du panneau du magasin des unités de la
bibliothèque CD/DVD.
2.
Déposez le panneau du magasin des unités.
1.
Installez les unités dans les racks n˚1 à 6 (n˚1 à 4 pour le
MC-8100U) dans cet ordre.
Installer les unités du numéro le plus bas vers le plus
haut facilite l’installation.
<Section du magasin des
unités MC-8100U>
<Section du magasin des
unités MC-8200U>
<Avec le MC-8100U>
<Avec le MC-8200U>
Section magasin
d’unité
Orifice pour vis de
verrouillage d’unité
Section magasin
à unités
Orifice pour vis
de verrouillage
d’unité
Unité n˚ 3
Unité n˚ 4
Unité n˚ 1
Unité n˚ 2
Unité n˚ 6
Unité n˚ 3
Unité n˚ 4
Unité n˚ 5
Unité n˚ 1
Unité n˚ 2
Vis Vis
Section magasin
à unités
Panneau de
magasin des
unités
Section magasin
des unités
Vis
Panneau de magasin
des unités
Ouverture de la porte de la bibliothèque
CD/DVD
Ouverture du panneau de magasin des
unités de la bibliothèque CD/DVD
Détermination de l’emplacement du
MC-R433U
●Installez le MC-R433U dans la bibliothèque CD/DVD.
Avant de commencer l’installation, mettez hors ten-
sion l’ordinateur hôte et tous les périphériques de la
bibliothèque.
Consultez le manuel d’instructions de la bibliothèque
CD/DVD pour les instructions la concernant.
INSTALLATION
MC-R433U(F).pm6 03.7.10, 2:13 PM3

F
1.
Insérez le MC-R433U par l’arrière de la bibliothèque CD/
DVD.
Faites attention de ne pas endommager le palpeur.
Insérez le MC-R433U dans le sens correct.
Veillez à ce qu’aucun câble raccordé à l’arrière de la
bibliothèque CD/DVD ne soit coincé à l’introduction du
MC-R433U.
2.
Insérez le MC-R433U lentement jusqu’à faire coïncider
l’orifice pour vis situé sur le côté du MC-R433U et l’orifice
pour vis de la section de fixation d’unité.
3.
Serrez la vis de fixation de l’unité fournie dans l’orifice pour
vis de la section de fixation d’unité.
Serrez fermement la vis.
Si la vis de fixation de l’unité est desserrée, l’unité et/ou
la bibliothèque peut être endommagée.
Palpeur
MC-R433U
MC-R433U
Vis de fixation
de l’unité
<Direction d’installation du MC-R433U>
<Méthode de fixation du MC-R433U>
Installation du MC-R433U dans la
bibliothèque CD/DVD
1.
Pour retirer les deux plaques d’obturation, déposez les
quatre vis de la section d’installation du connecteur SCSI
à l’arrière de la bibliothèque CD/DVD (panneau du magasin
des unités).
2.
Insérez le câble SCSI fourni par le trou d’installation de
l’intérieur du panneau du magasin des unités et
immobilisez-le avec les quatre vis.
Retirez le bouchon de connecteur du câble SCSI pour
l’installation.
Vérifiez que le connecteur SCSI est inséré dans le bon sens.
(Il doit être dans le même sens que le connecteur SCSI
“SCSI-A”.)
3.
Placez le bouchon de connecteur sur le côté OUT du
connecteur SCSI (“SCSI-P”) si le câble ou la terminaison
ne sont pas raccordés.
<Méthode de raccordement du câble SCSI fourni>
*Si le câble SCSI fourni n’est pas utilisé, passez à
“Raccordement des câbles à l’arrière du MC-R433U” à la page
suivante.
Plaque
d’obturation
Bouchon de
connecteur
Panneau du magasin
des unités
Câble SCSI fourni
Vis de fixation de
connecteur SCSI
Fixation du câble SCSI fourni
●Raccordez le MC-R433U à la bibliothèque CD/DVD.
Si nécessaire, deux canaux de bus SCSI ou plus sont
utilisables en ajoutant le câbe SCSI fourni.
Si le DVD-R est enregistré par intermittence à cause
d’une vitesse de transfert d’enregistrement insuffisante
sur le bus SCSI, la qualité de l’enregistrement pourra
se détériorer et la lecture mal fonctionner.
Consultez aussi le manuel d’instructions de la
bibliothèque CD/DVD.
RACCORDEMENTS
MC-R433U(F).pm6 03.7.10, 2:13 PM4
Other manuals for MC-R433U
1
Table of contents
Languages:
Other JVC DVD Drive manuals