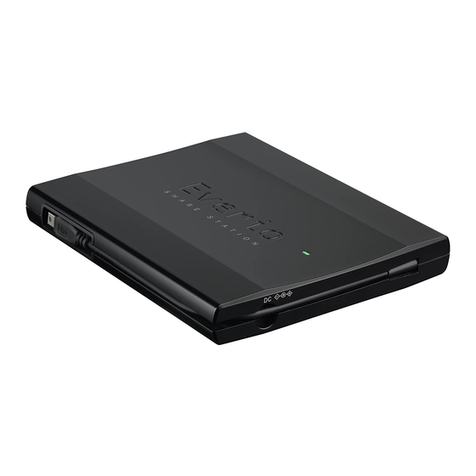
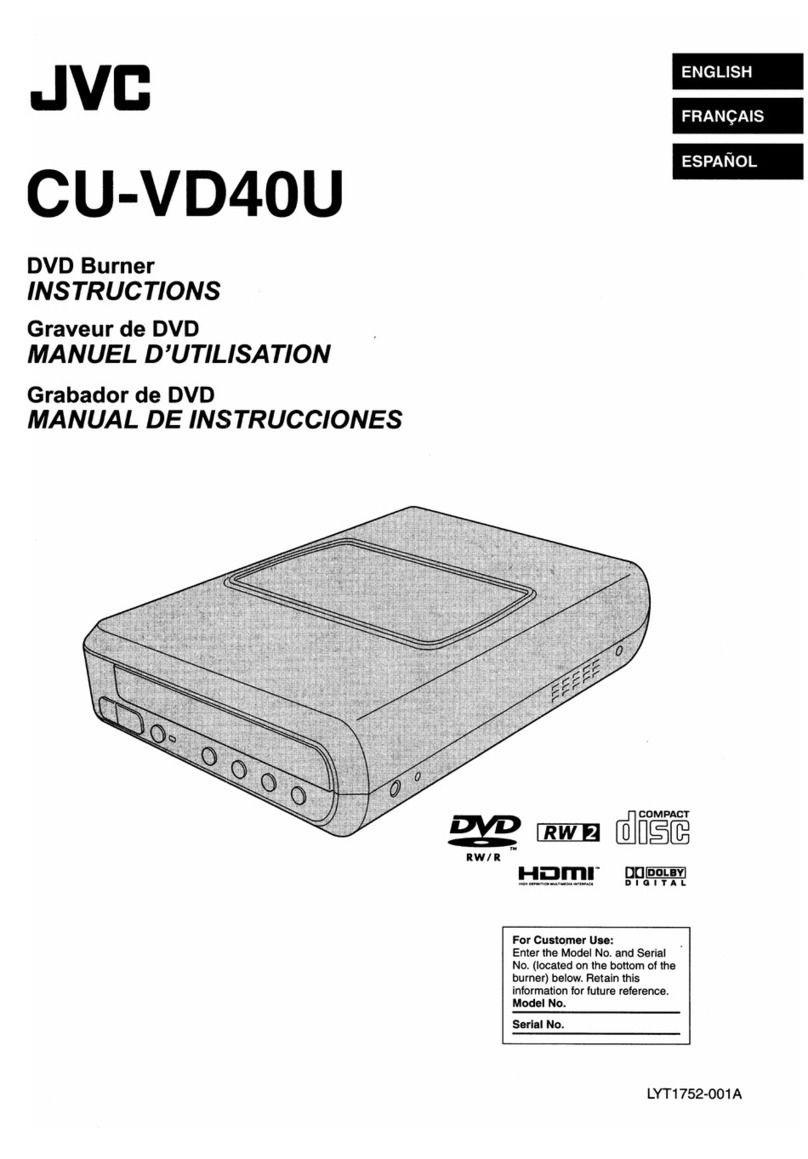
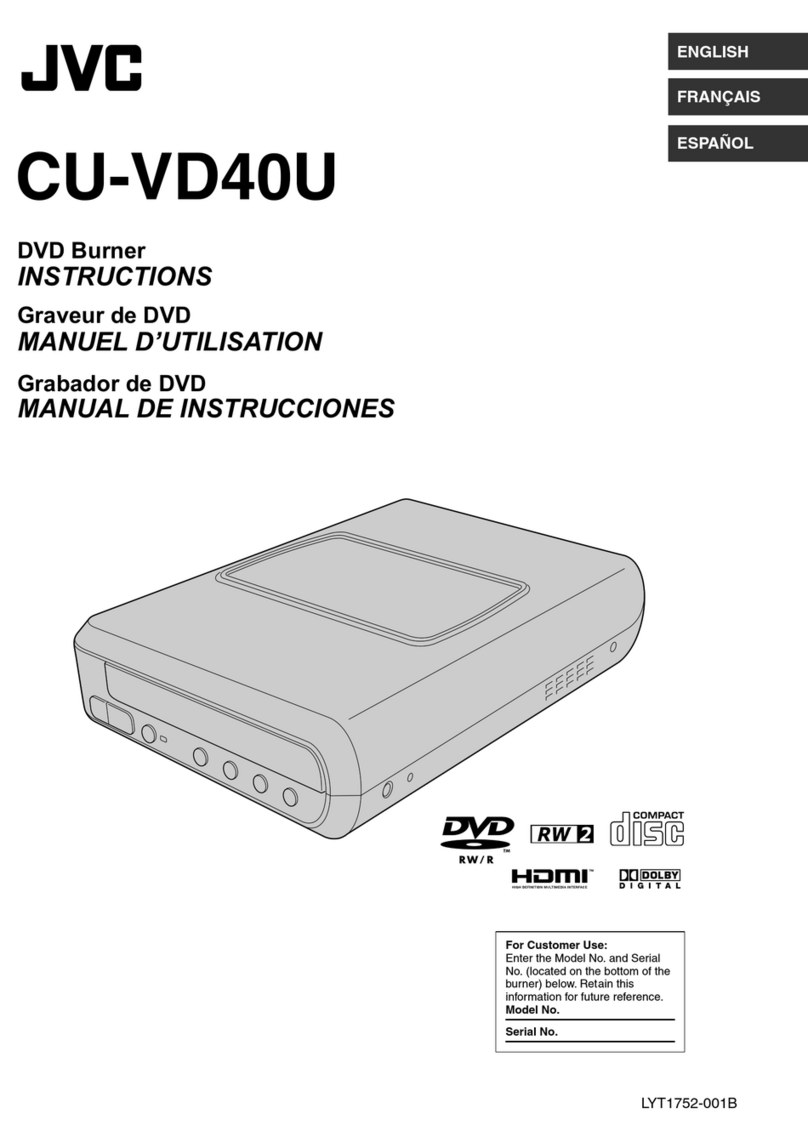
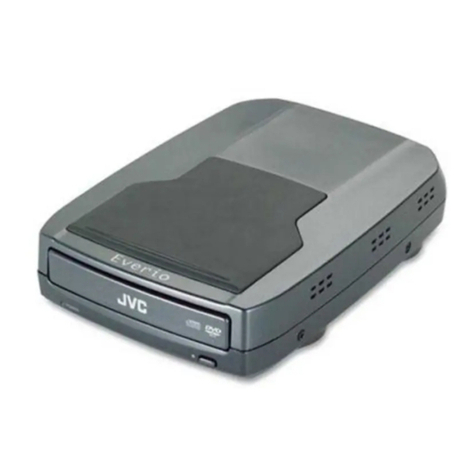
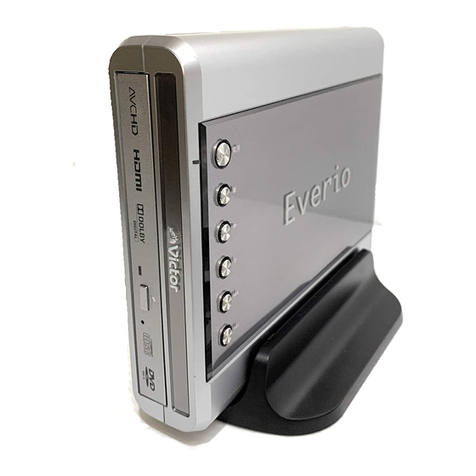
JVC Everio CU-VD3U User manual

ENGLISH
FRANÇAIS
ESPAÑOL
CU-VD3U
DVD Burner
INSTRUCTIONS
Graveur de DVD
MANUEL D'UTILISATION
Grabador de DVD
MANUAL DE INSTRUCCIONES
For Customer Use:
Enter the Model No. and Serial
No. (located on the bottom of the
burner) below. Retain this
information for future reference.
Model No.
Serial No.
CU-VD3U_001D_EN.book Page 1 Monday, February 11, 2008 10:45 AM

2
This burner enables DVDs of videos
recorded with the JVC Hard Disk Camera to
be created without using a PC.
•If you want to edit videos recorded with the camera
and create your original DVDs, use the software
provided with the camera for editing and creating
DVDs.
•An optional data writing software Power2Go 5.5 Lite
can be used for writing data. However, it cannot be
used to edit videos or create DVDs.
•The burner does not include support for Macintosh.
Dear Customer,
Thank you for purchasing this burner. Before use,
please read the safety information and precautions
contained in pages 2 and 3 to ensure safe use of this
product.
Safety Precautions
IMPORTANT:
In the event that any of the following occur, remove the
plug and make a request for repair to the dealer.
•Smoke or abnormal odor is emitted
•Damage from being dropped
•Water or an object enters inside
CAUTION:
A UNIT IS A CLASS 1 LASER PRODUCT.
HOWEVER THIS UNIT USES A VISIBLE LASER
BEAM WHICH COULD CAUSE HAZARDOUS
RADIATION EXPOSURE IF DIRECTED. BE SURE
TO OPERATE THE UNIT CORRECTLY AS
INSTRUCTED.
WHEN THIS UNIT IS PLUGGED INTO THE WALL
OUTLET, DO NOT PLACE YOUR EYES CLOSE TO
THE OPENING OF THE DISC TRAY AND OTHER
OPENINGS TO LOOK INTO THE INSIDE OF THIS
UNIT.
USE OF CONTROLS OR ADJUSTMENTS OR
PERFORMANCE OF PROCEDURES OTHER THAN
THOSE SPECIFIED HEREIN MAY RESULT IN
HAZARDOUS RADIATION EXPOSURE.
DO NOT OPEN COVERS AND DO NOT REPAIR
YOURSELF. REFER SERVICING TO QUALIFIED
PERSONNEL.
CLASS 1 LASER PRODUCT
REPRODUCTION OF LABELS
WARNING LABEL INSIDE OF THE UNIT
This unit applies to the standard “IEC60825-1:2001”
for laser products.
The socket-outlet shall be installed near the
equipment and shall be easily accessible.
ATTENTION:
This unit contains microcomputers. External electronic
noise or interference could cause malfunctioning. In
such cases, switch the unit off and unplug the mains
power cord. Then plug it in again and turn the unit on.
Take out the disc. After checking the disc, operate the
unit as usual.
CAUTION
ATTENTION
VORSICHT
ADVARSEL
ADVARSEL
VARNING
VARO!
CLASS 3B VISIBLE AND INVISIBLE LASER RADIATION WHEN OPEN. AVOID EXPOSURE TO THE BEAM.
CLASSE 3B RAYONNEMENT LASER VISIBLE ET INVISIBLE EN CAS D'OUVERTURE.
EXPOSITION DANGEREUSE AU FAISCEAU.
KLASSE 3B SICHTBARE UND UNSICHTBARE LASERSTRAHLUNG, WENN ABDECKUNG GEÖFFNET.
NICHT DEM STRAHL AUSSETZEN.
KLASSE 3B SYNLIG OG USYNLIG LASERSTRÅLING VED ÅBNING. UNDGÅ UDSÆTTELSE FOR STRÅLING.
KLASSE 3B SYNLIG OG USYNLIG LASERSTRÅLING NÅR DEKSEL ÅPNES. UNNGÅ EKSPONERING FOR STRÅLEN.
KLASS 3B SYNLIG OCH OSYNLIG LASERSTRÅLNING NAR DENNA DEL ÄR ÖPPNAD. STRÅLEN ÄR FARLIG.
AVATTAESSA OLET ALTTIINA LUOKAN 3B NÄKYVÄLLE JA NÄKYMÄTTÖMÄLLE LASERSÄTEILYLLE.
ÄLÄ KATSO SÄTEESEEN.
CAUTION:
To avoid electric shock or
damage to the unit, first firmly
insert the small end of the
power cord into the AC
Adapter until it is no longer
wobbly, and then plug the
larger end of the power cord into an AC outlet.
The mains plug shall remain readily operable.
•Remove the mains plug immediately if the burner
functions abnormally.
If malfunctioning occurs, stop using the unit
immediately and consult your local JVC dealer.
Declaration of Conformity (for owners in the U.S.A.)
Model Number : CU-VD3U
Trade Name : JVC
Responsible party : JVC AMERICAS CORP.
Address : 1700 Valley Road Wayne,
N. J. 07470
Telephone Number : 973-317–5000
This device complies with Part 15 of FCC Rules.
Operation is subject to the following two conditions: (1)
This device may not cause harmful interference, and
(2) this device must accept any interference received,
including interference that may cause undesired
operation.
(For owners in the U.S.A.)
Changes or modifications not approved by JVC could
void the user’s authority to operate the equipment.
This equipment has been tested and found to comply
with the limits for a Class B digital device, pursuant to
Part 15 of the FCC Rules. These limits are designed
to provide reasonable protection against harmful
interference in a residential installation. This
equipment generates, uses, and can radiate radio
frequency energy and, if not installed and used in
accordance with the instructions, may cause harmful
interference to radio communications. However, there
is no guarantee that interference will not occur in a
particular installation. If this equipment does cause
harmful interference to radio or television reception,
which can be determined by turning the equipment off
and on, the user is encouraged to try to correct the
interference by one or more of the following measures:
Reorient or relocate the receiving antenna.
Increase the separation between the equipment and
receiver.
Connect the equipment into an outlet on a circuit
different from that to which the receiver is connected.
Consult the dealer or an experienced radio/ TV
technician for help.
(For owners in Canada)
•FOR USE WITH MODEL NO. AP-V3U
(AC ADAPTER).
•POUR UTILISER AVEC MODELE AP-V3U
(ADAPTATEUR C.A.).
This Class B digital apparatus complies with Canadian
ICES-003.
Cet appareil numérique de la classe B est conforme à
la norme NMB-003 du Canada.
CU-VD3U_001D_EN.book Page 2 Monday, February 11, 2008 10:45 AM

EN
FR
ES
3
Safety Precautions for the Burner
Be sure to observe the following precautions. Failing to
do so may result in electric shock, fire, injury, or
malfunction.
•Do not disassemble, dismantle, or modify the
equipment. Requests for repair and inspection should
be made to the dealer.
•Do not insert metal or combustible objects or pour
water or other liquids inside the burner.
•Turn off the power when connecting equipment.
•Remove the plug when the burner will not be used for
a prolonged time or prior to cleaning (electricity flows
through the equipment even when the power is off).
•Do not block the ventilation holes of the burner.
•Do not use where there is condensation. Suddenly
carrying the burner from a cold location to a hot
location may result in the formation of drops, which
may cause a malfunction or failure.
•Do not cause the burner to vibrate when discs are in.
Safety Precautions for Accessories
•When using the AC adapter, the power cord, and the
USB cable, be sure to observe the following
precautions. Failing to do so may result in electric
shock, fire, injury, or malfunction.
•Do not insert or remove the plug when your hands
are wet.
•Fully insert the plug into the outlet.
•Keep dust and metal objects away from the plug.
•Do not damage the cord.
•Place the cord where it will not trip someone up.
•Do not use when thunder can be heard.
•Do not dismantle.
•Do not use for any product other than this one.
•Do not play the provided CD-ROM with an audio
player. Doing so may damage the circuits or speakers.
Safety Precautions for Discs
Do not use the following discs.
•Cracked discs
•Deeply scratched discs
Installation
Do not install in any of the following locations.
•Humid location
•Location of 60 °C or above
•Location subject to direct sunlight
•Location where overheating is likely
•Dusty or smoky locations
•Locations subject to oily smoke or steam such as a
kitchen counter or beside a humidifier
•Unstable location
•Bathroom
•Dusty places
•Slanted location
Cleaning Procedure
IMPORTANT:
•Be sure to unplug the burner before beginning
cleaning.
•Do not use liquid or aerosol cleaners.
•Ensure that no moisture or liquid comes into contact
with the drive during cleaning.
Exterior of the Burner:
Wipe dirt off with a dry cloth.
Disc Tray:
Wipe off dirt with a soft dry
cloth.
Do not touch the lens.
To clean the lens, use
commercially available lens
cleaning blower for cameras.
Using a lens cleaning disc will
cause malfunction.
Disc:
Use a commercially available cleaning cloth to gently
wipe from the inner edge to the outer edge.
Storage:
Make sure that discs are kept in their cases. If discs are
piled on top of one another without their protective
cases, they can be damaged. Do not put discs in a
location where they may be exposed to direct sunlight,
or in a place where the humidity or temperature is high.
Avoid leaving discs in your car!
Region Codes
Region codes are numbers for restricting DVD video
playback. The world is separated into six regions and
each region is identified by a number. If the number for
a disc does not match the number for the player, the
disc cannot be played on the player.
Disclaimer
JVC accepts no liability whatsoever for loss of data
resulting from inappropriate connections or handling.
Copyrights
Duplicating copyright protected material, for other than
personal use, without the permission of the copyright
holder is prohibited by copyright law.
Registered Trademarks and
Trademarks
•Other company and product names mentioned herein
are registered trademarks and/or trademarks of their
respective holders.
ATTENTION:
On placing the unit:
Some TVs or other appliances generate strong
magnetic fields. Do not place such appliances on top
of the unit as it may cause picture disturbance.
When moving the product:
Remove the power cord and all connecting cables.
Changing the region codes
You can change the region code to play a DVD that
has a different code. (The code cannot be changed for
some playback software.) When you insert the disc,
the Caution screen appears on the PC. Follow the on-
screen instructions to change the code.
The region code for the burner can be changed
5timesonly. The code set the fifth time becomes the
final code, so be sure to set a frequently used code.
Take sufficient care when changing the code.
Lens
CU-VD3U_001D_EN.book Page 3 Monday, February 11, 2008 10:45 AM

4
Getting ready to copy to a DVD!
AGet ready a recommended disc
Use DVD-R, DVD-RW or DVD-R DL disc of the brands listed below.
DVD+R, DVD+RW and DVD-RAM cannot be used.
BConnect
DVD-R DVD-RW DVD-R DL (Single-sided double layer)
Brand JVC, TDK, Verbatim,
SONY
JVC JVC, Verbatim
zUse a commercially available cleaning cloth to wipe the disc gently if there are any
fingerprints or dirt. Applying too much strength will result in scratches.
zDo not use discs that are scratched.
zDVD-R DL discs can be used only when the burner is connected to a high definition
Everio camera.
Caution
USB cable
Power input
To DC jack
To DC jack
The power lamp lights
in green.
CU-VD3
Everio camera
Use the AC adapter to
power on the Everio
camera.
USB extension cable
Use if necessary.
Important!
zWhen the DVD created on this burner cannot be played on other devices, play
back using this burner. (AP. 8)
zIf you encounter any problems, refer to “Troubleshooting”. (AP. 15)
zFollow the instructions in the instruction manual of the Everio camera when
connecting and operating the Everio camera.
Basic Guide
CU-VD3U_001D_EN.book Page 4 Monday, February 11, 2008 10:45 AM

5
COpen the tray and insert the disc
DClose the tray
Push in until the tray
snaps in.
zDo not push on the
top cover.
EOpen the LCD monitor
The Everio camera turns on.
Preparations
completed!
To copy images to DVD AP. 8f13
To play back copied images AP. 8
1) Press the eject
button.
2) Pull out completely.
3) Insert firmly into place.
Turn the Everio off and on
again if the following display
remains unchanged.
Pay attention to the followings!
zDo not touch the
recording side
zDo not place any
objects on top
¹Recording and playback may not function properly if the disc is
scratched or dirty.
zDo not topple
zDo not subject to
mechanical shock
CU-VD3U_001D_EN.book Page 5 Monday, February 11, 2008 10:45 AM

6
Contents
zSafety Precautions .................................................................................................. 2
zBasic Guide.............................................................................................................. 4
zGetting Started......................................................................................................... 7
Taking out the USB Cable ....................................................................................... 7
Placing the Burner ................................................................................................... 7
zCopying to DVD ....................................................................................................... 8
3 Copy Options........................................................................................................ 8
Playing Back Copied Images................................................................................... 8
Copying All Files to the DVD ................................................................................... 9
Copying by Date .................................................................................................... 10
Copying by Event .................................................................................................. 12
Creating Data DVD from a PC (Optional) .............................................................. 14
zTroubleshooting .................................................................................................... 15
zSpecifications ........................................................................................................ 17
Accessories
If there are any items missing, please consult your authorized dealer.
AC adapter
(AP-V3U) Power cord USB extension cable
Instruction manual
(this manual), other printed
material
Stand DVD-R (blank disc)
zUse the AC adapter, power cord and USB extension cable supplied with
this burner. Using accessories other than those supplied may result in
electric shock or fire.
Caution
CU-VD3U_001D_EN.book Page 6 Monday, February 11, 2008 10:45 AM

EN
FR
ES
7
Getting Started
AHook the protruding tip with your finger and
pull it towards you
BTake out the USB cable
•Can be connected to the USB extension cable.
oHorizontal orientation
Take note of the top and bottom of the burner and place it in
the horizontal orientation.
¹Do not place any objects on top of the burner.
oVertical orientation
Face the feet side towards the left and fix securely on the stand.
Taking out the USB Cable
Placing the Burner
Low side
High side
Back
Feet
Arrow
Front
CU-VD3U_001D_EN.book Page 7 Monday, February 11, 2008 10:45 AM

8
Copying to DVD
3 Copy Options
oCopying All Files to the DVD ....................................................................P. 9
oCopying by Date ........................................................................................P. 10
oCopying by Event ......................................................................................P. 12
Playing Back Copied Images
AConnect as shown above and turn on
each device
•The screen on the right appears on the
Everio camera.
BSwitch the TV to an appropriate input
CSelect “PLAYBACK” and press
•Playback begins automatically.
•To stop, select ousing the touch sensor.
zWhen opening/closing the disc tray or during
copying/playback, the access lamp lights or blinks
in orange.
USB cable
To USB jack
AV cable
(supplied with Everio)
To Audio/Video input
terminals
To AV jack
Use the AC adapter to
power on the Everio
camera.
Access lamp
<Everio LCD monitor screen>
Select with
touch sensor
CREATE TOGETHER
SELECT AND CREATE
CREATE DUPLICATE
PLAYBACK
PLAYBACK CREATED DISC
CREATE DVD
Note
CU-VD3U_001D_EN.book Page 8 Monday, February 11, 2008 10:45 AM

EN
FR
ES
9
APress the [DIRECT DVD] button
BSelect “EXECUTE” and press
CThe “CREATING NOW” screen
appears and copying starts
To cancel, select “STOP” and press .
DWhen “COMPLETED” appears,
press to complete copying
Copying All Files to the DVD
zIf the operation and display of your Everio camera differs from the following
procedures, refer to the instruction manual of your Everio camera.
zFor some Everio cameras, still images cannot be copied.
Connect CU-VD3 to the Everio camera according to the procedures on
P. 4f5 and turn on the Everio camera.
Caution
Preparations
[DIRECT DVD]
Select with
touch sensor
UNSAVED SCENES
READY TO CREATE
DVD-R
EXECUTE
RETURN
QUIT
<Everio LCD monitor screen>
CREATING NOW
ELAPSED: 3 min
STOP
30%
Do not turn off the power or remove the
USB cable while the “CREATING NOW”
screen is displayed.
COMPLETED
OK
CU-VD3U_001D_EN.book Page 9 Monday, February 11, 2008 10:45 AM

10
ADisplay the “CREATE DVD” screen,
select “SELECT AND CREATE” and
press
BSelect “CREATE BY DATE” and
press
CSelect the desired dates and
press
DSelect “ALL” and press
Copying by Date
zIf the operation and display of your Everio camera differs from the following
procedures, refer to the instruction manual of your Everio camera.
zFor some Everio cameras, still images cannot be copied.
Connect CU-VD3 to the Everio camera according to the procedures on
P. 4f5.
The screen in step Aappears when the Everio camera is turned on.
Caution
Preparations
CREATE TOGETHER
SELECT AND CREATE
CREATE DUPLICATE
PLAYBACK
SELECT AND CREATE
CREATE DVD
<Everio LCD monitor screen>
CREATE BY DATE
CREATE BY EVENT
CREATE BY PLAYLIST
SELECT FROM SCENES
CREATE DISC BY DATE
SELECT AND CREATE
CREATE BY DATE
OCT.12.2008
00h18m
TOTAL
QUIT
OCT.11.2008
DVD1
ALL
DVD1
DVD CREATION LIST
QUITCHECK
CU-VD3U_001D_EN.book Page 10 Monday, February 11, 2008 10:45 AM

EN
FR
ES
11
ESelect “EXECUTE” and press
FThe “CREATING NOW” screen
appears and copying starts
To cancel, select “STOP” and press .
GWhen “COMPLETED” appears,
press to complete copying
ALL
READY TO CREATE
DVD-R
EXECUTE
RETURN
QUIT
CREATING NOW
ELAPSED: 3 min
STOP
30%
Do not turn off the power or remove the
USB cable while the “CREATING NOW”
screen is displayed.
COMPLETED
OK
CU-VD3U_001D_EN.book Page 11 Monday, February 11, 2008 10:45 AM

12
ADisplay the “CREATE DVD” screen,
select “SELECT AND CREATE” and
press
BSelect “CREATE BY EVENT” and
press
CSelect the desired events and
press
DSelect “ALL” and press
Copying by Event
zIf the operation and display of your Everio camera differs from the following
procedures, refer to the instruction manual of your Everio camera.
zFor some Everio cameras, still images cannot be copied.
Register images to events beforehand.
For details, refer to the instruction manual of the Everio camera.
Connect CU-VD3 to the Everio camera according to the procedures on
P. 4f5.
The screen in step Aappears when the Everio camera is turned on.
Caution
Preparations
CREATE TOGETHER
SELECT AND CREATE
CREATE DUPLICATE
PLAYBACK
SELECT AND CREATE
CREATE DVD
<Everio LCD monitor screen>
CREATE BY DATE
CREATE BY EVENT
CREATE BY PLAYLIST
SELECT FROM SCENES
CREATE DISC BY EVENT
SELECT AND CREATE
SON 1
SEARCH EVENT
QUIT
ALL
DVD1
DVD2
DVD3
DVD CREATION LIST
QUITCHECK
CU-VD3U_001D_EN.book Page 12 Monday, February 11, 2008 10:45 AM
EN
FR
ES
13
ESelect “EXECUTE” and press
FThe “CREATING NOW” screen
appears and copying starts
To cancel, select “STOP” and press .
GWhen “COMPLETED” appears,
press to complete copying
ALL
READY TO CREATE
DVD-R
EXECUTE
RETURN
QUIT
CREATING NOW
ELAPSED: 3 min
STOP
30%
Do not turn off the power or remove the
USB cable while the “CREATING NOW”
screen is displayed.
COMPLETED
OK
CU-VD3U_001D_EN.book Page 13 Monday, February 11, 2008 10:45 AM

14
This burner can be used as a DVD burner by connecting it to a PC. Data DVD can be
created by using the disc writing software (sold separately).
¹During connection, switch off the power supply of CU-VD3.
CU-VD3 is turned on by inserting the AC adapter into the power supply outlet.
Optional Creating Data DVD from a PC
zThe supplied USB extension cable cannot be used.
C
Important!
oThe following optional accessories are required:
zSpecialized USB cable (QAM1092-001)
•Please purchase from the JVC Accessory Store at:
http://www.jvc.com
http://www.jvc.ca
zDisc writing software (Power2Go)
•Please purchase from the CyberLink homepage.
http://www.cyberlink.com/oem/jvc/cds/enu/index_2.jsp
AC adapter
Power cord
Specialized USB cable
(sold separately)
USB
Power supply outlet
USB cable
CU-VD3
PC
Note
CU-VD3U_001D_EN.book Page 14 Monday, February 11, 2008 10:45 AM
EN
FR
ES
15
Troubleshooting
Trouble Action
CU-VD3
Cannot turn the power
on.
zMake sure the AC adapter and power cord are connected
properly.
The burner and AC
adapter is hot.
zThis is not a malfunction.
zIf the burner is abnormally hot, remove the AC adapter and
consult your authorized dealer.
Cannot open the disc
tray.
zA disc cannot be ejected by pressing the eject button if data
is being written to the disc. Wait until writing finishes.
zIf a disc cannot be ejected with the eject button:
•Remove and insert the AC adapter, then press the eject
button again.
•If the disc cannot be ejected using the above method,
remove the AC adapter and all other connections. Insert a
thin rod of about 5 cm into the force eject hole located on
the right side of the eject button. The disc tray will be
ejected for about 1 cm, pull out the disc tray manually and
take out the disc.
Reading fails.
zInsert the disc with the label facing up.
zMake sure the disc tray is not dirty.
zMake sure the writing surface of the disc is not damaged.
zMake sure the special-shaped discs are not used.
zMake sure the audio CD complies with the CD-DA standard.
(Copy-control CDs cannot be played.)
zFor CD-R or CD-RW, make sure it is not recorded using the
packet-write method.
Writing fails.
zMake sure an appropriate disc is being used. (AP. 4, 17)
zUse discs recommended for the burner. (AP. 4, 17)
zMake sure that a new disc is used for DVD-R.
zInsert the disc with the label facing up.
zMake sure the disc tray is not dirty.
zMake sure the writing surface of the disc is not damaged.
zMake sure the special-shaped discs are not used.
The writing time is too
long.
zThe time taken for writing may be longer depending on the
usage environment and conditions of usage. This is not a
malfunction. It is the performance of this burner.
CU-VD3U_001D_EN.book Page 15 Monday, February 11, 2008 10:45 AM
16
Trouble Action
Everio
Cannot be recognized
by the Everio camera.
zMake sure the USB cable is connected properly.
zRemove and insert the USB cable again.
zRemove and insert the AC adapter of CU-VD3.
Problems occur
during operation.
zTurn off CU-VD3 and the Everio camera, and then turn on
again.
Unable to play DVD
video created on this
burner on other DVD
players.
zConnect CU-VD3 to the Everio camera and play back using
the playback function of the Everio camera. (Refer to the
instruction manual of the Everio camera.)
It is impossible to dub
the DVD discs, which
were written with this
burner, on a HDD-DVD
recorder.
zConnect CU-VD3 to the Everio camera, play back using the
playback function of the camera, and dub the DVD discs
with the DVD recorder. (Refer to the instruction manual of
the Everio camera.)
Trouble Action
PC
Cannot play back.
zIf the packet writing software, DLA (Direct Letter Access),
has been installed on the PC, the disc may not be played
back properly due to incompatibility.
In this case, consult the DLA software developer or check
out “DLA” related websites for solutions.
zConfirm the region code and change the region code of
CU-VD3.
zThe DVD video created on this burner is region free (“ALL”).
Region code cannot
be changed.
zFollow the instructions on the PC screen to change the
region code.
(The code cannot be changed for some playback software.)
The region code of CU-VD3 can be changed up to 5 times.
The region code cannot be changed anymore as the code is
finalized after changing the fifth time.
CU-VD3U_001D_EN.book Page 16 Monday, February 11, 2008 10:45 AM
EN
FR
ES
17
Specifications
zOptimal performance of the burner may not be possible depending on the disc used. Using discs
of manufacturers for which compatibility has been confirmed is recommended.
zOnly 12 cm discs can be used with this burner.
¹Compatible with all 2006, 2007 and 2008 Everio G models excluding GZ-MG21 & GZ-MG31 for
direct burning without PC as of December 2007. Updated information is available at
www.jvc.com.
General
Rated current 0.9 A
Dimensions (mm)
(W x H x D)
141 x 23 x 166
(5-3/5" x 9/10"x 6-1/2")
Weight
Approx. 380 g (0.84 lbs)
(Excluding AC adapter and
USB extension cable)
Operating
environment
Operating temperature:
5 °C to 35 °C (41 °F to 95 °F)
Storing temperature:
-20 °C to 60 °C
(-4 °F to 140 °F)
Laser power
(wavelength,
output)
For DVD:
661 nm, 0.4 mW
For CD:
785 nm, 0.6 mW
AC adapter (AP-V3U)
Power supply AC110 V to 240 V
50 Hz/60 Hz
Input capacity 0.26 A
Output DC 5.2 V, 2 A
Operating
temperature
0 °C to 40 °C
(32 °F to 104 °F)
Dimensions (mm)
(W x H x D)
49 x 28 x 79
(1-9/10" x 1-1/10"x 3-1/10")
(Excluding power cord)
Weight Approx. 136 g (0.3 lbs)
Recommended discs
DVD-R JVC, TDK, Verbatim, SONY *1 DVD-R DL discs can be used when the
burner is connected to a high definition
Everio camera or a PC.
*2 Dual layer DVD-RW discs cannot be used.
DVD-R DL*1 JVC, Verbatim
DVD-RW*2 JVC
When connected to an Everio camera
Interface USB 2.0
Interface cable USB extension cable
Compatible discs for
writing
(8 cm discs cannot
be used)
Everio : DVD-R, DVD-RW
High definition
Everio
: DVD-R, DVD-R DL, DVD-RW
Recording format
Everio : DVD video (video only)
High definition
Everio
: Data DVD (video, still image)
Recording time
Everio : Approx. 30 minutes (including time taken for finalization)
zApprox. 90 minutes of video recorded in fine mode on a
4.7 GB disc. (Varies depending on conditions such as
number of titles.)
High definition
Everio
: For details, refer to the instruction manual of the Everio
camera.
CU-VD3U_001D_EN.book Page 17 Monday, February 11, 2008 10:45 AM

2
Ce graveur vous permet de créer des DVD
de vidéos enregistrées à l’aide de l’appareil
photo à disque dur de JVC sans ordinateur.
•Si vous souhaitez éditer des vidéos enregistrées à
l’aide de l’appareil photo et créer vos DVD originaux,
utilisez le logiciel fourni avec l’appareil photo afin
d’éditer et de créer des DVD.
•Un logiciel facultatif d’écriture de données Power2Go
5.5 Lite fourni permet d’écrire des données.
Néanmoins, il ne permet pas d’éditer des vidéos ou
de créer des DVD.
•Le graveur ne prend pas en charge Macintosh.
Cher(e) client(e),
Nous vous remercions d’avoir acheté ce graveur.
Avant de l’utiliser, veuillez lire les informations et
mesures de sécurité figurant pages 2 et 3 afin
d’utiliser ce produit en toute sécurité.
Mesures de sécurité
IMPORTANT:
Si l’un des événements suivants venait à se produire,
débranchez la fiche et contactez votre revendeur pour
qu’il procède à la réparation.
•Émission de fumée ou d’odeur anormale
•Endommagement de l’appareil suite à une chute
•Intrusion d’eau ou d’un objet dans l’appareil
ATTENTION:
CET APPAREIL EST UN PRODUIT LASER DE
CLASSE 1. CEPENDANT, CET APPAREIL UTILISE
UN FAISCEAU LASER VISIBLE QUI PEUT
ENTRAÎNER UNE EXPOSITION DANGEREUSE
AUX RAYONNEMENTS. S’ASSURER DE FAIRE
FONCTIONNER L’APPAREIL CORRECTEMENT, EN
RESPECTANT LES INSTRUCTIONS.
LORSQUE CET APPAREIL EST BRANCHÉ À UNE
PRISE MURALE, NE PAS PLACER SES YEUX PRÈS
DE L’OUVERTURE DU TIROIR POUR DISQUE OU
D’AUTRES OUVERTURES DANS LE BUT
D’OBSERVER L’INTÉRIEUR DE L’APPAREIL.
UN EMPLOI DES COMMANDES, RÉGLAGES OU
PROCÉDURES DE PERFORMANCE AUTRE QUE
CELUI SPÉCIFIÉ DANS CE DOCUMENT RISQUE
D’ENTRAÎNER UNE EXPOSITION DANGEREUSE
AUX RAYONNEMENTS.
NE PAS OUVRIR NI RÉPARER DE VOUS-MÊME.
FAIRE APPEL À UN PERSONNEL QUALIFIÉ POUR
L’ENTRETIEN.
PRODUIT LASER DE CLASSE 1
REPRODUCTION DES ÉTIQUETTES
ÉTIQUETTE D’AVERTISSEMENT A L’INTÉRIEUR
DE L’APPAREIL
Cet appareil est conforme à la norme “IEC60825-
1:2001” relative aux produits laser.
La prise de courant doit être installée près du matériel
et être facilement accessible.
CAUTION
ATTENTION
VORSICHT
ADVARSEL
ADVARSEL
VARNING
VARO!
CLASS 3B VISIBLE AND INVISIBLE LASER RADIATION WHEN OPEN. AVOID EXPOSURE TO THE BEAM.
CLASSE 3B RAYONNEMENT LASER VISIBLE ET INVISIBLE EN CAS D'OUVERTURE.
EXPOSITION DANGEREUSE AU FAISCEAU.
KLASSE 3B SICHTBARE UND UNSICHTBARE LASERSTRAHLUNG, WENN ABDECKUNG GEÖFFNET.
NICHT DEM STRAHL AUSSETZEN.
KLASSE 3B SYNLIG OG USYNLIG LASERSTRÅLING VED ÅBNING. UNDGÅ UDSÆTTELSE FOR STRÅLING.
KLASSE 3B SYNLIG OG USYNLIG LASERSTRÅLING NÅR DEKSEL ÅPNES. UNNGÅ EKSPONERING FOR STRÅLEN.
KLASS 3B SYNLIG OCH OSYNLIG LASERSTRÅLNING NAR DENNA DEL ÄR ÖPPNAD. STRÅLEN ÄR FARLIG.
AVATTAESSA OLET ALTTIINA LUOKAN 3B NÄKYVÄLLE JA NÄKYMÄTTÖMÄLLE LASERSÄTEILYLLE.
ÄLÄ KATSO SÄTEESEEN.
ATTENTION:
Cet appareil contient des micro-ordinateurs. Des bruits
électroniques externes ou des interférences peuvent
causer un mauvais fonctionnement. Dans de tels cas,
éteindre l’appareil puis débrancher le cordon
d’alimentation de la prise secteur. Rebrancher ensuite,
et rallumer l’appareil. Retirer le disque. Après vérification
du disque, utiliser l’appareil comme d’habitude.
ATTENTION:
Afin d’éviter tout choc électrique
ou dommage, insérez d’abord
l’extrémité la plus courte du
cordon d’alimentation dans
l’adaptateur secteur jusqu’à ce
qu’elle soit bien en place, puis
branchez l’extrémité la plus longue sur une prise secteur.
La prise au secteur doit rester facilement opérationnelle.
•Débrancher immédiatement la prise au secteur si le
graveur fonctionne de façon anormale.
En cas de dysfonctionnement, cesser immédiatement
toute opération et consulter le revendeur JVC le plus
proche.
Déclaration de conformité (pour les propriétaires
situés aux États-Unis.)
Numéro de modèle : CU-VD3U
Nom de marque : JVC
Personne responsable : JVC AMERICAS CORP.
Adresse : 1700 Valley Road Wayne,
N. J. 07470
Numéro de téléphone : 973-317–5000
Cet ensemble se conforme à la partie 15 des règles de la
FCC (Federal Communications Commission). Le
fonctionnement est sujet aux deux conditions suivantes:
(1) Cet appareil ne peut pas causer d’interférences
nuisibles, et (2) cet appareil doit accepter toute
interférence reçue, comprenant des interférences qui
peuvent causer un mauvais fonctionnement.
(Pour les propriétaires situés aux États-Unis.)
Des changements ou modifications non approuvés
par JVC peuvent annuler le droit de l’utilisateur de
faire fonctionner l’appareil. Cet appareil a été testé et il
a été reconnu qu’il se conforme aux limites
concernant l’appareillage informatique de classe B
correspondant à la partie 15 des règles de la FCC.
Ces limites sont conçues pour garantir une protection
raisonnable contre des interférences nuisibles dans
les installations résidentielles. Cet appareil génère,
utilise et peut émettre de l’énergie des fréquences
radio et, s’il n’est pas installé et utilisé selon les
instructions du fabricant, peut causer des
interférences nuisibles en communications radio.
Cependant, il ne peut pas être garanti que des
interférences ne se produiront pas dans certaines
installations particulières. Si cet appareil provoque
des interférences avec la réception radio ou de
télévision, ce qui peut être vérifié en alimentant
l’appareil et en coupant son alimentation, nous
conseillons à l’utilisateur d’essayer d’éliminer ces
interférences par l’un ou plusieurs des moyens
suivants:
Réorienter ou déplacer l’antenne de réception.
Augmenter la séparation entre l’appareil et le
récepteur.
Brancher l’appareil sur une prise de courant d’un
circuit différent de celui sur lequel le récepteur est
branché.
Consulter le revendeur ou un technicien radio/TV
compétent pour vous aider.
CU-VD3U_001D_FR.book Page 2 Monday, February 11, 2008 8:45 PM

EN
FR
ES
3
Mesures de sécurité pour le graveur
Veillez à respecter les mesures de sécurité suivantes.
Leur non-respect risque d’entraîner un choc électrique,
un incendie, des blessures ou un dysfonctionnement.
•Ne désassemblez pas, ne démontez pas et ne
modifiez pas le matériel. Demandez au revendeur de
procéder aux réparations et à la maintenance.
•N’insérez pas d’objets métalliques ou combustibles et
ne versez pas d’eau ou d’autres liquides à l’intérieur
du graveur.
•
Coupez l’alimentation lors du branchement du matériel.
•Débranchez la prise si vous prévoyez de ne pas
utiliser le graveur pendant une période prolongée ou
avant de le nettoyer (l’électricité circule à l’intérieur du
matériel même lorsqu’il n’est pas sous tension.)
•N’obstruez pas les orifices d’aération du graveur.
•
N’utilisez pas le graveur en cas de condensation. Le
transfert soudain du graveur d’un lieu froid vers un lieu
chaud peut entraîner la formation de gouttes, susceptibles
de provoquer un dysfonctionnement ou une défaillance.
•Ne laissez pas le graveur vibrer lorsqu’il contient des
disques.
Mesures de sécurité pour les accessoires
•Lors de l’utilisation de l’adaptateur C.A., du cordon
d’alimentation et du câble USB, veillez à respecter les
instructions suivantes. Leur non-respect risque
d’entraîner un choc électrique, un incendie, des
blessures ou un dysfonctionnement.
•Ne branchez pas et ne débranchez pas la prise
lorsque vos mains sont mouillées.
•
Insérez entièrement la fiche d’alimentation dans la prise.
•Éloignez la poussière et les objets métalliques de la
fiche d’alimentation.
•N’endommagez pas le cordon.
•
Placez le cordon de sorte qu’il ne fasse trébucher personne.
•Ne l’utilisez pas en cas d’orage.
•Ne le démontez pas.
•Ne l’utilisez pas pour un produit autre que celui-ci.
•Ne lisez pas le CD-ROM fourni à l’aide d’un lecteur
audio. Vous risqueriez d’endommager les circuits ou
les haut-parleurs.
Mesures de sécurité pour les disques
N’utilisez pas les disques suivants:
•Disques fissurés
•Disques profondément éraflés
Installation
Ne l’installez pas dans les lieux suivants.
•Lieu humide
•
Lieu dont la température est supérieure ou égale à 60 °C
•Lieu exposé aux rayons directs du soleil
•Lieu de surchauffe probable
•Lieu poussiéreux ou enfumé
•Lieu sujet à de la fumée ou de la vapeur huileuse tel
qu’un plan de travail ou près d’un humidificateur
•Lieu instable
•Salle de bain
•Lieux poussiéreux
•Plan incliné
Procédure de nettoyage
IMPORTANT:
•Veillez à débrancher le graveur avant de procéder au
nettoyage.
•N’utilisez pas de nettoyants liquides ou aérosols.
•Assurez-vous que le lecteur n’entre pas en contact
avec de l’humidité ou du liquide pendant le nettoyage.
Extérieur du graveur:
Essuyez la saleté à l’aide d’un chiffon sec.
Chargeur de disque:
Essuyez la saleté à l’aide
d’un chiffon doux et sec.
Ne pas toucher la lentille.
Pour nettoyer la lentille,
utilisez un aspirateur
spécialement conçu à cet effet, disponible sur le
marché. L’utilisation d’un disque nettoyant causera des
défectuosités.
Disque:
Utilisez une lingette de nettoyage disponible en
commerce et essuyer doucement, de l’intérieur vers
l’extérieur.
Stockage:
Veillez à conserver les disques dans leurs boîtiers. Si
vous empilez les disques les uns sur les autres sans
utiliser leurs boîtiers de protection, vous risquez de les
endommager. Ne placez pas les disques dans un lieu
où ils risquent d’être exposés aux rayons directs du
soleil ou bien où l’humidité ou la température est
élevée. Évitez de laisser des disques dans votre
véhicule !
Codes de région
Les codes de région sont des numéros permettant de
restreindre la lecture de DVD vidéo. Le monde est
divisé en six régions et chaque région est identifiée par
un numéro. Si le numéro d’un disque ne correspond
pas au numéro du lecteur, ce disque ne peut pas être lu
sur le lecteur.
Clause de non-responsabilité
JVC n’assume aucune responsabilité en cas de perte
de données résultant de branchements incorrects ou
d’une mauvaise manipulation de l’appareil.
Copyrights
Toute copie de documents protégés contre la copie par
des droits d’auteur en vue d’une utilisation autre que
personnelle, sans l’autorisation du détenteur du
copyright est interdite par la loi sur le copyright.
Marques déposées et marques de
commerce
•Les autres noms de société et de produit mentionnés
dans le présent document sont des marques
déposées et/ou des marques de commerce de leurs
propriétaires respectifs.
(Pour les propriétaires situés au Canada)
•POUR UTILISER AVEC MODELE AP-V3U
(ADAPTATEUR C.A.).
Cet appareil numérique de la classe B est conforme à
la norme NMB-003 du Canada.
ATTENTION:
À propos du placement de l’appareil:
Certains téléviseurs ou appareils électroménagers
génèrent des champs magnétiques puissants. Ne pas
placer un tel appareil électroménager sur l’appareil,
car cela risque de provoquer des troubles de l’image.
Pour déplacer le produit:
Débranchez le cordon d’alimentation et tous les
câbles de connexion.
Changer les codes de région
Il est possible de changer le code de région pour lire
un DVD ayant un code différent. (Le code ne peut pas
être modifié pour certains logiciels de lecture.)
Lorsque vous insérez le disque, l’écran
d’avertissement s’affiche à l’ordinateur. Suivez les
instructions à l’écran pour modifier le code.
Le code de région de ce graveur ne peut être modifié
que 5 fois. Le code défini la cinquième fois devient le
code définitif: assurez-vous donc de choisir un code
utilisé fréquemment. Prenez bien garde lorsque vous
changez le code.
Lentille
CU-VD3U_001D_FR.book Page 3 Monday, February 11, 2008 8:45 PM

4
Préparer la copie d’un DVD !
APréparez un disque du type recommandé
Utilisez un disque DVD-R, DVD-RW ou DVD-R DL de l’une des marques ci-dessous.
Des DVD+R, DVD+RW et DVD-RAM ne peuvent pas être utilisés.
BRaccordez
DVD-R DVD-RW DVD-R DL (double couche monoface)
Marque JVC, TDK, Verbatim,
SONY JVC JVC, Verbatim
zUtilisez une lingette de nettoyage disponible en commerce pour nettoyer
délicatement le disque en cas d’empreintes de doigts ou de saleté. N’exercez pas
trop de force pour ne pas érafler le disque.
zN’utilisez pas des disques éraflés.
zDes disques DVD-R DL ne peuvent être utilisés que si le graveur est raccordé à une
caméra à haute définition Everio.
Attention
Câble USB
Prise
d’alimentation
Vers la fiche c.c.
Vers la
fiche c.c.
Le témoin d’alimentation
tourne au vert.
CU-VD3
Caméra Everio
Utilisez l’adaptateur
c.a. pour alimenter la
caméra Everio.
Câble
d’extension USB
Utilisez si nécessaire.
Important!
zSi vous ne pouvez lire un DVD créé avec ce graveur sur d’autres appareils, vous
devez en faire la lecture en utilisant ce graveur. (AP. 8)
zSi vous rencontrez des difficultés, reportez-vous à la section “Dépannage”.
(AP. 15)
zSuivez les directives du manuel du caméra Everio pour brancher et utiliser la
caméra Everio.
Guide de base
CU-VD3U_001D_FR.book Page 4 Monday, February 11, 2008 8:45 PM
Other manuals for Everio CU-VD3U
1
This manual suits for next models
1
Table of contents
Languages:
Other JVC DVD Drive manuals