JVC CU-VD50U User manual

ENGLISH
ESPAÑOL
CU-VD50U
DVD Burner
INSTRUCTIONS
Grabador de DVD
MANUAL DE INSTRUCCIONES
For Customer Use:
Enter the Model No. and Serial
No. (located on the bottom of the
burner) below. Retain this
information for future reference.
Model No.
Serial No.
CU-VD50U.book Page 1 Tuesday, June 17, 2008 9:45 AM

2
This burner enables DVDs of videos
recorded with the JVC Hard Disk Camera to
be created without using a PC.
•If youwant to edit videosrecorded with the camera
and create your original DVDs, use the software
provided with the camerafor editing and creating
DVDs.
•A provided datawriting software Power2Go 5.5 Lite
can be used for writing data. However, it cannot be
used to edit videosor create DVDs.
•The burner doesnot include support for Macintosh.
Dear Customer,
Thank youfor purchasing thisburner. Before use,
please read the safety information and precautions
contained in pages2 and 3 to ensure safe use of this
product.
Safety Precautions
IMPORTANT:
In the event that any of the following occur, remove the
plug and make arequest for repair to the dealer.
•Smoke or abnormal odor isemitted
•Damage from being dropped
•Water or an object entersinside
CAUTION:
A UNIT ISA CLASS 1 LASER PRODUCT.
HOWEVER THISUNIT USESA VISIBLE LASER
BEAM WHICH COULD CAUSE HAZARDOUS
RADIATION EXPOSURE IF DIRECTED. BE SURE
TO OPERATE THE UNIT CORRECTLY AS
INSTRUCTED.
WHEN THISUNIT ISPLUGGED INTO THE WALL
OUTLET, DO NOT PLACE YOUR EYESCLOSE TO
THE OPENING OF THE DISC TRAY AND OTHER
OPENINGSTO LOOK INTO THE INSIDE OF THIS
UNIT.
USE OF CONTROLSOR ADJUSTMENTSOR
PERFORMANCE OF PROCEDURESOTHER THAN
THOSE SPECIFIED HEREIN MAY RESULT IN
HAZARDOUSRADIATION EXPOSURE.
DO NOT OPEN COVERSAND DO NOT REPAIR
YOURSELF. REFER SERVICING TO QUALIFIED
PERSONNEL.
CLASS 1 LASER PRODUCT
REPRODUCTION OF LABELS
WARNING LABEL INSIDE OF THE UNIT
Thisunit appliesto the standard “IEC60825-1:2001”
for laser products.
The socket-outlet shall be installed near the
equipment and shall be easily accessible.
ATTENTION:
Thisunit containsmicrocomputers. External electronic
noise or interference could cause malfunctioning. In
such cases, switch the unit off and unplug the mains
power cord. Then plug it in again and turn the unit on.
Take out the disc. After checking the disc, operate the
unit as usual.
CAUTION:
To avoid electric shock or
damage to the unit, first firmly
insert the small end of the
power cord into the AC
Adapter until it isno longer
wobbly, and then plug the
larger end of the power cord into an AC outlet.
The mainsplug shall remain readily operable.
•Remove the mainsplug immediately if the burner
functionsabnormally.
If malfunctioning occurs, stop using the unit
immediately and consult your local JVC dealer.
Caution on Replaceable lithium battery
The battery used in thisdevice may present afire or
chemical burn hazard if mistreated.
Do not recharge, disassemble, heat above 100 C or
incinerate. Replace battery with Panasonic
(MatsushitaElectric), Sanyo, Sony or Maxell CR2025.
Danger of explosion or Risk of fire if the battery is
incorrectly replaced.
•Dispose of used battery promptly.
•Keep away from children.
•Do not disassemble and do not dispose of in fire.
For USA-California Only
Thisproduct containsaCR Coin Cell Lithium Battery
which containsPerchlorate Material – special handling
may apply.
See www.dtsc.ca.gov/hazardouswaste/perchlorate
WARNING:
Batteriesshall not be exposed to excessive heat such
as direct sunshine, fire or the like.
Declaration of Conformity (for ownersin the U.S.A.)
Model Number : CU-VD50U
Trade Name : JVC
Responsible party : JVC AMERICASCORP.
Address : 1700 Valley Road Wayne,
N. J. 07470
Telephone Number : 973-317–5000
Thisdevice complieswith Part 15 of FCC Rules.
Operation issubject to the following two conditions: (1)
Thisdevice may not cause harmful interference, and
(2) thisdevice must accept any interference received,
including interference that may cause undesired
operation.
CU-VD50U.book Page 2 Tuesday, June 17, 2008 9:45 AM

EN
ES
3
Safety Precautions for the Burner
Be sure to observe the following precautions. Failing to
do so may result in electric shock, fire, injury, or
malfunction.
•Do not disassemble, dismantle, or modify the
equipment. Requestsfor repair and inspection should
be made to the dealer.
•Do not insert metal or combustible objectsor pour
water or other liquidsinside the burner.
•Turn off the power when connecting equipment.
•Remove the plug when the burner will not be used for
aprolonged time or prior to cleaning (electricity flows
through the equipment even when the power isoff).
•Do not block the ventilation holesof the burner.
•Do not use where there iscondensation. Suddenly
carrying the burner from acold location to ahot
location may result in the formation of drops, which
may cause amalfunction or failure.
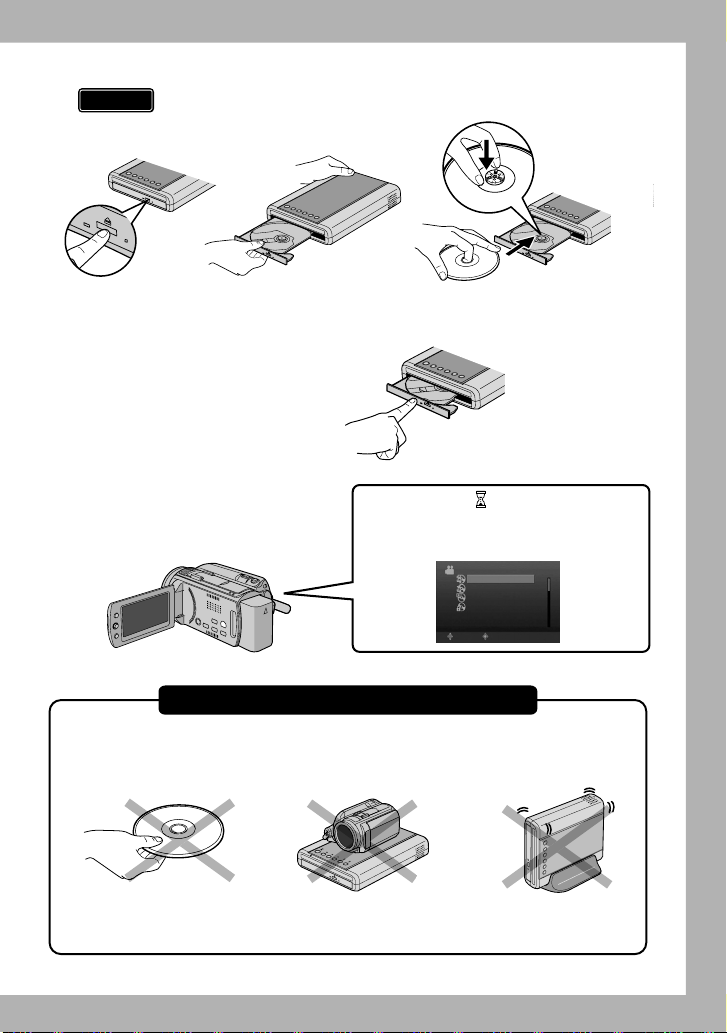
•Do not cause the burner to vibrate when discsare in.
Safety Precautions for Accessories
•When using the AC adapter, the power cord, and the
USB cable, be sure to observe the following
precautions. Failing to do so may result in electric
shock, fire, injury, or malfunction.
•Do not insert or remove the plug when your hands
are wet.
•Fully insert the plug into the outlet.
•Keep dust and metal objectsaway from the plug.
•Do not damage the cord.
•Place the cord where it will not trip someone up.
•Do not use when thunder can be heard.
•Do not dismantle.
•Do not use for any product other than thisone.
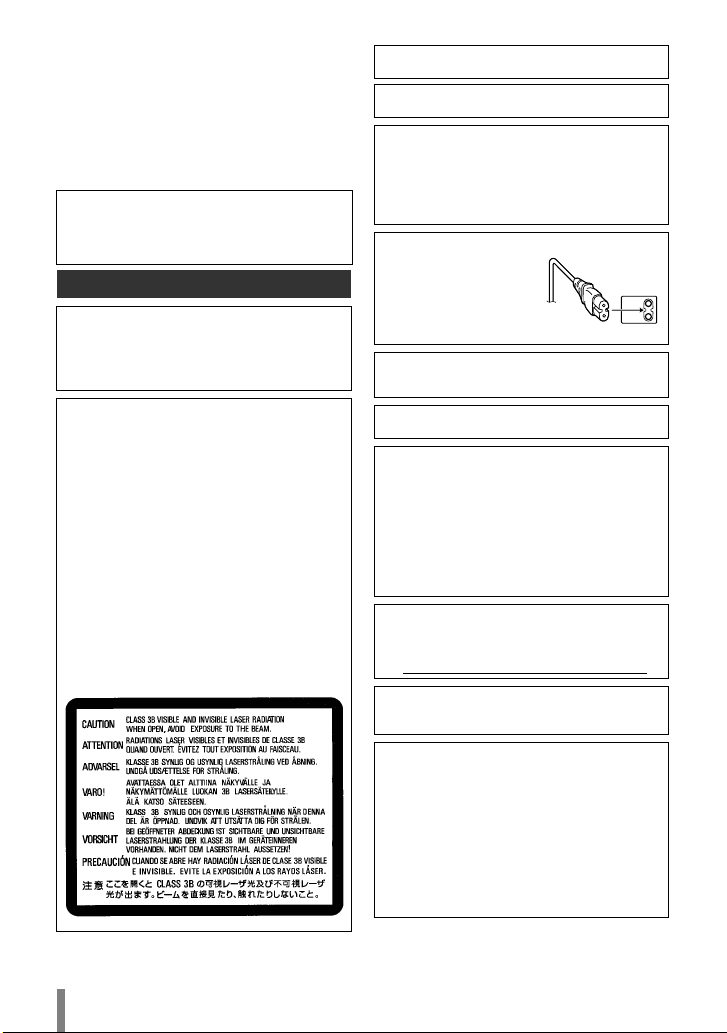
•Do not play the provided CD-ROM with an audio
player. Doing so may damage the circuitsor speakers.
Safety Precautions for Discs
Do not use the following discs.
•Cracked discs
•Deeply scratched discs
Installation
Do not install in any of the following locations.
•Humid location
•Location of 60 °C or above
•Location subject to direct sunlight
•Location where overheating islikely
•Dusty or smoky locations
•Locationssubject to oily smoke or steam such as a
kitchen counter or beside ahumidifier
•Unstable location
•Bathroom
•Dusty places
•Slanted location
(For ownersin the U.S.A.)
Changesor modificationsnot approved by JVC could
void the user’sauthority to operate the equipment.
Thisequipment has been tested and found to comply
with the limitsfor aClass B digital device, pursuant to
Part 15 of the FCC Rules. These limitsare designed
to provide reasonable protection against harmful
interference in aresidential installation. This
equipment generates, uses, and can radiate radio
frequency energy and, if not installed and used in
accordance with the instructions, may cause harmful
interference to radio communications. However, there
isno guarantee that interference will not occur in a
particular installation. If thisequipment doescause
harmful interference to radio or television reception,
which can be determined by turning the equipment off
and on, the user isencouraged to try to correct the
interference by one or more of the following measures:
Reorient or relocate the receiving antenna.
Increase the separation between the equipment and
receiver.
Connect the equipment into an outlet on acircuit
different from that to which the receiver isconnected.
Consult the dealer or an experienced radio/ TV
technician for help.
(For ownersin Canada)
•FOR USE WITH MODEL NO. AP-V50U
(AC ADAPTER).
•POUR UTILISER AVEC MODELE AP-V50U
(ADAPTATEUR C.A.).
ThisClass B digital apparatus complieswith Canadian
ICES-003.
Cet appareil numérique de laclasse B est conforme à
lanorme NMB-003 duCanada.
The C/Bbutton doesnot completely shut off mains
power from the unit, but switchesoperating current on
and off. ABBshowselectrical power standby and ACB
showsON.
ATTENTION:
On placing the unit:
Some TVsor other appliancesgenerate strong
magnetic fields. Do not place such applianceson top
of the unit as it may cause picture disturbance.
When moving the product:
Press C/Bto turn off the power, and wait at least 30
secondsbefore unplugging the power cord. Then, wait
at least 2 minutesbefore moving the product.
CU-VD50U.book Page 3 Tuesday, June 17, 2008 9:45 AM

4
Getting Ready to Copy to a DVD!
AGet ready a recommended disc
Use DVD-R, DVD-RW or DVD-R DL disc of the brandslisted below.
DVD+R, DVD+RW and DVD-RAM discscannot be used.
BConnect
CPress the power button to turn on the burner
• The power lamp changesfrom blinking orange to steady orange.
DVD-R DVD-RW DVD-R DL (Single-
sided double layer)
Brand JVC, TDK,
Verbatim, SONY JVC JVC, Verbatim
•DVD-RDL(single-sided double layer) discscan be used only when the
burner isconnected to ahigh definition Everio camera.
•Use acommercially available cleaning cloth to wipe the disc gently if
there are any fingerprintsor dirt. Applying too much strength will result in
scratches.
• Do not use discsthat are scratched.
• When an AVCHD disc (P. 15) isinserted into adevice that isnot AVCHD-
compatible, youmay not be able to eject the disc. To eject the disc, refer to the
instruction manual of your device.
Caution
Use the AC adapter to
power on the Everio
camera.
Power button
To DC jack
USB cable To DC jack
Protrusion
Insert the connector with the
protrusion to the burner.
Power lamp
CU-VD50
Everio
Basic Guide
CU-VD50U.book Page 4 Tuesday, June 17, 2008 9:45 AM

5
DOpen the tray and insert the disc
EClose the tray
•Push in until the tray snapsin.
FOpen the LCD monitor
• The tray cannot be opened/closed when the burner isoff.
Caution
APress the eject
button. BPull out
completely. CInsert firmly into
place.
#2%!4%&2/-!,,
3%,%#4!.$#2%!4%
0,!9"!#+
&).!,):%
6)$%/
3%,%#4 3%4
• The Everio cameraturnson.
• The power lamp on the burner
changesfrom orange to green light.
An hourglass ( ) isdisplayed when
the burner isrecognizing the disc.
When completed, the following screen
appears.
Pay attention to the following!
• Do not touch the
recording side • Do not place any
objectson top • Do not topple
• Do not subject to
mechanical shock
¹Recording or playback may not function properly if the disc isscratched
or dirty.
CU-VD50U.book Page 5 Tuesday, June 17, 2008 9:45 AM

6
Copying Videosto a DVD
Operate on the Everio camera.
¹Depending on the model connected, the on-screen display may differ from those
shown below.
ASelect “CREATE FROM ALL”
BSelect “ALL SCENES”
CSelect “OK”
DSelect “Yes”
ESelect “EXECUTE”
FPress “OK”
Copy completed!
Select
(move up-down)
Confirm
(push in)
CREATE FROM ALL
SELECT AND CREATE
PLAYBACK
FINALIZE
SELECT SET
VIDEO
-%.5
ALL SCENES
UNSAVED SCENES
SELECT SET
CREATE FROM ALL
TOP
$6$$6$$,
-%.5
QUANTITY REQUIRED
SELECT SET
ALL SCENES
TOP
OK
RETURN
PREPARE AN EMPTY DISC
-%.5
DO YOU WANT TO MAKE
AN AUTOMATIC HEADLINE ON
THE DISC TOP MENU?
SELECT SET
ALL SCENES
TOP
Yes
No
$6$
-%.5
SELECT SET
ALL SCENES
TOP
EXECUTE
CANCEL
COMPLETED
SET
ALL SCENES
OK
• Do not turn off the power or remove the USB cable while the the hourglass or the
copy in progress screen isdisplayed.
Youcan also choose to copy your favorite scenes. For details, refer to the
instruction manual of the Everio camera.
Note
CU-VD50U.book Page 6 Tuesday, June 17, 2008 9:45 AM

7
Playing VideosStored on the DVD
AConnect thisburner to the TV
BRemove the USB cable
• The power lamp on the burner changesas follows.
• When the USB cable isremoved, the playback navigator appearsautomatically.
(About 40 seconds.)
CUse the selection keyson the remote control to select the video to
play back and press the ENTER button.
Green Blinking orange Orange
Connect to the TV
with an Audio/Video
cable.
To DC jack
TV
• For details, refer to “Connecting to the TV” (P.12, 13).
Red
White
Yellow
Red Yellow
White
Power lamp
Remove the USB
cable
• When the power lamp blinksslowly in red due to adrop in the burner’sinterior
temperature, some functionswill not work and there will be no image displayed on
the TV screen. Wait until the power lamp stopsblinking in red before operating this
burner.
1/2
(Playback navigator screen on the TV)
DIGEST PLAYBACK
JUN.01.2008 09:51AM JUN.01.2008 11:45AM JUN.01.2008 05:09PM
•Anunfinalized disc
cannot be played back
properly. Refer to the
instruction manual of the
Everio cameraand
finalize the disc.
Caution
AUG.01.2008 01:42PM AUG.01.2008 03:15PM AUG.01.2008 05:32PM
Playback begins!
CU-VD50U.book Page 7 Tuesday, June 17, 2008 9:45 AM

8
Contents
zSafety Precautions.................................................................................................. 2
zGetting Started......................................................................................................... 9
Accessories............................................................................................................... 9
Placing the Burner..................................................................................................... 9
zNamesand Functionsof Each Part ..................................................................... 10
Front and Top Panel................................................................................................ 10
Rear Panel............................................................................................................... 10
Remote Control ....................................................................................................... 11
zConnecting to the TV ............................................................................................ 12
Connecting to aTV with HDMI Input Terminal ........................................................ 12
Connecting to aTV with Component Video Input Connectors................................ 13
Connecting to aTV with Audio/Video Input Connectors.......................................... 13
zCopying Everio Video to a DVD ........................................................................... 14
Connecting to an Everio Camera............................................................................ 14
Creating AVCHD Disc/DataDisc/DVD-Video.......................................................... 15
zCopying from PC to DVD ...................................................................................... 16
Connecting to aPC ................................................................................................. 16
Copying to aDVD.................................................................................................... 16
ComputersThat Can Be Used ................................................................................ 17
Installing CyberLink Power2Go 5.5 Lite .................................................................. 18
CyberLink Power2Go 5.5 Lite Contact Information ................................................. 20
zFolder Configuration ............................................................................................. 21
When Copying from High Definition Everio to DataDisc......................................... 21
When Copying from High Definition Everio to AVCHD Disc.................................... 22
When Creating and Storing Desired Foldersand Fileson aPC ............................. 22
zPlaying ImagesStored on the DVD...................................................................... 23
Viewing ImagesCopied from the High Definition Everio ......................................... 23
Viewing DVD-Video Copied from Everio ................................................................. 27
zChanging the Playback Settings.......................................................................... 29
zOperate in Conjunction with TV via HDMI........................................................... 31
zViewing High Quality Images............................................................................... 33
zSettingsMenu........................................................................................................ 34
MenuOperation Procedures................................................................................... 34
SettingsMenuItemsand Descriptions.................................................................... 35
zScreen Displays..................................................................................................... 39
zTroubleshooting .................................................................................................... 41
zError Messages...................................................................................................... 45
zOther Information .................................................................................................. 46
zSpecifications........................................................................................................ 48
CU-VD50U.book Page 8 Tuesday, June 17, 2008 9:45 AM

EN
ES
9
Getting Started
If there are any itemsmissing, please consult your authorized dealer.
oHorizontal orientation
Take note of the top and bottom of the burner and place it in the horizontal
orientation.
oVertical orientation
Align the groove on the bottom of
thisburner with the bulge on the
stand and fix the burner securely on
the stand.
Accessories
Do not use the provided AC adapter and power cord for other devices. In
addition, do not use AC adapter and power cord other than those provided
with thisburner. Doing so may result in electric shock or fire.
Placing the Burner
AC adapter
(AP-V50U) Power cord USB cable
Mini A – Mini B type
Audio/Video cable
DVD-R (blank disc) x 1
CD-ROM (datawriting
software) x 1
Instruction manual
(thismanual), other
printed material
Stand
Remote control
(RM-V55U)
Low side
Groove
High side
CU-VD50U.book Page 9 Tuesday, June 17, 2008 9:45 AM

10
Namesand Functionsof Each Part
Front and Top Panel
Rear Panel
Power (On/Off)
Stop
Play
Pause
Reverse skip
Forward skip
Ventilation holes
Do not block these
ventilation holes.
To eject tray (P. 5)
Access lamp
Tray
Remote
control sensor
Power lamp
Power on: orange
USB connected: green
Connect to the TV’scomponent
video input connectors(P. 13)
Connect to the Everio camera(P. 14)
Connect to the PC (P. 16)
Connect to the
AC adapter
Connect to the TV’saudio input
connectors(P. 13)
Connect to the TV’s
HDMI input terminal
(P. 12)
Connect to the TV’svideo
input connector (P. 13)
CU-VD50U.book Page 10 Tuesday, June 17, 2008 9:45 AM

EN
ES
11
Remote Control
• If the burner respondspoorly to the remote control, the battery of the
remote control isweak. Replace it with anew battery. Insert correctly
according to the eand ddirectionsindicated.
•Ifproblem occurswhile using the remote control, remove the battery
and insert it again before operating the remote control.
Basic playback
operations
(P. 25, 28)
Power (On/Off)
To perform basic setup
(P. 34)
To display the playback
navigator (P. 23)
To display the tool menu(P. 25)
To display the playback menu
(P. 29)
To change the output
resolution of the image (P. 33)
To display information on the
screen (P. 39)
To display the playback
navigator (P. 27)
To select/confirm
To return to the previous
screen
Note
oWhen using the remote
control for the first time
oWhen replacing the battery
Pull out the insulation sheet Lithium battery
CU-VD50U.book Page 11 Tuesday, June 17, 2008 9:45 AM

12
Connecting to the TV
Connecting to a TV with HDMI Input Terminal
•Imagescan only be displayed on aHigh-bandwidth Digital Content
Protection (HDCP) monitor.
• We recommend using the Category 2 HDMI cable (High Speed cable)
for viewing in higher picture quality.
TV
Thisburner
HDMI input
HDMI cable (not provided)
Note
CU-VD50U.book Page 12 Tuesday, June 17, 2008 9:45 AM

EN
ES
13
Connecting to a TV with Component Video Input Connectors
• Connect to aHigh-bandwidth Digital Content Protection (HDCP)
monitor when using an HDMI-DVI conversion cable.
Connecting to a TV with Audio/Video Input Connectors
TV
Thisburner
Y
Audio cable (not provided)
Component
video input
Component
video cable
(not provided)
CB/PB
CR/PR
Audio in (L)
Audio in (R)
Note
TV
Thisburner
Video input
Audio/Video cable
(provided)
Video input
Audio in (L)
Audio in (R)
CU-VD50U.book Page 13 Tuesday, June 17, 2008 9:45 AM

14
Copying Everio Video to a DVD
By connecting thisburner to an Everio camera, youcan easily copy recorded imagesto
aDVD.
Connecting to an Everio Camera
• When the USB cable isconnected, all buttonson the remote control of
thisburner are not functional except the power button.
AC adapter
USB cable (provided
with CU-VD50)
USB connector
USB connector
To DC jack
Protrusion
DC connector
AC adapter
•Everio:Off
•Thisburner: Off
Preparations
Note
CU-VD50U.book Page 14 Tuesday, June 17, 2008 9:45 AM

EN
ES
15
oDiscsthat can be created on thisburner
• High definition Everio GZ-HD30/HD40 supportsboth AVCHD and MPEG-2 format
recording. Other high definition Everio supportsMPEG-2 format recording. (Asof
May 2008.)
ATurn on Everio
• The Backup menuwill appear on the Everio’sLCD monitor.
BInsert a new disc
• Refer to page 5 on how to insert the disc.
• Refer to page 4 for the recommended discs.
CCreate a AVCHD disc, data disc or DVD-Video
• Refer to the instruction manual of your Everio cameraon how to create a
AVCHD disc, datadisc or DVD-Video.
Creating AVCHD Disc/Data Disc/DVD-Video
Copy Playback
AVCHD DiscHigh definition videosin
AVCHD format. Can be played back on AVCHD-
compatible devices(such as Blu-ray
recorder) or thisburner. (P. 23)
DataDiscHigh definition videosin
MPEG-2 format. Play back on thisburner. (P. 23)
Cannot be played back on other devices.
DVD-Video Standard definition videos
in MPEG-2 format. Can be played back on DVD recorder,
DVD player or thisburner. (P. 27)
• Mode switch on Everio:
or mode (depending on the item to be copied)
•Thisburner: On
• Depending on the model connected, still imagescannot be copied. For
details, refer to the instruction manual of the Everio camera.
• Do not turn off thisburner while dataisbeing written to the disc. The
disc cannot be ejected during datawriting. Wait until writing finishes.
• The remote control isnot operable when thisburner isconnected to the
Everio.
Preparations
Note
CU-VD50U.book Page 15 Tuesday, June 17, 2008 9:45 AM

16
Copying from PC to DVD
Thisburner can be used as aDVD burner when connected to aPC. And youcan use
the provided software to copy to aDVD.
ATurn on thisburner and the PC
• Install the CyberLink Power2Go 5.5 Lite software if youhave not done so.
(P. 18)
BInsert a new disc
• Refer to page 5 on how to insert the disc.
• Refer to page 4 for the recommended discs.
CUse Power2Go to copy to a DVD
AUse Power2Go to create afolder.
•Use alphanumeric characterswhen entering the folder namesor file names.
Youcan enter up to 40 characters.
BUnder the “Burner” tab in the Power2Go “Configuration/Information” menu,
check the box next to “Close disc”. Confirm that the file system under the data
tab isset to “UDF 1.5”. Video playback will not function properly if the disc was
created with the file system set to “ISO9660/Joliet”.
CCopy filessuch as JTS, TPD and JPG into the folder.
Connecting to a PC
Copying to a DVD
USB cable (provided
with Everio)
USB connector
USB connector
PC
AC adapter
•Everio:Off
•Thisburner: Off
DC connector
Preparations
CU-VD50U.book Page 16 Tuesday, June 17, 2008 9:45 AM

EN
ES
17
oRemoving USB cable from PC
ACarry out removing of hardware on the PC.
BRemove the USB cable.
CyberLink Power2Go 5.5 Lite can be used on computerssatisfying the following
conditions.
* If youuse USB 1.1 cable, it will take approximately 3 hoursto write one DVD.
• For detailson using Power2Go, refer to the User’sguide, Help and
Readme filesinstalled with the software. Youcan access the User’s
guide, Help and Readme filesfrom the Start menuon the PC.
• To get customer support and to register the software, youneed the
following product key (CD-Key):
PXNVM-NWE4G-XQD9Q-CU9DX-3FQFN-NAKUS
•Thisburner cannot be used to write filesinto CD-R or CD-RW discs.
Refer to page 51 for the recommended discs.
•Thisburner doesnot response to all the functionsof Power2Go 5.5 Lite.
• Power2Go 5.5 Lite doesnot support conversion of audio filesto MP3
format.
• When the “Enter Activation Key” screen appearswhile using Power2Go
5.5 Lite, close the screen without entering the activation key.
• To play back disc created on aPC on thisburner, follow the following
procedure.
Insert the disc into thisburner. After disc recognition, press the
NAVIGATION/TOP MENU button to display the playback navigator.
(P. 23)
•Fordatadisc created on aPC, the date and time displayed will not be
accurate.
ComputersThat Can Be Used
Operating
system
WindowsXP Home Edition (pre-installed)
WindowsXP Professional (pre-installed)
WindowsVistaHome Basic (32-bit edition, pre-installed)
WindowsVistaHome Premium (32-bit edition, pre-installed)
Connector USB 2.0/1.1 connector (*)
CPU IntelPentiumIII, at least 800 MHz
(IntelPentium4, at least 2 GHz recommended)
RAM At least 128 MB (at least 256 MB recommended)
Free hard disk
space At least 50 MB for installation
At least 5 GB recommended for creating DVDs
Display Must be capable of displaying 800 x 600 dots
Note
Caution
CU-VD50U.book Page 17 Tuesday, June 17, 2008 9:45 AM

18
AInsert the provided CD-ROM in the PC
WindowsVista:
AClick “Run INSTALL.EXE” on the “AutoPlay” screen.
BClick “Continue” on the “User Account Control” screen.
CThe “Choose Setup Language” screen appears.
WindowsXP:
• After awhile, the “Choose Setup Language” screen appears.
BConfirm the language and then click
“OK”
• The following screen appears.
CClick “Next”
• The “License Agreement” screen appears.
DConfirm the contentsand then click
“Yes”
• The “Customer Information” screen appears.
Installing CyberLink Power2Go 5.5 Lite
• Do not play the provided CD-ROM in an audio player. It isnot an audio
CD. Playing thisCD-ROM in an audio player will result in aloud high
noise. It may also damage the circuit and speaker.
Caution
CU-VD50U.book Page 18 Tuesday, June 17, 2008 9:45 AM

EN
ES
19
EEnter the “User Name” and “Company
Name” and then click “Next”
FFollow the on-screen intructions
• Installation starts.
After awhile, the “InstallShield Wizard Complete” screen appears.
GClick “Finish”
• The computer will restart and installation is
completed.
• If the screen on the right doesnot appear,
proceed to step H.
HClick “Finish”
• The “CyberLink Power2Go 5.5” Readme
screen appears.
IRead the contentsof the Readme
CU-VD50U.book Page 19 Tuesday, June 17, 2008 9:45 AM

20
For information on CyberLink Power2Go 5.5 Lite or other products, use the following
contact information.
Telephone/fax support
Paid voice support
Support web/e-mail
CyberLink Power2Go 5.5 Lite Contact Information
Location Language Office hours
(Mon. to Fri.) Phone # Fax #
Germany English / French /
Spanish9:00 am to 5:00 pm +49-700-462-92375 +49-241-70525-25
Location Language Office hours(Mon. to Fri.) URL
U.S.A. English 1:00 pm to 10:00 pm CSThttp://www.cyberlink.com/english/
cs/support/
Language URL/e-mail address
English http://www.cyberlink.com/english/cs/support/new_site/support_index.html
French /
SpanishgoCyberlink@aixtema.de
CU-VD50U.book Page 20 Tuesday, June 17, 2008 9:45 AM
This manual suits for next models
1
Table of contents
Languages:
Other JVC DVD Drive manuals