7
2 Preparation
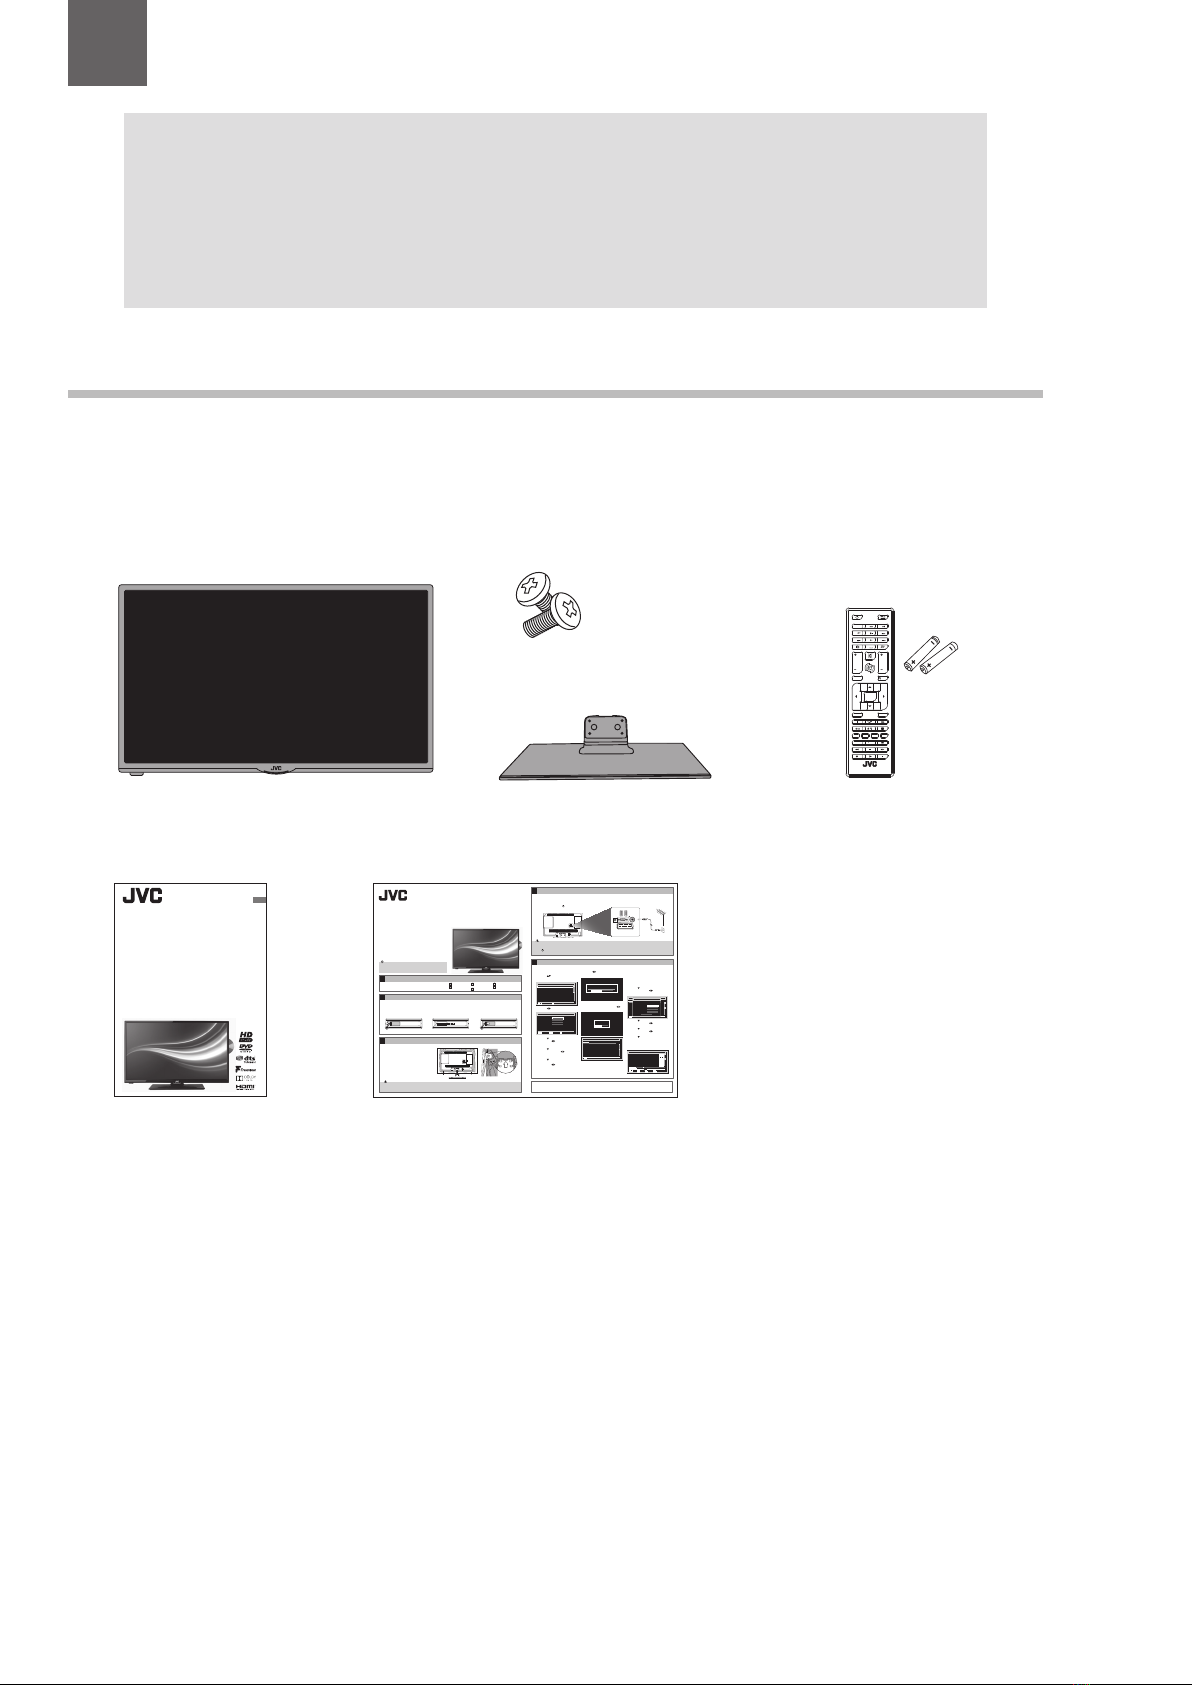
Unpacking the TV
Remove all packaging from the TV. Retain the packaging. If you dispose of it please do so according to local regulations.
The following items are included:
Thank you for purchasing your new JVC TV.
Your new TV has many features and incorporates the latest technology to enhance your viewing
experience. We recommend that you spend some time reading this instruction manual so that you fully
understand these features. You will also find some hints and tips to help you resolve any issues.
Read all the safety instructions carefully before use and keep this instruction manual for future reference.
Chapter
2
Stand screws x4
Instruction Manual Quick Start Guide
Instruction Manual
32” HD-Ready LED TV with DVD
LT-32C345(C) / LT-32C346(C)
GB
• DonotconnecttheTVtothemainssupplyuntilyouhavecompletedalltheconnections.
• AlwaysdisconnecttheTVfromthemainssocketwhennotinusefora longperiodoftime.
• The buttonontheremotecontrolisonlyusedforswitchingtheTVintostandby,itdoesnotdisconnect theTVfromthemainspower.
Tocompletelydisconnectthemainspower,pleaseremovethemainsplug fromthemainssocket.
TheLCDdisplayisveryfragile,andmust beprotectedatalltimeswheninstallingandremovingthebasestand.Besurethat nohardorsharpobject,
oranythingthatcouldscratchordamagetheLCDdisplay,comesinto contactwithit.DONOTexertpressureonthe frontoftheTVatanytimebecause
thescreencouldcrack.
Removeallpackagingfromtheunit.Retainthepackaging.
Ifyoudisposeofitpleasedosoaccordingtoanylocalregulations.
TV
TVStand
RemoteControl/
AAABatteriesx2
Screwsx4
InstructionManual
QuickStartGuide
Unpacking
1
1. ConnectoneendoftheRFcoaxialcabletotheaerialsocketonthewallandthe
otherendofthecabletotheANTsocketonthebackofyourTV.
2. PlugtheTVintoamainssocketandswitchonatthemains.
3. Instandbymode,pressthe buttonontheremotecontroltoturntheTVon.
TheredLEDindicatorwillashforafewsecondsthentheTVwillswitchon.
1. ThersttimeyouturntheTVon,itwillgo
straightintotheFirstTime Installation
menu.Pleaseensuretheaerialispluggedin.
Pressthe buttonstohighlightyour
languagethenpressOK.
2. Pressthe buttonstoselectyourcountry.
3. Pressthe buttontohighlightSearchType,
thenpressthe buttonstoselectDigital
Only.Thiswillonlysearchforthedigital
channels.
4. Pressthe buttontohighlightTeletext
Language,thenpressthe buttonsto
selectyourlanguage.Themajorityofpeople
willwantthissettoWest.
5. Pressthe buttontohighlightScan
EncryptedChannel(pay-per-viewchannels),
thenpressthe buttonstoselectYes
orNo.
6. ConrmthesesettingsbypressingOK.
7. Pressthe buttonstohighlightHome
ModethenpressOK.
8. Youwillnowbeaskedifyouwanttostart
theautomaticchannelscan.Pressthe
buttonstohighlightYesandpressOK.
Choose Region
Duringtuning,yourTVmayhavereceived
signalsfrommorethanonetransmitter.Ifthis
hasoccurredtheChooseRegionscreenwillbe
displayed.Thiswillenableyoutoselectthe
correctregionaltransmissionforthelocalnews
servicethatyourequire.
1. Pressthe buttontohighlightPrimary
region,thenpressthe buttonstoselect
yourPrimaryRegione.g.England.
2. Pressthe buttontohighlightSecondary
region,thenpressthe buttonstoselect
yourSecondaryRegione.g.London.
3. Pressthe buttontohighlightTertiary
region,thenpressthe buttonstoselect
yourTertiaryRegione.g.GreaterLondon.
4. Pressthe buttontohighlightOKthen
pressOK.YourTVisnowfullytunedin.
5. TheEditChannellistwillappear,pressthe
EXITbuttontoremovethis.YourTVisnow
fullytunedinandreadytouse.
Connecting the Aerial and Turningon the TV
Tuning in theT V
4
5
1. EnsuretheTVisswitchedoandnotconnectedto
themainspowersupply.
2. LaytheTVdownonaatsurfaceideallyontheedge
ofatablesothebaseoftheTVslightlyoverhangs
theedgeofthetable,withthebacksidefacingup.
Pleasemakesureasoftcushionedmaterial(suchas
adrybathtowelorthickpieceoffoam)isplaced
beneaththescreen.
3. Slidethestandunderthelip,theneckwilltsnuggly
overthescrewholes.ThenscrewthestandtotheTV
usingthe4screwssupplied.
Installing the Base Stand
3
Welldone,yournewTVisnowreadytouse.Youwillndthattherearemanyexcitingfeaturesavailable.Togettoknowallthesefeatures,pleasetake
sometimetoreadtheinstructionmanualprovidedwithyourTV.
(QSG-LT-32C345/46(C)-150827V1)
1. Removethescrewandopenthe
batterycompartment.
Operating YourRemote Control
2
Thank youforpurchasingyournewJVCTV.
YournewTVincorporatesthelatesttechnologytoenhanceyourviewing
experience.Wewouldsuggestthatyouallowabout20minsforinitialsetup.
Pleasefollowthisguideforasuccessfulrsttimeinstallation.
Thelatesteco-friendlypower-savingtechnologywillswitchotheTVif
deviceisleftonandidlefor4hours.Pleasereferto“AutoStandby”under
the“TimeSettings”sectionoftheinstructionmanualformoredetail.
Quick Start Guide
32" HD-Ready LED TV
with DVD
LT-32C345(C) / LT-32C346(C)
Slideunder
thelip
Table
Cushioned
material
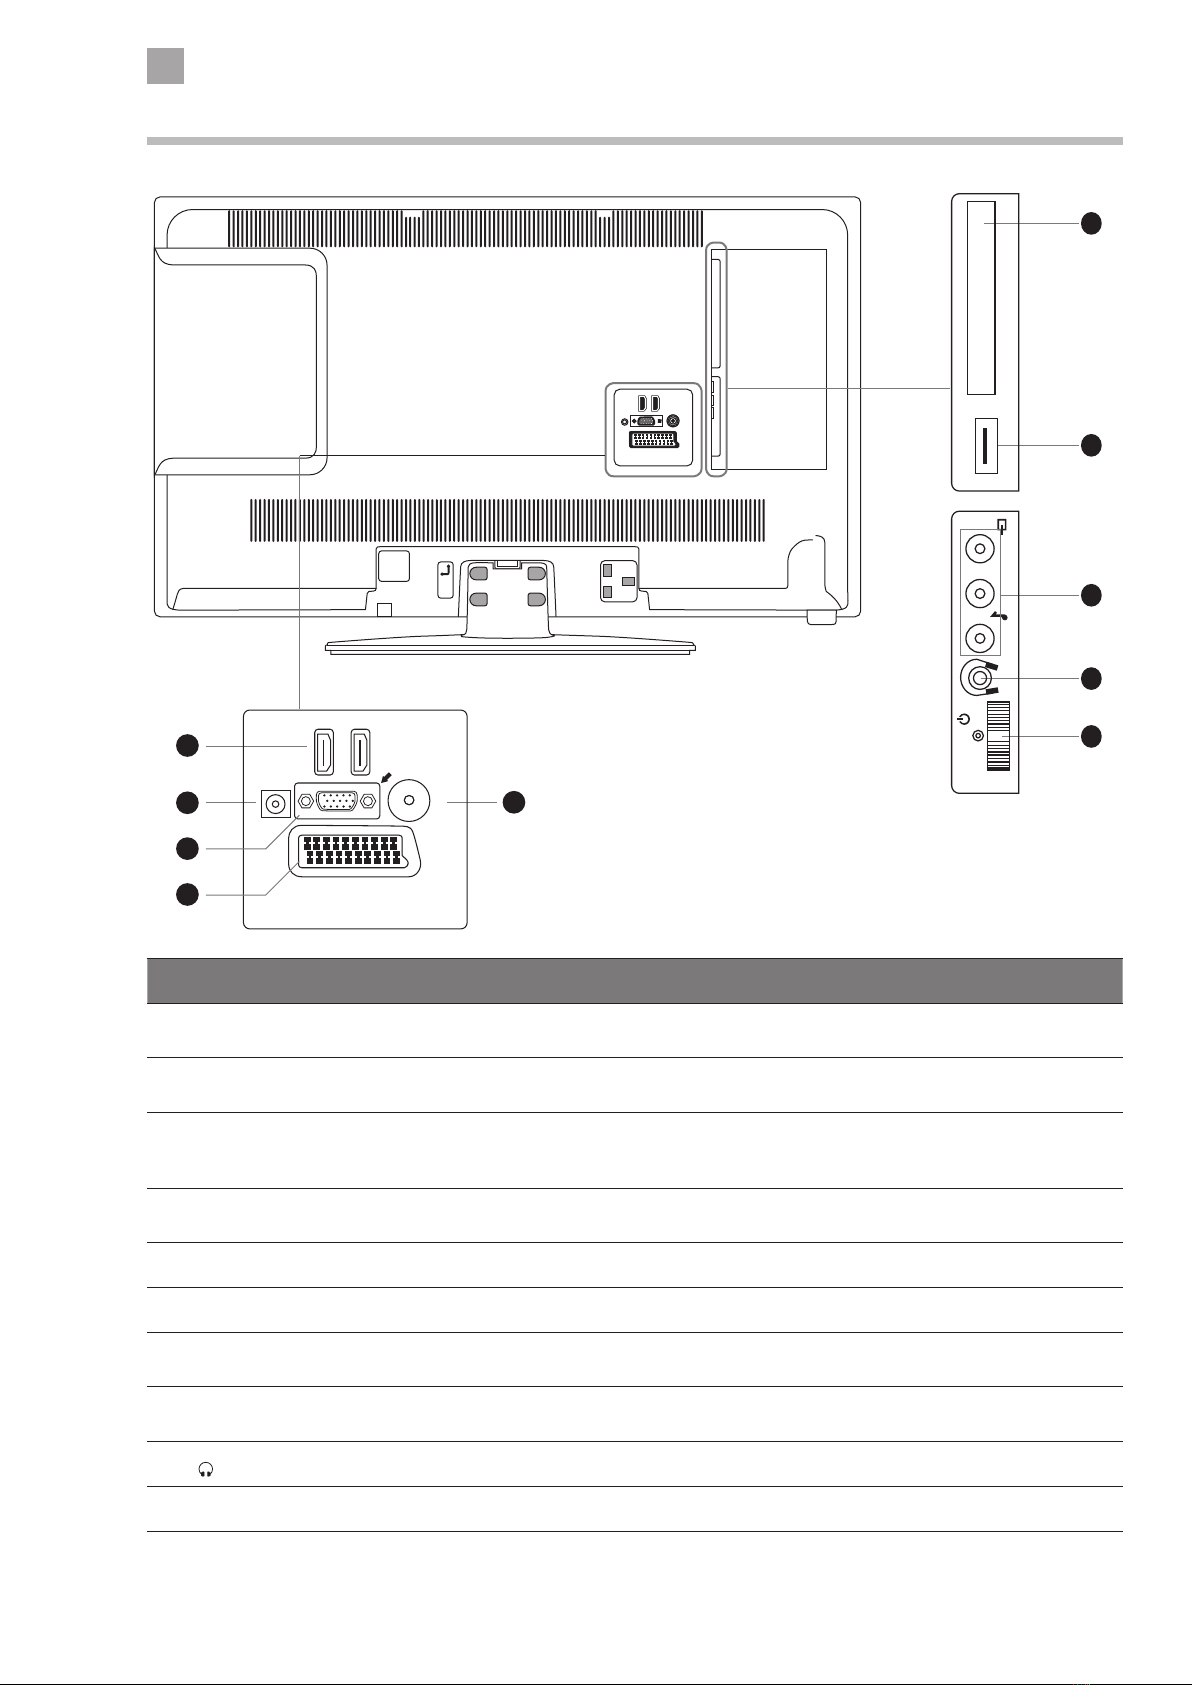
SCART
SPDIF
VGA
ANT.
HDMI1
HDMI2
RFcoaxial cable
(notincluded)
Firsttimeinstallation
Welcomepleaseselectyour language! English
Bienvenue!Veuillezchoisir une langue. Francais
Willkommen,WahlenSiebitte lhre Sprache aus! Deutsch
Benvenuti,Selezionatelavostra lingua! Italiano
Bienvenido,seleccioneunidioma Espanol
Hosgeldiniz,lutfen dil secimini yapiniz! Turkce
Dobrodosli,izberitevasjezik! Slovenski
Valkommen,valjdittsprak! Svenska
Udvozoljuk,kerjukvalasszaki a nyelvet! Magyar
Bem-vendo,favorselectionarseu idioma Portugues
Tervetuloa,valitsekielesi! Suomi
SelectLanguage SetLanguage
OK
Firsttimeinstallation
Welcome!
Country
SearchType
TeletextLanguage
ScanEncryptedChannels
UK
Digitalonly
West
Yes
< >
SelectLanguage Startsearch
OK
Chooseyourcountry OK
Pleaseensureyouraerial is plugged in before tuning in your TV
IftheTVis to be used in a store, please select the Store Mode. For domestic use,
HomeModeis recommended.
StoreModeHomeMode
Doyouwant tostar t an automatic
channel
NoYes
Automaticchannelscan (Retune)
Cambs&Beds: BBCTWO HD
Cambs&Beds: Channel 4 HD
Cambs&Beds: BBC ONE HD
Cambs&Beds: ITV HD
Cambs&Beds: BBCTHREE HD
Cambs&Beds: CBBC HD
Pleasewait.Thiswill take a few minutes. Scanning digital channels: UHF 22
ChannelsFound: 6
Cancelscan
MENU
Automaticchannelscan (Retune)
Cambs&Beds: BBCTWO HD
Cambs&Beds: Channel 4 HD
Cambs&Beds: BBC ONE HD
Cambs&Beds: ITV HD
Cambs&Beds: BBCTHREE HD
Cambs&Beds: CBBC HD
Pleasewait.Thiswill take a few minutes. Scanning digital channels: UHF 22
ChannelsFound: 6
Cancelscan
MENU
Country
Primaryregion
Secondaryregion
Tertiaryregion
Chooseregion
UK
Any
Any
Any
OK
Multipleregionalvariantshave been detected.
Pleasechooseyour preferredregion.
EditChannelList
1.BBCONE Lon
2.BBCTWO
3.ITV
4.Channel4
5.Channel5
6.ITV2
7.BBCTHREE
9.BBCFOUR
10.ITV3
Cancelscan
MENU
DTV TV
DTV TV
DTV TV
DTV TV
DTV TV
DTV TV
DTV TV
DTV TV
DTV TV
OK Move Delete Editname Lock
Function
Back
RET.BACK
Navigate
Jump
0....9 P+
OK
P-
Filter
PageUP/DOWN
Watch
2. InserttwoAAAsizebatteries.Make
suretomatchthe(+)and(-)ends
ofthebatterieswiththe(+)and
(-)endsindicatedinthebattery
compartment.
3. Replacethebatterycompartment
cover,makesureitclicksintoplace
thenreplacethescrew..
LT-32C345_46(C)_QSG.indd 1 27/08/2015 14:47
123
456
0
LANG.
BACK EXIT
OK
MENU Q.MENU
//
V
7
VP
7
P
77 8 9
.,/@
777
RM-C3182
TV TV Stand Remote Control /
AAA Batteries x 2