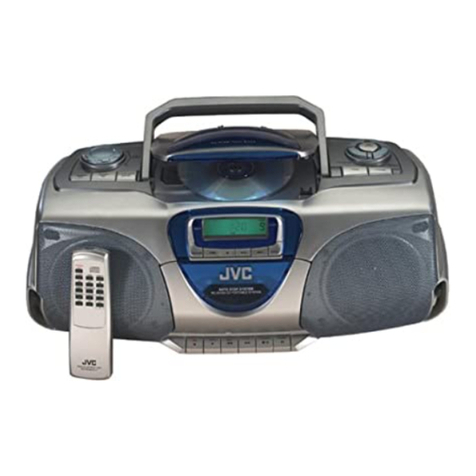
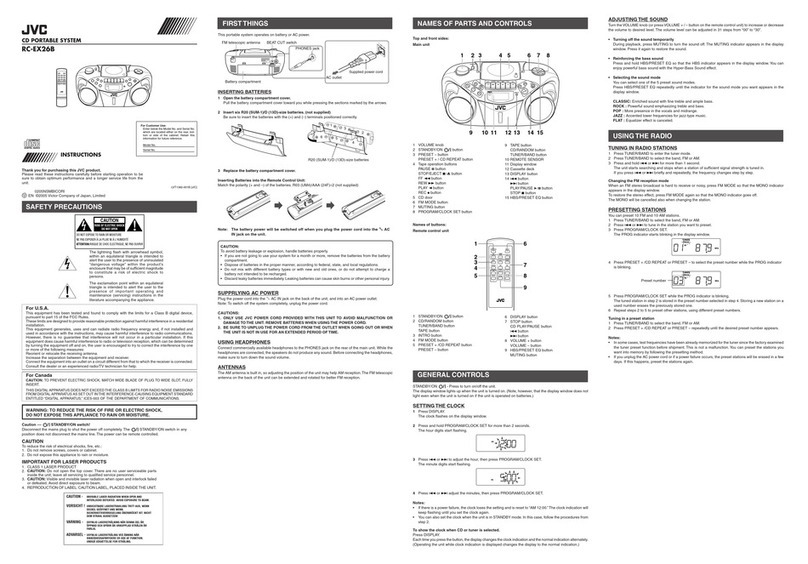
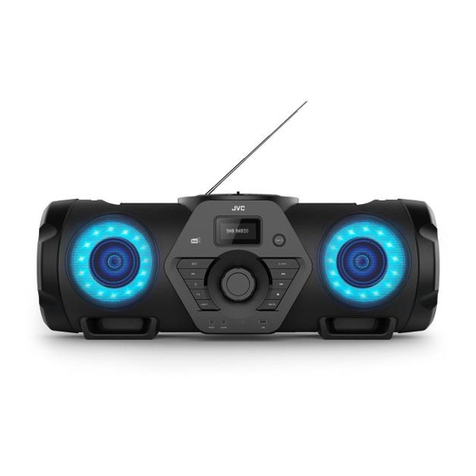
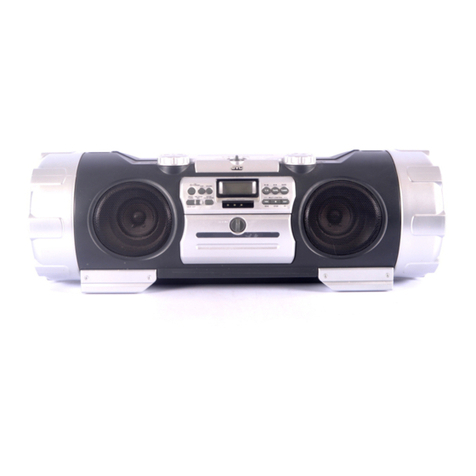
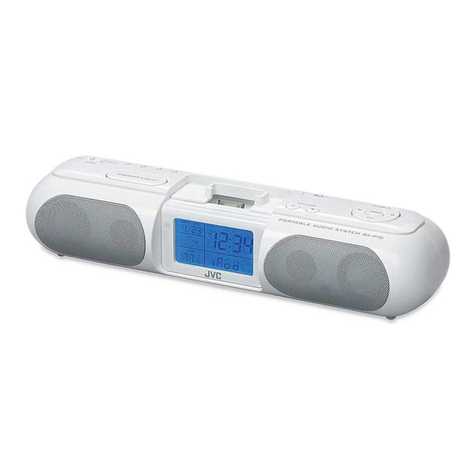
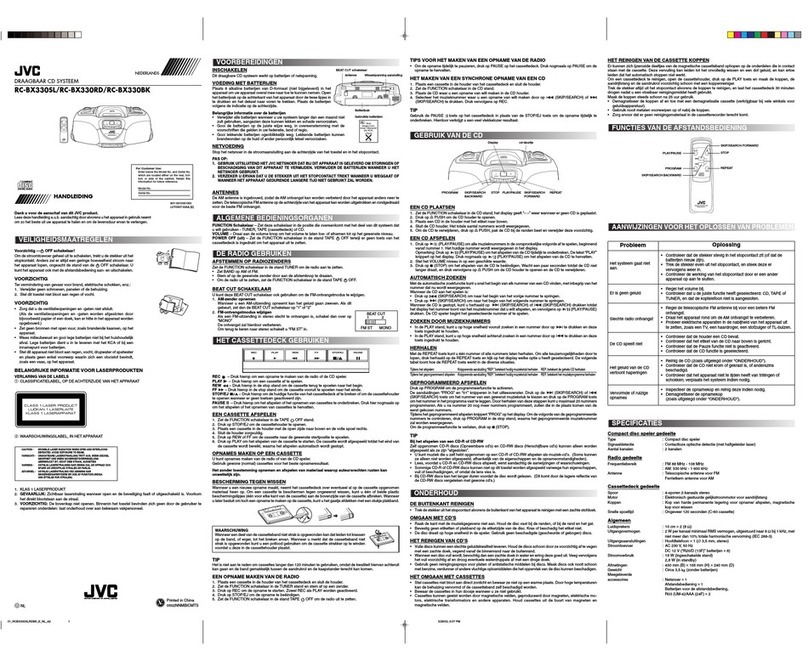
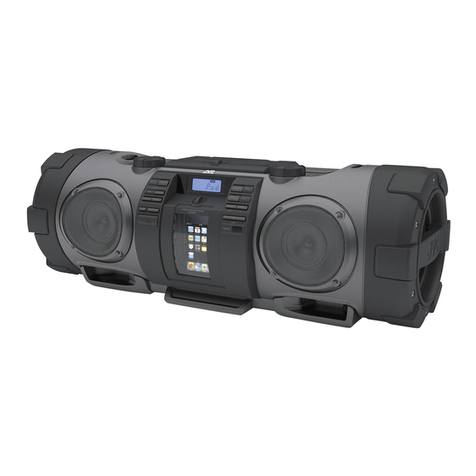
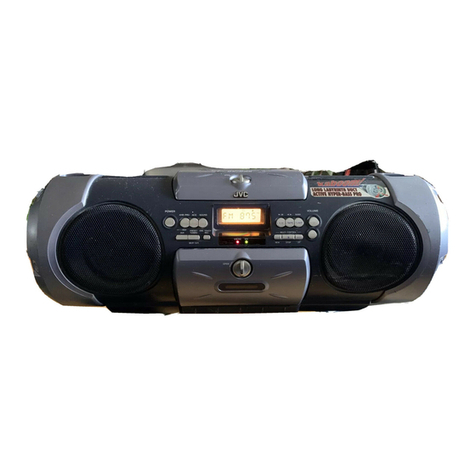
JVC RC-BZ6BUJ User manual

REMOTE CONTROL RM-SRCBZ6
For Customer Use:
Enter below the Model No. and Serial No.
which are located either on the rear, bot-
tom or side of the cabinet. Retain this
information for future reference.
Model No.
Serial No.
INSTRUCTIONS
MANUAL DE INSTRUCCIONES
MANUEL D’INSTRUCTIONS
LVT0490-001B
[J]
CD PORTABLE SYSTEM
SISTEMA PORTATIL CON CD
CHAINE PORTABLE A CD
RC-BZ6BU
Rc-BZ6BU-Cover(J).fm Page 1 Thursday, February 24, 2000 11:07 AM

G-1
Warnings, Cautions and Others
INFORMATION (For U.S.A)
This equipment has been tested and found to
comply with the limits for a Class B digital
device, pursuant to Part 15 of the FCC Rules.
These limits are designed to provide reasonable
protection against harmful interference in a resi-
dential installation. This equipment generates,
uses, and can radiate radio frequency energy
and, if not installed and used in accordance with
the instructions, may cause harmful interfer-
ence to radio communications. However, there
is no guarantee that interference will not occur
in a particular installation. If this equipment
does cause harmful interference to radio or tele-
vision reception, which can be determined by
turning the equipment off and on, the user is
encouraged to try to correct the interference by
one or more of the following measures:
– Reorient or relocate the receiving antenna.
– Increase the separation between the equip-
ment and receiver.
– Connect the equipment into an outlet on a
circuit different from that to which the
receiver is connected.
– Consult the dealer or an experienced radio/
TV technician for help.
IMPORTANT FOR LASER PRODUCTS
(For U.S.A only)
PRECAUTIONS
1 CLASS 1 LASER PRODUCT
2DANGER: Invisible laser radiation when open
and interlock falled or defeated. Avoid direct
exposure to beam.
3CAUTION: Do not open the rear cover. There
are no user serviceable parts inside the unit;
leave all servicing to qualified service person-
nel.
4CAUTION: The compact disc player uses invis-
ible laser radiation and is equipped with safety
switches which prevent the emission of radia-
tion when the CD tray is open. It is dangerous to
defeat the safety switches.
5CAUTION: Use of controls for adjustments and
the performance of procedures other than those
specified herein may result in exposure to haz-
ardous radiation.
WARNING:
TO REDUCE THE RISK OF FIRE OR
ELECTRIC SHOCK, DO NOT EXPOSE
THIS APPLIANCE TO RAIN OR MOIS-
TURE.
ADVERTENCIA:
PARA EVITAR RIESGOS DE INCEN-
DIOS O ELECTROCUCIONES, NO
EXPONGA ESTE APARATO A LA LLU-
VIA O A LA HUMEDAD.
AVERTISSEMENT:
POUR REDUIRE LES RISQUES
D’INCENDIE OU D’ELECTROCUTION,
NE PAS EXPOSER L’APPAREIL A LA
PLUIE OU A L’HUMIDITE.
CAUTION
RISK OF ELECTRIC
SHOCK
CAUTION “TO REDUCE THE RISK OF ELECTRIC
SHOCK DO NOT REMOVE COVER (OR BACK)
NO USER SERVICEABLE PARTS INSIDE
REFER SERVICING TO QULIFIED SERVICE PERSONNEL.”
The lightning flash with arrowhead symbol, within an equilat-
eral triangle is intended to alert the user to the presence of
uninsulated “dangerous voltage” within the product’s enclo-
sure that may be of sufficient magnitude to constitute a risk
of electric shock to persons.
The exclamation point within an equilateral triangle is
intended to alert the user to the presence of important oper-
ation and maintenance (servicing) instructions in the litera-
ture accompanying the appliance.
(For CANADA)
CAUTION
TO PREVENT ELECTRIC SHOCK, MATCH
WIDE BLADE OF PLUG TO WIDE SLOT,
FULLY INSERT.
(Pour le CANADA)
PRECAUTION
POUR EVITER LES CHOCS ELEC-
TRIQUES, INTRODUIRE LA LAME LA
PLUS LARGE DE LA
FICHEDANSLABORNE CORRESPON-
DANTE DE LA PRISE ET POUSSER
JUSQU’AU FOND.
Caution - POWER switch!
Disconnect the mains plug to shut the power off
completely. The POWER switch in any position does
not disconnect the mains line. The power can be
remote controlled.
Attention - Commutateur POWER!
Déconnecter la fiche de secteur poru couper com-
plètement le courant. Le commutateur POWER ne
coupe jamais complètement la ligne de secteur,
quelle que soit sa position. Le courant peut être télé-
commandé.
For Canada/pour le Canada
THIS DIGITAL APPARATUS DOES NOT EXCEED THE CLASS B LIMITS FOR
RADIO NOISE EMISSIONS FROM DIGITAL APPARATUS AS SET OUT IN THE
INTERRFERENCE-CAUSIING EQUIPMENT STANDARD ENTITLED “DIGITAL
APPARATUS,” ICES-003 OF THE DEPARTMENT OF COMMUNICATIONS.
CET APPAREIL NUMERIQUE RESPECTE LES LIMITES DE BRUITS RADIO-
ELECTRIQUES APPLICABLES AUX APPAREILS NUMERIQUES DE CLASSE B
PRESCRITES DANS LA NORME SUR LE MATAERIEL BROUILLEUR: “APPA-
REILS NUMERIQUES”, NMB-003 EDICTEE PAR LE MINISTRE DES COMMUNI-
CATIONS.
Rc-BZ6BU(J)-Warning.fm Page 1 Tuesday, February 22, 2000 4:49 PM
1
English
Thank you for purchasing the JVC CD Portable System.
We hope it will be a valued addition to your home as well as to your outdoor life, giving you years of enjoyment.
Be sure to read this instruction manual carefully before operating your new stereo system.
In it you will find all the information you need to set up and use the system.
If you have a query that is not answered by the manual, please contact your dealer.
Here are some of the things that make your System both powerful and simple to use.
■The controls and operations have been redesigned to make them very easy to use, freeing you to just enjoy the music.
• With JVC’s COMPU PLAY you can turn on the System and automatically start the Radio, CD Player, or Cas-
sette Deck with a single touch. (When power is supplied from AC)
■Sound effects; BEAT, POP, and CLEAR.
■The System incorporates AHB (Active Hyper Bass) PRO circuitry to faithfully reproduce low frequency sounds.
■A 30-station preset capability (15 FM and 15 AM) in addition to auto-seek and manual tuning.
■A user-friendly timer lets you wake or fall asleep to music.
• Basic information that is the same for many different functions - e.g. setting the volume - is given in the section ‘Common Operations’,
and not repeated under each function.
• The names of buttons/controls are written in all capital letters: e.g. TUNER BAND.
• System functions are written with an initial capital letter only: e.g. Normal Play.
Use the table of contents to look up specific information you require.
We’ve enjoyed making this manual for you, and hope it serves you in enjoying the many features built into your System.
■
1.When carrying the Unit
• Do not raise or lower the carrying handle of the Unit with the telescopic antenna extended in order to avoid damaging the antenna.
■
2.Where to place the Unit
• Select a place which is level, dry and neither too hot nor too cold (between 5°C/41°F and 35°C/95°F).
• Leave sufficient distance between the Unit and a TV.
• Do not use the Unit in a place subject to vibrations.
■
3.Power cord
• Do not handle the power cord with wet hands!
• Some power (2.8 W) is always consumed as long as the power cord is connected to the wall outlet.
• When unplugging the Unit from the wall outlet, always pull the plug, not the power cord.
■
4.Malfunctions, etc.
• There are no user serviceable parts inside. In case of system failure, unplug the power cord and consult your dealer.
• Do not insert any metallic object into the System.
■■Table of Contents
Features
How This Manual Is Organized
IMPORTANT CAUTIONS
Features ...............................................................................1
How This Manual Is Organized ..........................................1
IMPORTANT CAUTIONS ................................................1
Getting Started .........................................................2
Common Operations ................................................3
Using the Tuner ........................................................5
Using the CD Player .................................................6
Using the Cassette Deck (Listening to a Tape) ....7
Using the Cassette Deck (Recording) ...................8
Using the Timers ......................................................9
Care And Maintenance ......................................... 11
Troubleshooting .................................................... 12
Specifications ........................................................ 12
Rc-BZ6BU(J)-e.fm Page 1 Tuesday, February 22, 2000 4:47 PM

2
English
■■Getting Started
Check that you have all of the following items, which are supplied with the System.
Power Cord (1)
Remote Control (1)
If any of these items are missing, contact your dealer immediately.
How To Put Batteries In the Unit
1. Open the battery cover on the back of the Unit by pulling it toward you while pressing the tabs as shown by the arrows.
2. Put 8 batteries (not supplied) in the battery compartment in the order of “1” to “8” as shown.
3. Securely close the battery cover.
Note: When you operate your Unit on mains (AC) power, the power source switches automatically from batteries to AC. However, you should
remove the batteries when operating on AC power.
How To Put Batteries In the Remote Control
Match the polarity (+ and –) on the batteries with the + and – markings in the battery compartment.
CAUTION: Handle batteries properly.
To avoid battery leakage or explosion:
• Remove batteries when the Unit or the Remote Control will not be used for a long time.
• When you need to replace the batteries, replace batteries at the same time with new ones.
• Do not use an old battery with new ones.
• Do not use different types of batteries together.
• Do not try to recharge non-rechargeable batteries.
The Remote Control makes it easy to use many of the functions of the Unit from a distance of up to 7m (23 feet) away.
You need to point the Remote Control at the remote sensor on the Unit’s front panel.
Note: If you point the Remote Control from the slant direction, the above distance will be shortened.
Accessories
How To Put Batteries
Using the Remote Control
“R20/D (13F)” size batteries
R6P(SUM-3)/AA(15F) (not supplied)
Remote sensor
Rc-BZ6BU(J)-e.fm Page 2 Tuesday, February 22, 2000 4:47 PM

3
English
Firmly insert the AC power cord supplied with the System into the AC inlet on theback of the Unit.
The provided AC power cord for this unit has certain one-way direction connections to prevent elec-
tric shock. Refer to the illustration for correct connection.
CAUTIONS:
• ONLY USE THE JVC POWER CORD PROVIDED WITH THIS SYSTEM IN
ORDER TO AVOID MALFUNCTION OR DAMAGE TO THE SYSTEM.
• BE SURE TO UNPLUG THE POWER CORD FROM THE OUTLET WHEN
GOING OUT OR WHEN THE SYSTEM IS NOT IN USE FOR AN EXTEND-
ED PERIOD OF TIME.
Plug the AC power cord into the wall outlet, and your System is at your command!
JVC’s COMPU PLAY feature lets you control the most frequently used System functions with a single touch.
With One Touch Operation you can play a CD or tape, or turn on the radio, with a single press of the play button for that function. One Touch
Operation turns the power on for you, then starts the function you have specified. If the System is not ready (no CD in place), the System still
powers on so you can insert a CD.
How One Touch Operation works in each case is explained in the section dealing with that function.
The COMPU PLAY buttons are:
■■Common Operations
Connecting the AC Power Cord
COMPU PLAY (AC power only)
On the Unit
CD 6button
TUNER BAND button
PLAY (TAPE) button
On the Remote Control
CD 6button
TUNER BAND button
REMOTE CONTROL RM-SRCBZ6
PHONES BEAT CUT
NORM-123
...
SOUND AHB PRO
POWER POWER indicator
POWER
SOUND
STANDBY indicator
Display
VOLUME control
PHONES
VOLUME +, –
AHB PRO
Turning the Unit On ————————
Press the POWER button.
The POWER ON indicator (green) lights up and the display comes
on.
The Unit comes on ready to continue in the mode it was in when the
power was last turned off.
■For example, if the last thing you were doing was listening to a
CD, you are now ready to listen toa CD again. If you wish,you
can change to another source.
■If you were listening to the Tuner last, the Tuner comes on play-
ing the station it was last set to.
Note: When power is supplied from the batteries, the POWER but-
ton on the Remote Control does not work.
Turning the Unit Standby ——————
Press the POWER button again.
When operating on AC power:
The STANDBY indicator lights up and the display is blank.
■When in Standby mode, the Unit continues to a small amount of
power (2.8 W) to run the display.
■To switch off the Unit completely, unplug the AC power cord
from the AC outlet.
Turning the Power On and
Sandby
POWER
STANDBY
POWER ON
POWER
(AC)
or
POWER
STANDBY
POWER ON
POWER
(AC)
or
Rc-BZ6BU(J)-e.fm Page 3 Tuesday, February 22, 2000 4:47 PM

4
English
When power is supplied from the batteries:
When the Unit is turned off with the POWER button on the Unit
(the POWER button on the Remote Control is ineffective), the
Standby indicator goes out and the display is blank.
To switch off the Unit completely, remove the batteries from the
Unit.
You can adjust the volume level between 0 and 25 when the Unit is
turned on.
Turn the VOLUME control on the Unit to the right or left to in-
crease or decrease the volume level.
OR
Press the VOLUME + or – button on the Remote Control to increase
or decrease the volume level.
CAUTION: DO NOT turn on the Unit and/or start
playing any source without first setting the
VOLUME control to 0, as a sudden blast of sound
can damage your hearing, speakers and/or head-
phones.
For private listening
Connect a pair of headphones to the PHONES jack. No sound
comes out of the speakers.
Be sure to turn down the volume before connecting or putting on
headphones.
You can reinforce the bass sound to maintain rich, full bass at low
volume (you can use this effect only for playback):
To get the effect, press the AHB (Active Hyper Bass) PRO
button.
The “AHB PRO” indicator lights up on the display.
To cancel the effect, press the button again.
The “AHB PRO” indicator goes out.
The System has the following preset sound effects that give you
control over the way your music sounds, so you can tailor it to the
acoustics of your room and the quality of your source. Test the
sound effects out to hear how each affects the music. Note that the
effects work only during playback.
Sound effects
FLAT: No sound effect.
BEAT: Boosts low and high frequencies.
POP: Good for vocal music.
CLEAR: For a wide, dynamic stereo sound.
To get an effect, press the SOUND button repeatedly until the
Sound mode you want appears on the display.
Each time you press the SOUND button, the display changes as
shown below:
To cancel the effect, press the SOUND button until “FLAT” ap-
pears on the display.
In standby mode, both a digital and an analogue are displayed.
In Standby mode, both clocks are displayed on the display.
When the Unit is turned on, the analogue clock only is displayed.
To display both clocks while the Unit is turned on, press
the CLOCK/TIMER button on the Unit.
To return to the original display, press the CLOCK/TIMER
button on the Unit once again.
Note: You need to set the clock first in order for it to work. (See
“Setting the Clock” on page 9.)
Adjusting the Volume
Reinforcing the Bass Sound
(AHB PRO)
Sound Effects (SOUND)
FLATBEAT POP CLEAR
Showing the Time (DISPLAY)
Digital clock Analog clock
Rc-BZ6BU(J)-e.fm Page 4 Tuesday, February 22, 2000 4:47 PM

5
English
■■Using the Tuner
REMOTE CONTROL RM-SRCBZ6
Number keys
TUNER BAND
4
¢
JOG dial
PRESET
TUNER BAND
Band display, Frequency display, Preset channel
Analog clock
(Display when using the Tuner)
¢
4
You can listen to FM and AM stations. Stations can be tuned in
manually, automatically, or from preset memory storage.
One Touch Radio (AC power only)—
Just press the TUNER BAND button to turn on the Unit and start
playing the station you were last tuned to.
■You can also switch from any other sound source to theradio by
pressing the TUNER BAND button.
■
1.Press the TUNER BAND button.
The Band and Frequency you were last tuned to appear on the
display.
Each time you press the button, the band changes as follows:
■
2.Select a station using one of the following
methods.
■Manual Tuning
Press the 4or ¢button repeatedly to move from frequency
to frequency until you find the station you want.
OR
■Auto Tuning
If you press and hold the 4or ¢button for one second or
more, the frequency changes down, or up, automatically until a
station is found. OR
■Preset Tuning using the Unit (Possible only after pre-
setting stations)
Press the 7PRESET button to select the preset station.
After you have selected the preset number, the band and the fre-
quency are displayed.
• Example:Press the 7PRESET button until the preset
number 12 “P- 12” appears.
OR
■Preset Tuning using the Remote Control (Possible
only after presetting stations)
Select the station by entering its preset number on the number
keys.
• Example:For channel 5, press 5. For channel 15, press +10
then 5.
• The band and the frequency are displayed.
■
3.Turn the antenna for best reception.
• For FM broadcast, extend and turn the telescopic antenna.
• For AM broadcast, turn the Unit itself.
You can preset up to 15 FM stations and up to 15 AM stations into
memory using the Remote Control.
Auto Presetting (Using the Unit) ——
In each band, you can automatically preset FM-15, AM-15 stations.
Preset numbers will be allocated as stations are found, starting from
the station currently tuned to and moving up the frequency.
■
1.Select a band (AM or FM) by pressing the
TUNER BAND button.
■
2.Press the 7PRESET button for more than
two seconds.
■
3.Repeat steps 1-2 for the other band.
■If you want to change any of the auto preset stations, follow the
procedure for Manual Presetting.
CAUTION: If the Unit is unplugged or if a power
failure occurs, the preset stations will be erased
after approx. five minutes. If this happens, you
will need to preset the stations again.
Tuning In a Station
FM Auto FM MONO AM
or
Presetting Stations
For FM For AM
Rc-BZ6BU(J)-e.fm Page 5 Tuesday, February 22, 2000 4:47 PM

6
English
Manual Presetting (Using the Re-
mote Control) ———————————
■
1.Select a band by pressing the TUNER
BAND button.
■
2. Press the 4or ¢button to tune in a station.
■
3. Set the preset number by pressing and hold-
ing the number key on the Remote Control.
• To preset numbers 1 to 10: Press the number key and hold
down for 2 seconds.
• To preset numbers 11 to 15: Press and release the +10 but-
ton, then press the second number key (1 to 5) and hold
down for 2 seconds.
When the preset display blinks, the setting is stored and you can
release the number key. The display returns to the normal band
and frequency display.
Example: Preset number = 12
■
4.Repeat steps 1 - 3 for each station.
To change the preset stations, repeat the same steps as above.
The “STEREO” indicator lights up and you can hear stereo effects,
when a program is broadcast in stereo.
However if an FM stereo broadcast is hard to receive or noisy, you
can select Monaural mode. Reception improves, but you lose any
stereo effect.
Press the TUNER BAND button to select FM
MONO mode.
The “MONO” indicator lights up on the display.
To restore the stereo effect, press the TUNER BAND button
to select FM Auto mode. The “MONO” indicator goes out.
Number key(s) (hold for 2 seconds) To Change the FM
Reception Mode
■■Using the CD Player
REMOTE CONTROL RM-SRCBZ6
Number keys
REPEAT CD OPEN
CD holder
4
76
¢
JOG dial
Playing time, Preset number
Track number
Repeat indicator (Display when using the CD Player)
CD indicator/
Analog clock
¢
7
4
/8
You can use Normal or Repeat Play. Repeat Play can be set to repeat
all or just one of the tracks on the CD.
One Touch CD Player
(AC power only) ——————————
■Just press the CD 6button.
• The power is automatically turned on. If a CD is already
inserted, “PLAY” is displayed and the CD will start play-
ing from the first track.
• If no CD is inserted, “NO DISC” is displayed on the dis-
play and the CD Player remains in Stop mode.
■
1. Press the CD OPEN button on the Unit.
The CD holder opens.
■
2. Place a CD, with its label side up.
■
3. Gently close the CD holder by hand.
■
4. Press the CD 6button.
The first track of the CD begins playing.
The CD Player automatically stops when the last track of the CD has
finished playing.
• During playback, the track number being played and the play-
back time elapsed are shown on the display.
To stop playing the CD, press the 7button.
The following information for the CD is displayed.
To pause, press the CD 6.
To cancel pause, press the CD 6again. Play continues from
the point where it was paused.
Notes:
• You can place an 8 cm (3'') CD without an adaptor.
• If the CD cannot be read correctly (because it is scratched, for
example), “000000” appears on the display.
• Even if other function is selected during playing the CD, the
last track is memorized.
Normal Play
Playback time elapsed
Total number of tracks
Rc-BZ6BU(J)-e.fm Page 6 Tuesday, February 22, 2000 4:47 PM

7
English
Skip Play (4or ¢)————————
During playback, press the 4or ¢button to select the
track you want.
The selected track starts playing.
• Press and release the ¢button to go forward one track at a
time.
• Press and release the 4button to go back one track at a time.
Search Play ————————————
During playback, hold down the 4or ¢button.
This operation will fast forward/backwards the CD so you can
quickly find a particular passage in the track you are listening to (the
CD is played slowly for a moment and then the playback speed in-
creases).
Locating a Track directly with the
Remote Control ——————————
Using the number keys on the Remote Control allows you can go
directly to the beginning of any track.
During playback, enter the number of the track you want
to listen to using the number keys.
The selected track starts playing.
• Example: For track 5, press 5. For track 15, press +10 then 5.
For track 20, press +10, then 10. For track 32, press +10 three
times, then 2.
You can repeat one track or all the tracks on a CD.
During, or before playback, press the REPEAT button on
the Remote Control to select the Repeat mode.
The Repeat indicator changes with each press of the button, as
shown below.
=ALL =blank display =(back to the beginning)
: Repeats one track.
ALL : Repeats all the tracks.
To exit Repeat mode,press the REPEAT button until the Repeat
indicator on the display goes out.
Repeat Play
■■Using the Cassette Deck (Listening to a Tape)
PLAY (Display when using the Cassette Deck)
TAPE indicator/Analog clock
§
¡
1
8
The Cassette Deck allows you to play and record audio tapes
Notes:
• The Cassette Deck performs best with normal tapes (metal or
CrO2tapes are not recommended).
• The use of tapes longer than 120 minutes is not recommended,
since characteristic deterioration may occur and these tapes
easily jam in the pinch-roller and the capstan.
One Touch Play (AC power only) —
Just press the PLAY button on the Unit. The power is au-
tomatically turned on, “TAPE” is displayed, and if a tape is already
in the deck, it will start to play.
■
1.Press the §STOP/EJECT button to open
the cassette holder.
■
2.Insert a cassette tape with the exposed
side facing upward as shown below.
■
3.Close the holder gently until it clicks.
■
4.Press the PLAY button.
• The tape is played and then stops when it reaches the end.
• The TAPE indicator always turns to the right when the tape
is travelling.
To pause, press the 8PAUSE button on the Unit.
To cancel pause, press the 8PAUSE button again. Play contin-
ues from the point where it was paused.
To stop playing, press the §STOP/EJECT button.
To remove the tape, stop the tape, and press the §STOP/
EJECT button again.
Press the 1(fast-forward) button on the Unit to
fast-forward the tape.
Press the ¡(rewind) button on the Unit to re-
wind the tape.
• The Cassette Deck automatically stops when the tape reaches
its end.
Playback
TAPE
TAPE
+Forward direction
To Fast-Forward and Rewind a
Tape
TAPE
Rc-BZ6BU(J)-e.fm Page 7 Tuesday, February 22, 2000 4:47 PM

8
English
■■Using the Cassette Deck(Recording)
(Display when using the Cassette Deck)
REC indicator
TAPE indicator
Analogue clock
PLAY
§
¡
1
8¶
Things To Know Before You Start
Recording —————————————
■It should be noted that it may be unlawful to re-record
pre-recorded tapes, records, or discs without the con-
sent of the owner of copyright in the sound or video re-
cording, broadcast or cable program and in any literary,
dramatic, musical, or artistic work embodied therein.
■The correct recording level is automatically set by the ALC
(Automatic Level Control) function, and is not affected by the
VOLUME control on the Unit or by the use of sound effects.
■Two small tabs on the back of the cassette tape, one for side A
andonefor sideB, canberemoved topreventaccidental erasure
or recording.
■To record on a cassette with the tabs removed, you must cover
the holes with adhesive tape as shown.
Notes:
• Use normal tapes (not metal or CrO2tapes) for recording.
• At the start and end of cassette tapes, there is leader tape which
cannot be recorded onto.
• If a recorded tape you make has excessive noise or static, the
Unit may have been too close to a TV during the recording.
Either turn off the TV or increase the distance between the TV
and the Unit.
■
1.Press the §STOP/EJECT button to open
the cassette holder.
■
2. Insert a blank or erasable cassette tape
with the exposed side facing upward as
shown below and wind past the leader tape.
■
3.Close the holder gently until it clicks.
■
4.Tune in to a radio station.
■
5.Press the ¶REC button on the Unit.
The PLAY button is pressed at the same time, the “REC” indi-
cator lights up, and the Unit begins recording.
• The tape is recorded and then stops when it reaches the
end.
• The TAPE indicator always turns to the right when its tape
is travelling.
To pause the recording, press the 8PAUSE button on the Unit.
To cancel pause, press the 8PAUSE button again. Recording
continues from the point where it was paused.
To stop recording, press the §STOP/EJECT button.
To remove the tape, stop the tape, and press the §STOP/
EJECT button again to open the cassette holder.
Recording an AM station (BEAT CUT)
When recording an AM broadcast, beats may be produced which
are not heard when listening to the broadcast. If this happens, you
can use the BEAT CUT function.
Switch the BEAT CUT switch on
the back of the Unit from the
NORM-1 to 2 or 3.
Note: In regular use, the BEAT CUT switch
should be set to the NORM-1 position.
The CD Player can be started with the Cassette Deck for synchro-
nous recording and everything on the CD recorded onto the tape in
the order it is on the CD.
■
1. Insert a cassette tape in the Cassette
Deck and wind past the leader tape.
■
2. Load a CD.
■
3. Press the CD 6button.
■
4. Press the 7button to stop the CD.
• You can check the number of tracks and the total playback time
of the CD on the display. (See page 6.)
■
5. Select the Repeat mode of the CD if
desired.
To select the Repeat mode ( or ALL), press the RE-
PEAT button on the Remote Control.
■
6.Choose whether to have approx. four sec-
onds of blank tape between tracks.
If you want the blank section, skip this step.
If you do not want the blank section, perform the follow-
ing operation on the CD Player.
• Press the CD 6button twice.
Recording from the Radio
+Forward direction
Recording from the CD
Rc-BZ6BU(J)-e.fm Page 8 Tuesday, February 22, 2000 4:47 PM

9
English
■
7.Press the ¶REC button on the Unit.
The PLAY button is pressed at the same time, the “REC” indi-
cator lights up, and the synchronous recording begins.
• The tape is recorded and then stops when it reaches the end.
• To continue recording to the other side of the tape, perform the
following steps.
1. Reverse the cassette tape and wind past the leader tape.
2. Press the CD 6button and then press the ¶REC button.
Then, the synchronous recording begins from the beginning ofthe
last track that was stopped at the end of the first side of the tape.
To stop recording, press the §STOP/EJECT button.
To remove the tape, stop the tape, and press the §STOP/
EJECT button again to open the cassette holder.
Notes:
• If the CD reaches its end before the tape, the tape will continue
to run until stopped. Press §STOP/EJECT button to stop
the tape.
• During synchronous recording, the CD 6, 4, and ¢
buttons for the CD Player do not function.
• If you press the ¶REC button during playback the CD, record-
ing will start from the beginning of the track being played.
To Continue Recording to the Other
Side of the Tape———————————
When the tape reached its end and stopped, carry out the following
to continue recording to the other side of the tape.
1. Reverse the cassette tape and wind past the leader tape.
2. Press the ¶REC button again.
The synchronous recording will begin from the last track
that was stopped at the end of the first side of the tape.
■■Using the Timers
REMOTE CONTROL RM-SRCBZ6
SLEEP JOG dial
CLOCK/TIMER
(Display when using the Timer)
Timer indicator
Analog clock
The timers let you control listening functions automatically.
You can set the clock when the Unit is turned on.
Notes:
• The clock must be correctly set for the timers to work.
• When setting the timers, you have two minutes in which to
complete the procedure. Otherwise, the setting is cleared and
must be repeated from the beginning.
■
1.Press the CLOCK/TIMER button on the Unit
and hold for more than two seconds.
■
2.Turn the JOG dial until the “CLOCK” indica-
tor blinks on the display.
The display changes as follows:
■
3.Press the CLOCK/TIMER button.
The “CLOCK” indicator stays lit. The Unit’s current set time
blinks on the display.
■
4.Turn the JOG dial to set the time.
Turn the JOG dial to the right or left to increase or decrease the
time. Turning it rapidly advances or decreases the time faster.
■
5.Press the CLOCK/TIMER button.
Then wait for 5 seconds or press the CLOCK/TIMER button
once again to return to the original display. The selected time is
set and the seconds start counting from 0.
CAUTION: If there is a power failure, the clock
loses its setting after approx. five minutes. The
display shows “AM12:00” and the “CLOCK” indi-
cator blinks, and the clock must be reset.
Once you have set the Daily Timer. The timer will be activated at the
same time every day. You can cancel or re-activate the Daily Timer.
Note that the Timer indicator ( ) on the display shows that the
Daily Timer you have set is in effect.
Note: Perform each setting within 30 seconds. Otherwise, setting
is cleared and must be repeated from the beginning.
Setting the Clock
(For 2 seconds) (Display “CLOCK”) (Select the time)
(For 2 seconds) (“CLOCK”indicator) (Select the time)
Setting the Daily Timer
Rc-BZ6BU(J)-e.fm Page 9 Tuesday, February 22, 2000 4:47 PM

10
English
■
1. Press the POWER button to turn on the Unit.
■
2.Setting the ON time (Example: AM7:00)
1. Press the CLOCK/TIMER button on the Unit and hold for
more than 2 seconds.
2. Turn the JOG dial until the “ ” indicator blinks on the
display.
3. Press the CLOCK/TIMER button.
The current ON time blinks on the display.
4. Turn the JOG dial to set the time you want the Unit to come on.
Turn the JOG dial to the right or left to advance or decrease
the time.
Turning it rapidly advances or decreases the time faster.
■
3.Setting the OFF time (Example: AM10:15)
1. Press the CLOCK/TIMER button on the Unit.
The “ ” indicator lights up and the current OFF time
blinks on the display.
2. Turn the JOG dial to set the time you want the Unit to be
turned off.
■
4.Setting the volume level
1. Press the CLOCK/TIMER button on the Unit.
The Timer indicator is lit and the current volume setting
blinks on the display.
2. Turn the JOG dial to the right or left to increase or decrease
the volume level.
Volume setting range: 0 - 25 or –.
■
5.Press the CLOCK/TIMER button on the Unit.
The timer setting is completed and the display returns to the dis-
play before you set the timer. The Timer indicator stays lit.
■
6.Before turning off the Unit, prepare the
music source.
Tuner: Tune in to the desired station.
CD: Load a CD.
Tape: Load a prerecorded cassette tape.
■
7.Press the POWER button to turn off the
Unit.
To confirm the timer settings (ON/OFF time and volume
level),turn on the power, press the CLOCK/TIMERbutton for more
than 2 seconds, and press the CLOCK/TIMER button repeatedly.
To change the timer setting, repeat the setting procedure from
the beginning.
CAUTION: If the Unit is unplugged, or a power fail-
ure occurs, the timer setting will be lost after ap-
prox. five minutes. You will need to reset the
clock first, then the timer.
To cancel the Daily Timer, turn off the Timer indicator as follows:
■
1.Press the CLOCK/TIMER button on the Unit
for more than 2 seconds.
■
2.Turn the JOG dial until the “ ” indicator
blinks on the display.
■
3.Press the CLOCK/TIMER button .
The Timer indicator and the CLOCK indicator go out.
To re-activate the cancelled timer, repeat the same steps as for
setting the Daily Timer.
Use the Sleep Timer to turn the Unit off after a certain number of
minutes when it is playing. By setting the Sleep Timer, you can fall
asleep to music and know that your Unit will turn off by itself rather
than play all night.
■You can only set the Sleep Timer when the Unit is on and a
source is playing.
■
1. Play back a CD, tune in to a desired sta-
tion, or play back a tape.
■
2. Press the SLEEP button on the Remote
Control.
The “SLEEP” indicator lights up.
■
3. Set the length of time you want the source
to play before shutting off.
• Each time you press the SLEEP button, it changes the
number of minutes shown on the display in this sequence:
=30 =60 =90 =120 =Cancelled =(back to the begin-
ning)
The display will stop blinking after 5 seconds and return to the dis-
play before you set the Sleep Timer.
The Unit is now set to turn off after the number of minutes you have
set.
To Confirm the Sleep Time
When the SLEEP button is pressed, the remaining sleep time is dis-
played. After 5 seconds the original display returns.
To Cancel the SLEEP Timer Setting
Press the SLEEP button until the “SLEEP” indicator goes off on the
display.
Turning off the Unit also cancels the SLEEP Timer.
■If you are setting the Daily Timer, the Unit will be turned on at
the set time to wake you up.
Cancelling the Daily Timer
Setting the SLEEP Timer
(Hold for 2 seconds) (2 time)
Rc-BZ6BU(J)-e.fm Page 10 Tuesday, February 22, 2000 4:47 PM

11
English
■■Care And Maintenance
Handle your CDs carefully, and they will last a long time.
Compact Discs
• Only CDs bearing this mark can be used with
this Unit.
• Continued use of irregularly shaped CDs
(heart-shape, octagonal, etc.) can damage the
Unit.
• Remove the CD from its case by holding it at
the edges while pressing the case's center hole
lightly.
• Do not touch the shiny surface of the CD, or
bend the CD.
• Put the CD back in its case after use to prevent
warping.
• Be careful not to scratch the surface of the CD
when placing it back in the case.
• Avoid exposure to direct sunlight, temperature
extremes, and moisture.
• A dirty CD may not play correctly. If a CD is
dirty, wipe it with a soft cloth in a straight line
from center to edge.
CAUTION: Do not use any solvent (for example,
conventional record cleaner, spray thinner, ben-
zine, etc.) to clean a CD.
Moisture Condensation
Moisture may condense on the lens inside the
Unit in the following cases:
• After turning on heating in the room.
• In a damp room.
• If the Unit is brought directly from a cold to
a warm place.
Should this occur, the Unit may malfunction. If
this happens, leave it turned on for a few hours
until the moisture evaporates, unplug the AC
power cord, and then plug it in again.
General Notes
To ensure top performance, keep your CDs and the mechanism clean.
• Store CDs in their cases, and keep them in cabinets or on
shelves.
• Keep the CD holder closed when not in use.
Cassette Tapes
• If a tape is loose, it may get stretched, cut, or
caught in the cassette. Take up the slack by
inserting a pencil in one of the reels and rotat-
ing in the right direction.
• Do not touch the tape surface.
• Do not store the tape:
- In dusty places
- In direct sunlight or heat
- In damp areas
- On a TV or speaker
- Near a magnet
Cassette Deck
• If the heads, capstan, or pinch-roller in the Cassette Deck
become dirty, you may experience:
- Loss of sound quality
- Discontinuous sound
-Fading
- Incomplete erasure
- Difficulty recording
• Clean the heads, capstans, and pinch-rollers using a cotton
swab moistened with alcohol.
• If the heads become magnetized, the Unit will produce noise or
lose high frequency notes.
• To demagnetize the heads, turn off the Unit, and use a head
demagnetizer (available at electronics and record shops).
Erase head
Record/Play head
Capstan
Pinch roller
Rc-BZ6BU(J)-e.fm Page 11 Tuesday, February 22, 2000 4:47 PM

12
English
■■Troubleshooting
• If you have a problem with your System, check this list for a possible solution before calling for service.
• If you cannot solve the problem from the hints given here, or the System has been physically damaged, call a qualified person, such as your
dealer, for service.
Symptom Possible Cause Action
No sound is heard. • The power cord is disconnected.
• The batteries in the Unit have lost
their charge.
• Headphones are connected.
• Connect it firmly
• Replace the batteries.
• Disconnect the headphones.
Unable to record. Cassette record protect tabs are removed. Cover the holes on the back edge of the
cassette with tape.
Poor radio reception • The System is not properly posi-
tioned.
• The Antenna is not properly posi-
tioned.
• Turn the System to the best reception
position.
• Extend the Antenna and turn it to the
best reception position.
The CD skips. The CD is dirty or scratched. Clean or replace the CD.
The CD does not play. The CD is upside down. Put the CD in with the label side up.
Unable to operate the Remote Control. • The path between the Remote Con-
trol and the sensor on the Unit is
blocked.
• The batteries have lost their charge.
• Remove the obstruction.
• Replace the batteries.
Operations are disabled. The built-in microprocessor has mal-
functioned due to external electrical
interference.
Unplug the Unit then plug it back in.
The cassette door cannot be opened. During tape playing, the power cord was
unplugged. Plug in the power cord, press the
POWER button, and then press the §
STOP/EJECT button.
■■Specifications
Amplifier
Output Power 3.6 watts per channel, min. RMS at 3 ohms,
from 150 Hz to 15 kHz, with no more than
10% total harmonic distortion
Output Sensitivity/Impedance (1 kHz)
Phones 16 ohms - 1 kohm
0 - 20 mW/ch output into 32 ohms
Cassette Deck
Frequency Response 80 - 12,500 Hz
Wow and Flutter 0.15% (WRMS)
CD Player
Signal-To-Noise Ratio 90 dB
Wow And Flutter Unmeasurable
Tuner
FM Tuner
Tuning Range 87.5 - 108.0 MHz
AM Tuner
Tuning Range 530 - 1,710 kHz
Antenna Telescopic antenna for FM
Built-in ferrite core antenna for AM
Speakers 10 cm (3-15/16") ✕2, 3 ohms
General
Dimensions 438 ✕175.5 ✕261.5 mm (W/H/D)
(17-1/4 ✕6-29/32 ✕10-5/16 inches)
Mass Approx. 4.2 kg (9.3 lbs) (without batteries)
Accessories Power Cord (1)
Remote Control (RM-SRCBZ6) (1)
Power Specifications
Power Requirements AC 120 V ~ , 60 Hz
Power Consumption 18 watts (power on mode)
2.8 watts (in Standby mode)
Design and specifications are subject to change without notice.
Rc-BZ6BU(J)-e.fm Page 12 Tuesday, February 22, 2000 4:47 PM

1
Español
Gracias por comprar el reproductor de CD portátil JVC.
Esperamos que lo disfrute al máximo y durante muchos años, esté donde esté, tanto dentro como fuera de casa.
Asegúrese de leer detenidamente este manual de instrucciones antes de utilizar el sistema estéreo.
En él encontrará toda la información que precisa para configurar y utilizar el sistema.
Si tiene alguna duda no tratada en este manual, póngase en contacto con su distribuidor.
Aquí hay algunos de los aspectos que hacen que su sistema sea tan potente, así como fácil de utilizar.
■Los mandos y las funciones han sido rediseñados para que resulten muy fáciles de utilizar y pueda dedicarse sólo a
disfrutar de la música.
• Con el COMPU PLAY de JVC puede poner en marcha el sistema y escuchar automáticamente la radio, la plati-
na de casete o el reproductor de CD con un simple toque. (Con el equipo enchufado a la corriente)
■Efectos sonoros; BEAT, POP, y CLEAR.
■El sistema incorpora el circuito de graves AHB PRO (“Active Hyper Bass”) para reproducir con fidelidad los sonidos de frecuencias bajas.
■Posibilidad de presintonización de 30 emisoras de radio (15 FM y 15 AM) además de las funciones de autobúsqueda y sintonizaciónmanual.
■Un temporizador de fácil uso que le permite despertarse o dormirse con música.
• En la sección “Funciones comunes” se da información básica común a muchas funciones distintas - p.ej. el ajuste del volumen - sin
repetirla luego debajo de cada función.
• El nombre de los botones y mandos aparecen todos en mayúsculas: por ejemplo TUNER BAND.
• Funciones del sistema están escritas sólo con una inicial mayúscula: por ejemplo: Reproducción Normal.
Utilice el índice para buscar la información específica que está buscando.
Hemos disfrutado haciendo este manual para usted y esperamos que le sirva para sacar el máximo provecho de las funciones que posee su siste-
ma.
■
1.Cuando transporte el equipo
• No suba ni baje el asa del equipo con la antena telescópica extendida, ya que podría dañarla.
■
2.Dónde colocar el equipo
• Elija un lugar nivelado, seco y no demasiado frío ni demasiado caliente (que oscile entre los 5°C y los 35°C o los 41°F y los95°F).
• Deje espacio suficiente entre el equipo y un televisor.
• No utilice el equipo en un lugar sujeto a vibraciones.
■
3.Cable de alimentación eléctrica
• No manipule el cable de alimentación con las manos mojadas.
• Siempre se consume algo de corriente (2,8 W) mientras el equipo está enchufado a la corriente.
• Cuando desconecte el equipo de la toma de corriente, tire siempre del enchufe y no del cable.
■
4.Fallos, etc.
• No hay piezas reparables por el usuario en el interior. En caso de fallo del sistema, desconecte el cable principal de alimentación y con-
tacte con su distribuidor.
• No inserte ningún objeto metálico en el sistema.
■■Índice
Características
Cómo está organizado este manual
PRECAUCIONES IMPORTANTES
Características .....................................................................1
Cómo está organizado este manual .....................................1
PRECAUCIONES IMPORTANTES ..................................1
Cómo empezar .........................................................2
Funciones comunes ................................................3
Uso del sintonizador ................................................5
Uso del reproductor de CD .....................................6
Uso de la platina de casete (Escuchar una cinta)..7
Uso de la platina de casete (Grabación).................8
Uso de los temporizadores .................................... 9
Cuidado y mantenimiento .................................... 11
Solución de problemas ......................................... 12
Especificaciones ................................................... 12
Rc-BZ6BU(J)-sp.fm Page 1 Tuesday, February 22, 2000 4:49 PM
2
Español
■■Cómo empezar
Compruebe que tiene todos los elementos siguientes, suministrados con el sistema.
Cable de alimentación (1)
Mando a distancia (1)
Si faltara alguno de estos artículos, contacte de inmediato con su proveedor.
Cómo colocar las pilas en el mando a distancia
1. Abra la tapa del compartimento de las pilas (situado en la parte trasera de la unidad) apretando la pestaña como se muestra en la ilus-
tración y tirando de la tapa hacia usted.
2. Inserte 8 pilas (no incluidas) en el compartimento de las pilas en el orden de “1” a “8” como muestra la figura.
3. Vuelva a poner la tapa en su sitio hasta que quede bien sujeta.
Nota: Cuando utilice el equipo enchufado a la corriente alterna (CA), la fuente de alimentación cambiará automáticamente de pilas acorriente
alterna. Sin embargo, es preferible que le quite las pilas al equipo si lo va a utilizar enchufado a la corriente alterna (CA).
Cómo colocar pilas en el mando a distancia
Haga coincidir la polaridad de las pilas (+ y –) con las marcas + y – del compartimento de las pilas.
CUIDADO: Manipule las pilas adecuadamente.
Para evitar que las pilas pierdan o exploten:
• Saque las pilas cuando no vaya a utilizar el equipo o el mando a distancia durante mucho tiempo.
• Cuando necesite cambiar las pilas, cámbielas todas al mismo tiempo.
• No mezcle pilas nuevas y pilas viejas.
• No utilice al mismo tiempo pilas de distinto tipo.
• No intente recargar pilas no recargables.
El mando a distancia le facilita el uso de muchas funciones desde una distancia de hasta 7 m (23 pies).
Debe apuntar el mando a distancia hacia el sensor remoto en el panel frontal del sistema.
Nota: Si apunta con el mando a distancia en posición inclinada, la distancia indicada se reducirá.
Accesorios
Cómo colocar las pilas
Uso del mando a distancia
Pilas de tamaño “R20/D (13F)”
R6P(SUM-3)/AA(15F) (no incluidas)
Sensor remoto
Rc-BZ6BU(J)-sp.fm Page 2 Tuesday, February 22, 2000 4:49 PM
3
Español
Inserte el cable de alimentación principal CA (suministrado) firmemente en la toma CA de la parte
posterior del sistema.
Le cordon d'allmentetlon secteur fouml avec cet apparail ne peut étre branché qus dans un seul sens
afin d'avter tout nsque de choc électrique. Se rélérer á l'ilustration pour le racorder correctement.
CUIDADO:
• UTILICE SÓLO EL CABLE DE ALIMENTACIÓN PRINCIPAL DE JVC SUMI-
NISTRADO CON LA UNIDAD PARA EVITAR UN MAL FUNCIONAMIENTO
O DAÑOS EN EL SISTEMA.
• ASEGÚRESE DE DESENCHUFAR EL CABLE DE ALIMENTACIÓN PRINCIPAL CA DE LA TOMA DE CORRI-
ENTE CUANDO VAYA A SALIR O NO VAYA A UTILIZAR EL EQUIPO DURANTE CIERTO TIEMPO.
Conecte el cable de alimentación principal CA a la toma de corriente y su equipo estará bajo su control.
La función COMPU PLAY de JVC le permite controlar las funciones más frecuentes utilizadas en el sistema con un simple botón.
Con el funcionamiento mediante un sólo botón puede reproducir una cinta o un CD o encender la radio con sólo presionar el botón “PLAY”.
El funcionamiento mediante un sólo botón enciende la unidad para usted y luego comienza la función elegida por usted. Si el sistema no está
listo (no hay CD insertado), el sistema sigue encendido así que usted puede insertar un CD.
El funcionamiento mediante un sólo botón se explica en cada caso en la sección relacionada con esta función.
Los botones COMPU PLAY son:
■■Funciones comunes
Conexión del cable de alimentación principal CA
COMPU PLAY (Sólo corriente alterna)
En el equipo
Botón CD 6
Botón TUNER BAND (sintonizador/banda)
Botón PLAY (TAPE)
En el mando a distancia
Botón CD 6
Botón TUNER BAND (sintonizador/banda)
PHONES BEAT CUT
NORM-123
...
Indicador POWER
POWER
SOUND
Indicador STANDBY
AHB PRO
Pantalla
Mando VOLUME
REMOTE CONTROL RM-SRCBZ6
SOUND AHB PRO
POWER
PHONES
VOLUME +, –
Encendido del sistema———————
Presione el botón POWER.
El indicador de encendido POWER ON (de color verde) se en-
ciende y la pantalla se ilumina.
El sistema está listo para continuar en la función en que estaba cuan-
do se apagó por última vez.
■Por ejemplo, si lo último que hizo fue escuchar un CD, ahora es-
tará listo para continuar escuchando el CD. Si lo desea, puede
cambiar a otra fuente de audio.
■Si estaba escuchando la radio, al encender se pondrá en marcha
el sintonizador en la emisora que tenía al apagar.
Nota: Si el equipo funciona con la alimentación a pilas, el botón
POWER del mando a distancia no responderá.
Estado de espera del sistema ———
presione de nuevo el botón POWER.
Si el equipo está enchufado a la corriente:
EL indicador de espera STANDBY se enciende y la pantalla queda
en blanco.
Encendido y espera del equipo
POWER
STANDBY
POWER ON
POWER
(AC)
or
o
POWER
STANDBY
POWER ON
POWER
(AC)
or
o
Rc-BZ6BU(J)-sp.fm Page 3 Tuesday, February 22, 2000 4:49 PM
4
Español
■Aunque esté en modo de espera, el equipo consume algo de en-
ergía (2,8 W) para mantener la pantalla en funcionamiento.
■Para apagar el equipo completamente, desenchufe el cable de
alimentación de la toma de corriente.
Con el equipo alimentado a pilas
Cuando se apaga el equipo desde el botón POWER del panel frontal
(el botón POWER del mando a distancia no funciona) se apaga el
indicador de modo de espera (standby) y la pantalla se queda en
blanco.
Para apagar el equipo completamente, quítele las pilas.
Puede ajustar el nivel del volumen entre 0 y 25 con el equipo encen-
dido.
Gire el mando VOLUME hacia la derecha o hacia la izquierda para
aumentar o reducir el volumen. O
Presione el botón VOLUME + o – del mando a distancia para au-
mentar o reducir el nivel de volumen.
PRECAUCION: NO ENCIENDA el equipo ni
comience la reproducción de una fuente de audio
sin haber bajado antes el VOLUME a 0, ya que un
inicio repentino a muy alto volumen puede dañar
los oídos, los altavoces y/o los auriculares.
Para una audición privada.
Conecte unos auriculares a la salida rotulada PHONES. No se oye
nada por los altavoces.
Asegúrese de bajar el volumen antes de conectar o de ponerse los
auriculares.
Puede reforzar los sonidos graves para mantener un buen nivel de
graves incluso a bajo volumen (sólo podrá utilizar este efecto en la
reproducción):
Para lograr este efecto, presione el botón AHB (Active Hyper
Bass) PRO.
En la pantalla se encenderá el indicador “AHB PRO”.
Para cancelar el efecto, presione de nuevo el botón.
Se apagará el indicador “AHB PRO”.
El sistema cuenta con los efectos sonoros que se detallan a continu-
ación. Con ellos podrá controlar las características de la música para
ajustarlas a la acústica de la sala y a la calidad de la fuente de audio.
Pruebe todos los efectos sonoros para saber de qué manera afectan
a la música. Recuerde que los efectos sonoros sólo funcionan du-
rante la reproducción.
Efectos sonoros
FLAT: Sin efectos de sonido.
BEAT: Potencia las frecuencias bajas y altas.
POP: Ideal para piezas cantadas.
CLEAR: Para un sonido estéreo más amplio y dinámico.
Para activar un efecto sonoro, presione el botón SOUND has-
ta que aparezca en la pantalla el modo sonoro deseado.
Cada vez que presione el botón SOUND, la pantalla cambia en el
orden que se muestra a continuación:
Para cancelar el efecto sonoro, presione el botón SOUND
hasta que aparezca en la pantalla el mensaje “FLAT”.
En modo de espera (standby), la pantalla mostrará tanto el reloj dig-
ital como el analógico.
En modo de espera (standby), los dos relojes aparecen en pantalla.
Cuando el equipo se enciende, la pantalla sólo muestra el reloj
analógico.
Para ver en pantalla ambos relojes con la unidad en mar-
cha, presione el botón CLOCK/TIMER del equipo.
Para volver a la visualización anterior, presione de nuevo el
botón CLOCK/TIMER.
Nota: Para que el reloj funcione, tiene que ponerlo en hora antes.
(Consulte “Ajuste del reloj” en la página 9.)
Ajuste del volumen
Refuerzo de los sonidos
graves (AHB PRO)
Efectos sonoros (SOUND)
FLATBEAT POP CLEAR
Presentación de la hora (Pan-
talla)
Reloj digital Reloj analógico
Rc-BZ6BU(J)-sp.fm Page 4 Tuesday, February 22, 2000 4:49 PM

5
Español
■■Uso del sintonizador
Teclas numéricas
TUNER BAND
Mando giratorio JOG
Presentación de banda, presentación de frecuencia, canal de prefijado
Reloj analógico
(Mostrar al usar el sintonizador)
REMOTE CONTROL RM-SRCBZ6
4
¢
PRESET
TUNER BAND
¢
4
Podrá escuchar emisoras de FM y de AM. Las emisoras se pueden
sintonizar manualmente, automáticamente o desde las presintonías
almacenadas en la memoria.
Radio mediante un sólo botón (sólo
corriente alterna (CA))———————
Presione sólo el botón TUNER BAND para que el equipo se encien-
da y se escuche la emisora que tenía seleccionada cuando apagó el
equipo.
■También puede cambiar desde cualquier otra fuente de audio a
la radio con sólo pulsar el botón TUNER BAND.
■
1.Presione el botón TUNER BAND.
En la pantalla aparecerán la banda y la frecuencia sintonizadas
en último lugar.
Cada vez que presione el botón, la banda cambia del siguiente
modo:
■
2.Seleccione una emisora con uno de los
métodos siguientes.
■Sintonización manual
Presione el botón 4o el botón ¢varias veces para pasar de
frecuencia a frecuencia hasta encontrar la emisora deseada.
O
■Sintonización automática
Si pulsa y mantiene pulsado el botón 4o ¢ durante un se-
gundo o más, la frecuencia cambiará, hacia abajo o hacia arriba,
automáticamente hasta encontrar una emisora.
O
■Sintonización en el equipo de presintonías (sólo
cuando se hayan presintonizado emisoras)
Presione el botón 7PRESET para seleccionar la emisora sin-
tonizadaconanterioridad.Cuandohaya seleccionadoél número
de presintonía, la banda y la frecuencia correspondientes apare-
cerán en la pantalla.
Ejemplo: Presione el botón 7PRESET hasta que aparezca en
pantalla la presintonía nº 12 “P- 12”.
O
■Sintonice con el mando a distancia las presintonías
(sólo cuando se hayan presintonizado emisoras).
Seleccione la emisora introduciendo el número de presintonía
en las teclas numéricas.
• Ejemplo:Para el canal 5, presione el 5. Para el canal 15
presione +10 y luego el 5.
• Se visualizan la banda y la frecuencia.
■
3.Gire la antena para mejorar la recepción.
• Alargue y gire la antena telescópica para las emisoras FM.
• Para sintonizar emisoras AM basta con utilizar el equipo.
Se pueden presintonizar hasta 15 emisoras de FM y hasta 15 emiso-
ras de AM con el mando a distancia.
Presintonización automática (desde
el equipo) ——————————————
En cada banda puede prefijar automáticamente 15 emisoras FM y
15 AM. Los números presintonizados se distribuirán a medida que
se encuentren las emisoras empezando por la frecuencia en uso y
buscando hacia arriba.
■
1.Seleccione una banda (AM o FM) presio-
nando el botón TUNER BAND.
■
2.Presione el botón 7PRESET durante más
de dos segundos.
■
3.Repita los pasos 1 y 2 para la otra banda.
■Si desea realizar algún cambio en las emisoras presintonizadas
automáticamente, siga el procedimiento de presintonización
manual.
CUIDADO: si desenchufa el equipo o se va la cor-
riente, las presintonías se borrarán transcurridos
aproximadamente cinco minutos. Si sucediera,
necesitará volver a programar las emisoras.
Presintonización manual (con el
mando a distancia) —————————
Sintonización de una emisora
FM Auto FM MONO AM
or
o
Presintonía de emisoras
Para FM Para AM
Tecla(s) numérica(s) (pulsar durante 2
segundos)
Rc-BZ6BU(J)-sp.fm Page 5 Tuesday, February 22, 2000 4:49 PM
6
Español
■
1.Seleccione una banda con el botón TUNER
BAND.
■
2. Presione el botón 4o el botón ¢para sin-
tonizar una emisora.
■
3. Fije el número presintonizado pulsando y
manteniendo el botón del teclado numérico
en el mando a distancia.
• Para presintonizar los números del 1 al 10: Presione la tecla
numérica y manténgala pulsada durante 2 segundos.
• Para presintonizar los números del 11 al 15: Presione y
suelte el botón +10 y posteriormente la otra tecla (del 1 al
5) durante 2 segundos.
Cuando la presintonía se haya memorizado, la frecuencia par-
padeará en la pantalla y ya podrá soltar la tecla numérica. La
pantalla vuelve a mostrar la información habitual con la banda
y la frecuencia.
Ejemplo: presintonía número = 12
■
4.Repita los pasos 1 a 3 para cada emisora.
Para cambiar las emisoras presintonizadas, repita los mis-
mos pasos que arriba.
El indicador “STEREO” se enciende y se puede oír el efecto estéreo
cuando se recibe una emisora que emite en estéreo.
Sin embargo, si una emisora estéreo FM se recibe mal o con ruidos
puede seleccionar modo monoaural. La recepción mejora, aunque
se pierde el efecto estéreo.
Presione el botón TUNER BAND hasta selec-
cionar el modo FM MONO.
El indicador “MONO” se enciende en la pantalla.
Para volver a activar el efecto estéreo, presione el botón
TUNER BAND para seleccionar el modo “FM Auto”. Se apagará
el indicador “MONO”.
Para cambiar el Modo de re-
cepción FM
■■Uso del reproductor de CD
REMOTE CONTROL RM-SRCBZ6
4
76
¢
¢
7
4
/8
Teclas numéricas
REPEAT
CD OPEN Mando
giratorio
JOG
Tiempo de reproducción, número de presintonía
Número de pista
Indicador de función de repetición (Mostrar al usar el reproductor de CD)
Indicador de CD
Reloj analógico
Compartimento del CD
Puede utilizar la función Normal o Repetida. La Reproducción
Repetida se puede ajustar para que repita todas las pistas o sólo una
de las pistas del CD.
Reproducción de CD mediante un sólo
botón (Sólo corriente alterna (CA)) —
■Sólo tiene que presionar el botón 6del CD.
• El equipo se enciende automáticamente. Si ya hay un CD
insertado, en la pantalla aparecerá el mensaje “PLAY” y
comenzará la reproducción desde la primera pista.
• Si no se ha insertado un CD, en la pantalla aparecerá “NO
DISC” y el reproductor de CD permanece en el modo Stop.
■
1. Presione el botón CD OPEN del equipo.
El reproductor de CD se abre.
■
2. Coloque un CD con la cara impresa hacia
arriba.
■
3. Cierre suavemente el compartimento del
CD con la mano.
■
4. Presione el botón 6del CD.
Empieza la reproducción de la primera pista y el indicador de CD
gira hacia la derecha.
El reproductor de CD se parará automáticamente cuando acabe la
última pista del CD.
• Durante la reproducción, el número de pista que se está repro-
duciendo y el tiempo de reproducción transcurrido se muestran
en pantalla.
Para detener la reproducción del CD, presione el botón 7.
En la pantalla aparece la siguiente información sobre el CD.
Para hacer una pausa, presione el botón 6del CD.
Para cancelar la pausa, presione de nuevo el botón 6del CD.
Se reanuda la reproducción desde el punto en que se entró enla pausa.
Notas:
• Puede insertar un CD de 8 cm sin necesidad de adaptador.
• Si el CD no puede reproducirse correctamente (porque está
rayado, por ejemplo) en la pantalla aparecerá “000000”.
• La última pista se memoriza incluso si durante la reproducción
del CD ha seleccionado otra función.
Para saltar de una pista a otra
(4o ¢) ——————————————
Durante la reproducción, presione el botón 4o el botón
¢para seleccionar la pista que desee escuchar.
Empieza a oírse la pista seleccionada.
• Presione y suelte el botón ¢para avanzar una pista cada vez.
• Presione y suelte el botón 4para retroceder una pista cada vez.
Reproducción normal
Tiempo de reproducción transcurrido
Número total de pistas
Rc-BZ6BU(J)-sp.fm Page 6 Tuesday, February 22, 2000 4:49 PM
This manual suits for next models
1
Table of contents
Languages:
Other JVC Portable Stereo System manuals

JVC
JVC RD-T5BUC User manual

JVC
JVC RS-WP1WTB User manual

JVC
JVC RC-EZ35SB User manual

JVC
JVC RA-P11BKJ User manual

JVC
JVC KS-SB200 - Portable Speakers With Sirius Satellite Radio... User manual

JVC
JVC RC-EX36EV User manual

JVC
JVC RV-B55 BU User manual

JVC
JVC RC-EX16B User manual

JVC
JVC RC-EZ35SC User manual

JVC
JVC RA-P10J User manual

JVC
JVC RC-BX330BK User manual

JVC
JVC RD-D228H User manual

JVC
JVC RV-NB200BT User manual

JVC
JVC Kaboom ! Series RV-B99BK User manual

JVC
JVC RV-NB10B User manual

JVC
JVC CD Portable System RC-BX530SL System manual

JVC
JVC RC-EX26BB User manual

JVC
JVC RV-B55 GY/BU/LTD User manual

JVC
JVC RV-NB70B User manual

JVC
JVC RC-BZ6BU User manual