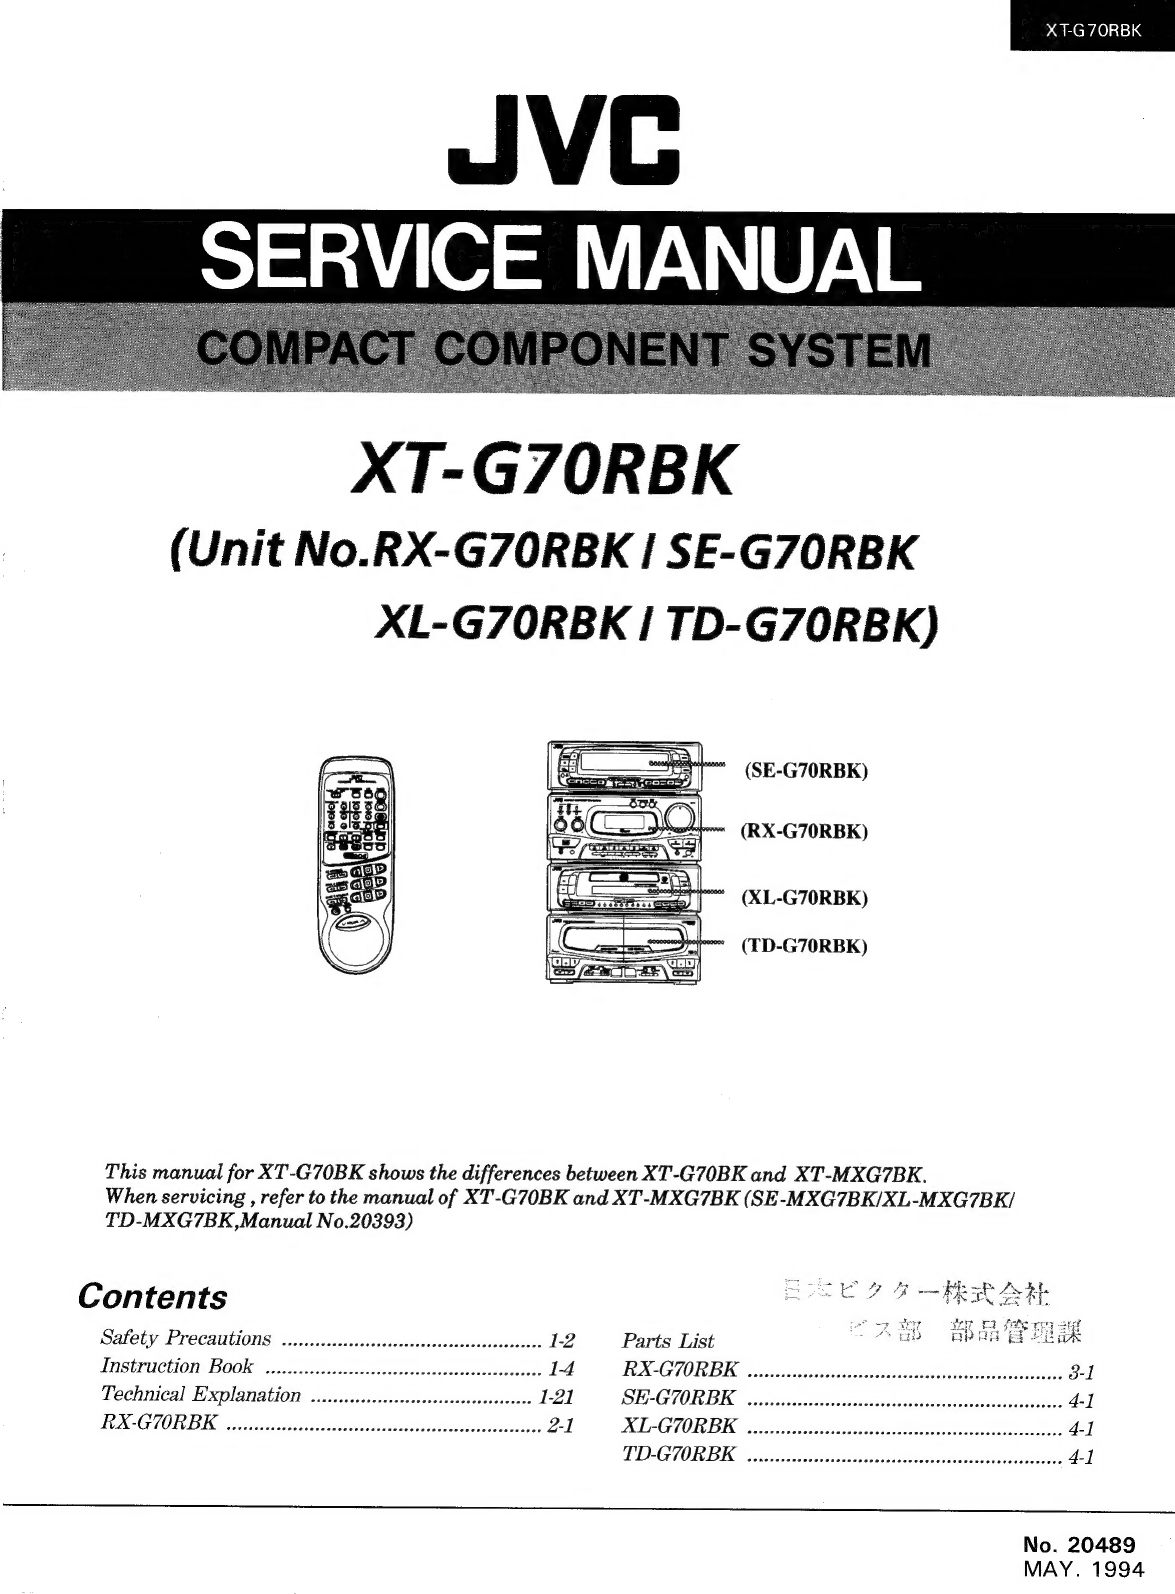
JVC XT-G70RBK User manual

YS
RCWAC)s1=1,¢
XT-G7ORBK
(Unit
No.RX-G70ORBK
|
SE-G70RBK
XL-G7ORBK
I
TD-G70RBK)
=
(SE-G70RBK)
Te
Qo
(RX-G70RBK)
5
2
——-:
(XL-G70RBK)
.
r=
(TD-G70RBK)
This
manual
for
XT-G70BK
shows
the
differences
between
XT-G70BK
and
XT-MXG7BK.
When
servicing
,
refer
to
the
manual
of
XT-G70BK
and
XT-MXG7BK
(SE-MXG7BK/XL-MXG7BK/
TD-MXG7BK,Manual
No.20393)
Contents
ROSE
Y&R
OE
Safety
Precautions
..icccccccccccsescsccssccssscessseserscesscess
12
Parts
List
ub
ARE
:
INSEPUCTION,
BOOK.
weis
bite
cticis
sss
vssoeea
isd
aeseriale?
1-4
XAG
OTIC
ss
aifav
taste
aschcbssidetindey
savelvinacdbiecaiece
3-1
Technical
Explanation
...ccccccseccesesssesesesessescsssrsees
1-2]
POPUP
OTIS
sit
fob
pitta
tad
asaa
eae
S
Vaess
ay
tyalsissawbotibe
4-]
TEMG
SOT
DIC
warainates
ts
isocaathsansibassaccdunlemecacaeesitotetts
2-1
XE-GORBE
weeeescssscsssessscssesceesssssesesassscssssocsererses
4-1
DDIAGIOLDNG
«os
crastrcsitcanal
nein
ists
vices
sass
4-1
No.
20489
MAY.
1994

XT-G7ORBK
Safety
Precautions
.
The
design
of
this
product
contains
special
hardware
and
many
circuits
and
components
specially
for
safety
purposes.
For
continued
protection,
no
changes
should
be
made
to
the
original
design
unless
authorized
in
writing
by
the
manufacturer.
Replacement
parts
must
be
identical
to
those
used
in
the
original
circuits.
Services
should
be
performed
by
qualified
personnel
only.
.
Alterations
of
the
design
or
circuitry
of
the
product
should
not
be
made.
Any
design
alterations
of
the
product
should
not
be
made.
Any
design
alterations
or
additions
will
void
the
manufacturer’s
warranty
and
will
further
relieve
the
manufacture
of
responsibility
for
personal
injury
or
property
damage
resulting
therefrom.
.
Many
electrical
and
mechanical
parts
in
the
products
have
special
safety-related
characteristics.
These
characteristics
are
often
not
evident
from
visual
inspection
nor
can
the
protection
afforded
by
them
necessarily
be
obtained
by
using
replacement
components
rated
for
higher
voltage,
wattage,
etc.
Replacement
parts
which
have
these
special
safety
characteristics
are
identified
in
the
Parts
List
of
Service
Manual.
Electrical
components
having
such
features
are
identified
by
shading
on
the
schematics
and
by
(A\)
on
the
Parts
List
in
the
Service
Manual.
The
use
of
a
substitute
repalcement
which
does
not
have
the
same
safety
characteristics
as
the
recommended
replacement
parts
shown
in
the
Parts
List
of
Service
Manual
may
create
shock,
fire,
or
other
hazards.
.
The
leads
in
the
products
are
routed
and
dressed
with
ties,
clamps,
tubings,
barriers
and
the
like
to
be
separated
from
live
parts,
high
temperature
parts,
moving
parts
and/or
sharp
edges
for
the
prevention
of
electric
shock
and
fire
hazard.
When
service
is
required,
the
original
lead
routing
and
dress
should
be
observed,
and
it
should
be
confirmed
that
they
have
been
returned
to
normal,
after
re-assembling.
.
Leakage
currnet
check
(Electrical
shock
hazard
testing)
After
re-assembling
the
product,
always
perform
an
isolation
check
on
the
exposed
metal
parts
of
the
product
(antenna
terminals,
knobs,
metal
cabinet,
screw
heads,
headphone
jack,
contorl
shafts,
etc.)
to
be
sure
the
product
is
safe
to
operate
without
danger
of
electrical
shock.
Do
not
use
a
line
isolation
transformer
during
this
check.
@
Plug
the
AC
line
cord
directly
into
the
AC
outlet.
Using
a
“Leakage
Current
Tester”,
measure
the
leakage
current
from
each
exposed
metal
parts
of
the
cabinet,
particularly
any
exposed
metal
part
having
a
return
path
to
the
chassis,
to
a
known
good
earth
ground.
Any
leakage
current
must
not
exceed
0.5mA
AC
(r.m.s.).
@
Alternate
check
method
Plug
the
AC
line
cord
directly
into
the
AC
outlet.
Use
an
AC
voltmeter
having,
1,000
ohms
per
volt
or
more
sensitivity
in
the
following
manner.
Connect
a
1,500Q
10
W
resistor
paralleled
by
a
0.15
uF
AC-type
capacitor
between
an
exposed
metal
part
and
a
known
good
earth
ground.
Measure
the
AC
voltage
across
the
resistor
with
the
AC
voltmeter.
Move
the
resistor
connection
to
each
exposed
metal
part,
particularly
any
exposed
metal
part
having
a
return
path
to
the
chassis,
and
meausre
the
AC
voltage
across
the
resistor.
Now,
reverse
the
plug
in
the
AC
outlet
and
AC
VOLTMETER
(Having
1000
ohms/volts,
or
more
sensitivity.)
Place
this
probe
on
repeat
each
measurement.
Any
voltage
each
exposed
measured
must
not
exceed
0.75
V
AC
(r.m.s.).
15002
10W
metal
part.
This
corresponds
to
0.5
mA
AC
(r.m.s.).
Good
earth
ground
Warning
.
This
equipment
has
been
designed
and
manufactured
to
meet
international
safety
standards.
.
It
is
the
legal
responsibility
of
the
repairer
to
ensure
that
these
safety
standards
are
maintained.
.
Repairs
must
be
made
in
accordance
with
the
relevant
safety
standards.
.
It
is
essential
that
safety
critical
components
are
replaced
by
approved
parts.
.
If
mains
voltage
selector
is
provided,
check
setting
for
local
voltage.
1-2
(No.
20489)

Important
for
Laser
Products
CLASS
1
LASER
PRODUCT
S.
2.
DANGER:
Invisible
laser
radiation
when
open
and
6
interlock
failed
or
defeated.
Avoid
direct
exposure
to
beam.
3.
CAUTION:
There
are
no
serviceable
parts
inside
the
Laser
Unit.
Do
not
disassemble
the
Laser
Unit.
Replace
7
the
complete
Laser
Unit
if
it
malfunctions.
4.
CAUTION
:
The
compact
disc
player
uses
invisible
laser
radiation
and
is
equipped
with
safety
switches
which
prevent
emission
of
radiation
when
the
drawer
is
open
and
the
safety
interlocks
have
failed
or
are
defeated.
It
is
dangerous
to
defeat
the
safety
switches.
VARNING
:
Osynlig
laserstralning
naér
denna
del
ar
,
XT-G7ORBK
CAUTION
:
If
safety
switches
malfunction,
the
laser
is
able
to
function.
CAUTION
:
Use
of
controls,
adjustments
or
performance
of
procedures
other
than
those
specified
herein
may
result
in
hazardous
radiation
exposure.
CAUTION
:
The
compact
disc
player
provides
a
laser
diode
of
wavelength
780-790nm
and
optical
output
power
typical
3mW
at
the
laser
diode.
ADVARSEL
:
Usynlig
laserstraling
ved
Abning,
nar
6ppnad
och
sp&rren
ar
urkopplad.
Betrakta
:
sikkerhedsafbrydere
er
ude
af
funktion.
Undga
ej
stralen.
:
udsgettelse
for
straling.
VARO
:
Avattaessa
ja
suojalukitus
ohitettaessa
olet
ADVARSEL
:
Usynlig
laserstraling
ved
Apning,
nar
alttiina
ndkymattémalle
lasersdteilylle.
Ala
sikkerhetsbryteren
er
avslott.
unnga
utsettelse
for
katso
séteeseen.
straling.
REPRODUCTION
AND
POSITION
OF
LABELS
WARNING
LABEL
(Except
for
the
U.S.
A.)
DANGER:
_
invisible
laser
radiation
when
open
and
interlock
failed
or
defeated.
AVOID
DIRECT
EXPOSURE
TO
BEAM.
(e)
ADVARSEL:
Usynling
laser-
straling
ved
&bning,
nar
sikkerhedsafbrydere
er
ude
lat
funktion.
Undgdudseet-
telse
for
straling.
(d)
CLASS
LASER
IVARNING:
Osynling
laser-
straling
nar
denna
del
&
Sppnad
och
sparren
ar
urkoppled.
Betrakta
ej
stélen.
(s)
VARO:
Avattaessa
ja
suo-
jalukitus
ohitettaessa
olet
alttiina
nakymattdmaile
lasers&teilylle.
Ala
katso
sateeseen.
(f)
1
PRODUCT
CLASSIFICATION
LABEL
(Except
for
the
U.S.
A.
and
Canada)
(No.
20489)
1-3

(68702
“ON)
PL
Easy
Guide
Getting
Started
Check
to
be
sure
you
have
all
of
the
following
items,
which
are
supplied
with
the
XT-G70RBK.
Batteries
Wire
Remote
Control
AM
(MW/LW)
Antenna
D>
FM
Wire
Antenna
FM
Feeder
Antenna
Antenna
Adaptor
(only
for
Germany)
(except
for
Germany)
{except
for
Germany)
Speaker
Control
cords
(for
connecting
the
panoramic
shifting
If
anything
is
missing,
contact
your
dealer
immediately.
speakers)
Putting
Batteries
in
the
Remote
Pay
close
attention
to
getting
the
batteries
in
correctly—we'
ve
made
it
very
easy,
just
match
the
+
and
~
marks
on
the
batteries
with
the
+
and
—
markings
in
the
battery
compartment.
CAUTION:
Observe
Proper
Handling
of
Batteries.
To
avoid
battery
leakage
or
explosion:
‘»
Remove
batteries
when
the
Remote
will
not
be
used
for
a
long
time.
*
When
you
need
to
replace
the
batteries,
replace
both
batteries
at
the
same
time
with
new
ones.
+
Don't
use
an
old
battery
together
with
a
new
one.
+
Don't
use
different
types
of
batteries
together.
Don't
expose
batteries
to
heat
or
flame,
What
you
can
do
from
the
Remote
Refer
to
the
pages
in
parentheses
for
details.
Tums
on
or
off
Panoramic
Surround
modes
(20)
TUNER/CD/PANORAMIC
SEA
selector
Turns
on
or
off
SEA
modes
(18)
Tums
on
the
Unit
or
put
it
in
STANDBY
mode
lects
thi
Selects
presets
channel,
CD
tracks,
or
Selects
the
sources
sound
effects
Selects
tuner
Changes
the
tuner
display
mode
(
14)
Operates
RDS
(
14)
Change
the
panoramic
shifting
speakers’
angle
(20)
Select
Mood
Menu
(21)
Operates
CD
Operates
deck
A
Operates
deckB
Sets
deck
B
into
recording
pause
mode
Reduces
the
volume
level
Change
the
volume
level
up
and
down
Page
3
CAUTION:
Connect
the
supplied
wire
as
illustrated
below;
otherwise,
the
Unit
may
malfunction.
ACHTUNG:
Den
mitgelieferten
Draht
wie
unten
gezeigt
anschlieBen;
andernfalls
kénnen
Fehifunktionen
aufireten.
ATTENTION:
Branchez
le
fil
fourni
comme
illustré
ci-dessous
sinon
l'appareil
risquerait
de
ne
pas
fonctionner
correctement.
WAARSCHWING:
Sluit
de
bijgeleverde
draad
aan
zoals
hieronder
aangegeven;
anders
kan
er
storing
in
de
werking
van
de
apparatuur
optreden.
PRECAUCION:
Conecte
el
cable
suministrado
como
se
muesta
en
la
ilustracién,
en
caso
contrairo,
Ja
unidad
podrfa
funcionar
mal.
ATTENZIONE:
Collegare
il
filo
in
dotazione
come
illustrato
sotto,
altrimenti
l’impianto
portrebbe
malfunzionare.
Layout-1/Layout-1I/Dispostion
1/Opstelling
L/Disposicién
1/Uscita
1
Graphic
Equalizer
Graphic
Equalizer
Egaliseur
graphique
Grafische
equalizer
Ecuatizador
grafico
Equatizzatore
grafico
Tuner/Amplifier
Tuner/Verstirker
Ampli-tuner
Tuner/versterker
Sintonizador/Amplificador
Sintoamplificatore
CD
Player
i
CD-Spieler
Supplied
wire
Mitgeliefertes
Kabel
peated
CD
Fil
fourni
i
nisin
aco
Bij
‘eproductor
ijgeteverde
draad
Sece
Cable
suministrado
Cabo
in
dotazione
Layout-2/Layout-2/Dispostion
2/Opstelling
2/Disposicién
2/Uscita
2
Supplied
wire
CD
Player
Mitgeliefertes
Kabel
CD-Spicler
Fil
fourni
Lecteur
CD
Bijgeleverde
draad
CD-speler
Cable
suministrado
Reproductor
de
CD
Cabo
in
dotazione
Lettore
CD
Graphic
Equalizer
Graphic
Equalizer
Egaliseur
graphique
Grafische
equalizer
Ecualizador
grafico
Equalizzatore
grafico
‘Tuner/Amplifier
Tuner/Verstarker
Ampli-tuner
Tuner/versterker
Sintonizador/Amplificador
Sintoamplificatore
AEHOLO-LX

G-L
(68707
“ON)
Connecting
the
System
Control
Cords
and
Connecting
Auxiliary
Equipment
*
Connect
the
components
as
illustrated.
Video
Disc
Player
VCR
,
DCC
or
MD
oo
nae
e
nave
anneeny
Turntable
iI
Saeceeceve
‘ “
*
:
: > : ‘
+
DCC:
Digital
Compact
Cassette
Deck
*MD
:
Mini-disc
Player
Graphic
Equalizer
Use
MM-cartridge
type
turntable
only.*
If
the
turntable
is
supplied
with
a
ground
wire,
connect
it
to
the
GND
rh
terminal
where
the
AM
loop
antenna
is
connected.
Tuner/Amplifier
Press
the
middle
of
the
connector
unit
until
it
clicks
into
the
male
connector.
any
other
equipment
3
To
disconnect
Pull
the
connector
out.
Never
pull
on
the
cords
themselves.
a
‘assette
Deck
all
When
connecting
the
components
with
the
system
control
cords,
make
sure
to
connect
the
terminals
having
the
same
names
like
“CONNECTOR-A”
or
“CONNECTOR-B”.
When
recording
an
AM
(MW/LW)
broadcasting
program,
beat
sounds
may
be
heard
and
recorded.
Set
the
BEAT
CUT
selector
to
either
1
or
2,
so
that
beat
sounds
will
not
be
heard
nor
recorded.
CAUTION:
First
make
all
connections
before
plugging
the
Unit
into
an
AC
power
outlet.
Page
4
Connecting
the
Front
Speakers
When
you
use
the
panoramic
shifting
speakers
SP-G70BK
For
each
speaker
connect
one
end
of
the
supplied
speaker
signal
cable
to
the
speaker
terminals
on
the
back
of
the
XT-G7ORBK
and
one
end
to
the
speaker.
On
the
back
panel:
1,
Open
each
terminal.
2.
Insert
the
end
of
the
speaker
signal
cable
as
shown
(be
sure
to
remove
the
insulation
at
the
end
of
each
wire
first).
3.
Close
the
terminals
to
clamp
the
speaker
signal
cables
firmly
in
place.
4.
Connect
the
black
(-),
red
(+),
blue
(—),
and
grey
(+)
terminals
of
the
right
side
speaker
to
the
black
(-),
red
(+),
blue
(--),
grey
(+)
terminals
marked
EX,
EJR
on
the
XT-G70RBK.
Connect
the
black
(—),
red
(+),
blue
(-),
and
grey
(+)
terminals
of
the
left
side
speaker
to
the
black
(-),
red
(+)
blue
(-),
grey
(+)
terminals
marked
FX,
EAL
on
the
XT-G70RBK.
5.
Connect
SPEAKERS
CONTROL
RIGHT
and
LEFT
with
the
supplied
speaker
control
cords.
speaker
signal
cable.
Speaker
contro!
Cord
LEFT
When
you
use
your
own
speakers
—
Conventional
speakers
1.
Connect
the
(+)
and
(—)
terminals
of
the
right
speaker
to
the
grey
(+)
and
blue
(--)
terminals
marked
EJR
on
the
XT-G70RBK.
2.
Connect
the
(+)
and
(—)
terminals
of
the
left
speaker
to
the
grey
(+)
and
blue
(—)
terminals
marked
EYL
on
the
XT-G70RBK.
Note:
You
can
use
only
FY
R
and
L
terminals
to
connect
conventional
speakers.
Page
5
HayOLD-LX

(68707
ON)
O-L
Connecting
the
FM
and
AM
(MW/LW)
Antennas
FM
Antenna
Connections
For
Germany
Lj
Using
the
Supplied
Wire
Antenna
The
FM
wire
antenna
supplied
can
be
connected
to
a
FM
75-ohm
COAXIAL
as
a
temporary
measure.
Using
the
Coaxial
Type
Connector
(Not
Supplied)
A
75-ohm
antenna
with coaxial
type
connector
(DIN
45332)
should
be
connected
to
the
FM
75-ohm
COAXIAL
terminal.
For
Other
Continental
Europe
(Using
the
Supplied
Feeder
Antenna
@
Attach
the
feeder
antenna
to
the
supplied
antenna
adaptor
as
shown
in
the
figure.
@
Connect
the
antenna
adaptor
to
the
FM
75-ohm
COAXIAL
terminal.
=
BUsing
FM
75-ohm
Antenna
Cable
(Not
Supplied)
@
Open
the
claws
at
both
sides
and
remove
the
cover.
.
Qu
t
@
Move
the
conductor
wire
from
[1
to[Z}
using
tweezers
or
similar
tool
(only
when
using
coaxial
cable).
@®
Fix
the
coaxial
cable
and
its
core.
@
Puton
the
cover.
®
Connect
the
supplied
antenna
adaptor
to
the
FM
75-ohm
COAXIAL
@ ®
terminal.
9
Note:
Make
sure
the
antenna
conductor
do
not
touch
any
other
terminals,
connecting
ay
cords
and
power
cord
on
the
system.
This
could
cause
poor
reception.
LA
a
<Ry>,,
For
Germany
Extend
the
supplied
wire
antenna
horizontally.
oil
=
For
other
continental
Europe
Unhold
the
loops
of
the
supplied
FM
feeder
antenna
FM
Feeder
Antenna
and
extend
them
as
shown.
Fasten
them
up
in
the
position
which
gives
you
the
best
FM
reception.
If
reception
is
poor,
connect
the
outside
antenna.
Before
attaching
a
75-ohm
coaxial
lead
(the
kind
with
a
round
wire
Outside
FM
Antenna
Wire
going
to
an
outside
antenna),
disconnect
the
supplied
antenna.
How
to
Strip
the
75-ohm
Coaxial
Cable
1.
Strip
back
the
outside
covering
of
the
75-ohm
coaxial
cable
to
expose
the
braided
metallic
mesh,
2.
Pull
the
mesh
back
over
the
cable
as
shown.
3.
Swip
the
insulation
about
10
mm
back from
the
central
wire.
4.
Attach
to
the
supplied
antenna
adaptor,
as
stiown
in
the
diagram
above.
1
2
|
Ae
3
|
one
C=
CiE—
|
AM
(MW/LW)
Antenna
Connections
|
AM
(MW/LW)
Antenna
Wire
If
reception
is
poor,
connect
an
outside
antenna.
AM
EXT
Snap
the
tabs
on
the
loop
ite
Tum
the
loop
until
you
have
into
the
stots
of
the
base
the
best
reception.
toassemble
the
AM(MW/
LW)
loop.
Gio
Ss
Bay
AM
(MW/LW)
Loop
Antenna
ANTENNA
Note:
Even
when
connecting
an
outside
AM
(MW/LW)
antenna,
keep
the
indoor
AM
(MW/LW)
loop
connected.
Page
6
Basic
Operations
Turning
on
the
Unit
1.
Press
the
POWER
ON/STANDBY
button
or
the
POWER
button
on
the
Remote.
The
LED
on
the
Unit
goes
off.
2.
Turn
down
the
VOLUME
control
completely.
On
the
Unit
From
the
Remote
a
vou
To
turn
the
Unit
in
STADBY
mode
Press
the
POWER
ON/
STANDBY
button
or
the
POWER
button
on
the
Remote
again.
The
LED
on
the
Unit
tights
up.
-
“
CAUTION:
The
small
amount
of
the
power
(16
watts)
is
always
constmed
even
in
STANDBY
mode.
To
switch
off
the
Unit
completely,
unplug
the
AC
power
cord
from
the
AC
outlet.
e
Playing
a
Tape
1,
Press
the
EJECT
button,
=)=
i
Note:
To
play
a
tape
recorded
with
Dolby
NR
,
see
page
11.
Fast
Winding
or
Rewinding
1.
Press
the
<#¢
or
BP
button.
fm
CAUTION:
—
The
use
of
C-120
(C-120
minutes
turn
around)
or
thinner
tape
is
not
recommended,
since
characteristic
deterioration
may
occur
and
these
tape
easily
jam
in
the
pinch
and
the
capstan.
Page
7
2.
Put
a
tape
in
deck
A
or
deck
B.
WgYOLD-1L
x
7
3.
Select
a
source,
start
playing
and
adjust
the
VOLUME
control.
On
the
Unit
STS
8
i
From
the
Remote
fy
Each
time
you
press
the
SOURCE
button,
the
source
changes
as
follows:
[pTAPECSTUNER
AUSF
HON
VIDEO*-VCR/DCC/MD+-CD.
3.
Press
the »
(or
<@
)
button.
ey
by
To
stop
playing
Press
the
@
button.
Sie
fm
To
stop
fast
winding
or
rewinding
Press
the
@
button.

(68702
ON)
lL
Receiving
Radio
Broadcasts
1.
Press
the
FM
or
AM
(MW/LW)
2.
Press
the
TUNING/TIMER/DIMMER/CHARACTER
<
or
button
to
select
the
band,
or
press
TUNER
on
the
Remote.
On
the
Unit
From
the
Remote
When
you
press
the
TUNER
button,
the
fast
received
station
is
tuned
in.
Playing
CDs
1.
Press
the
&
OPEN/CLOSE
button
.
2.
Load
a
CD
on
the
tray.
,
|
Bre
Note:
When
using
an
8
cm
CD,
place
it
on
the
inner
circle
of
the
tray.
Recording
onto
a
Tape
1.
Press
the
REC/REC
MUTE
0
button
2.
Start
playing
the
source
you
want
—
and
the
0%
button
simultaneously.
CD,
radio,
etc.
The
LED
next
to
them
lights
up
and
the
Unit
is
in
recording
pause.
On
the
Unit
a
From
the
Remote
Note:
To
record
a
tape
with
Dolby
NR
|
see
page
24.
>
button
to
tune
in
the
desired
stations,
When
the
Unit
tunes
in
the
station,
The
TUNED
indicator
lights
up
on
the
display.
3.
Press
the
PLAY/PAUSE
b/
if
button.
The
CD
starts
playing.
To
stop
playing
Press
the
STOP/CLEAR
@
button.
3.
Press
the
®
(
or
<)
button,
depend-
ing
on
which
side
of
the
tape
you
want
record
on,
to
start
recording.
GIy,
a
The
LED
onthe
<€(or®)
button
slowly
blinks
to
indicate
recording
is
now
on.
To
stop
recording
Press
the
@
button.
Page
8
Common
Operations
The
following
operations
are
commonly
used
when
you
play
any
sound
source.
©
|
Two
Bass
NORMAL
()
BALANCE
Page
9
Adjusting
the
Volume
To
increase
the
volume,
turn
the
VOLUME
control
clockwise.
To
decrease
the
volume,
turn
it
counterclockwise.
CAUTION:
Always
set
the
VOLUME
control
to
MIN
before
starting
any
source
such
as
the
radio,
tape,
or
CD
player.
Ifthe
VOLUME
control
is
left
turned
up,
the
sudden
blast
of
sound
energy
can
permanently
damage
your
hearing
and/
or
ruin
your
speakers.
Adjusting
the
Bass
Sound
You
can
reduce
or
increase
the
amount
of
bass
reinforcement
by
adjusting
the
TWIN
BASS
control.
When
set
to
the
NORMAL
position,
no
bass
reinforcement
is
applied.
Adjusting
the
Speaker
Output
Balance
If
the
sounds
you
hear
from
the
right
and
left
speakers
are
unequal,
you
can
adjust
the
speaker
output
balance
with
the
BALANCE
control.
High-fidelity
Playback
When
you
press
the
SOURCE
DIRECT
button,
the
LED
on
the
button
comes
on
and
“DIRECT
ON”
appears
on
the
graphic
equalizer
display.
By
bypassing
the
sound
effect
circuits
like
SEA
programs,
the
path
of
the
audio
signal
will
be
shortened,
giving
a
higher
fidelity
sound.
Dimmer
Function
(Tuner/Amplifier)
With
this
function
you
can
control
the
display
brightness
while
the
Unit
is
turned
off.
Press
the
TUNING/TIMER/DIMMER/CHARACTER
<
or
>
button.
<:
makes
the
display
dimmer
while
the
Unit
is
off.
>:
makes
the
display
brighter
while
the
Unit
is
off.
Listening
with
Headphones
A
standard
pair
of
headphones
can
be
connected
at
the
PHONES
jack
on
the
front
panel.
Be
sure
to
turn
down
the
volume
before
connecting
or
putting
on
headphones,
as
high
volume
can
damage
both
the
headphones
and
your
hearing.
When
you
connect
the
headphones,
no
sound
comes
out
from
the
speakers.
MadOZD-LX

(68707
ON)
8-L
Features
Guide
Playing
Tapes
If
there
are
4-second
or
longer
blanks
between
tracks
on
recorded
tapes,
you
can
use
Music
Scan
to
find
the
beginning
of
a
track.
For
simple
playback
procedures,
see
page
7.
Current
Song
——
>
deck
A
c>
|
~
[
deck
8
<
|
deck
A<J
>
[
deck
8
>
|
Music
Scan
(Finding
Songs)
To
find
the
beginning
of
a
music
track
use
Music
Scan.
Music
Scan
searches
for
blank
portions
that
usually
separates
tracks,
then
plays
the
next
track.
Finding
the
Beginning
of
the
Current
Song
Press
the
«#4
or
>>
button
during
play.
Make
sure
you
press
the
«#4
or
®
button
in
the
opposite
direction
to
tape
play.
Searching
stops
automatically
at
the
beginning
of
the
current
track,
and
the
current
track
starts
automatically.
Finding
the
Beginning
of
the
Next
Song
Press
the
<4
or
®&
button
during
play.
Make
sure
you
press
the
«#¢
or
>
button
in
the
same
direction
as
tape
play.
Searching
stops
automatically
at
the
beginning
of
the
next
track,
and
the
next
track
starts
automatically.
Notes
+
Music
Scan
works
by
detecting
a
4-second
blank
at
the
beginning
of
each
selection,
so
it
won't
work
well
if
your
tape has:
—
No
blank
at
the
beginning
of
a
track.
~
Noise
(often
caused
by
much
used
or
poor
quality
dubbing)
which
fills
the
blank
with.
—
Long
very
soft
passages
or
pauses
in
a
track.
Music
Scan
will
detect
these
instead
of
the
4-
second
blanks.
«
Music
Scan
only
works
on
one
tape
at
a
time.
~
Ifyou
use
Music
Scan
on
deck
A
during
recording
on
deck
B,
deck
B
enters
recording
pause
mode.
—
Ifyou
start
recording
on
deck
B
while
Music
Scan
is
used
on
deck
A,
Music
Scan
is
stopped.
Using
the
REVERSE
MODE
Selector
When
you
play
tapes,
you
can
select
the
side
to
be
played
by
using
the
REVERSE
MODE
selector.
x
:
only
one
side
is
played
2D
_:
both
sides
are
played
<>
:
both
sides
are
played
repeatedly.
When
tapes
are
in
both
decks,
continuous
play
follows
the
sequence
diagramed
at
the
left
regardless
where
playback
starts.
The
sequence
is
repeated
endlessly.
Page
10
Page
IE
DOLBY
NA
FOB
Skipping
Blank
Portions
during
Playback
If
there
is
a
blank
portion
of
10
seconds
or
longer
on
a
tape,
the
Unit
will
automatically
fast
forward,
and
skip
the
blank
portion,
then
play
back
the
next
track.
Press
the
BLANK
SKIP
button
before
or
during
play.
The
LED
next
to
it
lights
up.
To
cancel
the
blank
skip
playback
Press
the
BLANK
SKIP
button
again.
The
LED
next
to
it
goes
off.
Using
the
DOLBY
NR
*
Selector
To
play
a
tape
recorded
with
Dolby
NR,
set
the
DOLBY
NR
selector
to
the
same
NR
system
(B
or
C)
as
was
used
when
recording.
To
play
a
tape
recorded
without
Dolby
NR,
set
the
DOLBY
NR
selector
to
the
OFF
position.
If
a
tape
is
recorded
with
the
Dolby
NR
system,
playing
it
back
with
the
same
Dolby
NR
system
will
reduce
tape
hiss
and
improve
the
clarity
of
the
sound.
*
Dolby
noise
reduction
manufactured
under
license
from
Dolby
Laboratories
Licensing
Corporation,
“DOLBY”
and
the
double-D
symbol
are
trademarks
of
Dolby
Laboratories
Licensing
Corporation.
MaWOL
D-LX

6-L
(68702
ON)
Receiving
Radio
Broadcasts
4
ey
SoemceR
a
You
can
browse
through
ail
the
stations
or
use
the
preset
function
to
go
immediately
to
a
particular
station.
For
tuning
stations
manually,
see
page
8.
Storing
Preset
Stations
Once
a
station
is
assigned
to
a
channel
number,
the
station
can
be
quickly
tuned
either
from
the
Remote
using
the
10
keys
or
from
the
XT-G70RBK
itself
using
the
PRESET/PTY*TP
<
or
>
button
to
call
up
the
channel
number.
To
Preset
Radio
Stations
1,
Tune
in
the
station
you
want
to
preset
(see
page
8).
2.
Press
the
MEMORY
button,
On
the
Tuner/Amplifier
display,
the
MEMORY
indicator
blinks
for
5
seconds.
3.
Select
a
channel
number
by
pressing
the
PRESET/PTY-TP
<
or
>
button
while
the
MEMORY
indicator
is
blinking.
4,
Press
the
MEMORY
button
again
and
the
station
is
assigned
to
the
channel
number
showing
on
the
display.
You
can
preset
a
total
of
40
stations,
either
AM
(MW/LW)
and
FM
stations,
or
a
mixture
of
both,
at
random.
To
cancel
a
stored
preset
station
Storing
a
new
station
on
a
used
number
erases
the
previously
stored
one.
CAUTION:
Preset
stations
may
be
erased
when
power
is
cut
off
to
the
Unit,
as
when
it
is
unplugged
from
the
AC
outlet
or
a
power
failure
occurs.
If
the
preset
stations
are
lost,
simply
set
the
stations
again using
the
above
procedure.
Tuning
in
a
Preset
Station
The
Remote
is
very
useful
for
this
because
you
can
select
channels
by
number
using
the
10
keys.
PANORAMIC
TUNER
CD
/SEA
1.
Set
the
TUNER/CD/PANORAMIC
SEA
selector
to
the
TUNER
position.
—
2,
Press
the
+10
button
and
10
keys
to
select
the
channel
you
want.
2
Example:
For
preset
number
5,
press
5.
For
preset
number
15,
press
+10
then
5.
For
preset
number
20,
press
+10
then
10.
DANCE
CLUB
HALL
ROCK/A
=
POPS/A
©
You
can
also
tune
in
the
stations
by
using
the
PRESET/PT
Y*TP
<
or
>
button
on
the
Unit.
Each
CINEMA:
|:
CHURCH
|
CLABSION
>
“CANO.
time
you
press
the
PRESET/PTYTP
<
or
>
button,
the
channel
increases
or
decreases
by
one.
If
«)
8
you
hold
the
button
down,
the
stations
will
cycle
one
after
another.
Page
12
Selecting
the
FM
Tuning
Mode
When
an
FM
stereo
broadcast
is
hard
fo
receive
or
noisy:
Press
the
FM
MODE/MUTE
button
on
the
main
Unit
while
listening
to
the
radio
so
that
reception
improves,
although
you
lose
the
stereo
effect.
In
this
state,
you
will
hear
noise
while
tuning
into
the
stations.
The
MONO
indicator
lights
up
on
the
display.
To
restore
stereo
effect
Press
the
FM
MODE/MUTE
button
again
so
that
the
AUTO
indicator
appears
on
the
display,
In
this
state,
when
a
program
is
broadcast
in
stereo,
you
will
hear
stereo
sound;
when
in
monaural,
you
will
hear
monaural
sounds.
In
this
state,
you
won't
hear
noise
while
tuning
into
stations.
Using
the
Tuner
Entry
Function
When
the
CD
or
tape
playback
ends,
the
source
will
automatically
switch
to
the
radio.
Your
listening
enjoyment will
thereby
not
be
interrupted.
So
with
Tuner
Entry
on,
the
Unit
automatically
shifts
to
the
most
recently
tuned
radio
station
when
a
tape
or
CD
comes
to
an
end.
Press
the
TUNER
ENTRY
button.
The
LED
next
to
it
lights
up.
To
cance}
the
Tuner
Entry
function
Press
the
TUNER
ENTRY
button
again,
The
LED
next
to
it
goes
off.
Note
In
five
situations
even
if
the
Tuner
Entry
function
is
on,
it
will
not
take
effect,
and
the
source
will
not
switch
to
the
radio
after
the
CD
or
tape
playback
ends.
1)
When
you
intentionally
stop
the
CD
or
tape
deck
by
pressing
the
STOP/CLEAR
@
button
on
the
CD
player
og
the
Mf
bution
on
the
tape
deck.
2)
When
any
timer
activated
CD
or
tape
stops
playing.
3)
When
you
set
the
REVERSE
MODE
selector
for
tape
play
to
the
GD
position.
4)
When
you
use
Repeat
Play
for
CD.
5)
When
you
set
Auto
Power
Off.
ayOLD-LX

(68702
‘ON)
OL-L
cy
Receiving
FM
Stations
with
RDS
(Radio
Data
System)
RDS
is
a
broadcasting
service
which
a
growing
number
of
FM
stations
are
now
providing.
It
allows
these
FM
stations
to
send
additional
signals
along
with
their
regular
program
signals.
For
example,
the
stations
send
their
station
names,
and
information
about
what
type
of
program
they
broadcast,
such
as
sports
or
music,
etc.
When
tuned
to
an
FM
station
which
provide
the
RDS
service,
the
RDS
indicator
lights
up,
the
station
frequency
(and
then
the
station
name
if
sent)
is
displayed.
The
TP
(Traffic
Program)
indicator
lights
up
on
the
display
when
the
received
broadcast
carries
traffic
announcements,
and
the
TA
(Traffic
Announcement)
indicator
lights
up
while
a
traffic
announcement
is
being
received.
What
Information
Can
RDS
Provide
With
the
XT-G70RBK,
you
can
watch
three
types
of
RDS
service
as
well
as
two
other
indications
on
the
display.
To
show
them
on
the
display,
press
the
DISPLAY
MODE
button
while
listening
to
the
radio.
Each
time
you
press
the
button,
the
display
changes
to
show
the
following
information:
PS
(Program
Service):
While
searching,
“PS”
appears
and
then
Station
names
commonly
known
will
be
displayed.
“NO
PS”
appears
if
no
signal
is
sent.
PTY
(Program
Type):
While
searching,
“PTY”
appears
and
then
types
of
broadcast
programs
will
be
displayed.
““NOPT
Y”
appears
if
nosignal
is
sent.
RT
(Radio
Text):
While
searching,
“RT”
appears
and
then
text
messages
the
station
sends
will
be
displayed.
“NO
RT”
appears
if
no
signal
is
sent.
Theseare
the
three
RDS
services
Character
Mode:
&
characters
you
have
set
yourself.
(See
page
15.)
“NO
CHARA”
appears
if
you
have
not
used
this
function
or
if
you
have
tuned
to
preset
number
over
10.
Station
Frequency:
Station
frequencies.
Note
If
searching
finishes
at
once,
“PS”,
“PTY”,
and
“RT”
will
not
appear
on
the
display.
If
you
press
the
DISPLAY
MODE
button
while
tuning
to
an
AM
(MW/LW)
station,
the
display
alternates
between
station
frequency
and
character
mode
since
RDS
is
not
available
in
AM
(MW/
LW)
broadcasts.
Descriptions
of
the
PTY
codes
and
TP
With
the
XT-G70RBK,
you
can
receive
the
following
PTY
and
TP
signals.
NEWS:
News
AFFAIRS:
Topical
program
expanding
on
the
current
news
or
affairs
INFO:
Programs
on
medical
service,
weather
forecast,
etc.
SPORT:
Sports
events
EDUCATE:
Educational
programs
DRAMA:
Radio
plays
CULTURE:
Programs
on
national
or
regional
culture
SCIENCE:
Programs
on
natura!
sciences
and
technology
VARIED:
Other
programs
like
comedies
or
ceremonies
POP
M:
Pop
music
ROCK
M:
Rock
music
M.O.R.
M:
Middle-of-the-road
music
(usually
called
“easy
listening’)
LIGHT
M:
Light
music
CLASSICS:
Classics
OTHER
M:
Other
music
ALARM:
—
Emergency
broadcasts
NONE:
Undefined
TP:
Broadcasts
which
carry
traffic
announcements
Page
14
Page
15
spe
on
a
Teen
Me
nOMMET,
Bicsan
creo
es
To
search
the
Program
by
PTY
codes
and
TP
One
of
the
advantages
in
the
RDS
service
is
that
you
can
locate
a
particular
kind
of
program
by
specifying
the
PTY
codes.
To
search
a
program
using
the
PTY
codes,
follow
this
procedure:
lL.
Press
the
PTY-TP
SEARCH/CHARACTER
SET
button
(or
the
PTY*TP
SEARCH
button
on
the
Remote)
while
listening
to
the
radio.
The
display
alternates
between
“PTY
TP”
and
“SELECT.”
2.
Setect
the
PTY
code
with
the
PRESET/PTY:TP
<
or
>
button
(or
the
PTY:TP
<,
>
button
on
the
Remote}
within
4
seconds
and
show
the
PTY
(or
TP)
code
on
the
display.
Each
time
you
press
the
button,
the
display
gives
you
the
following:
NEWS
+—*
AFFAIRS
+—*INFO*—*SPORT+—+EDUCATE*—*
DRAMA+—>
CULTURE+—
SCIENCE*—
VARIED +—*POP
M+—*ROCK
M+—>
M.O.R,
M¢—*LIGHT
M*—*CLASSICS*—*+OTHER
M+—*ALARM+—
TP+—*NEWS
3.
Press
the
PTY*TP
SEARCH/CHARACTER
SET
button
(or
the
PTY-TP
SEARCH
button
on
(he
Remote)
within
4
seconds
again.
+
While
searching,
the
display
alternates
between
“SEARCH”
and
the
selected
PTY
code.
*
The
Unit
searches
40
preset
channels
and
stops
when
it
finds
the
one
you
have
selected.
To
continue
searching
after
the
first
stop,
press
the
PTY*TP
SEARCH/CHARACTER
SET
button
again
while
the
indications
on
the
display
blink.
If
no
program
is
found,
“NOT.
FOUND”
appears
on
the
display.
-~
Ifyouselect
TP,
the
Unit
will
stop
searching
when
it
finds
a
broadcast
carrying
traffic
announcements.
However,
this
does
not
necessarily
mean
that
you
can
listen
to
the
traffic
announcements
at
that
time.
Rather
it
means
that
you
will
get
them
when
they
are
broadcast.
Character
Méde
You
can
give
names
(8
characters)
to
any
station
(FM
and
AM
(MW/LW))
regardless
of
the
RDS
service
availability,
and
show
them
on
the
display
by
pressing
the
DISPLAY
MODE
button
repeatedly.
To
do
this,
you
need
to
preset
the
stations
you
want
to
name
into
the
first
ten
preset
numbers.
To
give
a
name,
follow
this
procedure:
1,
Press
the
PRESET/PTY*TP
<
or
>
button
and
select
a
preset
number
from
1
to
10
on
the
display.
2.
Press
the
PTY-TP
SEARCH/CHARACTER
SET
button
within
4
seconds.
3.
Press
the
TUNING/TIMER/DIMMER/CHARACTER
<
or
>
button
within
10
seconds
to
select
the
first
character.
Each
time
you
press
the
button,
the
character
changes.
The
available
characters
are
listed
on
page
G-6.
4.
Pressthe
PTY-TPSEARCH/CHARACTER
SET
button
to
move
the
character
insertion
position
on
the
display.
5.
Repeat
steps
3
and
4.
6.
Press
the
MEMORY
button
within
10
seconds.
The
Unit
memorizes
the
name
you
have
given.
Once
you
have
given
the
name
to
a
preset
channel,
this
name
appears
first
whenever
you
tune
to
this
preset
channel.
(If
RDS
sends
the
PS
signal,
it
will
appear
after
the
name
you
have
given.)
*
It
is
not
necessary
to
input
all
the
8
characters.
When
you
finish,
press
the
MEMORY
button.
aydOLD-LX

(68702
“ON)
LL-L
Playing
CDs
You
can
use
various
function
such
as
Auto
Search,
Random
Play,
Repeat
Play,
and
Program
Play.
-O
CD
“i
REPEAT
4
REPEAT
1
t
Locating
a
Particular
Track
or
a
Particular
Portion
of
the
Track
To
Find
a
Track
You
Want
Each
time
you
press
briefly
and
release
the
Kd
or
4
button,
the
track
changes
by
one.
+
Press
and
release
the
1
button
to
go
ahead
one
track
at
a
time.
+
Press
and
release
the
+4
button
to
go
back
one
track
at
a
time.
*
While
CD
is
not
playing,
holding
the
¢€
or
®t
button
will
change
the
tracks
continuously.
To
locate
a
track
directly
with
the
Remote
1.
Set
the
FUNER/CD/PANORAMIC
SEA
selector
to
the
CD
position.
2.
Press
the
+40
button
and
the
10
keys
to
select
a
track
number.
Example:
for
track
5,
press
5.
For
track
15,
press
+10
then
5.
For
track
20,
press
+10,
then
10.
To
Find
a
Particular
Point
You
Want
During
Play
Holding
down
the
#¢
or
®4
button
on
the
main
Unit
will
fast
forward
or
fast
reverse
the
CD
so
you
can
quickly
find
the
particular
portion
of
a
track
you
want
to
listen
to.
Using
Random
Play
Tracks
is
played
in
no
special
order.
Before
starting
a
CD,
press
the
RANDOM
button.
The
RANDOM
indicator
lights
up
and
Random
Play
starts.
When
all
of
the
tracks
have
been
played,
Random
Play
stops.
To
stop
and
cancel
Random
Play
Press
the
STOP/CLEAR
@
button.
Using
Repeat
Play
You
can
have
either
all
tracks
or
the
individual
track
currently
playing
repeat
as
many
times
as
you
like,
Each
time
you
press
the
REPEAT
button,
it
cycles
from
OFF,
which
turns
the
REPEAT
indicator
out
on
the
display,
to
REPEAT
which
repeats
all
tracks
in
order
or
according
to
the
program
you
have
set,
and
REPEAT
|
which
repeats
the
currently
playing
track.
To
cancel
Repeat
Play
Press
the
REPEAT
button
until
the
REPEAT
or
REPEAT
1
indicator
on
the
display
goes
off.
Note
Repeat
Play
can
be
used
with
Program
Play
or
Random
Play.
+
With
Program
Play,
the
program
you
made
is
repeated.
+
With
Random
Play,
all
the
tracks
on
the
CD
are
repeated
in
a
different
order
each
time.
Page
16
PANORAMIC
TUNER
CD
‘SEA
—>
<—
Q
en
DANCECLUB
HALL
7
ROCKA
POPSB
©
9|O
O
CINEMA
CHURCH
CLASSIC
CARD.
S
B/S
6
6
@!S
yy
4
Using
Program
Play
You
can
arrange
the
tracks
to
play
in
any
order
you
like.
You
can
program
up
to
32
tracks,
and
you
can
repeat
tracks
if
you
wish.
The
Remote
is
very
useful
for
making
a
program.
J.
Set
the
TUNER/CD/PANORAMIC
SEA
selector
to
the
CD
position.
2.
Press
the
PRGM
button.
The
PROGRAM
indicator
lights
on
the
CD
display.
3.
Press
the
+
10
button
and
the
10
keys
to
select
the
track
numbers
you
want.
4.
Press
the
>
button
on
the
CD
CONTROL
section
of
the
Remote
to
start
the
program.
The
first
track
you
programmed
starts
to
play.
To
stop
the
CD
during
Programmed
Play
Press
the
C1
button.
Tocancel
the
program,
press
the
PRGM
button
on
the
Remote
or
the
PROGRAM
button
on
the
main
Unit.
A
Few
Hints
to
Make
Programming
Easier
+
If
you
want
to
change
the
number
of
a
track
you
just
entered,
press
CANCEL
on
the
Unit,
and
enter
another
number.
+
Ifyou
want
to
change
the
entire
program,
press
the
STOP/CLEAR
@
button
on
the
Unit
while
CD
is
not
playing,
and
then
you
can
start
over.
*
To
view
the
order
of
the
tracks
in
your
program
when
it’s
playing,
press
the
(1
button
on
the
Remote
or
the
STOP/CLEAR
@
button
on
the
Unit,
then
press
the
Kad
or
m4
(o
display
the
order
of
the
tracks.
Each
time
you
press
the
Pi
button
the
next
selection
in
your
program
is
displayed.
(Press
the
@<€
button
for
the
previous
selections.)
To
add
a
track
fo
your
program
during
play,
press
the
10
keys
on
the
Remote.
Any
tracks
you
add
will
appear
at
the
end
of
the
current
program.
Listening
to
a
VCR
,
Turntable
or
other
Equipment
through
Your
XT-G70RBK
By
playing
a
VCR,
Turntable
or
other
connected
equipment
through
the
XT-G70RBK,
you
can
often
dramatically
improve
the
sound
quality,
as
well
as
gain
control
over
how
the
music
or
program
sounds.
1.
Set the
Unit's
volume
to
its
lowest
setting.
Use
<
VOLUME
>
on
the
Remote,
or
turn
the
VOLUME
control
all
the
way
counterclockwise.
2.
Select
the
connected
equipment
with
the
source
selecting
buttons
on
the
Unit
or
press
the
SOURCE
button
on
the
Remote
repeatedly.
3.
Switch
on
the
connected
equipment
and
start
it
playing.
4.
Adjust
the
volume.
WayOLD-
LX

(6870€
‘ON)
ZL-L
Adjusting
the
Sound
fa
;|
El
geo
You
can
select
one
of
five
pre-programmed
SEA
patterns
(Preset
mode)
or
to
create
your
own
sound
patterns
(Manual
mode).
2
PANORAMIC
TUNER
CD
/SEA
—p
ROCK/A
—
POPS.
©
CLASSICE
CARD
QO
©
Using
the
SEA
Preset
Patterns
(Preset
Mode)
1,
Make
sure
that
the
LED
next
to
the
MANU.
button
on
the
Unit
is
turned
off.
If
it
lights
up
(the
Unit
is
in
SEA
manual
mode),
press
the
PRGM
button.
2,
Press
the
desired
SEA
preset
button.
ROCK
_
Increases
both
treble
and
bass
sounds.
Us
POPS
Increases
the
richness
and
fullness
of
the
vocal
sound.
ee
ee
eae
CLASSIC
Adds
depth
and
brilliance
to
the
sound.
Pa
oe
CAR
For
recording
onto
car
stereo
tapes.
SOT
ont
cme
pur
oan
sree
cue
BR
ano
H.PHONE
For
recording
onto
headphones
stereo
tapes.
You
can
also
use
the
Remote
to
select
the
SEA
preset
patterns,
1.
Set
the
TUNER/CD/PANORAMIC
SEA
selector
to
the
PANORAMIC
SEA
position.
2.
Make
sure
that
the
LED
next
to
the
MANU.
button
on
the
Unit
is
turned
off.
ff
it
lights
up
(the
Unit
is
in
SEA
manual
mode),
press
the
PRGM/MANU.
button.
3.
Press
the
desired
SEA
preset
button.
To
cancel
the
SEA
effect,
press
the
SEA
button
on
the
Unit
or
SEA
ON/OFF
on
the
Remote.
Each
time
you
press
the
button,
the
SEA
effect
switches
on
and
off
repeatedly.
Page
18
Page
19
Creating
Your
Own
SEA
Patterns
(Manual
Mode)
1.
Press
the
MANU.
button
to
put
the
Unit
into
SEA
manual
mode.
The
LED
next
to
it
lights
up.
2.
Press
the
<f
or
f>
button
fo
set
the
frequency
range
to
be
changed.
The
LED
on
the
SEA
button
lights
up,
and
the
frequency
range
level
bar
on
the
display
blinks.
Each
time
you
press
the
<f
or
f>
button,
the
frequency
range
changes
up
or
down.
While
it
is
blinking
you
can
set
the
frequency
level.
3.
Press
the—-LEVEL
+
button
to
set
the
level,
while
the
selected
frequency
range
level
bar
is
blinking.
4.
Repeat
steps
2
and
3
to
adjust
other
frequency
ranges.
You
can
adjust
7
frequency
ranges.
To
fatten
the
SEA
pattern
Press
the
FLAT
button.
The
adjusted
SEA
pattern
will
be
flattened
so
you
can
readjust
the
SEA
pattern.
Note
Although
the
five
SEA
preset
patterns
cannot
be
changed,
an
individual
sound
pattern
can
be
created
based
ona
preset
pattern,
When
you
make
any
change
to
the
SEA
preset
pattern,
the
Unit
automatically
enters
the
SEA
manual
mode
so
you
can
modify
and
store
the
pattern
you
create.
To
store
the
pattern
1,
Press
the
MEMORY
button
after
creating
your
own
SEA
pattern.
Your
own
SEA
pattern
blinks
on
the
display.
2.
While
the
SEA
pattern
is
blinking,
press
the
SEA
preset
button
to
select
the
memory
number
from
among
A,
B,
C, D,
or
E.
To
record
the
SEA
pattern
To
record
sound
together
with
a
SEA
pattern
(either
a
preset
or
manual
one),
first
turn
on
SEA
and
select
the
desired
SEA
pattern.
The
music
will
be
enhanced
according
to
the
pattern
you
selected.
SEA
patterns
cannot
be
applied
to
the
following
types
of
recording:
+
A
song
cannot
be
dubbed
(at
either
normal
or
high
speeds)
with
a
SEA
sound
pattern.
*
When
the
amplifier's
SOURCE
DIRECT
is
on,
songs
cannot
be
recorded
with
a
SEA
pattern.
*GYOLD-
LX

EL-L
(68707
‘ON)
Using
Panoramic
Surround
Modes
With
five
Panoramic
Surround
modes
and
panoramic
shifting
speakers,
the
sound
field
can
be
enlarged
to
give
a
more
realistic
sound.
By
connecting
the
panoramic
shifting
speakers,
the
angle
of
the
speakers
will
shift
in
accordance
with
the
respective
Panoramic
Surround
mode:
DANCE
CLUB, HALL,
CINEMA,
CHURCH,
DOME.
DOME:
wil}
shift
outward
20°.
HALL/CHURCH:
will
shift
outward
15°.
DANCE
CLUB
_
will
shift
outward
10°.
CINEMA:
will
shift
inward
23°.
Notes
*
Panoramic
shifting
speakers
inside
the
speaker
cabinet
will
shift
corresponding
to
the
respective
Panoramic
Surround
mode
.
The
speakers
shift
automatically
inward
or
outward
to
give
you
the
dynamic
sound
fields.
The
mode
can
be
set
from
either
the
Unit
or
the
Remote.
«
When
you
select
CINEMA,
the
speakers
will
shift
inward
to
make
the
spoken
words
easier
to
hear.
+
Normally,
the
speakers
face
directly
forward.
Selecting
Panoramic
Surround
Mode
PANORAMIC
TUNER
CD
__/SEA
When
using
the
Remote:
1.
Set
the
TUNER/CD/PANORAMIC
SEA
selector
to
the
PANORAMIC
SEA
position.
:
2,
Press
the
desired
Panoramic
Surround
mode
button.
Canee
rue
WALL
DANCE
CLUB
gives
a
throbbing
bass
beat.
LIVE
gives
the
feeling
of
a
live
stage.
DOME
gives
the
spacious
feeling
of
a
domed
stadium.
CINEMA
=
CHURCH
HALL
gives
clear
vocals
and
the
feeling
of
a
recital
hall.
CHURCH
reproduces
the
echo
effect
of
a
stone-walled
church.
(s)
When
you
use
the
Unit,
just
press
the
desired
Panoramic
Surround
mode
button
directly.
K
To
change
the
speaker
angle
from
the
Remote.
Press
the
IN
or
OUT
button
to
change
the
angle
(3°,
8°,
13°,
18°
and
23°).
The
indicator
blinks
to
indicate
the
speaker's
direction
of
movement.
*
Press
the
IN
button
to
shift
the
speakers
inward.
+
Press
the
OUT
button
to
shift
the
speakers
outward.
—
Ifthe
speaker
angle
is
changed
when
CINEMA
is
selected,
the
Panoramic
Surround
mode
will
change
from
CINEMA
to
the
previously
selected
one.
———
SPEAKER
CONTROL_———
To
get
back
the
preset
speaker
angle
for
the
Panoramic
Surround
mode
selected
Press
the
AUTO
button.
Notes
*
You
can
apply
Panoramtic
Surround
modes
when
you
record.
+
A
sound
cannot
be
dubbed
with
the
Panoramic
Surround
modes
(at
either
normal
or
high
speeds).
Toa
cancel
the
Panoramic
Surround
mode
Press
the
PANORAMIC
SURROUND
on
the
Unit
or
PANORAMIC
ON/OFF
on
the
Remote
so
that
the
indicator
on
the
Unit
goes
off.
Each
time
you
press
the
button,
the
panoramic
surround
mode
turn
on
and
off
repeatedly.
Page
20
EXCITING
RELAXING
Page
21
Using
Mood Menu
The
Mood
Menu
allows
you
to
select
one
of
four
special
effect
sound
modes.
Selecting
a
mode
will
set
the
respective
SEA
pattern
and
shift
panoramic
shifting
speaker
angle
automatically.
The
Individual
Mode
allows
you
to
store
your
own
settings
in
memory.
EXCITING
Press
the
EXCITING
button,
Regardless
of
the
music
source,
a
sharp,
upbeat
sound
is
produced.
RELAXING
Press
the
RELAXING
button.
A
beautiful,
subtle
sound
is
obtained.
The
sound
feels
like
a
refreshing
breeze
which
gives
a
relaxed
feeling.
SOOTHING
Press
the
SOOTHING
button,
By
controlling
the
dynamic
range,
a
rich,
easy
listening
sound
can
be
maintained.
Low-volume
sounds
drowned
out
by
larger-volume
sounds
are
boosted
and
peak
sounds
are
suppressed.
INDIVIDUAL
Press
the
INDIVIDUAL
button
so
that
the
stored
setting
is
called
up.
You
can
use
the
Individual
Mode
to
create
your
own
customized
sound
effect.
The
individual
mode
settings
can
be
stored
in
memory.
To
store
your
own
settings
into
the
Individual
Mode
1.
Select
the
desired
Panoramic
Surround
mode
or
SEA
pattern.
(See
page
18
or
20.)
2.
Adjust
the
frequency
range
if
you
want.
(See
page
19.)
3.
Press
and
hojd
the
INDIVIDUAL
button
to
store
your
own
pattem.
Note
Do
not
keep
the
INDIVIDUAL
button
pressed
to
call
up
the
stored
setting;
otherwise,
you
may
Store
a
new
Setting
rather
than
calling
up
the
previous
one.
MaYOLO-LX

(68702
“ON)
PL-L
Demo
Mode
Display
Mode
Use
the
Demo
Mode
to
try
the
various
sound
modes
for
a
song.
During
play,
press
the
DEMO
button.
Nine
sound
patterns
cycle
automatically.
To
cancel
the
Demo
Mode,
press
the
DEMO
button
again.
DANCE
CLUB
During
play,
press
the
DISPLAY
button
on
the
graphic
equalizer.
Each
time
you
press
the
button,
the
display
shows
the
various
sound
patterns,
DUAL
PEAK
and
DUAL
SHOWER
show
also
the
SEA
pattem
simultaneously.
PEAK
HOLD
|
SPI
OFF
No
pattern
appears
Page
22
Page
23
CSRP
(COMPU
LINK
SOURCE
RELATED
PRESET
SYSTEM)
Function
CSRP
is
the
electronic
feature
that
presets
volume,
display
mode
and
other
control
functions.
The
XT-G70RBK
has
four
CSRP
functions;
Volume
CSRP,
Time
Link
CSRP,
Auto
Loudnes,
Auto
Power
Off.
Volume
CSRP
Press
the
CSRP
button
(the
CSRP
indicator
lights
up)
while
the
Unit
ison.
The
VOLUME
contol
is
automatically
set
to
around
the
most
recently
used
level.
When
you
tum
off
the
Unit,
the
VOLUME
control
is
automatically
turned
down.
Time
Link
CSRP
When
you
turn
off
the
Unit
with
the
CSRP
indicator
lit,
Time
Link
CSRP
stores
the
following
items
into
the
CSRP
memory
automatically.
+
Volume
level
+
Panoramic
Surround
mode
(see
page
20)
+
SEA
preset
pattern
(see
page
18)
+
Display
mode
(see
page
22)
These
four
items
are
stored
for
each
source
and
for
each
time
range.
*
One
day
is
divided
into
our
time
ranges;
6:00—,
12:00—,
18:00-—
and
24:00—.
To
call
up
the
Time
Link
CSRP
Select
the
sources
while
the
CSRP
indicator
is
lit.
Auto
Loudness
When
you
press
AUTO
LOUDNESS
button
(the
indicator
on
it
lights
up),
the
SEA
characteristic
will
change
in
accordance
with
the
volume
level.
This
means
that
at
low
volume,
insufficient
bass
and
treble
are
automatically
compensated
for,
so
you
can
have
a
full
sound
at
any
volume
level.
e
At
low
volume
level
roroua
The
bass
and
treble
are
automatically
increased.
At
high
volume
level
et
+
“Ss.-
wants
The
setting
approaches
the
normal
SEA
characteristic.
Auto
Power
Off
You
can
fall
asleep
to
music
while
listening
to
CD
or
tape.
The
XT-G70RBK
will
turn
off
by
itself
rather
than
play
all
night.
Press
the
AUTO
POWER
OFF
button
while
listening
to
CD
or
tape.
When
CD
or
tape
play
is
over,
the
Unit
will
automatically
turn
off.
Notes
*
The
Repeat
Play
of
CD
player
(see
page
16)
does
not
work
with
Auto
Power
Off.
*
The
Tuner
Entry
(see
page
13)
does
not
work
with
Auto
Power
Off.
*
Ending
of
tape
play
depends
on
the
Reverse
Mode
setting
(see
page
10).
Tape
play
ends
either
after
one
side
is
played
or
after
both
sides
are
played.
ayOL9-1LX

{68702
“ON)
SL-L
Recording
onto
Tape
Recording
from
one
tape
to
another
is
called
dubbing.
You
can
dub
at
regular
speed
for
highest
quality,
or
at
high
speed
with
a
slight
loss
in
sound
quality.
With
high
speed
it
takes
only
about
one-half
the
time
to
copy
a
tape.
For
regular
recording
procedure,
see
page
8.
Things
to
know
before
start
recording
+
It
should
be
noted
that
it
may
be
unlawful
to
re-record
tapes,
records,
or
discs
without
the
consent
of
the
owner
of
copyright
in
the
sound
or
video
recording,
broadcast
or
cable
program
and
in
any
literary,
dramatic,
musical,
or
artistic
work
embodied
therein.
*
Toreduce
hiss
noise,
set
the
DOLBY
NR
selector
either
to
the
B
or
to
the
C
position.
(See
page
11.)
*
Cassettes
have
a
special
feature
so
you
won't
accidentally
record
over
a
tape
you
want
to
save.
Two
small
tabs
on
the
back,
one
for
side
A
and
one
for
side
B,
can
be
removed
to
prevent
erasure
or
re-recording.
To
record
on
a
cassette
with
the
tabs
removed,
you
must
cover
the
holes
with
tape
first.
However,
when
a
Type
II
tape
is
used,
only
cover
part
of
the
hole
as
shown
below,
since
the
other
part
of
the
hole
is
used
to
detect
the
tape
type,
*
Type
I,
I
and
type
IV
tapes
can
be
used
for
recording.
+
If
recordings
you
make
have
excessive
noise
or
static,
the
Unit
may
be
too
close
to
a
TY
which
was
on
during
recording.
Either
turn
off
the
TV
or
increase
the
distance
between
the
TV
and
the
XT-G70RBK,
3
HIGH
©
DUBBING
fm
NORMAL
High
Speed
Dubbing
or
Normal
Speed
Dubbing
Although
the
quality
of
the
dubbed
tape
is
a
little
less,
high
speed
dubbing
is
a
very
convenient
way
to
record
from
one
tape
to
another.
You
can
only
use
deck
B
to
make
recordings.
Deck
A
is
for
playback
only.
1,
Put
the
tape
you
want
to
copy
from
into
deck
A,
and
the
tape
to
be
copied
onto
in
deck
B.
2,
On
both
decks,
press
either
the
<4
or
®
button
while
pressing
the
@
button,
in
order
to
select
the
playing
and
recording
side.
3.
Press
either
the
DUBBING
HIGH
or
the
DUBBING
NORMAL
button.
Notes
+
During
dubbing,
you
can
listen
to
another
source
such
as
the
radio
or
the
CD
player,
just
as
if
you
weren't
dubbing.
+
The
sound
cannot
be
dubbed
with
neither
SEA
sound
effects
nor
Panoramic
Surround
effects.
+
During
dubbing,
when
you
press
the
AUTO
POWER
OFF
button,
the
Unit
automatically
turns
off
after
dubbing
is
over.
To
dub
on
both
sides
Set
the
REVERSE
MODE
selector
to
either
>
or
>.
Dubbing
starts
from
the
front
side
of
both
deck
A
and
B.
To
Record
Selections
from
Several Different
Tapes
When
you
want
to
take
selections
from
several
different
tapes
and
combine
them
on
one
tape
during
dubbing,
follow
these
steps:
1.
Press
the
@
button
on
deck
A.
This
causes
deck
A
to
stop,
so
you
can
change
tapes,
and
deck
B
makes
a
4-second
blank
and
pauses.
2.
Change
the
tape
in
deck
A.
3.
Press
either
the
DUBBING
HIGH
or
NORMAL
button
(the
same
one
you
are
using
now)
to
start
deck
A
playing
and
deck
B
recording
again,
Note
Dolby
NR
is
inactive
in
dubbing
mode
regardless
of
the
setting
of
the
DOLBY
NR
switch.
The
dubbed
tape
automatically
contains
the
same
processing
as
the
source
tape.
Page
24
REC/REC
MUTE
NONSTOP
FADE
NONSTOP
Page
25
a
Making
a
4-second
Blank
on
a
Recorded
Tape
1.
Press
the
REC/REC
MUTE
0
button
during
play.
The
LED
next
to
it
blinks
for
4
seconds
and
deck
B
enters
recording
pause
mode.
To
make
a
blank
portion
longer
than
4
seconds,
keep
the
button
pressed
for the
length
of
time
you
want
the
blank
to
be.
When
the
button
is
released,
deck
B
enters
recording
pause
mode.
2.
Press
the
<4
or
>
button
to
restart
recording.
Recording
from
CD
—
Fuzzy
CD
Recording
Since
the
XT-G70RBK
provides
3
types
of
Fade
modes
and
4
types
of
CD
Editing
modes,
you
can
make
a
variety
of
CD
recordings
by
combining
these
7
modes.
To
Use
the
Fade
Mode
There
are
3
types
of
Fade
mode;
FADE,
NONSTOP,
FADE
NONSTOP
(a
combination
of
NONSTOP
and
FADE).
Each
time
you
press
the
FADE
MODE
button,
the
Fade
Mode
changes
in
the
following
sequence.
(eee
re
>FADE,NONSTOP
+
OFF
(You
will
see
these
changes
on
the
CD
display)
FADE
:
At
the
end
of
the
tape,
the
XT-G70RBK
automatically
goes
back
to
the
beginning
of
the
last
track
and
re-records
it,
this
time
gently
fading
out
at
the
end,
+
If
you
have
set
the
REVERSE
MODE
selector
to
>
or
c25
,
side
B
starts
recording
at
the
beginning
of
the
last
track
on
side
A.
So
you
get
the
whole
track,
even
though
part
of
it
was
cut
off
when
the
tape
ran
out
on
side
A.
NONSTOP:
Every
track
ends
by
fading
out,
and
the
next
track
starts
as
soon
as
fading-out
is
over.
Thus,
you
can
make
a
tape
with
no
blank
portions
between
tracks.
At
the
end
of
the
tape,
however,
this
mode
does
not
make
the
end
of
the
track
fade
out,
if
the
track
is
cut
off
when
the
tape
runs
out.
FADE
NONSTOP:
Using
this
mode
you
can
record
the
entire
tape
without
any
blanks.
Every
track
ends
by
fading
out,
and
at
the
end
of
the
tape,
the
last
track
fades
out
instead
of
cutting
off
abruptly
when
the
tape
runs
out,
just
like
FADE.
+
If
you
have
set
the
REVERSE
MODE
selector
to
2D
or
<2,
side
B
starts
recording
at
the
beginning
of
the
last
track
on
side
A.
Note
NONSTOP
and
FADE
NONSTOP
modes
cannot
be
used
with
the
Multi
Edit
mode
(see
page
27).
To
record
with
sound
effects
When
you
start
recording
with
Fuzzy
CD
Recording
or
CD
Edit,
the
special
effects
cannot
be
changed
without
stopping
recording,
and
often
having
to
start
over.
If
you
need
different
sound
effects
for
each
track,
use
the
standard
recording
features
described
on
page
8.
MayOLD-
Lx

(68702
‘ON)
QL-L
‘Auto
Fane
FUZZY
LOH
CO
REC
4
Jomect
Fuzzy
CD
Recording
If
the
recording
level
is
too
high,
distortion
will
result;
On
the
other
hand,
if
the
recording
level
is
too
low,
the
sound
volume
will
be
low.
So,
itis
very
important
to
check
the
peak
level
of
the
source
tracks
before
recording.
Furthermore,
itis
necessary
to
check
the
tracks’
overall
Jevel.
With
the
Fuzzy
CD
Recording
feature,
if
the
tracks'
overall
level
is
high,
the
recording
level
will
be
set
lower,
and,
if
the
tracks’
overall
level
is
low,
the
recording
level
will
be
set
higher.
In
this
way,
the
optimum
recording
level
is
set
according
to
the
sound
inclination
of
the
tracks
as
well
as
the
peak
level.
The
conventional
peak
search
function
does
not
take
into
account
the
tracks’
overall
balance
when
setting
the
recording
level;
therefore,
the
recording
level
tended
to
be
low.
Fuzzy
CD
Recording
gives
a
balanced
recording
level
which
matches
different
kinds
of
tracks.
I.
Load
a
CD
in
the
tray.
2.
Put
a
tape
in
deck
B.
3.
Select
the
side
to
record
on,
by
pressing
either
the
<
or
>
button
while
pressing
the
button
on
deck
B.
4.
Press
either
FUZZY
LOGIC
CD
REC
AUTO
FADE
or
DIRECT
button.
The
tape
starts
recording
10
seconds
before
the
CD
starts,
making
a
10-second
blank
at
the
beginning
of
the
tape
to
insure
the
entire
selection
is
recorded.
AUTO
FADE
starts
recording
with
Al
Edit
(page
27)
and
FADE
mode
(page
25).
DIRECT
starts
recording
from
the
first
track
to
the
end.
+
When
FUZZY
LOGIC
CD
REC
(either
AUTO
FADE
or
DIRECT)
is
pressed,
the
optimum
recording
level
will
be
determined
by
the
fuzzy
search,
then
the
recording
will
start
from
the
first
CD
track.
(Since
the
fuzzy
search
will
search
the
entire
CD,
it
will
take
a
little
time.)
*
During
the
fuzzy
search,
the
track
number,
number
of
tracks,
playing
time,
etc.,
will
change
accordingly.
*
If
the
last
recorded
track
cannot
fit
on
side
A,
it
will
be
re-recorded
with
fade-out.
«
Whenthe
REVERSE
MODE
selector
is
set
to
either
D
or
>,
side
B
recording
will
start
after
a
blank
portion
of !O
seconds
is
made.
The
recording
will
continue
with
the
last
track
recorded
with
a
fade-out
on
side
A.
+
The
last
track
on
side
B
will
end
by
fading-out.
+
ff
the
inserted
tape
has
not
been
rewound,
it
will
be
rewound
automatically
before
recording
begins.
To
stop
recording
Press
the
l@
button
on
deck
B
or
the
STOP/CLEAR
@
button
on
the
CD
player.
Note
The
tracks
can
be
recorded
with
a
specified
sound
effect
(SEA
pattern
and
Panoramic
Surround
modes).
Sound
effects
cannot
be
changed
during
recording.
Page
26
Al
Edit
Blank
Fade
out
a
[ets
Te
To}
A
7
Remaining
time
Blank
Auto
Edit
Blank
Remaining
time
Remaining
time
Blank
PRGM
Edit
Remaining
tim
Remaining
time
Blank
Multi
Edit
Blank
Remaining
time
to
be
continued
Page
27
Using
CD
Edit
Mode
The
XT-G70RBK
has
four
CD
Edit
modes;
Al
Edit,
Auto
Edit,
Program
Edit
and
Multi-Edit.
To
take
advantage
of
these
Edit
modes,
read
the
following
instructions
carefully.
What
is
Al
Edit?
This
is
an
editing
function
which
complements
the
Auto
Edit
mode
(below).
You
can
use
it
to
maximize
the
use
of
the
remaining
tape
length.
When
the
tape
comes
to
its
end,
the
FADE
mode
will
function
automatically.
Up
to
16
tracks
can
be
edited
for
one
side.
What
is
Auto
Edit?
To
prevent
the
beginning
of
the
track
from
not
being
recorded,
the
last
track
will
be
replaced
automatically
in
accordance
with
the
remaining
tape
length.
The
editing
will
start
with
the
earlier
tracks
and
the
tracks
will
be
selected
so
they
can
fit
on
the
tape.
No
track
is
selected
twice.
However,
depending
on
the
remaining
time,
the
same
track
may
be
selected
twice
to
fill
in
the
recording
time
at
the
end
of
the
tape.
Up
to
16
tracks
can
be
edited
for
one
side.
What
is
PRGM
(program)
Edit?
Using
this
mode
you
can
select
which
CD
tracks
go
on
which
side
of
the
tape,
and
in
what
order,
What
is
Multi
Edit?
Using
this
mode
you
can
select
tracks
from
several
different
CDs,
The
NONSTOP
and
FADE
NONSTOP
modes
cannot
be
used
with
Multi
Edit
mode.
Operating
procedures
1.
Load
a
CD
in
the
tray.
*
2.
Press
the
EDIT
MODE
button
to
select
the
desired
CD
Edit
mode
you
want
to
use.
Each
time
you
press
the
button
the
indicator
is
displayed
as
follows
in
the
CD
display.
ie
Ai——>
AUTO—*PRGM
—>
MULTI—
=e]
3.
Press
the
TIME
button
to
select
the
time
length.
Each
time
you
press
the
button,
the
pre-programmed
tape
length
is
shown
on
the
display
as
follows.
Reco
54——»
60
“7
90+
80+
74 70
64
If
you
want
touse
the
Remote,
you
can
set
the
tape
length
by
using
the
+10
button
and
10
keys.
(Make
sure
that
the
TUNER/CD/PANORAMIC
SEA
selector
is
set
to
the
CD
position.)
ex.
C-30:
+10,
+10,
10.
C-46:
+10,
+10,
+10,
+10,
6.
C-74;
+10,
+10,
+10,
+10.....Press
the
+10
button
seven
times,
then
press
4
button.
This
number
shows
how
many
times
you
have
pressed
the
+10
button.
to
be
continued
WaYOLD-LX

LL-L
(68v0%
ON)
PRGM
Edit
or
Multi
Edit
6666666666
4.
Press
the
SIDE
A/B
button
to
set
the
tape
length.
When
you
have
selected
the
Al
Edit
or
Auto
Edit
‘The
tracks
which
can
fit
on
side
A
and
B
will
be
automatically
selected
in
accordance
with
the
specified
tape
length.
By
repeatedly
pressing
the
SIDE
A/B
button
you
can
check
which
tracks
have
been
programmed
for
which
side
of
the
tape.
When
you
have
selected
the
PRGM
Edit
Select
the
track
numbers
for
side
A
with
the
10
keys.
Press
the
SIDE
A/B
button.
Select
the
track
number
for
side
B.
When
you
have
selected
the
Multi
Edit
Select
the
track
numbers
from
the
first
disc
with
the
10
keys.
When
you
have
selected
the
Multi
Edit,
you
can
select
tracks
from
different
discs
(up
to
10
tracks
from
one
disc).
5.
Put
a
tape
in
deck
B
and
set
the
REVERSE
MODE
selector
to
the
>
position.
6.
Press
the
FUZZY
LOGIC
CD
REC
DIRECT
button.
After
a
blank
of 10
seconds
is
made
at
the
beginning
of
the
tape,
the
recording
starts.
If
the
inserted
tape
has
not
been
rewound,
it
will
be
rewound
automatically
before
the
recording
begins.
7.
When
you
have
selected
the
Multi
Edit
Deck
B
enters
recording
pause
mode,
when
the
first
disc
play
ends.
Change
the
disc
and
select
the
tracks
again,
then
press
the
FUZZY
LOGIC
CD
REC
DIRECT
button.
If
you
want
to
record
on
side
B,
press
the
SIDE
A/B
button
and
repeat
this
procedure.
To
stop
the
recording
Press
the
STOP/CLEAR
i
button.
To
delete
the
last
selected
track
(only
for
PRGM
Edit
and
Multi
Edit)
Press
the
CANCEL
button
in
stop
mode.
Each
time
you
press
the
button,
the
last
selection
will
be
deleted.
Page
28
Using
the
Timers
The
timers
let
you
contro!
recording
and
playing
functions
automatically.
—[a~y-
Recording
Timer—Unattended
recording
of
radio
broadcasts.
You
can
set
the
starting
time
and
recording
duration.
Wake
Up
Timer/Steep
Timer—Wake
up
to
music
from
any
source.
Fall
asleep
and
have your
XT-G70RBK
tum
off
automatically
after
a
certain
length
of
time.
Once
Timer/Daily
Timer—You
can
program
the
Unit
to
come
on
playing
a
source
at
a
particular
time,
and
then
shut
off
at
a
special
time.
Setting
the
Clock
1.
2.
3.
<
ean
4,
5.
Page
29
The
timers
depend
on
the
clock:
If
the
clock
is
right,
the
timers
will
work
as
you
expect,
but
if
the
time
is
incorrect
on
the
clock
then
the
timers
will
also
be
incorrect.
So,
let's
set
the
clock
first.
Press
the
CLOCK
ADJ.
button.
Set
the
hour
by
pressing
the
TUNING/TIMER/DIMMER/CHARACTER
<or
>
button.
Each
time
you
press
it,
the
hour
advances
by
one.
Hold
the
button
down,
and
the
clock
will
advance
one
hour
at
a
time.
Press
the
MEMORY
button,
when
the
correct
hour
is
showing
on
the
display.
The
hour
is
set.
Set
the
minutes
by
pressing
the
TUNING/TIMER/DIMMER/CHARACTER
<
or
>
button.
Each
time
you
press
it
the
minutes
advance
by
one.
Hold
the
button
down,
and
the
minutes
advance
in
10
minute
increments
.
e
Press
(he
MEMORY
button
again.
‘The
minute
is
set,
and
the
clock
is
set
and
starts
from
zero
second.
If
the
clock
has
not
been
set
or
if
there
has
been
a
power
outrage,
“0:00”
will
be
displayed
and
“CLOCK”
will
blink.
If
there
is
a
power
failure,
the
clock
loses
its
setting,
the
display
shows
“0:00,”
and
it
must
be
reset.
You
can
set
the
clock
and
the
Timers
whenever
the
XT-G70RBK
is
turned
off,
but
still
connected
to
a
live
power
source.
MAYOLO-LX

(68v0Z
ON)
8L-L
TUNG
TMRER
OWNER
<
GEA
>
n>
Recording
Timer
With
the
recording
timer
you
can
make
a
tape
of
a
radio
broadcast
automatically
whether
or
not
you
are
there
to
start
the
XT-G70RBK.
For
the
timer
to
work
correctly,
you
need
to
make
sure
of
two
things
in
addition
to
setting
the
time
for
the
radio
and
tape
deck
to
come
on:
+
A
long
enough
tape
must
be
in
deck
B.
*
The
clock
must
be
set
to
the
correct
time.
3.
5
Press
the
REC
button,
As
long
as
the
indicators
are
blinking
on
the
display,
you
can
continue
with
the
setting
process.
If
you
wait
too
long,
and
they
stops
blinking
before
you
are
done,
just
press
the
REC
button
twice
and
start
over.
Set
the
time
you
want
the
radio
to
come
on
and
the
tape
in
deck
B
to
start
recording.
Use
the
TUNING/TIMER/DIMMER/CHARACTER
<or
>
button
and
the
MEMORY
button
just
like
setting
the
clock.
(
See
page
29)
Set
the
time
you
want
the
radio
and
deck
B
to
shut
off.
Use
the
TUNING/TIMER/DIMMER/CHARACTER
<
or
>
button
and
MEMORY
button
just
like
setting
the
clock.
(See
page
29)
Press
the
PRESET/PTY+TP
<
or
>
button
to
select
the
preset
channels.
At
the
end
of
the
set
length
of
time
the
radio
and
deck
B
will
shut
off.
Press
the
REC
button
again,
The
Unit
will
memorize
the
setting.
When
the
recording
timer
switches
the
XT-G70RBK
on,
the
VOLUME
control
wiil
automatically
be
set
to
MIN.
Notice
that
the
REC
indicator
is
lighted
up
on
the
display
whenever
the
Recording
Timer
is
set.
If
you
do
not
want
the
timer
to
operate
but
want
to
keep
the
setting
Press
the
REC
button
so
that
the
REC
indicator
on
the
display
goes
off.
To
reactivate
the
timer,
press
the
REC
button
again
so
that
the
REC
indicator
lights
up.
Note
You
will
see
“VOLUME-0”
on
the
display
after
setting
is
complete
or
while
checking
the
timer
contents.
This
indication
means
that
the
volume
level
during
timer
recording
is
set
to
minimum.
Page
30
Ter
een
ones
Eicuanactcney
fy
—e
TUOmOTAME
ROWER,
EicHaracrea
Page
31
—
Once
Timer/Daily
Timer
Once
Timer
works
only
once.
Daily
Timer
executes
the
timer
operation
at
the
same
time
everyday.
1.
Press
the
ONCE
or
DAILY
button
which
you
want
to
set.
The
ONCE
or
DAILY
indicator
(whichever
you
have
chosen)
blinks
on
the
display.
2.
Press
the
TUNING/TIMER/DIMMER/CHARACTER<
or
>
button
toset
the
start
time
and
the
stop
time.
Use
the
TUNING/TIMER/DIMMER/CHARACTER
<
or
>
button
and
MEMORY
button
just
like
setting
the
clock.
(See
page
29)
3.
Press
the
TUNING/TIMER/DIMMER/CHARACTER
<
or
>
button
to
select
the
source,
and
then
press
the
MEMORY
button.
Each
time
you
press
it
the
display
will
cycle
from
one
source
to
the
next.
When
the
source
you
want
is
showing,
press
the
MEMORY
button.
The
Unit
will
memorize
the
setting.
Setting
the
Source
Indicator
Source
played
)
TUNER
TUNER
|
CD
---
cD
|
TAPE TAPE
|
J
noose
the
most
recently
used
source
*
When
TUNER
is
selected
You
need
to
select
a
preset
station
by
using
the
PRESET/PTY*TP
<
or
>
button.
+
When
CD
is
selected
You
can
designate
the
first
track
to
play
from
the
first
20
tracks
on
the
CD
by
using
the
PRESET/P@Y*TP
<
or
>
button.
4,
Press
the
TUNING/TEMER/DIMMER/CHARACTER
<
or
>
button
to
set
the
volume,
then
press
the
MEMORY
button.
Each
time
you
press
it
the
display
cycles
from
one
volume
setting
to
the
next
as
shown
in
the
table
below.
When
you
press
the
MEMORY
button,
the
Unit
will
memorize
the
setting.
Setting
the
volume
VOLUME
——
Volume
level
at
the
last
setting
before
turning
off the
Unit
VOLUME
~
A
VOLUME
~
B
VOLUME
-
C
5,
Press
the
ONCE
or
DAILY
button.
The
timer
indicator
you
have
selected
remains
lit
on
the
display
and
shows
you
the
timer
is
set.
6.
Press
the
POWER
button
fo
turn
the
Unit
off.
If
you
do
not
want
the
timer
to
operate
but
want
to
keep
the
setting
Press
the
ONCE
or
DAILY
button
so
that
the
ONCE
or
DAILY
indicator
disappears
from
the
display.
To
reactivate
the
timer,
press
the
ONCE
or
DAILY
button
again
so
that
the
ONCE
or
DAILY
indicator
lights
up.
Note
When
the
start
time
comes,
the
VOLUME
control
gradually
turns
up
to
the
set
position.
For
example,
if
your
set
position
is
VOLUME-B,
the
VOLUME
control
first
turns
up
to
and
stays
at
the
VOLUME-A
position
briefly,
then
turns
up
to
the
VOLUME-B
position.
MaYOLD-1X

6L-L
(68707
‘ON)
WAKE
UPSLEEP.
Wake
Up
Timer
With
this
timer
you
can
wake
up
to
music
from
a
CD,
tape
or
your
favorite
radio
program.
+
The
Wake
Up
Timer
can
only
be
set
when
the
Unit
is
turned
off.
Press
the
WAKE
UP/SLEEP
button
with
the
XT-G70RBK
off.
The
WAKE
UP
indicator
starts
blinking
on
the
display
.
Each
time
you
press
the
WAKE
UP/SLEEP
button
while
the
WAKE
UP
indicator
is
blinking,
it
changes
the
time
shown
on
the
display
in
the
sequence
shown
below.
alas
0:30
>
1:00
>
1:30
-
2:00
>
=]
OFF
+
12:00
+
11:00
4:00
After
selecting
the
time,
wait
about
5
seconds,
and
the
XT-G70RBK
memorizes
your
setting.
+
The
WAKE
UP
indicator
remains
lit
on
the
display
to
let
you
know
that
the
Wake
Up
Timer
is
set.
To
check
the
time
remaining
unti!
the
Unit
turns
on
Press
the
WAKE
UP/SLEEP
button
once.
The
remaining
time
is
displayed
for
5
seconds.
To
change
the
set
time
Press
the
WAKE
UP/SLEEP
button
repeatedly.
To
cancel
the
Wake
Up
Timer
setting
Press
the
WAKE
UP/SLEEP
button
repeatedly
so
that
the
WAKE
UP
indicator
disappears
from
the
display.
Hints
for
using
your
Wake
Up
Timer
+
When
the
set
time
comes
you
will
hear
the
most
recently
used
source.
¢
The
volume
when
the
timer
turns
on
the
source
is
the
volume
last
set
when
the
XT-G70RBK
was
used.
This
can
be
quite
a
surprise
first
thing
in
the
morning,
so
you
might
want
to
reset
it
before
going
to
sleep.
+
If
the
CD
is
the
most
recently
used
source,
it
starts
playing
from
the
first
track.
Sleep
Timer
Using
this
timer,
you
can
fall
asleep
to
music
and
know
your
XT-G70RBK
will
turn
off
by
itself
rather
than
play
all
night.
+
Sleep
timer
can
be
set
only
when
the
Unit
is
turned
on.
Press
the
WAKE
UP/
SLEEP
button
with
the
XT-G70RBK
on
and
a
source
playing,.
The
SLEEP
indicator
start
blinking
on
the
display.
Each
time
you
press
the
WAKE
UP/SLEEP
button
while
the
SLEEP
indicator
is
blinking,
the
shut-off
time
shown
on
the
display
changes
as
shown
below.
pare
>
0:30
>
*]
OFF
+
2:00
=
1:30
The
Unit
will
now
turn
off
after
the
time
you
set.
To
check
the
time
remaining
until
the
Unit
turns
off
Press
the
WAKE
UP/SLEEP
button
once.
The
remaining
time
is
displayed
for
5
seconds.
To
cancel
the
Sleep
Timer
setting
Press
WAKE
UP/SLEEP
button
repeatedly
until
the
SLEEP
indicator
disappears
from
the
display.
Page
32
Timer
Priority
Setting
multiple
timers within
the
same
time
range
will
make
actual
operation
complicated,
For
instance,
while
the
Recording
Timer
may
be
set
to
record
a
program
from
8:00
AM
to
9:00
AM,
the
Daily
Timer
may
be
set
to
play
a
CD
at
8:30
AM
.
So
will
it
interrupt
the
radio
recording,
or
will
it
just
not
come
on,
since
Recording
Timer
is
already
on?
A)
Ifthe
Recording,
Once,
and
Daily
Timers
are
set
within
the
same
time
range,
each
§
Timer
setting
timer
will
come
on
at
the
time
you
have
set.
If
another
timer
is
already
on,
that
timer
ONCE
will
be
shut
off
when
the
second
timer
starts.
So
if
you
are
recording
a
radio
DAILY
broadcast
with
the
Recording
Timer
and
the
Once
Timer
is
set
to
start
a
different
station
playing
during
the
recording,
you
will
Jose
the
recording
at
that
point,
Actual
operation
*
{A],
[B],
and
{C]
indicate
the
different
sources.
B)
If
the
Recording,
Once,
and
Daily
Timers
have
the
same
starting
time,
the
timer
operation
will
be
executed
according
to
the
following
priority:
1.
Recording
Timer
2.
Once
Timer
3.
Daily
Timer
C)
Ifthe
Sleep
Timer
is
set
while
another
timer
is
operating,
the
other
timer
operation
will
be
canceled,
Timer
operations
will
not
start
and
be
canceled
while
the
Sleep
Timer
is
operating.
SLEEP
ON
[A]
OFF
Timer
setting
pace:
tal
DAILY
|
|
Actual
operation
SLEEP
REC
or
Timer
setting
ONCE
ON
[CLOFF
DAILY
a
Actual
operation
seenaees
ON
*
Since
the
source
cannot
be
selected
for
the
Sleep
Timer,
the
source
is
always
[B].
on
D)
The
Wake
Up
Timer
operation
will
have
priority
over
any
other timer
operation.
TAL
WAKE
UP
Timer
setting
ON}
[8]
OFF
REC
ONCE
or
DAILY
IA}
Actual
operation
E)
Ifthe
Sleep
Timer
and
Auto
Power
Off
have
been
set
within
the
same
time
range,
the
timer
operation
with
the
earlier
shut-off
time
will
have
priority.
F)
Ifa
timer
operation
begins
during
Auto
Power
Off,
the
timer
operation
will
have
priority.
G)
If
Auto
Power
Off
is
used
during
a
timer
operation,
Auto
Power
Off
will
have
priority.
Page
33
NEeYOL9-LX

(68702
‘ON)
OZ-L
Vocal
Masking
(Sing
Along)
‘9
}
Troubleshooting
SR
a
ea
a
eG
NR
I
I
RIO
RT
PTE
STREET
I
ETE
TY
AGS
EF
TN
NETS
——
7
ty
+
If
you
are
having
a
problem
with
your
XT-G70RBK,
check
this
list
for
a
possible
solution
before
calling
for
service.
The
VOCAL
MASKING
button
ets
you
use
regular
tapes,
CDs
or
records
as
sources
of
sing-along
music,
When
you
press
the
VOCAL
MASKING
+
If
you
cannot
solve
the
problem
from
the
hints
given
here,
or
the
Unit
has
been
physically
damaged,
call
a
qualified
person,
such
as
your
dealer,
for
service,
button,
the
lead
vocal
is
reduced,
and
you
can
replace
it
by
singing
into
the
microphone
as
the
music
plays.
Symptom
Possible
Cause
ACTION
7
No
sound
is
heard.
Connections
are
incorrect,
or
foose.
Check
ali
connections
and
make
corrections.
(See
How
to
Sing
Along
with
Vocal
Masking
pages
4-6.)
impossible
to
record.
Cassette
record
protect
labs
are
removed.
Cover
holes
on
back
edge
of
cassette
with
tape,
1.
Turn
down
the
VOLUME
contro}
completely.
Hard
to
listen
to
broadcasts
The
antenna
is
disconnected.
Re-connect
the
antenna
securely.
because
of
noise.
‘The
loop
antenna
is
too
close
to
the
system.
Change
the
position
and
direction
of
the
loop
antenna.
2.
Attach
the
microphone
(not
supplied)
by
plugging
it
into
the
MIC
jack
in
the
amplifier
The
feeder/wire
antenna
is
not
properly
extended
Extend
feeder/wire
antenna
at
the
best
reception
section.
and
positioned.
position.
The
CD
sound
is
discontinuous,
The
CD
is
scratched
or
dirty.
Clean
or
replace
the
CD.
3.
Start
the
source.
Unable
to
operate
the
Remote.
The
path
between
the
Remote
and
the
sensor
on
Remove
the
obstruction.
CD,
tape,
connected
VCR,
Turntable,
etc.
the
Unit
is
blocked.
The
batteries
are
discharged.
Replace
the
batlerics,
4,
Press
the
VOCAL
MASKING
button.
The
CD
tray
cannot
be
operated.
The
main
AC
power
cord
is
not
plugged
in.
Plug
in
the
AC
power
plug.
The
LED
on
it
lights
up.
The
CD
docs
not
play.
The
CD
is
upside
down.
Put
the
CD
in
with
the
label
side
up.
Operations
are
disabled.
The
built
in
microprocessor
may
malfunction
due
—
Unplug
the
system
then
plug
it
back
in.
5.
Now
adjust
the
volume
of
the
source
with
the
VOLUME
control,
and
the
volume
of
your
to
external
electrical
interference,
voice
with
the
MIXING
LEVEL
control
as
you
sing
into
the
microphone,
‘The
cassette
holder
cannot
be
opened.
The
systom
was
turned
off
because
the
timer
was
Turn
on
the
system.
Setting
the
MIXING
LEVEL
operated
while
the
tape
was
running.
TOWARD
RESULT
'
‘,
SOURCE
Instrumental
music
source
CI
are
emphasized
Amplifier
Compact
Disc
Player
Output
Power
(IEC
263-3/DIN)
Dynamic
Range
(1
kHz)
90
dB
FRONT
SPEAKERS
A
19
watts
per
channel,
min.
RMS,
Signal-to-Noise
Ratio
100
dB
R
both
channels
driven
into
8
ohms
*
Wow
and
Flutter
Unmeasurable
Important
information
about
Vocal
Masking
at
|
kHz
Dimensions
(WxHxD)
275
x
90x
275
mm
*
Because
the
radio
signal
is
not
as
reliable
as
signals
coming
from
a
tape
or
CD,
you
may
not
FRONT
SPEAKERS
B
(10
-
7/8
x
3-
9/16
x
10
-
7/8
in.)
always
get
satisfactory
results
using
the
radio
as
a
source
for
Vocal
Masking.
21
watts
per
channel
into
6
ohms
(Maximum
depth
415
mm
(16-2/8
in.)
with
the
*
With
this
method
of
Vocal
Masking
the
sound
in
the
middle
of
the
stereo
field,
which
is
usually
al
80
Hz
with
0.9%
total
harmonic
CD
tray
open)
a
vocal,
is
reduced
without
reducing
the
instrumental
part.
However,
the
voice
part
is
not
distortion.
Weight
2.2
kg
(4.8
Ibs)
Gompleiely
ellssinnical
only
slenificantly
reduced.
anickindnie
tor
yey
Sacra
me
63
Hz,
160
Hz,
400
Hz,
1
kHz,
2.5
kHz
ania
|
wer
{
‘enter
fret
3
He,
zy
hs
2,
2.5
kHz,
+
Some
tapes
and
CDs
are
better
sources
for
singing
along
than
others.
Audio
Input
Sensitivity/Ampedance
(1
kHz)
4
6.3
kHz,
16
kHz
Mono
sources
are
not
suilabie
for,
Vorel
Masking.
P
Sos
PHONO
2.5
mV/50
kohms
SEA
Control
Range
$1248
+1dB
+
Onsources
with
duets,
strong
echoes,
a
chorus,
or
with
only
a
few
instruments,
the
singer's
voice
VIDEO
300
mV/S0
kohms
Dimensions
(WxHxD)
275
x
0
x
267
mm
may
not
be
completely
reduced.
VCR/DCC/MD
300
mV/S0
kohms
(10
-
7/8
x
3
-
9/16
x
10
-
9/16
in.)
*
Poorly
dubbed
tapes
may
not
work
well
for
Vocal
Masking.
AUX
300
mV/50
kohms
Weight
1.6
kg
(3.6
Ibs)
Audio
Output
Load/Impedance
Power
Specifications
VCR/DCC/MD
*150
mV/S
kohms
Line
Voltage
&
Frequency
AC230VV50
Hz
Video
Input
Power
Consumption
160
watts
Using
the
Microphone
Only
VIDEO
1
Vp-p/75
ohms
Supplied
Accessories
VCR
1
Vp-p/75
ohms.
FM
feeder
antenna
(except
for
Germany)
(1)
.
Video
Output
FM
wire
antenna
(only
for
Germany)
(1)
Te
“Attach
the
microphone,
MONITOR
1Vp-p/7S
ohms
AM
(MW/LW)
loop
antenna
(1)
VCR
1Vp-p/75
ohms
Remote
contro!
(RM-SEG70U)
(1)
2.
Set
the
MIXING
LEVEL
to
the
MIC
position.
Tuner
Batteries
RO3(UM-4/AAA(24F)
(2)
FM
Antenna
adaptor
(except
for
Germany)
(1)
3.
Press
the
CD
button
from
the
source
selecting
buttons,
Tuning
Range
87.5
-
108.0
MHz.
Wire
(1)
If
you
hear
the
sound
from
a
CD,
press
the
STOP/CLEAR
@@
button.
Usable
Sensitivity
—
0.95
LV/75
ohms
(10.8
dBf)
Speaker
control
cords
(2)
Signal-to-Noise
Ratio
MONO
{at
85
dBf)
80
aan
ia
Panoramic
Shifting
Speakers
SP-G70BK
.
(IHF-A
weighted/DIN)
STEREO
(at
85
dB)
7:
Type
3-way
bass
reflex
t
4,
Adjust
the
VOLUME
control.
AM
(MWILW)
Speakers
baits
‘Tuning
Range
MW:
522
—
1,629
kHz
Low
range:
Woofer
16.5
em
(6-1/2
in.)
cone
x
1
To
record
from
the
microphone
LW:
144
~
288
kHz Mid
range:(Moter
Driven)
—_
9.0
cm
(3-9/16
in.)
cone
x
1
Youcan
use
the
microphone
for
recording.
Sound
going
into
the
microphone
is
mixed
with
sound
Dimensions
(WxHxD)
275
x
125
x
299
mm
:
High
range:Tweeter
5.5
cm
(2-3/16
in.)
cone
x
1
sent
to
the
tape
in
deck
B
from
some
other
source,
such
as
the
CD,
or
radio.
,
(10
-
7/8
x
4
-
15/16
x
11
-
13/16
in.)
Sound
pressure
level
See
the
procedure
for
recording
on
page
8.
Weight
5.1
kg
(11-2ibs)
Kane
Fange
speaker
86
dB/w.m
You
cannot
record
your
singing-along
when
the
main
source
is
a
tape
in
deck
A.
‘Tape
deck
Mid/High
range
speaker
Bo
dB
ro
-m
Frequency
response
Power
handling
capacity
Normal:
30
~
15,000
Hz
Low
range
speaker
30
watts
Note
CrO2:
30
~
16,000
Hz
Mid/High
range
speaker
25
watts
To
prevent
howling
and
squealing
when
using
the
microphone,
adjust
the
VOLUME
control,
and
Metal:
30
—
17,000
Hz
Frequency
Range
try
not
to
point
the
microphone
at
the
speakers.
Wow
and
Flutter
Low
range
speaker
38
Hz
—
200
Hz
(XT-G70RBK
System
total)
When
you
are
not
using
the
microphone,
disconnect
it.
(WRMS/DIN)
0.09%0.2%
Mid/High
range
speaker
120
Hz
—
20,000
Hz
Dimensions
(WxHxD)
275
x125x
270mm
Impedance
(10
-
7/8
x
4
-
15/16
x
10
-11/16
in.)
Low
range
speaker
6
ohms
Weight
2.9
kg
(6.5
Ibs)
Mid/High
range
speaker
8
ohms
Dimensions
(WxHxD)
230
x
426
x
281
mm
(9-
1/16
x
16-
3/16
x
11
-
£/8
in.)
Weight
6.5
kg
(14.4lbs)
each
Supplied
Accessory
Speaker
cords
(2)
(Design
and
specifications
subject
to
change
without
notice.)
Page
34
Page
36
1GYOZLD-LX
This manual suits for next models
4
Table of contents
Other JVC Stereo System manuals