9
Setting the Tuner
Your recorder needs to memorise all necessary stations in
channel positions in order to record TV programmes. Once
stored, you can call them up with the TV PROG. 8/9 button
without going through any vacant channels.
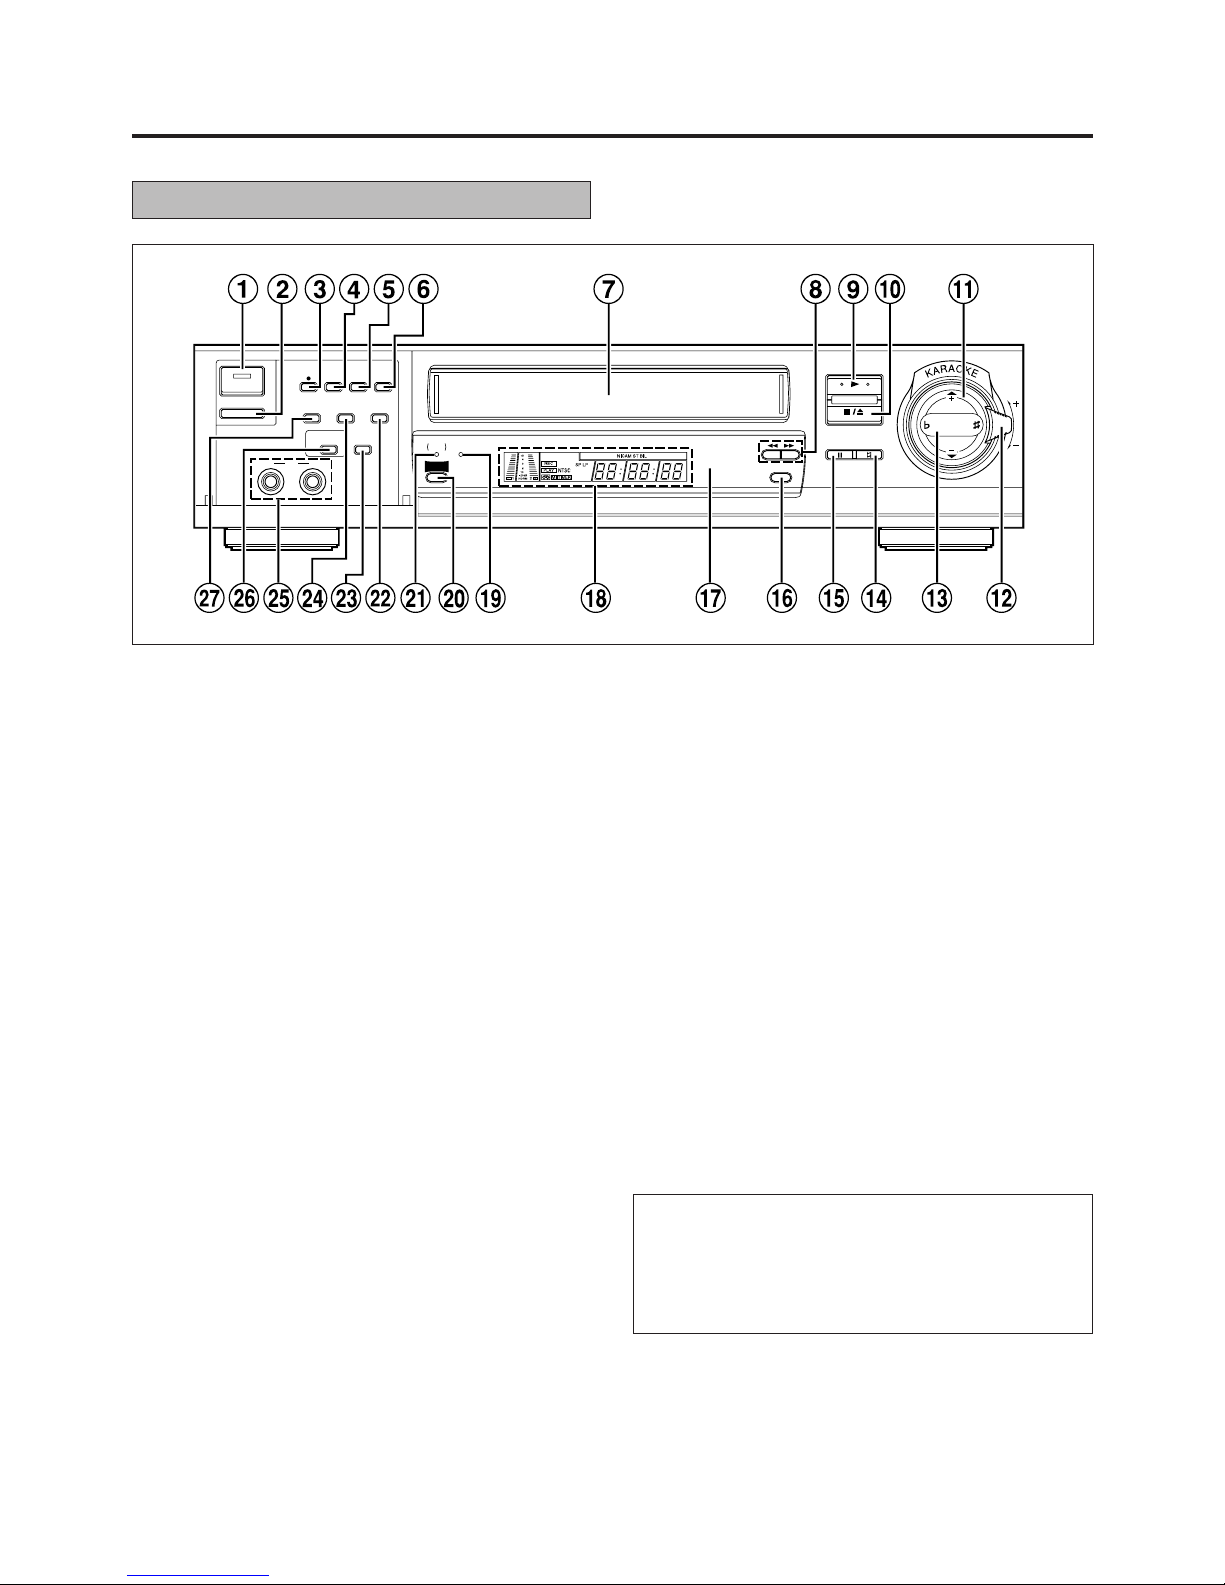
Use the buttons on the recorder for this procedure.
Press OPERATE button to turn on the recorder.
LBesure to selectthe AUTO modeby pressing theCOLOUR
SYSTEM button.
PressandholdCHSETbutton formorethan2seconds.
LThe Channel Set Mode Select screen appears.
Press TV PROG. 88
88
8/99
99
9button to
place the pointer next to
“SEARCH/STORE”, then press
OK button.
LThe Band Select screen appears.
Press TV PROG. 88
88
8/99
99
9 button to place the pointer next
to the band of your choice, then press OK button to
initiate Auto Channel Search.
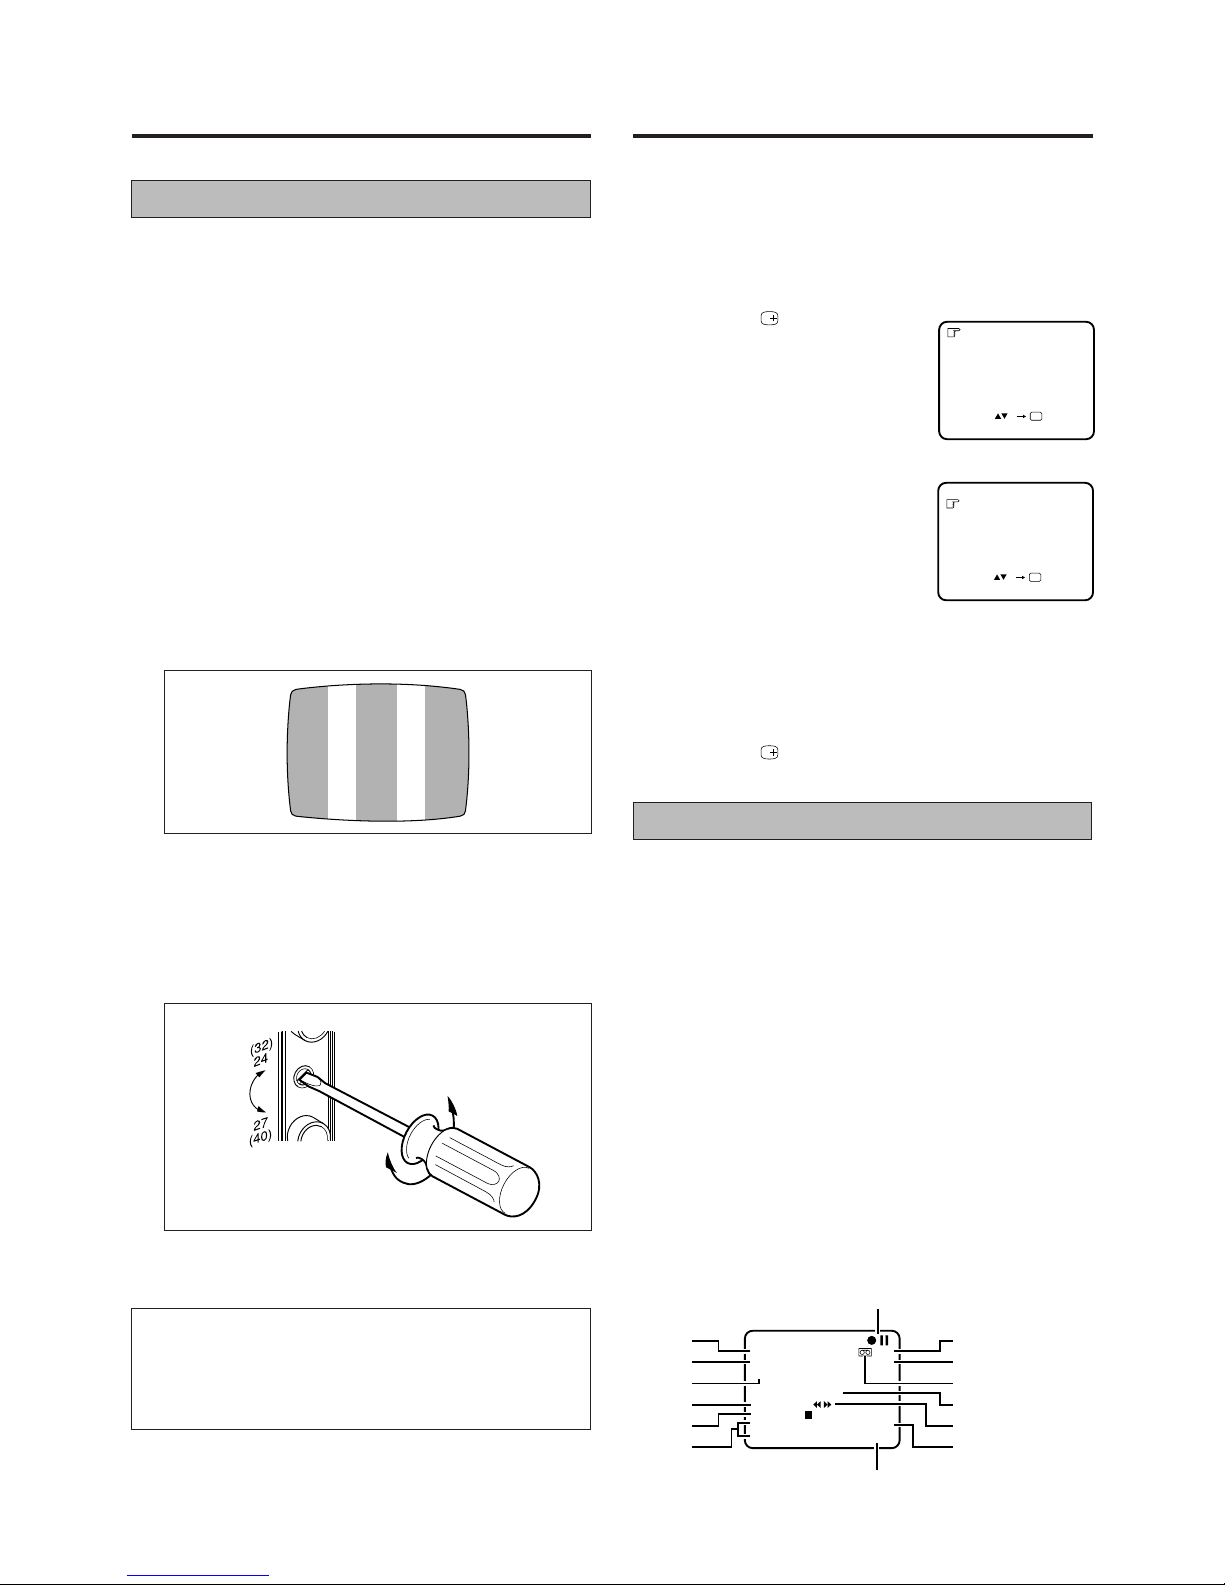
Therightscreenappearswhena
station is detected.
LTo store the detected station, place
the pointer next to “STORE” by
pressing TV PROG. 8/9 button,
then press OK button.
LIf your don’t want to store the station, press TV PROG. 8/9
buttonto place the pointer next to “CONTINUE”, then press
OK button. Auto Channel Search will start resume.
LThe blueback screen and the TV picture currently being
broadcast appear alternately for 8 seconds each.
PressTVPROG.88
88
8/99
99
9buttonuntil
an open position in which you
want to store a channel appears,
then press OK button.
If fine tuning is not necessary,
simply press STORE button.
LForfinetuningadjustment,press TV
PROG. 8/9 button until the picture
becomesclearer,thenpressSTORE
button.
LTo continue Auto Channel Search,
pressTVPROG.8/9 buttontoselect
“CONTINUE”,thenpressOKbutton.
Repeat steps 5 to 7 as necessary.
LTo set channels for other bands, press
TVPROG.8/9 buttontoselect“BAND
SELECT”,thenpressOKbuttontogo
back to the Band Select screen.
Repeat steps 4 to 7.
Press CH SET to return to normal screen.
Setting the Clock
Since your video recorder bases all of its timer recording start
and stop “decisions” on the time kept by its built-in clock,
accuratesettingofthisclockiscrucialforpropertimerrecording
results. Each entry must be made within 10 seconds of the
previous entry.
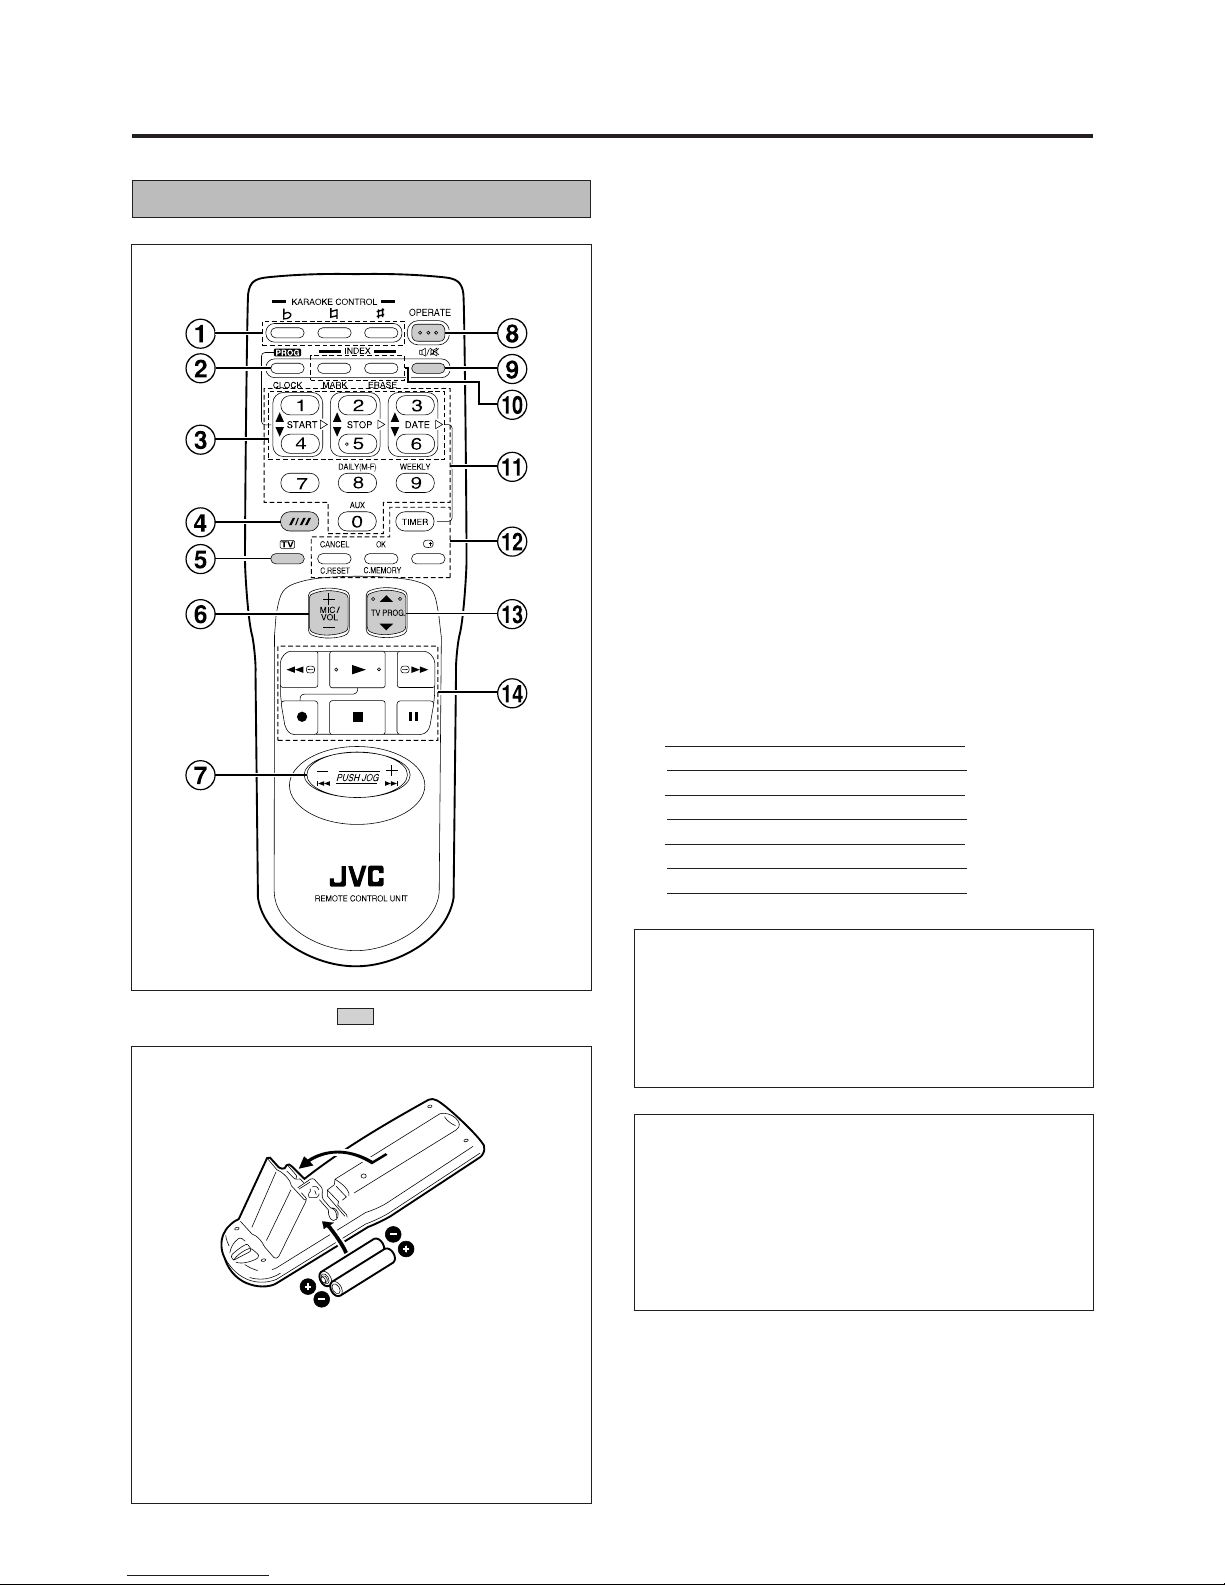
Use the buttons on the remote control for this procedure.
Press OPERATE button to turn on the recorder.
Press CLOCK button to access mode select screen.
Press TV PROG. 88
88
8/99
99
9button to
placethepointernextto“CLOCK
SET”, then press OK button.
LThe Clock Set screen appears.
Use NUMBER button “1 (88
88
8)” or
“4 (99
99
9)” to set the time.
LPressandholdeitherbuttontodelay
or advance the time by 30 minutes.
Use NUMBER button “2 (88
88
8)” or “5 (99
99
9)” to set the date.
LPress and hold either button to change the date by 15 days.
Use NUMBER button “3 (88
88
8)” or “6 (99
99
9)” to set the year.
Press CLOCK button to return to normal screen.
LTo Make Corrections
Perform steps 1 to 3 to call up the Clock Set screen, use
NUMBER buttons “1” to “6” to make the correction, then
press CLOCK button.
Note:
•If, in step 7, the year digits are automatically cleared, it is
possible that you have input 29th February for a non-leap
year. Input the correct data.
Power failure indicator
Theclockresetsto“–:––”whentherehasbeenapowerfailure.
Reset the time to return the clock display to normal.
2
1
3
4
5
6
7
TIMER PROGRAMMING
CLOCK SET
[TV PROG ]
[CANCEL] : EXIT
OK
CLOCK SET
TIME DATE YEAR
0 : 00 01 : 01 00
[1
-
6]
[PROG/CLOCK] : EXIT
1
8