manuals.online logo
Brands
  1. Home
  2. •
  3. Brands
  4. •
  5. JVC
  6. •
  7. VCR System
  8. •
  9. JVC HR-XVC20U User manual

JVC HR-XVC20U User manual

Other manuals for HR-XVC20U

1

Other JVC VCR System manuals

JVC HR-P82A User manual

JVC

JVC HR-P82A User manual

JVC HR-J272EU Setup guide

JVC

JVC HR-J272EU Setup guide

JVC HR-VP655U User manual

JVC

JVC HR-VP655U User manual

JVC HR-S8600EK User manual

JVC

JVC HR-S8600EK User manual

JVC HR-J260EK User manual

JVC

JVC HR-J260EK User manual

JVC HR-VP680U User manual

JVC

JVC HR-VP680U User manual

JVC SHOWVIEW HR-DVS1EU Quick start guide

JVC

JVC SHOWVIEW HR-DVS1EU Quick start guide

JVC HR-S7955EK User manual

JVC

JVC HR-S7955EK User manual

JVC HR-J785EK User manual

JVC

JVC HR-J785EK User manual

JVC SR-L911UB User manual

JVC

JVC SR-L911UB User manual

JVC HR-DVS3EK User manual

JVC

JVC HR-DVS3EK User manual

JVC HR-S5600AM User manual

JVC

JVC HR-S5600AM User manual

JVC HR-V205EF User manual

JVC

JVC HR-V205EF User manual

JVC HR-DVS2EU User manual

JVC

JVC HR-DVS2EU User manual

JVC HR-IP820U User manual

JVC

JVC HR-IP820U User manual

JVC HR-S7955EK User manual

JVC

JVC HR-S7955EK User manual

JVC HR-P125EE User manual

JVC

JVC HR-P125EE User manual

JVC HR-DVS1EK User manual

JVC

JVC HR-DVS1EK User manual

JVC HR-DD858E/EH User manual

JVC

JVC HR-DD858E/EH User manual

JVC HR-DVS3EU User manual

JVC

JVC HR-DVS3EU User manual

JVC HR-S9400U User manual

JVC

JVC HR-S9400U User manual

JVC HR-J245EE User manual

JVC

JVC HR-J245EE User manual

JVC HR-P71K User manual

JVC

JVC HR-P71K User manual

JVC HR-S6970AG User manual

JVC

JVC HR-S6970AG User manual

Popular VCR System manuals by other brands

RCA VR678HF user guide

RCA

RCA VR678HF user guide

Zenith VRL4270HF Operating guide & warranty

Zenith

Zenith VRL4270HF Operating guide & warranty

Akai VS-606EA Operator's manual

Akai

Akai VS-606EA Operator's manual

Panasonic NV-SJ412EE operating instructions

Panasonic

Panasonic NV-SJ412EE operating instructions

FUNAI 27C-450 Service manual

FUNAI

FUNAI 27C-450 Service manual

Sanyo VHR-M262EV Service manual

Sanyo

Sanyo VHR-M262EV Service manual

Sony SLV-X37 operating instructions

Sony

Sony SLV-X37 operating instructions

Grundig GV 7400 EURO Service manual

Grundig

Grundig GV 7400 EURO Service manual

Zenith VCM321 Installation and operating guide

Zenith

Zenith VCM321 Installation and operating guide

Aiwa VX-S135U operating instructions

Aiwa

Aiwa VX-S135U operating instructions

RCA VR725HF user guide

RCA

RCA VR725HF user guide

TruTech ZV450TT8 owner's manual

TruTech

TruTech ZV450TT8 owner's manual

Sensory Science DDV2120 user guide

Sensory Science

Sensory Science DDV2120 user guide

RCA VR611HF user guide

RCA

RCA VR611HF user guide

Panasonic AG-6840P operating instructions

Panasonic

Panasonic AG-6840P operating instructions

Philips VR6293 operating instructions

Philips

Philips VR6293 operating instructions

SV2000 SVX142AT Specifications

SV2000

SV2000 SVX142AT Specifications

Philips VRZ263AT owner's manual

Philips

Philips VRZ263AT owner's manual

manuals.online logo
manuals.online logoBrands
  • About & Mission
  • Contact us
  • Privacy Policy
  • Terms and Conditions

Copyright 2025 Manuals.Online. All Rights Reserved.

For model:
HR-XVC20U
DVD/CD PLAYER
Hi-Fi STEREO
VIDEO CASSETTE
RECORDER
USER'S UIDE
LPT0829-001B
For Customer Use:
Model No.
Serial No.
Enter below the Model No.and Serial No.which are located on the rear of cabinet.
Retain this information for future reference.
2C50101BE Cover 13/5/03, 3:32 PM1
2
RISK OF ELECTRIC SHOCK
DO NOT OPEN
CAUTION
The lightning flash with arrowhead
symbol, within an equilateral triangle is
intendedtoalerttheusertothepresence
of uninsulated dangerous voltage within
the product's enclosure that may be of
sufficient magnitude to constitute a risk
of electric shock to persons.
Theexclamationpointwithinanequilateral
triangle is intended to alert the user to
thepresence of important operating and
maintenance (servicing) instructions in
theliteratureaccompanyingtheappliance.
CAUTION: TO REDUCE THE RISK OF ELECTRIC
SHOCK, DO NOT REMOVE COVER (OR
BACK). NO USER-SERVICEABLE
PARTS INSIDE. REFER SERVICINGTO
QUALIFIEDSERVICE PERSONNEL.
WARNING:TO REDUCE THE RISK OF FIRE OR ELECTRIC SHOCK, DO NOT EXPOSE THIS APPLIANCE
TO RAIN OR MOISTURE.
CAUTION:TO PREVENT ELECTRIC SHOCK DO NOT USE THIS POLARIZED PLUG WITH AN EXTENSION
CORD, RECEPTACLE OR OTHER OUTLET UNLESS THE BLADES CAN BE FULLY INSERTED
TO PREVENT BLADE EXPOSURE.
ATTENTION:
POUR PREVENIR LES CHOCS ELECTRIQUES, N'UTILISEZ PAS CETTE FICHE POLARISEE
AVEC UNE RALLONGE, UNE PRISE DE COURANT OU UNEAUTRE SORTIE DE COURANT,
SAUF SI LES LAMES PEUVENT ETRE INSEREESA FOND SANS EN LAISSER AUCUNE
PARTIE A DECOUVERT.
NOTE: Changes or modifications not approved by JVC could void user’s authority to operate the equipment.
This equipment has been tested and found to comply with the limits for a Class B digital device, pursuant to
Part 15 of the FCC Rules. These limits are designed to provide reasonable protection against harmful
interference in a residential installation. This equipment generates, uses, and can radiate radio frequency
energy and if not installed and used in accordance with the instructions, may cause harmful interference to
radio communications. However, there is no guarantee that interference will not occur in a particular
installation. If this equipment does cause harmful interference to radio or television reception, which can be
determined by turning the equipment off and on, the user is encouraged to try to correct the interference by
one or more of the following measures:
Reorient or relocate the receiving antenna.
Increase the separation between the equipment and receiver.
Connect the equipment into an outlet on a circuit different from that to which the receiver is connected.
Consult the dealer or an experienced radio/TV technician for help.
CAUTION:
THIS DIGITAL VIDEO PLAYER EMPLOYS A LASER SYSTEM.
TO ENSURE PROPER USE OF THIS PRODUCT, PLEASE READ THIS USER'S GUIDE CAREFULLY AND
RETAIN FOR FUTURE REFERENCE. SHOULD THE UNIT REQUIRE MAINTENANCE, CONTACT A JVC
AUTHORIZED SERVICE CENTER.
USE OF CONTROLS,ADJUSTMENTS ORTHE PERFORMANCE OF PROCEDURES OTHER THANTHOSE
SPECIFIED HEREIN MAY RESULT IN HAZARDOUS RADIATION EXPOSURE.
TO PREVENTDIRECT EXPOSURE TO LASER BEAM, DO NOT TRY TO OPEN THE ENCLOSURE. VISIBLE
LASER RADIATION MAY BE PRESENT WHEN THE ENCLOSURE IS OPENED. DO NOT STARE INTO BEAM.
Location of the required Marking
The rating sheet and the safety caution
are on the rear of the unit.
CERTIFICATION: COMPLIES WITH
FDA RADIATION PERFORMANCE
STANDARDS,21 CFRSUBCHAPTER J.
2C50101BE(02-05) 13/5/03, 3:32 PM2
3
1. READ INSTRUCTIONS
All the safety and operating instructions should be read before the unit is operated.
2. RETAIN INSTRUCTIONS
The safety and operating instructions should be retained for future reference.
3. HEED WARNINGS
All warnings on the unit and in the operating instructions should be adhered to.
4. FOLLOW INSTRUCTIONS
All operating and use instructions should be followed.
5. CLEANING
Unplug this unit from the wall outlet before cleaning. Do not use liquid cleaners or aerosol cleaners.
Use a damp cloth for cleaning the exterior cabinet only.
6. ATTACHMENTS
The manufacturer of this unit does not make any recommendations for attachments, as they may cause
hazards.
7. WATER AND MOISTURE
Do not use this unit near water. For example, near a bathtub, washbowl, kitchen sink, laundry tub, in a wet
basement, or near a swimming pool.
8. ACCESSORIES
Do not place this unit on an unstable cart, stand, tripod, bracket, or table.
The unit may fall, causing serious injury, and serious damage to the unit.
An appliance and cart combination should be moved with care. Quick stops,
excessive force, and uneven surfaces may cause the appliance and cart
combination to overturn.
9. VENTILATION
Slots and openings in the cabinet back or bottom are provided for ventilation,
to ensure reliable operation of the unit, and to protect it from overheating.
These openings must not be blocked or covered. The openings should never be blocked by placing the unit
on a bed, sofa, rug, or other similar surface. This unit should never be placed near or over a radiator or heat
source. This unit should not be placed in a built-in installation such as a bookcase or rack unless proper
ventilation is provided and/or the manufacturer’s instructions have been adhered to.
10. POWER SOURCES
This unit should be operated only from the type of power source indicated on the rating plate. If you are not
sure of the type of power supply to your home, consult your appliance dealer or local power company. For
units intended to operate from battery power, or other sources, refer to the operating instructions.
11. GROUNDING OR POLARIZATION
This unit is equipped with a polarized alternating-current line plug (a plug having one blade wider than the
other). This plug will fit into the power outlet only one way. This is a safety feature. If you are unable to insert
the plug fully into the outlet, try reversing the plug. If the plug should still fail to fit, contact your electrician to
replace your obsolete outlet. Do not defeat the safety purpose of the polarized plug, if your unit is equipped
with a 3-wire grounding-type plug, a plug having a third (grounding) pin. This plug will only fit into a ground-
ing-type power outlet. This too, is a safety feature. If you are unable to insert the plug into the outlet,
contact your electrician to replace your obsolete outlet. Do not defeat the safety purpose of the grounding-
type plug.
12. POWER-CORD PROTECTION
Power-supply cords should be routed so that they are not likely to be walked on or pinched by items placed
upon or against them, paying particular attention to cords at plugs, convenience receptacles, and the point
where they exit from the appliance.
S3125A
PORTABLE CART WARNING
(symbol provided by RETAC)
IMPORTANT SAFEGUARDS
2C50101BE(02-05) 13/5/03, 3:32 PM3
4
13. LIGHTNING
To protect your unit from a lightning storm, or when it is left unattended and unused for long periods of time,
unplug it from the wall outlet and disconnect the antenna or cable system. This will prevent damage to the
unit due to lightning and power line surges.
14. POWER LINES
An outside antenna system should not be located in the vicinity of overhead power lines or other electric
light or power circuits, or where it can fall into such power lines or circuits. When installing an outside
antenna system, extreme care should be taken to keep from touching such power lines or circuits, as
contact with them might be fatal.
15. OVERLOADING
Do not overload wall outlets and extension cords, as this can result in a risk of fire or electric shock.
16. OBJECT AND LIQUID ENTRY
Do not push objects through any openings in this unit, as they may touch dangerous voltage points or short
out parts that could result in fire or electric shock. Never spill or spray any type of liquid into the unit.
17. OUTDOOR ANTENNA GROUNDING
If an outside antenna or cable system is connected to the unit, be sure the antenna or cable system is
grounded to provide some protection against voltage surges and built-up static charges, Section 810 of the
National Electrical Code, ANSI/NFPA 70, provides information with respect to proper grounding of the mast
and supporting structure, grounding of the lead-in wire to an antenna discharge unit, size of grounding
conductors, location of antenna discharge unit, connection to grounding electrodes, and requirements for
the grounding electrode.
18. SERVICING
Do not attempt to service this unit yourself as opening or removing covers may expose you to dangerous
voltage or other hazards. Refer all servicing to qualified service personnel.
19. DAMAGE REQUIRING SERVICE
Unplug this unit from the wall outlet and refer servicing to qualified service personnel under the following
conditions:
a. When the power-supply cord or plug is damaged.
b. If liquid has been spilled, or objects have fallen into the unit.
c. If the unit has been exposed to rain or water.
d. If the unit does not operate normally by following the operating instructions.Adjust only those
controls that are covered by the operating instructions, as an improper adjustment of other controls
may result in damage and will often require extensive work by a qualified technician to restore the
unit to its normal operation.
e. If the unit has been dropped or the cabinet has been damaged.
f . When the unit exhibits a distinct change in performance, this indicates a need for service.
20. REPLACEMENT PARTS
When replacement parts are required, be sure the service technician uses replacement parts specified by
the manufacturer or those that have the same characteristics as the original part.
Unauthorized substitutions may result in fire, electric shock or other hazards.
21. SAFETY CHECK
Upon completion of any service or repairs to this unit, ask the service technician to perform safety checks to
determine that the unit is in proper operating condition.
22. HEAT
The product should be situated away from heat sources such as radiators, heat registers, stoves, or other
products (including amplifiers) that produce heat.
23. DISC TRAY
Keep your fingers away from the disc tray as it is closing. It may cause serious personal injury.
24. CONNECTING
When you connect the product to other equipment, turn off the power and unplug all of the equipment from
the wall outlet. Failure to do so may cause an electric shock and serious personal injury. Read the owner's
manual of the other equipment carefully and follow the instructions when making any connections.
IMPORTANT SAFEGUARDS
2C50101BE(02-05) 13/5/03, 3:32 PM4
5
EXAMPLE OF ANTENNA GROUNDING AS PER THE
NATIONAL ELECTRICAL CODE
CONDENSATION
Moisture will form in the operating section of the DVD/VCR if the player is brought from cool surroundings into a
warm room or if the temperature of the room rises suddenly. And when this happens, DVD/VCR's performance
will be impaired.
To prevent this, let the DVD/VCR stand in its new surroundings for about an hour before switching it on, or
make sure that the room temperature rises gradually.
Condensation may also form during the summer if the DVD/VCR is exposed to the breeze from an air
conditioner. In such cases, change the location of the DVD/VCR.
25. LASER BEAM
Do not look into the opening of the disc tray or ventilation opening of the product to see the source of the
laser beam. It may cause sight damage.
26. DISC
Do not use a cracked, deformed, or repaired disc. These discs are easily broken and may cause serious
personal injury and product malfunction.
27. NOTE TO CATV SYSTEM INSTALLER
This reminder is provided to call the CATV system installer’s attention toArticle 820-40 of the NEC that
provides guidelines for proper grounding and, in particular, specifies that the cable ground shall be con-
nected to the grounding system of the building, as close to the point of cable entry as practical.
TO USE AC POWER SOURCE
Use the AC polarized line cord provided for operation on AC. Insert
the AC cord plug into a standard 120V 60Hz polarized AC outlet.
NOTES:
•Never connect the AC line cord plug to other than the specified
voltage (120V 60Hz). Use the attached power cord only.
•If the polarized AC cord does not fit into a non-polarized AC
outlet, do not attempt to file or cut the blade. It is the user’s
responsibility to have an electrician replace the obsolete outlet.
•If you cause a static discharge when touching the unit and the
unit fails to function, simply unplug the unit from the AC outlet
and plug it back in. The unit should return to normal operation.
Polarized AC Cord Plug
(One blade is wider than the other.)
AC Outlet
Wider Hole
and Blade
Power source
ANTENNA
DISCHARGE UNIT
(NEC SECTION 810-20)
ANTENNA LEAD IN WIRE
GROUNDING CONDUCTORS
(NEC SECTION 810-21)
GROUND CLAMPS
POWER SERVICE GROUNDING
ELECTRODE SYSTEM
(NEC ART 250, PART H)
GROUND CLAMP
ELECTRIC SERVICE
EQUIPMENT
NEC-NATIONAL ELECTRICAL CODE
S2898A
IMPORTANT SAFEGUARDS / Power source
2C50101BE(02-05) 13/5/03, 3:32 PM5
6
Features
DVD/CD Player/Video Cassette Recorder
•DVD/CD player with Video Cassette Recorder -Unique space saving design combines a DVD/CD player and a Hi-Fi Video
cassette recorder. The DVD disc has much more capacity, but is the same size as the audio CD disc. Picture quality is higher
than Super VHS.Audio quality is higher than audio CD.
•High Quality Picture - More than 500 lines (VCR mode: 230 lines) of Horizontal Resolution. It exceeds Super VHS (400
lines) or Laser Disc (430 lines) in resolution.
VCR Section
•Stereo/SAP Reception - This VCR is designed to receive stereo and separate audio program (SAP) broadcasts where
available.
•SQPB - Tapes recorded in the S-VHS system can be played back simply on this VCR.
•4 Video Heads - Provides optimal picture quality for special effects playback.
•19µm HEAD - For superior picture quality even in EP mode, 19micron width technology helps to avoid crosstalk and
boost EP picture quality to near SP levels. With precision technology, ghosts and color beats are virtually eliminated.
•Hi-Fi Stereo Sound - With a frequency response of 20 to 20,000 Hz and a dynamic range of better than 90dB, this
VCR provides a level of excellence that rivals compact discs.
•Instant Timer Recording (ITR) - Simply by pressing the REC and PLAY buttons, the VCR can be programmed for up
to 6 hours of recording with an immediate start.
•Skip Search - When the SKIP SEARCH button is pressed during playback, the VCR will automatically search forward
in 30 seconds increments to a maximum of 3 minutes with each press of the SKIP SEARCH button, and then return to
normal playback.
DVD Section
•Compatible with a wide range of DVD audio outputs
Digital Audio Jack (Optical or Coaxial):
•When a component with a built-in Dolby Digital decoder is connected, Dolby Digital sound can produce the effect of
being in a movie theater or a concert hall.
•Surround standard different from Dolby Digital. This format is already in use in many theaters. By connecting this unit
to a DTS decoder or an AV amplifier with a built-in DTS decoder, the DTS audio of DVD discs recorded in this format
can be enjoyed. However, audio will not be output from the analog audio output jacks.
•The MPEG audio of DVD discs recorded in this format can be enjoyed.
•The Linear PCM sound of a 48 kHz/16 bit through 96 kHz/24 bit exceeds audio CD sound.
•Surround audio - This DVD equipped with a “SPATIALIZER N-2-2”. It can produce the effect of being in a cinema or a
concert hall.
•Multi-Language - Since this DVD matches with 124 language-subtitles/-soundtracks, you can enjoy selecting a favorite
one. (You can not select the language that is not recorded on the disc.)
•Multi-Angle - Pictures of Sports or a Live Concert are recorded with many cameras. When you play such a disc, you
can change the angles during playback. (If a Multi-Angle is not recorded on the disc, you can not change the angle.)
•Repeat Playback - You can repeat chapter, track, title, sides or material between two selected points.
•Program/Random Playback (CD) - You can play back tracks in programmed or random-selected sequences.
•Zoom - You can zoom in on the selected subject on the screen during playback.
•Video Aspect Ratio - You can change the aspect ratio of the screen for your monitor/television on a suitable disc.
•Parental Control - You can limit the playback of scenes or sounds of adult DVD discs which have a parental level rating.
•MP3/WMA/JPEG file Compatibility - This DVD can play back MP3/WMA/JPEG file recorded on the CD-R/RW and
FUJICOLOR CD and Kodak Picture CD formats.
This product incorporates copyright protection technology that is protected by method claims of certain U.S. patents
and other intellectual property rights owned by Macrovision Corporation and other rights owners. Use of this copyright
protection technology must be authorized by Macrovision Corporation or other rights owners and is intended for home
and other limited viewing uses only unless otherwise authorized by Macrovision Corporation or other rights owners.
Reverse engineering or disassembly is prohibited.
Manufactured under license from Dolby Laboratories. “Dolby”and the double-D symbol are trademarks of Dolby
Laboratories. Confidential unpublished works. © 1992-1997 Dolby Laboratories, Inc. All rights reserved.
“DTS”and “DTS Digital Out”are trademarks of Digital Theater Systems, Inc.
Certain audio features of this product manufactured under license from Desper Products,Inc. Spatializer and the circle
- in - square device are trademarks owned by Desper Products,Inc.
Unauthorized recording of copyrighted television programs, films, video cassettes and other materials may infringe the
rights of copyright owners and be contrary to copyright laws.
*
*
*
*
*
2C50101BE(06-11) 13/5/03, 3:32 PM6
7
Contents
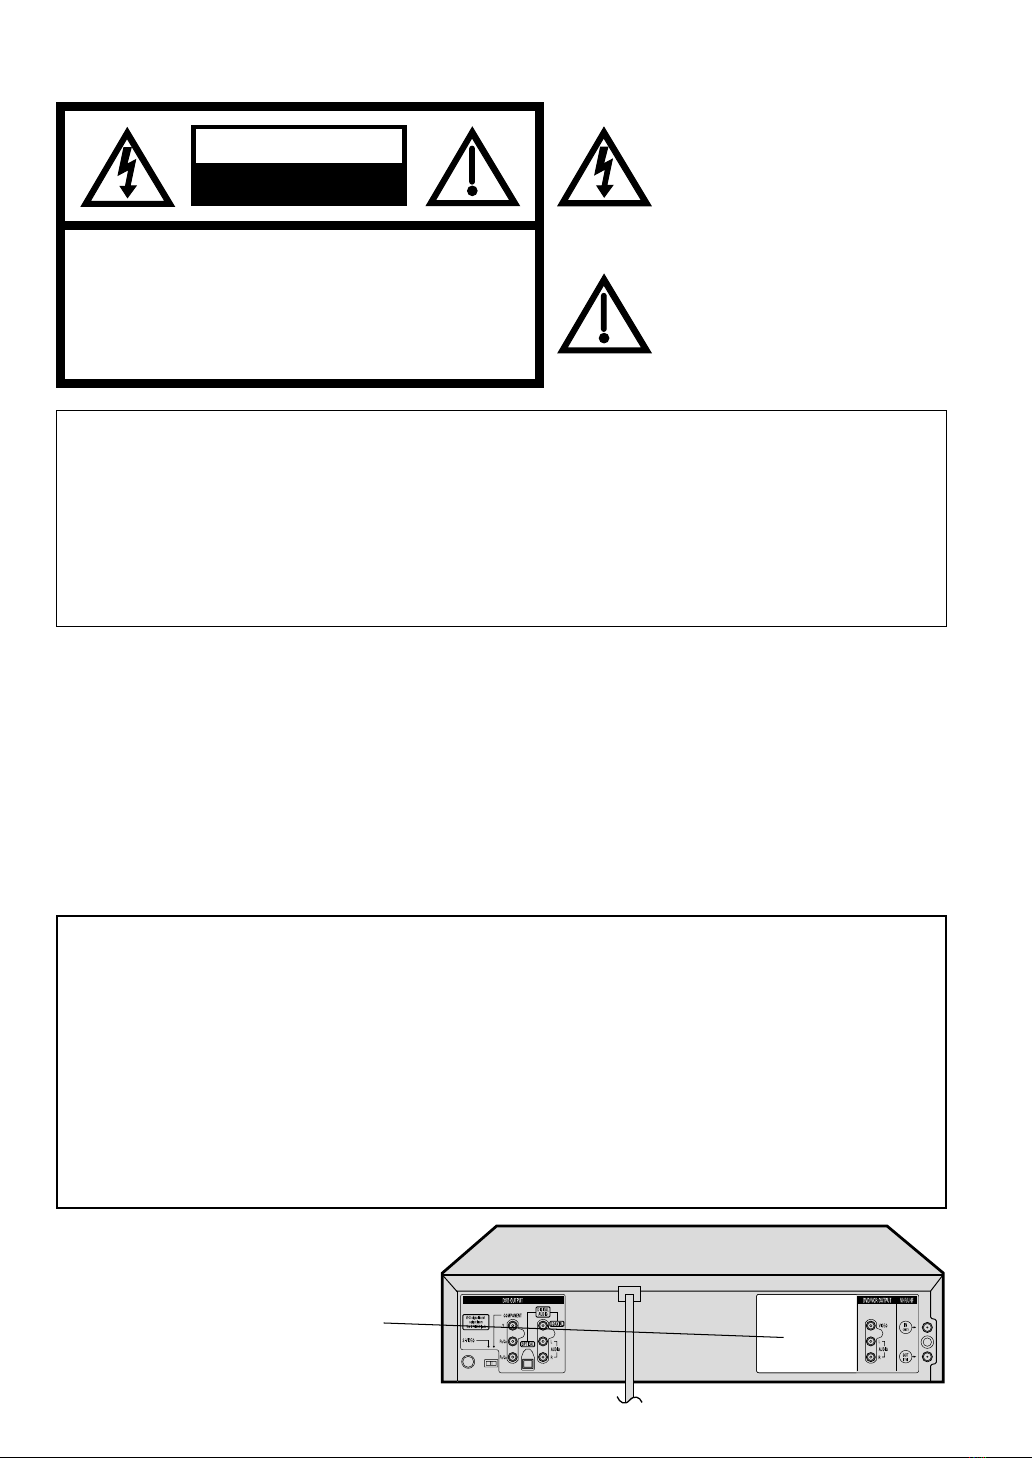
IMPORTANT SAFEGUARDS........................ 3
Powersource ............................................... 5
Features ...................................................... 6
Contents ...................................................... 7
Parts and functions....................................... 8
Display ........................................................ 9
Remotecontrol ........................................... 10
TV multi-brand remote control ..................... 12
Control four JVC VCRs............................... 13
Basicconnections ...................................... 14
CATV (CABLE TV) connections .................. 16
Playbackconnections ................................. 18
Before using your unit
Recording a TV program.............................. 30
Instant Timer Recording (ITR)...................... 32
Timer recording ........................................... 33
Recording
Stereo recording and playback ..................... 35
SeparateAudio Program (SAP).................... 35
Duplicating a video tape............................... 36
Duplicating a disc material onto a video tape ....
36
Advanced function of VCR section
Cassette tape playback................................ 27
Special playback......................................... 28
ZERO RETURN function ............................. 29
Video Index Search system.......................... 29
Tape playback operation
Setting the video channel ............................. 20
Setting the language .................................... 20
Tuner setting ............................................... 21
ToADD/DELETE channels ........................... 22
Noise elimination......................................... 22
Auto clock setting ........................................ 23
Manual clock setting.................................... 25
Loading and Unloading a cassette tape ........ 26
Setting up the VCR section
Disc............................................................ 37
Settingsetuplanguage ................................ 38
Playback procedure ..................................... 39
Special playback......................................... 40
Zooming ..................................................... 41
Locating desired scene ................................ 41
Repeat playback ......................................... 42
Program playback (CD)............................... 43
Random playback (CD)................................ 43
MP3/WMA/JPEG playback........................... 44
Setting the JPEG Interval............................. 46
Setting the Select Files ................................ 47
Zooming (JPEG CD).................................... 48
Changing angles (JPEG CD)........................ 48
Marking desired scenes ............................... 49
Changing soundtrack language .................... 50
Karaoke playback........................................ 50
Subtitles ..................................................... 51
Changing angles ......................................... 51
Titleselection .............................................. 51
DVD menu .................................................. 51
Disc Playback operation
Parental control........................................... 52
Temporary disabling of rating level by DVD
disc ............................................................ 53
Setting menu language ................................ 54
Setting subtitle language .............................. 55
Setting audio soundtrack language ............... 56
Setting surround sound ................................ 56
Setting the aspect ratio of TV screen ............ 57
Setting on screen display ............................. 58
Status display of disc................................... 58
Dynamic Range Control............................... 59
Language code list ...................................... 60
Advanced Function of DVD section
Problems and troubleshooting ...................... 61
Video head cleaning .................................... 62
Specifications .............................................. 63
HOWTO LOCATE YOUR JVC SERVICE
CENTER .................................................... 64
LIMITED WARRANTY ................................. 65
Additional information
2C50101BE(06-11) 13/5/03, 3:32 PM7
8
Parts and functions
Front
STOP button
Rear
PLAY button
OPEN/CLOSE button
Disc tray
POWER
button CHANNEL +/–buttons
AUDIO (L/R)/
VIDEO IN jacks FF (Fast Forward) button
Remote sensor
EJECT button
VCR indicator
VCR/DVD mode selector button
Cassette Loading Slot
REW (Rewind) button REC button
DVD indicator
AC power cord
DVD/VCR common AUDIO (L/R)/
VIDEO OUT jacks
S-VIDEO/COMPONENT
Video selector switch
DVD COAXIAL DIGITAL
AUDIO OUT jack
RF IN jack
DVD OPTICAL DIGITAL
AUDIO OUT jack
DVD S-VIDEO
OUT jack
DVD COMPONENT OUT jacks
RF OUT jack
DVD AUDIO (L/R)
OUT jacks
2C50101BE(06-11) 13/5/03, 3:32 PM8
9
No. Display Description
VCR mode
1
2
3
4
5
6
7
1 2 34
7
6
5
Playback
Stop
Still picture
Frame advanced playback
Forward slowmotion
FastForward playback
Reviewplayback
Skip chapter to forward direction
Skip chapter to reverse direction
Open or Close the tray
Auto resume
Direction button’s mark
A-B repeat
Subtitle language
Soundtrack language
Output sound for Video-CD
Karaoke vocal setting
Angle
Zoom
Parental level locked
Parental level unlocked
Screen size: Letter box
Screen size: Pan scan
Screen size: Wide
Shows prohibited act
AB
Explanation for On-Screen-Symbol (DVD):
Display
8
9
10
11
VCR
DVD
CD
PM
10 : 00
01 : 00
2
C036
L
TRK
REC
CH02
Playback (lights) / Auto resume (flashes)
Still picture
DVD disc is inserted.
CD is inserted.
Display for afternoon (lights out in the morning)
Clock display (colon [ : ] flashes)
Counter display by hour/minute at VCR/DVD / by minute/second at CD
Track number display for CD
TV channel display for VCR
CATV channel display
External input display
Timer recording display
Video tape is in the unit
Track display for CD
Normal recording display (flashes during Instant Timer Recording - ITR)
NOTE:
Some discs may be displayed wrong or e.g. chapter number, playback time, etc. may not be displayed.
89
10
11
Display window
Err Error display
Pbc Playback Control (Video CD)
2C50101BE(06-11) 13/5/03, 3:32 PM9
10
TV/VCR/DVD switch
Switch to operate TV or VCR or DVD 20,38
POWER Power on/off 20
DVDMENU Display menu of DVD software 51
MARKER Locating desired scene 49
RETURN Remove DVD set up menu 38,53
OPEN/CLOSE Open or Close the tray 39
DISPLAY Change the front Display mode 29
SUBTITLE Set Subtitle of a DVD disc 51
A.TRK DigitalAUTO TRACKING 28
ANGLE Change playback angle of a DVD disc 48,51
C.RESET Reset the counter to 00:00 29
SEARCH MODE Index for DVD 41
ZERO RETURN
Stop the tape when the counter reaches 00:00
29
PLAY MODE Select playback mode 42,43
SP/EP Sets the tape speed for recording 30,32
ZOOM Zoom(DVD/VCD) 41,48
TITLE Select title of a DVD disc 51
REPEAT A-B
Repeat playback betweenA and B (DVD/CD)
42
0-9 Direct channel selection of TV 22,30
Input setting 41,43
Enter a password 52,53
TIMER
Set the unit to start recording at a preset time
.
33,34
TV/VCR Switches between TV and VCR 20,31
TV POWER Turn the connected TV on or off 10
INPUT Switch the connected TV to external mode 10
TV VOL +/–Adjust the connected TV’s volume 10
REW Rewind/Review playback 27,28,40
PLAY Playback 27,39
FF
Fast Forward/Forward search playback
27,28,40
REC Recording 30,32,36
STOP Stop 27,39
PAUSE Still picture/Recording pause on/off 28,31,36,40
SKIP /
Skip chapter to forward or reverse direction
40,45
INDEX / Search for the INDEX mark of a tape 29
TV/VCR CH +/–Select channel of the connected TV or VCR
10,30,32,36
/ Cursor buttons
SET –/+ Setting buttons 33,34
Manual tracking buttons in playback mode 28
/ Cursor buttons - To move Up in the VCR menu
you press the . To move Down in the VCR
menu you press the .
ENTER Enter information in the menu
SELECT Select option in the menu
SET UP MENU Display menu of setup 20,21,38,46-47,54-58
CANCEL Delete Timer program 34
Cancel input data in the setting mode 25,33,41,43
OSD Display VCR or DVD operation status 31,58
A.MONITOR
Switches sound between mono and stereo
35
Change sound track language of DVD
50
SLOW Slowmotion playback 28,40
SKIP SEARCH Skip the unwanted short material of a tape 28
Remote control
Page
This Remote can control some functions (TV
POWER,NUMBER(0-9),INPUT,TV VOL +/–,
TV CH +/– and ENTER)
of a remote controllable
TVof JVC and the brands listed on page 12 by slide
TV/VCR/DVD switch to TV.
(The POWER button on the upper right is not
effective for theTV.)
TV Multi-Brand Remote Control
NOTES:
It’s not possible to operate a unit not
equipped with a remote sensor.
Whenyou operate theVCRor DVD, the
TV/VCR/DVD switch must be slided to
VCR/DVD again. Otherwise the DVD/
VCR may not operate properly.
Since this unit is combined type of DVD
and VCR, the remote code of DVD is
individual.SopleasenotethattheDVD-
keys on the RCU of the other JVC
RECEIVER/TV
isnoteffectiveforthisunit.
•
•
•
2C50101BE(06-11) 13/5/03, 3:32 PM10