Filename [HRJ480EU1.fm]
Masterpage:Left
10 EN INITIAL SETTINGS (cont.)
Preset Download
Auto Channel Set by Downloading
from TV/Auto Clock Set/Auto Guide
Program Number Set
NOTES:
●For details, refer to the instruction manual of your TV.
●In the area where no TV station transmits a PDC (Programme
Delivery Control) signal, the recorder can perform neither
Auto Clock Set nor Auto Guide Program Number Set.
●If there is a power cut, or if you press 1or MENU while
downloading or set up is in progress, it will be interrupted; be
sure to turn off the recorder power once and try again from the
beginning.
●Auto Clock Set may not function properly depending on the
reception condition.
●On this recorder, the characters available for station names
(ID) are A–Z, 0–9, –, f, + and I(space). Some names of
downloaded stations may differ from those of your TV
(墌pg. 42).
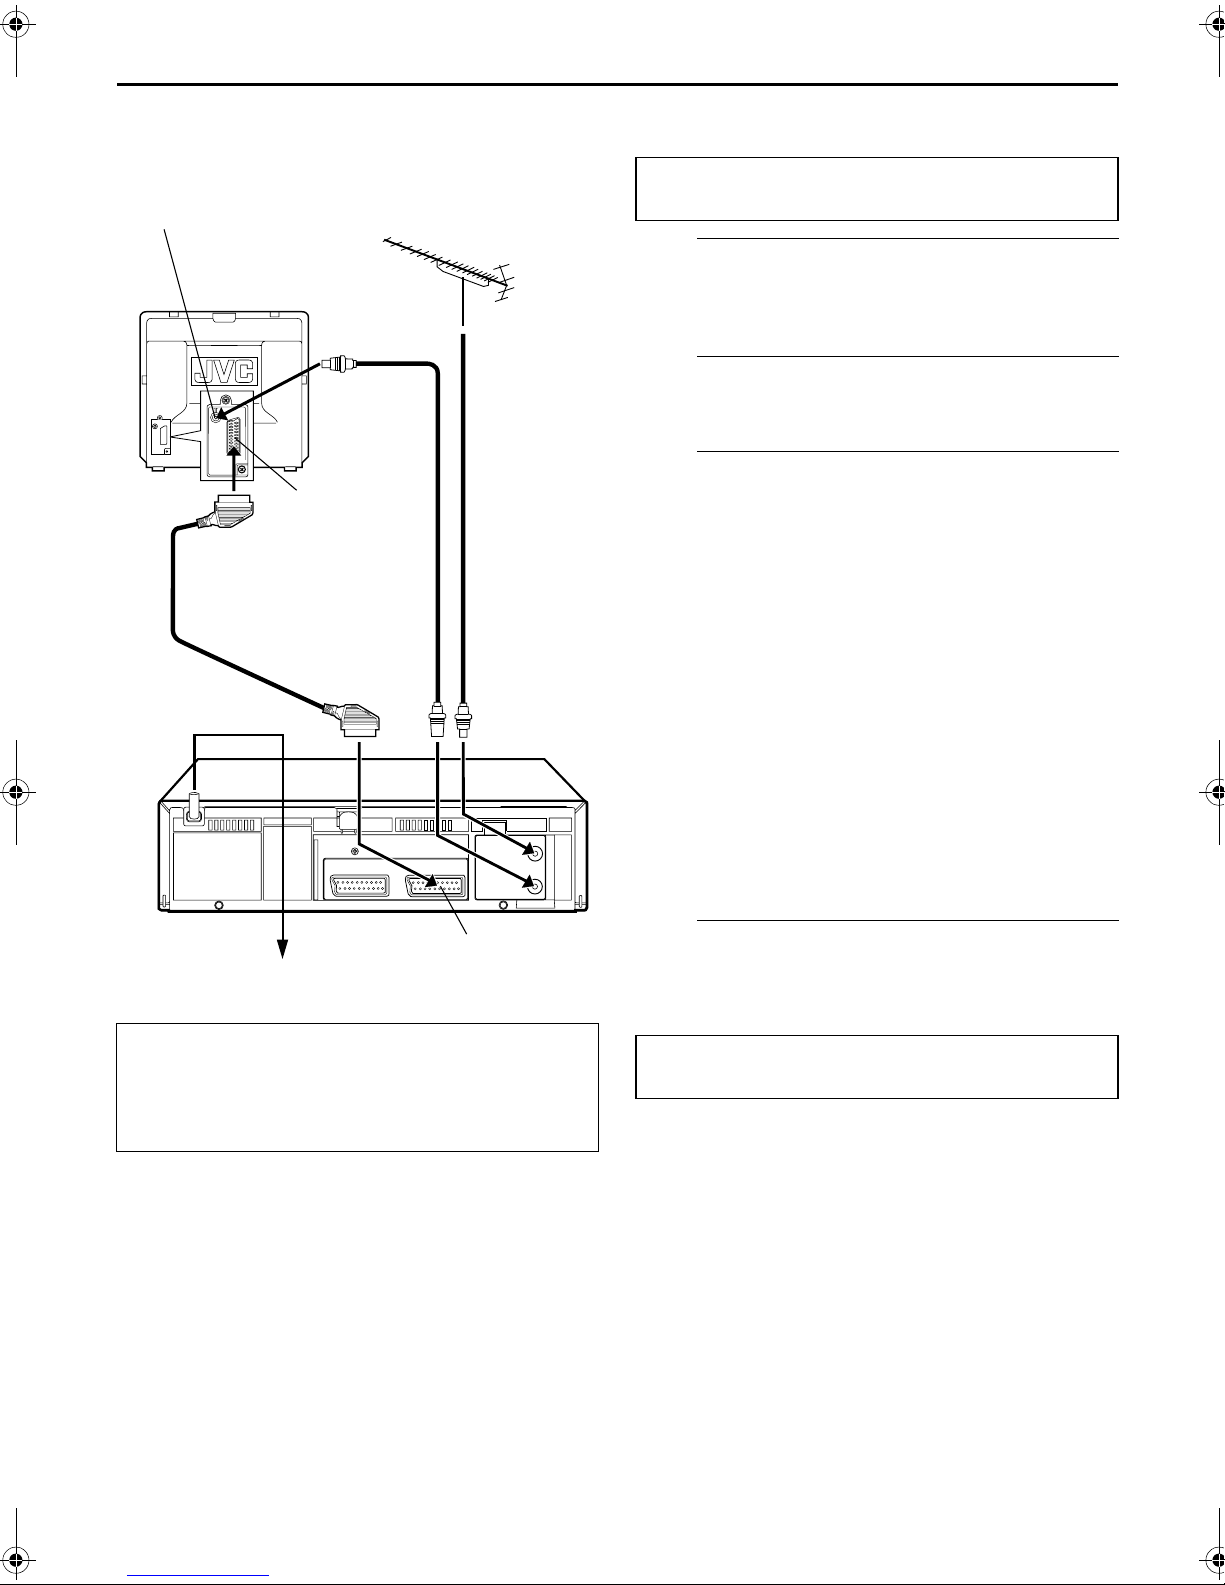
If you have connected the recorder to your TV via the AV
connection (墌pg. 7), the recorder will automatically perform
Preset Download instead of the Auto Set Up in step 4on page 9.
After downloading, the recorder sets the clock and Guide
Program numbers automatically.
APerform Preset Download.
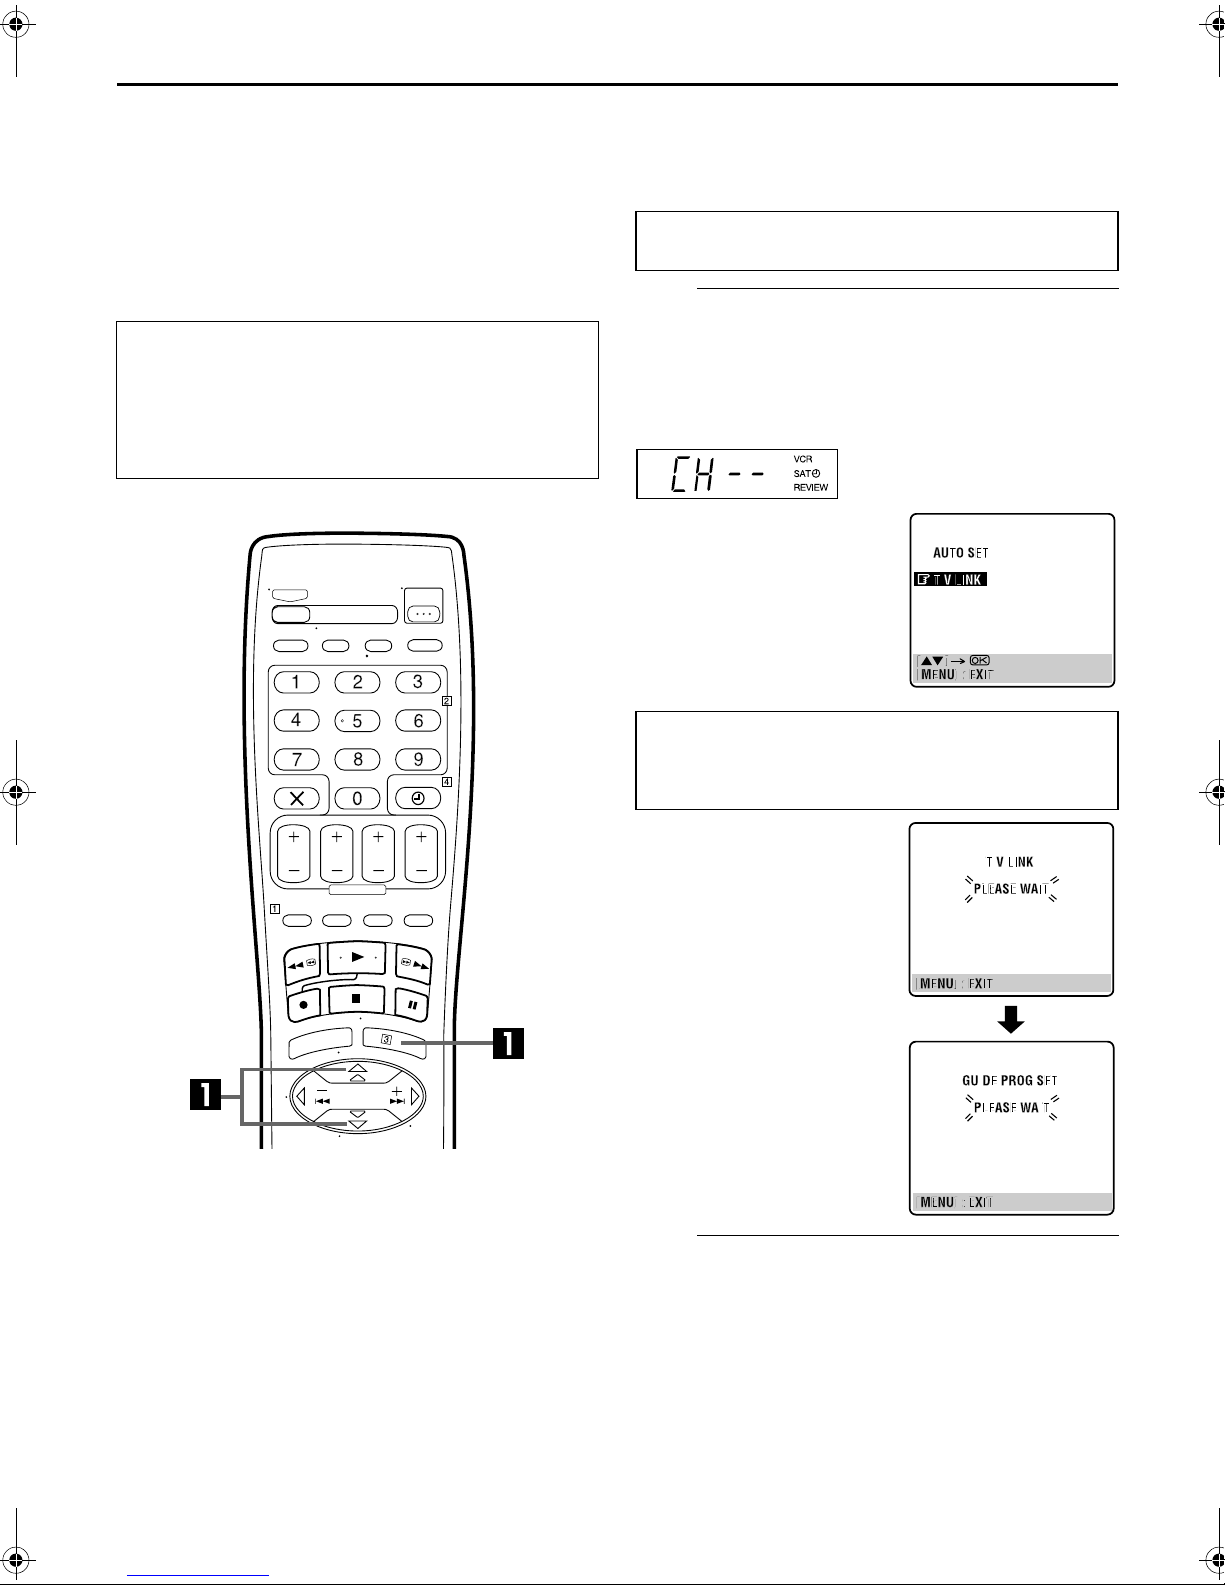
Press OK. The AUTO SET/T-V LINK display appears on
the front display panel and/or on the TV screen.
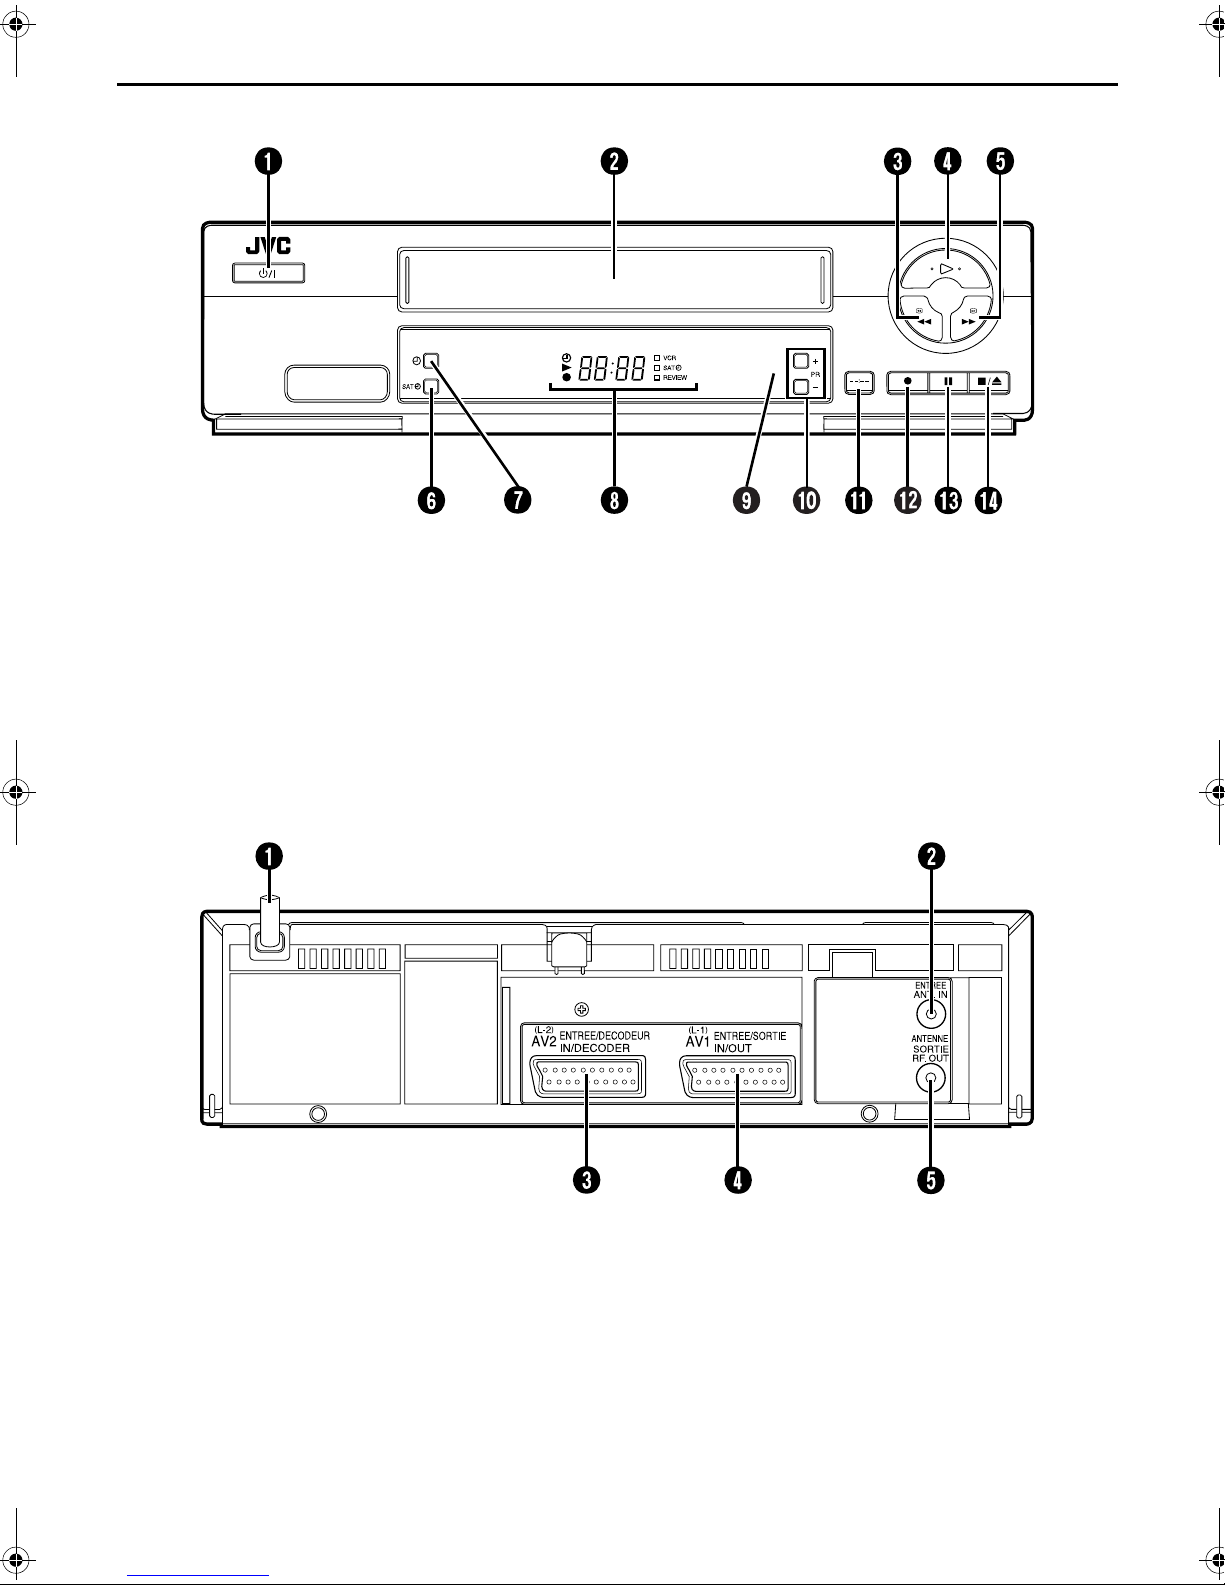
On the front display panel
Press rt to select “CH – –” and press OK or e.
BSet the video channel.
Set the video channel to off manually. (墌pg. 46)
ATTENTION
You can use this function only with a TV offering T-V Link,
etc.* Be sure to use a fully-wired 21-pin SCART cable.
* Compatible with TVs offering T-V Link, EasyLink, Megalogic,
SMARTLINK, Q-Link, DATA LOGIC or NexTView Link via
fully-wired 21-pin SCART cable. The degree of compatibility
and available functions may differ by system.
Perform steps 1to 3of “Auto Set Up” on page 8 before
continuing.
On the on-screen display
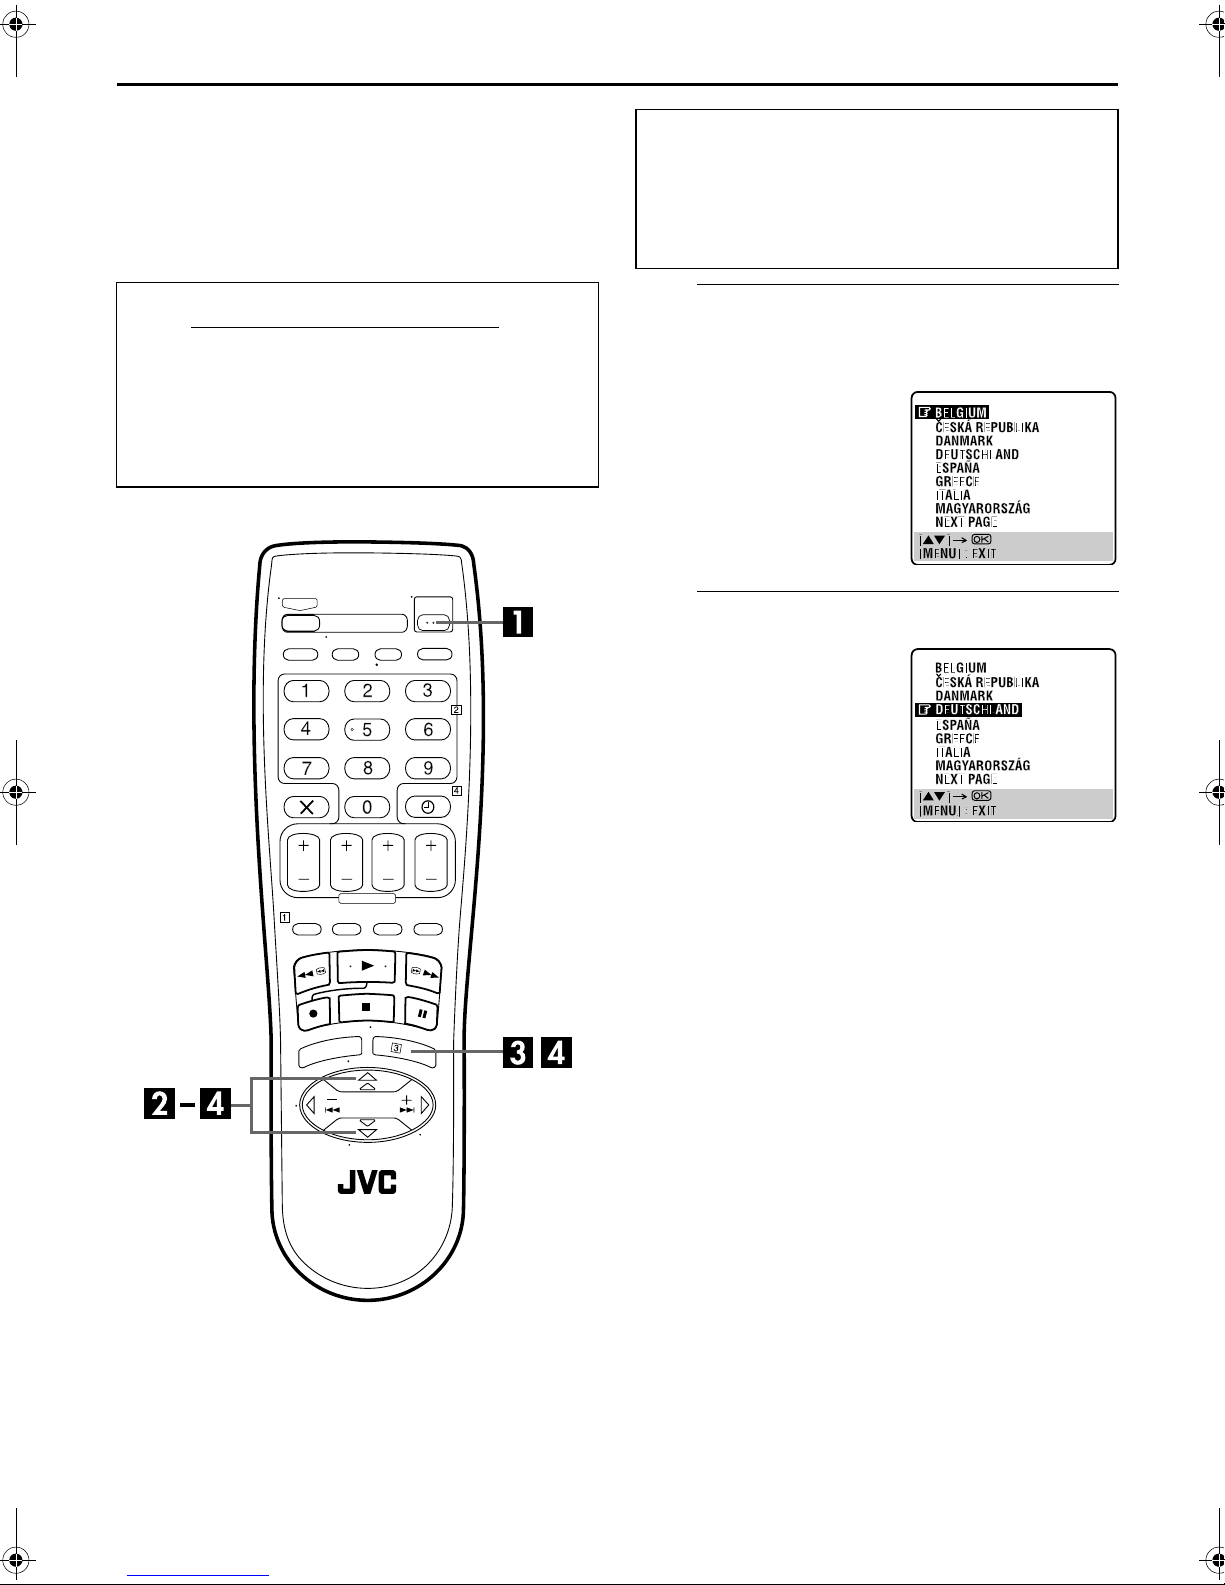
Press rt to move the
highlight bar (pointer) to
“T-V LINK” and press OK or
e.
Preset positions on the front display panel increase from
“CH1”; do NOT press any button on the recorder or remote
control until the front display panel shows clock time,
“(CH) 1” or “– –:– –” as illustrated on page 11.
●If you are using the on-screen
display, the T-V LINK screen
will appear. Then the GUIDE
PROG SET screen will appear
during Guide Program
Number Set. When Preset
Download is completed,
“COMPLETED” appears for
about 5 seconds, then the
normal screen appears.
●If you press any button on the
recorder or remote control
while downloading is in
progress, it will be interrupted.
HRJ480EU1.fm Page 10 Friday, January 12, 2001 10:50 AM


 User manual")