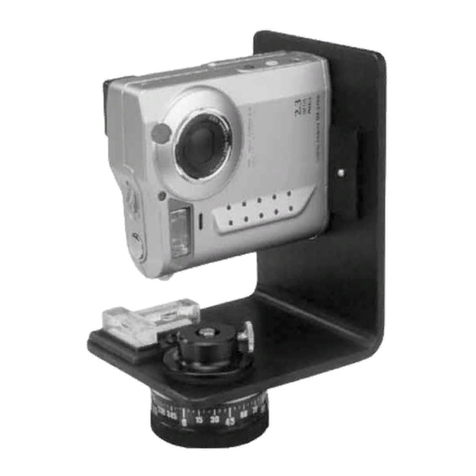
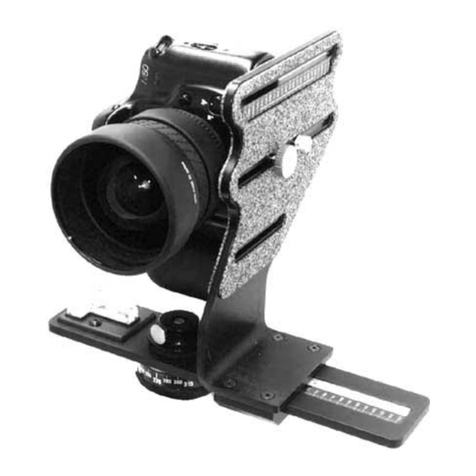
Kaidan QuickPan Magnum QPX-2 User manual

QuickPan™Magnum
User’sGuide
PhotographicVR
PanoramicTripodHead
(QPX-2)
Theprofessional’schoiceinPhotographic
VRtripodheads.

Copyright Information
Copyright © 2000 Kaidan, Inc. All Rights Reserved. First Edition, Septem er
2000. KiWi is a trademark of Kaidan, Inc. Other products mentioned herein may
e trademarks of their respective companies. Patents Pending.
Information in this manual is su ject to change without notice and does not
represent a commitment on the part of Kaidan. No part of this manual may e
reproduced or transmitted in any form or y any means, electronic or mechani-
cal, including photocopying, recording, or information storage and retrieval sys-
tems, or translated to another language, for any purpose other than the licensee’s
personal use and as specifically allowed in the licensing agreement, without the
express written permission of Kaidan.
Kaidan Warranty and Return Policy
A • Limited Warranty
In the event of a defect in materials or workmanship, Kaidan will repair the
product with new or re uilt parts for a period of three-hundred and sixty five
(365) days from the date of original purchase. Such work will e performed free
of charge. Follow the Product Return Procedure (Section D following).
Likewise, any software purchased from Kaidan also comes with a one year
warranty if your disc or media is defective or damaged. This warranty is ex-
tended only to the original purchaser and is not transfera le. A purchase receipt
or other proof of original purchase will e required efore warranty performance
is rendered.
This warranty only covers failures due to defects in materials or workman-
ship which occur during normal use. It does not cover damages or failures which
are caused from accident, misuse, a use, neglect, mishandling, misapplication,
alteration, faulty installation, modification, service y anyone other than an au-
thorized representative of Kaidan, Acts of God, or y products not supplied y
Kaidan.
This warranty covers any damage incurred during original shipment of prod-
uct to customer. Any item resold, or distri uted y, and not explicitly manufac-
tured y Kaidan will e covered y their respective company’s product warranty.
B • Warranty Exclusions
There are no express warranties except as listed a ove.
Kaidan shall not e lia le for special, incidental, consequential or punitive
damages, including, without limitation, loss of goodwill, profits or revenue, loss
of the use of this product or any associated equipment, cost of su stitute equip-
ment, downtime costs, or claims of any party dealing with uyer for such
damages,resulting from use of this product or arising from reach of warranty
or contract, negligance, or any other legal theory .
All express and implied warranties, including the warranties of merchant-
a ility and fitness for a particular purpose, are limited to the applica le war-
ranty period set forth a ove. Some states do not allow the exclusion or limitation
of consequential damages, or limitations on how long an implied warranty lasts,
so the a ove exclusions or limitations may not apply to you.
This warranty and any claims which arise with the Kaidan product(s) are
governed y the laws of the state of Pennsylvania. By purchasing this product,
customer acknowledges and agrees to these Limits and Exclusions. If a pro lem
with your Kaidan product develops during the warranty period, immediately
contact Kaidan for assistance.
C • Product Return Policy
All Kaidan products come with a 30-day return policy (a minimum 10 percent
re-stocking fees will apply) from date of purchase, with the exception of software
or videotapes.
Both of the aforementioned items are copyrighted and su ject to the laws
concerning intellectual property. Kaidan will replace defective software/video-
tapes free of charge upon return receipt of defective item(s). Products returned
under this policy, excluding replacement of defective items, must e shipped at
purchaser’s expense. Purchaser must ship product with an approved tracea le
service, such as FedEx, and with appropriate levels of shipping insurance for the
item eing returned. Kaidan will not e held responsi le for returned items lost
or damaged in transit.
Kaidan ill issue a refund to customer’s account if the follo ing condi-
tions are satisfied:
1) Receipt of item(s) in a restocka le condition.
Criteria for Restocka le Condition is as follows:
• All parts are included in ox; hardware, manuals, discs, nuts/ olts, tools.
• No signs of damage; scratches, ent parts, missing pieces, markings, alter-
ations, or additions to the product.
• All packaging materials are intact; foam, peanuts, card oard, u le ags.
• No signs of excess usage or wear to the product.
Items of Non-restocka le condition are su ject to the following:
• Restocking Fee/s - a minimum of 10 percent and possi le additional fees
ased on the condition of the product (how the product est meets the criteria
a ove), at Kaidan’s discretion.
Non-Restocka le Condition - constitutes the following:
• Missing parts; hardware, manuals, discs, nuts/ olts, tools, and packaging
materials; foam, peanuts, card oard, u le ags.
• Signs of damage; scratches, ent parts, missing pieces, markings, alter-
ations, additions to the product.
• Signs of excess usage or wear to the product.
• Damage or loss incurred during uninsured shipping to Kaidan. In this case,
Kaidan cannot issue any type of refund. Customer will e responsi le to su -
mit claim with their shipping company.
• If damages occur in shipping, customer must su mit claim with shipping
company prior to any action y Kaidan.
Items Part of Special Bundle
If item(s) are part of a special undle offer, return of part of the undle will
void any special pricing and the item(s) remaining in the possession of the cus-
tomer will revert to their regular Suggested Retail Price (SRP). The credit, to
customer, will reflect the difference of the actual product SRP from the amount
of credit due customer.
Shipping Costs
All shipping costs, VAT, duties and return costs are sole responsi ility of cus-
tomer. If customer purchases thru Kaidan distri utor or reseller, customer is
responsi le for all shipping and VAT costs incurred y that distri utor or reseller.
These charges are non-refunda le.
For instructions on the return of your product, follow the Product Return
Procedure elow
D • Product Return Procedure
When returning a product, customer must first contact Kaidan (or the dis-
tri utor/reseller) and o tain a Return Material Authorization Num er (RMA#).
After receiving the RMA#, customer will e instructed to return product directly
to Kaidan. Returned goods must e shipped with an approved tracea le service,
such as FedEx, and with appropriate levels of shipping insurance for the item
eing returned. Kaidan will not e held responsi le for returned items lost or
damaged in transit. RMA num ers are valid for 15 days, and the product(s)
must e received y Kaidan efore the RMA expires. We are una le to accept for
return any product(s) received after the expiration of the RMA.
Return Packaging
The product packaging must reflect customer name, address, RMA# as well as
Kaidan information:
Kaidan Incorporated
703 E. Pennsylvania Blvd • Feasterville, PA 19053 • U.S.A.
Attention: Return Department per RMA# ______
Contact Information: Voice: 215-364-1778 • Fax: 215-322-4186
http://www.kaidan.com • E-mail: [email protected]

Page - 3
Chapter 1
UnpackingyourQuickPan™
UNPACKING THE BOX
Thismanualcovers theQuickPanMagnum QPX-2.Seethefigurebelow.De-
pendingonhowyoupurchasedyourQuickPan,itmighthaveshippedwitha
camerabracket,suchasourQPU-2,oritmighthaveshippedwithoutabracket
andthenonlytheindexingbasewouldbeinthebox.Ifyourunitcamewitha
camerabracket,suchasthe QPU-2,thenyou’llwanttoreferto the separate
manualforthatunittomakesurethatallthecomponentsareincluded.
TheQuickPanMagnumbaseisdetailedbelow.Pleasemakesurethatallparts
areincluded.Examinethepartsforanysignsofshippingdamage.Intheevent
ofshippingdamage,immediatelycontactKaidantoprocessclaims.
Ifanyitemsaremissingoryounoticeanydamage,callKaidanat215-364-1778,
betweenthehoursof10:00amand6:00PM,Mon-Fri,EST.
LevelAdjustmentScrew(1of3)
QPX-2(Micro-TiltBase)

Page - 4
Chapter 2
AssemblingtheQuickPan™
ATTACHING THE BASE TO YOUR TRIPOD
The QuickPan Magnum base has a 1/4-20 threaded hole in the bottom of the
base.Thiswillaccomodate the1/4-20threadedposts foundonmosttripods.If
yourtripodhasalargerthreadedpost,thenitismostlikelya3/8-16thread,which
ismorecommoninEurope.ContactKaidanformoreinformationonobtaining
abaseplatethathasthe3/8-16thread.

Page - 5
Chapter 3
UsingtheQuickPan™
CHANGING THE INCREMENT ROTATION ANGLE
The QPX-2 uses a spring-loaded plunger indexing mechanism.A spring-loaded
brassplungerislocatedontheunderneathsideoftheQuickPan.Toremovethe
plunger,simplyunscrew the unitfrom the base.When removing or replacing
the plunger,be sure to hold on to the brass housing and notthe dark colored
adjustingscrewwhichprotrudesfromtheendoftheplunger.

Page - 6
Chapter 4
UsingtheQuickPan™
ADJUSTING THE SPRING FORCE OF THE PLUNGER
The dark colored adjusting screw which protrudes from the end of the
plunger is used to vary the force of the spring plunger.This adjustment is
typicallyusedtoprovidemoreforcewhentheplungerismovedtowardsthe
centerofthedetent.Ingeneral,theclosertheplungeristothecenterofthe
wheel, the more force is required in orderto achieve a satisfactory detent
action.You can also adjust the force simplyto correspond to yourpersonal
preference.
Youcantightenorloosentheadjustingscrewwhentheplungerisinstalled
orremovedfromtheunit,asshownbelow.

Page - 7
Chapter 5
UsingtheQuickPan™
WHICH HOLE SHOULD IUSE?
Thenumberofclick-stoppositionsisdeterminedbywhichholetheplunger
isthreadedinto.Itisalsoafunctionofwhichdetentwheelismountedonthe
base.Thestandardwheel,QPD-1,isgoldcoloredandhas8,12,16,20and36posi-
tions.These positions correspond to the five threaded holes on the under-
neathofthebase,withthe8positionlocationbeingclosesttothecenterand
the36positionlocationbeingfurthestfromthecenter.
You mayalso have (orwish to obtain) ourQPDD-2 detent wheel.Itis a light
purplecolorandhas10,14,18,24and30positions.Inthiscase,the10position
locationisclosesttothecenterandthe30positionlocationisfurthest.

Page - 8
Chapter 6
UsingtheQuickPan™
STORING THE PLUNGER AND FREE ROTATION
Youmayfindthatyoudon’twantorneedtouse theclick-stops.Inthiscase,
youcanremovethespringplunger.Whentheplungerisremoveditdoesnot
engagetheholesonthedetentwheel.
In this configuration, the detentwheelwill spin freely, and itcan be locked
into anydesired position byuse of the Clamp knob,which protrudes from
thesideofthebaseasshownbelow(lower).

Page - 9
Chapter 7
UsingtheQuickPan™
ATTACHING THE CAMERA BRACKET
Thecamerabracket(i.e.QPU-2)simplyscrewsontothetopofthedetentwheel
oftheQuickPan.Youdon’tneedtotightenthebracketexcessively.Mostpan-
oramas are produced by rotating the bracket in a clockwise direction (as
viewedfromabove),andthisactionnormallytightensthebracket.

Page - 10
Chapter 8
UsingtheQuickPan™
FINAL
ThecompletedQuickPanMagnum,withthecamerabracketisshownbelow.
Undernormalusage,yourQuickPanshouldlastforyears.Youcancleanitwith
adamprag.Avoidsoakingtherubberizedcorkfacesofthe camerabracket.
In time, you may need a replacement spring plunger tip - simply contact
Kaidanandwe’llsendyouareplacementatanominalcost.
Everysooftenyoushouldremovethedetentwheelandplungerassembly
andcleanthese“hidden”areas.

Page - 11
Chapter 9
UsingtheQuickPan™
HOW DOILOCATE MY CAMERA’SNODAL POINT?
This is one ofthe mostfrequentlyasked questions when it comes to QTVR
panorama creation.Once you understand the basics,you’ll be able to easily
locatethenodalpointforanycameraandlenscombination.
Simplyput,the nodal pointis the point inside yourcamera where the light
raysconvergeandflipover.WhenshootingaQTVR panoramaIt’snecessary
torotateaboutthispointtoeliminatetheimagemismatchcausedbyparal-
laxerror.
It’salsoworthnotingthatthenodalpointisnotthesameasthefilmplane,
whichisoftenmarkedontheunderneathsideofmany35mmcameras.Gen-
erally,for most35mm cameras and lenses,the nodal point is located some-
wheretowardsthecenterofthelensbarrel.
Parallaxerrorcan be easily demonstrated bythis simple experiment.Close
oneeyeandholdyourindexfingeruprightaboutsixinchesawayfromyour
open eye.Rock your head from side to side. Notice how your finger moves
with respect to the background.This relative movement is due to the fact
that you’re not rotating your head around your eye’s nodal point, which is
somewhereinthecenterofyoureyeball.Instead,you’rerotatingaboutyour
spinewhichisseveralinchestotherearandofftooneside.Itisthisrelative
side-to-sidemotion thatwewillstrivetoeliminate when setting upacam-
eraforVRpanoramas.

Page - 12
STEP 1:THE EASY PART -THE SIDE-TO-SIDE ADJUSTMENT
Onceyourcameraisfastenedtoyourpanhead,movetothefrontoftheunit
soyou’relookinginto thelens.Thecenterofthelens shouldbedirectlyover
thepivotaxisofthepanhead.Adjusttheside-to-sideadjustmentsothelens
iscenteredoverthepivot.WiththeQuickPan™youcanalsomeasure(inmilli-
meters) the distance from the camera’s mounting surface to the centerof
the lens.Then,slide the bracketuntil the out-
sideedgeofthebottomoftheverticalbracket
,(thesidewiththebubblelevel),alignswiththe
appropriate number on the scale.(See Fig.to
right)
STEP 2:THE SLIGHTLY HARDERPART -
FORE-AFTADJUSTMENT
This step is most easily accomplished out of
doors. Find avertical edge or line, such as a doorway or edge of a building.
Positionyourcameraandtripodabouttwofeetaway,orascloseaspossible
withtheedgestillinfocuswhenyoulookthroughtheviewfinder.
Looking throughthe camera’sviewfinder,findanotherverticaledge orline
that is far away, such as another building or telephone pole.Align the two
objects and rotate the pan head so they are in the left hand side of the
viewfinder.
Rotatethepanheadsothetwoobjectsmove overtotherighthandsideof
theviewfinder. Unless you’ve managed to unwittingly locate the right posi-
tion,youshouldnoticethetwoobjectswillmovewithrespecttoeachother
asyourotatethepanfromlefttoright.Slidethecameratothefrontorrear
asrequiredtoeliminatethisrelativemovement.
Itmayhelptofirstlocatethecameraallthewaytothefrontorrearandthen
moveita littlebitatatime.Thiswayyou’ll more readilyseethe parallaxef-
fectandnoticehowitimprovesasyouslidethebracket.
STEP 3:LEVEL THE CAMERA
Onceyouhavelocatedthefore-aftposition,younowmustlevelthecamera.If
yourcamerahasaflashhotshoe,youcanuseabubbleleveldesignedtoslide
into the shoe.You should be able get these at a good photographic supply
store.Kaidanalsohastheselevelsforsaleatcompetitiveprices.

Page - 13
Ifyourcameradoesnothaveahotshoe,thenyou’llneedtolevelthecamera
anotherway.Ifthecamerahasaflat,levelsurface,thenyoucanuseabubble
level.You should be able to locate a small level at a hardware store.Ifyour
therearenolevelsurfaces,thenyoumayhavetoresortto“eyeballing”.
STEP 4:RECORDYOUR RESULTS
Afteryou’ve discovered the two location dimensions,be sure to record the
settings.TheQuickPancamerabrackethasaconvenientindicatorscalesfor
thispurpose.Thesenumbersrepresentthenodalpointforthisgivencamera
and lens combination.Ifyou change cameras or lenses,this procedure may
havetoberepeated.
Lookingthroughthe
viewfinderaligna
closeobject(brick
wall)witha faraway
object(telephone
pole).Asyourotate
thecamerafrom
side-to-sidethere
shouldbe no relative
movementbetween
thetwoobjectsas
shownto the right.
If,asshown to the
right,the two objects
movewithrespectto
oneand anotherin
theviewinder,slide
thecameraforeor
aftin orderto elimi-
natethismovement.
Here,the telephone
polehasmoved be-
hindthe brickwall.

Page - 14
STEP 5:HOW ABOUT RANGEFINDER CAMERAS?
A rangefinder camera is a camera where you look through a separate
viewfinderandnotthroughtheactuallens. Theprocessisbasicallythesame.
Locatethe Side-to-SideadjustmentasdiscussedinStep 1.When itcomesto
theFore-Aftadjustment,youwon’tbeabletolookthroughtheviewfinderto
determinethepropersettingsincetheviewfinderisaseparateopticalpath
thatdoesn’treally“see”thesameimageasthefilm.
Instead,you’llhavetostartwiththebracketallthewaytothefrontandtake
pairsoftestshots.Eachpairwillhavetheverticallyalignedobjectsintheleft
andthentherightsideoftheviewfinder.Aftereachpairofphotos,slidethe
bracketrearward and repeat the process.Slide the bracketthe same incre-
menteachtime(i.e.10mm).Besuretorecordthescalesettingforeachpairof
images.Processthefilm,orinthecaseofdigitalcameras,downloadtheim-
agestoyourcomputer.
Attheendofthisprocessyouwillbeablelocatethepairofimageswiththe
leastrelativemovement.Ifnosingleimageisoptimum,youmayneedtoin-
terpolatebetweentwoimagestofindtheclosestvalue.

Page - 15
Chapter 10
TakingPhotoswiththe
QuickPan™
HOW MUCH OVERLAP?
The amountyou turn the camera for each shotvaries.Itis dependenton a
numberof factors such as the field ofview(the angle) ofyourcamera and
lens,aswellaswhichprogramyouintendtouse.Forexample,Applerecom-
mendsthattheimagesshouldoverlapbyanywherefromone-thirdtoone-
half. Youshouldcheckwiththerecommendationsofthesoftwarethatyou
intendtouseinordertodetermineoverlaprequirements.
HOW MANY SHOTS?
Once you’ve determined the overlap,you’ll be able to figure out how many
shots.Theeasiestwaytodothisistosimplylookthroughtheviewfinderand
turn the camera to achieve the desired amountof overlap.You then check
theanglereadouttoseehowfaryouturnedthecamera.Roundtheangular
valuetothenearestconvenientvalue.Formoststitchingprograms,itisgen-
erallynotthatimportanttouseapreciseoverlapvalue.
However, itshould be noted thatsome programs are more sensitive to an
overlap value that constantly repeats from shot to shot. You may need to
experimentsomewhattoobtainthebestresults.
TAKING THE PHOTOS
Whenyou’re ready to shoot,make sure thatthe camera and QuickPan™ are
securelyattached.Youshoulduseatripodthatissturdy,ideallyonethathas
a centersupport system of braces to help keep the camera and QuickPan™
fromexcessiveflexing.Sometripodshavebuilt-inbubblelevelswhichmake
iteasytoleveltheunit.
Properlevelingisimportant.Wediscussedearlier,theprocessforlevelingthe
camerainelevation(lookingupanddownontheVerticalBracket),nowthat
you’rereadytoshoot,itisimportantthattherotationplaneofthecamerais
levelaswell.

Page - 16
TAKING THE PHOTOS (CONTINUED)
Using the twin-axis bubble level on the bottom of theVertical Bracket,ob-
serve itwhile you level the tripod.Of course,this taskis much easier ifyour
tripodalsohasatilthead.
OncethetripodandQuickPan™arelevel,nowisthetimeto doublecheckto
see if the camera is level in elevation. If it needs to be adjusted, loosen the
Captive knob just a slight amount and tilt the camera accordingly. Be sure
nottochangetheFore-Aftdimension.TightentheCaptiveknob.
Rotate the camera so thatthe lens is facing the direction you wantto take
yourfirstshot.Dependingonwhetherthestitchingsoftwarethatyou’reus-
ing prefers having the photos taken in a clockwise or counterclockwise se-
quence,you’llhavetoeithercountthenumberofshotsbeingtakenfromyour
startposition.
Atthispoint,you’rereadytoshootthephotos.Asyoushootaroundthecircle,
trytoavoidcapturinganymovingobjectsthatmightcomeintoyourfieldof
view.There is no harm in waiting, for example, while a person walks past
beforeshootingthephoto.
Youmayalsowanttocheckwiththesoftwaredeveloperofthestitchingsoft-
ware thatyou’re using to get theirrecommendations forexposure settings
andothercamerasettings.
Wehopeyouenjoyshootingyourpanoramasand ifyouhaveanyquestions
orproblems using ourequipment,please let us know.We would also like to
seetheresultsofyourworkandwouldbegladtoconsiderplacingyourwork
onourwebsite,ortoputalinktoyourwebsiteaswell.
Thankyou,
TheKaidanteam.
Other Kaidan Camera Accessories manuals

Kaidan
Kaidan Meridian TM-400 User manual

Kaidan
Kaidan KiWiTM 2900 User manual

Kaidan
Kaidan KiWi 2000 User manual

Kaidan
Kaidan KiWi-L User manual

Kaidan
Kaidan QuickPan QuickPan Panoramic Tripod Head User manual

Kaidan
Kaidan QuickPan User manual

Kaidan
Kaidan KiWi KiWi Panoramic Tripod Head User manual

Kaidan
Kaidan KiWi 990 User manual