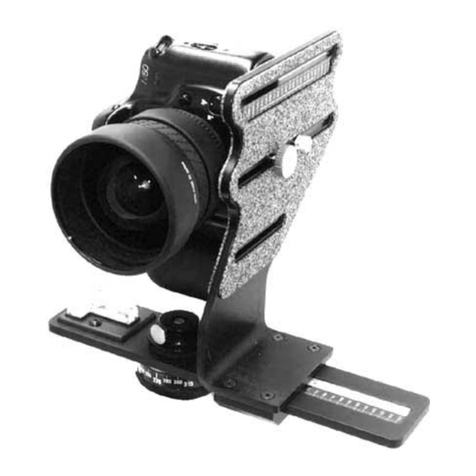
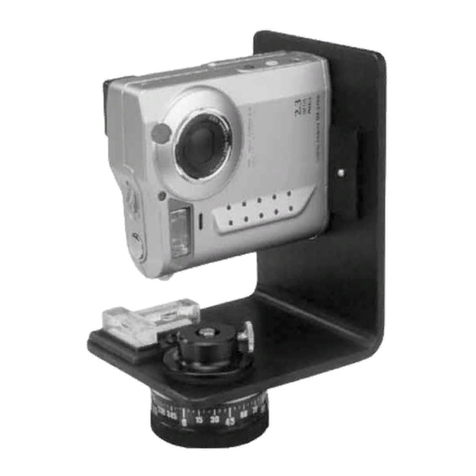
Kaidan KiWi 2000 User manual

KiWi™2000/2020
User’sGuide
PhotographicVR
PanoramicTripod Head
DesignedexpresslyfortheOlympusC-2000
andtheC-2020DigitalCameras

Copyright Information
Copyright © 2000 Kaidan, Inc. All Rights Reserved. First Edition, Septem er
2000. KiWi is a trademark of Kaidan, Inc. Other products mentioned herein may
e trademarks of their respective companies. Patents Pending.
Information in this manual is su ject to change without notice and does not
represent a commitment on the part of Kaidan. No part of this manual may e
reproduced or transmitted in any form or y any means, electronic or mechani-
cal, including photocopying, recording, or information storage and retrieval sys-
tems, or translated to another language, for any purpose other than the licensee’s
personal use and as specifically allowed in the licensing agreement, without the
express written permission of Kaidan.
Kaidan Warranty and Return Policy
A • Limited Warranty
In the event of a defect in materials or workmanship, Kaidan will repair the
product with new or re uilt parts for a period of three-hundred and sixty five
(365) days from the date of original purchase. Such work will e performed free
of charge. Follow the Product Return Procedure (Section D following).
Likewise, any software purchased from Kaidan also comes with a one year
warranty if your disc or media is defective or damaged. This warranty is ex-
tended only to the original purchaser and is not transfera le. A purchase receipt
or other proof of original purchase will e required efore warranty performance
is rendered.
This warranty only covers failures due to defects in materials or workman-
ship which occur during normal use. It does not cover damages or failures which
are caused from accident, misuse, a use, neglect, mishandling, misapplication,
alteration, faulty installation, modification, service y anyone other than an au-
thorized representative of Kaidan, Acts of God, or y products not supplied y
Kaidan.
This warranty covers any damage incurred during original shipment of prod-
uct to customer. Any item resold, or distri uted y, and not explicitly manufac-
tured y Kaidan will e covered y their respective company’s product warranty.
B • Warranty Exclusions
There are no express warranties except as listed a ove.
Kaidan shall not e lia le for special, incidental, consequential or punitive
damages, including, without limitation, loss of goodwill, profits or revenue, loss
of the use of this product or any associated equipment, cost of su stitute equip-
ment, downtime costs, or claims of any party dealing with uyer for such
damages,resulting from use of this product or arising from reach of warranty
or contract, negligance, or any other legal theory .
All express and implied warranties, including the warranties of merchant-
a ility and fitness for a particular purpose, are limited to the applica le war-
ranty period set forth a ove. Some states do not allow the exclusion or limitation
of consequential damages, or limitations on how long an implied warranty lasts,
so the a ove exclusions or limitations may not apply to you.
This warranty and any claims which arise with the Kaidan product(s) are
governed y the laws of the state of Pennsylvania. By purchasing this product,
customer acknowledges and agrees to these Limits and Exclusions. If a pro lem
with your Kaidan product develops during the warranty period, immediately
contact Kaidan for assistance.
C • Product Return Policy
All Kaidan products come with a 30-day return policy (a minimum 10 percent
re-stocking fees will apply) from date of purchase, with the exception of software
or videotapes.
Both of the aforementioned items are copyrighted and su ject to the laws
concerning intellectual property. Kaidan will replace defective software/video-
tapes free of charge upon return receipt of defective item(s). Products returned
under this policy, excluding replacement of defective items, must e shipped at
purchaser’s expense. Purchaser must ship product with an approved tracea le
service, such as FedEx, and with appropriate levels of shipping insurance for the
item eing returned. Kaidan will not e held responsi le for returned items lost
or damaged in transit.
Kaidan ill issue a refund to customer’s account if the follo ing condi-
tions are satisfied:
1) Receipt of item(s) in a restocka le condition.
Criteria for Restocka le Condition is as follows:
• All parts are included in ox; hardware, manuals, discs, nuts/ olts, tools.
• No signs of damage; scratches, ent parts, missing pieces, markings, alter-
ations, or additions to the product.
• All packaging materials are intact; foam, peanuts, card oard, u le ags.
• No signs of excess usage or wear to the product.
Items of Non-restocka le condition are su ject to the following:
• Restocking Fee/s - a minimum of 10 percent and possi le additional fees
ased on the condition of the product (how the product est meets the criteria
a ove), at Kaidan’s discretion.
Non-Restocka le Condition - constitutes the following:
• Missing parts; hardware, manuals, discs, nuts/ olts, tools, and packaging
materials; foam, peanuts, card oard, u le ags.
• Signs of damage; scratches, ent parts, missing pieces, markings, alter-
ations, additions to the product.
• Signs of excess usage or wear to the product.
• Damage or loss incurred during uninsured shipping to Kaidan. In this case,
Kaidan cannot issue any type of refund. Customer will e responsi le to su -
mit claim with their shipping company.
• If damages occur in shipping, customer must su mit claim with shipping
company prior to any action y Kaidan.
Items Part of Special Bundle
If item(s) are part of a special undle offer, return of part of the undle will
void any special pricing and the item(s) remaining in the possession of the cus-
tomer will revert to their regular Suggested Retail Price (SRP). The credit, to
customer, will reflect the difference of the actual product SRP from the amount
of credit due customer.
Shipping Costs
All shipping costs, VAT, duties and return costs are sole responsi ility of cus-
tomer. If customer purchases thru Kaidan distri utor or reseller, customer is
responsi le for all shipping and VAT costs incurred y that distri utor or reseller.
These charges are non-refunda le.
For instructions on the return of your product, follow the Product Return
Procedure elow
D • Product Return Procedure
When returning a product, customer must first contact Kaidan (or the dis-
tri utor/reseller) and o tain a Return Material Authorization Num er (RMA#).
After receiving the RMA#, customer will e instructed to return product directly
to Kaidan. Returned goods must e shipped with an approved tracea le service,
such as FedEx, and with appropriate levels of shipping insurance for the item
eing returned. Kaidan will not e held responsi le for returned items lost or
damaged in transit. RMA num ers are valid for 15 days, and the product(s)
must e received y Kaidan efore the RMA expires. We are una le to accept for
return any product(s) received after the expiration of the RMA.
Return Packaging
The product packaging must reflect customer name, address, RMA# as well as
Kaidan information:
Kaidan Incorporated
703 E. Pennsylvania Blvd • Feasterville, PA 19053 • U.S.A.
Attention: Return Department per RMA# ______
Contact Information: Voice: 215-364-1778 • Fax: 215-322-4186
http://www.kaidan.com • E-mail: [email protected]

1SettingUpYourKiWi2000/2020™
WarrantyRegistrationPleasetakeabriefmomentandfilloutthewarrantyregistrationcardin-
cludedwithyourpackage.Pleaseprintclearlyincapitallettersandremember
toaffixpostage.Youcanalsoregisterafterfillingoutthecardbyfaxingitto
215-322-4186orregisteron-lineat:http//ww.kaidan.com/register.html.
UNPACKING THEBOX
The KiWi 2000/2020 is shipped in a single boxand consists of the components
detailed below.Please make sure that all parts are included. Examine the parts
foranysignsofshippingdamage.Intheeventofshippingdamage,immediately
contactKaidan to process claims.If anyitem is missing oryou notice any dam-
age, call Kaidan at 215-364-1778 between the hours of 9:00AM and 6:00 PM EST,
Mon-Fri.
TheKiWi 2000also comes with two detentdiscs (14and 18 positions,notshown)
andaCameraAdjustmentShoe(attachedtotheVertical Bracket).
VerticalBracket
CaptiveCameraKnob
&MountingHolesfor
standard andwide
anglesettings
(Notvisible)
AngleIndicator
FrictionCap and
RetainingKnob
Twin-axis Bubble
Level
Olympus
C-2000ZCamera
(notincluded)
IndexingHub

Page-4
REMOVING THE FRICTION CAP
TheFrictionCapneedstoberemovedinordertochangedetentdiscs.Thediscs
providethemeansforestablishingandchangingthenumberandspacingofthe
angularincrementsofthetripodhead.Thetwodiscsthatcomestandardwith
theKiWi2000/2020providefor14and18shotsperrevolution.Usethe18position
detentdisc when capturing imageswith the normal wide-angle setting ofthe
camera.Use the14position detentdiscwhenusing theoptionalOlympusWide
ConversionLensWCON-08 fortheOlympusC-2000ZandC-2020Zcamera.
ToremovetheFrictionCap,loosenthesilvercoloredRetainingKnobwhichislo-
catedonthesideoftheFrictionCap.ItdoesnothavetoberemovedfromtheCap,
butonlybackedoutfarenoughtoallowtheCaptobeunscrewedfromtheaxle.
YoucanlookintotheopeninginthecenterofthecaptoseewhentheRetaining
Knobisclearofthehexagonal-shapedaxle.Rotatethecapcounterclockwiseand
removeitfromtheunit.
Retaining
Knob
FrictionCap
OncetheFrictionCaphasbeenremoved,separatetheVerticalBracketfromthe
IndexingHub.Youmightneedtowigglethepiecesasyoupullthemapart.
IndexingHub
Vertical Bracket

Page-5
REMOVING &REPLACING THE DETENT DISC
Oncethe IndexingHubis removed,the detentdisc canbe removedfromitsre-
cessin thebottomoftheVerticalBracket.ThediscmayslipoutoncetheIndex-
ingHubisremoved.Ifit sticksinsidetherecess,simplyinsertthetipofaballpoint
penora pin smallenoughto fitintothe detentdiscejectionholeonthetopof
thebracketandpushthedetentdiscoutofthedetentdiscrecess.
With the disc removed,a different disc can be inserted to change the angular
spacing.The 14 position detent disc (includedwith your bracket) is for use with
theoptionalOlympusWideConversionLensWCON-08.
Toinstall a different disc,simplyalign thekeyed slotandpush the discinto the
recess.Makesurethediscisproperlyseated andflushtothebottomsurfaceof
theVerticalBracket.Withthenewdiscinserted,reassemblebyinsertingtheIn-
dexingHubbackthroughthebearingintheVerticalBracket.
REPLACING THE FRICTION CAP
Replace the Friction Cap by threading the Cap back onto the axle. Continue to
threadthecapsothatthereisnofreeplaybetweentheVerticalBracketandthe
Indexing Hub. The rubberwasheron the bottom of the Friction Cap should be
slightlycompressed.Whenthedragfeelsadequate,turntheFrictionCapsothat
thethreadedshaftoftheRetaining Knobis aligned with the closestflaton the
axle.TightentheRetainingKnobtolocktheCapinplace.

Page-6
ADJUSTING THE DETENT FORCE
Thespringplungerthatprovidesthedetentactioncanalsobeadjustedtovary
theforce.Useaflatbladescrewdrivertomovetheplungerinandoutasdesired.
A convenient way to adjust the plunger is to screw the plunger all the way in
untilitgentlybottomsout.Thenunscrewtheplungeraboutonecompleteturn.

Page-7
2ShootingPanoramas
HOW MANY SHOTS?
TheKiWi2000/2020isdesignedtobeusedwith:
•Thenormalwide-anglesettingofthecameralens
•TheoptionalOlympusWideConversionLensWCON-08(screwon)
•OtherthirdpartylensesusablewiththeOlympusC-2000ZandC-2020Zcamera
Thenormalwide-anglesettingofthecamerawillrequirethe18positiondetent
disc.TheOlympusWideConversionLensWCON-08 requirestheuseofthe14po-
sitiondetentdisc.
MOUNTINGTHECAMERA?
The KiWi 2000/2020 also comes with a Camera Adjustment Shoe to help keep
yourcameramountedvertically.Italsomakesiteasytoremoveandreplaceyour
camerainthesameposition.Beforethecameraisattached, loosentheknobon
theCameraAdjustmentShoe.Oncetheknobisloosened,theshoe canslide for-
ward or backwards to help position the camera.You may need to remove the
shoeandrepositionitagainsteitherthefrontorthebackofthecamera,depend-
ingwhichconfigurationisselected.
Camera
AdjustmentShoe
(Knob is on the
otherside)

Page-8
TAKING THE PHOTO TheKiWi2000/2020hasafemale1/4-20threadonthebottomoftheIndexing
Hubformountingtomoststandardtripods.Whenreadytoshoot,makesure
thattheKiWi2000/2020issecurelyattachedtothetripod. Useatripodthatis
sturdy,ideallyonethathasacentersupportsystemofbracestohelpkeepthe
cameraandKiWi2000/2020fromexcessiveflexing.Itmaybepossiblethatyour
tripodusesalarger3/8inchthread.Ifthisisthecase,youcanpurchasea3/8to
1/4adapteratacamerastoreorphotographerequipmentsupplier.
Whenreadytoshoot,itisimportantthattheunitislevel.Observethetwin-axis
bubblelevelontheKiWi2000/2020whilelevelingthetripod.Ofcourse,thistask
ismucheasierifthetripodisequippedwithatilthead.Ifthetripoddoesnot
haveatilthead, aQuickTilt™levelercanbepurchasedfromKaidanforusewith
theKiWi2000/2020.OncetheKiWi2000/2020 islevel,doublechecktoseeifthe
cameraismountedlevelinelevation.UsetheCameraAdjustmentShoeand
placeitagainstthecamera.Byplacingtheshoesnuglyagainstthecamera,it
willhelptoverticallyalignandpositionthecamera.
Youarenowreadytobegincapturingyourfirstpanorama.Youshouldalso,at
thistime,reviewthedocumentationofthepanoramicstitchingsoftwarethat
isbeingusedinordertogetrecommendationsforexposuresettingsandother
camerasettings.
MOUNTING THECAMERA?(CONTINUED)
TheKiWi 2000/2020isdesigned tobe usedwitheitherthe standardwide-angle
camerasettingorwiththeadd-onOlympusWideConversionLensWCON-08.The
two threaded mounting holes belowthe slot on the Camera Bracketwill posi-
tion the camera atits proper nodal pointsetting foreither configuration.The
diagrambelowshowsthepropermountingholesforthecamera.
Note:The slot above the camera mounting holeswill acceptthe Camera Knob
and can be used to locate the camera in accordance with the nodal points of
other3rdpartylenses(seeChapter3forinstructions).
CameraAdj.Shoe Knob
CaptiveCamera
Knob
Mounting hole
forstandardwide
anglesettingof
camera
Mounting holefor
wide angle lens

Page-9
TAKING THE PHOTOS
TheKiWi2000/2020hasafemale1/4-20threadonthebottomoftheIndexing
Hubformountingtomoststandardtripods.Whenreadytoshoot,makesure
thattheKiWi2000/2020issecurelyattachedtothetripod. Useatripodthatis
sturdy,ideallyonethathasacentersupportsystemofbracestohelpkeepthe
cameraandKiWi2000/2020fromexcessiveflexing.
Itmaybepossiblethatyourtripodusesalarger3/8inchthread.Ifthisisthe
case,youcanpurchasea3/8to1/4adapteratacamerastoreorphotographer
equipmentsupplier.
Whenreadytoshoot,itisimportantthattheunitislevel.Observethetwin-axis
bubblelevelontheKiWi2000/2020whilelevelingthetripod.Ofcourse,thistask
ismucheasierifthetripodisequippedwithatilthead.Ifthetripoddoesnot
haveatilthead, aQuickTilt™levelercanbepurchasedfromKaidanforusewith
theKiWi2000/2020.
OncetheKiWi2000/2020 islevel,doublechecktoseeifthecameraismounted
levelinelevation.UsetheCameraAdjustmentShoeandplaceitagainstthe
camera.Byplacingtheshoesnuglyagainstthecamera,itwillhelptovertically
alignandpositionthecamera.
You’renowreadytobegincapturingyourfirstpanorama.Youshouldalso,at
thistimereviewthedocumentationofthepanoramicstitchingsoftwarethat
isbeingusedinordertogetrecommendationsforexposuresettingsandother
camerasettings.

Page-10
3
HOW DOILOCATE MY CAMERA’SNODAL POINT?
Followthese steps and you will be able to easily locate the nodal pointforany
cameraandlenscombination.
Simplyput,thenodalpointisthe pointinsideyourcamerawherethelightrays
converge and flip over.When shooting an immersive panorama, itis necessary
torotateaboutthispointto eliminatethe image mismatchcausedbyparallax
error.
Parallaxerrorcanbe easilydemonstratedbythissimple experiment.Closeone
eyeandholdyourindexfingeruprightaboutsixinchesawayfromyouropeneye.
Rockyourheadfromsidetoside.Noticehowyourfingermoveswithrespectto
thebackground.Thisrelativemovementisduetothefactthat youarenotrotat-
ingyourheadaroundyoureye’snodalpoint,whichissomewhereinthecenterof
youreyeball.Instead,you’rerotatingaboutyourspinewhichis severalinchesto
therearandofftooneside.Itisthisrelativeside-to-sidemotionthatwewillstrive
toeliminatewhensettingupacameraforVRpanoramas.
STEP 1:THE EASY PART -THE SIDE-TO-SIDEADJUSTMENT
Once the camera is fastened to the KiWi 2000 /2020Pan Head, the centerof the
lenswillbedirectlyoverthepivotaxis.Noside-to-sideadjustmentwillbeneeded.
FindingtheNodalPoint
Whenusing3rdPartyLenses

Page-11
STEP 2:THE SLIGHTLY HARDER PART -FORE-AFTADJUSTMENT
Put the Captive Camera Knob in the long slot of the Vertical Bracket.This will
allowyou to slide the camera (along with the CameraAdjustment Shoe) as re-
quired.Note:Thisstepismosteasilyaccomplishedoutside.Findaverticaledgeor
line,suchasa doorwayoredgeofa building.Positiontheunitandtripodabout
fourfeet away, oras close as possible with the edge still in focus when looking
throughtheviewdisplayedontheLCDscreenofthecamera.
Lookingatthecamera’sLCD,findanotherverticaledgeorobjectthatisfaraway,
suchasanotherbuildingortelephonepole.Alignthetwoobjectsandrotatethe
VerticalBracketsotheyareinthelefthandsideoftheviewfinder.
Rotatethepan headsothetwoobjectsmoveovertotherighthandsideofthe
viewfinder. Unless you’ve managed to unwittingly locate the right nodal point
position,youshouldnoticethetwoobjectswillmovewithrespecttoeachother
astheVerticalBracketisrotated fromlefttoright.Slidethecameratothefront
orrearasrequiredtoeliminatethisrelativemovement.
Looking through theviewfinder,aligna closeobject(brickwall)with afaraway
object(telephonepole).Asthecameraisrotatedfromside-to-side,thereshould
benorelativemovementbetweenthetwoobjects.
If,asshowntotheright,thetwoobjectsmovewithrespecttooneanotherin
theviewinder,slidethecameraforeoraftinordertoeliminatethismovement.
Here,thetelephonepolehasmovedbehindthebrickwall.
Good.
No relative movement
betweenobjectwhen
rotating camerafrom
sideto side.
Bad.
Relativemovement
betweenobjectwhen
rotating camerafrom
sideto side.
This manual suits for next models
1
Table of contents
Other Kaidan Camera Accessories manuals

Kaidan
Kaidan QuickPan Magnum QPX-2 User manual

Kaidan
Kaidan KiWi 990 User manual

Kaidan
Kaidan KiWi-L User manual

Kaidan
Kaidan KiWiTM 2900 User manual

Kaidan
Kaidan QuickPan QuickPan Panoramic Tripod Head User manual

Kaidan
Kaidan QuickPan User manual

Kaidan
Kaidan Meridian TM-400 User manual

Kaidan
Kaidan KiWi KiWi Panoramic Tripod Head User manual