Kaleidescape M700 Guide

Kaleidescape, Inc. December, 2020
Instructions for M700 and DV700 Optical Disk Drive (ODD)
Replacement
Title KVault Optical Disc Drive Replacement
Time to Complete 30 minutes
Service Kit Parts
•Slim Optical Disc Drive
•Spare 1.5mm hex screws and washers for ODD
•Tie-wrap
Tools Required
•4mm hex screwdriver or Allen Key
•2.5mm hex screwdriver or Allen Key
•2mm hex screwdriver or Allen Key
•1.5mm hex screwdriver or Allen Key
•Phillips screwdriver
•Container for collecting screws as they are removed
•Disc storage for safely collecting removed discs
•Fine-tip felt marker (required for A-Frame Only)
Overview
Follow this procedure to replace the optical disc drive in a Kaleidescape
Vault. There are two optical drive bracket configurations that were used with
the vaults: the original and new A-Frame ODD mounting bracket that was
updated in June 2016. Identifying the version and replacement procedures
for both are covered by this document.
The steps to follow are:
Prepare and Open the Vault
Identify the Vault
Eject All Discs
Power Off and Disconnect
Expose the Optical Disc Drive
Original Bracket Procedure
Remove Old Optical Drive
Transfer Mounting Brackets to New Optical Disc Drive
Install New Optical Disc Drive
Calibrate the Optical Disc Drive Position
New A-Frame Bracket Procedure
Mark the Locations of the Bracket
Remove Old Optical Disc Drive
Install New Optical Disc Drive

KVAULT ODD Replacement December 2020
101-0269-00 Rev 2 Page 2 of 24
Calibrate the Optical Disc Drive Position
Reinstall the Cables
Testing and Installation
Test the Unit
Put the Disc Vault Back Together
Insert the Discs
Procedure
Prepare and Open the Vault
Identify the Vault
If multiple vaults are in the system, note the vault serial number that requires
the ODD replacement and its physical location. The vaults serial numbers can
be found on the back of the unit or by removing the front panel (see Figure
1). Ensure that this is the vault serial number referenced when using the
Browser Interface or Onscreen Display.
Eject All Discs
All discs must be removed prior to replacing the drive. Ejecting the discs
properly through methods 1-3 listed below is best as this ensures the vault is
in a known empty state prior to servicing and will save time at the end of the
procedure. If this is not possible, discs will have to be removed manually.
This will result in a long start-up time once repaired. Have cases, spindles, or
a box available to receive the discs.
1. Front panel buttons – use the Option button to select Eject All.
2. Browser interface – Connect to the Premiere Browser Interface. See
https://support.kaleidescape.com/article/Accessing-the-
Browser-Interface
Navigate to Settings -> Components -> Find the disc vault in
the list -> Eject all discs
3. Onscreen display (vault must be connected to a system). This is found
in the discs menu.
Navigate to Menu -> Discs -> Select the Vault -> Eject all discs
Note: Not available for Co-Star viewing zones.
KVAULT ODD Replacement December 2020
101-0269-00 Rev 2 Page 3 of 24
4. If options 1-3 above are unsuccessful, discs may be removed
manually as described in step 10. This method will require an
additional 40 minutes upon start up for the Vault to self calibrate
before discs can be inserted.
Power Off and Disconnect
Disconnect the power cord, Ethernet, and audio/video cables from the back
of the disc vault.
Note: The drive replacement cannot be done with the unit in a rack.
Expose the Optical Disc Drive
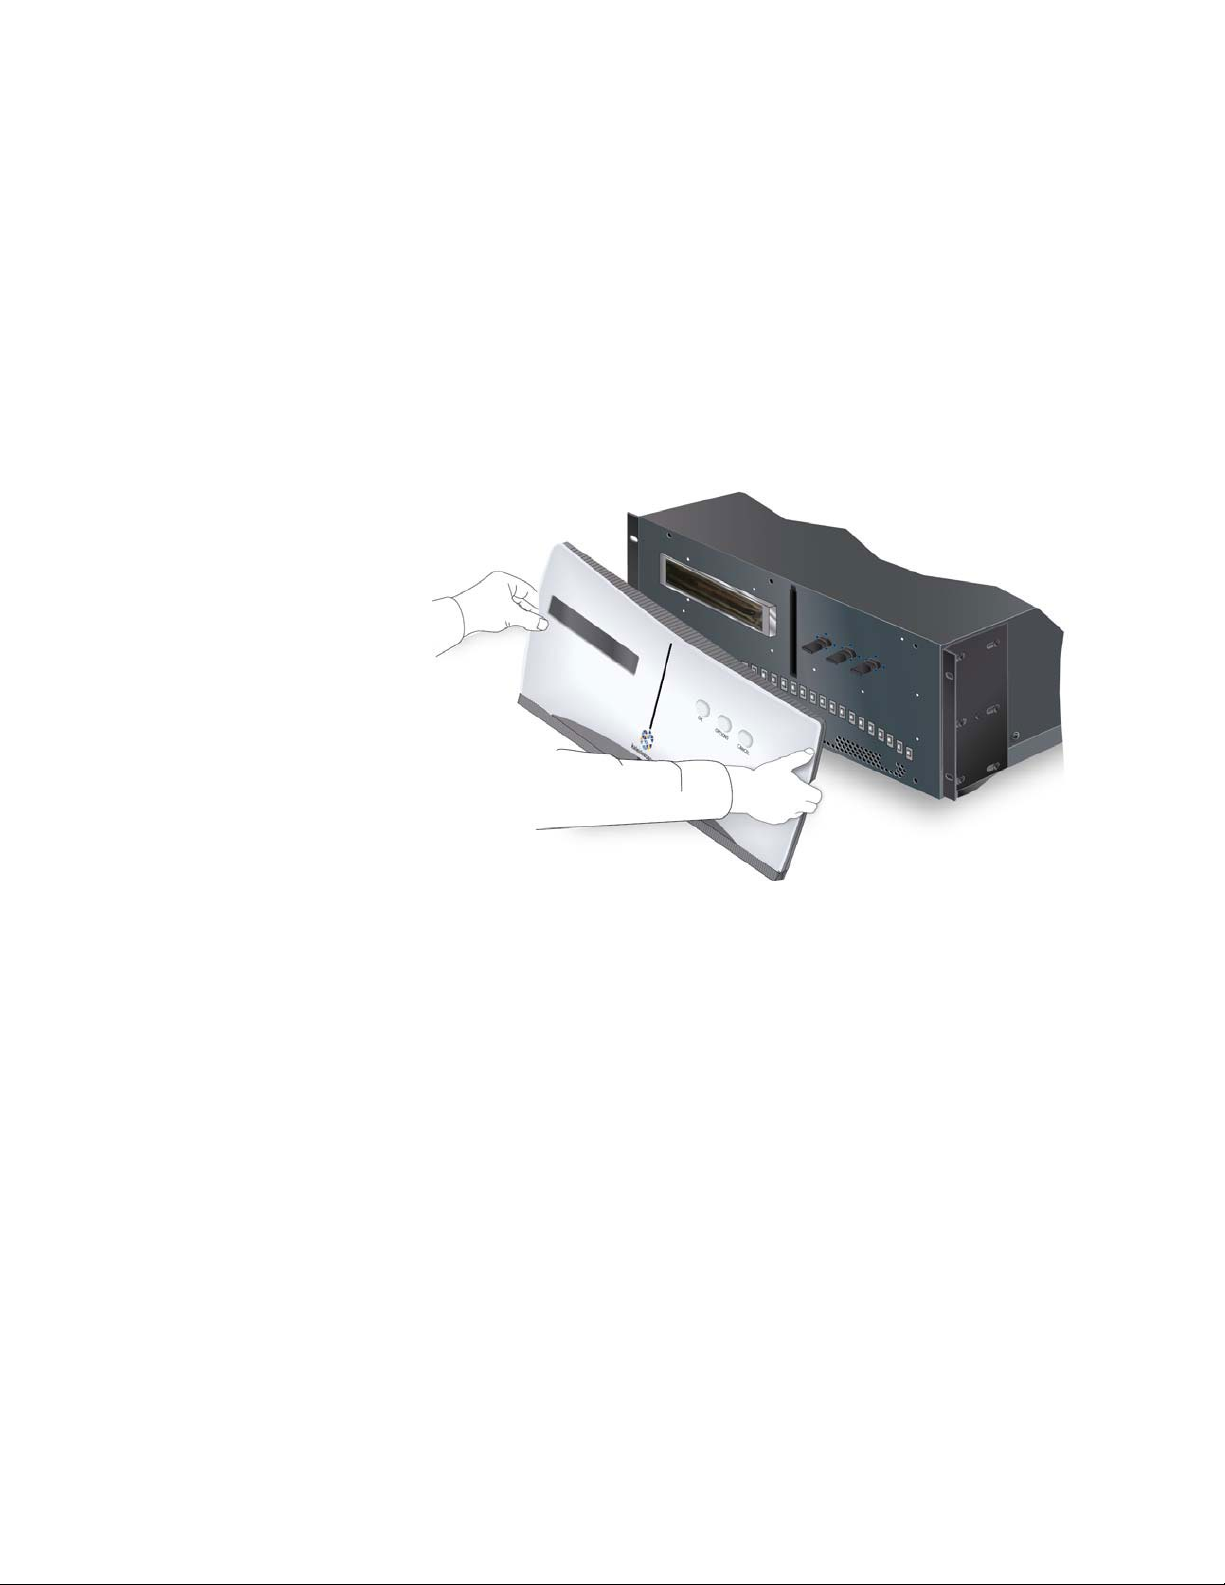
1. Remove the front panel by gripping each side and pulling it straight
from the disc vault. See Figure 1.
Figure 1
2. Remove the disc vault from the rack. Use a Phillips screwdriver to
unmount the ears from the rack. A fully loaded vault weighs 49 lbs. A
two-person lift technique is required to safely remove a disc vault
from the rack.

KVAULT ODD Replacement December 2020
101-0269-00 Rev 2 Page 4 of 24
3. Take off the rack ears using a 2.5 mm hex screwdriver to remove the
7 screws that hold them on each side of the chassis. See Figure 2.
Figure 2
4. Remove 6 screws from the back using the 2.5 mm hex screwdriver.
See Figure 3.
Note: All remaining chassis screws will use the 2.5mm hex
screwdriver.
Figure 3
KVAULT ODD Replacement December 2020
101-0269-00 Rev 2 Page 5 of 24
5. Cut the warranty sticker with a box knife.
Note: Cutting the warranty sticker will not void the warranty if
Kaleidescape Support has already issued an RMA for the M700 Disc
Vault or DV700 Disc Vault and sent this document to you.
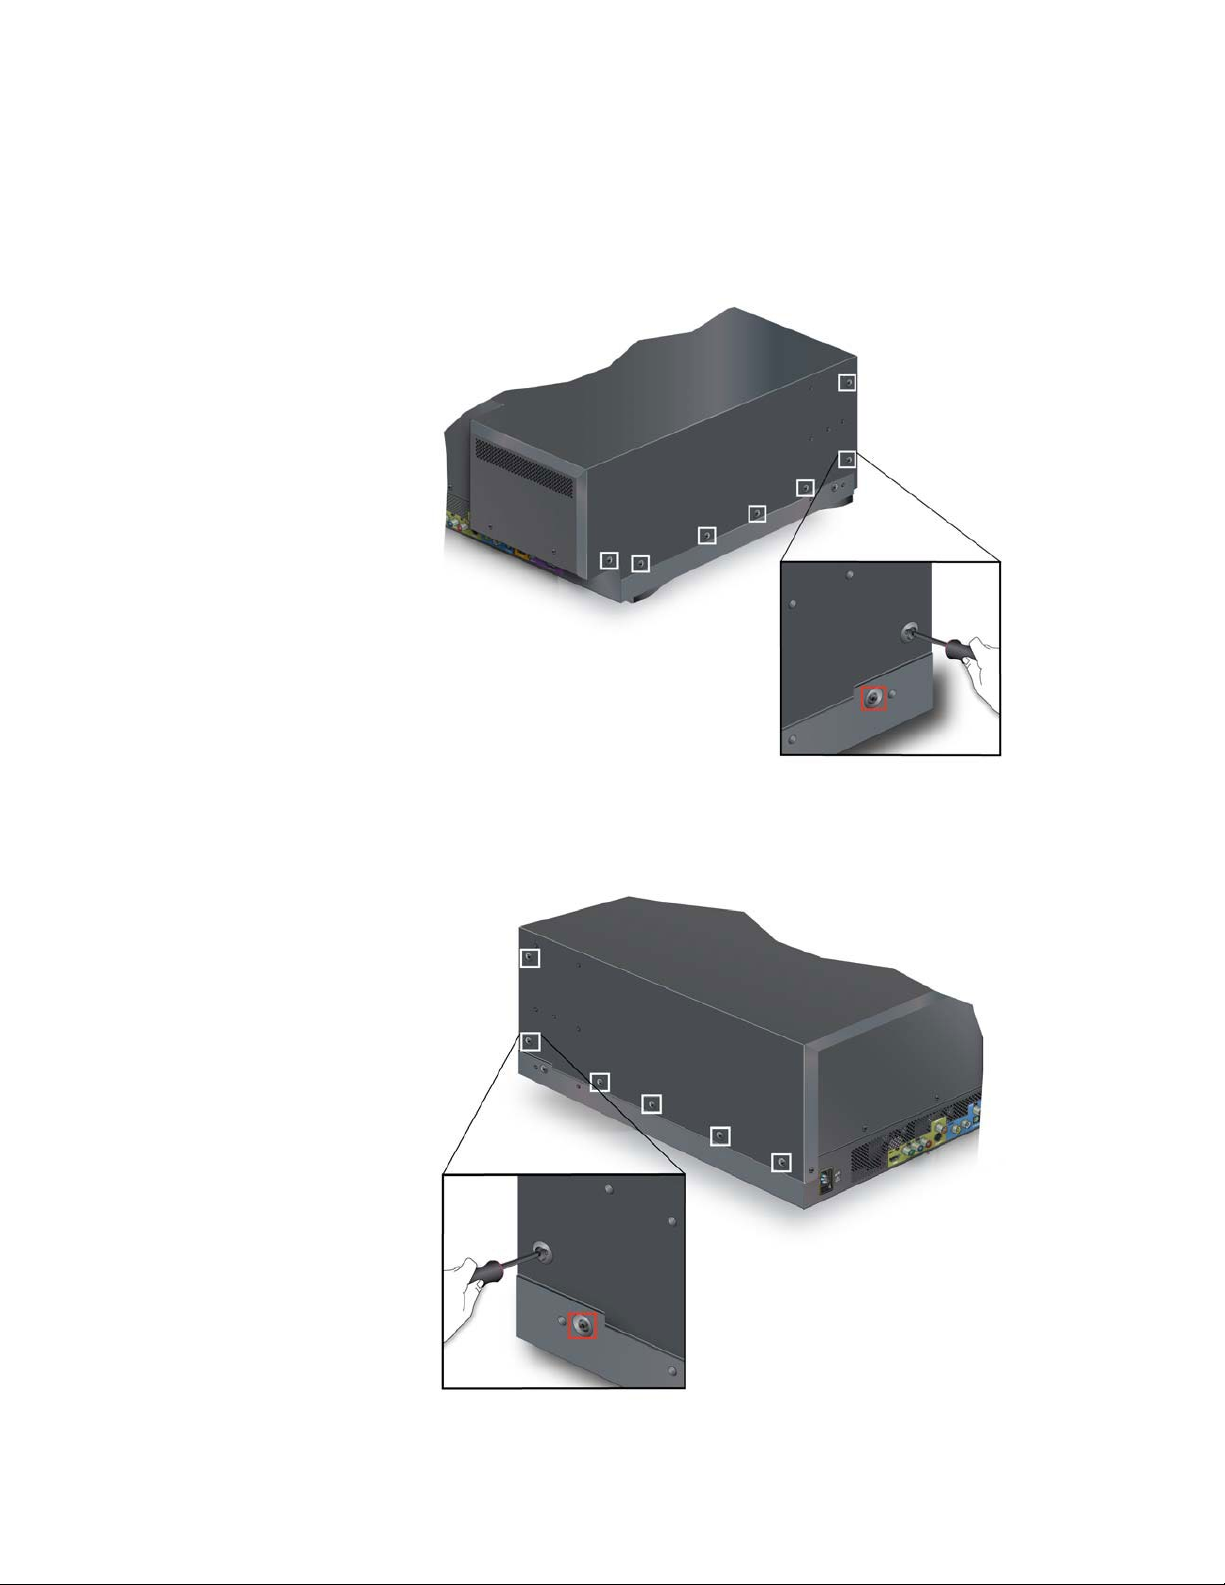
6. Remove 7 screws from the longer side. Do not remove the screw
marked in red. See Figure 4.
Figure 4
7. Remove 6 screws from the shorter side. Do not remove the screw
marked in red. See Figure 5.
Figure 5

KVAULT ODD Replacement December 2020
101-0269-00 Rev 2 Page 6 of 24
8. Remove the casing by sliding it back towards the rear of the vault,
then lift it off. See Figure 6 and Figure 7.
Figure 6
Figure 7
9. Remove the Disc Retention Funnel. Remove the 4 screws with
washers using a 2mm hex screwdriver. Remove the central bolt with
washer using a 4mm hex screwdriver and lift off the funnel.

KVAULT ODD Replacement December 2020
101-0269-00 Rev 2 Page 7 of 24
Figure 8
10. If there are any discs remaining in the carousel, manually remove
them and store them in a safe place, such as disc cases or a spindle,
to avoid scratches.
Note: We recommend that the rollers be cleaned. You can proceed
to Step 9 of the “Exposing the Rollers” section in the “M700 and
DV700 Roller Cleaning Procedure” document
https://support.kaleidescape.com/article/M700-and-
DV700-Roller-Cleaning-Procedure
11. Carefully unpack the new drive. When handling the new disc drive, do
NOT put pressure on the large surface on the top of the drive. The
best way to handle the drive is to grasp from the sides. See Figure 9.
Place the drive aside until called for in the procedures.
Figure 9

KVAULT ODD Replacement December 2020
101-0269-00 Rev 2 Page 8 of 24
12.
If your bracket is the
original
mount,
proceed below.
If your bracket is the newer
A
-Frame version,
jump to page
14.
Figure 10
Original Bracket Procedure
Remove Old Optical Drive
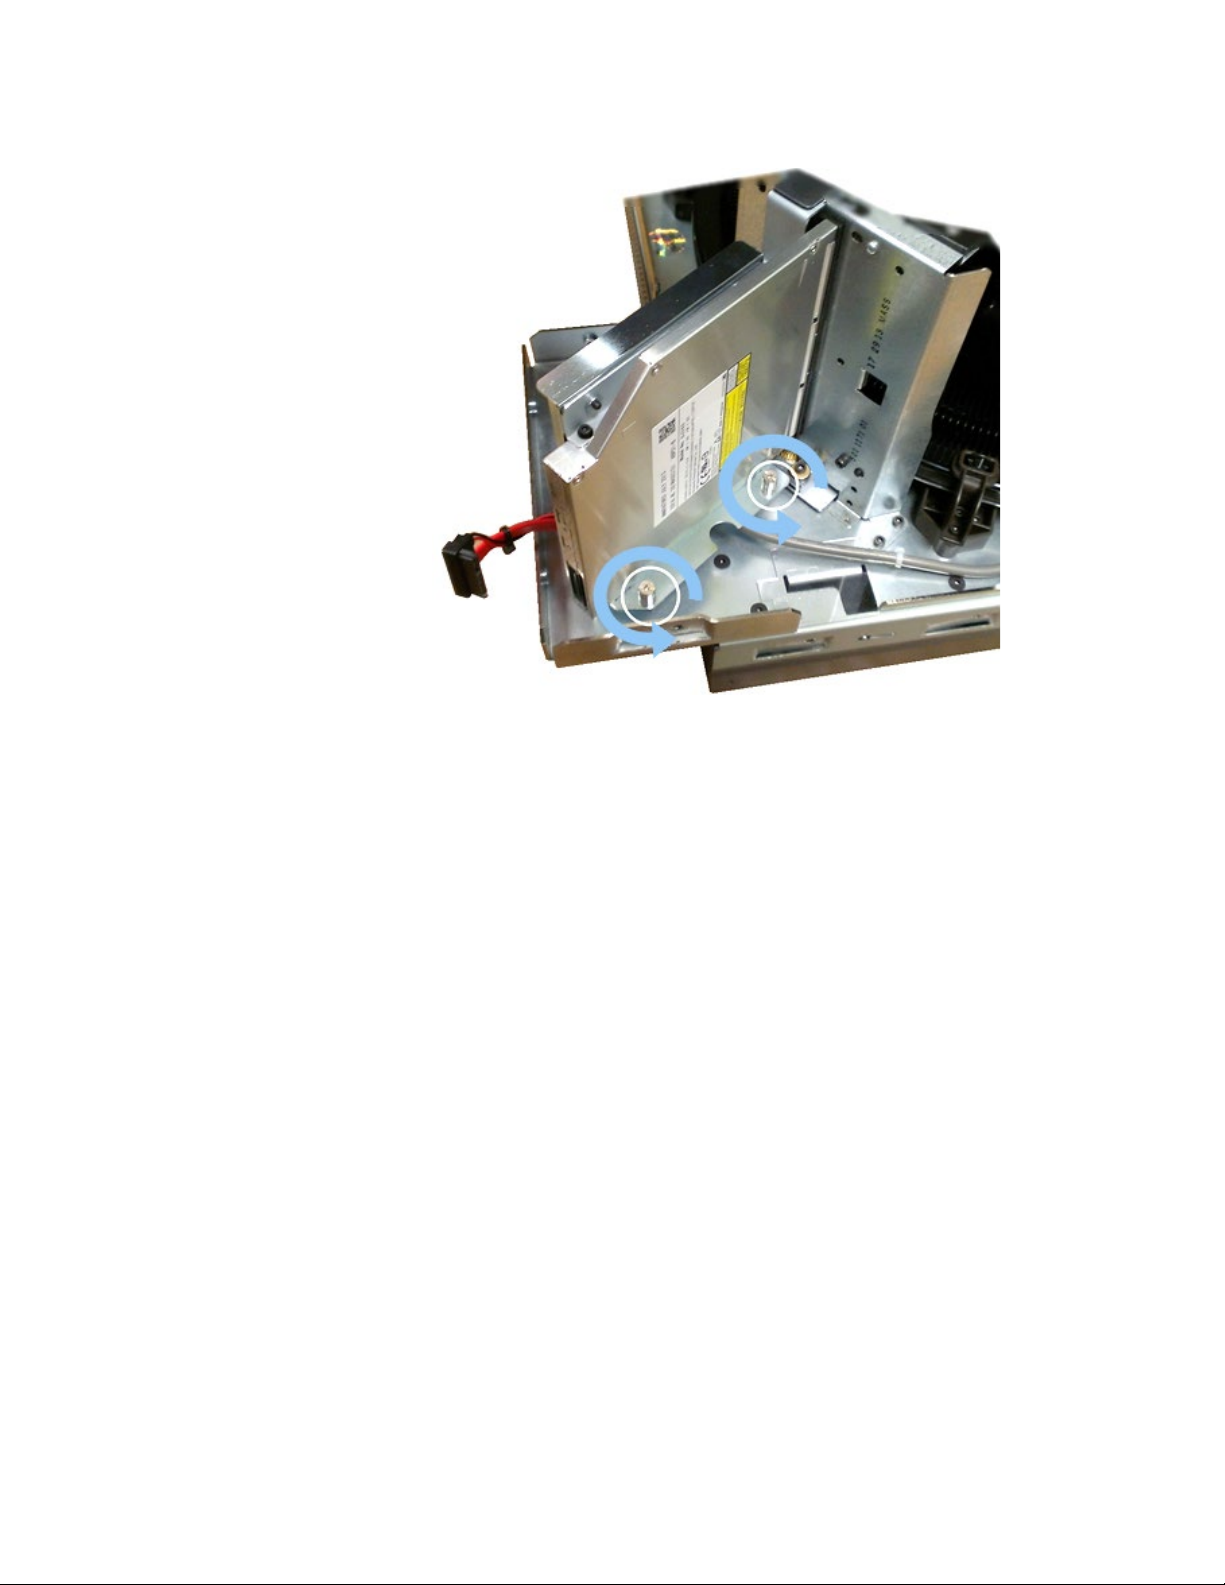
1. Remove the red SATA cable from the back of the disc drive by
pinching both sides and pulling straight back. See Figure 11.
2. Using the 2.5mm Hex screwdriver, remove the 2 mounting screws
from the bottom of the optical disc drive. See Figure 11.
Figure 11
KVAULT ODD Replacement December 2020
101-0269-00 Rev 2 Page 9 of 24
3. On the other side of the drive, use the Philips screwdriver to remove
the 2 self-retaining mounting screws. See Figure 12.
Figure 12
4. Remove the disc drive and attached mounting brackets from the unit.
Mark the drive as defective, to avoid accidental reuse.
5. Check the defective drive for stuck discs and carefully extract any
disc if found. Removing the drive bezel can help with this.
Transfer Mounting Brackets to New Optical Disc Drive
1. On the removed optical disc drive, note the orientation of the bottom
bracket in relation to the optical drive.
2. Remove the two screws from the bottom bracket and recover the
bracket.
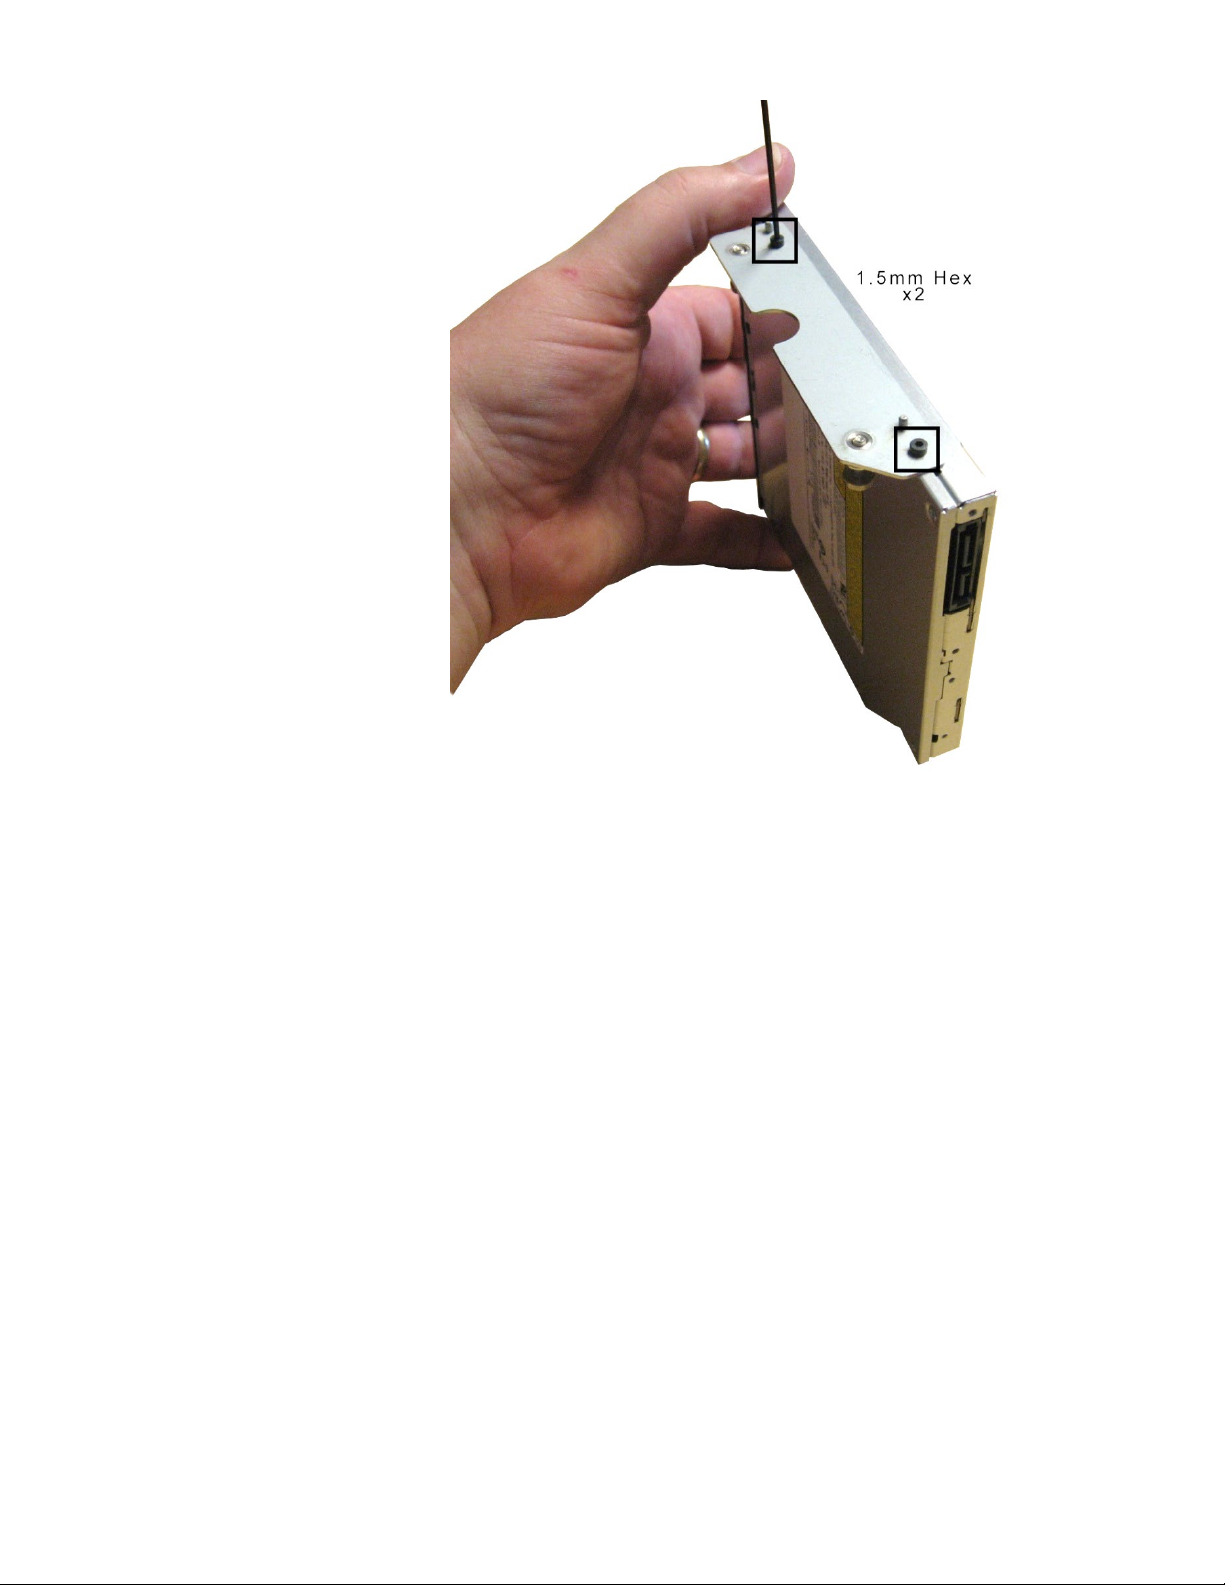
3. Attach the recovered bottom mounting bracket to drive with two of
the provided M2 screws with a 1.5mm hex screwdriver. These screws
are threaded into the soft aluminium of the drive housing and only
require a gentle tightening.
KVAULT ODD Replacement December 2020
101-0269-00 Rev 2 Page 10 of 24
Figure 13
4. On the removed optical disc drive, note the orientation of the top
bracket to the optical drive.
5. Remove the two screws and washers from the top bracket and
recover the bracket.
6. Loosely install the top 1.5mm hex screws with washers through the
bracket and into the drive. Leave these screws loose for now. The
washers are important to avoid internal damage to the drive
mechanism.
This manual suits for next models
1


