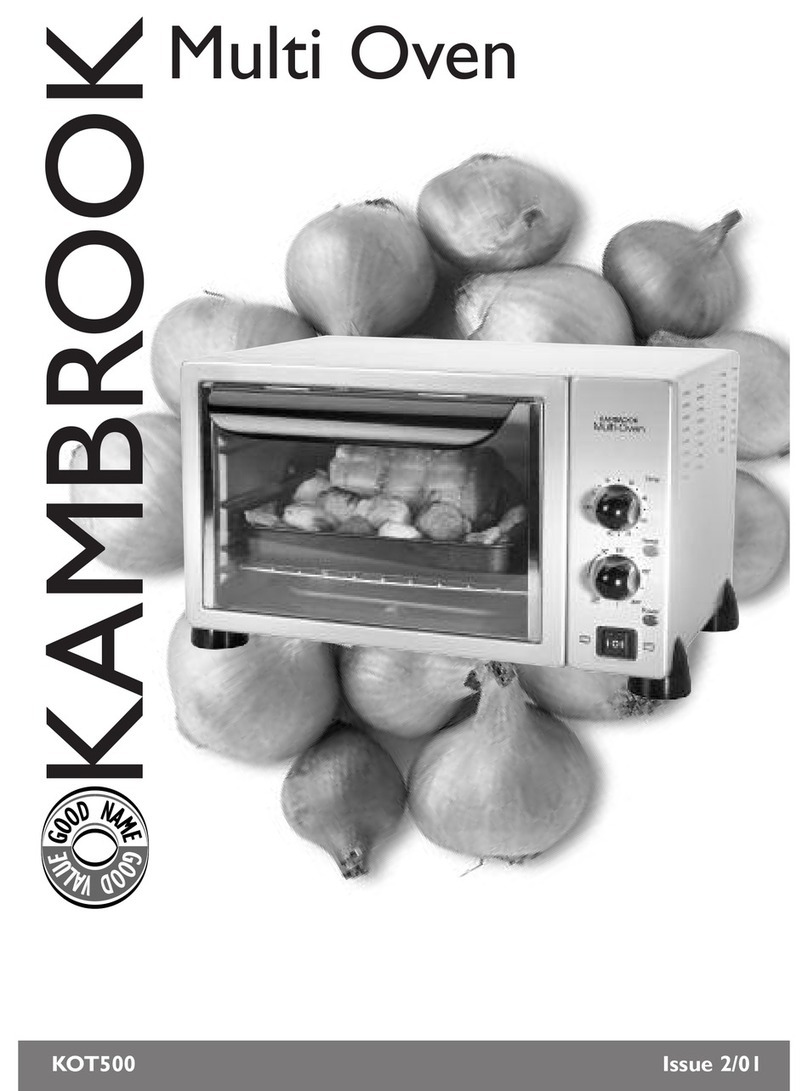
Kambrook KOV200 User manual

Due to continual improvement in design or otherwise, the product you
purchase may differ slightly from the illustration in this book. Issue C15
Kambrook - New Zealand
Private Bag 94411
Botany, Manukau
Auckland 2163
New Zealand
Customer Service Line/
Spare Parts 0800 273 845
Customer Service Fax 0800 288 513
www.kambrook.co.nz
Kambrook - Australia
170 -180 Bourke Road
Alexandria NSW 2015
Australia
Customer Service Line 1300 139 798
www.kambrook.com.au

For all KOV200 modelsINSTRUCTION BOOKLET

Important
Please retain your instruction
book for future use.
In the event that you need some assistance with your
Kambrook appliance, please contact our Customer Service
Department on 1300 139 798 (Australia) or 0800 273 845
(New Zealand). Alternatively, visit us on our website at
www.kambrook.com.au or www.kambrook.co.nz

Contents
Kambrook Recommends
Safety First
p4
Your Kambrook 9L Mini Oven p6
Using Your Kambrook Mini Oven p7
Care, Cleaning and Storage p10
Recipes p11

4
Kambrook Recommends Safety First
IMPORTANT: Please retain your
instruction book for future use.
At Kambrook, we believe that safe performance is the first priority in any
consumer product, so that you, our valued customer can confidently
use and trust our products. We ask that any electrical appliance that
you use be operated in a sensible fashion with due care and attention
placed on the following important operating instructions.
Important Safeguards For Your Kambrook
9L Mini Oven
• Carefully read all instructions before
operating the oven for the first time and save
for future reference.
• Remove and safely discard any packaging
material and promotional labels before using
the oven for the first time.
• To eliminate a choking hazard for young
children, remove and safely discard the
protective cover fitted to the power plug of
the oven.
• Do not place the oven near the edge of a
bench or table during operation. Ensure the
surface is level, clean and free of water and
other substances.
• Do not operate the oven on a sink drain
board.
• Do not place the oven on or near a hot gas
or electric burner, or where it could touch a
heated oven.
• Position the oven with sufficient clearance
(minimum 50mm) above and on all sides and
a minimum distance of 50cm away from all
other heat sensitive materials when in use.
This will allow for adequate air circulation
and also help prevent the possibility of wall,
curtains, and cloth discoloration due to
radiated heat.
• Always operate the oven on a stable and
heat resistant surface. Do not use on a
cloth-covered surface, near curtains or other
flammable materials.
• Do not place cardboard, plastic, paper or
other flammable materials into the oven.
• Do not cover any other external part of
the oven with metal foil. This will cause
overheating of the oven.
• Extreme caution must be used when the
oven contains hot food and liquids. Do not
move the oven during cooking.
• This oven is not intended to be operated
by means of an external timer or separate
remote control system.
• The door or the outer surface may get hot
when the oven is operating.
• The temperature of accessible surfaces will
be high when the oven is operating and for
some time after use. The surfaces are liable
to get hot during use.
• Do not touch hot surfaces, use protective hot
pads or insulated oven mitts to prevent burns
or personal injury.
• Always use protective pot holders or
wear insulated oven mitts when inserting,
removing or handling items from the oven
when hot. Alternatively, allow the oven to
cool down before handling.
• Always use extreme caution when removing
any of the accessories, hot food and
disposing of hot grease.
• Do not place hands inside the oven during
operation.
• Do not leave the door open for extended
periods of time when the oven is turned on.

5
• The glass of the oven door has been specially
treated to make it stronger, more durable
and safer than ordinary glass, however it is
not unbreakable. If struck extremely hard, it
may break or weaken, and could at a later
time shatter into many small pieces without
apparent cause.
• Do not insert over-sized foods into the oven
as they create risk of fire or electric shock.
• The oven is designed for reheating, toasting/
cooking or grilling small portions of suitable
foods as described in this book.
• Always place the bread on the wire rack or
the baking tray in the upper shelf position of
the oven to avoid overheating on the bottom
side of the toast.
• It is recommended to use only the
accessories supplied with the oven.
Using other accessories may cause hazard
or injury.
• Do not store any materials other than the
supplied accessories in the oven when not
in use.
• Do not clean the interior of the oven with
metal scouring pads as pieces can break off
the pad and touch electrical parts, creating
risk of electric shock.
• Do not attempt to operate the oven by any
method other than those described in this
book.
• Always ensure the oven is properly
assembled before use. Follow the instructions
provided in this book.
• Do not place anything on top of the oven
when in use and when stored other than
those described in this book.
• The oven should not be left unattended at
any time when in use.
• Always ensure the oven has cooled, the
temperature control dial is in the OFF
position, the oven is switched off at the
power outlet, and the cord is unplugged
from the power outlet before attempting
to move the oven, when not in use, if left
unattended and before disassembling,
cleaning or storing.
• Keep the oven clean. Follow the cleaning
instructions provided in this book.
Important safeguards for all electrical
appliances
• Fully unwind the power cord before use.
• Connect only to 230V or 240V power outlet.
• Do not let the power cord hang over the
edge of a bench or table, touch hot surfaces
or become knotted.
• To protect against electric shock, do not
immerse the power cord, power plug or
appliance in water or any other liquid,
unless it is recommended in the cleaning
instructions.
• The appliance is not intended for use by
persons (including children) with reduced
physical, sensory or mental capabilities,
or lack of experience and knowledge,
unless they have been given supervision or
instruction concerning use of the appliance,
by a person responsible for their safety.
• Children should be supervised to ensure that
they do not play with the appliance.
• It is recommended to inspect the appliance
regularly. Do not use the appliance if the
power supply cord, plug, connector or
appliance becomes damaged in anyway.
Return the entire appliance to the nearest
authorised Kambrook Service Centre for
examination and/or repair.
• Any maintenance other than cleaning
should be performed at an authorised
Kambrook Service Centre.
• This appliance is for household use only.
Do not use this appliance for other than its
intended use. Do not use in moving vehicles
or boats. Do not use outdoors. Misuse may
cause injury.
• The installation of a residual current device
(safety switch) is recommended to provide
additional safety protection when using
electrical appliances. It is advisable
that a safety switch with a rated residual
operating current not exceeding 30mA be
installed in the electrical circuit supplying
the appliance. See your electrician for
professional advice.
• Always turn the appliance to the OFF
position, switch off at the power outlet,
and unplug at the power outlet when the
appliance is not in use.
• Before cleaning, always turn the appliance
to the OFF position, switch off at the power
outlet, unplug at the power outlet, and
remove the power cord, if detachable, from
the appliance and allow all parts to cool.
• Do not place this appliance on or near
a heat source, such as hot plate, oven or
heaters.
• Position the appliance at a minimum
distance of 20cm away from walls, curtains
and other heat or steam sensitive materials
and provide adequate space above and on
all sides for air circulation.

6
Your Kambrook 9L Mini Oven
1. Glass oven door
2. Element selection dial for
choosing desired cooking
function
3. 15 minute timer dial
4. Baking tray
5. Wire oven rack
6. High and low wire oven rack
positions
7. Power On indicator llight
8. Non-slip feet
Not shown:
• Top and bottom elements

7
Operating Your Kambrook Mini Oven
Before First Use
Remove and safely discard any
packaging material and promotional
labels before using the oven for the
first time. Wash the baking tray in
warm, soapy water, rinse and dry
thoroughly. Wipe the wire oven rack,
glass door and exterior with a soft,
damp cloth then dry thoroughly.
Place the oven on a level,
flat surface.
Plug the oven into a 230V or 240V
power outlet and turn the power on.
Set the timer dial to 15 minutes. Select
the TOAST/COOK function on the
element selection dial and allow the
oven to operate until the timer counts
down to 0 and turns 'OFF'. This should
eliminate any oil residue that may
have been used for packing and
shipping.
Allow the oven to cool before
inserting the accessories. The oven is
now ready to use.
NOTE: When operated on for
the first time, the oven may give
off vapours for up to 15 minutes.
This is due to the protective
substances on the heating
elements. It is safe, not detrimental
to the performance of the oven
and will dissipate with use.
IMPORTANT: The oven will not
heat until ALL of the following are
activated:
• the element selection dial
has been selected
• the timer has been set on a
cooking time
Operating Your Kambrook
Mini Oven
1. Slide the wire oven rack into
either the high or low position
inside the oven.
2. Place food to be grilled,
reheated, or cooked onto the
baking tray, then place baking
tray onto the wire oven rack and
close the door.
3. Turn the element selection dial to
the desired function:
a. GRILL
b. REHEAT
c. TOAST/COOK
4. Turn the timer dial to the required
cooking time (up to 15 minutes).
5. Heating will begin and the timer
dial will start count down. Power
indictor light will illuminate.
6. At the end of the selected time,
a short bell will ding when the dial
reaches 0 and the oven will turn
'OFF', the Power indicator light will
extinguish. If further cooking time
is required, reset the timer dial
to the required time. If no further
cooking time is required and the
timer dial is set to 'OFF', manually
turn the element selection dial
NOTE: Do not move the oven
during cooking as the oven is
very hot.
NOTE: Both the element
selection dial and the timer dial
must be selected for the mini
oven to operate.

8
to the 'OFF' position. Switch off
at the power outlet and unplug
the power cord from the power
outlet.
7. Open the oven door and remove
the food carefully as the oven
and the food will be hot.
NOTE: Use insulated oven mitts
when inserting, removing or
handing items from the oven
when it is hot.
Grill
Suitable for sandwich melts, cheese
on toast, open sandwiches, or similar.
Preheating of the mini oven is not
required.
• Always place sandwiches, melts,
etc. for grilling into the baking tray.
• Do not overfill the sandwich tops
with ingredients. Ensure food does
not overlap the edges of the
baking tray.
• If additional heat is required to the
bottom of the food in the baking
tray, select the TOAST/COOK
function instead of the GRILL
function.
Reheat
Suitable for reheating small portions of
foods already thawed and cooked.
Preheating of the mini oven is not
required.
• Always ensure food for reheating
has been properly thawed and/or
precooked before using the REHEAT
function.
• Always place food for reheating
into the baking tray. Ensure food
does not overlap the edges of the
baking tray.
• If additional heat is required to the
top of the food in the baking tray,
select the TOAST/COOK function
instead of the REHEAT function.
Toast/Cook
Suitable for toasting bread, bagels or
crumpets, and cooking small portions
of thawed foods such as bacon
rashers, fish fillets, fish pieces, etc.
Preheating of the mini oven is not
required
• For toasting, open oven door
and carefully place suitably sized
bread, bagels or crumpets directly
onto the wire oven rack so that
both sides of the food can be
toasted. Do not place any spreads,
toppings, etc. onto the food being
toasted.
NOTE: Always place the toast on
the wire rack or the baking tray
in the upper shelf position of the
oven to avoid overheating on the
bottom side of the toast.
• Always ensure food for toasting/
cooking has been properly thawed
before using the TOAST/COOK
function.
• Always place food for cooking into
the baking tray, then the baking
tray onto the oven rack. Ensure
food does not overlap the edges of
the baking tray.
• Some foods release fat/oil during
cooking, so to avoid overflowing
from the baking tray, interrupt
the cooking process, remove the
baking tray and carefully drain fat
away.
• Dry or stale foods, bread, etc.
will toast faster than fresh.
Operating Your Kambrook Mini Oven Continued...

9
NOTE: Element guards may
slightly discolour after using for
some time. This is normal and it
will not affect the performance
of the mini oven
Important
• All wrappers, cardboard, foil, etc.
should be removed from the food
before placing in the mini oven.
• Ensure food does not fall onto
bottom element or touch top
element during baking by selecting
suitably sized portions and
choosing the appropriate position
for the wire oven rack.
• If unsure of correct cooking time,
select a shorter time initially and
add extra time if required.
• If desired result has been achieved
before the end of the selected
time, turn the element selection
dial and the timer dial to the ‘OFF’
position.

10
Care, Cleaning and Storage
Care and Cleaning
Before cleaning, always ensure the
mini oven, wire oven rack and baking
tray have cooled, the element
selection dial and the timer dial are
in the ‘OFF’ position, the mini oven is
switched off at the power outlet and
the power cord is unplugged.
After each use, remove the wire oven
rack and baking tray and carefully
discard any food residue. Wash the
baking tray in hot, soapy water. A soft
plastic scouring pad can be used to
avoid build-up of stains. Rinse and dry
thoroughly.
Wipe the wire rack and the interior
of the oven with a soft damp cloth,
lightly wetted with hot water and mild
detergent, or soft plastic scouring
pad. Wipe again with a soft damp
cloth, lightly wetted with hot water,
then with a dry cloth.
Wipe the exterior with a soft damp
cloth then dry thoroughly. The glass
oven door can be cleaned with a
glass cleaner. Do not use an abrasive
cleaner or pad as these may scratch
the surface.
Do not wash any parts or accessories
in a dishwasher. Allow all parts and
surfaces to dry thoroughly before
reassembling and reusing.
Storage
Before storing, the element selection
dial and the timer dial should be
in the ‘OFF’ position, the mini oven
switched off at the power outlet and
the power cord unplugged. Ensure
the mini oven is completely cool,
clean and dry. Insert the accessories
into position in the mini oven and
close the door. Do not place anything
on top and store the mini oven upright
on the non-slip feet.
WARNING: Do not
immerse power cord,
power plug or the oven
into water or any other
liquid.
WARNING: Do not use
metal scouring pads to
clean the oven. Pieces
of metal can break
off the pad and touch
electrical parts of the
oven, creating risk of
electric shock.

11
Garlic Bread
Serves 2
150g butter, softened
4 garlic cloves, crushed
2 tbsp fresh flat-leaf parsley leaves, finely
chopped
¼ cup grated parmesan cheese
4 slices sourdough
Salt and pepper to taste
1. Preheat the oven by turning the
element selection dial to the TOAST/
COOK function.
2. Turn the timer dial to 10 minutes.
3. Combine butter, garlic, parsley, and
parmesan cheese in a bowl. Season
with salt and pepper.
4. Spread over cut slices of bread, and
place on the baking tray.
5. Turn the timer dial to 5 minutes and
bake until golden brown.
Prosciutto, semi dried Tomato,
Olive and Basil Palmier
Makes 12 palmiers
2 sheets pack ready-rolled puff pastry
4 tbsp semi-dried tomato puree
¼ cup chopped pitted olives
25g parmesan cheese, grated
10 fresh basil leaves
8 slices prosciutto
Small handful pine nuts
Extra virgin olive oil
1. Unroll the pastry and spread the
tomato puree over. Scatter over
the olives, parmesan, basil leaves,
prosciutto, and pine nuts. Roll up
from one of the longer edges to the
middle, and then roll up from the
other long edge to the middle.
2. Transfer to the baking tray, and chill
for 30min.
3. Preheat the oven by turning the
element selection dial to the TOAST/
COOK function and turn the timer
dial to 10 minutes.
4. Slice across the rolls into 1cm slices.
Turn the timer dial to 15minutes and
cook until golden.
5. Serve warm, drizzled with extra virgin
olive oil.
Recipes

12
Caramelised onion, Feta and
Spinach tart
Serves 4
Olive oil
2 red onions, sliced
400g baby spinach leaves
1 garlic clove, crushed
¼ cup grated parmesan cheese
¼ bunch thyme, chopped
1 tbsp thickened cream
Salt and pepper to taste
1 sheet pack ready-rolled puff pastry
1 tbsp milk
1 egg
60g Persian feta, crumbled
1. Preheat the oven by turning the
element selection dial to the TOAST/
COOK function and turn the timer
dial to 15 minutes.
2. Heat some olive oil in a frypan on low
heat. Fry the red onions until they start
to break down, about 5 minutes. Set
aside.
3. Heat some more olive oil in the frypan
and fry garlic for 2 minutes, add and
wilt the spinach of for 30 seconds,
drain and squeeze out all the liquid
thoroughly.
4. Mix the garlic and spinach with
parmesan, thyme and cream, and
season with salt and pepper.
5. Place your puff pastry sheets on a
flat surface and cut the pastry into 4
squares.
6. Score the inside of the pastry with a
small knife, but don’t cut all the way
through, to make a small rim around
the edge.
7. Mix the egg and milk to make egg
wash, and brush the rim of each base
with egg wash. Turn the timer dial to
15 minutes, and bake until it just starts
to colour.
8. Remove from the oven and press
down on the inner square piece
so that it drops in, it should come
away where you have scored it. Fill
each pastry case with 1 tablespoon
caramelised onion, 1 tablespoon
creamy spinach mix, and top with
feta.
9. Turn the timer dial to 5 minutes and
return the tarts to the oven until the
feta starts to colour up.

13
Vegetable Frittata
Serves 2
4 eggs
¼ cup milk
Salt and pepper to taste
½ tbsp olive oil
1 zucchini, sliced into small pieces
½ bunch asparagus, thinly sliced
½ cup sliced mushrooms
¼ red onion, sliced
½ cup baby spinach
¼ cup grated cheddar
75g feta cheese, crumbled
¼ bunch fresh chives, chopped
1. Preheat the oven by turning the
element selection dial to the TOAST/
COOK function and turn the timer
dial to 10 minutes.
2. Line a small tin with baking paper.
3. In a bowl, mix eggs, milk and salt and
pepper together.
4. In a large frypan, heat the olive oil
and fry off the zucchini, asparagus,
mushrooms, onion, and baby spinach.
Cook only for a few minutes. Place
into the tin and pour egg mixture over
the vegetables. Sprinkle cheddar and
feta over the top.
5. Turn the timer dial to 15 minutes. Once
cooked, remove from the oven and
allow to col before serving. Garnish
with fresh chives.
Spanish-style Baked Eggs
Serves 2
1 chorizo sausage, sliced
3 shallots, chopped
1 red chilli, seeds removed, chopped
1 garlic clove, chopped
1 x 400g can diced tomatoes
10 capers
1 tbsp red wine vinegar
3 tbsp chopped fresh flat parsley
4 eggs
Crusty bread, to serve
1. Preheat the oven by turning the
element selection dial to the TOAST/
COOK function and turn the timer
dial to 15 minutes.
2. Cook the chorizo sausage in a frypan
for 3 minutes, add the shallots, chilli,
garlic and sauté for 3 more minutes.
3. Add the tomatoes, capers, vinegar
and parsley bringing them up to a
boil, and simmer for 3 minutes.
4. Remove from the heat and spoon into
a 12 cm ovenproof dish. Make two
wells in the mixture and crack an egg
into each. Cover with foil and place
on the baking tray. Turn the timer dial
to 10 minutes and bake until the eggs
are just set or cooked to your liking.
Serve with crusty bread.

14
Avocado, Chicken and Swiss
Cheese Melt
Serves 2
2 x 150g chicken breast fillets, cooked
Olive oil spray
2 slices Italian-style crusty bread, thick cut
1 ripe avocado, peeled, stone removed,
and sliced
1 tbsp garlic aioli
1 ripe tomato, finely sliced
½ red onion, finely chopped
2 slices Swiss cheese
Salt and pepper to taste
1. Preheat the oven by turning the
element selection dial to the TOAST/
COOK function and turn the timer
dial to 5 minutes.
2. Place bread on the wire rack and
cook each side for 2 minutes or until
lightly toasted.
3. Spread bread with avocado, squeeze
garlic aioli, lay chicken, tomato, and
red onion on top. Season with salt and
pepper. Lay cheese over the top.
4. Return to oven. Cook until cheese
melts, and serve immediately.
Lamb Cutlets with Rosemary
and Garlic
Serves 2
2 lamb racks (3 cutlets per rack)
2 garlic cloves, sliced
2 long sprigs fresh rosemary
1 tbsp honey
2 tbsp wholegrain mustard
2 tbsp mint sauce
1. Trim any excess fat from the lamb
racks. Cut small slits in the top of the
lamb with a small, sharp knife.
2. Heat a frypan up on high and cook
the lamb rack, fat side down, to
render the fat out. Cook for 3-4
minutes. Allow to cool slightly and
insert slices of garlic and small pieces
of rosemary into the slits. Set aside.
3. Whisk together the honey, wholegrain
mustard and mint sauce and brush
over the lamb racks. Allow to marinate
for 20 minutes in a cool place.
4. Preheat the oven by turning the
element selection dial to the TOAST/
COOK function and turn the timer
dial to 5 minutes.
5. Put the lamb racks into the baking tray
and spoon on any sauce that may be
left on the plate. Turn the timer dial
to 15 minutes and bake until the bell
dings. Baste a couple of times during
cooking with the honey mustard
mixture.
6. Remove from the oven and allow
to stand, covered, in a warm place,
for 10 minutes. This will finish cooking
the lamb, and stop the juices from
coming out.
7. Slice lamb into individual cutlets and
serve with some roasted potatoes and
seasonal vegetables.

15
Pizza Dough
Makes 3 pizzas (tray-sized)
½ tsp white sugar
1 tbsp active yeast
1 cup warm water
3 cups plain flour
1 tsp salt
1 tbs vegetable oil
1. Place sugar, yeast and water in a
bowl, mix together and allow to rest
for 15 minutes (it should go frothy).
2. Sift flour and salt into a second bowl
and then transfer to the frothy sugar
mix. Add the oil and knead the
mixture until smooth and stretchy
in texture. This can take about 8-10
minutes.
3. Place dough in a greased bowl, cover
with a clean tea towel, place in a
warm spot and allow the dough to
double in size.
4. Once doubled, the dough needs to
be punched to knock the air out of it.
Cut dough into 4 equal-sized pieces.
Use a rolling pin to roll each piece of
dough.
5. Lightly oil your pizza tray, place dough
on, and add your toppings.
6. Preheat the oven by turning the
element selection dial to the TOAST/
COOK function.
7. Turn the timer dial to 15 minutes and
cook your pizza until the bell dings.
Pizza Combinations
• Tomato sauce, chorizo, prosciutto,
fresh Basil, mozzarella.
• BBQ sauce, roasted chicken, bacon,
red onion, oregano, mozzarella.
• Tomato sauce, prawn, chili, lemon,
dill, capers onion, mozzarella.
• BBQ sauce, bacon, salami, sausage,
red capsicum, mozzarella.
• Garlic oil, slow roasted lamb,
potatoes, mint yogurt, rosemary, feta,
mozzarella
TIP: When making your pizza, start
with the sauce, leaving 1cm rim
around the edge. Sprinkle a bit of
cheese on the sauce, this act as a
glue to help the toppings stay on top.
Alternate the remaining toppings,
don’t overload the pizza with toppings
as this will make for a soggy base. Top
up the pizza with more cheese and
the herbs. Dried oregano is great with
every pizza.

16
Lamb Cutlets with Rosemary
and Garlic
Serves 2
2 lamb racks (3 cutlets per rack)
2 garlic cloves, sliced
2 long sprigs fresh rosemary
1 tbsp honey
2 tbsp wholegrain mustard
2 tbsp mint sauce
1. Trim any excess fat from the lamb
racks. Cut small slits in the top of the
lamb with a small, sharp knife.
2. Heat a frypan up on high and cook
the lamb rack, fat side down, to
render the fat out. Cook for 3-4
minutes. Allow to cool slightly and
insert slices of garlic and small pieces
of rosemary into the slits. Set aside.
3. Whisk together the honey, wholegrain
mustard and mint sauce and brush
over the lamb racks. Allow to marinate
for 20 minutes in a cool place.
4. Preheat the oven by turning the
element selection dial to the TOAST/
COOK function and turn the timer
dial to 5 minutes.
5. Put the lamb racks into the baking tray
and spoon on any sauce that may be
left on the plate. Turn the timer dial
to 15 minutes and bake until the bell
dings. Baste a couple of times during
cooking with the honey mustard
mixture.
6. Remove from the oven and allow
to stand, covered, in a warm place,
for 10 minutes. This will finish cooking
the lamb, and stop the juices from
coming out.
7. Slice lamb into individual cutlets and
serve with some roasted potatoes and
seasonal vegetables.
Grilled Barramundi with Lemon
Butter
Serves 2
2 x 200g Barramundi fillets
Lemon Butter Sauce
1 eschallot, chopped
1 clove garlic, chopped
10 black peppercorns
1 bay leaf
½ cup white wine
½ cup thickened cream
250g unsalted butter
Juice of 1 lemon
Salt and pepper to taste
1. Preheat the oven by turning the
element selection dial to the TOAST/
COOK function and turn the timer
dial to 5 minutes.
2. Place fish fillets on the baking tray. Turn
the timer dial to 15 minutes.
3. Once cooked, pour the lemon butter
sauce on top and serve.
Lemon butter sauce
1. In a frypan, heat the eschallot, and
garlic. Add peppercorns, bay leaf,
and wine, and reduce down by ¾.
2. Add cream and reduce until the
sauce has thickened and turns dark
cream colour.
3. Whisk in the butter over low heat
(do not boil it) until the butter has all
melted.
4. Season with salt, pepper and lemon
juice.
NOTE: Check the fish is cooked
before serving. Cooking time will
vary for different thickness of fish.

17
Steak and Leek Vol au Vents with
Hollandaise Sauce
Serves 4
1 tbsp olive oil + extra for coating steak
1 brown onion, diced
1 leek, chopped
3 cloves garlic, crushed
½ bunch thyme, chopped
½ cup white wine
1 tbsp butter
2x250g fillet steak, sealed
Salt and pepper
4 large vol au vents cases
Hollandaise sauce
250g unsalted butter
4 egg yolks
1 tbsp white wine vinegar
1 tsp tarragon leaves
Pinch salt and pepper
1. To make the hollandaise sauce, melt
butter in the microwave and only use
the yellow part.
2. Crack eggs in a bowl, add the vinegar
and tarragon leaves and place it over
a pot of boiling water; this is called a
double boiler. Don’t allow the bottom
of the bowl to touch the water.
3. Whisk the egg yolks and vinegar
together over the pot of boiling water;
make sure the bowl fits tightly. The
steam will heat up the bottom of the
bowl, cooking the eggs. Continually
whisk the egg mixture so it doesn’t
scramble.
4. Once it nearly doubles in size and is
pale and fluffy, slowly add the yellow
part of the butter while whisking. Add
1 tablespoon of hot water to help
stabilise the sauce. Season with salt
and pepper.
5. In a large pan, heat oil and sauté
onions for 2 minutes. Add leek and
garlic and sauté for 3 more minutes, or
until the leek starts to wilt.
6. Add thyme and white wine. Reduce
wine until nearly all gone, season with
salt and pepper, and stir in the butter.
Set aside.
7. Cover steak in olive oil and season
with salt and pepper.
8. Heat up a frypan until just smoking,
add the steak and cook for 30
seconds. Turn over and cook for 30
seconds. Repeat this for 2 -3 minutes.
Remove from pan and allow to rest for
2 minutes before slicing.
9. Preheat the oven by turning the
element selection dial to the TOAST/
COOK function and turn the timer
dial to 5 minutes.
10. Spoon leek mixture into the vol au
vent cases, lay a few pieces of sliced
steak over, and top with a spoonful of
hollandaise.
11. Place in the oven and turn the timer
dial to 3-4 minutes. Cook until the
hollandaise starts to gratinate. Serve
immediately.

18
Giant Gooey Cookie
Serves 4
250g plain flour
2g baking soda
Pinch of salt
170g unsalted butter, melted
220g brown sugar, packed
100g caster sugar
15ml vanilla extract
1 egg + 1 yolk
335g chocolate chips
1. Preheat the oven by turning the
element selection dial to the TOAST/
COOK function and turn the timer
dial to 10 minutes.
2. Line the baking tray with baking
paper.
3. Sift the flour and baking soda into a
bowl, add the salt and set aside.
4. In a bowl, mix together the melted
butter and sugars thoroughly. Beat in
the vanilla, egg, and egg yolk until
light and creamy. Then mix in the
reserved sifted ingredients until mixed.
Stir in the chocolate chips using a
wooden spoon.
5. Pour a quarter of the cookie dough at
a time onto the baking tray.
6. Turn the timer dial to 13 minutes
and bake until the edges are lightly
toasted.
7. Cool on baking tray for a few minutes
before transferring to wire racks to
cool completely.

19
Notes
Table of contents
Other Kambrook Oven manuals
Popular Oven manuals by other brands

Indesit
Indesit IFW6340IXUK Daily reference guide

Beko
Beko BIM25300X user manual

Debag
Debag DECON 9126481 Translation of the original operating manual

Miele
Miele DG 6010 Operating and installation instructions

Bosch
Bosch CBG675B 3 Series User manual and installation instructions

Daihan Scientific
Daihan Scientific ThermoStable OF-50 user manual