2
ETL Model No.: CF995-1
Table of Contents
Safety Instructions
TO REDUCE THE RISK OF FIRE, ELECTRICAL
SHOCK, OR INJURY TO PERSONS, OBSERVE THE
FOLLOWING:
a. Use this unit only in a manner intended by the
manufacturer. If you have questions, contact the
manufacturer.
b. Before servicing or cleaning unit, switch power
off at service panel and lock service panel
disconnecting means to prevent power from
being switched on accidentally. When the service
disconnecting means cannot be locked, securely
fasten a warning device, such as a tag, to the
service panel.
WARNING
!
Additional Safety Instructions for Installation
1. To avoid possible shock, be sure electricity is turned
off at the main fuse box or circuit breaker panel before
wiring, and do not operate fan without blades.
2. All wiring must be in accordance with the National
Electrical Code “ANSI/NFPA 70-2017” and Local
Electrical Codes. Use the National Electrical Code
if Local Codes do not exist. The ceiling fan must be
grounded as a precaution against possible electrical
shock. Electrical installation should be made or
approved by a licensed electrician.
3. The outlet box and joist must be securely mounted
and capable of reliably supporting at least 50 pounds.
Use only U.L. outlet boxes listed as “Acceptable for
Fan Support of 22.7 kg. (50 lbs.) or less”, and use
the mounting screws provided with the outlet box.
Most outlet boxes commonly used for support of light
fixtures are not acceptable for fan support and may
need to be replaced. Consult a qualified electrician
if in doubt.
4. Follow the recommended instructions for the proper
method of wiring your ceiling fan. If you do not know
enough about electrical wiring, have your fan installed
by a licensed electrician.
NOTE: This fan is suitable for use with solid-state speed
controls.
NOTE: All set screws must be checked and re-tightened
where necessary before installation.
1. Read your owner’s manual carefully and keep it for
future reference.
2. Be careful of the fan and blades when cleaning,
painting, or working near the fan. Always turn off the
power to the ceiling fan before servicing.
3. Do not put anything into the fan blades while they are
turning.
4. Do not operate reversing switch until fan blades have
come to a complete stop.
READ AND SAVE THESE INSTRUCTIONS
To reduce the risk of electrical shock, this fan must be
installed with an isolating wall control/switch.
To reduce the risk of fire or electrical shock, this fan
should only be used with fan speed control, Model No.
RH786NRG, manufactured by Rhine Electric Co., Ltd.
To avoid fire, shock or injury, do not use a Luminance
Brands or any other brand of control not specifically
approved for this fan.
This product is designed to use only those parts
supplied with this product and/or any accessories
designated specifically for use this product
by Luminance Brands. Substitution of parts or
accessories not designated for use with this product
by Luminance Brands could result in personal injury
or property damage.
To reduce the risk of personal injury, do not bend
the blades during installation, balancing the blades
or cleaning the fan. Do not insert foreign objects in
between rotating fan blades.
WARNING
!
Section Page
Safety Instructions ................................ 2
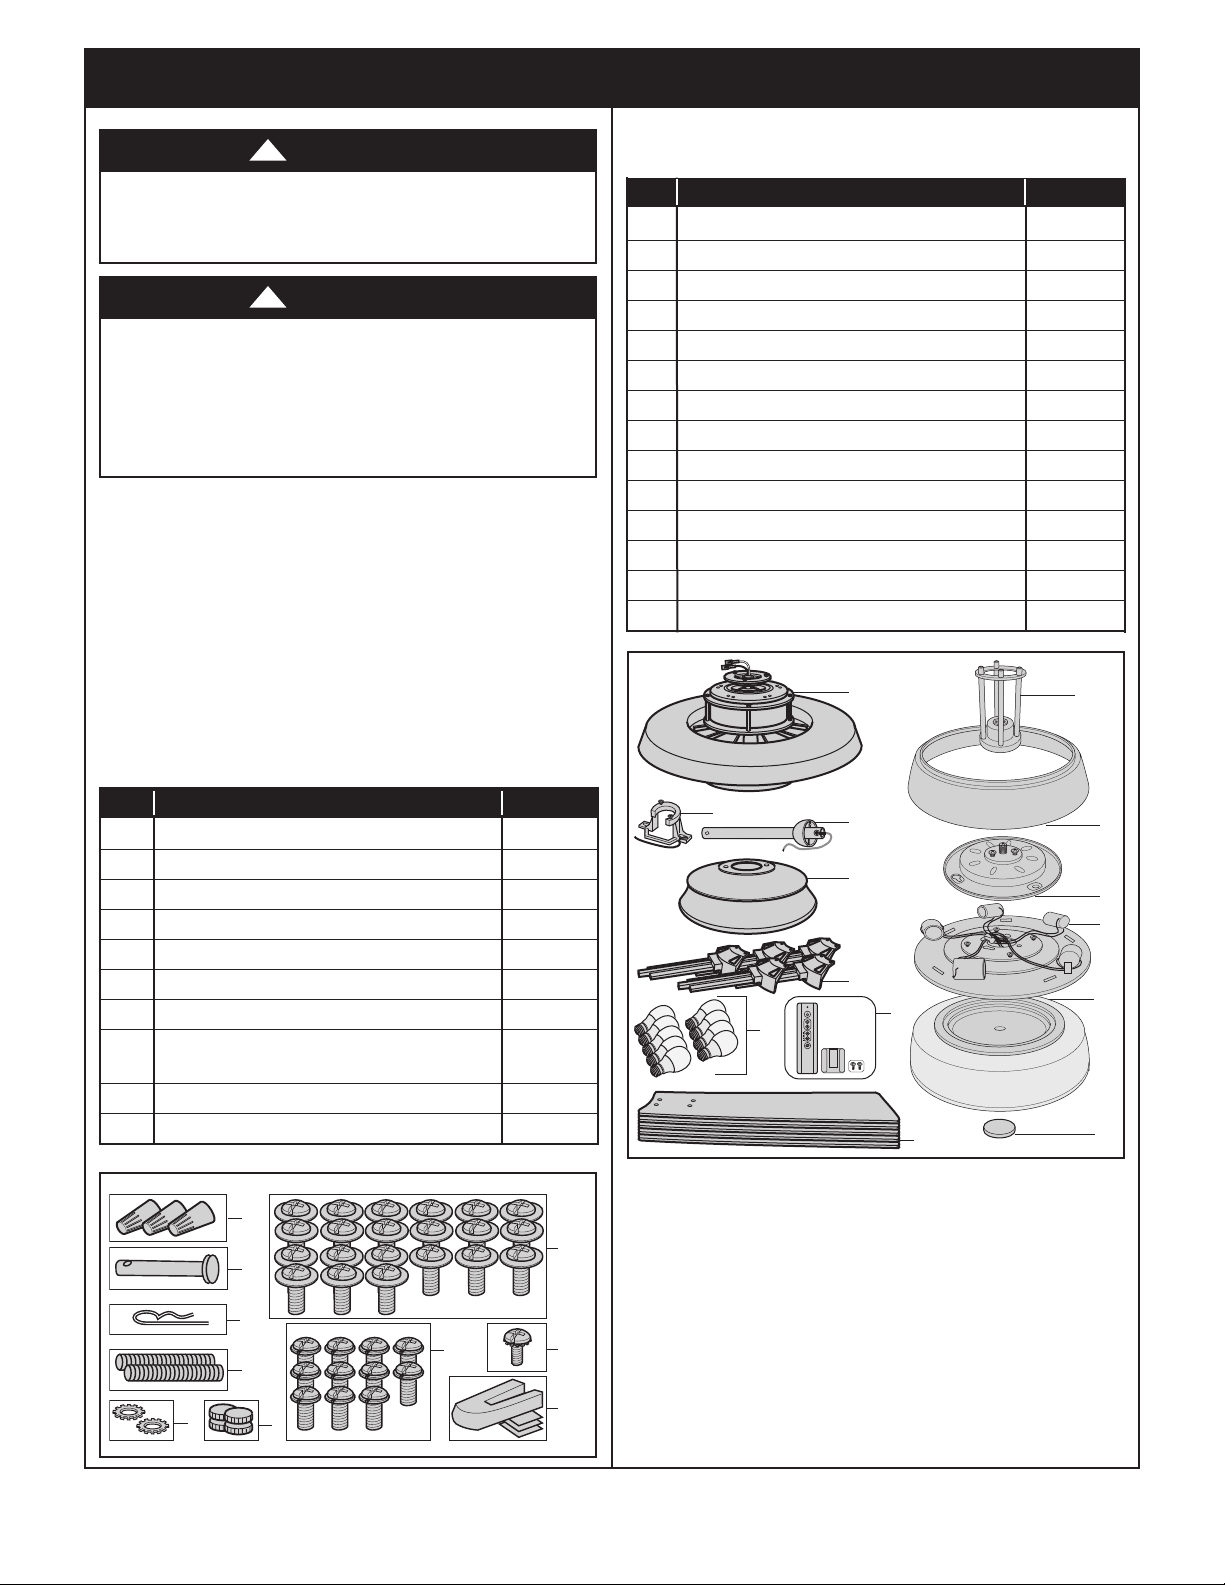
1. Unpacking Instructions ..........................3-4
2. Electrical Requirements .......................... 4
3. Ceiling Fan Assembly ..........................5-11
4. How to Hang Your Ceiling Fan .................... 12
5. How to Wire Your Ceiling Fan ..................13-14
6. Final Assembly ..............................15-17
7. Remote Control Procedures ....................18-21
Section Page
8. Maintenance .................................. 22
9. Accessories .................................. 22
10. Troubleshooting .............................. 23
11. Repair Parts ...............................24-25
12. Energy Efficient Use of Ceiling Fan ............... 26
Instructions to the User . . . . . . . . . . . . . . . . . . . . . . . . . . . . 26
Ceiling Fan Limited Warranty ....................... 27
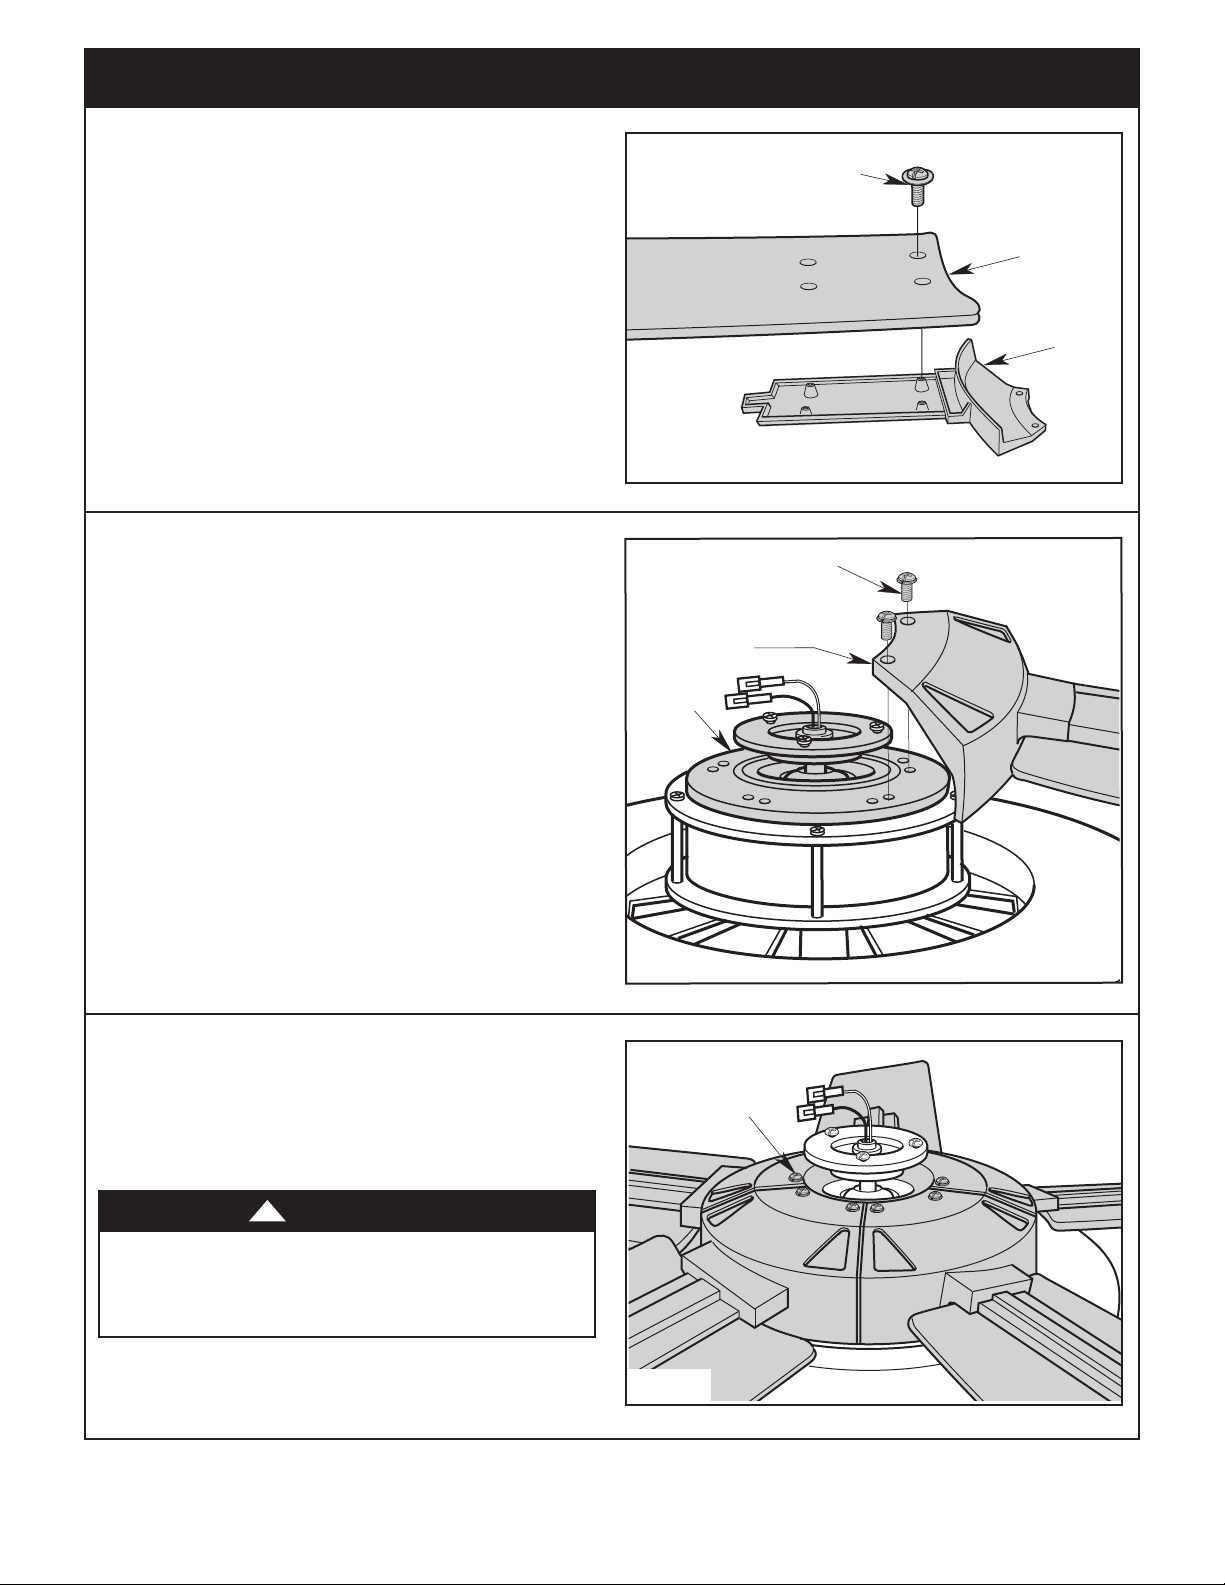
To reduce the risk of injury, install the fan so that the
blades are at least 7 ft. (2.1m) above the floor.
CAUTION
!