@
Before
Using
the
FS800
SuperBoard....B-1
@
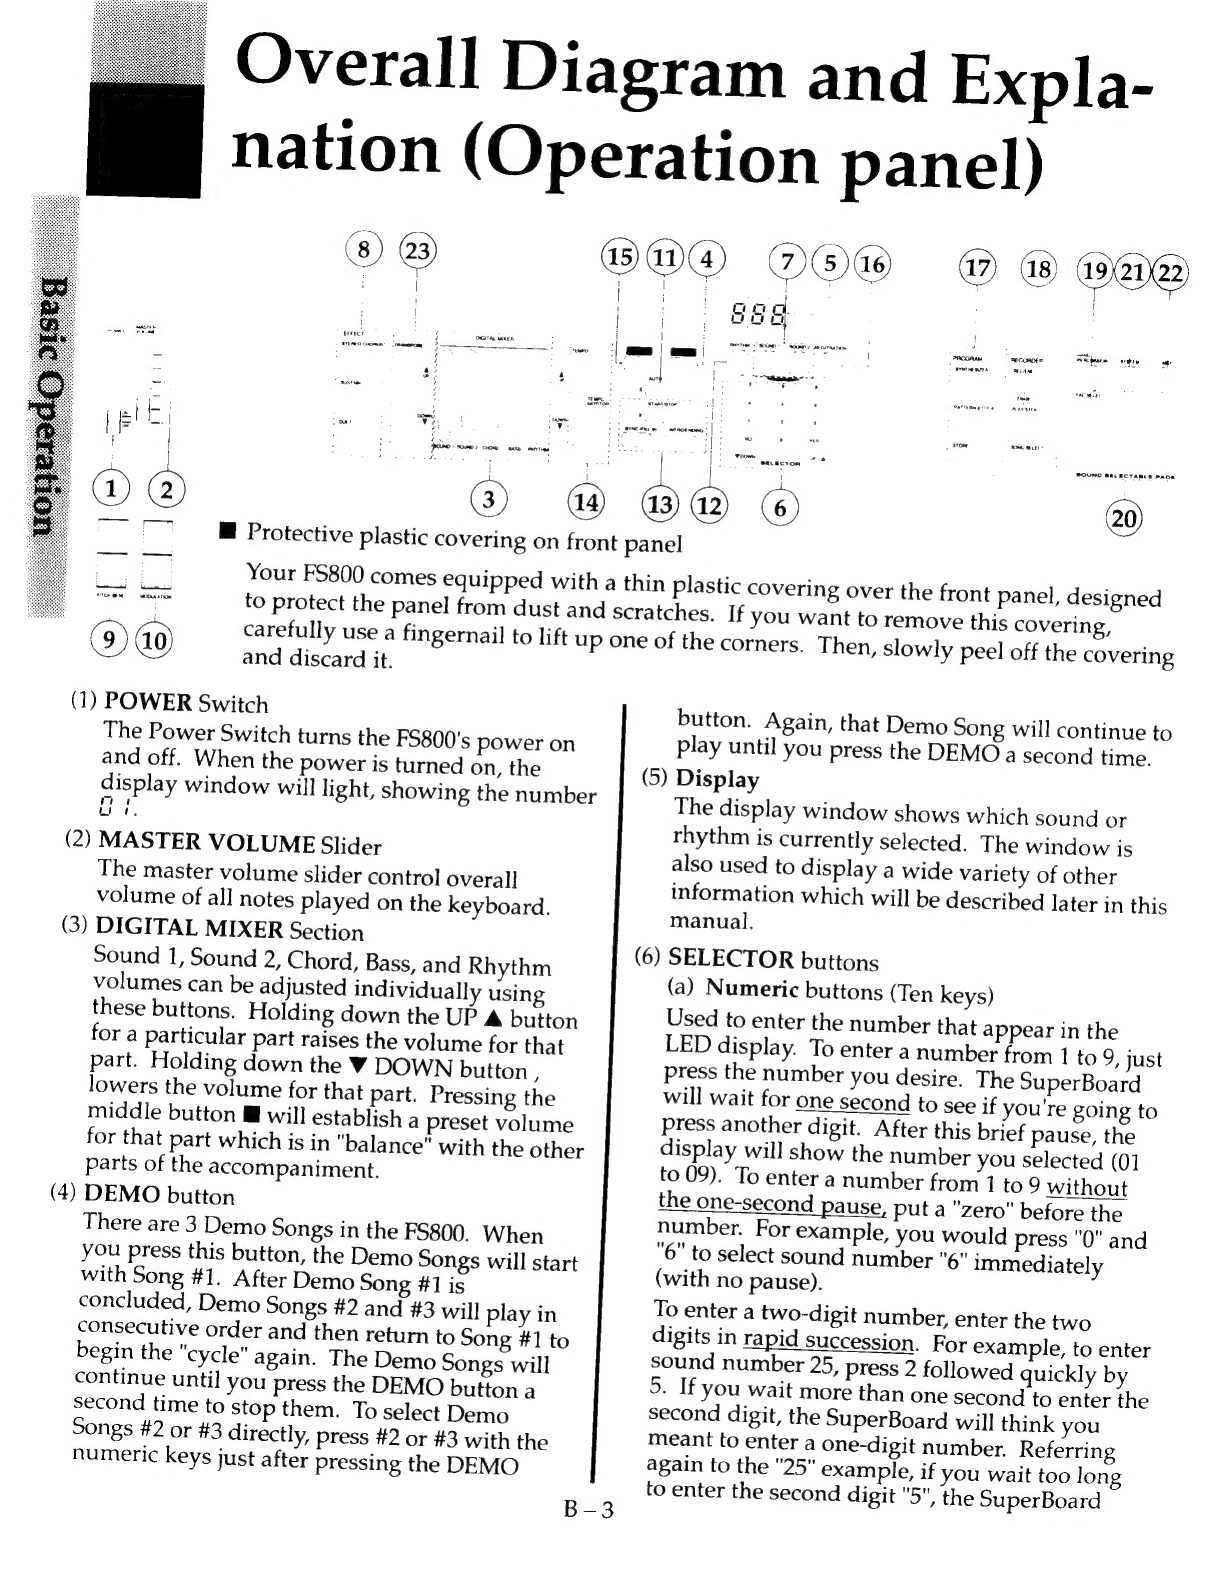
Overall
Diagram
and
Explanation
(Operation
panel)
2..ccccisaitiserstentaninns
B-3
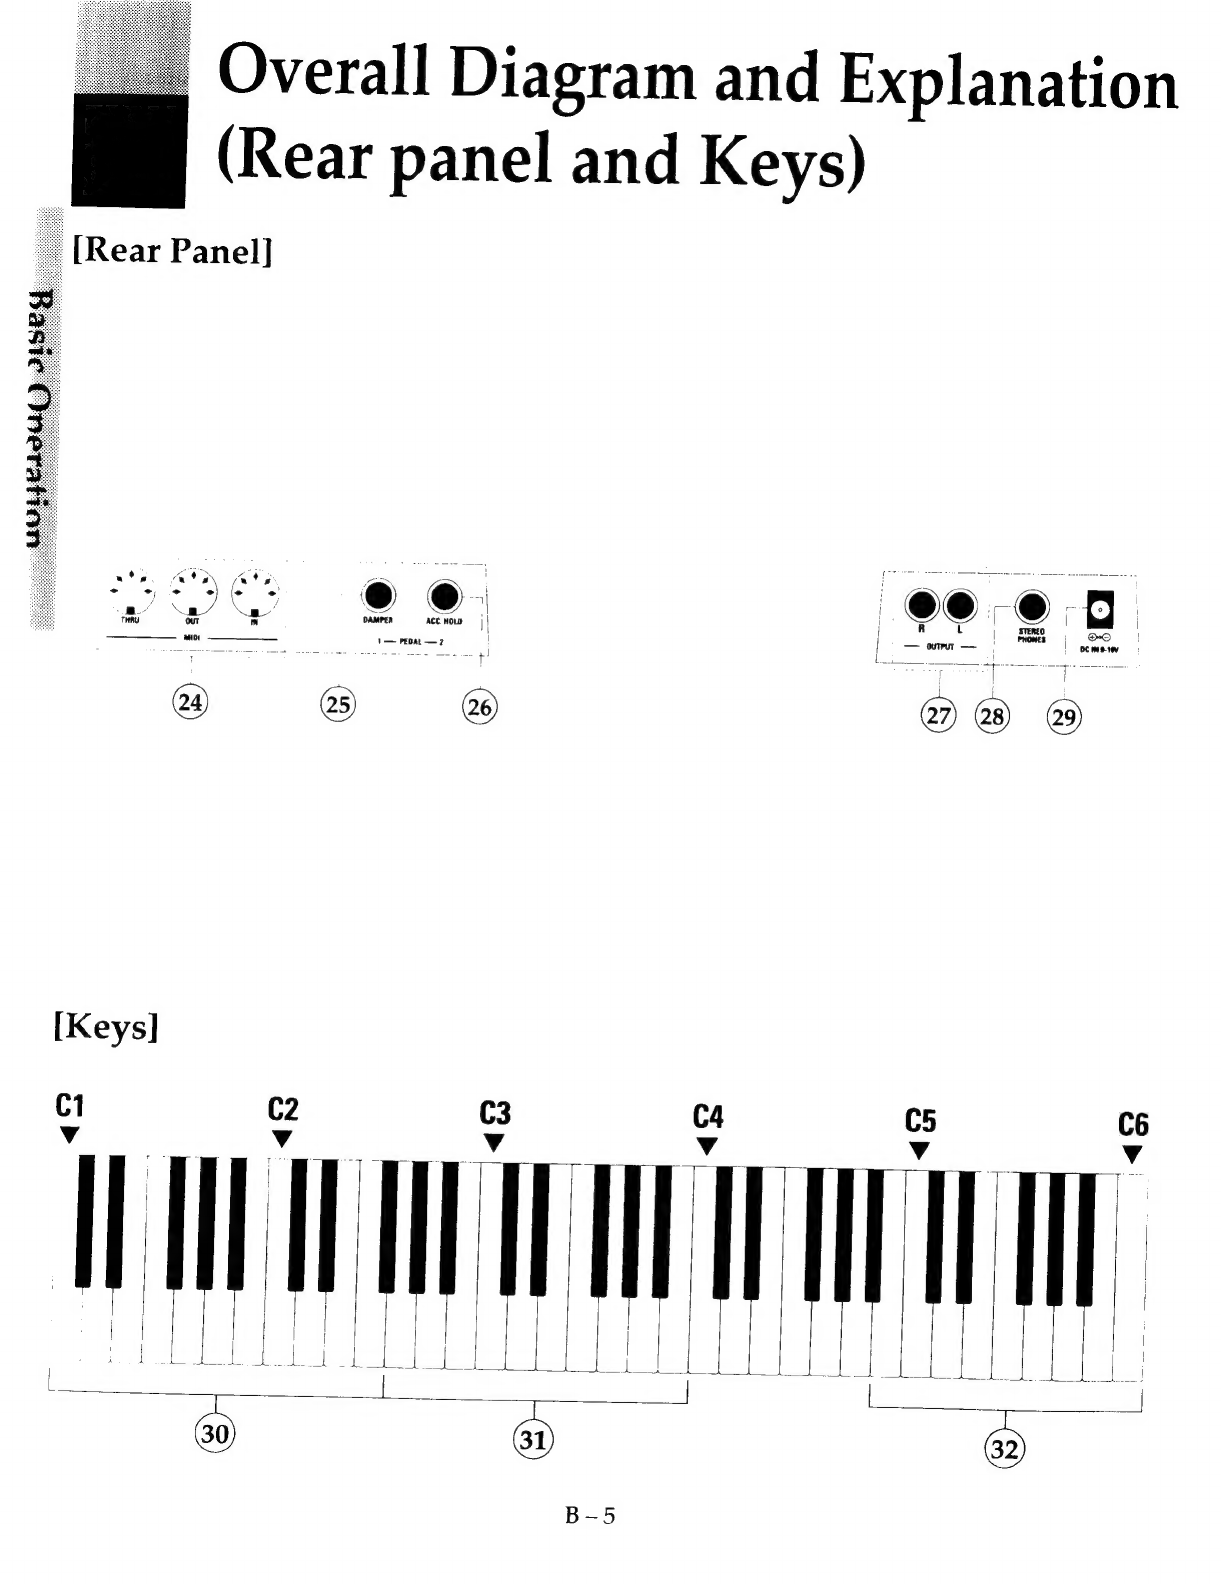
@
Overall
Diagram
and
Explanation
(Rear
panel
and
KeyS)...........::ccee
B-5
@
Getting
Started
on
your
FS800:
Selecting
SOUNdS.cuduccwi
asa
an
B-7
@
Getting
Started
with
Rhythms..............
B-8
@
Other
Important
Rhythm
Functions....B
—9
@
Changing
Rhythm
Tempo...................
B-10
@
Using
Auto-Accompaniment
for
easy
ensemble
play
..........::cc
B-11
@
Using
Auto-Accompaniment
Section:
PRETO
ata
ot
sna
hee
hea
ate
tej
iaaa
eset
teatce
B-12
@
Using
ONE
FINGER
AD-LIB
torplay
like
ai
pro!
es
csecsne
cali
B-13
@
Special
use
of
ONE
FINGER
AD-LIB..............:e
B-
16
@
The
Digital
Mixer
Section...............05
B-18
@
Using
REGISTRATION
MCI
ODY.
5
icesacustneatedawaeachcecsedsinie
det
sasncates
B-
20
M@
Using
the
Real-Time
RECORDER......B
—
23
@
Advanced
Use
of
Sounds:
..........000.00....
A-1
@
Combining
Two
Sounds..................
A-1
@
Adding
Fleets
cach
sschcuttetussedeaetts
A-2
@
Advanced
Use
of
Auto-
Accompaniment
Sections...
A-3
@
Explanation
of
AUTO
2...
A-4
@
Explanation
of
AUTO
3...........000..
A-6
@
Explanation
of
AUTO
4.....0.000000...
A-7
@
Introducing
Accompaniment
ET
OUGL
96i5
ccdec
seca
Gils
aatedencebuslnataamum
ater
A-8
@
Using
Hand
Percussion
and
sound
Selectale
Pads
................:ccceccceesssceereeees
A-9
Table
of
Contents
@
Creating
Your
Own
Soumds:
......0....5
A-10
@
The
Synthesizer
Function:
.............
A-10
@
Changing
the
Parameters..........
A-12
@
Storing
Your
New
Sound
..........
A-16
@
Creating
Rhythm
and
Auto-
Accompaniment
Patterns:
..............0.
A-17
@
Creating
Basic
Patterns
................
A-18
@
Creating
Fill-in
and
Intro/Ending
Patterns...................
A-19
@
Storing
the
Newly
Created
PACTS
Sister
cow
A-2]
@
Programmable
ONE
FINGER
AD-LIB:
.....0...ee
A-
22
@
Creating
Phrases
....0....
A-
22
®
Storme
Phrases
462s
ces
a,
A
-
24
@
Using
the
SYSTEM
Functions:...........
A
-
26
@
Tuning
Control
ccsiiansauaees
A
-
26
@
Pedal
1
(Damper
Pedal)
and
Pedal
2
(Accompaniment
Hold
Pedal)......A
—
27
@
Using
the
MIDI
Functions:.................
A
-
28
@
Setting
the
Local
Control
ROING
OR
Pe
sath
atte
pe
etans
radia
htt
cas
A-
28
@
Setting
the
Program
Change
Control
ON
OPE
acsoset
aa
ieceehocen
tian
A
-
30
@
Using
an
External
Sequencer:
.......
A=31
@
Creatine
Songs.
csscivientnatuis
A-31
@
Sending
Automatic
Functions..A
—
34
@
Changing
MIDI
Channels.........
A-35
@
Creating
Patterns...
A
—
36
@
Creating
O.F.
AD-LIB
Phrases..A
—
38
@
Using
Other
Functions
..............
A
-
39
3.
Appendices
nN)
aw,
(
MB
TrOUB
ESO
OtNE
assess
chon
eoneeedciseices
Ap-1
MM
Appendices
ia:
nnaasa
aan
issceass
Ap
3
@
MIDI
Implementation
Chart..............
Ap-4
ME
Speciicalions
a.
ieencticancoten
eng
otaeds
Ap-
6