5
Important Information
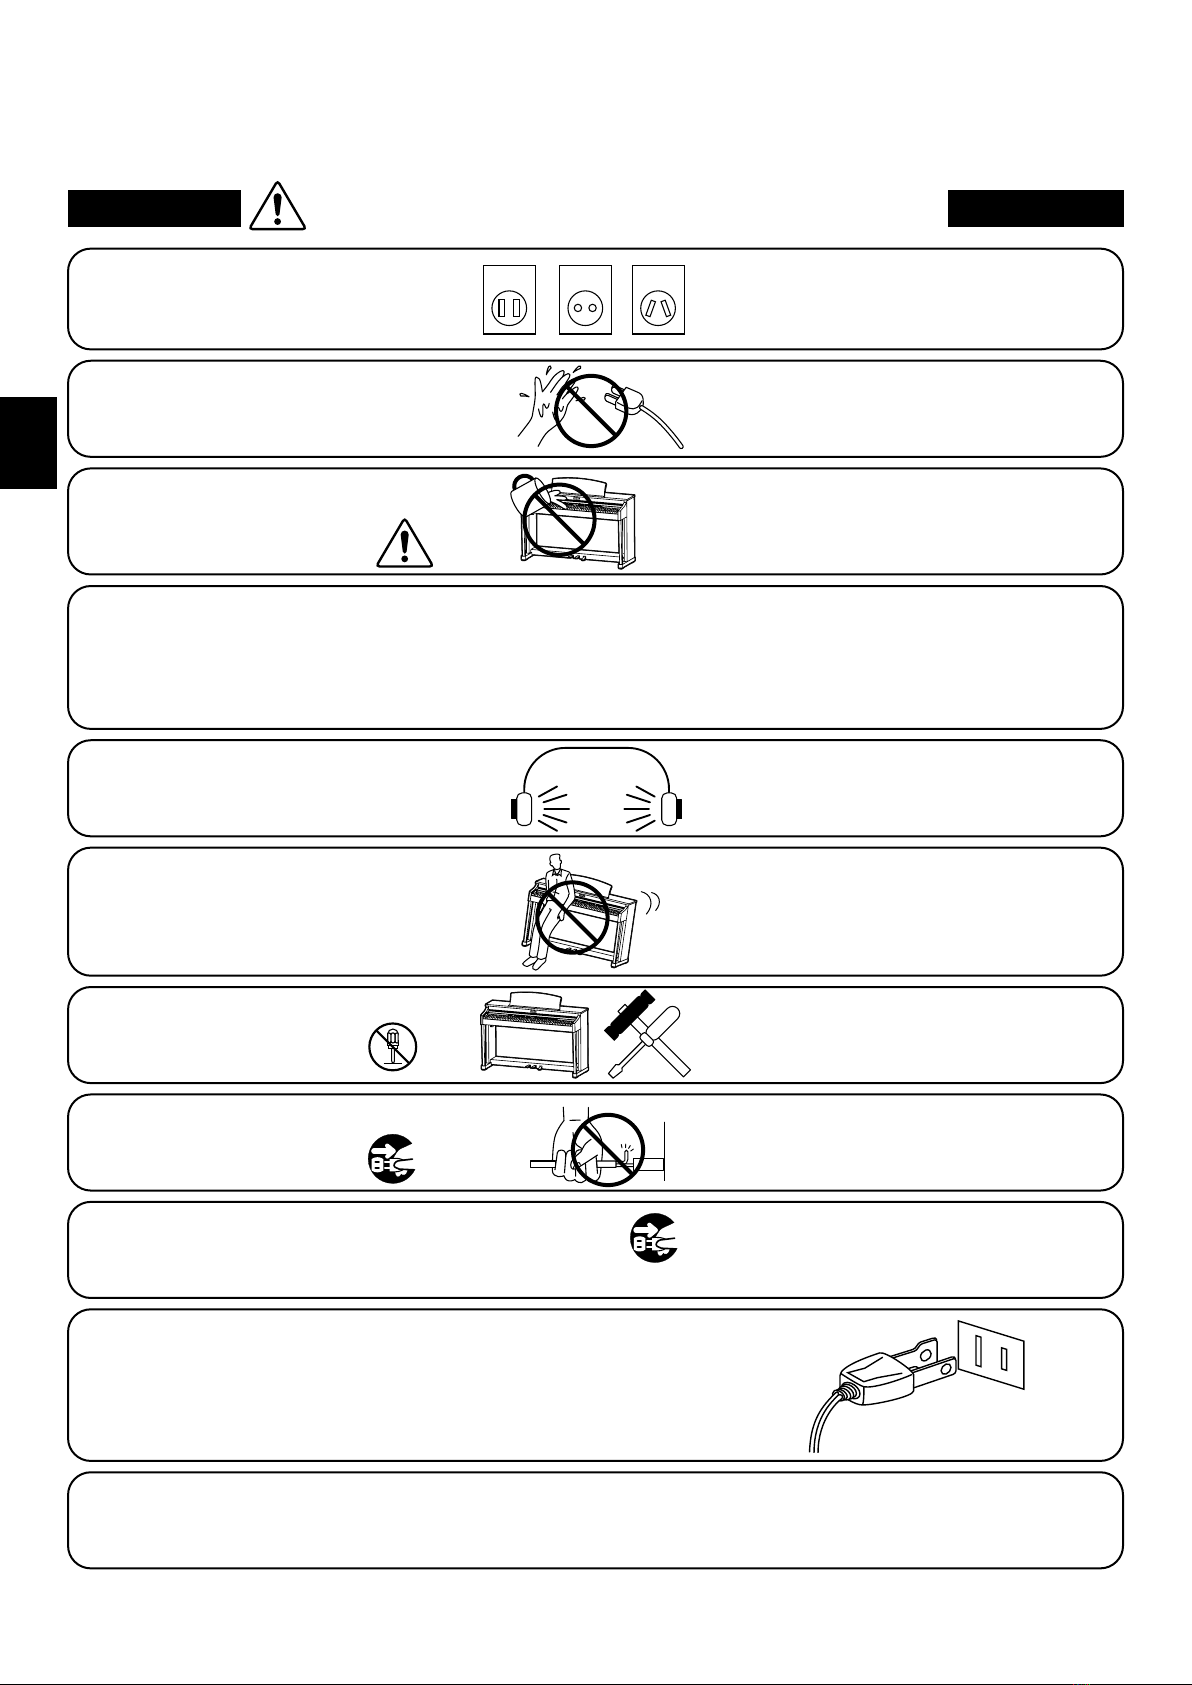
WARNING
The product should be connected to
an AC outlet of the specied voltage.
● If you are going to use an AC power cord,
make sure that its has the correct plug shape
and conforms to the specied power voltage.
● Failure to do so may result in re.
120V 240V230V
Indicates a potential hazard that could result in death or
serious injury if the product is handled incorrectly.
Do not insert or disconnect the power
cord plug with wet hands. Doing so may cause electric shock.
WARNING - When using electric products, basic precautions should always be followed, including the following.
The product is not completely disconnected from the
power supply even when the power switch is turned
o. If the product will not be used for a long time,
unplug the AC power cord from the AC outlet.
● Failure to do so may cause re in case of
lightning.
● Failure to do so may over-heat the product,
resulting in re.
Do not disassemble, repair or modify
the product. Doing so may result in product breakdown, electric
shock or short-circuit.
This product may be equipped with a polarized line plug (one blade wider
than the other). This is a safety feature.
If you are unable to insert the plug into the outlet, contact an electrician to
replace your obsolete outlet.
Do not defeat the safety purpose of the plug.
When disconnecting the AC power cord's
plug, always hold the plug
and pull it to remove it.
● Pulling the AC power cord itself may damage
the cord, causing a re, electric shock or
short-circuit.
Doing so may cause the product to fall over,
resulting in injury.
Do not lean against the keyboard.
When using the headphones, do not
listen for long periods of
time at high volume levels.
Doing so may result in hearing problems.
It is a good practice to have the instrument near the AC outlet and the power cord plug in a position
so that it can readily be disconnected in an emergency because electricity is always charging
while the plug is in the AC outlet even in a power switch o condition.
The chair must be used properly (it must be
used only when playing the product).
● Do not play with it or stand on it.
● Only one person is allowed to sit on it.
● Do not sit on it when opening the lid.
● Re-tighten the bolts occasionally.
Doing so may cause the chair to fall over or your
ngers to be trapped, resulting in injury.
Entry of water, needles or hair pins may result
in breakdown or short-circuit.
The product shall not be exposed to dripping or
splashing. No objects lled with liquids, such as
vases, shall be placed on the product.
Take care not to allow any foreign
matter to enter the product.
● Doing so may cause the product to become
deformed or fall over, resulting in breakdown
or injury.
Do not stand on the product or exert
excessive force.
● Doing so may result in discoloration or deformation
of the product.
● When cleaning the product, put a soft cloth in
lukewarm water, squeeze it well, then wipe the
product.
Do not wipe the product with benzene
or thinner.
Failure to do so may damage them, resulting in
re, electric shock or short-circuit.
When connecting the AC power cord
and other cords, take care
not to get them tangled.
● Doing so may cause the product to generate
noise.
● If the product generates noise, move the
product suciently away from the electrical
appliance or connect it to another AC outlet.
Do not place the product near electrical
appliances such as TVs and radios.
Please lift up the product when moving it.
Please note that the product is heavy and must
be carried by more than two persons.
Dropping the product may result in breakdown.
Do not drag the product on the oor.
Take care not to drop the product.
Doing so may cause the illumination to fall over,
resulting in re.
Do not place naked ame, such as lighted
candles on the product.
CAUTION Indicates a potential hazard that could result in injury or
damage to the product or other property if the product
is handled incorrectly.
Using the product in such areas may result in
product breakdown.
Use the product only in moderate climates (not
in tropical climates).
Do not use the product in the following areas.
● Areas, such as those near windows, where the product is
exposed to direct sunlight
● Extremely hot areas, such as near a heater
● Extremely cold areas, such as outside
● Extremely humid areas
● Areas where a large amount of sand or dust is present
● Areas where the product is exposed to excessive
vibrations
Closing it roughly may trap your ngers,
resulting in injury.
When you close the keyboard cover,
close it gently.
Failure to do so may cause breakdown of this
product and other devices.
Before connecting cords, make sure
that the power to this product
and other devices is turned
OFF.
OFF
The product should be located so that its location or position does not interfere with its proper ventilation. Ensure a
minimum distance of 5cm around the product for sucient ventilation.
Failure to do so may over-heat the product,
resulting in re.
Ensure that the ventilation is not
impeded by covering the ventilation
openings with items, such as newspaper,
table-cloths, curtains, etc.
Use only the AC adaptor included with this instrument to power the instrument.
● Do not use other AC adaptors to power this instrument.
● Do not use the included AC adaptor or AC power cord to power other equipment.