Thank
you
for
choosing
this
Kawai
PN
Series
Digital
Piano.
Your
new
PN
Series
Digital
Piano
is
a
high-quality
instrument
offering
the
very
latest
in
leading-
edge
music
technology.
This
manual
contains
valuable
information
that
will
help
you
make
full
use
of
your
piano’s
many
capabilities.
Please
read
it
carefully
and
keep
it
handy
for
further
reference.
TABLE
OF
CONTENTS
Page
Important
Safety
їпїтисПОП$..................................
3
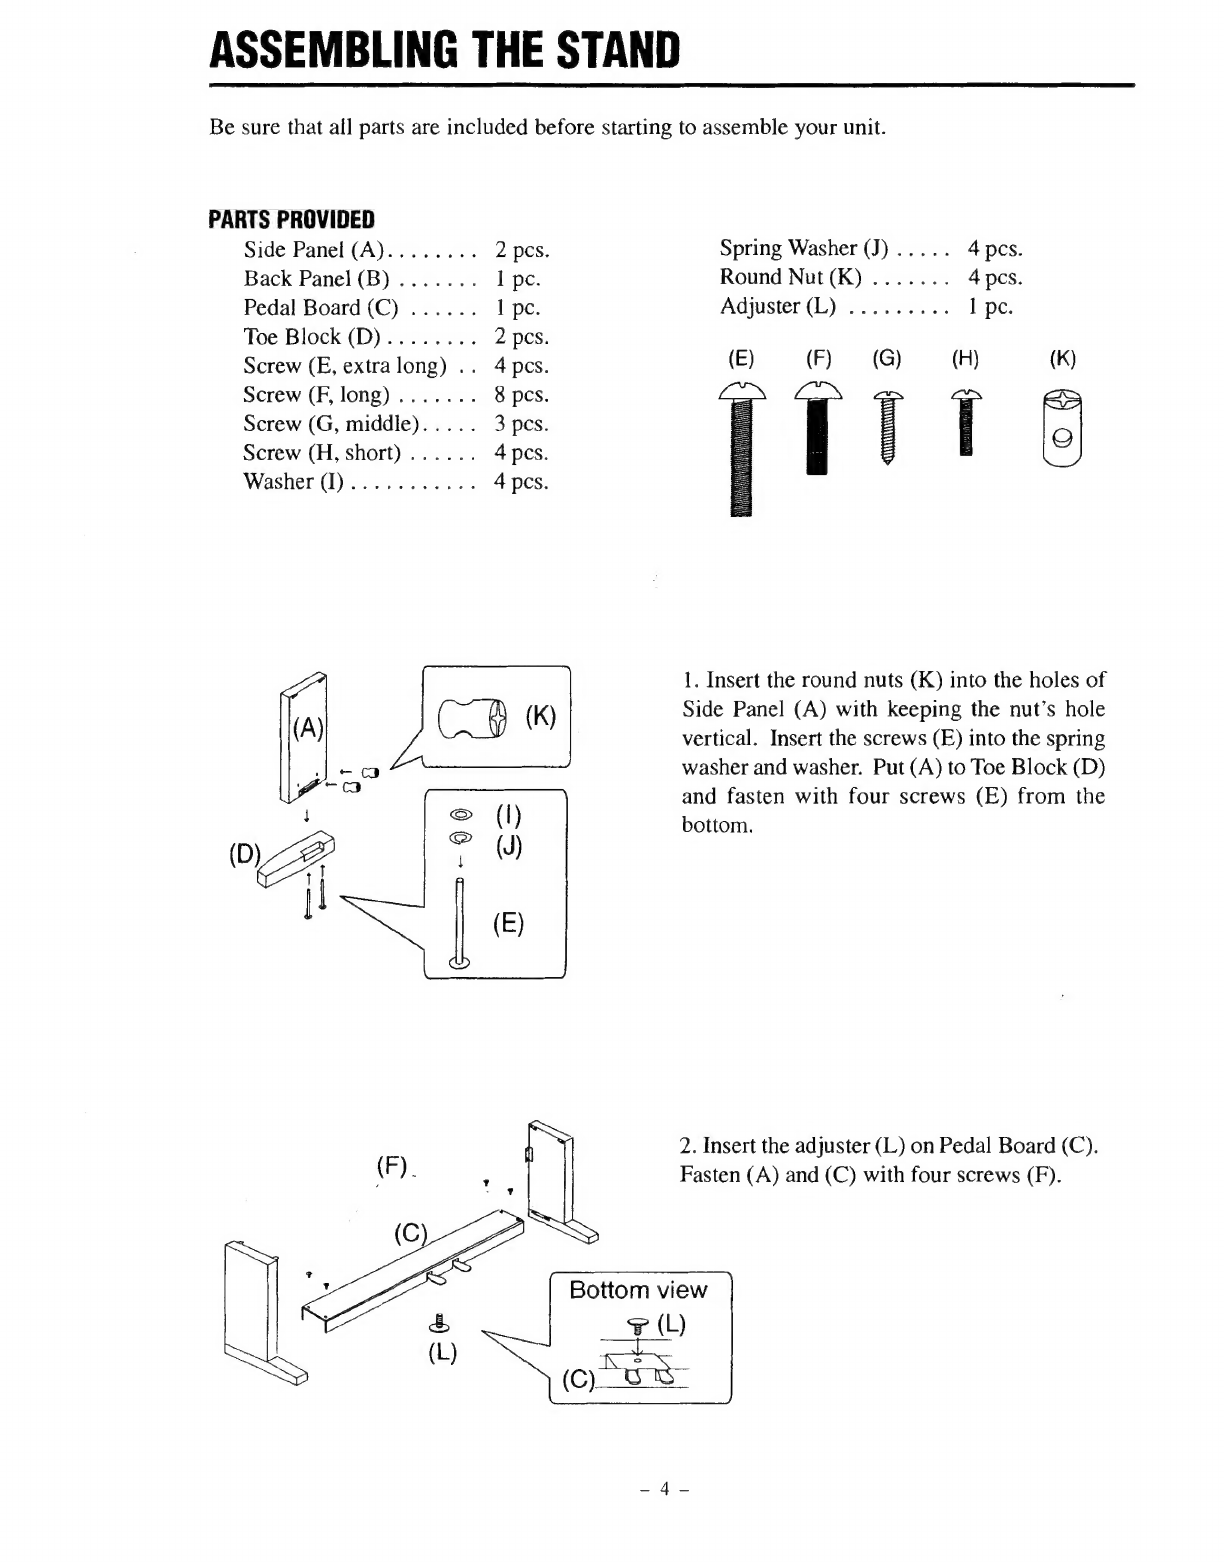
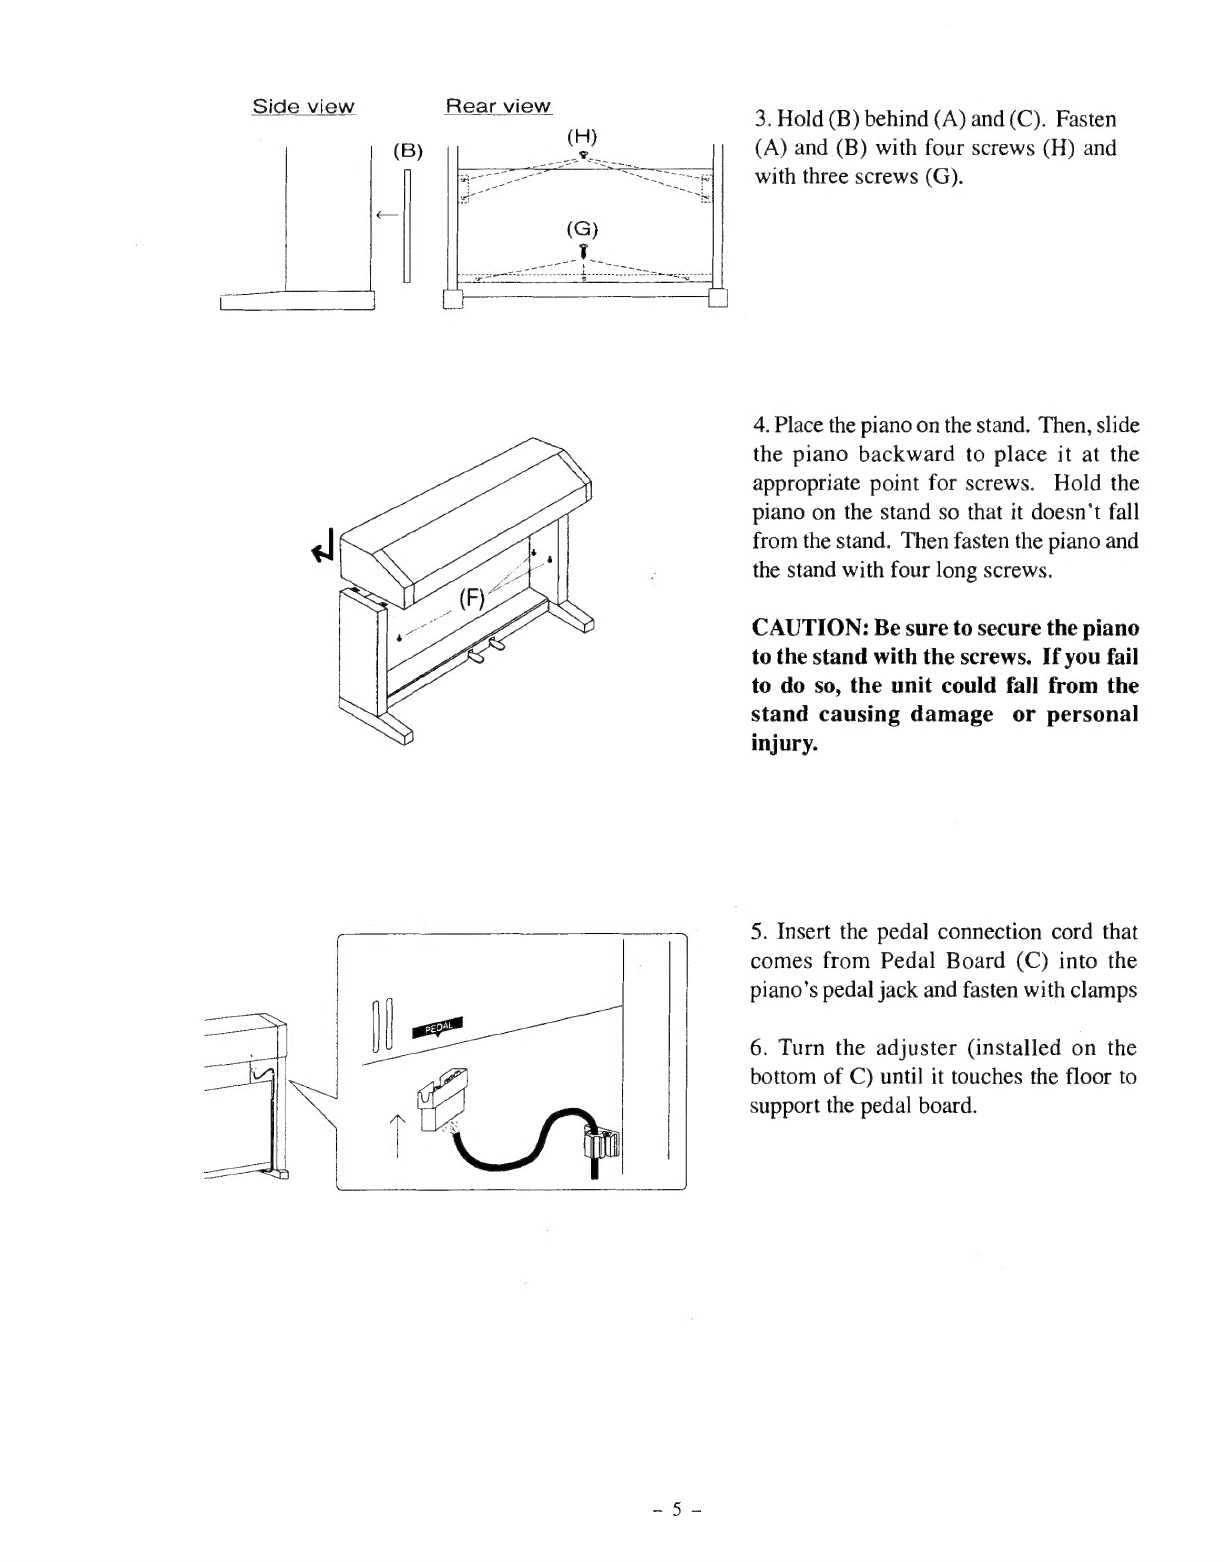
Assembling
The
Stand
.......................................
4
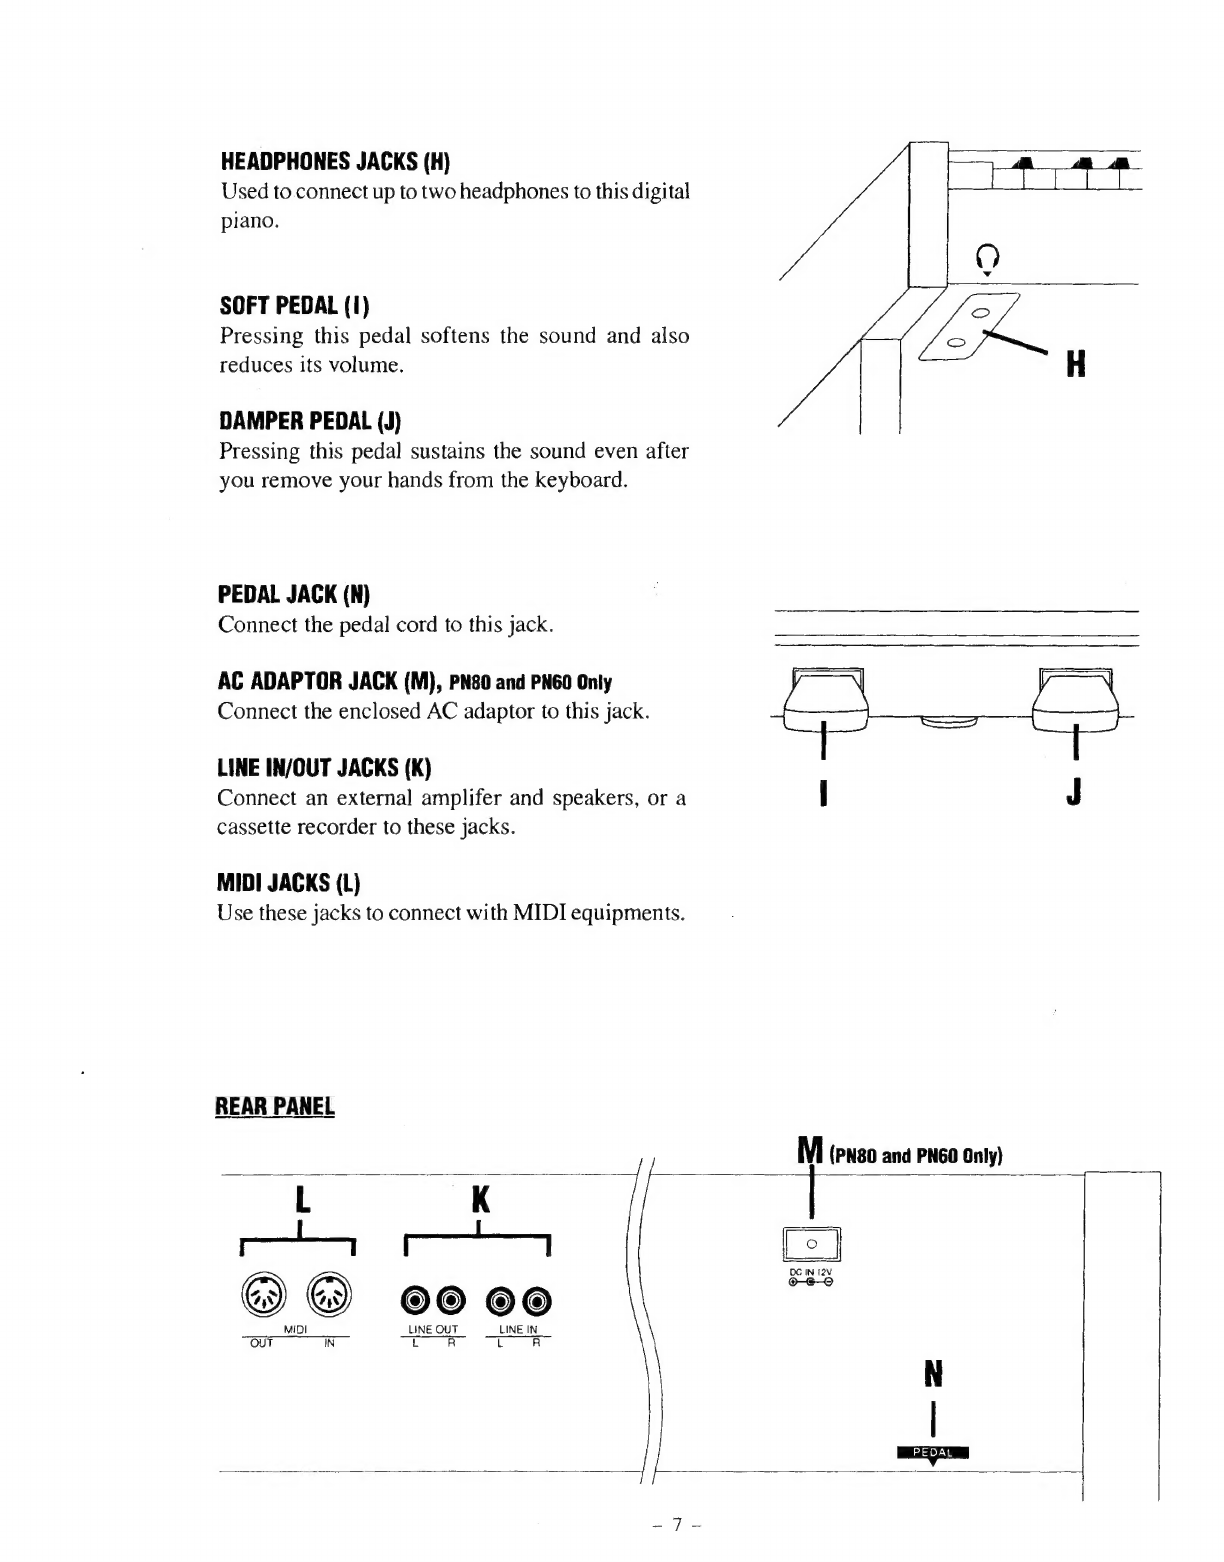
Part
NAMES
spe
zoe
td
eR
ы
аккыш
Wee
ende
a
a
6
Getting
Started
1.
Basic
Орегайоп$....................................
8
2.
Transpose
..............
DR
PORTER
uae
9
3.
“POUCH
RESPONSE
esed
н
ооа
неад
9
4.
Demonstration
$опр$...............................
10
Digital
Recording
Functions
I.
;Basy
Recording
(«eese
rta
S
RECHT
eee
ex
11
2.
Playing
Back
A
5$опр...............................
11
3.
Advanced
Recording/Playback
Functions
...............
12
4.
Deleting
A
5$опр/ТгасК..............................
14
Programming
Mode
1.
Selecting
A
Touch
Type
.............................
15
2)
TUBIDE,
eee
bs
ЛОГОС
T
IO
eg
EER
RA
ЛО
А
16
3,
MIDI
Channel
Select
...............................
16
4.
Turning
Sending
Program
Number
On
And
Off...........
17
5.
Turning
Multitimbre
On
And
ОЁ......................
17
6.
Local
Control
On
And
ОЁ
...........................
17
ToReSeto
siete
ian
a
MES
OE
Bde
Pe
So
ER
S
.
18
MIDI
ste
asc
ema
ab
eee
eats
e
d
19
SPECIPICATIONS
>
wc
vot
ave
sie
Sure
es
edu
deir
ri
ДУ
21
MIDI
IMPLEMENTATION
СНАКТ...........................
22


 User manual")