KAYACAT PUMA User manual

PUMA | COUGAR
ASSEMBLY INSTRUCTIONS

WARNINGS
Always read and follow all warnings and product instructions before use.
• Kayacat is not a Toy and Children must be closely supervised by a competent adult at all
times.
• All Kayacat users do so entirely at their own risk and remain responsible at all times for
any events including any involving 3rd parties.
• Ensure you have suitable insurance to cover any event
• Before using a Kayacat seek professional water safety and navigation advice from
competent organisations such as The RNLI for The United Kingdom.
• Always use a personal Buoyancy Aid.
• Make sure you are a good swimmer.
• Do not use Kayacat when wind blowing offshore - away from shore and out to the water.
• Do not use Kayacat alone - always have an expert companion with you or very nearby at
all times.
• Only use close to land.
• Do not use Kayacat in waves exceeding 50cm/20 inches.
• Kayacats, as with all Kayaks, are susceptible to capsize in waves breaking on the shore.
• Kayacats are not designed for wave surfing.
• Always check weather and conditions are safe and suitable before entering the water.
• Always check local Tides and Currents before deciding whether it is safe to go on the
water.
• Always inform someone reliable if you are going out on the water and advise a reliable
time of return - ideally the local coastguard/lifeguard etc.
• If you are anywhere near rocks, overhanging trees or other solid obstructions then always
wear protective head gear.
• Stay Away from power boat users - Jet skis, etc.
• Make sure you are conspicuous - e.g. wear bright coloured clothing/gear.
• Always take a whistle or horn with you to alert your presence.
• Take Flare pack or fully charged water proof communication device in case of emergency
• Always check and seek permission to use any given water and be sure to familiarise with
and observe all local rules and regulations.
• Do not go out late in the day if you cannot ensure safe return before darkness falls.
• Do not overload your Kayacat - maximum load including all baggage should not exceed
120KGs.
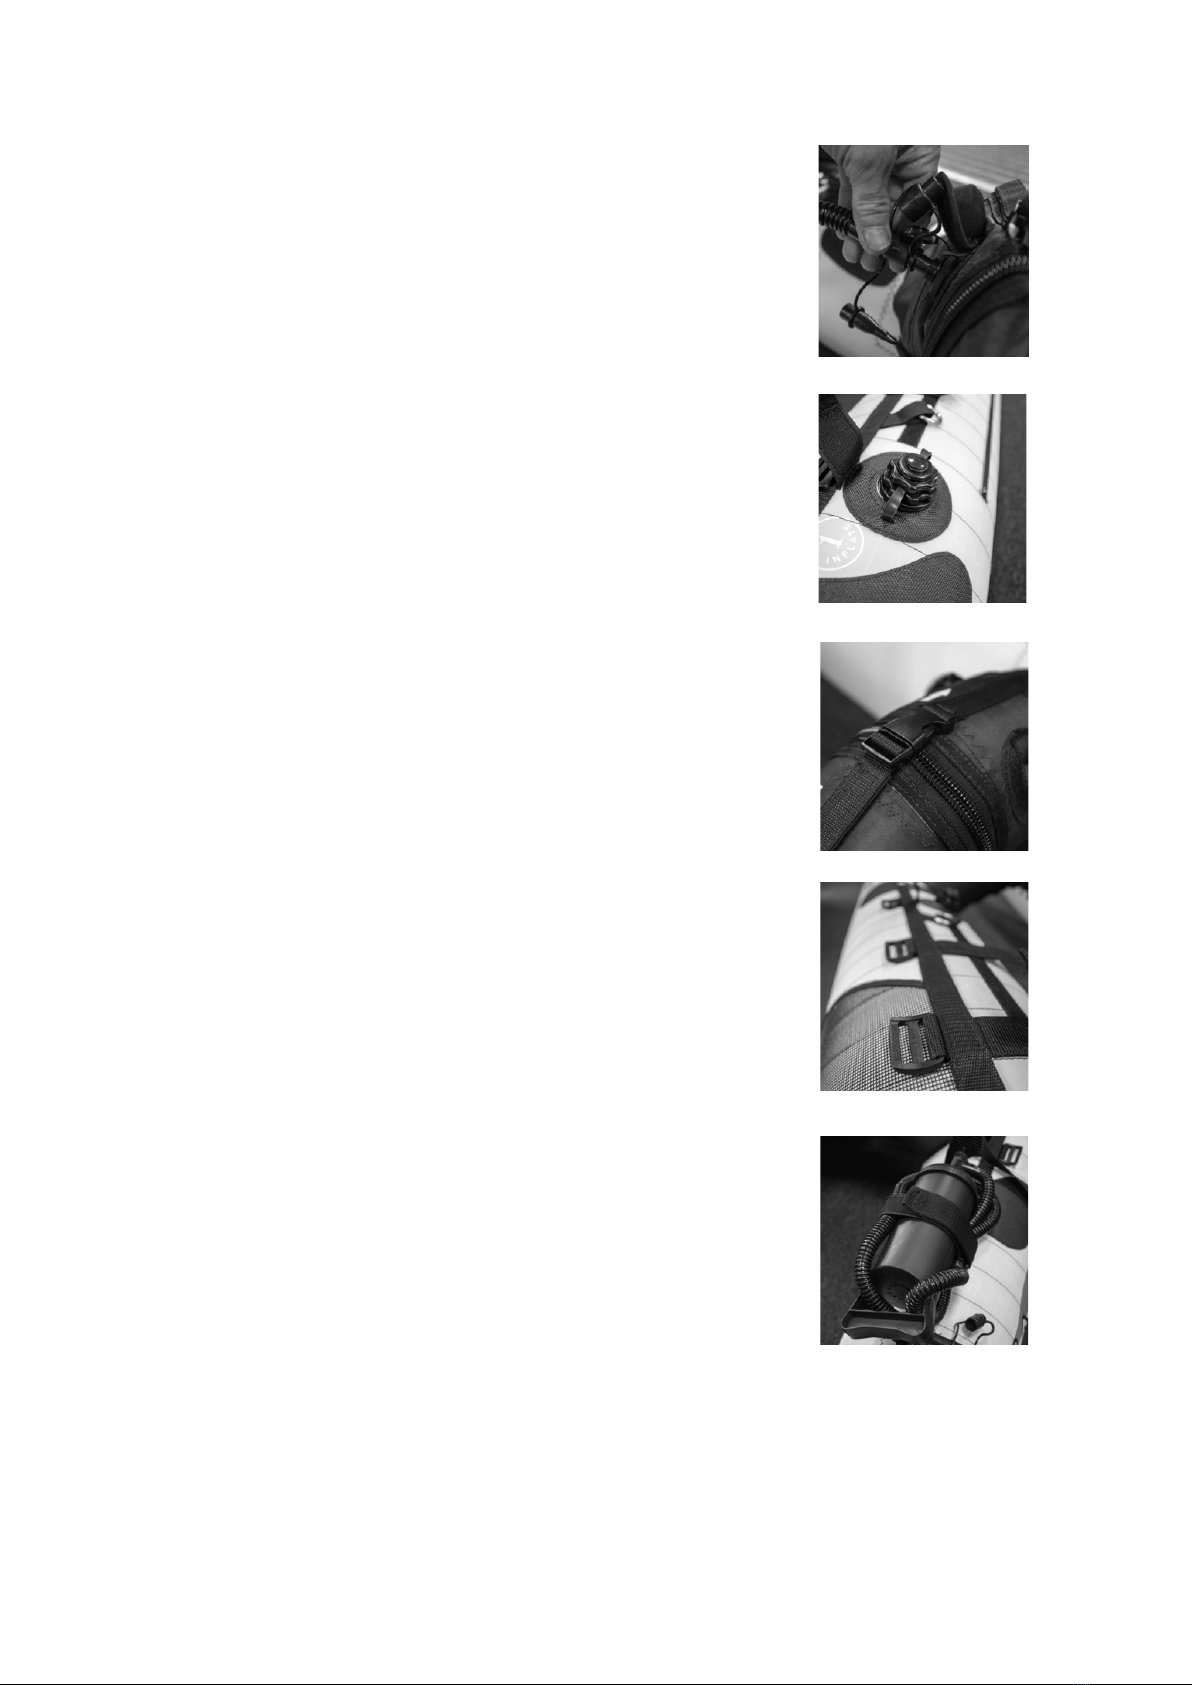
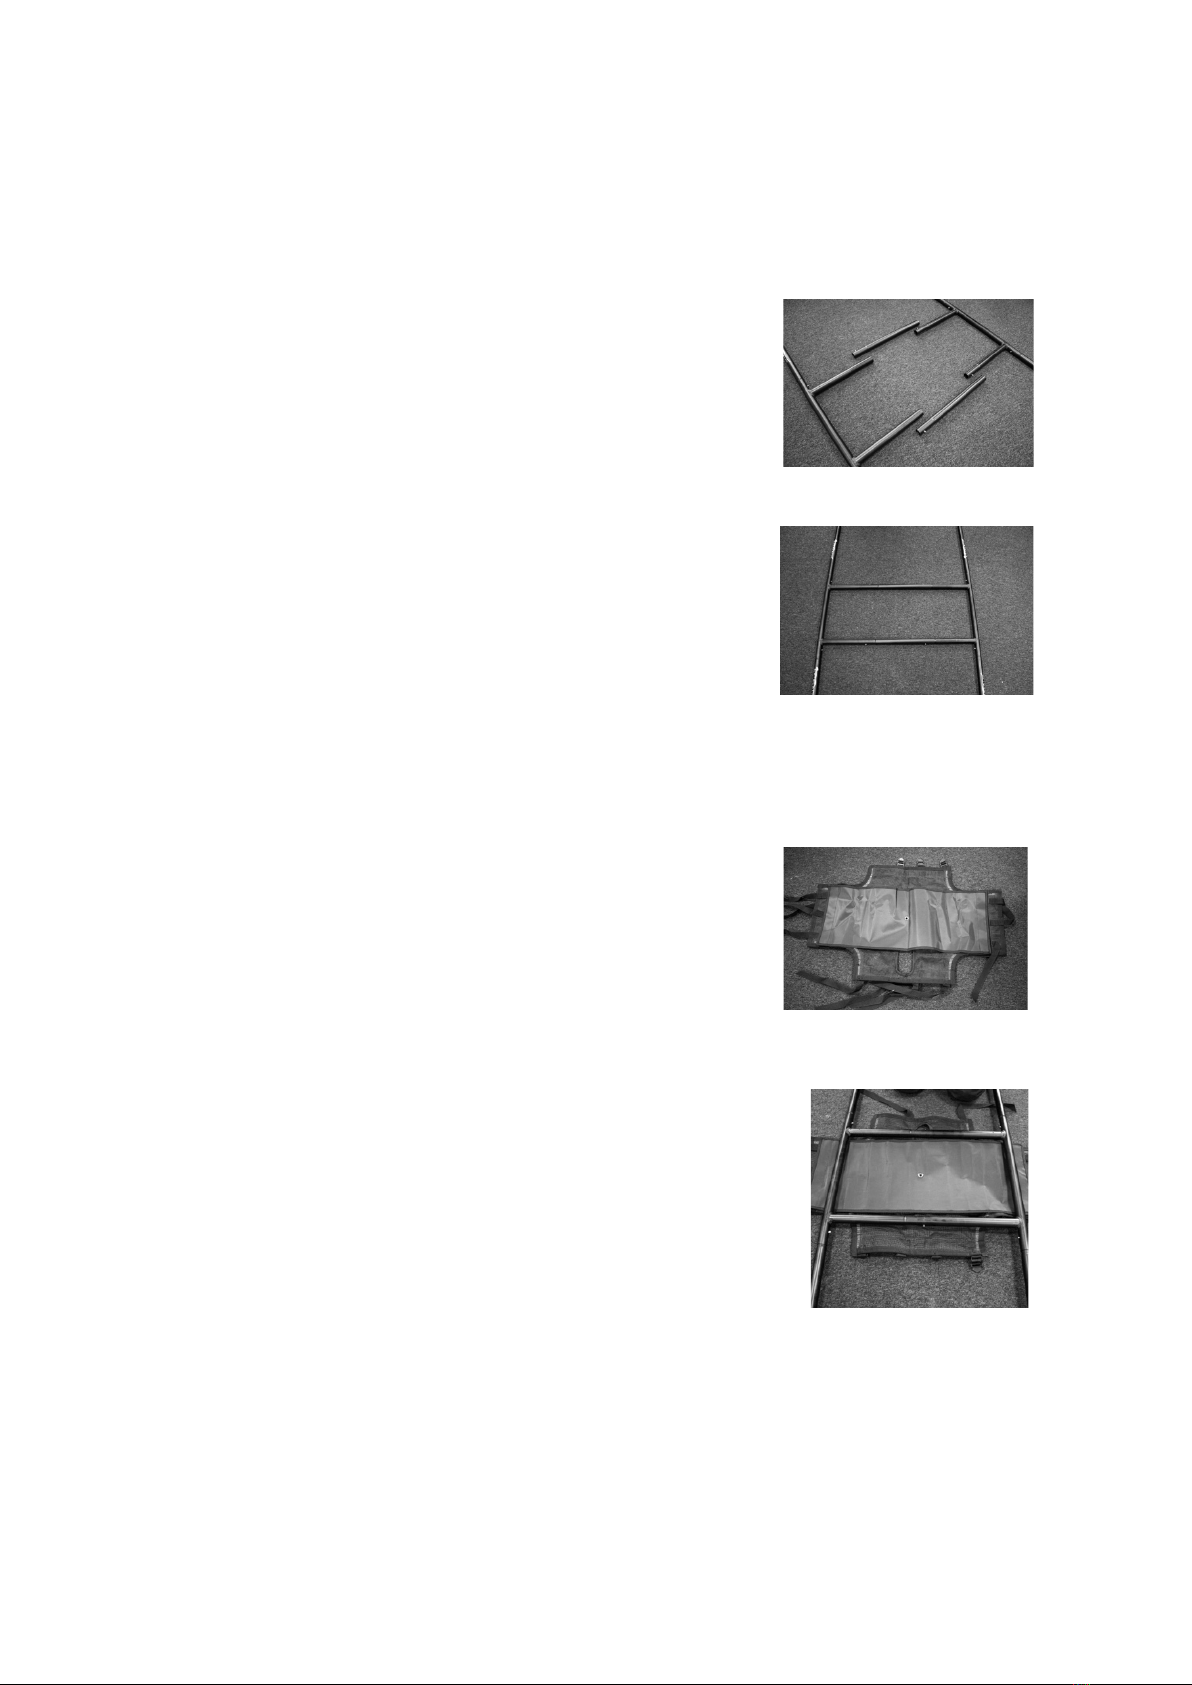
• Always regularly check joints are tight and correctly fitted using Allen key provided
• Kayacat Pumas and Cougars are designed only for one person use.
• We recommend all Kayacat users take a second back up paddle.
• Any modifications to Kayacat will invalidate manufacturer’s warranty and may increase
risk to life.
• If in doubt do not use Kayacat.
• Disclaimer - Whilst we have attempted to cover good warnings for most eventualities, we
DO NOT admit these warnings are a complete and comprehensive cover of possible and
potential risks or events. ALWAYS USE COMMON SENSE AND SEEK ADVICE BEFORE USING
KAYACAT

PUMA | ASSEMBLY INSTRUCTIONS
Contents of Backpack
• 2 x Plain seat extension tubes (for wide mode)
• 2 x Long Seat frame poles (with Kayacat logo)
• 2 x Medium Seat frame poles (with Kayacat logo)
• 2 x Paddle Blades
• Set of paddle shafts tubes including 1 x SUP handle, 1 x short tube,
2 x longer tubes
• 1 x Backrest
• 1 x Mesh Seat
• 1 x Seat spray guard
• 1 x Bungee leash
• 2 x Cargo nets for narrow mode/when joined for us in wide mode
• Main Kayacat Float
• Kayacat Pump
• Spare button clips

Unpacking Your Puma
1|
Unpacking - note how Kayacat is packed so you
can repeat in reverse when re-packing (take photos
or video for most reliable record)
2|
Unroll and unfold Kayacat fully on snag-free/no
sharp objects surface.
3|
Push in transparent deflation valve plugs as far as
they will go, 1 per float and 1 per cross strut = 4 in
total. Then tightly secure using Velcro strap.
4|
Inflating the Main Float - Check black inflation
valves are screwed in tightly (no need to ever
remove these) then inflate main floats using Kayacat
pump supplied. Use both feet on pump plates
when inflating.
Inflate main floats until hard, making sure float is
inflated wrinkle free. Any excess air pressure should
release through red pressure release valves. Use
both feet on pump plates when inflating.
5|
Note – Red Pressure Release valve as per photo.
Regularly rinse clean and check in good working
order.

6|
Inflating the Cross Struts - Check black inflation
valves are screwed in tightly (no need to ever
remove these) then remove black dust cap and with
one hand holding the small pump nozzle attachment
in black inflation valve. Using your other hand Inflate
cross struts until firm, Placing your feet either side
of pump plate.
7|
Once all chambers are fully inflated, screw on all 4 x
black dust caps.
Note - do not over tighten dust caps.
8|
Adjust cross strut buckles top and bottom to fit.
These provide added security to zip joint.
Note – do not sit/ride on cross struts
9|
Check all frame securing buckles and Velcro straps
are fully open with buckles facing outward position
and Velcro facing inwards.
10|
Locate extra-long Velcro strap, fitted to rear of
Main Float and use to secure pump to Kayacat
11|
Remove and layout all other components from
Kayacat Bag

Assembling the frame in Narrow Mode
1|
Join the 2 halves of seat frame directly with button
clips engaged.
2|
Add 2 x medium seat frame poles to rear of seat
frame then 2 x long seat frame poles to front of
seat frame.
3|
Lay Mesh Seat on ground with colour coordinated
stripe facing down. Take seat spray guard and fit
using Velcro attachment to underside of Mesh
Seat.
4|
Place assembled frame upside down on top of
Mesh Seat.
5|
Loosely fasten shorter Mesh Seat straps ensuring
seat is located centrally on frame, then tighten
fully. Fasten tight all remaining seat straps.

6|
Place assembled frame on top of Kayacat in
position suitable to your leg length when feet are
placed on front cross strut with knees comfortably
bent. Ensure the long poles of seat frame face
forward. Test leg length and adjust accordingly.
8|
Use a minimum of 2 front and 2 rear Velcro
buckles each side, to secure frame to Kayacat. All
unused Velcro straps and buckles are for use in
different modes/seat positions to suit user.
9|
Attach back rest adjustable side straps to metal
“O” rings. Adjust back rest as required for
comfort/support.
10|
If your Kayacat comes with backrest harness
strap, then remove and store for future use with
sailing rig as required.
Warning! For safety reasons Do Not use any
Strap or Harness to tie you to the Kayacat, other
than safety leash provided, as risk of drowning is
increased in the event of capsizing!
11|
Use Velcro straps either side of Mesh Seat for
securing paddle/spare tubes/SUP handle.

Assembling the Paddle
1|
Remove matte rubberised finish paddle shafts from
sleeves.
2|
Assemble shaft sections with short section as
middle piece. Fit paddle blades with optional
paddle twist as required.
3|
For Stand Up Paddling, replace one paddle blade
with the SUP handle and adjust length to suit by
removing/adding paddle shafts.
4|
Attach paddle leash to paddle bar and then clip to
rear of seat

Cargo Nets and Back-Pack
1|
Separate cargo nets to provide 2 smaller nets in
narrow mode.
2|
Pass cargo net straps through buckles and tighten
on to main float in positions either behind seat, at
rear of float, or in front of forward cross strut.
3|
Slot back pack shoulder straps around rear seat
frame extension poles and tighten fast.

Assembling in Wide Mode
1|
Fit unmarked/plain seat extension tubes to seat
frame with button clips
2|
Add 2 x medium seat frame poles to rear of seat
frame then 2 x long seat frame poles to front of seat
frame.
3|
Lay Mesh Seat on ground with colour coordinated
stripe facing down.
4|
Take seat spray guard and fit using Velcro
attachment to underside of Mesh Seat.
5|
Place assembled frame upside down on top of
Mesh Seat.

6|
Loosely fasten shorter Mesh Seat straps ensuring
mesh is central on frame then tighten fully. Fasten
tight all remaining seat straps.
7|
Ensure Kayacat main floats are fully inflated (see
previous narrow mode instructions) and Cross struts
are deflated and fully unzipped and unclipped, with
transparent deflation valve stoppers fully pushed in
then Velcro closed.
8|
Inflating the Cross Struts in wide mode - Check
Black inflation valves are screwed in tightly (no need
to ever remove these) then remove black dust cap
and with one hand hold the small pump nozzle
attachment in black inflation valve. Using your other
hand Inflate cross struts until firm, placing your feet
either side of pump plate.
9|
Once fully inflated screw on 4 x black dust caps to
all inflation valves.
Note: Do not over tighten dust caps.
10|
Locate extra-long Velcro strap, fitted to rear of
Main Float and use to secure pump to Kayacat.

11|
Attach back rest to adjustable side straps to metal
“O” rings. Adjust back rest as required for comfort.
12|
If your Kayacat comes with backrest harness strap,
then remove and store for future use with sailing rig
as required.
Warning! For safety reasons Do Not use any Strap
or Harness to tie you to the Kayacat, other than
safety leash provided, as risk of drowning is
increased in the event of capsizing!
13|
Use Velcro straps either side of Mesh Seat for
securing paddle/spare tubes/SUP handle.

Cargo Nets and Back-Pack
1|
Take 2 small cargo nets and attach to create single
wide mode cargo net using Velcro strip and fitted
buckles. Fit wide mode cargo net to buckles at
front or rear of Kayacat.
2|
Use four long corner straps on back pack to secure
backpack to main float through buckles behind
seat.
Safety Leash
1|
It is vital to your safety that you always reliably
attach safety leash to your ankle or wrist before
using Kayacat in any mode.
2|
Clip safety leash to either left or right clips behind
seat.

Packing Away
• Always rinse Kayacat with fresh water and allow to dry before storing.
• Remove and dissemble all items attached to floats (frame, seat etc)
• Open 4 x transparent deflation valves
• Re-pack in reverse order using your previous photos/video clips and be sure to roll
main Kayacat floats tightly.
• Tip - Place back rest then seat frames in back pack first, followed by Mesh Seat and
cargo nets, then tightly rolled Kayacat. Then insert frames pieces and paddle
sections either side adding pump and leash etc.
• Back Pack can be zipped in narrow mode for optimal space saving when
transporting

COUGAR | ASSEMBLY INSTRUCTIONS
Contents of Backpack
• 2 x Plain unmarked seat extension tubes one with dagger board joint
• Front set of tubes, connected by bungee
• Rear set of tubes, connected by bungee
• 1 x Plain unmarked Torque Tube
• 1 x Rudder Stock assembly
• 2 x Paddle Blades
• Set of rubber coated paddle shaft tubes including 1 x SUP handle, 1 x short
tube, 2 x longer tubes
• 1 x Backrest, 1 x Mesh Seat, 1 x Seat Splash Guard
• 1 x Safety Leash
• 2 x Wide mode cargo net
• Main Kayacat Float
• 1 Kayacat Pump
• Spare button clips
• 1 x Allen key
• 1 x Carbon fibre telescopic mast
• 1 x Float packing strap
• 1 x Sail
• 1 x Short bungee with black bobble
Unpacking your Cougar

1|
Unpacking - note how Kayacat is packed so you
can repeat in reverse when re-packing (take photos
or video for most reliable record)
2|
Unroll and unfold Kayacat fully.
3|
Push in transparent deflation valve plugs as far as
they will go and secure with Velcro, 1 per float and 1
per cross strut = 4 in total.
4|
Inflating the Main Float - Check black inflation
valves are screwed in tightly (no need to ever
remove these) then unscrew top dust caps and
inflate main floats using Kayacat pump supplied.
Use both feet on pump foot plates when inflating.
5|
Inflate main floats until hard, making sure float is
inflated wrinkle free. Any excess air pressure should
release through red pressure release valves.
6|
Ensure cross struts are fully unzipped ready for wide
mode inflation.

7|
With one hand hold small nosel pump attachment in
black inflation valve, then with other hand operate
pump to Inflate cross struts until firm, keeping feet
either side of pump foot plate.
8|
Once fully inflated screw on 4 x black dust caps.
Note - do not over tighten dust caps.
9|
Check all frame securing buckles are fully open
facing outward position.
10|
Take extra-long Velcro strap fitted to float at rear of
Kayacat and fasten pump.
11|
Remove and layout all other components from
Kayacat Bag.

Assembling Cougar Frame
1|
Lay out seat halves and 2 x plain unmarked
seat extension tubes (one tube with dagger
board joint attached fitted to front of seat) and
connect as per photo diagram.
2|
Connect Front set of tubes together
(connected by bungee), then attach to front of
seat frame.
3|
Connect Rear set of tubes together
(connected by bungee), then attach to rear of
seat frame.
4|
Connect plain unmarked torque bar to mast
foot.

5|
Insert Rudder Stock assembly and tighten
bolts as required to achieve minimum
resistance.
6|
Take rubberised SUP handle/Tiller arm and
connect to Rudder Stock.
7|
Fit Seat Splash Guard loosely to underside of
mesh seat and allow for stretch when
tightening mesh seat to frame.
8|
Lay mesh seat on seat frame with colour
coordinated stripe facing up/splash guard
underneath.
9|
Loosely fasten side mesh seat straps
ensuring mesh is central on seat frame then
tighten fully. Flip frame over onto reverse
side then fasten tight all remaining seat
straps.
Note: We recommend sitting at 45 degrees
when Sailing the Cougar.

10|
The Velcro quick-release back-rest belt
allows back-rest to move with you as you
change sides for sailing.
Warning! Only for use by experienced sailors.
When using back-rest belt ensure you are
well practiced in activating the quick release
e.g. if submerged in water!
11|
Fasten torque bar to underside of seat using
clip and strap and adjust strap to generate
required mast angle.
12|
Flip frame back over and place on Kayacat
float as per diagram photo then secure frame
to main float in position using Velcro straps
and buckles, ensuring rudder joint fits free
and beyond rear cross strut.
13|
All unused Velcro straps and buckles on main
float are for use in different modes/seat
positions to suit user.
This manual suits for next models
1
Table of contents