KC 23.590 User manual

Plankton Pump for 6000 m
Model 23.590
Manual
KC Denmark A/S
Research Equipment
Limnology Oceanography Hydrobiology

23.590 –Plankton Pump for 6000 m –Ver. 3 - Manual
2
Plankton Pump for 6000 m
KC Denmark A/S is not, and cannot be held, responsible for any damage(s) made to equipment
or to operators who ignore safety precautions or because of misuse or wrong operation.
Table of contents
Page
Charging and preparation
2
Connect motor cable, charger and USB cable
3-4
Dummies
3-4
Plug for starting the pump
3-4
Emptying the collecting bottle
4
How to handle the pump
4
Zinc anode
5
Pressure compensation
5
SubConn handling instructions
6-9
Maintenance
10
Safety information
10
Item
Charging and preparation
1
The battery cylinder has 2 Subconn connectors:
1. Always grease the connectors with Molykote, see
pg. 6-8
2. Power supply to motor (5 pins - MCBH5F).
3. Charging the battery (8 pins - MCBH8F). Once the
battery is charged, you also use this connector for
programming by USB.
4. The photo shows the programming plug and a
dummy to the right; the dummy is not part of the
standard delivery.
2
1. Connect the charger to ensure the battery is fully
charged. Allow up to 10 hours of charging
2. The charger has a built-in circuit to prevent
overcharging the battery.
3. The battery charger is useable for a main voltage
between 100 and 240 VAC.

23.590 –Plankton Pump for 6000 m –Ver. 3 - Manual
3
3
Connect the cable from the motor to the battery
cylinder, connector 1.
4
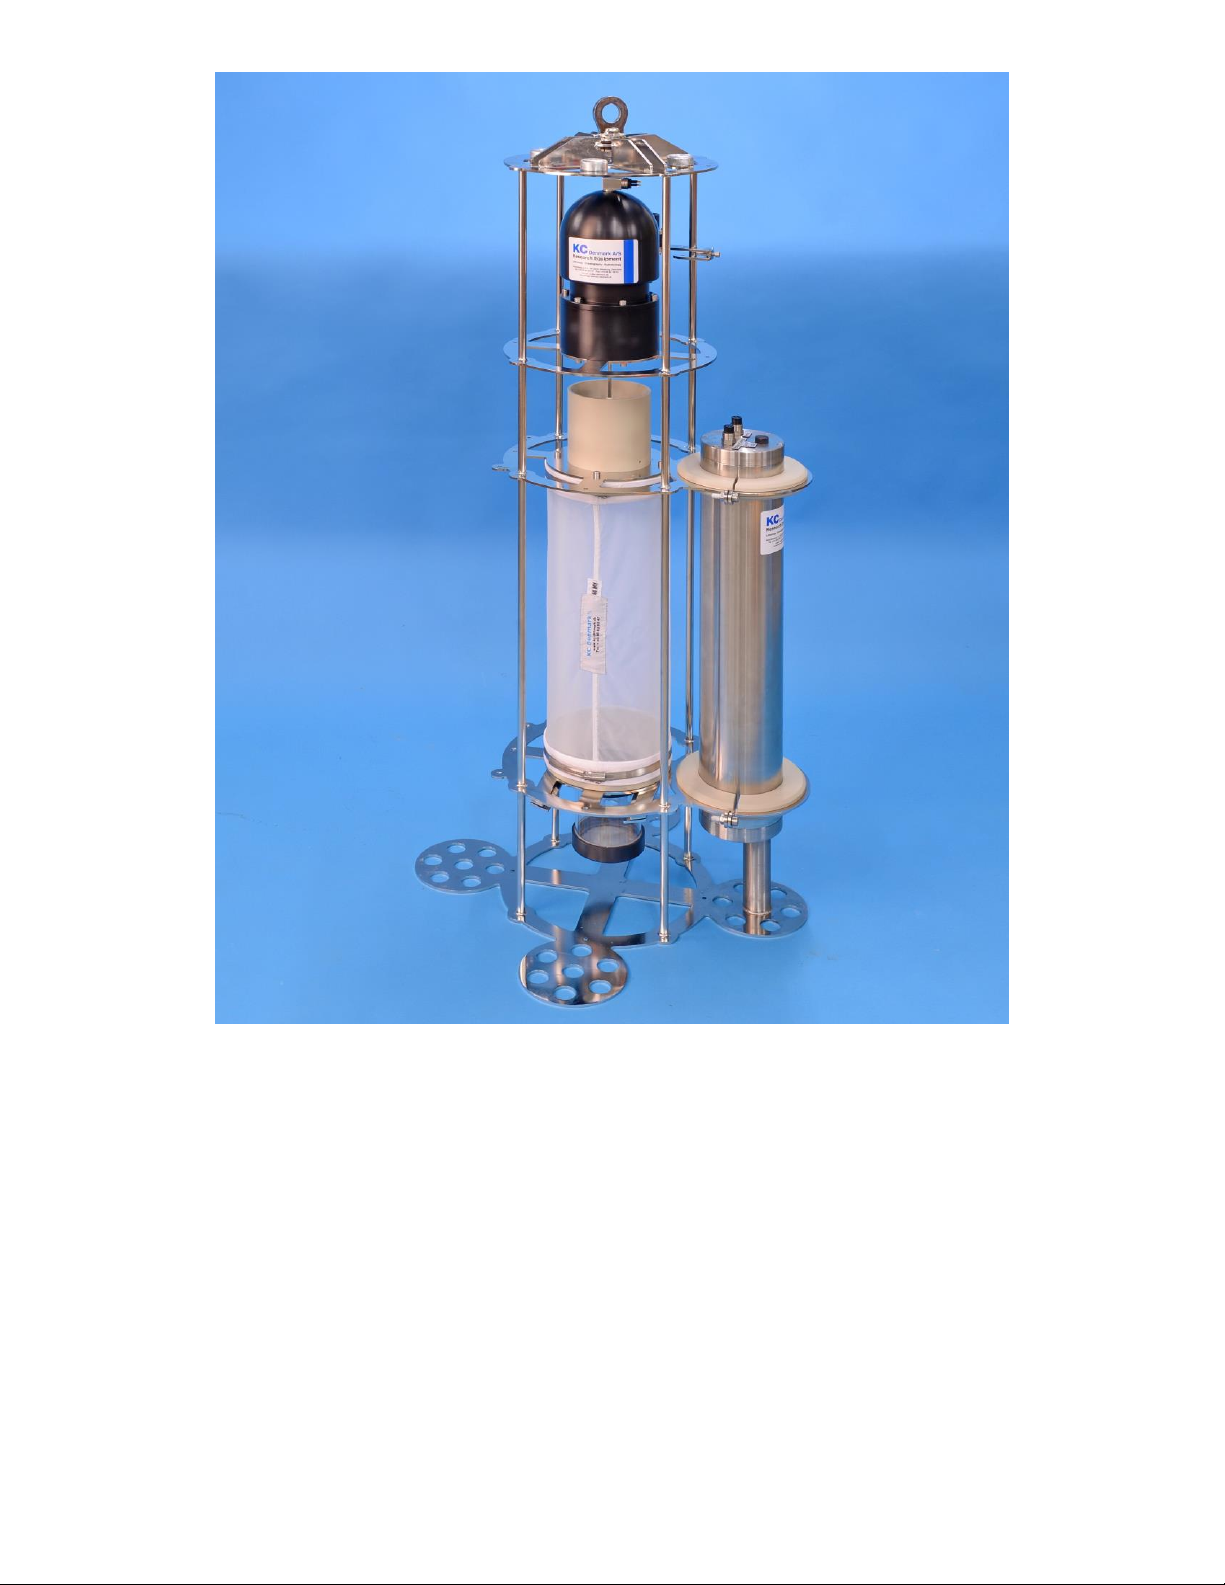
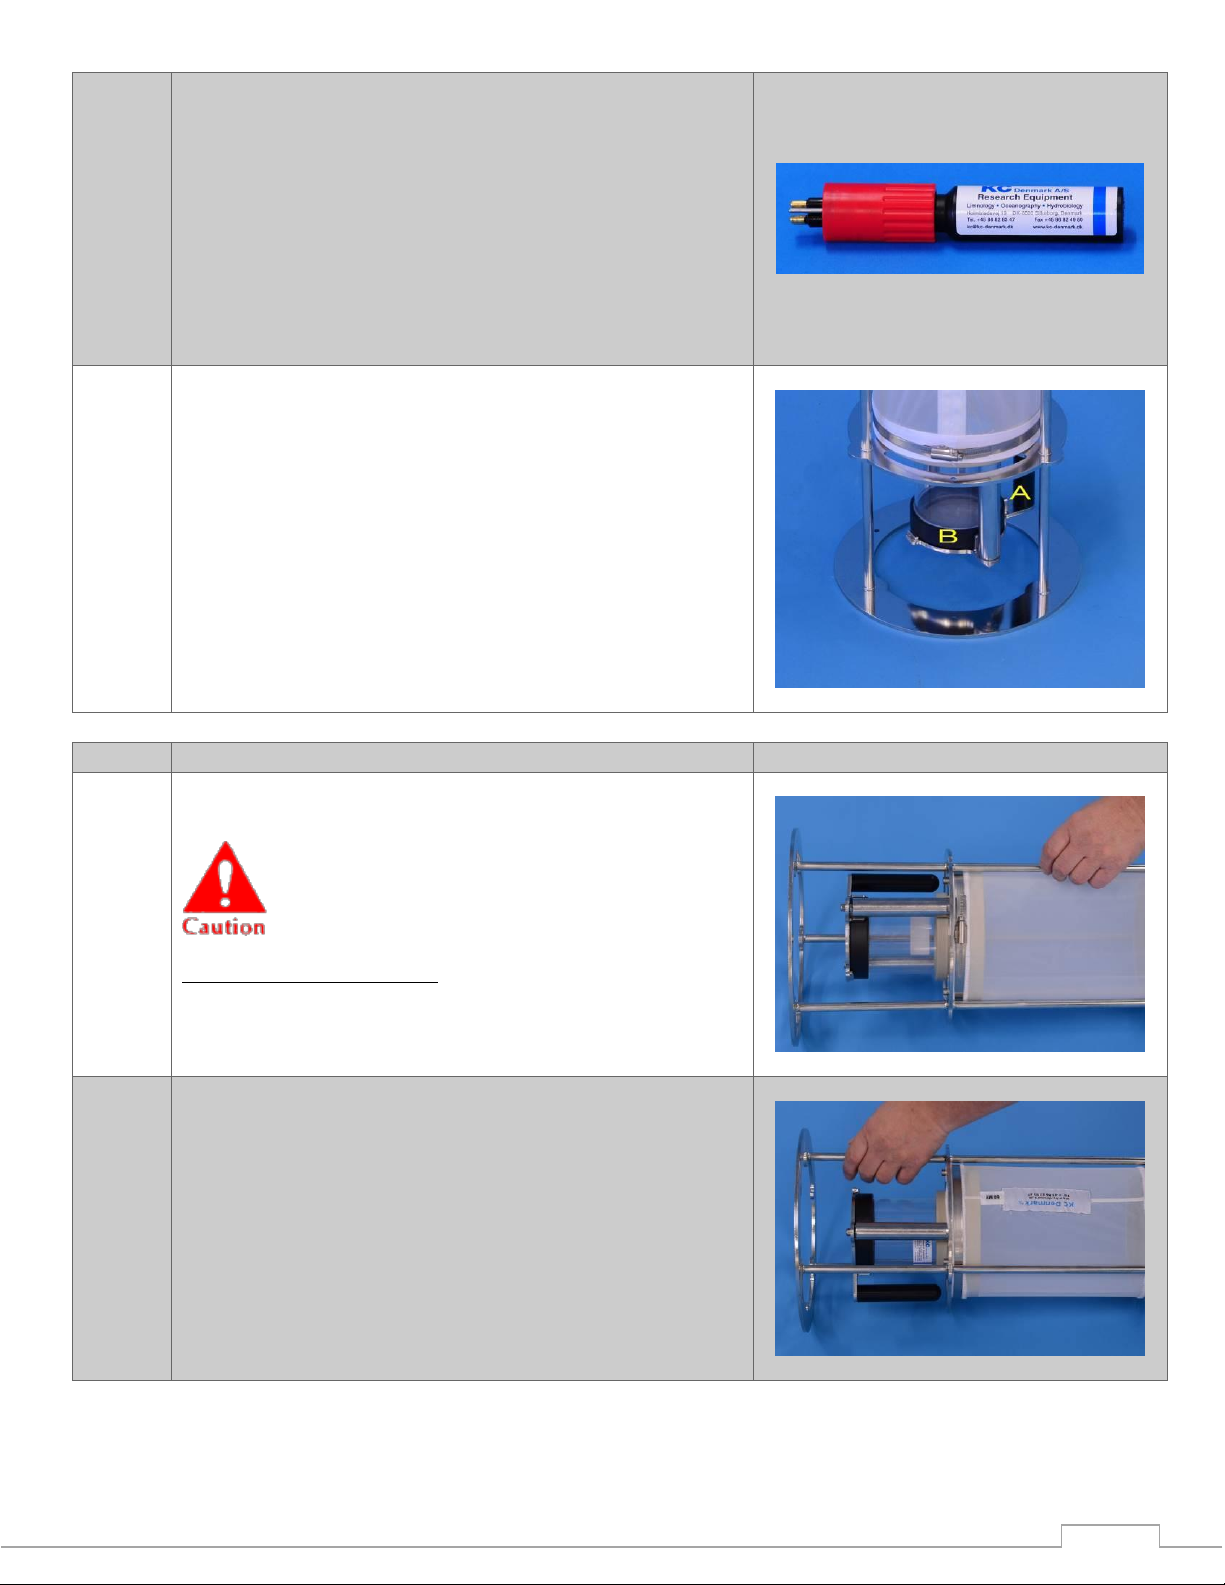
A is connected at top of the motor.
B is inserted into 1on the battery cylinder.
You may secure the motor cable to the vertical bar
with 2 plastic strips, C and D.
5
The delivery includes a laptop with preinstalled
software.
Turn on the laptop.
Connect the USB cable from the laptop to the USB
connector on the battery cylinder.
Start the application via the icon on the desktop,
adding the requested data for start/stop etc.
Disconnect the cable and once you are ready to deploy
the pump, insert the 8-pins programming plug into the
battery cylinder. The plug is shown in front of the
laptop; please also refer to item 6, next pg.
Once inserted, the programmed session will start.
Deploy the pump.

23.590 –Plankton Pump for 6000 m –Ver. 3 - Manual
4
6
Once the plug is inserted, the actual programming
cycle will start within 1 min.
It is possible implementing a longer delay in the
program so that the pump first starts pumping after a
set amount of time. Another option is a trigger system
done by pressure transmitter.
(Pressure transmitter is not included, please ask
KC Denmark A/S for more information).
7
When the pump is retrieved back on deck, you can
empty the collecting bottle.
Force down the spring loaded handle A, and you can
remove the bottle B.
Handling the pump
8
Do not lift the pump here, you may damage the net
itself or cause a stretch of the plankton cloth.
9
Lift the pump here as shown.

23.590 –Plankton Pump for 6000 m –Ver. 3 - Manual
5
10
The 4 zinc anodes, A, at the top will prevent corrosion
of the pump when used in salt water. Replace the zinc
anodes when they are eroded.
11
The pressure compensation, A, will compensate the
over pressure during the deployment. It is important,
to rinse the membrane A regularly with fresh water.
To extend life of the membrane please don’t expose to
direct sunlight for a long time.
The motor and the pressure compensation contains
Fluorinert FC-770 liquid. If you need to add extra liquid
please contact KC Denmark A/S for more information.
12
It is highly recommended, that the pump isn’t exposed
to direct sunlight for a longer period. The battery
cylinder and the motor will accommodate the heat.
Battery’s life will increase and the Fluorinert in the
pump’s house may expand, so it can break the
membrane for the pressure compensation.

23.590 –Plankton Pump for 6000 m –Ver. 3 - Manual
6

23.590 –Plankton Pump for 6000 m –Ver. 3 - Manual
7

23.590 –Plankton Pump for 6000 m –Ver. 3 - Manual
8

23.590 –Plankton Pump for 6000 m –Ver. 3 - Manual
9

23.590 –Plankton Pump for 6000 m –Ver. 3 - Manual
10
Maintenance
All parts of the plankton pump must be rinsed using fresh water. Regular cleaning with
fresh water is recommended and all moveable parts must be moved individually to ensure
all dirt has been removed.
Safety information
Disconnect power supply to avoid any unattended operation causing accident to
personnel and pump.
An expert maintenance technician fully familiar with the attendant hazards must only do
all maintenance, inspection and repairs.
When working on the unit in areas, which are difficult to access or hazardous, ensure to
take adequate safety precautions for the operator and others in compliance with the
provisions of law on health and safety at work.
Replace worn component with original spare parts.
Rev.: November 06, 2018 - lkj
KC Denmark A/S
Research Equipment
Limnology Oceanography Hydrobiology
E-mail: [email protected] website: http://www.kc-denmark.dk/
Holmbladsvej 17-19, DK 8600 Silkeborg, Denmark. Tel. +45 86 82 83 47
Bank: Sydbank. SWIFT: SYBKDK22 - IBAN DK5070460000104832
VAT no. DK 29 61 96 62
Table of contents