manuals.online logo
Brands
  1. Home
  2. •
  3. Brands
  4. •
  5. KDE Direct
  6. •
  7. Controllers
  8. •
  9. KDE Direct LV Series User manual

KDE Direct LV Series User manual

IMPORTANT: To reduce the risk of fire, bodily injury, and damage to the
equipment, read through Instruction Manual before operating ESC and
always follow all instructions.
KEEP OUT OF THE REACH OF CHILDREN.
Pay attention to the maximum voltage allowed:
KDE-UAS LV Series 7.4V (2S LiPo) –26.1V (6S LiHV) 26.5V Max.
KDE-UAS XF Series 7.4V (2S LiPo) –34.8V (8S LiHV) 35V Max.
KDE-UAS HVC Series 11.1V (3S LiPo) –52.2V (12S LiHV) 55V Max.
If model is not listed, maximum voltage is stated in specifications.
Operating outside of the listed voltage voids warranty.
All KDE Direct ESCs are opto-isolated and do not provide BEC power output for
the peripheral equipment and requires 3 to 12V applied to the control lead.
Never operate the ESC beyond the specifications stated on hardware. Serious
injury or property damage can result from misuse.
Ensure the polarity is correct with the power supply to the ESC power source
leads. Reverse polarity may cause fire and serious injury and will immediately
damage the ESC beyond warranty coverage.
Ensure the ESC is installed in a safe location and protected to prevent any
exposed connections and solder-locations from contacting conductive areas.
Always use electronics-grade solder and make sure to use proper soldering
techniques and equipment. Poor soldering technique is a common cause of in-
flight failure and ESC damage. Ensure all connectors are protected with
insulation and heat-shrink to prevent unwanted conduction and shorts.
Check all connectors for secure connection before flight. Disconnection due to
vibration and flight-conditions can result in a dangerous loss of control and
potential damage and serious injury.
Do not disassemble or open the ESC or DMA. Opening of the case or removal of
shrink-wrap may cause damage to the internal components, void all warranty
claims, and yield unsafe operation.
Install the ESC in a location with adequate airflow to maintain cool
temperatures and achieve the maximum performance rating.
An electric motor that is connected to the ESC can start unexpectedly and can
cause serious injuries. Always remove the propeller and disengage all gearing
when working on the system with power applied.
Do not allow full submersion of the ESC in water. Water can damage the ESC
and cause malfunction and failure of the electrical components.
KDE Direct is not responsible for the use of this Product(s) or for any
damages or injuries caused or sustained by its usage. Always observe all
laws and instructions regarding the use of this Product(s), and operation of
devices using this Product(s).
This is a high-power, electromechanical device with the potential to be very
dangerous –always handle with caution and be aware of proper operation.
This product may contain chemicals known to the State of California to cause
cancer and/or birth defects or other reproductive harm. Do not ingest or
attempt to ingest this product.
Disconnect brushless motor from ESC motor leads before programming ESC.
An electric motor that is connected to the ESC can start unexpectedly and
cause serious injuries or damage.
Before flight, ensure that all ESCs are operating on the same settings and
firmware.
Extending the ESC power leads is at your own risk and voids the warranty.
At low load we recommend you turn off Synchronous Rectification, low load
may result in discontinuity with the motor RPM.
REVISION PR012
For the latest instruction manual revisions, software updates, liability
policy, and warranty information, visit the KDE Direct website at:
http://www.KDEDirect.com.
All technical inquiries, review the KDE Resource Center.
Pay close attention to proper wiring as shown in the diagram above. Ensure the
polarity is correct and proper soldering techniques are used when connecting
the power source and brushless motor to prevent damaging the ESC.
ESC INSTALLATION AND WIRING
(-) TO POWER SOURCE
(BLACK POWER LEAD)
TO FLIGHT CONTROLLER
(W-R-BLK CONTROL LEAD)
TO BRUSHLESS MOTOR
(BLACK MOTOR LEADS)
(+) TO POWER SOURCE
(RED POWER LEAD)
TO DEVICE MANAGER ADAPTER
(O-R-BRN PROGRAMMING LEAD)
1 2
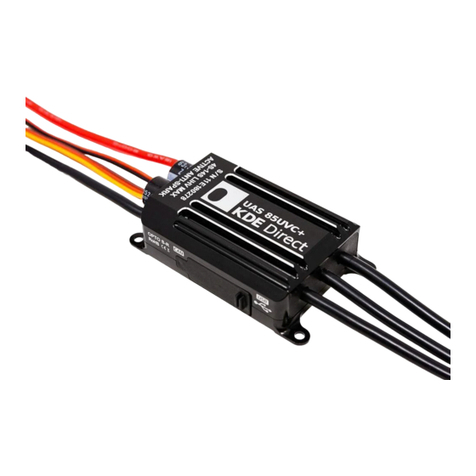
The KDE Direct UAS ESC (Electronic Speed Controller) Series is specifically
designed for multi-rotor applications, and utilizes a proprietary algorithm
for up to 600Hz refresh rate communication and high-speed response for
optimal flight performance.
The UAS ESC Series is optimized for the KDE Direct UAS Brushless Motor Series
and will not require additional programming for most flight applications.
Throttle calibration is not required –the ESCs are factory-calibrated and the
proprietary control algorithm will dynamically adjust to the receiver (RX)
and/or flight controller for simple plug-and-play operation. If manual throttle
calibration is desired, this option can be selected via the KDE Direct Device
Manager Adapter (DMA) programming kit (sold-separately).
1. Ensure the ESC control lead is connected to the throttle channel on your
receiver (RX) or flight controller, confirming correct orientation of plugs.
2. Turn on the transmitter (TX) and set the throttle-stick position to zero or
low (0% throttle signal) to arm the ESC circuitry.
3. Connect the battery or power system to the ESC power source leads. The
ESC will remain disarmed until a 0% throttle signal is received. An arming-
tone will be heard and the number of LiPo battery cells will be heard as
individual tones, followed by additional and final arming tones.
4. If arming tones are not heard, adjust the transmitter throttle end-points
(ATV/AFR) values until the arming sequence is heard. Check the operation
of the ESC with the receiver (RX) throttle channel for correct direction and
reverse if necessary (reverse direction for Futaba systems).
If the arming throttle signal (0%) is not applied when the power
source is first connected to the ESC, short tones will continuously
sound after approximately five (5) seconds. To remove this
warning tone move the throttle to 0% or disconnect power.
5. Check for proper rotation direction of each ESC/motor combination. To
change rotation direction, swap ANY two brushless motor lead connections.
New technologies incorporated into the latest production designs include:
•Regenerative Braking –active braking during motor deceleration phase,
providing instantaneous response to the flight controller commands and
matched-response to acceleration profiles (less “float” during flight).
•Temperature-Controlled Synchronous Rectification –new proprietary
algorithm for smooth-running motors at low-throttle and improved, faster
response under high-peak loads; all while significantly increasing flight-time
efficiency and reducing operating temperatures.
A wide-range of KDE Direct UAS Brushless Motors are available to suit your UAS
and multi-rotor applications; ranging from smaller 180-class (2S+) tuned
motors, up to industrial 1400-class (14S+) and larger motors.
ESC THROTTLE CALIBRATION
REVISION PR012
Pay close attention to proper wiring as shown in the diagrams. The ESC is
automatically powered via the USB DMA when using the Programming Lead
(orange-red-brown cable). External power is NOT required to properly arm and
program the microcontroller in most cases.
The KDE Direct DMA provides the ability to update and program the
KDE Direct UAS Brushless ESC Series to the latest production firmware
releases, and customize advanced options for multiple applications.
Advanced technologies, such as Synchronous Rectification and
Regenerative Braking, can be enabled for enhanced performance and
optimized control algorithms.
DEVICE INSTALLATION AND WIRING
If the ESC does not include the dedicated Programming Lead or does not
connect, a 9V to 12V power source (2S or 3S LiPo preferred, 25V maximum) is
required for powering the ESC during programming. Once external power is
properly applied to the ESC, the microcontroller is programmed via connection
of the DMA to the Control Lead (white-red-black cable).
3 4
1. Download and install the Device Manager software from the KDE Direct
Device Manager Adapter (DMA) webpage at:
www.kdedirect.com/products/kdexf-dma
2. Complete installation of the software (and all prerequisites), and run the
KDEDevice application from the Windows start menu or desktop shortcut.
3. Connect the Device Manager Adapter to an available USB port.
- Adapter will be recognized via an activated “red” LED signal.
- Adapter will change to a“green” LED signal upon recognition by the
KDEDevice application and proper installation.
4. Connect the ESC to the Device Manager Adapter, ensuring proper orientation
of the 3-wire plug (see diagrams in Device Installation and Wiring).
- Adapter will NOT be damaged with incorrect orientation. Software will
simply not recognize device until proper installation.
- Detection of the ESC via the Device Manager software may take up to
five (5) seconds to properly boot the internal microprocessor and
download current settings.
ESC PROGRAMMING AND FIRMWARE UPDATE
1. Download the latest production firmware file (make sure to choose the
appropriate version for your ESC model) from the KDE Direct website at:
www.kdedirect.com/products/kdexf-dma
2. Update the ESC to the latest production firmware release by pressing the
“UPDATE FIRMWARE” button in the Device Manager software and selecting
the downloaded firmware file (.kde).
Do not disrupt power or connection to the ESC or Adapter during the
update process, or corruption of the firmware and permanent-failure
of the ESC can occur (6ESC can be restored in most cases via the
“REPAIR MODE” feature).
3. When update is completed, the default settings will be automatically applied
to the ESC and confirmed (allow up to five (5) seconds for this to complete).
- Default Settings can be reapplied by pressing the “DEFAULT SETTINGS”
button, followed by pressing the “SEND SETTINGS” button in the Device
Manager software (allow five (5) seconds to pass before unplugging).
(additional changes may be required for optimal perrf)
4. Disconnect power from the ESC (if required), then disconnect the Adapter
from the ESC Programming Lead or Control Lead to complete the update.
DEVICE MANAGER SOFTWARE INSTALLATION
REVISION PR012
DRIVE FREQUENCY
PRECISION
(30 kHz –32 kHz)
Fastest PWM drive frequency to the motor, providing the
smoothest/quietest operation (increases ESC temperature).
DYNAMIC
(16 kHz –18 kHz)
Dynamically adjusts the PWM drive frequency to the motor,
providing the best overall balance of performance.
BALANCED
(8 kHz –10 kHz)
Lowers the PWM drive frequency to the motor, reducing ESC
temperatures (increases motor commutation noise).
SYNCHRONOUS RECTIFICATION (ACTIVE-FREEWHEELING)
ENABLED Enables synchronous rectification (also termed active-
freewheeling) for improved efficiency and regenerative braking
algorithms ideal for UAS and multi-rotor operation.
DISABLED
Disables synchronous rectification for improved light-loading
operation (such as motor bench-testing) and minimal-brake
activation ideal for specific single-rotor applications.
S.R. BRAKING ACTIVATION (REGENERATIVE-BRAKING)
PRECISION
Enables synchronous rectification immediately, ideal for FPV
racing and light multi-rotor applications. Provides immediate
response at spool-up and flight take-off.
DYNAMIC Enables synchronous rectification upon reaching optimal ESC
temperatures, allowing for smooth operation during initial
motor spool-up and flight take-off.
BALANCED
Enables synchronous rectification upon reaching higher ESC
temperatures, allowing for smooth operation during initial
motor spool-up and further into initial flight.
STARTUP POWER
DYNAMIC Dynamically adjusts to the startup-requirements of the motor,
optimal for most setups and KDE Direct brushless motors.
HIGH (HARD) Increases the startup-power for high-cogging torque motors or
high-stall loading setups.
NOTE: The Device Manager Software allows for modification of control
algorithms and tuned ESC operation –in rare instances will the Advanced
Settings need to be changed for proper UAS and multi-rotor flight application.
* Bold indicates default settings
ESC PROGRAMMING AND ADVANCED SETTINGS
5 6
VOLTAGE CUTOFF
ON
2Enables voltage-cutoff for specific applications, resulting in a
50% RPM limit reduction when reaching the target cell voltage
(selectable with pull-down menu, i.e. 3.2V/CELL).
OFF Disables voltage-cutoff, highly-recommended and default
setting for UAS and multi-rotor flight applications to prevent
power stall and potential loss of flight control.
ADVANCE TIMING
DYNAMIC Dynamically adjusts advance timing (15° to 22°) to the brushless
motor, providing higher efficiency and balance of power.
PRECISION Dynamically adjusts advance timing (22° to 30°) for maximum
thrust output and acceleration response (at a slight loss of
efficiency), best for high-pole count motors and heavy-lift.
MOTOR DIRECTION
FORWARD Default motor direction, determined by the motor windings and
motor lead connection order.
REVERSE Alternate motor direction (opposite of Forward setting),
reversing the rotational direction for ease of installation.
THROTTLE CALIBRATIONMODE
DYNAMIC Factory-calibrated, automatic throttle calibration to the flight
controller for simple, drop-
in installation (ideal for most UAS and
multi-rotor applications, such as the DJI™ A2/A3 series).
MANUAL
1Enables manual (fixed) throttle calibration. After selection,
throttle calibration will proceed upon next power-up:
- Turn on the transmitter and move throttle stick to maximum
upper position (100% throttle). Apply power to ESC.
- Motor will emit dual tones, memorizing upper position.
- Quickly move throttle stick to low position (0% throttle).
- Motor will emit tones, memorizing lower position and arming.
- Calibration is now complete and ready for operation.
RANGE
1Allows direct input of the throttle calibration, via the MIN(LOW)
and MAX(HIGH) range. When selected, values can be typed into
the THROTTLE CALIBRATION RANGE textboxes:
- Allowable value for MIN(LOW): 800 to 1250 [µs].
- Allowable value for MAX(HIGH): 1750 to 2200 [µs].
ARMING TONES
STANDARD Initialization of the ESC will emit voltage count tones (number of
LiPo battery cells), followed by final arming tones.
- Safety warning tones will emit until arming signal is received.
ARM ONLY Initialization of the ESC will emit final arming tones only.
- Safety warning tones will emit until arming signal is received.
INITIALIZE 3Initialization of the ESC will emit final arming tones only.
- Safety warning tones will not emit before arming signal.
REVISION PR012
PROPELLER HOLD
ENABLED
4Enables an active-brake to the propeller when minimum throttle
position (0%) is received, providing a rapid propeller-stop and
hold to position (ideal for emergency parachute recovery).
DISABLED Disables an active-brake to the propeller, allowing free-spool of
the propeller when minimum throttle position (0%) is received.
MOTOR EDITION
DEFAULT Enables motor-drive control-algorithm optimizations for
simple compatibility to the widest range of motors –
ideal for
the KDE5215XF and smaller series brushless motors.
KDE6213XF-185
↓ ↑
KDE8218XF-120
Enables motor-drive control algorithm optimizations for
specific KDE Direct motor editions, ideal for the industrial
heavy-lift brushless motor series (KDE6213XF and larger).
ACCELERATION RATE
MEDIUM
Optimizes the maximum acceleration/deceleration control
profiles for smooth reaction-rates and safety in industrial-
heavy lift applications (dynamic reduction up to 20%).
MEDIUM-HIGH Optimizes the maximum acceleration/decelerationcontrol
profiles for balanced operation in commercial aerial-
cinematography applications (dynamic reduction up to 15%).
HIGH
Optimizes the maximum acceleration/decelerationcontrol
profiles for increased stability in adverse weather conditions
and long-endurance flights (dynamic reduction up to 10%).
ULTRA-HIGH
Maximizes the acceleration/decelerationcontrol profiles for
high-speed applications, where fast-reaction rates and tight-
control to the flight-controller commands is required.
7 8
REVISION PR012
9 10
DATA-LOG SPEED
DISABLED Only available on the UVC series ESCs
KDECAN BAUD
DISABLED Only available on the UVC series ESCs
OVERLOAD PROTECTION
ULTRA
-
HIGH
5ESC will enable overload protection
when witnessing a three (3)
second continuous-current duration above 175% of the
continuous amperage rating (i.e., 170A for the 95A ESC).
STANDARD
ESC will enable overload protection when witnessing a three (3)
second continuous-current duration above 150% of the
continuous amperage rating (i.e., 145A for the 95A ESC).
DISABLED
Overload protection is disabled. Use with caution - overload
protection is designed to protect the internal electronics from
high continuous-current situations and circuit damage.
KDECAN CONTROL
DISABLED Only available on the UVC series ESCs
ESC ID (KDECAN)
DISABLED Only available on the UVC series ESCs
ADAPTER
DUAL ESC will optimize control algorithms for dual propellers
TRIPLE ESC will optimize control algorithms for triple propellers
HEX ESC will optimize control algorithms for hex propellers
STALL PROTECTION
ENABLED Enables advanced algorithms allowing for the immediate
shutdown of electronics in the case of a propeller impact or
alternate unsafe event.
DISABLED ESC will not detect a blocked or stalled motor incident during
the startup and in-flight operation.
11 12 REVISION PR12
KDE Direct, LLC (KDE Direct) warrants to the original purchaser that the
Product(s) will be free from defects in materials and workmanship for a period
of one (1) year from the date of purchase. This warranty does not cover abuse,
neglect, or damage to the Product(s) from preventable failure methods, such as
incorrect wiring, reverse polarity, voltage exceeding the maximum specification,
incompatible system components, or amperages exceeding the maximum
specification (overloading).
The full definition and terms of this limited warranty are available at:
https://www.kdedirect.com/pages/warranty-and-returns-policy.
All of KDE Direct’s sales are subject to its Liability Policy, available at:
http://www.kdedirect.com/pages/liability-policy.To the extent permitted by
law, KDE Direct makes no other warranty or representation, and HEREBY
DISCLAIMS ANY AND ALL IMPLIED WARRANTIES, INCLUDING, WITHOUT
LIMITATION, THE IMPLIED WARRANTIES OF NON-INFRINGEMENT,
MERCHANTABILITY AND FITNESS FOR A PARTICULAR PURPOSE. The
purchaser acknowledges that they alone have determined that the Product(s)
will suitably meet the requirements of the purchaser’s intended use.
KDE DIRECT SHALL NOT BE LIABLE FOR SPECIAL, INDIRECT, INCIDENTAL,
OR CONSEQUENTIAL DAMAGES, LOSS OF PROFITS OR PRODUCTION OR
COMMERCIAL LOSS IN ANY WAY, REGARDLESS OF WHETHER SUCH CLAIM
IS BASED IN CONTRACT, WARRANTY, TORT, NEGLIGENCE, STRICT
LIABILITY, OR ANY OTHER THEORY OF LIABILITY, EVEN IF KDE DIRECT
HAS BEEN ADVISED OF THE POSSIBILITY OF SUCH DAMAGES. FURTHER, IN
NO EVENT SHALL THE LIABILITY OF KDE DIRECT EXCEED THE INDIVIDUAL
PRICE OF THE PRODUCT(S) ON WHICH LIABILITY IS ASSERTED. As KDE
Direct has no control over use, setup, final assembly, modification, or misuse, no
liability shall be assumed nor accepted for any resulting damage or injury. By
the act of use, setup, or assembly, the user accepts all resulting liability.If
the purchaser or users are not prepared to accept the liability associated with
the use of the Product(s), purchaser or users are advised to return the
Product(s) immediately in new and unused condition to the authorized dealer
or KDE Direct.
Always observe all laws and instructions regarding the use of this product, and
the operation of devices using this product.
KDE Direct reserves the right to change or modify its Warranty and Return
Policy and its Liability Policy at any time without prior notice.

This manual suits for next models

6

Other KDE Direct Controllers manuals

KDE Direct KDE-UAS85UVC User manual

KDE Direct

KDE Direct KDE-UAS85UVC User manual

KDE Direct KDECAN Protocol KDE-UAS125UVC-HE User manual

KDE Direct

KDE Direct KDECAN Protocol KDE-UAS125UVC-HE User manual

Popular Controllers manuals by other brands

Emerson Leroy-Somer R220 Installation and Maintenance

Emerson

Emerson Leroy-Somer R220 Installation and Maintenance

Brooks Granville-Phillips Convectron 316 Series instruction manual

Brooks

Brooks Granville-Phillips Convectron 316 Series instruction manual

Emulex MD21/S2 Technical manual

Emulex

Emulex MD21/S2 Technical manual

Lenze Starttec E71MM402 Mounting instructions

Lenze

Lenze Starttec E71MM402 Mounting instructions

American Standard ASYSTAT625A Installer's guide

American Standard

American Standard ASYSTAT625A Installer's guide

Bard CompleteStat CS9B-THO installation instructions

Bard

Bard CompleteStat CS9B-THO installation instructions

Hornby HM6000 Getting to know

Hornby

Hornby HM6000 Getting to know

National Instruments PXI-8106 user manual

National Instruments

National Instruments PXI-8106 user manual

Litecraft USC-600 user manual

Litecraft

Litecraft USC-600 user manual

Johnson Controls FX80 installation instructions

Johnson Controls

Johnson Controls FX80 installation instructions

Extech Instruments 48VTR user guide

Extech Instruments

Extech Instruments 48VTR user guide

Kramer 860 user manual

Kramer

Kramer 860 user manual

hydrotab FW Series Operator's manual

hydrotab

hydrotab FW Series Operator's manual

YASKAWA 1000-Series Technical manual

YASKAWA

YASKAWA 1000-Series Technical manual

Nexmosphere XM-350 quick start guide

Nexmosphere

Nexmosphere XM-350 quick start guide

Renesas RL78/G13 user manual

Renesas

Renesas RL78/G13 user manual

JUMAR REG-03 Mini Installation and maintenance  instruction

JUMAR

JUMAR REG-03 Mini Installation and maintenance instruction

Oval EL1810 instructions

Oval

Oval EL1810 instructions

manuals.online logo
manuals.online logoBrands
  • About & Mission
  • Contact us
  • Privacy Policy
  • Terms and Conditions

Copyright 2025 Manuals.Online. All Rights Reserved.