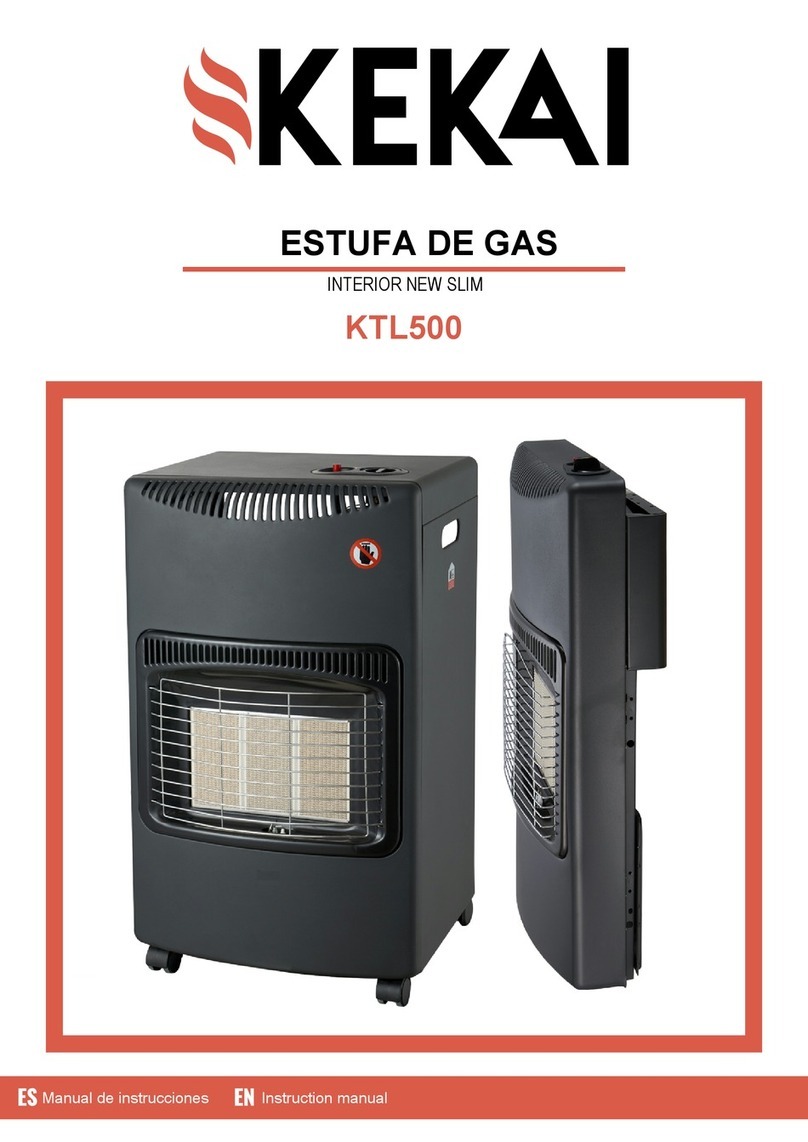
KEKAI NOVA SLIM User manual

Manual de instrucciones Instruction manual
REF: KT0655
ESTUFA DE GAS
INTERIOR NOVA SLIM

1
Querido usuario,
Ha tomado la decisión acertada de comprar un calefactor de gabinete de GLP con seguridad total.
¡Felicidades! Su calefactor está diseñado para prestarle servicio durante muchos años.
Para disfrutar de un uso ininterrumpido, sin problemas y seguro del calefactor, lea atentamente las
instrucciones proporcionadas con esta guía del usuario y téngala a mano para futuras consultas.
Si hay algo de lo que no está seguro, póngase en contacto con su distribuidor para que le preste
asistencia.
Guarde este folleto en un lugar seguro para que pueda consultarlo cuando lo necesite.
●Después de retirar el embalaje, asegúrese de que el aparato esté en buenas condiciones. Si
tiene dudas, no utilice el aparato y diríjase a su distribuidor.
●Los materiales de embalaje contienen plástico, tornillos, etc. Esto podría suponer en peligro,
por lo que no debe dejarse al alcance de los niños. Este aparato es un calefactor de GLP
(gas licuado del petróleo) y no debe funcionar continuamente (como máximo 2 horas). Este
aparato debe instalarse de acuerdo con las normas vigentes en el país de destino.
●Este aparato lo debe instalar una persona competente.
●Este calefactor debe instalarse en una estancia ventilada para que funcione correctamente ya
que, de lo contrario, tendrá lugar una mala combustión.
●Úselo solo en un área ventilada.
●La estancia donde se instale el aparato debe tener suficiente circulación de aire para
proporcionar una ventilación y combustión adecuadas. Debe haber una ventilación de al
menos 100 cm² para renovar el aire.
●Este aparato debe usarse exclusivamente para calentar áreas habitables.
●Este aparato no debe utilizarse en sótanos, subterráneos; o en vehículos recreativos como
caravanas y autocaravanas.
●No instale el aparato en apartamentos de edificios de torre, sótanos, baños o en habitaciones
cerradas.
●No coloque objetos inflamables (telas, cortinas, etc.) sobre o contra el aparato.
●No almacene productos químicos o materiales inflamables o aerosoles cerca de esta unidad.
●No utilice este aparato en un área inflamable, como en áreas donde se almacenan gasolina u
otros líquidos o vapores inflamables.
●La calefacción no debe ser con productos explosivos (al menos a 2 metros de distancia).
●El aparato debe estar a 1 m de las paredes.
●El aparato requiere una manguera de GLP válida (etiqueta en la manguera) y un regulador de
butano adecuado para el tipo de gas. Si no se suministran accesorios con la unidad, consulte
a su proveedor de gas local.
●Se recomienda no utilizar el aparato en habitaciones con un volumen inferior a 15 m3o de 7 a
8 m2de superficie.
●Coloque el calefactor auxiliar de modo que el calor se dirija hacia el centro de la habitación.
La parte delantera (radiación) del aparato debe estar al menos a 2 metros de las cortinas,
sofás, muebles u otros objetos que puedan encenderse.
●Coloque la bombona de gas (GLP) en el compartimento suministrado, preste atención a la
manguera: no debe estar torcida, aplastada o ni en contacto con un elemento caliente.
●No utilice el aparato si el cilindro de gas no está colocado en su compartimiento.
●No retire ninguna pieza del calefactor.
●No cubra la unidad.
●No mueva el dispositivo mientras está en funcionamiento.
●Nunca deje el aparato desatendido.
●La rejilla protectora de este aparato está diseñada para evitar el riesgo de incendio o lesiones
por quemaduras; ninguna pieza debe desmontarse de forma permanente.
ESPAÑOL - Manual de instrucciones

2
●NO PROTEGE TOTALMENTE A NIÑOS PEQUEÑOS NI PERSONAS CON DISCAPACIDAD.
●Mantenga a estas personas alejadas del dispositivo cuando esté en funcionamiento.
●En caso de fuga de gas, se debe apagar el calefactor auxiliar y cerrar la válvula de la
bombona de gas con un trapo húmedo.
●Nunca use una llama para comprobar si hay fugas de gas.
●Incluso si su cilindro de gas parece estar vacío, puede seguir conteniendo gas. Transporte y
almacene el cilindro correctamente.
●El aparato no debe colocarse inmediatamente debajo de una toma de corriente.
●No utilice el calefactor en las inmediaciones de un cuarto de baño, una ducha o una piscina.
●No utilice este calefactor con un programador, temporizador o cualquier otro dispositivo que
encienda el calefactor automáticamente, ya que existe riesgo de incendio si el calefactor está
cubierto o colocado incorrectamente..
●Este aparato no debe ser utilizado por niños menores de ocho años ni personas con
capacidades físicas, sensoriales y mentales reducidas, así como por personas con
experiencia y conocimientos insuficientes, siempre que estén supervisados o instruidos en el
funcionamiento seguro del aparato y comprendan el riesgo que comporta.
●Los niños no deben jugar con el aparato.
●Las labores de limpieza y mantenimiento llevadas a cabo por el usuario no deben estar a
cargo de niños sin supervisión.
Instalación del calefactor
1. Después de sacar el calefactor del paquete, retire el panel posterior del interior de la cavidad
posterior.
2. Coloque el cilindro de gas lleno en la parte posterior del calefactor con la salida de la válvula hacia
afuera.
3. Atornille el regulador correcto en la salida de la válvula del cilindro de gas en sentido horario.
Gírelo solo a mano. No utilice una llave de ajuste. Atornille hasta que la tuerca esté
completamente encajada.
4. PRUEBA IMPORTANTE para detectar fugas:
Esta prueba debe realizarse en una zona bien ventilada, sin llamas abiertas u otras fuentes de
ignición. Con el regulador conectado al cilindro, gire la válvula del cilindro de gas una vuelta y
media en sentido antihorario.
Cepille todas las conexiones de la manguera, las conexiones del conducto a la válvula de gas, la
conexión del regulador al cilindro y la válvula del cilindro de gas con una solución 50/50 de
detergente y agua. Si se forma una corriente de burbujas, quiere decir que hay una fuga. Si se
detecta una fuga, cierre la válvula del cilindro (en sentido horario), desconecte el regulador del
cilindro de gas y retire el cilindro de gas a una zona exterior bien ventilada y fresca. Póngase en
contacto con su distribuidor o proveedor de gas para obtener asistencia.
NO USE EL CALEFACTOR SI DETECTA UNA FUGA.
NO USE UNA LLAMA DESCUBIERTA PARA
DETECTAR FUGAS.
NO UTILICE NINGÚN EQUIPO ELÉCTRICO SI HAY FUGAS DE GAS.
5. Cuando haya realizado satisfactoriamente la prueba de fugas, coloque el panel trasero en el
calefactor. Es posible que
deba girar el cilindro ligeramente para permitir que el regulador y la manguera encajen en el
panel trasero sin doblar la manguera.
Nota: el calefactor incorpora varios dispositivos de seguridad que apagarán el calefactor en condiciones no seguras. En caso
de fallo accidental de la llama, el calefactor de gas se apagará automáticamente. Estos dispositivos apagarán el calefactor si
se vuelca, si se encuentra activo; coloque el calefactor en posición vertical, compruebe si hay daños evidentes y espere 5-10
minutos antes de intentar volver a encender el calefactor. Este dispositivo también puede activarse si el calefactor recibe
algún golpe.

3
EN CASO DE FUGAS DE GAS:
Cierre inmediatamente la válvula del cilindro si detecta olor a gas.
lApague cualquier llama descubierta.
lNo intente volver a encender la unidad.
lNo toque ningún interruptor eléctrico.
lNo utilice ningún teléfono en su vivienda.
lPóngase en contacto con el proveedor de gas, nuestro servicio posventa o nuestro distribuidor y siga
sus instrucciones.
ESPECIFICACIONES TÉCNICAS:
Modelo de gas completo:
Gas: GLP (gas licuado del petróleo G 30)
Presión del gas: entre 28 y 30 mbar
Categoría: I3+
Flujo nominal (máx.): 4,2 kW - 305 g/h
Caudal medio: 2,8 kW - 205 g/h
Caudal mínimo: 1,6 kW - 117 g/h
Tres inyectores con un diámetro de 0,59 mm
Encendido: piezoeléctrico
Dispositivo de seguridad (ODS): 1112 A
Cilindro de gas: 10 kg (máx.)
Modelo a gas y eléctrico:
Gas: GLP (gas licuado del petróleo G 30)
Presión del gas: entre 28 y 30 mbar
Categoría: I3+
Flujo nominal (máx.): 4,2 kW - 305 g/h
Caudal medio: 2,8 kW - 205 g/h
Caudal mínimo: 1,6 kW - 117 g/h
Tres inyectores con un diámetro de 0,59 mm
Encendido: piezoeléctrico
Dispositivo de seguridad (ODS): 1112 A
Cilindro de gas: 10 kg (máx.)
Capacidad de calentamiento del cuarzo: 400/800/1200 W
Voltaje/frecuencia: 220-240 V/50-60 HZ
INSTRUCCIONES DE INSTALACIÓN:
lSaque el aparato del embalaje.
lMonte las diferentes partes del aparato de acuerdo con las ilustraciones del apéndice.
lMonte los paneles individuales con los tornillos suministrados.
lColoque la perilla de control en la posición «(O)» u «OFF» (apagado).
lColoque la manguera de gas con la conexión del aparato y apriete con una abrazadera.
lUtilice un regulador con un ajuste fijo de 28 a 30 mbar y un caudal de 1000 a 1500 g/h.
lColoque el otro extremo de la manguera de gas especial en la salida del regulador y apriete con
un collar. La manguera debe tener una longitud de entre 0,50 y 1,00 m.
lColoque el regulador en la bombona de gas (10 kg) y apriételo correctamente.
lAbra la válvula del cilindro y revise el sello con agua jabonosa.

4
Instrucciones de funcionamiento del calefactor:
Instrucciones de iluminación:
El calefactor se puede regular en tres ajustes diferentes: 1-BAJO, 2-MEDIO y 3-ALTO. Modo de
encendido: encendido piezoeléctrico.
•Abra la válvula del cilindro del calefactor una vuelta y media.
•Presione hacia abajo y gire la perilla de control a la posición 1-BAJO y manténgala pulsada durante
10 segundos.
•Mientras sigue pulsando la luz piloto, pulse una o dos veces el botón de encendido hasta que la luz
piloto (en la parte inferior del quemador) se encienda. Siga pulsando la perilla de control durante 10-15
segundos más, suelte el botón y, si la llama del piloto se apaga, repita la operación anterior.
Nota: cuando encienda un calefactor nuevo por primera vez, puede ser necesario mantener pulsada la perilla de control
durante más tiempo para permitir que el gas circule hacia el piloto.
Una vez que el calefactor esté encendido en la posición 1-BAJO, cuando gire la perilla de control a la posición
2-MEDIO o 3-ALTO, se iluminarán el segundo y tercer panel respectivamente.
Para apagar el calefactor, gire la perilla de control a la posición «OFF» (apagado) y cierre la válvula del cilindro
completamente (en sentido horario). El calefactor solo se puede apagar cerrando la válvula del cilindro. No se puede
apagar con la perilla de control.
Funcionamiento del cuarzo:
Utilice el calefactor de acuerdo con los siguientes procedimientos cuando se use energía
eléctrica.
El sistema de calefacción eléctrica está diseñado con tecnología de radiación infrarroja. Incluso si
se utiliza en una estancia grande y sin aislamiento, la eficiencia de la calefacción será óptima.
1.Asegúrese de que el enchufe tenga una conexión a tierra normal. Coloque el enchufe en la toma
2.Pulse el interruptor para encender el tubo de cuarzo superior.
3.Pulse el interruptor para encender los otros dos tubos de cuarzo.
4.Pulse el interruptor y para encender todos los tubos de cuarzo. La carga de calor alcanza su
punto máximo.
5.Apague todos los interruptores después de utilizar el calefactor. Retire el enchufe de la toma.
Como se muestra en la siguiente figura:
Nota:
Para evitar que se alcancen temperaturas demasiado altas cerca de las rejillas de salida de aire, se
recomienda no utilizar a la vez el gas y los elementos calefactores eléctricos del calefactor.

5
CAMBIO DE CILINDRO:
Cierre completamente la válvula del cilindro (en el sentido de las agujas del reloj) y deje que el
calefactor se enfríe completamente antes de retirar y sustituir el cilindro. No intente retirar el
regulador mientras el calefactor sigue funcionando.
LOCALIZACIÓN DE LA CALEFACCIÓN DE GAS:
•Este calefactor está diseñado para colocarlo en el piso y lejos de las paredes. Cuando utilice el
calefactor, oriéntelo siempre hacia el centro de la estancia. Elimine todos los materiales combustibles
de las proximidades del calefactor.
•El aparato debe estar a 0,5 m de las paredes.
•La parte delantera de la unidad debe contar con al menos 2 metros de espacio libre delante.
SUSTITUCIÓN DEL CILINDRO DE GAS:
•La sustitución del cilindro de gas debe realizarse en una estancia no inflamable y bien ventilada. El
aparato debe estar apagado.
•Cierre la válvula del cilindro.
•Desconecte y retire el regulador del cilindro.
•Sustituya el cilindro vacío por un cilindro de gas lleno; compruebe que el sello esté en buenas
condiciones y que la manguera no esté en mal estado ni doblada, aplastada o en contacto con las
superficies calientes de la unidad.
•Abra con cuidado la válvula del cilindro y, con agua jabonosa, compruebe si hay fugas.
•En caso de fugas (burbujas), cierre la válvula del cilindro y corrija las fugas o llame a un técnico
cualificado.

6
VENTILACIÓN:
Su calefactor de gas consume oxígeno cuando está en funcionamiento. Por ello, la estancia donde se
utiliza debe contar con la ventilación adecuada. De esta forma, se garantiza la eliminación de los
productos de combustión y se renueva el aire. Una ventilación adecuada debería reducir en gran
medida el riesgo de condensación. La siguiente tabla muestra la ventilación adecuada para que el
aire se renueve adecuadamente.
Número de radiantes
en uso constante Tamaño
de la
estancia
Ventilació
n
Nivel bajo Nivel alto
1 40 metros cúbicos (aprox.
4 x 4 x 2,5 m)
40 cm² 40 cm²
2
70 metros cúbicos (aprox.
7 x 4 x 2,5 m)
70 cm²
70 cm²
3 105 metros cúbicos (aprox.
8,5 x 4 x 2,5 m)
105 cm² 105 cm²

7
EN CASO DE PROBLEMAS:
Los tres problemas más comunes asociados con cualquier calefactor de gas son las fugas de gas, la
mala presión del gas y la suciedad.
•Compruebe si hay fugas: la fuga puede tener su origen en el transporte o la instalación. Una
solución de agua y jabón tamponada en los accesorios provocará burbujas si hay fugas de gas.
•Presión de gas deficiente: una presión de gas excesiva puede dañar seriamente su
electrodoméstico, mientras que una presión insuficiente no permite que su dispositivo funcione
correctamente. Si el instalador no puede verificar la presión del gas, consulte a su distribuidor de
gas.
•Polvo y suciedad: este calefactor requiere cierto mantenimiento. Si la chispa no permanece
encendida o si una parte no es tan potente como la otra, es probable que su calefactor necesite una
buena limpieza. Está prohibido desmontar el termopar o el piloto. Si es necesario, póngase en
contacto con nuestro servicio posventa.
ASISTENCIA TÉCNICA ANTES DE SOLICITAR AYUDA
El calefactor no se enciende:
•Revise el cilindro de gas para comprobar que está lleno.
•Verifique el regulador para comprobar que está correctamente conectado y que la válvula del cilindro
está encendida.
•Compruebe que se hayan seguido correctamente las instrucciones.
Si esto sucede después de que se haya cambiado el cilindro, las posibles causa son:
•Hay aire en el cilindro. Mantenga presionada la perilla de control durante hasta que el piloto y
el quemador principal se enciendan. Cambie a la configuración a 3-ALTA.
•Es posible que el cilindro se haya enfriado demasiado. Deje que el cilindro alcance la temperatura
ambiente antes de intentar encender el calefactor.
El calefactor se apaga solo:
•Si la estufa se apaga en funcionamiento continuo, repita la operación, siguiendo rigurosamente las instrucciones.
•Si se apaga poco después de 30 minutos aproximadamente, significa que se está utilizando en una zona mal
ventilada. Abra una ventana o una puerta para ventilar la estancia y vuélvalo a encender.
•Evite golpear el calefactor cuando esté en funcionamiento. No mueva el calefactor mientras está en
funcionamiento. El interruptor de vuelco puede activarse y apagar el calefactor.
MANTENIMIENTO Y LIMPIEZA:
•Antes de realizar las labores de mantenimiento y limpieza, se debe apagar el suministro del
calefactor de gas y el calefactor debe estar frío. No intente limpiar el calefactor mientras se está
utilizando.
•Un técnico cualificado debe revisar el calefactor anualmente para garantizar un funcionamiento seguro
ydetectar cualquier fallo.
•En caso de que se detecten fallos durante el uso, deje de usar el calefactor y comuníquese con su distribuidor
para obtener asesoramiento.
•Limpie periódicamente el exterior y el área de almacenamiento de su calefactor para eliminar el polvo y
las pelusas acumuladas en las superficies de los componentes cerámicos.
•No utilice productos abrasivos para limpiar el calefactor.
•Compruebe la luz piloto mientras está funcionando. Debería estar constantemente encendida. Si parpadea o
hay una llama amarilla, se debe revisar el calefactor para comprobar si está funcionando correctamente.
•Si debe sustituirse alguna pieza, solo debe sustituirse por una pieza del fabricante original. El uso de
piezas incorrectas o sustitutas puede ser peligroso y anulará cualquier garantía. Cuando el calefactor
no se esté utilizando, recomendamos que esté cubierto o guardado en su caja para minimizar la
acumulación de suciedad.

8
Tornillo de la
ruedecilla
Panel posterior
Panel superior
Panel lateral
izquierdo
Panel inferior
ALMACENAMIENTO:
Si decide no utilizar el calefactor durante un período de tiempo prolongado, siga las siguientes
instrucciones:
•Cierre la válvula del cilindro y desconecte el regulador del cilindro.
•Guarde el cilindro en una estancia bien ventilada lejos de materiales inflamables o
explosivos, preferiblemente fuera de su vivienda. Nunca almacene cilindros en un sótano o
ático.
•El calefactor debe almacenarse en un lugar seco y protegido del polvo (preferiblemente, guárdelo
en su embalaje original).
Diagramas de montaje:
LISTA DE EMBALAJE DE PIEZAS DE REPUESTO DENTRO DEL PAQUETE
1. PANEL SUPERIOR/PANEL TRASERO
2. 5 RUEDAS
3. TORNILLOS
4. HERRAMIENTAS DE INSTALACIÓN (DESTORNILLADOR Y LLAVE)
1.
RETIRE EL CALEFACTOR DEL
EMBALAJE Y ALCANCE EL
TORNILLO, LA RUEDECILLAS Y EL
PANEL TRASERO
2.
LOS PANELES LATERALES
IZQUIERDO Y DERECHO GIRAN
HACIA FUERA, EN UN ÁNGULO
DE 10 GRADOS; EL PANEL
INFERIOR GIRA HACIA DENTRO.
Gir
e hacia fuera
Gir
e hacia fuera
Gire hac
ia
dentro
Empujar
hacia
abajo
para
colocar
Panel inferior

9
3.
LOS PANELES
LATERALES IZQUIERDO Y
DERECHO Y EL PANEL
INFERIOR GIRAN EN UN
ÁNGULO DE 90 GRADOS.
Posición convexa
4.
HAGA COINCIDIR LA POSICIÓN
Y FIJE EL PANEL LATERAL
IZQUIERDO, EL PANEL
LATERAL DERECHO Y EL
PANEL INFERIOR.
Placa de
calibre
Ranura
5.
COLOQUE EL PANEL
SUPERIOR EN LA PARTE
SUPERIOR DEL CALEFACTOR
Y HÁGALO COINCIDIR CON
LA POSICIÓN.
6.
EMPUJE EL PANEL SUPERIOR Y SUJETE LOS
PANELES LATERALES IZQUIERDO Y DERECHO Y
EL PANEL FRONTAL.

10
Posición del tornillo
7.
FÍJELO CON EL TORNILLO COMO
INDICAN LAS FLECHAS DE LA
IMAGEN. INSTALE EL PANEL
POSTERIOR Y LAS RUEDECILLAS.
(d) Panel superior
(e) Panel frontal
(f) Panel posterior
(b) Panel derecho
(a) Panel izquierdo
(c) Panel inferior
8.
TERMINADO.

Dear User
You have made the right decision and purchased a LPG cabinet heater with full safety.
Congratulations.Your heater has been designed to give you service for many years.
For continued trouble-free and safe use of the heater , Please read the instructions provided with
this user guide carefully, and keep it handy foro the future reference.
If there is anything that you are not sure about, please contact your dealer for advice.
Keep this booklet in a safe place so that you may consult it later
After removing the packaging, make sure that the appliance is in good condition.If you have
doubts, do not use the appliance and reture to your retailer.
The packaging materials contain plastic, screws,etc. Which may be hazardous and therefore.
Sould not be left within the reach of children. This appliance is a LPG(Liquid Petroleum Gas)
heater and must not run continuously(maximum 2hrs). this appliance must be installed in
accordance with the rules in force in the country of destination.
This appliance must be installed by a competent person.
This heater should be installed in a ventilated room foro proper operation,resulting in poor
combustion if this is not te case.
Use only in a ventilated area.
The room where the appliance is installed must have sufficient air circulation for proper
ventilation and combustion. There must be a ventilation of a least 100cm² to renew the air.
This appliance must be used foro the heating of living areas only.
This apploance must not be used in cellars,underground; or iin recreational vehicles such as
caravans and camp-cars(caravans)
Do no install the appliance in apartments of tower buildings, basements, bathroonms, or in
enclosed rooms.
Do not place flammable objects(fabrics,curtains etc.) On or against the appliance.
Do not store chemicals or flammable materials or aerosols near this unit.
Do not operate this appliacne in a flammable area such as in areas where gasoline or other
flammable liquids or vapors are stored.
Heating must not be explosive products(at least 2 meters away)
The appliance must be within 1m of the walls.
The appliance requires a valid LPG hose(label on the hose) and a butane regulator suitable for
the type of gas. If accessories are not supplied with the unit, consult your local gas supplier.
It is recommended not to use the appliance inrooms with a volume of less than 15m3 or 7 to 8m ² of
surface.
Place the auxiliary heater so that the heat is directed towards the center of the room. The front
(radiation) of the appliance must be at least 2 meters from curtains, sofa, furniture or other
objects that can ignite.
Place the gas cylinder (LPG) in the compartment provided, pay attention to the hose: it must
not be twisted, smothered or in contact with a hot part.
Do not operate the appliance if the gas cylinder is not placed in its compartment.
No part of the heater should be removed.
Do not cover the unit with anything.
Do not move the device while it is in operation.
Never leave the appliance unattended.
The protective grill on this appliance is designed to prevent the risk of fire or injury from
burning and no part must be disassembled permanently.
11
ENGLISH - Instruction Manual

IT DOES NOT PROTECT TOTALLY YOUNG CHILDREN AND DISABLED PEOPLE.
Keep these people away from the device when it is operating.
In the event of a gas leak, the auxiliary heater must be switched off and the gas cylinder valve
closed by means of a wet mop / cloth
Never use a flame to check for gas leakage.
Even if your gas cylinder appears to be empty,gas may remain. Transport and store the
cylinder properly.
The appliance must not be located immediately below a socket outlet.
Do not use the heater in the immediate surroundings of a bath, a shower or a swimming pool.
Do not use this heater with a programmer, timer or any other device that switches the heater
on automatically, since a fire risk exists if the heater is covered or positioned incorrectly.
This appliance should not be used by children younger than 8 years of age and by people with
reduced physical, sensor and mental capabilities, as well as by people with insufficient
experience and knowledge provided they are supervised or instructed in safe operation of the
appliance and understand the related risk.
Children should not be allowed to play with the appliance.
Cleaning and user maintenance operations must not be carried out by children without
supervision.
Heater set-up
1. After the heater has been removed from its package, remove the back panel from inside the
back cavity.
2. Place the filled gas cylinder into the back of the heater with the valve outlet facing outwards.
3. Screw the correct regulator onto the outlet of the gas cylinder valve clockwise. Turn by hand only.
Do not use a spanner. Screw on until the nut is fully home.
4. IMPORTANT TEST for leaks:
This must be carried out in a well-ventilated area, free from any open flames or other sources of
ignition. With the regulator connected to the cylinder, turn on the gas cylinder valve 1 and 1/2
turns anti-clockwise.
Brush all hose connections, pipe connections to the gas valve, regulator connection to the
cylinder and gas cylinder valve with a 50:50 solution of detergent and water. A stream of bubbles
forming is an indication of a leak. If a leak is found, turn off the cylinder valve (clockwise),
disconnect the regulator from the gas cylinder and remove the gas cylinder to a cool, outdoor
well-ventilated area. Contact your dealer or gas supplier for assistance.
DO NOT USE THE HEATER IF A LEAK IS FOUND.
DO NOT USE A NAKED FLAME FOR LEAK TESTING.
DO NOT OPERATE ANY ELECTRICAL EQUIPMENT IN THE PRESENCE
OF A GAS LEAK.
5. After leak-testing is satisfactorily carried out, fit the rear panel onto the heater. It may be
necessary to twist the cylinder slightly to allow the regulator and hose to fit inside the back panel
without kinking the hose.
Note: The heater incorporates several safety devices that will shut down the heater in unsafe conditions.
In case of accidental flame failure, the gas heater will shut down automatically. These con-device will
turn off the heater if it is tipped over, if this activate, set the heater upright, check for obvious damage
and again wait 5-10 minutes before attempting to tore-light the heater. This device may also operate if
the heater is knocked against or bumped.
12

IN CASE OF GAS LEAK:
Immediately close the cylinder valve if gas odor is detected.
Extinguish any naked flame.
Do not try again to turn on the unit.
Do not touch any electrical switch.
Do not use a telephone in your apartment / house.
Contact the gas supplier or our after-sales service or our dealer and follow their instructions.
TECHNICAL SPECIFICATIONS:
Full gas model:
Gas: LPG (Liquid Petroleum Gas G 30
Gas pressure: 28 to 30 mbar
Category: I3 +
Nominal flow (Max): 4.2 kW - 305 g / h
Average flow: 2.8 kW - 205 g / h
Minimum flow rate: 1.6 kW - 117 g / h
3 injectors with a diameter of 0.59 mm
Ignition: piezo - electric
Safety device (ODS): 1112A
Gas Cylinder: 10 kg (Max)
Gas and electric model:
Gas: LPG (Liquid Petroleum Gas G 30
Gas pressure: 28 to 30 mbar
Category: I3 +
Nominal flow (Max): 4.2 kW - 305 g / h
Average flow: 2.8 kW - 205 g / h
Minimum flow rate: 1.6 kW - 117 g / h
3 injectors with a diameter of 0.59 mm
Ignition: piezo - electric
Safety device (ODS): 1112A
Gas Cylinder: 10 kg (Max)
Quartz heating capacity: 400/800/1200W
Valtage/Frequency: 220-240V/50-60HZ
INSTRUCTIONS FOR INSTALLATION:
Remove the appliance from its packaging.
Mount the different parts of the appliance according to the illustrations in the appendix.
Assemble the individual panels with the supplied screws.
Set the control knob to the (O) or OFF position.
Fit the gas hose with the appliance connection and tighten with a clamp.
Use a regulator with a fixed setting of 28 to 30 mbar and a flow rate of 1000 to 1500g/h.
Fit the other end of the special gas hose to the regulator outlet and tighten with a collar. The hose
must have a length of 0.50 to 1.00 mtr.
Fit the regulator on the gas cylinder (10kg) and tighten it properly.
Open the cylinder valve and check the seal with soapy water.
13

Heater Operation instructions:
Lighting instruction:
The heater can be regulated to three different settings: 1-LOW, 2-MEDIUM and 3-HIGH. Ignition mode:
piezo ignition.
• Open the valve on the heater cylinder 1 and 1/2 turns.
• Press down and turn the control knob to 1-LOW position and hold for 10 seconds.
• While still pressing down the pilot light, press once or twice on the ignition button until the pilot light (at
the bottom of the burner) ignites. Continue to hold the control knob down for 10-15 seconds
more.Release the button, and if the pilot flame goes out, repeat the above operation.
Note: when lighting a new heater for the first time, it might be necessary to hold the control knob down
for longer time in order to allow gas to flow to the pilot.
Once the heater in on at the 1-LOW setting, turning the control knob to 2-MEDIUM or 3-HIGH
positionwill light the second and third panel respectively.
To turn off the heater, turn back the control knob to the OFF position and close the cylinder valve
fully(clockwise). The heater can only be turned off by closing the cylinder valve. It can not be turned
offby the control knob.
Operating the quatz:
Operation the heater according to following procedures when electric power is use.
The electric heating system is designed with technology of infrared radiation. Even if it is used inan
unsealed and large size room, heating efficiency will be perfect.
1.Make sure plug is normally earthed. Put plug in the socket
2.Press switch to start the top quartz tube.
3.Press switch to start the other two quartz tubes.
4.Press switch and to start all quartz tubes. Heat load reaches to peak.
5.Turn all switch off after use. Remove the plug from the socket.
As shown in below Figure
Note:
To prevent too high temperature near the air-outlet grilles, it is recommended that in the use of gasand
the electric heating elements in the heater should not be used at the same time.
14

CHANGING THE CYLINDER:
Turn off the cylinder valve fully (clockwise) and allow the heater to fully cool before removing and
replacing the cylinder. Do not attempt to remove the regulator while the heater is still running.
PLACE OF GAS HEATING:
• This heater is designed to be placed on the floor and away from the walls. When using the
heater,always point it in the direction of the center of the room. Clear all combustible materials from the
vicinity of the heater.
• The appliance must be 0.5 meters away from the walls.
• The front of the unit must be clear of a minimum of 2 meters.
REPLACING THE GAS CYLINDER:
• Replacing the gas cylinder must be done in a non-flammable, well-ventilated room. The appliance is
stopped.
• Close the cylinder valve.
• Disconnect and remove the regulator from the cylinder.
• Replace the empty cylinder with a full gas cylinder, checking that the seal is in good condition and that
the hose is in good condition and is not bent or crushed or in contact with the hot surfaces of the unit.
• Gently open the cylinder valve and check for leaks (no leakage) with soapy water.
• In the event of leakage (bubbles) close the cylinder valve and eliminate leaks; If not call a qualified
technician.
VENTILATION:
Your gas heater consumes oxygen when in operation. For this reason, adequate ventilation must be
provided in the room where it is used. This ensures the elimination of the products of combustion and
allows a renewal of the air. Proper ventilation should greatly reduce the risk of condensation. The table
below shows you the proper ventilation so that the air is renewed properly
Number of Radiants
Continuously in use Room size Ventilation
Low Level High Level
1
2
3
40 cubic meters- say 4m*4m*2.5
70 cubic meters- say 7m*4m*2.5
105 cubic meters- say 8.5m*4m*2.5
40 cm ²
70 cm ²
105cm ²
40 cm ²
70 cm ²
105cm ²
15

IN THE CASE OF PROBLEMS:
The 3 most common problems associated with any gas heaters are gas leaks, gas pressure that is bad,
as well as dirt.
•Check for leaks: The origin of the leakage may originate from transport or installation. A solution of
soap and water buffered on the fittings will cause bubbles if gas leaks are present.
•Poor gas pressure: Too much gas pressure can seriously damage your appliance. Little
pressuredoes not allow your device to function properly. If the installer cannot verify the gas pressure,
consult your gas dealer.
•Dust and dirt: This heating requires a little maintenance. If the spark does not stay on or if one part is
not as bright as the other, your heater probably needs a good cleaning. Disassembly of the
thermocouple or pilot is prohibited. If necessary, please contact our after-sales service.
TECHNICAL ASSISTANCE BEFORE CALLING FOR FURTHER HELP
The heater doesn’t light:
• Check the gas cylinder to make sure that it is full.
• Check the regulator to make sure that it is properly attached and the cylinder valve is turned on.
• Check that the instructions have been followed correctly.
If this happens after the cylinder has been changed it would be due to:
• Air in the cylinder. Hold the control knob down for a longer period of time until the pilot and main
burner light. Switch to the 3-HIGH setting.
• The cylinder may have been excessively cold. Allow the cylinder to reach room temperature before
attempting to start the heater.
The heater turns off by itself:
• If the heater goes out on continuous working, repeat the operation, following the instructions faithfully.
• If it goes out soon after 30 minutes or so, it means that it is operated in a badly ventilated area. Open
a window or a door to ventilate the area and reignite.
• Avoid bumping the heater in operation. Don’t move the heater while in operation. The tip-over switch
may be activated and turn the heater off.
MAINTENANCE AND CLEANING:
• Before maintenance and cleaning, gas heater supply must be turned off, the heater should be
cold.Don’t attempt to clean the heater while it is in use.
• The heater should be checked annually by a qualified technician for safe operation and in order
todetect any faults.
• In case any faults are detected while in use, stop using the heater and contact your dealer for advice.
• Periodically clean the exterior and storage area of your heater to remove dust and fuzz build upon
thesurfaces of the ceramic components.
• Do not use abrasive products to clean the heater.
• Check the pilot light while it is operating. It should burn steadily. If it flickers or there is a yellow flame,
the heater should be checked to make sure it is properly functioning.
• In case any parts need replacement, they must be replaced only with parts from the original
manufacturer. The use of incorrect or substitute parts might be dangerous and will void any
warranty.When the heater is not in use, we recommend that it is covered, or kept in its carton to
minimize the accumulation of dirt that may occur.
16

STORAGE:
If you decide not to use the heater for an extended period of time please follow the instructions below:
• Close the cylinder valve and disconnect the regulator from the cylinder.
• Store the cylinder in a well-ventilated room away from flammable or explosive materials and
preferably outside your home. Never store cylinders in a cellar or attic.
• The heater must be stored in a dry place and protected from dust (even better,store it in its original
packaging)
Assembly diagrams:
PACKING LIST OF SPAREPART INSIDE THE PACKAGE
1. UPPER PANEL / BACK PANEL
2. 5 WHEELS
3. SCREWS
4.
INSTALL TOOLS(SCREW DRIVER AND WRENCH)
1. REMOVE THE HEATER FROM THE
PACKAGE, PICK UP THE SCREW,
CASTOR AND THE BACK PANEL.
17
Push
Down
Locate
2. LEFT SIDE AND RIGHT SIDE
PANEL TURN OUSIDE, AT A 10
DEGREE ANGLE, BOTTOM TURN
INSIDE.
Back panel
Screw of the castor
Upper panel
Left side panel
Right side panel
Bottom panel
Turn out side Turn insde
Turn out side
Bottom panel

3. LEFT SIDE, RIGHT SIDE
PANEL AND BOTTOM AT A
90 DEGREE ANGLE.
18
4. MATCH THE POSITION, FASTEN
5. PUT THE UPPER PANEL ON
THE LEFT SIDE PANEL, RIGHT
TOP OF THE HEATER, MATCH
SIDE PANEL AND BOTTOM
THE POSITION.
PANEL.
6. PUSH THE UPPER PANEL,
FASTEN THE LEFT, RIGHT
SIDE PANEL AND FRONT
PANEL.
Convex position
Gauge plate
Slot

7. FASTEN WITH THE SCREW
FOLLOWING THE ARROWS IN THE
PICTURE. INSTALL THE BACK PANEL
AND CASTOR.
19
(d)Top Panel
(e)Front Panel
(f)Back Panel
(b)Right Panel
(a)Left Panel
(c)Bottom Panel
Screw position
Screw position
8. COMPLETED.
This manual suits for next models
1
Table of contents
Languages:
Other KEKAI Stove manuals
Popular Stove manuals by other brands

Newman
Newman FLAME VIEW ST1 Installation & servicing book

LA CASTELLAMONTE
LA CASTELLAMONTE RNO 200 Instruction manual for installation, use and maintenance

Ecowood
Ecowood Pretty Installation, users and maintenance handdook

Mendip Stoves
Mendip Stoves Ashcott Operation and instruction manual

Grain
Grain Comfort Plus user manual

BioLite
BioLite CampStove 2+ Instructions & Usage