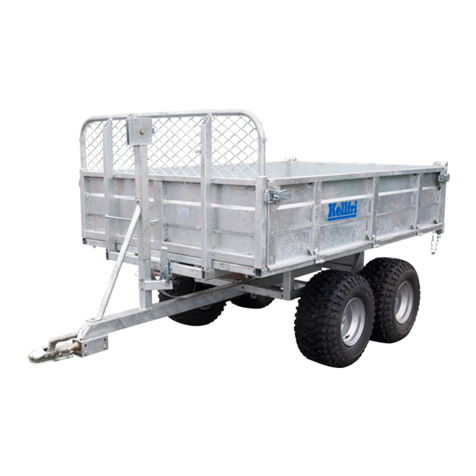
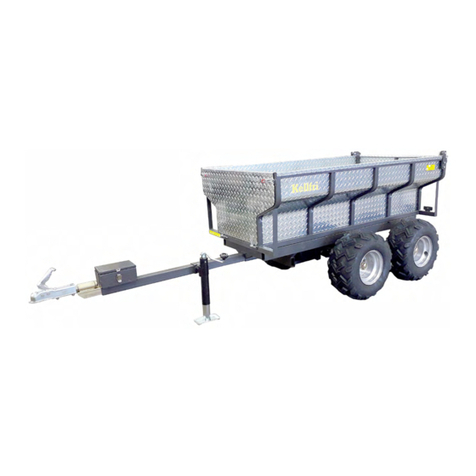
Kellfri 23-TV25 User manual

Read this manual carefully
before using the product!
Translated from the original
2018-10-23
23-TV25
TIPPING TRAILER

Table of contents
Table of contents
Introduction 3
Product details 3
Safety instructions 4
Product safety information 4
Instructions for emergency situations 5
Warning decals 5
Personal protection 6
Surroundings 6
Steps to take before use 6
Use 7
Connecting the trailer 7
After use 8
Transportation and set-up 8
Recycling 9
Maintenance and service 9
Care instructions 9
Blueprint and material list 10
Assembly instructions TV25 11 - 15
Electrical diagram for connecting electrical contacts to trailers 16
Notes 18
Complaint form 19
Warranty terms and conditions 20

Table of contents
INTRODUCTION
Thank you for choosing a product from Kellfri AB. Compliance with the general safety instruc-
tions, instruction manual and sound common sense will guarantee many years of enjoyment
using the product. Kellfri’s equipment and products are aimed at self-employed farmers who
have stringent performance demands.
PRODUCT DETAILS
Kellfri’s Tipping Trailer has opening aps and is perfect for lighter transport work.
This tipping trailer is equipped with a tipper ram and can withstand a max. load of up to
2,500kg.
The perfect trailer for gardens, parks, smaller farms and forestry work.
Equipped with opening aps, lighting, parking jack and tarpaulin attachment hooks as stan-
dard.
Warning!
The original design of the trailer must not, under any circumstances,
be modied without the approval of the manufacturer. Unauthorised
modications and/or accessories may cause life-threatening injuries or death
to users and others.
PRODUCT NO. 23TV25 TIPPING TRAILER
Load capacity 2.5 tonnes
Load volume 1.25 m3
Total length 3,700 mm
Floor dimensions, L xW 2,400 x 1,270 mm
Floor depth 400 mm
Height 1,100 mm
Max. lifting angle 45°
Tyres (Wheel size) 20 x 10 - 8 / Max. tyre pressure 1.5 bar
Max. load 2,500 kg
Operating weight 335 kg
Rear lights Standard
Opening aps Standard
Axle type Bogie
Kellfri is not liable for any modications, changes or rebuilds carried out by customers.

Table of contents
SAFETY INSTRUCTIONS
Before using the equipment or product, and for the safety of yourself and others, you must
read the safety instructions and instruction manual and understand their contents. Always
make the safety instructions and the instruction manual easily accessible to users of the equip-
ment or product. It is a good idea to read the safety instructions from time to time, both for
your own safety and that of others. If the safety instructions or instruction manual gets dam-
aged or in any other way cannot be used, new copies may be ordered from:
Kellfri AB, Munkatorpsgatan 6, SE-532 37 SKARA, Sweden. Tel.: +46 (0)511 242 50
The safety instructions can also be downloaded from the Kellfri website: www.kellfri.se
Do not use the equipment or product if you feel ill, tired or are under the inuence of alcohol.
Do not use the equipment or product if you are taking prescribed medication or drugs. Always
comply with general rules of the road and applicable rules stipulated by the Animal Welfare
Act. People under the age of 15 are not allowed to use the equipment.
Where the machine is used professionally, employers are responsible for ensuring that users of the
machine have theoretical and practical knowledge of the machine and that work is performed in
a safe manner. Stay informed by complying with work environment legislation, contact your local
work environment authority.
PRODUCT SAFETY INFORMATION
Compliance with the safety instructions requires that the tipping trailer is only used as de-
scribed in these instructions. It is the user’s responsibility to read through the instructions and
comply with them.
• The trailer must only be used with tractors that provide the correct towing capability.
• Never overload the tipping trailer. Always comply with applicable regulations to ensure
the permitted total weight for the vehicle is not exceeded. Never exceed the permitted
weight and braking load!
• Never leave the driver’s seat until the brakes on the towing vehicle have been engaged.
• The risk area is 15 metres. Only the operator is allowed to be within the risk area while
the tipping trailer is in use.
• Do not leave a loaded tipping trailer parked unsupervised. To stop the equipment moving,
in an emergency, engage the vehicle’s brake system.
• When unhitching the tipping trailer, it must be empty and on a level surface with the
trailer wheels secured using suitable brake blocks.
• Do not leave a loaded trailer parked unsupervised.
• The parking jack must always be used when carrying out maintenance and service.
• When tipping, the trailer must always be connected to the tractor.
• Always comply with applicable regulations when driving on public roads. An SMV sign
must be visible and mounted when travelling on public roads.
• Operators or others should not stand under suspended loads.
• Never permit children or inexperienced persons to drive the trailer.
• Never allow anyone to travel on the trailer whilst it is in motion. Never allow anyone to
climb up on the trailer whilst it is in motion.
• Always inspect the trailer before use. A damaged or worn tow bar eye and/or hitch must
not be used and should be replaced before the trailer can be used. Using a damaged or
worn tow bar eye and/or hitch may cause serious injuries or death to users and others, as
well as damaging the trailer and equipment.
• Exercise caution when working with equipment with hydraulic hoses as the oil under
pressure can penetrate skin. Immediately seek medical attention if this should occur.
• WARNING! When hitching, the trailer’s brake system must not be connected to the
towing vehicle’s hydraulic system. The trailer’s brake system must be connected to the
tractor’s brake outlet!
• Risk of crushing! Be careful when opening and closing the aps.
• Be extra careful if the trailer has to be moved with oor tipped (risk of tipping)! Use the
right speed; drive as slowly as possible to prevent accidents.
Table of contents
INSTRUCTIONS FOR EMERGENCY SITUATIONS
In case of emergency, call 112.
Always have a mobile phone or emergency phone available when working alone. A rst aid
kit and re extinguisher must be kept in an easily accessible location when carrying out any
work, maintenance and service.
WARNING DECALS
Make sure warning decals are always visible and clean them when necessary. Do not use a
high-pressure washer directly on the warning decal. If any of part with a decal is replaced or
the decal becomes worn or in any other way unusable, order a new set of decals.
SYMBOL EXPLANATION
Read the operating manual! Before carrying out work.
Risk zone 15 m
Risk zone 15 m
Respect the equipment’s risk zone!
WARNING! Be careful with low-hanging power lines.
Warning! Risk of crushing! - ngers/hands
Do not permit anyone to stand under suspended loads.
Warning! Do not stand under the trailer when it is lifted!
Always prop up the trailer using supports when carrying
out repairs, maintenance and service.
Warning! Oil under pressure can penetrate the skin!
Immediately seek medical attention if this should occur!
Risk child accident!
Children may not be near the trailer.
Retighten nuts, wheel nuts
and hub nuts after a few
hours of operation.
Retighten nuts, wheel nuts and hub nuts after a few hours
of operation.
The product is CE marked

Table of contents
PERSONAL PROTECTION
Always use suitable clothing and shoes. Do not wear loose clothing or jewellery while working
with the equipment or the product. Long hair should be tied up when working with equip-
ment that has moving parts.
SURROUNDINGS
Check that the work area is free from bystanders, children and objects before hitching or us-
ing the equipment. There is a risk of serious bodily harm. Be extra careful if there are children
in the vicinity of the area where the equipment or product is used or stored. Check that there
are no low-hanging electrical cables within the work area. Exercise caution when working on
slopes and close to ditches.
Always work alone with equipment or products that are made for working alone. Remove all
rubbish from your work area. Keep work areas clean. Always respect the equipment risk zone.
STEPS TO TAKE BEFORE USE
Carefully read the safety instructions and the instruction manual. Make sure that you under-
stand the safety instructions, the instruction manual and warning decals. Use common sense
when using the product and suitable personal protective equipment.
Always check the performance of the machine combination to be used. It is important that
these are in harmony and work satisfactorily together. This is done to ensure the equipment or
product work as expected, and to guarantee the safety of yourself and others.
Carry out a visual inspection of the equipment or product before use. Repair or replace dam-
aged or worn parts to reduce the risk of injury. Grease moving parts and check that all nuts and
bolts are tightened. Correct if necessary.
Learn and remember the correct working method. Beginners must work slowly until they have
learned how the machine or product works. Users/customers are responsible for ensuring us-
ers can handle the situation. If users feel that the machine is dangerous to use, it should not
be used.
Warning!
Compliance with the safety instructions requires that the product is only
used as described in these instructions. It is the user’s responsibility to read
through the instructions and comply with them.
DANGER!
Children must not be left unsupervised in the area.
Do not permit anyone to stand under suspended loads.
Warning! Keep o the machine!

Table of contents
USE
Only those who understand the safety instructions and the instruction manual may use the
equipment or product. Exercise caution and care when working with the equipment or prod-
uct and only use them in the way described in the instruction manual. There is a risk of crush-
ing when working with equipment that has moving parts. Exercise caution when working
with equipment with hydraulic hoses as oil under pressure can penetrate the skin. Immedi-
ately seek medical attention if this should occur. Always work alone with equipment that is
made for working alone. Respect the equipment’s risk zone.
• Check that the trailer is not damaged before hitching it to the vehicle; the oor must
always be completely at when hitching the trailer.
• Loads must be spread evenly across the trailer. Never exceed the permitted load weight.
• Loads sticking out must be well anchored. Ensure the load is spread evenly across the
trailer. Uneven loads can have an impact on how the towing vehicle is driven and can
cause accidents!
• All operations are performed from the driver’s seat.
• An SMV sign must be attached when travelling on public roads.
• The trailer is equipped for use on public roads. EU regulations stipulate how fast a rig with
a non-braked/braked trailer is allowed to go. Comply with these regulations. (Maximum
of 40 km/h in Sweden and 30 km/h in Norway).
• NOTE: do not disconnect the hydraulic hoses from the tractor, the tipper ram or connec-
tions when the oor is tipped.
• Check that the hitch between the trailer and towing vehicle is locked. When tipping, the
trailer must always be connected to the towing vehicle.
• Tipping must take place on a level, hard surface.
• Safety distance when tipping: 15 m radius.
• Never drive with the trailer in the tipped position. Keep an eye on the trailer, oor, aps
and load when tipping. Stop tipping if anything unexpected should happen or if there is
a risk of damage or overturning due to, for instance, strong side winds.
• Risk of crushing! Be careful when opening and closing the trailer aps!
• Be careful when lowering the oor, especially when it is loaded.
• When carrying out work under the oor, the tipper ram must be disconnected and the
oor locked in place.
CONNECTING THE TRAILER:
• Check the ball coupling on the trailer; then connect the tipping trailer to the towing
vehicle. Beware! When hitching and unhitching the trailer, there is a crushing risk due to
the force exerted on the hitch due to the upward and downward motion.
• Connect the hydraulic hose to the towing vehicle’s hydraulic system. The trailer’s brake
system must be connected to the tractor’s brake outlet!
• Operate and carefully check the movements of the trailer. Hoses must not be stretched or
rub against sharp edges, etc. Correct if necessary. Tighten leaking connections if there are
any leaks. Do not overtighten the connections. They may break if they are overtightened.
Check the air pressure in the tyres. Max. 1.5 bar
• When using a tractor with an automatic hitch system, make sure the tow bar eye is
correctly tted. Always check that the trailer is correctly connected to the tractor.

Table of contents
Warning!
Never use equipment or products that have defective safety components.
AFTER USE
• Stabilisers must always be used when unhitching the trailer.
• Ensure that the trailer is on a level surface when unhitching it.
• On slopes, place brake blocks in front of the wheels before unhitching.
• Before disconnecting the hydraulic hoses, make sure there is no pressure left in the system.
• To extend the service life of your trailer, do not park it out in the open, but under a roof.
• Wash down the trailer when required.
TRANSPORTATION AND SETUP
Check that the work area is free from bystanders, children and objects before driving o. Al-
ways observe additional caution during transport and moving. Ensure that the equipment or
product is well anchored and existing transport lashings are tted. Always position the load as
low as possible. Respect the risk zones even during transport and moving. Do not permit any-
one to walk under suspended loads when carrying out lifts. Trailers used for transport should
have brakes that work.
Always store the equipment or product on a dry surface, preferably under a roof when not in
use. Ensure that the equipment or product is stable and cannot fall over. Never permit children
to play at the storage site. Be aware of the tipping risk!
Warning!
NOTE: loading and tipping the trailer must de done on an
even surface.
Respect the trailer’s risk zone! Persons are not allowed in
the vicinity of the trailer when tipping and loading.
Most accidents occur when tipping the trailer. It is therefore important to inspect the trailer
and the hitch on the towing vehicle before use. Damaged and worn parts should be replaced.
Incorrect use can lead to serious personal injury or damage the trailer and equipment. When
tipping, the operator must sit in the driver’s seat in the towing vehicle and follow the trailer’s
movements carefully.
IMPORTANT! This can cause major damage to the trailer or lead to a serious accident if tip-
ping is not performed correctly. Make sure the hitch is correctly attached and will stay in place
during tipping.
IMPORTANT! The towing vehicle’s motor must idle when tipping. (This may vary from vehicle
to vehicle.) Always start at a low speed and tip the oor with care. Make sure the trailer is used
as required.
Remember that the driver is liable for any damage or injury.

Table of contents
RECYCLING
When scrapping, the equipment should be dismantled and transported to a designated recy-
cling station. Contact your municipality for further information.
MAINTENANCE AND SERVICE
Make sure that the equipment is stable and cannot tip over when carrying out maintenance
and service work. Disconnect the trailer from the vehicle while faults are being repaired.
Replace damaged or worn parts to reduce the risk of injuries. Only use spare parts with equal
performance to reduce the risk of injuries and breakdowns. Carry out maintenance, service
and checks in line with recommendations.
• Regularly check the condition of the rig. Retighten the wheel bolts and nuts when re-
quired. If cracks, twists, bends, gaps or fatigue are discovered, stop using the trailer and
rectify the fault. Avoid using the trailer at temperatures lower than -20°C and higher than
+30°C.
• After wheel replacement, check that the wheel nuts are tightened and retighten after a
number of miles in use. The tightening torque must not exceed 90Nm.
• Grease the wheel bearings regularly.
• Never perform welding on the tow bar eye as this may aect its durability!
• Check that all nuts and bolts are tightened after maintenance and service work.
Service Interval
Tyres Before each use Check the air pressure in the tyres. It must always
at least be the recommended air pressure
(1.2-1.5 bar)
Cables and hoses Before each use Check that all cables and hoses are intact.
Wheel nuts Perform an initial check after 2-3 hours of
operation, and subsequently 2-3 times a year.
Retighten all the wheel nuts, 90 Nm
Trailer parts Regularly, at least 3 times a year, Visually inspect any brakes tted, lights, SMV sign,
tow bar eye, bogie eye, hinges. Replace worn and
damaged parts.
Lights Before each use, check that all lights are working.
Trailer After each use Wash down with water if required.
2
3
CARE INSTRUCTIONS
1. Do not overload the tractor and trailer!
2. After wheel replacement, check that the wheel nuts
are tightened and repeat after a stable period of opera-
tion. The tightening torque must not exceed 90 Nm. Use
a torque wrench if possible.
3. Check that the bearing setting is correct to prevent
bearing play and abnormal bearing wear. The bearing
setting should preferably be too loose than too tight.
Regularly grease all wheel bearings.

Table of contents
NO. DESIGNATION
1 Wheels
2 Side
3 Bottom beam
4 Tow bar beam
5 Side beam
6 Front side
7 Tailgate
8 Support beam
9 End-to-end axle
10 Short axle
11 Pin
12 Bogie
13 Parking jack (stabiliser)
14 R-clip
15 Axle hub
16 12 Washer
17 M12 nut
18 M12 x 30 bolt
19 M12 x 120
21 R-clip
22 M10 x 25 bolt
23 10 Washer
24 M10 x 30 screw
25 M10 nut
26 Tipper ram
27 M20 nut
28 20 Washer
29 M20 x 90 bolt
30 Rear light

Table of contents
21 R-clip
22 M10 x 25 bolt
23 10 Washer
24 M10 x 30 screw
25 M10 nut
26 Tipper ram
27 M20 nut
28 20 Washer
29 M20 x 90 bolt
30 Rear light
ASSEMBLY INSTRUCTIONS TV25
Consider the following when assembling the trailer:
Due to the weight of the trailer, it is recommended that two people work together to
assemble it.
1. Check that all parts are included in the delivery.
- Chassis
- Front side
- Tailgate
- Sides (2)
- Tow bar with stabilisers
- Bogie (2)
- Wheels (4)
- Grease nipples (90°) for wheels (4)
- Stabiliser bars (2)
- Pins, bolts, nuts and washers are tted to the trailer
- Pins for tting sides to the oor (6)
- 4 pins with 2 lynch pins for front side and 2 for tailgate
- 4 bolts with washers and M10 x 60 nuts for tting the front side
- 2 L-pins for tting tailgate
- 2 axles for tting bogie
- 3 bolts for tting tow bar
- 4 wheel nuts and washers
- White reectors (2)
- Stickers
- Hitch for towing vehicle
2. Collect all the tools required to assemble the trailer.
- Angle grinder for cutting the transport frame
- Combo wrenches 9, 10, 16, 17, 18, 19
- Jack required to lift the chassis
- Rachet tool
- Size 36 socket or jack wrench
- Pliers
- Jack stands
- Screwdrivers
- Hammer
- Grease gun

Table of contents
1. The trailer is delivered packed on a steel frame. Cut around the frame using an angle grinder
to remove the trailer. Line up all the parts required for assembly, remove packing such as plas-
tic, steel bands etc. NOTE: the steel band marked in the illustration must not be cut until the
tow bar is tted. The steel band holds the frame and the chassis together.
2. Lift the trailer using a jack and support using jack stands.
WARNING for crushing risk! Make sure the trailer cannot tip or overturn when carrying out
the assembly.
3. Remove the bolts (marked in the picture) to t the tow bar.

Table of contents
4. Fit the tow bar, wind up the stabiliser completely to get the tow bar at the correct height.
Use a jack if required to get the correct height.
5. Fit the stabiliser bars to the trailer and the tow bar. Tighten all the bolts.
6. Lift the back of the trailer and support using jack stands. Remove the axles under the trailer
to t the bogie.

Table of contents
7. Fit the bogie to the trailer Insert the axle and lock with a washer and an R-clip.
Do the same on the other side of the trailer.
8. Before tting the wheels, pull the hydraulic hose through the hole and attach the electrical
cables to the chassis. Make sure the hose and the cables are not crushed or exposed to abrasion.
9. Fit the wheels to the bogie. The wheels should have angled 90 ° grease nipples to make it
easier to attach the grease gun nozzle. Replace the wheel nipples if required. Hand tighten the
wheel nuts. NOTE: the wheel nut must not be tightened too much. Grease all wheel bearings,
wipe o any excess grease and the t the hub cap.

Table of contents
10. Remove the bolts (4) on the front of the oor frame, t the front side and screw the bolts
back in place. Fit the sides (with the KELLFRI sticker on the front) and the tailgate, and lock in
place with pins.
11. Check that all bolts are tightened. The stickers and white reectors must be stuck on to
the trailer. (See illustration above for positioning.)
are attached to the
FRONT and BACK.
White reectors

Table of contents
L - Left indicator
ELECTRICAL DIAGRAM FOR CONNECTING ELECTRICAL CONTACTS TO TRAILERS
IMPORTANT! CHECK THAT ALL THE LIGHTS ARE WORKING BEFORE USING THE TRAILER.
54g - Dimmer brake light
31 - Earth
R - Right indicator
58R - Right rear light
58L - Left rear light
54 - Brake light
YELLOW BLUE
WHITE
BROWN
BLACK
GREEN
RED
OPTIONS: Increase the load volume with 23-TV25FH steel mesh extension sides.
Fitted to the trailer’s existing sides by drilling a hole in the aps and screwing them in place.
The extension sides can also be welded onto the trailer.
Weight: 100 kg
Height: 400 mm
250 mm
750 mm 750 mm
250 mm
Drill 4 Ø11 holes
and attach with M10 bolts.

Table of contents
We are grateful for your help pointing out any inaccuracies in the Kellfri product delivered to you. Before making a complaint
read Kellfris general warranty and sales conditions in our catalog as well as the enclosed User’s manual that comes with the
machine.
Please ll in the details below and attach photo and other information in order to process your request.
Buyer: Customer number:
Adress: Invoice number:
E-mail: Phone no:
Signiture: Date:
When was the product delivered? When was the product taken into
operation?
Did the product functioned as it should
upon the rst operation?
KELLFRI AB
Munkatorpsgatan 6
SE-532 37 SKARA
Phone: +46 (0)511-242 50
Fax. +46 (0)511-168 33
Web
www.kellfri.se
E-mail
Issue:: 2014-01-01
COMPLAINT FORM
Defect product / part:
Problem description:
Describe the sequence of events:
Other:
Submit Complaint form and photo to:
Kellfri AB
Division of Services : Contact Kellfri retailer
Munkatorpsgatan 6
532 37 Skara
Or e-mail service.

According to 2006/42/EC, Annex 2A
Kellfri AB
Munkatorpsgatan 6
532 37 Skara, Sweden
Declares that the machine
Name: 23-TV25
Type: Tipping trailer
Complies with all applicable provisions of the Machinery Directive 2006/42/EC.
Other equipment must meet the hardware requirements of the Directive.
EC-DECLARATION OF CONFORMITY, ORIGINAL
WARRANTY TERMS AND CONDITIONS
Validity of the warranty - Kelifri’s Warranty is valid 12 months from the date of purchase.
This warranty replaces - Compensation for spare parts after acknowledgment that the
fault lies on the material or manufacturing defects.
This guarantee do not
cover
• Labour costs
• Travel expenses
• Any modification that the buyer himself has/had made.
• Any consequential damages that occurred due to damage to the machine.
• Damage due to normal deterioration of the machine, inadequate: service,
user inexperience or use of spare parts which are not original.
• Wear parts such as hoses, seals, oils, and mechanical belts
CUSTOMER SERVICE
You are always welcome to give your feedbacks, reviews or ask us about our equipment and products.
Kellfri AB is constantly working on further developing their products and therefore reserves the right to
modify, among other things the design and appearance without further notice.
KELLFRI AB
Phone no: +46 (0)511 - 242 50
Fax: +46 (0)511 - 168 33
E-post: [email protected]
Kjell Johansson
Product Development Manager
2018-10-23
Table of contents
Other Kellfri Utility Vehicle manuals

Kellfri
Kellfri 28 VBS+ User manual

Kellfri
Kellfri 23-TV06PRO User manual

Kellfri
Kellfri 23-TV15ATV User manual

Kellfri
Kellfri 23-TV06 User manual

Kellfri
Kellfri 23-TV07PRO User manual

Kellfri
Kellfri 23-TV15ATV User manual

Kellfri
Kellfri 23-TV07PRO User manual

Kellfri
Kellfri 28 V Plus User manual

Kellfri
Kellfri 23-V10H User manual

Kellfri
Kellfri 23-VV800 User manual
Popular Utility Vehicle manuals by other brands

TILLOTSON
TILLOTSON T4 user manual

Cushman
Cushman Titan 36V Owner's manual and service guide

Bush Hog
Bush Hog Off Road Utility Vehicle 4430 Operator's manual

Motrec
Motrec E-348 Operator and maintenance manual

Yamaha
Yamaha YTF2E Owner's/operator's manual

Anderson Manufacturing
Anderson Manufacturing EC Utility Series Specification sheet