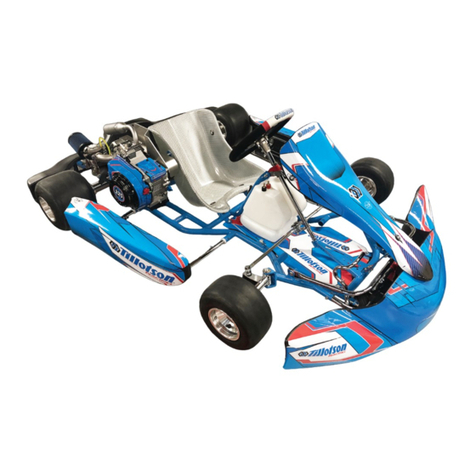
TILLOTSON T4 User manual

Tillotson T4 User Manual

Introduction:
Congratulations on purchasing a Tillotson T4 Kart package! This document has been prepared to
offer information on all items from building the new kart to maximising the performance from the
equipment. It will advise on many aspects including the following:
Kart Build
Starting the Engine
Engine Running-In Procedure
Chassis Setup
Tyre Pressures
225RS Engine
Engine Safety Precautions
Engine Specification
Engine Recommendations
Torque Values
T4 Oil / Lubricants
Carburettor Setup
Kart Preparation
Event Preparation
Necessary Tools
Competition Check List
Troubleshooting
T4 Optional Items

Kart Build:
Items Required:
Tillotson T4 Kart Package x 1
Kart Trolley x 1
Tools:
Spanners / Wrench Sizes: 8mm, 10mm(x 2), 13mm(x 2), 16mm, 17mm
Socket Sizes: 8mm, 10mm, 13mm, 22mm
Allen Key Set: 3mm, 4mm, 5mm, 6mm, 8mm
Measuring Tape
Snips
Laser Alignment Tool / Tracking Discs: For front end tracking geometry
Straight Edge Ruler / Laser Sprocket Aligner: For setting the position of sprocket so chain is aligned
Tyre Mounting Paste / Soap / WD-40: For Mounting Tyres
Impact Gun / Spark Plug Stopper: For Mounting Clutch
Compressed Air: For Popping Tyres onto Rim
Flat section of timber / any material: For Seat fitting
Fuel / Fuel Funnel
Tie Wraps
Loctite
Steps to Take:
Take all items from the T4 packaging and identify each item supplied
It is recommended to start by fitting the axle first. Mount the Rear Axle fitting the Sprocket Carrier
and Brake Disc in Correct position and ensure the axle is fitted the correct orientation so the keyway
lines up to the brake disc / sprocket carrier and not in reverse.
Measure the Rear Axle so it is centered in the chassis and tighten the 3 x grub screws in the Axle
Bearing Carriers (2 of them). It is recommended to fit using Loctite as these grub screws can come
lose on a bumpy track.
Set the position of the two Rear Hubs. Recommended Rear width with wheels mounted is 139-
140cm. Insert photo.
Mount the side and front rails followed by the KG bodywork using the bolts and springs provided.

Mount the rear Bumper Section using the bumper kit supplied.
Mount the Steering Column, Steering Wheel and Nasseau Panel brackets.
Mount the Stub Axles (Central Position) and Steering Track Rods.
Mount the front hubs and fit one large spacer on the inside as a starting position (10mm). Insert
photo
Track the front-end geometry
Mount the Brake Cable to Caliper
Mount Tyres to Wheels and pump until Popped. Set Pressures in the recommended range from 12-
18Psi.
Mount the seat. Cable Tie a flat section of Timber or another material to be underside of the frame
so the seat is resting on the timber. This makes the bottom of the seat flush and level to the lower
chassis rail. It is possible to mount it higher or slightly lower in extreme cases however it is not likely
to last long where there is large kerbs as the seat will drag along the track easily.
Factory Recommendation for a driver sizes 5ft 6” – 6ft:
From Front Chassis Rail to Front Of Seat RHS: 63cm
From Rear Axle to Crown of the Seat: 20cm
Engine Assembly:
Mount the exhaust by tightening the two 13mm Nuts first / then insert the bolt and spacer to
tighten the exhaust support arm. USE LOCTITE ON BOTH STUDS AND SUPPORT BOLT.
Mount Clutch using impact gun or with a 13mm socket with a spark plug stopper so to tighten the
clutch sufficiently.
Mount the inlet Manifold. USE LOCTITE ON BOTH STUDS.
Mount Tillotson HW Carburettor: check Jet Settings using the Tillotson Quickjet tool.
L: 2T
H: 1T
Mount Air Filter
Fill Engine with 500mL of Tillotson Racing Oil
Mount the Engine Mount to the base of the 225RS engine.
Engine Now Ready for Assembly to Kart:
Fit Engine and align the rear sprocket to the front sprocket using a Laser Alignment Tool or straight
edge ruler.
Lock the Rear Sprocket Carrier in Position and Mount the Chain.
Set the appropriate Chain Tension.

Mount the chain guard supplied and fasten via the supports provided.
Fit the outer and inner throttle cable from the chassis to the carburettor – check that the accelerator
pedal is hitting the cable stop so it will not stress the throttle cable and confirm you are reaching full
throttle from the carburettor.
Fit the fuel line from the fuel tank to the carburettor. Also it can be advised to mount an option in-
line fuel filter which are available such as the Tillotson FS-1 filter
Ensure the overflow bottle from the fuel tank has a hole drilled to vent the fuel tank.
Mount Tyres
Fit the Tillotson Racing Decals to the T4 Kart using heat gun if necessary to soften the material
Double check each nut and bolt is tight
Fill with Fuel
Proceed to Running-in Procedure for the Engine.

Starting Procedure:
It is necessary when the engine has not been running to set the choke in the On Position and pull the
starter chord until the fuel has reached inside the carburettor. Alternatively, with the air filter
removed you can cover the inlet with your hand and pull the starter chord until fuel arrives to the
venturi of the carburettor.
At this stage the engine should be ready to ignite. It may be necessary to open the throttle lever on
the carburettor to help with the engine start.
When the engine is running through the day it should not be necessary to use the choke mechanism
however if the engine is not starting it is advised to set the Choke in the On Position and pull two
times and then release again.
It is important that the spark plug is not coked up with carbon otherwise this will affect the engine
starting so it can be necessary to clean the spark plug / fit a new one to avoid starting issues when
the plug has had a lot of use.
Running-In Procedure:
The running in procedure for the engine is a very important element in the engine life. If care is not
taken when running in the engine, then it can shorten the life of the engine dramatically.
Start the engine on the Kart Stand and warm up the engine for 3-5minutes but not revving the
engine to high rpms without load.
For the first 10 minutes, drive moderately at varying speeds up to 4,500-5,000rpm. It is important to
vary the RPM for proper camshaft, piston rings and component break in.
Stop and allow the engine to cool, check that there are no fuel or oil leaks.
For the second 10 minutes, drive moderately at varying speeds from 5,500-6,200rpm. Again, stop
and allow the engine to cool.
For the final 10 minutes it is necessary to drive at race speed so increase to the maximum 6,500rpm
(Wide Open Throttle).
Once you have completed the running-in procedure it is important to change the oil. This is to
remove any metal particles which could arrive from the new components in the engine. Drain the oil
when hot so it can easily transport any particles.
Re-fill 500mL of Tillotson Racing oil into the engine and you are race ready.

Tillotson T4 Chassis
The chassis has been designed specifically to suit the Tillotson 225RS engine with user friendliness in
mind and to provide great handling performance. Only stock components will be allowed in the T4
Series in order to maintain the low cost for the category including Seat, Axle, Wheels, etc.
Adjustments can be made to the kart as per any normal category however only using the stock parts
and it is fitted with a caster camber system as standard.
In order to obtain the optimum performance from the kart in all conditions it can be necessary to
make fine adjustments to the setup of the kart throughout the race weekend. The track conditions
can change each session due to more grip being applied to the track or if weather conditions are a
factor and the track condition is not stable. There are many ways to alter the setup of the kart to
improve the performance which will be outlined. Note: the optimum kart setup for each driver will
vary due to driving style, weight distribution (height of driver / lead on kart), condition of tyres, etc.
Front-End Setup:
How to Add More Front-End Grip:
1. Widen the front width of the wheels by adding spacers. Standard setting is with one large
10mm spacer.
2. Raise front of the chassis using spacers on the stub axle.
3. Add positive caster to the front stub axle.
4. Reducing rear end grip can make the front end more positive.
5. Alter the position of the track rods on the steering column - the lower the mounting the
more positive the steering.
Conditions to add more Front End:
When there is minimal tyre wear and kart is not as positive on entry into corners.
On a tight track where the front end of the kart needs to be reactive.
On a green, damp or wet track where the track condition is not good and the kart is less
responsive / understeering.
How to Remove Front-End Grip:
1. Narrow the front width of the wheels by removing spacers.
2. Lower the front of the chassis using spacers on the stub axle.
3. Remove caster on the front stub axle.
4. Adding rear end grip can push the front end and cause understeer removing front end grip.
5. Alter the position of the track rods on the steering column - the higher the mounting the
less positive the steering.
Conditions to reduce Front End Grip:
When tyre is brand new and very positive on steering
On a wide track where less steering input is required
On a high grip track
When the driver is aggressive on turn on this style will suit less front end grip

Rear-End Setup:
How to Add more Rear-End Grip
1. Narrow the width of the rear hubs on the axle
2. Use optional seat stay from seat mounted to the bearing carrier on the axle
3. Lower the rear axle (raise the chassis) – not highly recommended only in extreme conditions
Conditions to add Rear-End Grip:
On a green track, or in damp / wet weather conditions
If you need to increase rear end traction
If front end is too reactive and the rear end is stepping out
How to Remove Rear-End Grip:
1. Widen to width of the rear hubs on the axle to the max. permitted length at 140cm
2. Raise the rear axle (lower the chassis) – not highly recommended only in extreme conditions
Recommended Seat Position:
Factory Recommendation for a driver sizes 5ft 6” – 6ft:
From Front Chassis Rail to Front Of Seat RHS: 63cm
From Rear Axle to Crown of the Seat: 20cm
It is possible to alter this seat position for a very small or larger driver so the seating position is more
comfortable. The max range recommended is from:
From Front Chassis Rail to Front Of Seat RHS: 58-66cm
Tyres Pressures:
Maxxis Sport T4 Slicks:
This tyre is a medium compound which is extremely durable. The recommended window for this
tyre is from 12Psi – 18Psi. The occasion to run lower tyre pressures would be in very hot track
conditions or for a very long race so the tyre will not drop off a lot during the race.
The time to run higher pressures will be in cold conditions or in damp weather so it is necessary to
generate as much tyre heat as fast as possible so the tyre will work.
Maxxis Sport T4 Wets:
The wet tyre is a soft rain tyre so care needs to be taken so not to overheat the tyre from new. The
recommended window can range from 10Psi – 20Psi depending on how wet the track is and also
how abrasive the surface of the track is. Here is a typical recommended guide for setting the tyre
pressures in wet conditions:

Damp: 10-12Psi
Wet: 12-16Psi
Heavy Rain: 16-20Psi
Stock Recommended T4 Kart Setup
Front Width: 10mm
Caster / Camber: Neutral
Front Chassis Height: Middle (Neutral)
Steering Track Rod Position on Steering Column: Middle
Rear Width: 139cm – 140cm
Rear Chassis Height: Middle (Neutral)
Optional: No seat stays mounted
Tyre Pressures Slicks: 12-18Psi depending on temperature and track conditions

TPP225RS Engine:
Engine Specification
F
eature:
Specification
Engine
Tillotson 225RS, 2 Valve, 4 Stroke, Single Cylinder
Fuel Type
Unleaded Petrol
Bore x Stroke (mm)
72 x 56mm
Displacement (cc) 225cc
Required Oil Capacity Min
500mL
Oil Type Tillotson Racing Oil by
XERAMIC® Kart Lubricants
(*only oil
permitted)
Cooling System Air
Carburettor
Tillotson HW
-
46A 20mm venturi
Compression Ratio 9:1
Ignition System
PVL Digital Ignition limited to 6,500rpm
Flywheel
Billet flywheel digital ignition type 31
°
Advance Timing
Connecting Rod Billet Aluminium with Bearing inserts 88mm length
Camshaft
Max Lift Race Cam with built in Compression Release
Cylinder Head 2 Valve OHV
Horsepower
15HP Peak
Engine Weight Dry
16kg
Clutch
Dry Shoe Clutch
Exhaust System
RLV
Silencer

Engine Recommendations:
Description Recommendation
Replace Engine Oil
Immediately a
fter Running
-
in engine /
otherwise required after 5hrs of running.
Ignition Coil
–
Flywheel Gap
0.75mm
Valve Clearance Gap
0.15mm
Carburettor Recommend Settings
L:
2T
+/
-
5mins
H: 1T
Carburettor Pop
-
Off Pressure
Opening: 0.
75
Bar
Closing: 0.55Bar
Using standard pop-off spring 37g
Engine Idle Speed 2,000-2,400rpm
To alter the idle speed it is necessary to adjust
the speed screw on the carburettor linked to
the throttle lever.
Replace Carburettor Kit
Required after 1
2
hours of running / or every
6months.
Maintain Valve Clearance
Required to monitor after 8hrs / or every
4
days
of running.
Clean Air Filter with Compressed Air
Required to clean
with brake cleaner
after
every 4 days of use or after every day used in
rain. Replace annually.
Clean Spark Plug
Required every
5
hours. Replace annually.
Torque Values
Description
Socket Size
Torqu
e (Nm)
Cylinder Head
12mm
37Nm
Flywheel 21mm 70Nm
Valve Locking Nut
12mm
24Nm
Valve Adjusting Screw 10mm 10Nm
Spark Plug
21mm
24Nm
Crankcase Side Cover
10mm
30Nm
Blower Housing 8mm 10Nm
Carburettor to Manifold
10mm
10Nm
Connecting Rod 1/4” 12 Point 17Nm
Exhaust to Engine
13mm
28Nm
Intake Manifold to Engine
5mm
20Nm
Oil Drain Plug
10mm
22Nm
Valve Cover
8mm
7Nm

Tillotson Racing Oils / Lubricants:
Tillotson have partnered with XERAMIC® Kart Lubricants to develop a specific oil to offer long engine
life and optimum lubrication. The oil is also unique which can detect any contamination or additives
to the oil by a method of inspecting with a UV lamp which has been developed to cut out cheating.
The 4 Stroke version of this oil will be made exclusively only for Tillotson.

Carburettor:
The Tillotson HW-46A carburettor has been developed specifically for the 225RS engine. In order to
obtain the optimum performance from the engine it is necessary to carry out some maintenance on
the carburettor at regular intervals.
Tools Required
Pop-Off Pressure Gauge Tillotson P.N. 243-504
DG1HW Kit
233-721P Needle & Seat Repair Kit – only necessary if carburettor is not sealing
Torx 15 Screwdriver
Flat Head Screwdriver
Compessed Air / Carb or Brake Cleaner
Optional: Adapter Connector Tillotson P.N.243-506P
Optional: Tillotson Quickjet Tool P.N. SA504
How to Maintain your Tillotson Carburettor:
Check the pop-off pressure of the carburettor to see if it requires a DG Kit (Half) or RK Kit
(Full including inlet needle and seat) – if it is sealing well, it is necessary to fit a DG kit only
however if it is leaking or not sealing, it is advised to fit a repair kit. For the T4 kart is
necessary to replace the kit after 6months or after 12hours of driving.

Remove the carb top and fuel filter gauze – below there are some dirt particles present
which must be blown out with compressed air or carb cleaner.
Remove the 6 Torx screws to dismantle the metering and fuel pump covers from the main
body.
Inspect the condition of the metering diaphragm to see if the convolution has lost shape and
become flat – this results in incorrect metering of fuel and inconsistent carburetion.
Inspect the fuel pump diaphragm to see if the area around the fuel pump is ‘sagging’ which
shows it has become weak and as a result will not have the same pumping capacity as when
fitted as new.
The arrow above shows some sagging in the pump area of the Pump Diaphragm on left
which is advisable to replace in this condition. The Metering Diaphragm on the right is still in
good condition however as the convolution has not lost its shape.
Inspect the inlet control lever (paddle) to see the height which is recommended to be flush
with the body as shown below:

Spray the area with carb cleaner and blow out with compressed air – make sure no dirt
particles pass into the inlet needle and seat area as this can cause the carb to leak.
If your carburettor is not sealing:
It is necessary to fit a Needle & Seat Kit (233-721P) – this can be caused by dirt in the fuel or
if a foreign material becomes lodged between the inlet needle and seat and will no longer
seal.
Having dismantled the metering and fuel pump plates, remove the screw holding in the inlet
fulcrum arm, inlet tension spring and inlet needle.

With your inlet seat tool, remove the seat and copper washer underneath.
Blow out with carb cleaner and compressed air in the inlet seat orifice.

Now insert the new copper washer and centralise.
Fit the new inlet seat and re-assemble with the new inlet needle.
Using an adaptor piece (Tillotson p.n. 243-506P) it is possible to check if the carb is now
sealing in the needle and seat before assembling fully.
Clean the metering and pump covers with carb cleaner and compressed air.
Fit the new gasket and diaphragms and tighten the Torx screw in a cross pattern direction so
the seal is uniform.

When the fuel cap is tight re-check the pop-off pressure to confirm it is sealing well.
Re-set the carb setting to your ‘home’ position; we recommend using the QuickJet tool as it
allows the user to be very precise and ensures repeatability with the setting of both high and
low speed jets.
Finally, check the butterfly position to ensure it is set to give full throttle and it is not going
under or over the correct setting.
Removing and Cleaning the Adjustment Jets:

For a complete overhaul of the carburettor it is advisable to also remove both low and high
speed jets.
Remove the rubber O Ring inside the orifice and inspect to see if there is damage – replace if
necessary.
Blow out with compressed air to ensure there is no dirt inside either low or high speed
orifice and re-assemble.

Things Not To Do To When Maintaining the Carburettor:
It is equally as important to know also the things ‘Not To Do’ when maintaining the carburetor as
damage to the body can hinder performance or even damage it beyond repair!
When tightening the carb top ensure not to torque the screw too tight; this can crack the
plastic and will cause a leak.
If the carburetor has not been re-kitted in a long time the gasket material can sometimes
stick to the body of the carburettor. This material should be removed but it is important not
to damage the surface of the body. Do not use a sharp object that will scratch or damage as
it can affect the sealing characteristic. We recommend using a very fine wire wool to remove
this material.
Ensure the inlet control lever (paddle) is flush to the body or if it is raised or lowered adjust
to only half the thickness of the lever itself. Be careful in making this adjustment – if set too
low there may be a gap between the metering diaphragm button and the lever which can
cause poor throttle response; if set too high it may contact the metering diaphragm button
and cause poor sealing at the inlet seat.
If fitting the inlet seat, ensure that the seat is on the correct thread. If it is cross-threaded it
will no longer seal and the carburettor will no longer function.
When re-seating (closing) the low and high speed jets do not use added force or force this
closed. This can increase the orifice opening and will cause a greater flow of fuel to enter the
passage meaning the optimum jet setting can change.
Other manuals for T4
1
Table of contents
Other TILLOTSON Utility Vehicle manuals
Popular Utility Vehicle manuals by other brands
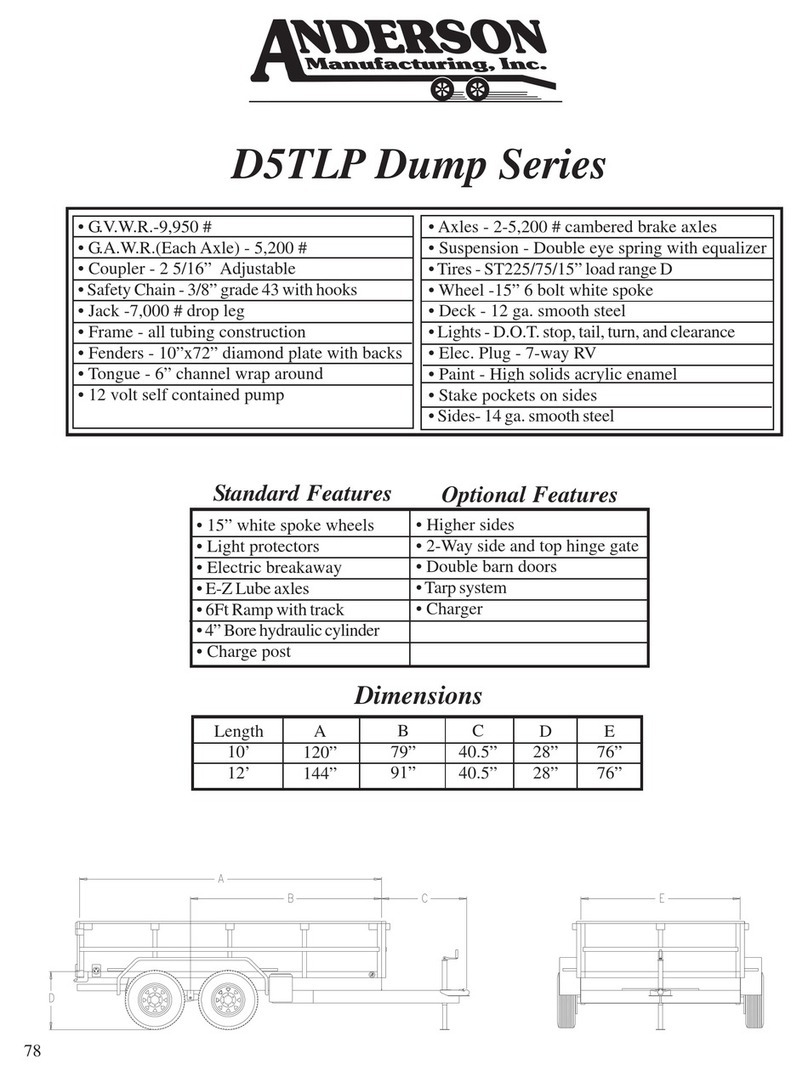
Anderson Manufacturing
Anderson Manufacturing Dump Series D5TLP specification
Taylor-Dunn
Taylor-Dunn SC-100-24 Service and Replacement Parts Manual
Snapper
Snapper UV1621BV parts manual
Cub Cadet
Cub Cadet 430 Operator's manual

Sodi
Sodi ekokart lpg user manual

Stiga
Stiga COMPACT 8211-0001-70 Instructions for use
