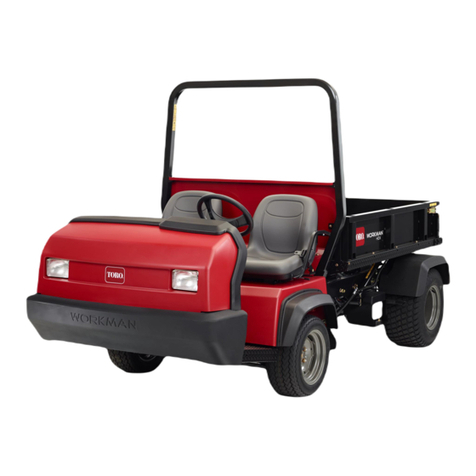
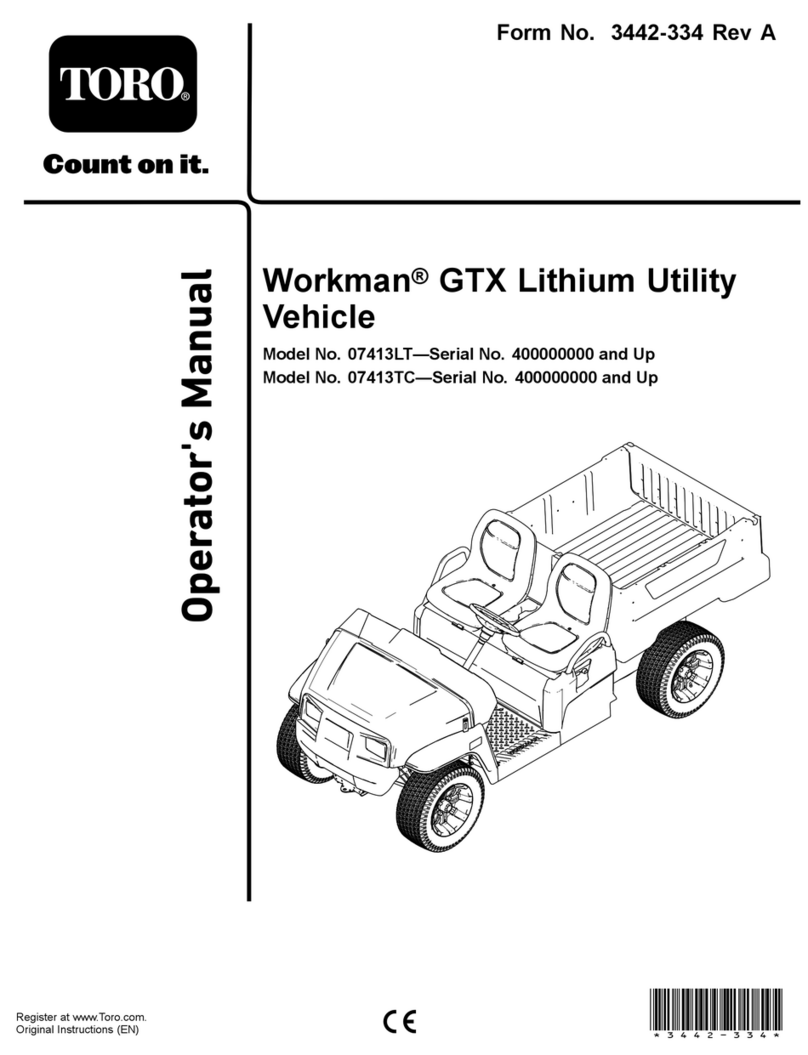
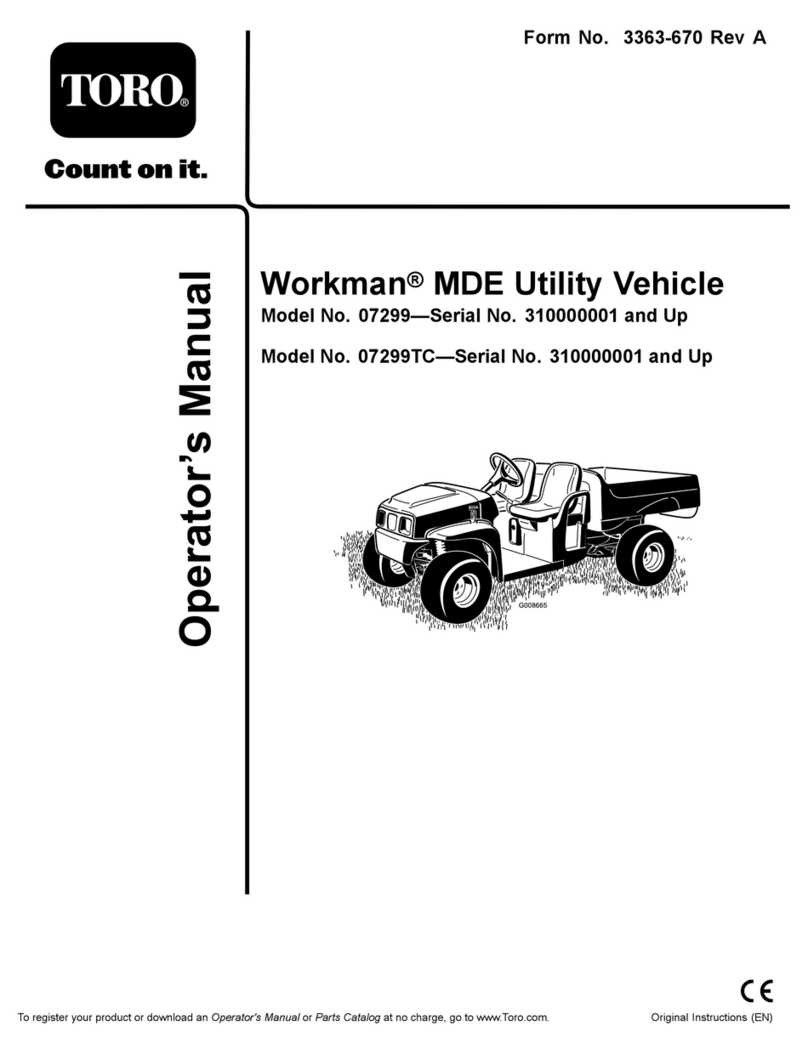
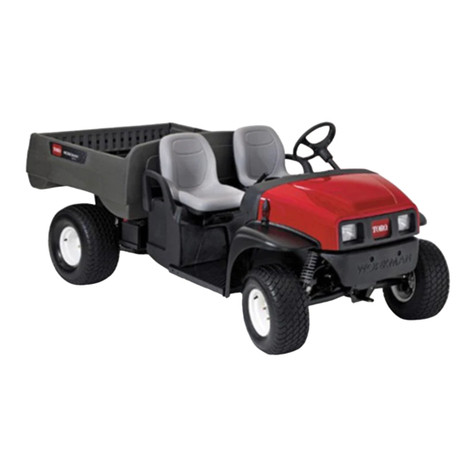
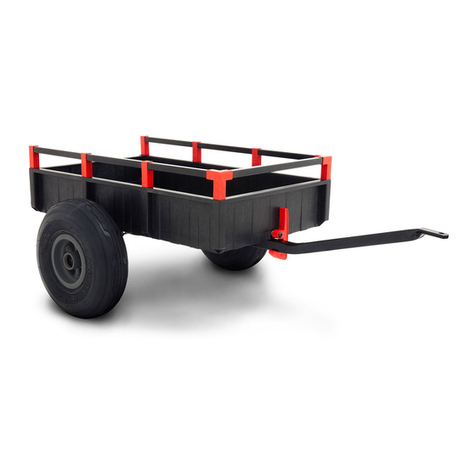
Toro Workman 07040 User manual

FormNo.3421-347RevA
Workman®GTXGasoline/Petrol
UtilityVehicle
ModelNo.07040—SerialNo.401400001andUp
ModelNo.07042—SerialNo.401400001andUp
ModelNo.07059—SerialNo.400000000andUp
ModelNo.07060—SerialNo.400000000andUp
ModelNo.07130TC—SerialNo.400000000andUp
ModelNo.07132—SerialNo.400000000andUp
ModelNo.07132TC—SerialNo.400000000andUp
ModelNo.07152—SerialNo.400000000andUp
Registeratwww.Toro.com.
OriginalInstructions(EN)*3421-347*A

ThisproductcomplieswithallrelevantEuropean
directives;fordetails,pleaseseetheseparateproduct
specicDeclarationofConformity(DOC)sheet.
WARNING
CALIFORNIA
Proposition65Warning
Thisproductcontainsachemical
orchemicalsknowntotheStateof
Californiatocausecancer,birthdefects,
orreproductiveharm.
Theengineexhaustfromthisproduct
containschemicalsknowntotheStateof
Californiatocausecancer,birthdefects,
orotherreproductiveharm.
ItisaviolationofCaliforniaPublicResourceCode
Section4442or4443touseoroperatetheengineon
anyforest-covered,brush-covered,orgrass-covered
landunlesstheengineisequippedwithaspark
arrester,asdenedinSection4442,maintainedin
effectiveworkingorderortheengineisconstructed,
equipped,andmaintainedforthepreventionofre.
Pleaserefertotheenginemanufacturer’sinformation
includedwiththemachine.
Introduction
Thisutilityvehicleisintendedtobeprimarilyused
off-highwaytotransportpeopleandmaterialloads.
Readthisinformationcarefullytolearnhowtooperate
andmaintainyourproductproperlyandtoavoid
injuryandproductdamage.Youareresponsiblefor
operatingtheproductproperlyandsafely.
YoumaycontactT orodirectlyatwww.Toro.com
forproductsafetyandoperationtrainingmaterials,
accessoryinformation,helpndingadealer,orto
registeryourproduct.
Wheneveryouneedservice,genuineToroparts,or
additionalinformation,contactanAuthorizedService
DistributororToroCustomerServiceandhavethe
modelandserialnumbersofyourproductready.
Figure1identiesthelocationofthemodelandserial
numbersontheproduct.Writethenumbersinthe
spaceprovided.
Important:Withyourmobiledevice,youcan
scantheQRcodeontheserialnumberdecal(if
equipped)toaccesswarranty,parts,andother
productinformation.
g235847
Figure1
BottomofSeatAssemblyShown
1.Modelandserial-numberlocation
ModelNo.
SerialNo.
Thismanualidentiespotentialhazardsandhas
safetymessagesidentiedbythesafety-alertsymbol
(Figure2),whichsignalsahazardthatmaycause
seriousinjuryordeathifyoudonotfollowthe
recommendedprecautions.
g000502
Figure2
Safety-alertsymbol
Thismanualuses2wordstohighlightinformation.
Importantcallsattentiontospecialmechanical
informationandNoteemphasizesgeneralinformation
worthyofspecialattention.
©2018—TheToro®Company
8111LyndaleAvenueSouth
Bloomington,MN554202
Contactusatwww.Toro.com.
PrintedintheUSA
AllRightsReserved

Contents
Safety.......................................................................4
GeneralSafety...................................................4
SafetyandInstructionalDecals..........................5
Setup........................................................................9
1InstallingtheSteeringWheel(International
ModelsOnly)...................................................9
2CheckingtheFluidLevelsandTire
Pressure.........................................................9
3BurnishingtheBrakes....................................10
4ReadingtheManualandViewingthe
SetupMaterial...............................................10
ProductOverview....................................................11
Controls...........................................................12
Specications..................................................15
Attachments/Accessories.................................15
BeforeOperation.................................................16
BeforeOperationSafety...................................16
PerformingDailyMaintenance..........................16
CheckingtheTirePressure...............................16
AddingFuel......................................................17
BreakinginaNewMachine..............................17
DuringOperation.................................................18
DuringOperationSafety...................................18
OperatingtheCargoBed..................................20
UsingtheRearCargoBedAccessory
Mount............................................................22
LoadingtheCargoBed.....................................23
StartingtheEngine...........................................23
StoppingtheMachine.......................................24
ParkingtheMachine.........................................24
AfterOperation....................................................24
AfterOperationSafety......................................24
TransportingtheMachine.................................24
TowingtheMachine..........................................25
TowingaTrailer................................................25
Maintenance...........................................................26
RecommendedMaintenanceSchedule(s)...........27
DailyMaintenanceChecklist.............................28
MaintainingtheMachineunderSpecial
OperatingConditions....................................28
Pre-MaintenanceProcedures..............................29
MaintenanceSafety..........................................29
PreparingtheMachineforMaintenance............29
LiftingtheMachine...........................................30
AccessingtheHood..........................................30
RaisingandLoweringtheSeat
Assembly......................................................31
RemovingtheSeatAssembly...........................31
InstallingtheSeatAssembly.............................31
Lubrication..........................................................32
GreasingtheMachine.......................................32
GreasingtheFrontWheelBearings..................32
EngineMaintenance...........................................35
EngineSafety...................................................35
ServicingtheAirCleaner..................................35
ServicingtheEngineOil....................................37
ServicingtheSparkPlug...................................38
AdjustingtheHigh/LowIdle..............................39
FuelSystemMaintenance...................................39
InspectingFuelLinesandConnections.............39
ReplacingtheFuelFilter...................................39
ServicingtheCarbonCanister..........................40
ElectricalSystemMaintenance...........................41
ElectricalSystemSafety...................................41
ServicingtheBattery.........................................41
ReplacingtheFuses.........................................43
MaintainingtheHeadlights...............................44
DriveSystemMaintenance..................................45
MaintainingtheTires........................................45
AdjustingtheFrontWheelAlignment................45
CheckingtheTransaxle-FluidLevel..................47
ChangingtheTransaxleFluid...........................47
CheckingtheNeutralGear-Shift
Position.........................................................47
AdjustingtheNeutralGear-Shift
Position.........................................................48
MaintainingthePrimary-DriveClutch................48
ReducingtheT opSpeed...................................49
CoolingSystemMaintenance..............................50
CleaningtheEngine-CoolingAreas..................50
BrakeMaintenance.............................................50
CheckingtheParkingBrake.............................50
AdjustingtheParkingBrake..............................50
CheckingtheBrake-FluidLevel........................51
InspectingtheBrakes.......................................51
ChangingtheBrakeFluid.................................51
BeltMaintenance................................................52
ServicingtheDriveBelt.....................................52
AdjustingtheStarter-GeneratorBelt.................52
ChassisMaintenance...........................................53
AdjustingtheCargo-BedLatches.....................53
Cleaning..............................................................53
WashingtheMachine.......................................53
Storage...................................................................54
StorageSafety..................................................54
StoringtheMachine..........................................54
3
Safety
Improperuseormaintenancebytheoperatoror
ownercanresultininjury.Toreducethepotential
forinjury,complywiththesesafetyinstructions
andalwayspayattentiontothesafety-alert
symbol(Figure2),whichmeansCaution,Warning,
orDanger—personalsafetyinstruction.Failureto
complywiththeinstructionmayresultinpersonal
injuryordeath.
Thismachinehasbeendesignedinaccordancewith
therequirementsofSAEJ2258.
GeneralSafety
Thisproductiscapableofcausingpersonalinjury.
Alwaysfollowallsafetyinstructionstoavoidserious
personalinjury.
Usingthisproductforpurposesotherthanitsintended
usecouldprovedangeroustoyouandbystanders.
•Readandunderstandthecontentsofthis
Operator’sManualbeforeyoustarttheengine.
Ensurethateveryoneusingthisproductknows
howtouseitandunderstandsthewarnings.
•Useyourfullattentionwhileoperatingthe
machine.Donotengageinanyactivitythat
causesdistractions;otherwise,injuryorproperty
damagemayoccur.
•Donotputyourhandsorfeetnearmoving
componentsofthemachine.
•Donotoperatethemachinewithoutallguards
andothersafetyprotectivedevicesinplaceand
workingonthemachine.
•Keepthemachineasafedistanceawayfrom
bystanderswhileitismoving.
•Keepchildrenoutoftheoperatingarea.Never
allowchildrentooperatethemachine.
•Stopthemachine,shutofftheengine,andremove
thekeybeforeservicingorfueling.
Improperlyusingormaintainingthismachinecan
resultininjury.Toreducethepotentialforinjury,
complywiththesesafetyinstructionsandalwayspay
attentiontothesafety-alertsymbol,whichmeans
Caution,Warning,orDanger—personalsafety
instruction.Failuretocomplywiththeseinstructions
mayresultinpersonalinjuryordeath.
Youcanndadditionalsafetyinformationwhere
neededthroughoutthismanual.
4

SafetyandInstructionalDecals
Safetydecalsandinstructionsareeasilyvisibletotheoperatorandarelocatednearanyarea
ofpotentialdanger.Replaceanydecalthatisdamagedormissing.
decal99-7345
99-7345
1.Warning—readtheOperator'sManual.
2.Hotsurface/burnhazard—stayasafedistanceawayfrom
thehotsurface.
3.Entanglementhazard,belt—stayawayfrommovingparts;
keepallguardsinplace.
4.Crushinghazard,cargobed—usetheproprodtosupport
thecargobed.
decal115-2047
115-2047
1.Warning—donottouchthehotsurface.
decal115-7739
115-7739
1.Falling,crushinghazard,bystanders—noridersonmachine
decal120-9570
120-9570
1.Warning—stayawayfrommovingparts;keepallguards
andshieldsinplace.
decal131-8410
131-8410
1.Firehazard—shutofftheenginebeforefueling.
5

decal131-8413
131-8413
CarburetorModelsOnly
1.Horn4.Engine—start
2.Off5.Tostarttheengine:1)Sit
intheoperator'sposition;
2)Disengagetheparking
brake;3)Turnthekeyto
theengineSTARTposition;
4)Engagethechoke;5)
Pressdownonthepedal.
3.On6.Toshutofftheengine:
1)Releasethepedal;2)
Engagetheparkingbrake;
3)TurnthekeytotheOFF
position;4)Removethe
key.
decal131-8414
131-8414
1.Warning—readthe
Operator'sManual.
3.Tippinghazard—drive
slowlyacrossorupslopes;
taketurnsslowly;donot
exceedspeedsof25kph
(16mph);driveslowly
whenhaulingcargo;drive
slowlyonuneventerrain.
2.Warning—receiveproper
trainingbeforeoperating
themachine.
4.Fallinghazard;severing
hazardoflimbs—donot
carrypassengersinthe
bed;donotcarryextra
passengersinbetween
theseats;donotputyour
armsorlegsoutsideofthe
machinewhileoperating.
decal131-8463
131-8463
1.Forward3.Reverse
2.Neutral
6

decal131-8492
131-8492
1.Headlight—on3.Raisethebed.
2.Headlight—off4.Lowerthebed.
decal131-8552
131-8552
1.ReadtheOperator's
Manualforfuse
information.
4.Headlights(10A)
2.Horn(30A)5.USBpowerpoint/options
(10A)
3.Mainpower(15A)6.Optionalliftkit(15A)
decal133-7148
133-7148
CarburetorModelsOnly
1.ReadtheOperator’sManualformoreinformationon
servicingthemachine.
200 LBS
91 KG
1500 LBS
680 KG
137-9984
decal137-9984
137-9984
1.Donotexceedatongue
weightof91kg(200lb).
2.Donotexceedatransport
loadof680kg(1,500lb).
7

decal138-3397
138-3397
EFIModelsOnly
1.Horn4.Engine—start
2.Off5.Tostarttheengine:1)Sit
intheoperator'sposition;
2)Disengagetheparking
brake;3)Turnthekeyto
theengineSTARTposition;
4)Pressthebrakepedal.
3.On6.Toshutofftheengine:1)
Releasethebrakepedal;
2)Engagetheparking
brake;3)Turnthekey
totheOFFposition;4)
Removethekey.
decal138-3528
138-3528
EFIModelsOnly
1.ReadtheOperator’s
Manualbeforeperforming
maintenance.
5.Sparkplugairgap
2.Engineintake/airlter6.Engineoil
3.Fuellter7.Transmissionuid
4.Sparkplug8.Brakeuid
8

Setup
LooseParts
Usethechartbelowtoverifythatallpartshavebeenshipped.
ProcedureDescriptionQty.Use
Steeringwheel1
Steeringwheelcover1
Washer(1/2inch)1
1Dustcover1
Installthesteeringwheel(International
modelsonly).
2Nopartsrequired–Checktheuidlevelsandtirepressure.
3Nopartsrequired–Burnish(break-in)thebrakes.
Operator'sManual1
Engineowner'smanual1
Registrationcard1
PredeliveryInspectionForm1
CerticateofQuality1
4
Key2
ReadtheOperator'sManualandview
thesetupmaterialbeforeoperatingthe
machine.
Note:Determinetheleftandrightsidesofthe
machinefromthenormaloperatingposition.
1
InstallingtheSteering
Wheel(InternationalModels
Only)
Partsneededforthisprocedure:
1Steeringwheel
1Steeringwheelcover
1Washer(1/2inch)
1Dustcover
Procedure
1.Ifthecoverisinstalled,removeitfromthehub
ofthesteeringwheel(Figure3).
2.Removethelocknut(1/2inch)fromthesteering
shaft(Figure3).
3.Slidethesteeringwheel,dustcover,andwasher
(1/2inch)ontothesteeringshaft(Figure3).
Note:Withthefrontwheelsstraight,orientthe
steeringwheelsothatthesmallerspokeonthe
steeringwheelisvertical.
4.Securethesteeringwheeltotheshaftwiththe
locknut(1/2inch)andtightenitto18to30N∙m
(13to22ft-lb).
5.Installthecoveronthesteeringwheel(Figure3).
g198932
Figure3
1.Steeringwheelcover4.Steeringwheel
2.Locknut(1/2inch)5.Dustcover
3.Washer(1/2inch)6.Steeringshaft
9

2
CheckingtheFluidLevels
andTirePressure
NoPartsRequired
Procedure
1.Checktheengine-oillevelbeforeandafter
yourststarttheengine;refertoCheckingthe
Engine-OilLevel(page37).
2.Checkthebrake-uidlevelbeforeyourststart
theengine;refertoCheckingtheBrake-Fluid
Level(page51).
3.Checkthetransaxle-uidlevelbeforeyou
rststarttheengine;refertoCheckingthe
Transaxle-FluidLevel(page47).
4.Checktheairpressureinthetires;referto
CheckingtheTirePressure(page16).
3

BurnishingtheBrakes
NoPartsRequired
Procedure
Toensureoptimumperformanceofthebrakesystem,
burnish(break-in)thebrakesbeforeuse.
1.Bringthemachineuptofullspeed,applythe
brakestorapidlystopthemachinewithout
lockingupthetires.
2.Repeatthisprocedure10times,waiting1minute
betweenstops,toavoidoverheatingthebrakes.
Important:Thisprocedureismosteffective
ifthemachineisloadedwith227kg(500lb).
4
ReadingtheManualand
ViewingtheSetupMaterial
Partsneededforthisprocedure:
1Operator'sManual
1Engineowner'smanual
1Registrationcard
1PredeliveryInspectionForm
1CerticateofQuality
2Key
Procedure
•ReadtheOperator'sManualandtheengine
owners'smanual.
•Fillouttheregistrationcard.
•CompletethePredeliveryInspectionForm.
•ReviewtheCerticateofQuality.
10

ProductOverview
g033925
Figure4
1.Hoodlatch3.Steeringwheel5.Towingtongue7.Cargo-bedlever
2.Shiftlever4.Cargobed6.Fuelcap
g034517
Figure5
1.Passengerhandhold3.Rearcargo-bed-accessorymount
2.Parking-brakelever4.Trailerhitch
11

Controls
Becomefamiliarwithallthecontrolsbeforeyoustarttheengineandoperatethemachine.
Note:Determinetheleftandrightsidesofthemachinefromthenormaloperatingposition.
ControlPanel
g033921
Figure6
1.Steeringwheel6.USBpowerpoint
2.Gear-shiftindicator7.Parking-brakelever
3.Gear-shiftlever8.Chokecontrol
4.Hornbutton(Internationalmodelsonly)9.Brakepedal
5.Keyswitch10.Acceleratorpedal
AcceleratorPedal
Usetheacceleratorpedal(Figure6)tovarythe
groundspeedofthemachine.Pressingdownthe
acceleratorpedalstartstheengine.Pressingthe
pedalfartherincreasesthegroundspeed.Releasing
thepedalslowsthemachine,andtheengineshutsoff.
Note:Themaximumforwardspeedis26km/h
(16mph).
BrakePedal
Usethebrakepedaltostoporslowthemachine
(Figure6).
CAUTION
Operatingamachinewithwornorincorrectly
adjustedbrakescanmayresultinpersonal
injury.
Ifthebrakepedaltravelstowithin25mm(1
inch)ofthemachineoorboard,adjustor
repairthebrakes.
12

KeySwitch
Thekeyswitchislocatedatthelower,rightcornerof
thedashpanel(Figure6).
Thekeyswitchhas3positions:OFF,ON,andSTART.
Thereare2modesofstartingthemachine;referto
StartingtheEngine(page23).
Parking-BrakeLever
Theparking-brakeleverislocatedonthecontrol
panel(Figure6).
Wheneveryoushutofftheengine,engagetheparking
braketopreventthemachinefromaccidentally
moving.Ifthemachineisparkedonasteepgrade,
ensurethatyouengagetheparkingbrake.
Toengagetheparkingbrake,pulltheparking-brake
levertowardyou(Figure7).
g033923
Figure7
1.Parking-brakelever
Todisengagetheparkingbrake,pushdownthe
buttonontopoftheparking-brakelever,pullthe
parking-brakelevertowardyoutoreleasepressure,
andthenpushtheparking-brakeleverforward(Figure
8).
g033924
Figure8
1.Parking-brakelever
ChokeControl
Thechokecontrolislocatedonthecontrolpanel.Use
thechoketohelpstartacoldenginebypullingthe
chokecontroloutward(Figure6).Aftertheengine
starts,adjustthechoketokeeptheenginerunning
smoothly.Astheenginewarmsup,pushinthechoke
controltotheOFFposition.
Gear-ShiftLeverandGear-Shift
Indicator
Thegear-shiftlevercanbesetto3positionson
thegear-shiftindicator:FORWARD,REVERSE,and
NEUTRAL(Figure9).
Note:Theenginestartsandrunsinanyofthe3
positions.
FromtheNEUTRALposition,youcanmovethe
gear-shiftleverlefttotheFORWARDpositionorright
totheREVERSEposition(Figure9).
Important:Alwaysstopthemachinebefore
changinggears.
g033922
Figure9
1.Gear-shiftindicator2.Gear-shiftlever
HornButton
InternationalModelsOnly
Thehornbuttonislocatedonthecontrolpanel(Figure
6).Pressthehornbuttontosoundthehorn.
13

LightSwitch
Thelightswitchislocatedtotheleftofthesteering
column(Figure10).Usethelightswitchtoilluminate
theheadlights.Pushthelightswitchuptoturnonthe
headlights.Pushthelightswitchdowntoturnoffthe
lights.
g033954
Figure10
1.Lightswitch2.Hourmeter
HourMeter
Thehourmeterislocatedtotherightofthelight
switch(Figure10).Usethehourmetertondoutthe
totalnumberofenginehours.Thehourmeterstartsto
functionwheneveryouturnthekeyswitchtotheON
position,STARTposition,oriftheengineisrunning.
Note:Whenthemachineisrunning,thehourmeter
blinkscontinuously,recordingusage.
USBPowerPoint
TheUSBpowerpointislocatedtotheleftofthe
parking-brakelever(Figure6).Usethepowerpoint
topowermobiledevices.
Important:WhenyouarenotusingtheUSB
powerpoint,inserttherubberplugtoprevent
damagetothepowerpoint.
FuelGauge
Thefuelgauge(Figure11)islocatedonthefueltank
inthellercap,attheleftsideofthemachine.The
gaugedisplaystheamountoffuelinthetank.
g033956
Figure11
1.Empty4.Full
2.Halffull5.Fuel-tankcap
3.Needle6.Fuelgauge
PassengerHandholds
Thepassengerhandholdsarelocatedontheoutside
ofeachseat(Figure12).
g033955
Figure12
PassengerSideShown
1.Passengerhandhold
14

Specications
Note:Specicationsanddesignaresubjecttochangewithoutnotice.
Baseweight397kg(875lb)
Ratedcapacity(onlevelground)544kg(1,200lb)total,including90.7kg(200lb)operatorand91
kg(200lb)passenger,load,accessories,andattachments
Maximumgrossvehicleweight(GVW)—onlevelground941kg(2,075lb)total,includingalloftheweightslistedabove
Maximumcargocapacity(onlevelground)363kg(800lb)total,includingrear-mountedaccessories
Maximumrearcargo-bed-accessorymountcapacity45kg(100lb)total
Tongueweight:91kg(200lb)
TowcapacityMaximumtrailerweight:680kg(1,500lb)
Overallwidth119cm(47inches)
Overalllength302cm(119inches)
Overallheight127.5cm(50.2inches)
21.6cm(8.5inches)atthefrontwithnoloadoroperator
Groundclearance14cm(5.5inches)attherearwithnoloadoroperator
Wheelbase220cm(86.6inches)
Front:119cm(47inches)
Wheeltread(centerlinetocenterline)Rear:119cm(47inches)
Inside:102cm(40inches)
CargobedlengthOutside:114.3cm(45inches)
Inside:98cm(38.5inches)
CargobedwidthOutsideofthemoldedfenders:107.3cm(42.25inches)
Cargobedheight28cm(11inches)inside
Lowidle:1,250to1,350rpm
EnginespeedHighidle:3,650to3,750rpm
Attachments/Accessories
AselectionofToroapprovedattachmentsandaccessoriesisavailableforusewiththemachinetoenhance
andexpanditscapabilities.ContactyourAuthorizedServiceDealerorDistributororgotowww.Toro.comfora
listofallapprovedattachmentsandaccessories.
15

Operation
Note:Determinetheleftandrightsidesofthe
machinefromthenormaloperatingposition.
BeforeOperation
BeforeOperationSafety
GeneralSafety
•Neverallowchildrenoruntrainedpeopleto
operateorservicethemachine.Localregulations
mayrestricttheageoftheoperator.Theowner
isresponsiblefortrainingalloperatorsand
mechanics.
•Becomefamiliarwiththesafeoperationofthe
equipment,operatorcontrols,andsafetysigns.
•Knowhowtostopthemachineandshutoffthe
enginequickly.
•Ensurethatyouandyourpassengersdonot
exceedthenumberofhandholdsequippedonthe
machine.
•Checkthatallsafetydevicesanddecalsarein
place.Repairorreplaceallsafetydevicesand
replaceallillegibleormissingdecals.Donot
operatethemachineunlesstheyarepresentand
functioningproperly.
FuelSafety
•Useextremecareinhandlingfuel.Itisammable
anditsvaporsareexplosive.
•Extinguishallcigarettes,cigars,pipes,andother
sourcesofignition.
•Useonlyanapprovedfuelcontainer.
•Donotremovethefuelcaporllthefueltank
whiletheengineisrunningorhot.
•Donotaddordrainfuelinanenclosedspace.
•Donotstorethemachineorfuelcontainerwhere
thereisanopename,spark,orpilotlight,such
asonawaterheaterorotherappliance.
•Ifyouspillfuel,donotattempttostarttheengine;
avoidcreatinganysourceofignitionuntilthefuel
vaporshavedissipated.
PerformingDaily
Maintenance
Beforestartingthemachineeachday,performthe
EachUse/DailyprocedureslistedinMaintenance
(page26).
CheckingtheTirePressure
ServiceInterval:Beforeeachuseordaily
Frontandreartiresairpressurespecication:165
to207kPa(24to30psi)
Important:Donotexceedthemaximumair
pressureindicatedonthesidewallofthetire.
Note:Theairpressureneededinthetiresis
determinedbythepayloadthatyouintendtocarry.
1.Checktheairpressureinthetires.
•Uselowerairpressureinthetiresforlighter
payloads,forlesssoilcompaction,fora
smootherride,andtominimizetiremarkson
theground.
•Usehigherairpressureinthetiresfor
carryingheavierpayloadsathigherspeeds.
2.Ifnecessary,adjusttheairpressureinthetires
byaddingorremovingairinthetires.
g001055
Figure13
16

AddingFuel
RecommendedFuel
•Forbestresults,useonlyclean,fresh(lessthan
30daysold),unleadedgasolinewithacetane
ratingof87orhigher((R+M)/2ratingmethod).
•Ethanol:Gasolinewithupto10%ethanol
(gasohol)or15%MTBE(methyltertiarybutyl
ether)byvolumeisacceptable.Ethanoland
MTBEarenotthesame.Gasolinewith15%
ethanol(E15)byvolumeisnotapprovedforuse.
Neverusegasolinethatcontainsmorethan
10%ethanolbyvolume,suchasE15(contains
15%ethanol),E20(contains20%ethanol),orE85
(containsupto85%ethanol).Usingunapproved
gasolinemaycauseperformanceproblemsand/or
enginedamagewhichmaynotbecoveredunder
warranty.
•Donotusegasolinecontainingmethanol.
•Donotstorefueleitherinthefueltankorfuel
containersoverthewinterunlessafuelstabilizer
isused.
•Donotaddoiltogasoline.
FillingtheFuelTank
Thefuel-tankcapacityisapproximately18.9L(5US
gallons).
1.Parkthemachineonalevelsurface.
2.Engagetheparkingbrake.
3.Shutofftheengineandremovethekey.
4.Cleantheareaaroundthefuel-tankcap(Figure
14).
g033956
Figure14
1.Empty4.Full
2.Halffull5.Fuel-tankcap
3.Needle6.Fuelgauge
5.Removethefuel-tankcap.
6.Fillthetanktoabout25mm(1inch)belowthe
topoftank(bottomofthellerneck).
Note:Thisspaceinthetankallowsfuelto
expand.Donotoverllthefueltank.
7.Installthefuel-tankcapsecurely.
8.Wipeupanyspilledfuel.
BreakinginaNewMachine
ServiceInterval:Aftertherst100hours—Perform
theguidelinesforbreakinginanew
machine.
Performthefollowingguidelinestoprovideproper
performanceforthemachine.
•Ensurethatthebrakesareburnished;referto3
BurnishingtheBrakes(page10).
•Checktheuidandengine-oillevelsregularly.
Remainalertforsignsthatthemachineorits
componentsareoverheating.
•Afterstartingacoldengine,letitwarmupforabout
15secondsbeforeusingthemachine.
Note:Allowmoretimefortheenginetowarmup
whenoperatingincoldtemperatures.
•Varythemachinespeedduringoperation.Avoid
faststartsandquickstops.
17

•Abreak-inoilfortheengineisnotrequired.
Originalengineoilisthesametypespeciedfor
regularoilchanges.
•RefertoMaintenance(page26)foranyspecial,
low-hourchecks.
•Checkthefrontsuspensionpositioningandadjust
it,ifnecessary;refertoAdjustingtheFrontWheel
Toe-in(page46).
DuringOperation
DuringOperationSafety
GeneralSafety
•Theowner/operatorcanpreventandisresponsible
foraccidentsthatmaycausepersonalinjuryor
propertydamage.
•Passengersshouldsitinthedesignatedseating
positionsonly.Donotcarrypassengersinthe
cargobed.Keepbystandersandpetsawayfrom
themachineduringoperation.
•Wearappropriateclothing,includingeye
protection;longpants;substantial,slip-resistant
footwear;andhearingprotection.Tiebacklong
hairanddonotwearloosejewelry.
•Donotoperatethemachinewhileill,tired,or
undertheinuenceofalcoholordrugs.
•Operatethemachineoutdoorsorina
well-ventilatedareaonly.
•Donotexceedthemaximumgrossvehicleweight
(GVW)ofthemachine.
•Useextracautionwhenoperatingthemachine
withaheavyloadinthecargobed.Theheavier
theload,themoredifcultitistoturnorstop.
•Carryingoversizedloadsinthecargobedreduces
thestabilityofthemachine.
•Carryingmaterialthatcannotbeboundtothe
machine,suchasalargetankofliquid,adversely
affectsthesteering,braking,andstabilityofthe
machine.
•Beforeyoustarttheengine,ensurethatthe
transmissionisinneutral,theparkingbrakeis
engaged,andyouareintheoperatingposition.
•Youandyourpassengersshouldremainseated
wheneverthemachineismoving.Keepyour
handsonthesteeringwheel;yourpassengers
shouldusethehandholdsprovided.Keepyour
armsandlegswithinthemachinebodyatalltimes.
•Operatethemachineonlyingoodvisibility.
Watchforholes,ruts,bumps,rocks,orother
hiddenobjects.Uneventerraincouldoverturnthe
machine.T allgrasscanhideobstacles.Usecare
whenapproachingblindcorners,shrubs,trees,or
otherobjectsthatmayobscureyourvision.
•Alwayswatchoutforandavoidlowoverhangs
suchastreelimbs,doorjambs,overhead
walkways,etc.
•Lookbehindanddownbeforereversingthe
machinetobesureofaclearpath.
•Donotdrivethemachineneardrop-offs,ditches,
orembankments.Themachinecouldsuddenly
rolloverifawheelgoesovertheedgeorifthe
edgegivesway.
•Whenusingthemachineonpublicroads,follow
alltrafcregulationsanduseanyadditional
accessoriesthatmayberequiredbylaw,suchas
lights,turnsignals,slow-movingvehicle(SMV)
signs,andothersasrequired.
•Ifthemachineevervibratesabnormally,stopthe
machineimmediately,shutofftheengine,remove
thekey,waitforallmovementtostop,andinspect
fordamage.Repairalldamagetothemachine
beforeresumingoperation.
•Carryareducedloadandreducetheground
speedofthemachinewhenoperatingonrough,
uneventerrain,andnearcurbs,holes,andother
suddenchangesinterrain.Loadsmayshift,
causingthemachinetobecomeunstable.
•Itcantakelongertostopthemachineonwet
surfacesthanondrysurfaces.T odryoutwet
brakes,driveslowlyonlevelgroundwhileputting
lightpressureonthebrakepedal.
•Suddenchangesinterrainmaymovethesteering
wheelunexpectedly,whichcouldresultinhand
andarminjuries.Reduceyourspeedandgrip
thesteeringwheellooselyaroundtheperimeter,
keepingyourthumbsoutofthewayofthesteering
wheelspokes.
•Reducethespeedwhenyouoperatethemachine
withthecargobedremoved.Operatingthe
machineathighspeedandthenquicklystopping
maycausetherearwheelstolockup,which
impairsyourcontrolofthemachine.
•Donottouchtheengine,transmission,mufer,or
mufermanifoldwhiletheengineisrunning,or
soonafteryoushutofftheengine,becausethese
areasmaybehotenoughtocauseburns.
•Donotleavearunningmachineunattended.
•Beforeleavingtheoperatingposition,dothe
following:
–Parkthemachineonlevelground.
–Engagetheparkingbrake.
–Lowerthecargobed.
–Shutofftheengineandremovethekey.
18

•Donotoperatethemachinewhenthereistherisk
oflightning.
•Useaccessoriesandattachmentsapprovedby
TheT oro®Companyonly.
Multi-PassengerSafety
•Youmustaccountfortheextrapassengers
contributingtotheoverallgrossvehicleweight
(GVW)ofthemachine.
•Ifyouhavealoadinthecargobed,ensurethat
youdonotexceedthecapacityofthemachineby
havingtoomanypassengers.
•Passengersshouldsitinthedesignatedseating
positionsonly.Donotallowpassengerstositin
thecargobed.
•Youandyourpassengersshouldremainseated
wheneverthemachineisinmotion.
•Theadditionalmachinelengthresultsinalarger
turnradius,soallowmorespacetomaneuverthe
machine.
SlopeSafety
Note:A2-postRolloverProtectionSystem(ROPS)
isavailableforthismachineasanaccessory.Usea
ROPSifyouwillworknexttodrop-offs,nearwater,
inroughterrain,oronaslope,whichcouldresultin
arollover.ContactanauthorizedT orodistributorfor
moreinformation.
Slopesareamajorfactorrelatedtoloss-of-control
andtip-overaccidents,whichcanresultinsevere
injuryordeath.
•Surveythesitetodeterminewhichslopesare
safeforoperatingthemachineandestablishyour
ownproceduresandrulesforoperatingonthose
slopes.Alwaysusecommonsenseandgood
judgmentwhenperformingthissurvey.
•Ifyoufeeluneasyoperatingthemachineona
slope,donotdoit.
•Keepallmovementonslopesslowandgradual.
Donotsuddenlychangethespeedordirectionof
themachine.
•Avoidoperatingthemachineonwetterrain.Tires
maylosetraction.Arollovercanoccurbeforethe
tireslosetraction.
•Travelstraightupanddownaslope.
•Ifyoubegintolosemomentumwhileclimbinga
slope,graduallyengagethebrakesandslowly
reversethemachinestraightdowntheslope.
•Turningwhilegoingupordownaslopecanbe
dangerous.Ifyoumustturnonaslope,doitslowly
andcautiously.
•Heavyloadsaffectstabilityonaslope.Carrya
reducedloadandreduceyourgroundspeedwhen
operatingonaslopeoriftheloadhasahigh
centerofgravity.Securetheloadtothecargobed
ofthemachinetopreventtheloadfromshifting.
Takeextracarewhenhaulingloadsthatshifteasily
(e.g.,liquids,rock,sand,etc.).
•Avoidstarting,stopping,orturningthemachine
onaslope,especiallywithaload.Stoppingwhile
goingdownaslopetakeslongerthanstopping
onlevelground.Ifyoumuststopthemachine,
avoidsuddenspeedchanges,whichcancause
themachinetotiporrollover.Donotengagethe
brakessuddenlywhenrollingrearward,asthis
maycausethemachinetooverturn.
LoadingandDumpingSafety
•Donotexceedthegrossvehicleweight(GVW)
ofthemachinewhenoperatingitwithaloadin
thecargobedand/ortowingatrailer;referto
Specications(page15).
•Distributetheloadinthecargobedevenlyto
improvethestabilityandcontrolofthemachine.
•Beforedumping,ensurethatthereisnoone
behindthemachine.
•Donotdumpaloadedcargobedwhilethe
machineissidewaysonaslope.Thechange
inweightdistributionmaycausethemachineto
overturn.
19

OperatingtheCargoBed
RaisingtheCargoBedtothe
DumpPosition
WARNING
Araisedbedcouldfallandinjurepersonsthat
areworkingbeneathit.
•Alwaysusetheproprodtoholdthebedup
beforeworkingunderthebed.
•Removeanyloadmaterialfromthebed
beforeraisingit.
WARNING
Drivingthemachinewiththecargobedraised
couldcausethemachinetotiporrolleasier.
Youcoulddamagethestructureofthecargo
bedifyouoperatethemachinewiththebed
raised.
•Operatethemachinewhenthecargobed
isdown.
•Afteremptyingthecargobed,lowerit.
CAUTION
Ifaloadisconcentratednearthebackofthe
cargobedwhenyoureleasethelatches,the
bedmayunexpectedlytipopen,injuringyou
orbystanders.
•Centerloadsinthecargobed,ifpossible.
•Holdthecargobeddownandensurethat
nooneisleaningoverthebedorstanding
behinditwhenreleasingthelatches.
•Removeallcargofromthebedbefore
liftingthebeduptoservicethemachine.
1.Pulltheleveronleft,insideofthecargobed
towardyouandliftthecargobedup(Figure15).
g034019
Figure15
1.Cargo-bedlever
2.Pulltheproprodintothedumppositiondetent
slottosecurethebedfordumping(Figure16).
g034021
Figure16
1.Servicepositiondetent
slot
3.Dumppositiondetentslot
2.Proprod
20
This manual suits for next models
7
Table of contents
Other Toro Utility Vehicle manuals

Toro
Toro Workman GTX Series User manual

Toro
Toro Workman GTX User manual

Toro
Toro TransPro 200 User manual

Toro
Toro 7220 User manual

Toro
Toro Workman 07143 User manual

Toro
Toro TX Platform User manual

Toro
Toro 07385 Workman HDX-D User manual

Toro
Toro 7363 User manual

Toro
Toro Workman 07170 User manual

Toro
Toro 7280 User manual
Popular Utility Vehicle manuals by other brands

Coleman
Coleman CK100-S Assembly instructions

Husqvarna
Husqvarna HUV4210-G owner's manual

Silver Eagle
Silver Eagle VAST-20W Operation, service & parts manual

Taylor-Dunn
Taylor-Dunn C0-426-48AC Service and Replacement Parts Manual

Cushman
Cushman SHUTTLE 4X Technician's repair and service manual

TrailMaster
TrailMaster 150XRS Setup instructions