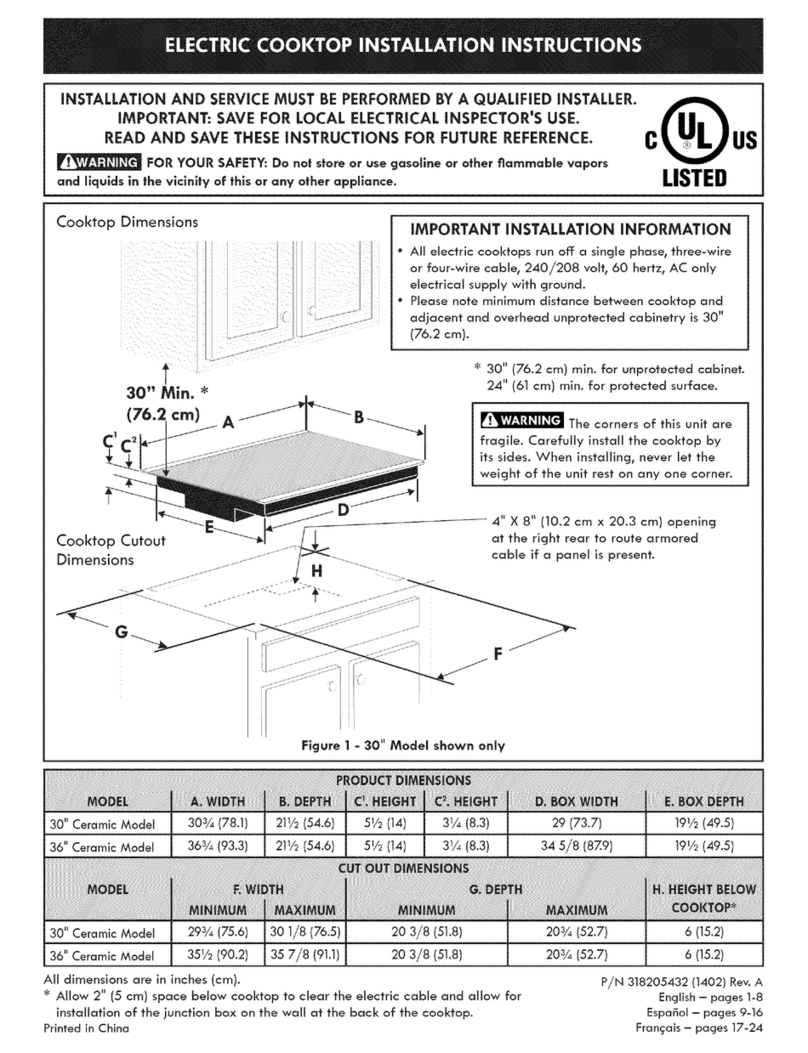
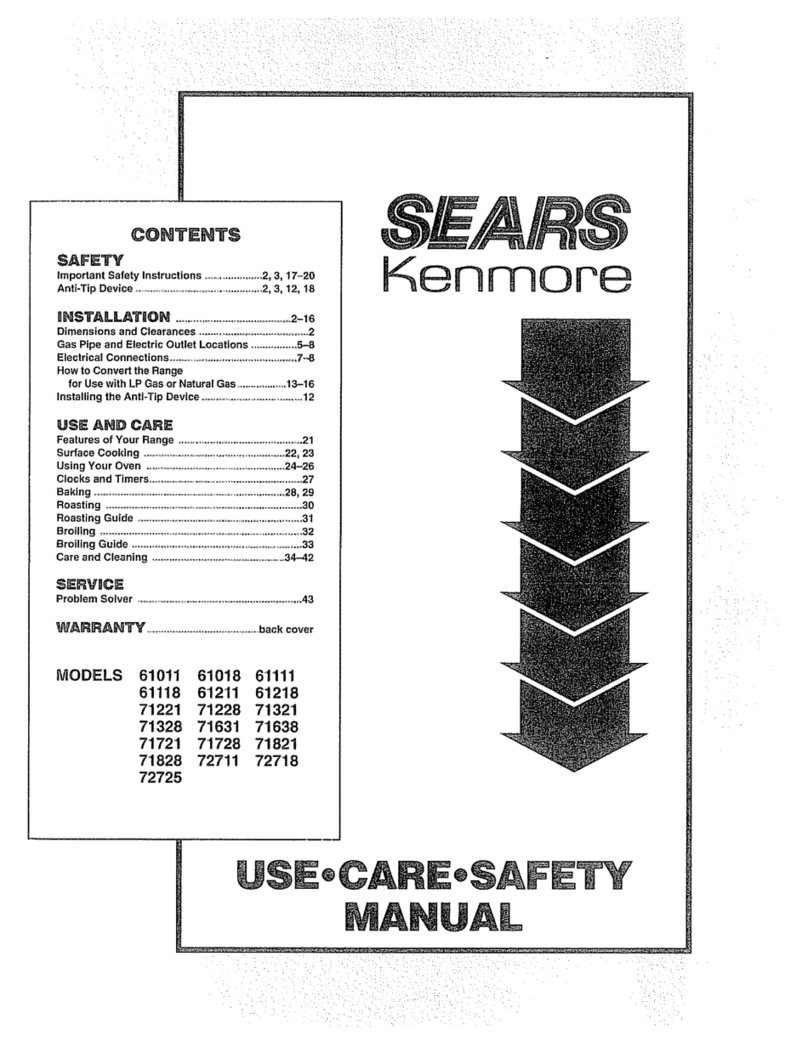
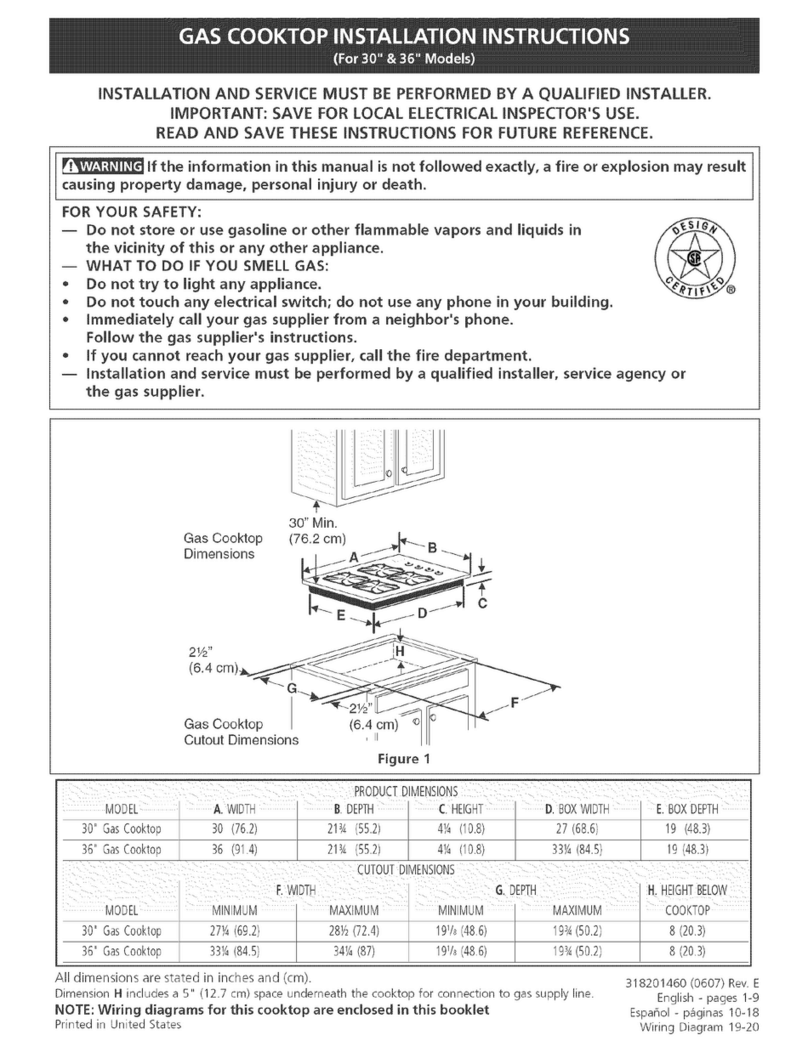
manuals.online logo
Brands
  1. Home
  2. •
  3. Brands
  4. •
  5. Kenmore
  6. •
  7. Cooktop
  8. •
  9. Kenmore Sears 95629 Installation instructions

Kenmore Sears 95629 Installation instructions

SAFETY
aHSTALLATaON
Features of Your Range ..................................................................8
Clock and Timer .....................................................................................8
TO START THINGS COOKING
Cooktop Cooking ......................................................................................9
Oven Cocking ...................................................................................9,10
Broiling ............................................................................ t 1
CLEANUNG
Self-Clean Cycle ....................................................................12,13
Cleaning Tips .....................................................................................14
Removable Parts ............................................................15,16
B_FORE CAILLDNG FOR SERVICE
..................................................................................................16,17
Thermostat Adjustments .......................................................18
WARRANTY
MODEL 95629
nm
ii::::i!i!i:'!_i_::i:i::::::::::
:?:: :: :!: :/::i ¸
/::_:__i,_::,_:_::::!::::_!:_i_::_:_i:_
i__::,__:i:_:?_:::___:_,_::i :,_
;:::};:]i:!];:_:::::•i¸¸::•:::::;
SAVE THESE IHSTRUCTIOHS
Read aH instructions before using this appliance. When using enectricaU
appliances, basic safety precautions shou]ld be fol]lo_ed, including the foil]lowing:
Teach children not to play
with range knobs or any
other part of the range.
Never leave children
alone or unattended where
a range is in use.
Never store things chil-
dren might want above a
range.
Never let anyone climb,
sit or stand on the open
door or any other part of
the range. Their weight
may make the range tip
over.
Never leave the oven door
open when you are not
watching the range.
WARNING:
To prevent accidental tip-
ping of the range, attach it
to the wall or floor by in-
stallingtheanti-tipbracket
supplied. Be sure rear leg
leveler enters slot in
bracket. 1NESAF08
_i!iii!_i_i!i_!iliii_iiii_iiiiii_i!iii_i!!ii!i!¸iiii!iiiiiii!iiiiiliililiii_iii!ii!iii!iii!i_iiiii!ii!i_iiil_iii!il!i!i!iii_iiiiiiiii!!iiiiii_ili_ililiiiiiiiii!!ii_!iiii!iiii!iiiiiii_i!_!ii_iiiii_i_iii_ili!ii_i!!!_iili!_i_iiiii_!!illi_ili_iii_iii!_i_i_ii_iiii!!iiliiili¸iiii_i!ii!_ii_¸ii_i!_i!_i!i_i_i!!ii!i¸!!i_!_iiiii!illiilili!iiii_iii!iii!!i!!!i!i!ii¸ii!iiiii!!iiiiili!iiiiiiiiliiiiii!iii!!iiiii!i_!_i_!!i!!i_i!_ii!_ii_ii!_i!_iiiii_i_ii_!!_ii_!ii_ii!i_i!_i!_!_i_!!_!_i!!_iiii_!iiiii!iiiii!iiiiii_iiiilliili
ili_ __ __ _i__i_ _ _ _i _i_s___ _ o_i_! __
!i___iii_i _ ii___a___i_c_!i_s_!!r_i__i__ _s__i_ _ i_ !
,_llwaVs keep the range area
clear and free from things that
will burn.
_ver store things in an
oven or near cooktop ele-
ments/burners. Thesethings
may catch fire and plastic
items could melt.
Never use your range for
warming or heating a
room. You could be burned or
seriously injured. Such misuse
could also cause damage to
the range.
l_ever wear loose clothing
when using your range. Such
clothing could catch fire.
Never use atowel or other bulky
cloth as a potholder. Such
cloths could catch fire on a hot
element/burner.
_ever let pot handles stick
out over the front of the
range. Turn handles insothat
they cannot be bumped
into. Keep the handles away
from other hot surface ele-
ments/burners.
Never leave cooktop elements/
burners unwatched at high heat
settings. Boilovers cause
smoking and greasy spillovers
could catch fire.
2NESAFOg-1
Keep this book for later use.
Be sure your range is Installed and grounded properly
by a qualified technician.
Choose pots and pans wlth flat bottoms, large enough
to cover the entire cooktop element. This will cut down
t!_e risk of setUng potholders or clothing on fire with an
uncovered element and waste less energy.
hi]ways use care when touching the cooktop, oven
heating elements or Inside the oven. Heating elements
could be hot enough to burn you even If they are dark In
co!or. The oven vent duct and oven door may also
become hot during range use. The glass surface of the
cooktop will retain heat after the controls are turned off.
O_gy some kinds of glass or ceramic pans can be used
for cooktop cooking. Be sure that the pan you use will
not break when heated on the cooktop elements.
P_ac_ oven racks in desired position while oven is cool.
Bfrack must be moved while oven is hot, do not let
pothoider contact hot heating element In oven.
/_'_er brolllng, always take the broiler pan out of the
range and clean it. Leftover grease In the broiler pan
can catch on fire next time you use the pan.
A_ways use dry potholders when removing pans from
_he oven or cooktop, tVlolst or damp potholders can
cause steam burns.
_h_Javs use care when opening oven door. Let hot air
and steam out before moving food.
Atlways follow cleaning instructions In this book.
A_wajs keep the range and oven clean. Food and
grease are easy to Ignite. Clean the range, oven and
vents regularly.
Do _'_o_ Use Over_ Clieaners -- No commercial oven
cleaner or oven liner protective coating of any kind
should be used in or around any part of the oven.
Cl_ea_ Only Paris Listed in Manual.
A_ways remove broiler pan and other utensils from the
oven before a self-clean cycle.
C_UT_@I_: Do no_ sltore items of _nterest _o
children in cabinets above a range or on the
ibackguard] efa range. ChiJdren climbing on a
_'a_ge _o reach 6_e_s cougd be ser_ouslly _,jured.
Allwavs keep combustible wall coverings, curtains, or
d_apes asafe distance away from your range and oven.
Airways keep dish towels, diSh cloths, potholders and
other linens a sate distance away from your range.
Never s_ore such Items on your range.
A_]ways keep the appliance area clear and free from
things that wUl burn (gasoline and other flammable
vapors and ltqulds).
Never, try to repair or replace any part of the range
unless Instructions are given In this book. All other
work should be done by a skilled technician.
Never heat unopened food containers. Pressure
buildup may make container burst and cause Injury.
Never leave jars or cans of fat or drippings on or near
the range. Never let grease build up on your range. You
can keep grease fires from starting If you clean up
grease and spills after each range use.
Never use aluminum foil to line drip bowls or oven
bottoms. Improper use of foil could start afire.
Never block free airflow through the oven vent.
Never try to move apan of hot fat, especially a deep fat
fryer. Wait until the fat has cooled.
_eve_put removable heating elements in water. Do not
put them in a dishwasher. Do not put them In the self-
clean cycle of self-cleaning ovens.
Do not cook on broken coektop. If cooktop should
break, cleaning solutions and splllovers may penetrate
the broken cooktop and create a risk of electrical shock,
Contact a qualified techniclan Immediately.
Never rub, move, or damage the door gasket on self-
cleaning ranges. The gasket Is essential fora good seal.
Only clean the gasket by soaking it with hydrogen
peroxide, as described In the self-clean section of the
manual.
Never touch surface units, heating elements, or interior
surfaces of the oven. They may be hot even though they
appear dark in color.
ill_he se_-c_eaning mode mallfu_c_ons, turn off and
disconnect the power supply. Have sep_lced by a
qualified technician.
Us_en for Fan -- Afan noise should be heard some-
time during the clean cycle. If not, call a service techni-
cian before self-cleaning again.
A_ways keep wooden utensils, plastic utensils or canned
food a safe distance away from your range.
Be sure eve_4ene In your home knows what to do in
case of fire.
For major sp_Hs -- Turn unit to LO; use dry paper
towels to wipe up major spills, and then use arazor
scraper (held In a potholder) to scrape major spills from
a hot cooking zone. DO NOT attempt further cleaning
until cooktop surface has cooled.
Some cleaners produce noxious fumes and wet cloths
could cause steam burns ff used on a hot surface.
Never try to clean utensils, cookware or removable
parts of your range during a self-clean cycle.
3NESAF22
FETY nNSTR@CTIION$ (continued)
' i, i,iii ,,
COOKTOP GREASe: FtlRE
Never pick up aframing pan.=oilnstead."
1.Turn off the element.
2.Smother the fire with a tightly fitting pan lid,
baking soda or an extinguisher.
OVe:N FliRE ==-
Do not try to move the Ipa_n_
1. Close oven door and turn controls off.
2. if fire continues, throw baking soda on the
fire, or use adry chemical foam, or halon
type extinguisher.
.................................................. H,,
P@RTANT SAFETY NOTnCE
The California Safe Drinking Water and Toxic Enforce-
ment Act requires the governor of California to publish
a list of substances known to the state to cause birth
defects or other reproductive harm and requires busi-
nesses to warn customers ofpotential exposure to such
substances.
The fiberglass Insulation in self-clean ovens gives off a
very small amount of carbon monoxide during the
cleanlng cycle. Exposure can be minimized by venting
with an open window or using a ventilation fan or hood.
° Never slide cookware across your cooktop.
. DO NOT use adish towell or sponge _o wipe up the cook_op.
They may leave a detergent film on the cooktop which may cause
discoloration when heated. Ifthls occurs, remove the discoloration
with a recommended cooktop cleaner.
° Melted materials (plastic, aluminum loll, sugar, or foods with high
sugar content) can cause damage to the cooktop, if you acciden-
tally melt anything on your cooktop, turn unit to LO; wipe hot
cooktop Immediately with several dry paper towels. Scrape off
remainder of burned material with razor scraper (held in potholder)
at 30°anglewhlleunit lswarm. Becarefulnottoburnyourself! After
cooking is complete, turn unit to OFF. DO NOT attempt further
cleaning until cooktop surface has cooled.
,DO NOT use scouring powders, plastlc, nylon or metal cleaning
pads. They may scratch the cooktop.
• DO NOT usechlorlne bleach,ammonla, hydrofluoric acid, chemical
oven cleaners, or any other kind of chemical cleaner. They may
discolor the cooktop.
4NESAF23
Fig, 1
t
18" MIN
!
30" iN
_ r_
F'
,, m
O" _
MINIMUM DIMENSIONS BETWEEN
COOKTOP AND WALLS
ABOVE COOKTOP
ACCEPTABLE ELECTR_
OUTLET AREA *_,
36" N-
i "j_'_ i L-2"
i \i 6 1/2"
\
PREFERRED ELECTRICAL
OUTLET AREA
ROUGHED-INDIMENSIONS
Fig. 2
=See Figures 1and 2 for all rough-In and spacing
dimensions. These dimensions must be met for safe
use of your range. Electricity to the range can be
disconnected at the outlet without moving the range
if the outlet is in the preferred location (remove lower
drawer).
oTo eliminate the risk of burns or fire when reaching
over hot surface elements, cabinet storage space
above the cooktop should be avolded. If cabinet
storage space Is to be provided above the cooktop,
the risk can be reduced by installing a range hood that
sticks out at least 5" beyond the front of the
cabinets. Cabinets Installed above a cooktop may be
no deeper than I3".
The range may be placed with 0" clearance (flush) at
the back wall and side walls of the range If the front
edges of the range side panels stick out beyond the
cabinet front at least 1/4". See Figure 2.
For listed over-the.range microwave ovens, the
microwave ovens can be Installed above the cooktop
as per manufactured Installation Instructions.
5. For proper cooking and baking the range must be
leveled:
a. install the oven racks (see use and care section
for Instructions).
b. Use a 1 3/8" open end wrench or an adjustable
wrench to equally back out the four leg levelers
two or three turns each.
1. Remove all tape and packaging. Be sure to remove
clear plastic film that covers some chrome parts
(around glass oven doors, slde trim) and any tape or
packaging from inside the oven.
2. Take the accessory pack out of the oven.
3. Check to be sure that no range parts have come
loose during shipping.
4. Remove the shipplng wire or tape from each of the
four cooktop elements (coil cooktop element models
only).
s.mPi.G
WIRE !
I
C_ Put a spirit level or a glass measuring cup
partially filled with water on one of the oven
racks.
d. Use the wrench to adjust the leg levelers.
LEVELER
LOWER
RANGE
SPIRIT
LEVEL
RAISE
RANGE
5NEINS08-1
L ©TRICAL CO ]NECT @N
We recommend that you have the electrical hookup of
your range done by a qualified electrician. Have the
electrician show you where your range disconnect is
located.
Call your Electric Company and ask which codes apply
in your area. if there are no codes, you must follow the
NATIONAL ELECTRICAL CODE, ANSI/NFPA NO. 70-
Latest Edition. You can get a copy by writing:
National Fire Protection Association
Battewmarch Park
Quincy, MA 02269
If you fall to wire your range In accordance with govern-
Ing codes, you may create a hazardous condition.
You must use athree-wire, single-phase AC 120/240 Volt
or 208Y/120 Volt, 60 Hertz electrical system to operate
your range.
Use #8 wire and 40 Amp fuse or circuit breaker for 120/
240 Volt and 208Y/120 Volt systems.
The range connector block is approved for copper wire
connection only. If you are connecting to aluminum
house wiring, you must use a special U.L. approved
connector for joining copper to aluminum.
THRE oWIRE CORE) CONNECTNON
1. Remove the screws on the terminal block.
2. Install the three-wire cord and the strain relief in the
hole In the strain relief bracket.
3. Connect the outer leadstotheouter terminals and the
center lead to the center termlnal.
4. Push the cord upward (to relieve strain), while
tightening the strain relief clamp.
if local codes require an ungrounded neutral:
a. Remove ground strap.
b. Fasten the white wire to the center termlnal.
c. Use groundlng terminal or lead to ground unit in
accordance with local codes.
SCREW
IGROUNDED
NEUTRAL
TERMINAL
To Make Electrical Connection:
1. Remove the junction block access cover (on range
back). See Fig. A or B. SOME MODELS will have a
one-piece wire cover shown In Fig. B. When re-
Installing one-piece wire cover, make sure that wire
does not become plnched between wire cover and
malnback.
e_
FIg. A Fig,
2. Use a 3-wire flexible cord kit marked for ranges. If
range is rated between 8,750-16,500 watts, cord must
be rated for 40 Amps-125!250 Volts. If range is rated
between 16,501-22,500 watts, then the cord must be
rated for 50 Amps-125/250 Volts. Mobile homes or
Installations where local codes do not allow grounding
through the neutral require a4-wire flexible cord. The
same cord sizing conditions described above apply.
3. When using acord rated 40 Amps, remove the next to
outermost knockout (13/8"diameter) inthe connection
plate. Likewise, when using a cord rated 50 Amps,
remove the outermost knockout (1 3/4" diameter) in
the plate.
4. Terminations shall be either closed loop terminals or
open-end spade lugs with upturned ends.
You must use a clamp or strain relief to hold the cord.
FOUR=WIRw: CORD CONNECT1]@N
1. Remove the screws on the terminal block.
2. Remove the ground screw, then remove the ground
strap.
3. Install the four-wire cord and strain relief in the hole
In the strain relief bracket.
4. Connect the red and black leadtothe outside terminals
and the white lead to the center termlnal.
5. Attach the green lead below the junction block with
the ground screw that was removed earlier (step 2).
6. Push the strain relief upward (to relieve strain), while
tightening the strain relief clamp.
SCREW
GROUND STRAP
GROUND SCREW
STRAIN
CLAMP
SCREW
STRAIN
RELIEF
CLAMP NE]NS09-1
W , NING
• ALL RANGES CAN TIP
o _NJUlRY COULD RESULT
INSTALL ANTmoT[IF
DEVICE PACKED WUTH
RANGE:
oSEE [INSTRUC:TIiOiNI$
TOOLS NEEDED: Phillips head screwdriver
1-3/8" open end or adjustable
wrench
Bracket attachesto floor or wall to hold either rightor left
rear leg leveler. If fastening to floor, be surethat screws
do not penetrate electrical wlrlng or plumblng. If this
cannot be determined, use shorter screws that will not
penetrate through flooring.
if the bracket came with your range, tt Is shipped at-
tached to the lower range back. Remove and discard
the shipping screw that holds the bracket and then
follow instructions below.
1. Decide whether the bracket will be Installed on the
right or left side of range location.
2. Ifthe bracket side ofthe range Isadjacent to acablnet,
place the bracket against back wall and cabinet as
shown In Figure 1.
if there Is no adjacent cabinet, determine where the
!ocatlon of the range side (painted outside panel) will
be. Place the bracket with Its outside edge at this
location and against back wall. See Flgure I.
3. Determ ine whether you will anchor the bracket to the
floor or wall. Fasten the bracket securely with the
screws provided. Screws are self-drilling In wood,
plywood, particle and chip board, and most metal
framlng. Ifattaching to masonry you can buy suitable
screws and anchors at hardware stores. Use a
masonry drill to drill the required holes.
4. Using the wrench, back out the four leg levelers at
least two turns. See your Installation guide for more
leveling Information before positioning range.
5. Slide the range Into place. Be sure rear leg leveler
fully engages slot in bracket. If range cannot be
moved back far enough for rear leg leveler to enter
bracket, move bracket forward as required and attach
to floor In new location.
ADJACENT CABINET OR FINAL
LOCATION OF RANGE SIDE
PANEL OUTSIDE EDGE OF
BRACKET TO BE
FLUSH WITH LEFT OR
RIGHT SIDE OF RANGE
\
WALL BEHIND
RANGE
Fig. 1
BRACKET
scREW MUST ENTER
WOOD OR METAL
WALL
PLATE
/
°-><1Fig. 2
ATTACHMENT TO WALL
7 NCINS01
COOKTOPKNOBS
¥@ IIMPORTANT:
The model and serial number of your range can be found on a tag, behind
the removable panel, on the left slde of the range front frame.
SURFACE UNIT OVEN INDICATOR OVEN CLOCK
INDICATOR LIGHT (glows when TEMPERATURE AND
oven Is turned on° KNOB TIMER OVEN SET
Turns off when KNOB
oven Is preheated°)
CLEAN INDICATOR LIGHT_
GLASS COOKTOP-------
DOOR LOCK/UNLOCK
HANDLE-.--.
SELF.CLEANING
OVEN INTERIOR'
REMOVABLE STORAGE
DRAWER
OVEN LIGHT
SWITCH
__OVEN VENT
COOKING ZONE
(28"COOKINGZONES)
HOTSURFACE
INDICATOR LIGHT
OVEN DOOR LATCH
OVEN DOOR GASKET OVEN BAKE ELEMENT
BROILER PAN AND GRID REMOVABLE OVEN DOOR
TO SET THE CLOCK:
Push In and turn CLOCK KNOB to set time. Turn knob
without pushing In to set the timer hand back to OFF.
TO SET THE TIMER:
Turn CLOCK KNOB without pushing In. To turn off
buzzer after time Is up, reset TIMER hand to OFF.
NOTE: The timer is areminder onWyand will not
control the range,
8NEFSF04
THIH@$
Before you use the cooktop for the first tlme, clean It
with cooktop cleaner. The sign near each cooktop
control knob shows which element is turned on by that
knob.
@O OO O@ OO
OO @ O OO O®
Left Left Right Right
Rear Front Rear Front
The glass cooking zones are shown by the outlines on
the glass surface of the cooktop.
To operate cooktop controls:
1. Push to turn.
2. Set on or between marks for desired heat. The
indicator light will glow when any cooking zone is
activated.
When cooking zone isactivated, coils beneath the zone
radiate heat through the glass to the utensil. The red
glow of the coils will be vlslble through the glass. It will
take the cooking zone on the surface a few moments to
heat up. The coil cycles on and off to maintain your
selected control setting.
The su_ace win retain heat after
controls have been turned off= The
HOT SURFACE _ndicator light glows
unt_g the coektop has ceoUed to a
sa_e _emperature= Th_s may take
up to an hour after use. The tem_
perature of the me_al frame around
the glass wjlt_ aqso rise during
cooktop use. Use caution when
working around your cooktop, es-
pecially if more than one cooking
zone _sen or if using _he cooktep for
an extended period of time= Be
carefug not to ge_ burned when _he
unit has not had t_me to cool after
USeo
Do not s!l_de coekware on the sur-
face as _t may scratch Ithe glass_
Never cook food directly on the glass.
You must use proper cookware. Do not
use surface as a cutting board.
For best cooklng results and energy efficient operation,
you should use pans that:
A. Have flat bottoms and straight sides.
B. Have light handles that do not tilt pans.
C. Are about the same size as the element.
NOTE: A slight odor is nonnall when z_ new
coektop is used _or _he firs_ _irneo g__s caused by
the heating of new parts and _nsu_at_ng ma_edalls
and wJlll d_sappear in a sho_ _me,
TO BA I , R@AST @R I R@ L:
Be sure that the SELECTOR knob Is turned to BAKE/
BROIL.
1. Set the OVEN CONTROL knob to desired tempera-
ture or to BROIL. For broiling the OVEN CONTROL
must be set to the stop just before the word BROIL.
2. When finished, turn OVEN CONTROL to OFF.
AUT@ ATI;C @FF:
1. Turn the SELECTOR knob to TIMED BAKE (Indicator
light will glow).
2. Push In and turn STOP TIME knob to set time when
oven will turn off. START TliVIE should show same
time as clock.
3. Set OVEN CONTROL to desired temperature.
4. When finished, turn OVEN CONTROL and SELEC-
TOR to OFF.
A TO ATt C @VF= @N AIR @FF==
1. Turn the SELECTOR to TIMED OVEN.
2. Push in and turn START TIME knob to set time when
oven will turn on.
3. Push In and turn STOP TIME knob to set time when
oven will turn off.
4. Set OVEN CONTROL to desired temperature.
5. When finished, turn OVEN CONTROL and TIMED
OVEN switch OFF.
Never let food such as dairy products,
fish, meat, poultry, etc., sit for more than
1 hour before cooking starts; when you
set your oven for a delay start. Room
temperature promotes the growth of
harmful bacteria. Be sure the oven light
Is off because heat from the bulb will
speed bacteria growth.
SELECTOR OVEN CONTROL
9NEMTC23
OVEN ©@@KINQ
When cooking a food for the first time in your new
oven, use time given on recipes as a guide.
Your new oven has been set correctly at the factory
and Is more apt to be accurate than the oven it
replaced.
After you have used your oven for awhile, ifyou feel
your oven should be hotter or cooler, you can adjust
it yourself. See THERMOSTAT ADJUSTMENTS
in this manual.
,Always follow recipe carefully.
• Measure Ingredients properly.
.Use proper pan placement.
• Place pans on the oven racks with 1" to I 1/2" of air
space on all sides of each pan. Avoid overcrowding
the oven.
Pans too close to each other, to oven walls orto the
oven bottom block the free movement of alr. Im-
proper air movement causes uneven browning and
cooking.
Cakes, cookies, muffins, and quick breads should
be baked In shiny pans wto reflect the heat
because they should have alight golden crust.
Yeast breads and pie crusts should be baked in
glass or dull (non-shiny) pans --to absorb the heat
-- because they should have a brown, crisp crust.
Be sure the underside of the pan Is shiny, too.
Darkened undersides will absorb the heat and may
cause over-browning on the bottom of your food.
f
2 cake layers
4cake layers
When baking several Items stagger pans so that no
pan Is directly above another.
Let the oven preheat thoroughly before cooking
baked products. Allow 15 minutes preheat time.
Listen for preheat notification tone and put the food
In the oven.
Opening the door too often to check food during
baking will allow heat loss and may cause poor
baking results.
Oven temperatures should be reduced 25 degrees
below recommended temperatures ifexterior of pan
is predarkened, darkened by age or oven proof
glass.
There may be some odor when the oven is first used°
This Is caused by the heating of new parts and
Insulation.
Do not cover an entire oven rack with foil. The foil
can block normal heat flow and cause poor baking
results. Do not place any foil directly abovethe bake
element. Foil used on the oven bottom under the
element may damage the oven surface; therefore, It
should not be used.
Cookies should be baked on flat cookie sheets
without sides to allow the air to circulate properly.
When recipes require preheating, have food nearby
before you open the oven door. If the oven door Is
allowed to remain open for more than a brief time,
the preheat temperature will be lost.
10 NEOVC03-2
@JLBNG
Broiling Is cooking by direct heat from the broil
burner. Tender cuts of meat or marinated meat
should be selected for broiling. For best results
steaks and chops should be at least 314"thlck.
After placing food on the broiler pan, put the pan on
the rack in the lower oven. The recommended rack
position and cooking time can be found in the chart
at rlght.
The closer the food is to the broil burner, the faster
the meat browns on the outside, yet stays red to pink
in the center. Moving the meat farther away from the
burner lets the meat cook to the center while brown-
ing outside. Side one should be cooked I - 2 minutes
longer than side two.
Your oven doors should be open to the broi0
stop position whiSe broiging, Bf 1the door is
cUosed the food will roast and not broil,
Use only the broiler pan and grid that came with your
range for broiling. They are designed for proper
drainage of fat and liquids and help prevent spatter,
smoke or fire.
Do not preheat when broiging. Preheating may
cause the thermostat to cycle the broil burner off
and on. For even broiling on both sides, start the
food on a cold pan.
Trim the outer layer of fat from steaks and chops.
Slit the fatty edges to keep the meat from curling.
For maximum juiciness, salt the first side just before
turning the meat. Salt the second side just before
serving.
. Brush chicken and fish with butter several times as
they broil. When broiling fish, grease the grid to
prevent sticking and broil with skin slde down. It is
not necessary to turn fish.
=Hover ileave asoiled broiler pan in the range.
Grease In the pan may smoke or burn the next time
the oven is used.
=Be sure you know the correct procedure for
putting out agrease fire. See the section on
safety=
Do not cover the entire broiSer
grid with foil Poor drainage of
hot fat may cause abroiller fire.
fir atth'e starts_ cgose the oven
door and turn controUs o_, Ill
fire continues, throw baking
soda on the fire. De no_ put
water an _he fh'e.
PO$1TIONiIN@ I P OBLI -R PAN
iRack
I Position To_a!{ Thee
Food 14 = Highest (minu_es)
It= Lowest
Steak- 1" Thick
Rare
Medium
Well Done
Ground Beef Patties
Medium - 1" Thick
Medium - 1/2" Thick
Lamb Chops - 1" Thick
49-11
3 13-15
3 21-23
3 16_18
4 7-9
3 18-21
Pork Chops- 1" Thick 3 27-29
Pork Chops -1/2" Thick 3 16-18
Ham Slice -1/2" Thick 3 11-12
Fish (Fillets) 3 11-13
Chicken (Pieces) 2 45-55
Frankfurters 3 8-11
Bacon 3. 9-11
This chart Is a general guide. The size, weight, thick-
ness, and starting temperature of the food, as well as
your own personal preference, will affect the cooking
time. Times in the chart are based on the food being at
refrigerator temperature.
11 NEBRL03-1
THE $ELFo©L H CYCLE
BEFORE A CLEAN YCLE
1. Remove the broil pan and grid, oven racks, all utensils
and any loll that may be in the oven. Do not try to
clean utensils or any other objects In the oven during
a self-clean cycle. Uf oven racks are Ueft in the
range during a cllean cyclie, they will darken,
lose their _uster and become hard to slide. If
you choose to leave the racks in the oven, you can
polish the edges of the racks with steel wool and
apply a small amount of vegetable oll to the rack
edges after the self-clean cycle. This will make the
racks easier to slide.
2. Soilon the oven front frame and the door lineroutslde
the door seal and the front edge of the oven cavity
(about 1" Into the oven) will not be cleaned during a
clean cycle (see illustration below). Clean these
areas by hand before starting a clean cycle.
Use hot water with a soap-filled steel wool pad, then
rinse well.
No matter how stubborn the stain, never use harsh
abrasive cleaners. They could permanently damage
the enamel surface. We recommend a cleanser such
as 'Soft Scrub®' brand or a slmilar cleaning product
to keep white surfaces looking clean and new. After
cleaning, rinse well with a vinegar and water mtxture.
This will help prevent a brown resldue from formlng
when the oven Is heated. Buff these areas dry with a
dry cloth.
DOOF
"DOOR LINER
3. Wipe up heavy splllovers on the oven bottom. Too
much soll may cause smoking during the clean cycle.
4. Clean the door seal by uslng a clean sponge to soak
the soiled area with hydrogen peroxide. Repeated
soaking may be needed depending on the amount of
soil Frequent cleaning will help prevent excessive
soil buildup. Do not rubthe doorseal. The fiberglass
material of the seal has an extremely low resistance
to abrasion. An Intact and well flttlng oven door seal
Is essential for energy efficient oven operation and
good baking results. If you notice the seal becoming
worn, frayed or damaged in any way or If it has
become displaced on the door, you should replace
the seal.
AFTER A CILI AN CYCLE
Aftera clean cycle, you may notice some white ash in the
oven. Just wipe It up with a damp cloth.
If white spots remain, remove them with asoap-filled
steel wool pad. Be sure to rinse thoroughly with a
vinegar and water mixture. These deposits are usually
a salt residue that cannot be removed by the clean cycle.
12
If the oven Is not clean after one clean cycle, the cycle
may be repeated.
QUESTIONS AND ANSWERS
Q. Ifmy oven CLOCK Is not working, can Istill self-clean
my oven?
A. No. Your CLOCK isused to program the oven to start
and stop the self-cleaning cycle.
Q. Can I use commercial oven cleaners on any part of
my self-cleaning oven?
A. No cleaners or coatings should be used on or around
any part of this oven.
a.
A.
a.
A.
Q.
A.
a_
A.
a.
A.
Can !clean the woven gasket around the oven door?
You can soak Itwith hydrogen peroxide as explained
In the Cleaning Tips section of this manual. Be
careful not to rub, move, or damage the gasket.
Is it normal to hear "crackling sound" during clean-
ing?
Yes. This is the metal heating and cooling.
Why do I have ash left In my oven after cleaning?
Some types of soil will leave a deposit. It can be
removed with adamp sponge or cloth.
What should Ido if excessive smoking occurs during
cleaning?
This Is caused by excessive soil and you should turn
STOP TIME knob to the current time-of-day. Open
windows to rid room of smoke. Allow the oven to
cool for at least one hour before opening the door.
Wtpe up excess soil and reset the clean cycle.
Should there be any odor during the cleaning?
Yes, there may be a slight odor during the first few
cleanings. Failure to wipe out excessive soil might
also cause an odor when cleaning.
NESCL16
SELECTOR OVEN CONTROL
Fig. 1
Fig. 2
For your safety,the oven door cannot be unlocked
while the oven Is at cleaning temperature, After
a clean cycle, the door cannot be unlocked until
the temperature has dropped to a safe le_iel(about
30 minutes).
=to SET A CLEAN CYCLE:
Recommended Cleaning Times:
Llght Soil ........................................... 1-1/2 hours
Moderate Soil .................................... 2-1/2 hours
Heavy Soil .......................................... 3-1/2 hours
1. Set START TIME knob to the present time of day.
2. Set the STOP TIME knob to the time of day when you
want the clean cycle to end.
Note: The oven wSU not un,ock unroll the
temperature has dropped to a safe level]; about
30 minutes after the stop t_me.
3. Turn SELECTOR to CLEAN.
4. Turn OVEN CONTROL to CLEAN. Turn the knob all
the way until it stops.
5. Slide the door unlock handle all the way to the right
to lock the door. You may need to press on the door
slightly to get it to lock.
TO UNTERRUPT A CLEAH CYCLE:
1. Turn STOP TIME knob to the current time of day.
2. Wait about 30 minutes.
Do not force the door lock handle°
3. Turn SELECTOR and OVEN CONTROL to OFF.
WHEN ACLEAN CVCLE IS FINISHE :
1. Stop time will be the same as the time of day.
2. Wait about 30 minutes.
3, Turn SELECTOR and OVEN CONTROL to OFF.
TO SET A DELAYED CLE tN
CYCLE:
1. Set START TIME knob to time-of-day when you want
cleaning to begin.
2. Set STOP TIME knob to the time-of-day when you
want the clean cycle to end.
3. Turn OVEN SELECTOR and OVEN CONTROL to
Clean.
4. Slide door handle all the way to the right to lock the
door. You may need to press on the door slightly to
get It to lock,
The surface of the glass may be hot after
aself-clean cycle. Use caution when
touching the surface, oven door, oven
vent opening, crevices around the oven
door, and metal trim parts inside the
oven door.
13 NESCL14-1
©LEANING TIPS
On the following pages, all removable parts on your range are shown. Refer to those pages when cleaning your
range.
Warm water, a mild detergent and a soft cloth are safe to use on all cleanable parts of your range. Do not use metal
scouring pads, except where recommended.
............ PART
Controlpaneland
knobs
Glass
Oven Interior
CL_E,AN,NG MAT_R,ALS ............ REMARKS
Detergent, warm water, soft cloth Do not use abrasive cleaners. Knobs pull
off for easier cleaning.
Correct and consistent cleaning is essen-
tial to maintaining your cooktop, if soil,
mineral deposits from evaporated water
spills or metal rub-off from aluminum
cookware are not removed, they will burn
onto the cooktop and cause permanent
discoloration. Be sure that the cooktop is
cool before cleaning. Do not use cooktop
cleaneron a hot surface. Thefumescan be
hazardous to your health and can chemi-
cally attack the cooktop. W_pe surface
cllean after each use, Do not use a
dish cloth or sponge to wipe up the
cooktopo They may leave a film of deter-
gent which can dtscolor your cooktop when
heated. If this happens, remove the film
with the recommended cleaner. We rec-
ommend that you use paper towels or a
clean cloth whtch is used only for cooktop
cleaning. After the cooktop has cooled,
remove any crusty soil with the razor
scraper. Hold the scraper at about a 30°
angle to the cooktop and scrape off
spot. Scrub cooktop with Sears Cooktop
Cleaning Creme®orother all-purpose, non-
abrasive cleaner. Rinse well and wipe
dry. NEVER USE ANY ABRASIVE SCOUR-
1NG PADS OR POWDERS ON YOUR
COOKTOP. Plastic mesh pads, such as
.............................. Doble®, may .be used.
Detergent, warm water and/or soap- Cleaning Inside the oven need only be
filled steel wool pad; do not use done as an optional touch-up between self-
oven cleaner in or around any part clean cycles. Rinse oven Interior thor-
of the oven °ugh!y after cleaning...
' Hydrogen peroxide ....................... Soak with hydrogen peroxide, using a
sponge. Frequent soaking helps prevent
soil buildup. Do not rub. See self-clean
...........................section for more information.
.............Detergent, wa_ Water, scouring Remove from oven to clean. Rinse thor-
Oven door gasket
Oven racks
Broiler pan and grid
Sears Cooktop Cleaning Creme®
(Stock No. 40079) or other all-pur-
pose non-abrasive cleaner; single-
edge razor scraper, soft cloth
Do not use a cooktop cleaner on a hot
cooktop. The fumes can be hazard-
ous to your health and can chemi-
cally attack the cooktop surface.
If you accidentally melt anything on
your cooktop, turn unit to LO; wipe
hot cooktop Immediately with sev-
eral dry paper towels. Scrape off
remainder of burned material with
razor scraper (held in potholder) at
30° angle whlle unlt Is warm. Be
careful not to burn yot,rself!
pad or soap-filled steel wool pad
Detergent, warm water, soap-filled
scouring pad, plastic scouring pad,
commercial oven cleaner (pan only)
oughly.
Removesolled panfrom oventocool. Drain
fat or drippings. Fill pan with warm water.
Sprinkle grid with detergent and cover with
damp cloth or paper towels, Let pan and
grid soak fora few minutes. Rinse or scour
as needed. Dry well. Pan and grid may be
washed In a dishwasher.
14 NECCHIO-4
REMOVABLE OVEN RACKS
Be careful not to scratch the oven finish when
instagRing or removing ore. racks.
To instaih
1. Set the raised back edge of the rack on apair of rack
guides.
2. Push the rack in until you reach the bump in the rack
guide, then lift the front of the rack and push the rack
all the way In.
To remove="
1. Pull the oven rack out, then up.
Some models have one standard oven rack and one
folding oven rack.
The folding rack can be easily stored away when not in
use.
NOTE: For best pe_ormance, remove oven racks
during a clean cycle. If oven yacks are le_t in the
range during a self-clean cycle, they v_ill darken,
lose theiF luster and become hard to slide° If you
choose to leave the racks 8n the oven, you can
polish the edges of the racks with steel woot and
apply asmall amunt of vegetabge oil to the rack
edges after the self.clean cycle.
BUMP
IN RACK
GUIDE
F
REMOVABLE OVEN DOOR
TO _'emove:
1. Open the door to the stop position (see Ulustratlon).
2. Grasp the door at each slde and lift up and off the
hinges.
NOTE: When the door is removed and hinge
arms are at stop position, do not bump or
t_ to remove the hinge arms. The hinges
could snap back causing an injury to the
hands or damage to the porcelain on the
front of the range. Cover the hinges with
toweling or empty towel roils while
working in the oven area.
To replace:
1. Hold the door over the hinges with the slots at the
bottom edge of the door lined up with the hinges.
The hinge arms must stilll be in the stop
position,
2. Slide the door down onto the hinges as far as it will
go and close the door.
STOP (BROIL) POSITION
HINGE
REMOVAIBLE STORAGE DRAWER
This drawer gives you space for keeping cook-
ware and bakeware. PlasUcs and fiamrrmble
material should not be kept in this drawer.
Do not overload the storage drawer. If the drawer is too
heavy, itmay sllp off the track when opened. To open the
drawer, grasp the center of the handle and pull stralght
out.
To remove: Pull drawer straight out and lift over the
guide stops.
To replace: Lift over the guide stops and slide
drawer Into place,
STOP
15 NCMNT01
AII contro_ knobs may be removed for easy cleaning by
puling the knob straight off the stem. Be sure that the
I_nob is in tile OFF position before removal.
Hint: Slip a thin cloth (such as a handkerchief) or a piece
of string under and around the knob edge and pull up.
l_autio_-"Flea_llhese ins_t_uctions carefully be-
_o_e replacing _he l_nobs. Replacing _he l_nobs
ir_l_epe_lywill_la_age _he l_mobs and Ehe spring
clips o_ _he s_e_s. I_this happess_ _he knobs
will fi_;loosely,
To replacethe _nob:
1. The knob stem has agroove in each side. The
groove on one side has a spring clip. The other
groove Is clear (see illustration).
£1PIA©INI Til! ©VEN ILIII=IT
2. Check the Inside of the knob and find the molded rlb.
3. Replacethe knob by fitting the molded rib Inside the
CLEAR GROOVE
IN STEM
lMote: Be sure to replace knobs on correct stems
from which they came.
Re su_'e _ha_ _he light switch is in the off position.
Do soi to_ch hoI oven bulb. Do noI _ouch oven
l_ull_ wilh wet ha_s. Do no_ w_pe oven llight a_ea
wiIh weI clolh.
/eve_ Iouch lie elect_ically live collar on lhe
l_ull_ when £eplacing ii=
ileci_ical Ipower must ibe shut off it you have 1to
_eFlaceab_el_e_ l_ulfe.
1. Unscrew glass cover and remove.
2. Replace the bulb with a40 watt appliance bulb.
3. Replace the cover.
No;_e_ We recommendyou use a 40 watt appllance bulb
_hat 18no longer than 3 1/2%
GLASS
RETAINER
A ORA ©ALLII @ FOR $111RVI©II
Save Ii_+_e asI m_ey. Check _his Iis_ before you cal fo_ service.
To eliminate unnecessary service calls, first, read all the instructions in this manual carefully. Then, if you have a
problem, always check this list of common problems and possible solutions before you call for service.
if you do have aproblem you cannot fix yourself, call your nearest Sears Store or Service Center for help. When
calling, have this manual and your Repair Parts List handy with the model, serial number and purchase date.
PFIOtlILIi;I POSSIBLE CAUSE DoNor CALL FOR S_RVI1CE
UNTIL YOU CHECK
oTiny scratches or abra- . Use of Incorrect cleaning ma- • Tiny scratches are not removable and do
sions on cooktop terlals not affect co©king. In time, the scratches
will become smoother and less vlslble.
=Coarse parlicles (salt, etc.)
between cookware bottoms
and cooktop. Be sure cook-
ware bottoms and cooktop are
clean before use
-Cookwarawith rough bottoms
= Metal marking on .Sliding or scraping metal •Use recommendedcooktopcleaners.
cooktop utensils and cookware across
cooktop
.Darkstreaksandsp_ks °Encrustedbolloversorgrease °Use razor scraper and follow directions In
on cooktop spatters cleaning chart.
° Incorrect cleaning materials - Use recommended cleaners in cleaning
chart. (Continued next page.... )
16 NEMNT35
COVER
knob into the clear groove on the stem.
IEF©IE © LLlll@ F@lil $111 WIQI! ![cont°)
I_t_@tlLEM
,Areas of discoloration
on cooktop
= Range does not work;
totally inoperative
Oven does not heat;
cooktop zones OK
Cooktop zone does not
work; oven OK
[POSSIBLE CAUSE
o iVlneraldepositsfromwateror . Use recommended cleaners.
food
,No power to range
Foods cook slowly on
the cooktop
Foods do not bake
properly
Foods do not broil
properly
Oven smokes
Oven light does not work
Oven does not clean or
poorcleaning results (self-
clean models only)
Oven door will not unlock
(self,clean models only)
.Clock set incorrectly
, Oven controls set incorrectly
Improper operation of control
o improper cookware
o
a
a
o
o
o
o
u
o
o
e
e
Oven not preheated long
enough
Improper rack or pan place-
ment
Oven vent blocked or covered
Improper use of foil
Improper temperature setting
for utensil used
Recipe not followed
Improper thermostat calibra-
tion
Range and oven rack not level
Using improper cookware
Improper rack position
Oven preheated
Improper utensil used
Oven door closed during broil
Improper broiling time
Dirty oven
Broiler pan containing grease
left In oven
Light switch in off position
Light bulb burned out
.Controls not set properly
,Clean cycle interrupted too
soon
oOven too dirty
Clean cycle not complete
E)OI_I'=i" CALL FOIl SIEIIIViC5
UHTII- YGU Ct!tECIE
oCheck household circuit breaker or fuse.
, Check power cord to be sure it is
plugged in.
,Check clock instructions.
- Check oven control instructions.
o
o
s
e
o
o
e
a
o
6
u
o
o
o
Be sure knob is pushed in while turning.
Use pans that have flat bottoms and a tight
fitting lid (ifapplicable). Pans should match
cooking zone size. Read thecooktop cook=
ing section for complete information,
Be sure to preheat:
Until notification tone sounds
or' 15 minutes.
lVlaintain uniform air space around pans
and utensils; see oven cooking section.
Keep vent area clear,
Foil use not recommended,
Reduce temperature 25 degrees for glass
or dull/darkened pans,
Is recipe tested and reliable?
Check oven temperature adjustment pro-
cedures (next page).
Check the Installation section for leveling
Instructions,
See cooking hints section.
Check broil pan placement. See broiling
section.
Do not preheat when broiling.
Use broiler pan and grid suppled with range.
Open door to broil stop position; see remov-
able oven door section.
Check broiling chart in broiling section.
Check for' heavy spillover.
Clean pan and grid after each use.
Check switch setting; see operating instruc-
tions,
Check or replace lig htbulb; see use and care
Instructions.
Check self-clean instructions,
Heavily soiled ovens require a 3-1/2 hour
clean cycle.
Heavy spillovers should be removed before
setting clean cycle, Repeat clean cycle.
Oven must cool below lock temperature (ap-
proximately 30 minutes aiter clean cycle is
complete).
17 NESER39
ADJUSTmNG OVEN
TEMPERATURE
The temperature in your new range hasbeen set correctly
at the factory, so be sure to follow the recipe tempera-
tures and times the first few times you bake in your new
oven,
Ifyou think the oven should be hotter or cooler, you can
adjust it yourself. To decide how much to change the
temperature, set the oven temperature 25°F higher or
Iowerthan the temperature inyour recipe, then bake. The
results of this "test" should give you an idea of how
much the temperature should be changed.
To adjust temperature=
1. Turn OVEN CONTROL knob to OFF and remove the
knob by pulling straight off.
2. Look at the back of the knob. The arrow pointing to
the center of the upper screw indicates the original
factory setting. The knob can be adjusted up to 75°F
hotter or 75°F cooler, in 15° Increments.
3. Use a screwdriver to loosen the two screws about 1
turn each.
4. Hold the knob handle (A on illustration) while turning
the knob skirt (Bon illustration) inthe desired direction.
As you turn, you should be able to hear clicks and feet
notches or teeth. Each click or notch is 15°. You can
turn up to 5 clicks or notches In either direction.
5. When you reach the desired adjustment, retlghten
both screws.
MAKES OVEN COOLER MAKES OVEN HOTTER
18 NESER40
i,, ill,i
Dear Customer:
Our constant efforts are
directed toward making
sure your new Kenmore
Range will arrive at your
home In perfect condition
and will give you proper
performance. As part of
these efforts, we feel it is
our responsibility to pro-
vide you with this warranty
for your range_
...................... J
r..................... _,q
FULL ONE YEAR WARRANTY ON THE FUNCTIIONING OF ALL
PARTS EXCEPT GLASS PARTS
If, within one year from the date of installation, any part, other than a glass
part, fails to function properly due to a defect in material or workmanship,
Sears will repair or replace it, free of charge.
FULL 30-DAY WARRANTY ON GLASS PARTS AND FINISH OF PORCE.
LAiN ENAMEL, PAINTED OR BRIGHT METAL FINISHED PARTS
if, within 30 days from the date of installation, anyglass part or the finish
on any porcelain enamel, painted or bright metal part is defective in
material or workmanship, Sears will replace the part, free of charge.
FULL 90-DAY WARRANTY ON MECHANICAL ADJUSTMENTS
For 90 days from the date of installation, Sears will provide, free of charge,
any mechanical adjustments necessary for proper operation of the range,
except for normal maintenance.
If the range is subjected to other than private famlty use, the above
warranty coverage is effective for only 90 days.
WARRANTY SERVICE gS AVAILABLE BY CONTACTING THE
NEAREST SEARS SERVICE CENTER/DEPARTMENT HIRTHE
UNITED STATES
This warranty applies only while this product is in use in the United States.
This warranty gives you specific legal rights, and you may also have other
rights which vary from state to state. SEARS, ROEBUCK and CO.
Dept. 731 CR-W
Sears Tower
Chicago, ill 60684
WE SERVICE WHAT WE SELL
"We Service What We Sell" is our assurance to you that you can depend on Sears for service because Sears '
service Is nationwide.
Your Kenmore Range has added value when you consider that Sears has a service unit near you staffed by
Sears trained technicians.., professional technicians specifically trained on Sears appliances, having the
parts, tools and equipment to ensure that we meet our pledge to you -- "We Service What We Sell!"
TO FURTHER ADD TO THE VALUE OF YOUR RANGE, BUY ASEARS MAINTENANCE AGREEMENT.
KenmoreRangesaredesigned,manufactured and
testedfor yearsofdependableoperation. Yet,any
modern appliance may requlre service from time
to time. The Searswarranty plusthe SearsMain.
tenance Agreement provides protection from un-
expected repair bills and assuresyou of enjoying
maximum range efficiency°
Here's a comparative warranty and Maintenance
Agreement chart showing you the benefits of a
Sears RangeMaintenance Agreement.
Y_ars of Ownership Coverage 1st Year 2nd Year 3rd Year
Replacement of Defective
1 Parts other than Porcelain _t_ iViA MA
or Glass
9O DAYS
2Mechanical Adjustmm_t WMA MA
30 DAYS
3 PorcelainandGI;_saParts W MA MA
Annual PrevonlIIve Malnlon-
4ance Check at your request MA MA MA
W-W_anty MA. M_IntenanceAgreement
CONTACT YOUR SEARS SALESPERSON OR LOCAL SEARS SERVICE
CENTER TODAY AND PURCHASE A SEARS MAINTENANCE AGREEMENT.
_ r_ _ O_ ® America's Best Selliing Appliance Brand
Sold by SEARS, ROEBUCK AND CO., Chicago, IlL 60684

This manual suits for next models

1

Other Kenmore Cooktop manuals

Kenmore 79095262991 User manual

Kenmore

Kenmore 79095262991 User manual

Kenmore 79043820000 User manual

Kenmore

Kenmore 79043820000 User manual

Kenmore ELITE 790.3322 Series User manual

Kenmore

Kenmore ELITE 790.3322 Series User manual

Kenmore 790.4273 Series User manual

Kenmore

Kenmore 790.4273 Series User manual

Kenmore 79075722991 User manual

Kenmore

Kenmore 79075722991 User manual

Kenmore ELITE 911.44033 User manual

Kenmore

Kenmore ELITE 911.44033 User manual

Kenmore 79044113110 User manual

Kenmore

Kenmore 79044113110 User manual

Kenmore 911.95475 User manual

Kenmore

Kenmore 911.95475 User manual

Kenmore 3248 - Elite 30 in. Gas Cooktop User manual

Kenmore

Kenmore 3248 - Elite 30 in. Gas Cooktop User manual

Kenmore 790.4511 Series User manual

Kenmore

Kenmore 790.4511 Series User manual

Kenmore C970 Series User manual

Kenmore

Kenmore C970 Series User manual

Kenmore 93521 Use Installation instructions

Kenmore

Kenmore 93521 Use Installation instructions

Kenmore 3243 User manual

Kenmore

Kenmore 3243 User manual

Kenmore 790.4281 User manual

Kenmore

Kenmore 790.4281 User manual

Kenmore 911.43675 User manual

Kenmore

Kenmore 911.43675 User manual

Kenmore C970 Series User manual

Kenmore

Kenmore C970 Series User manual

Kenmore 790. 7260 User manual

Kenmore

Kenmore 790. 7260 User manual

Kenmore 3050 - Pro 36 in. Gas Slide-In Cooktop User manual

Kenmore

Kenmore 3050 - Pro 36 in. Gas Slide-In Cooktop User manual

Kenmore 363.42482 User manual

Kenmore

Kenmore 363.42482 User manual

Kenmore 318201473 User manual

Kenmore

Kenmore 318201473 User manual

Kenmore 790.3254 Series User manual

Kenmore

Kenmore 790.3254 Series User manual

Kenmore 4292 - Elite 36 in. Induction Cooktop User manual

Kenmore

Kenmore 4292 - Elite 36 in. Induction Cooktop User manual

Kenmore 46745 User manual

Kenmore

Kenmore 46745 User manual

Kenmore 91131 Use Installation instructions

Kenmore

Kenmore 91131 Use Installation instructions

Popular Cooktop manuals by other brands

Monogram ZGU384NSMSS installation instructions

Monogram

Monogram ZGU384NSMSS installation instructions

Nemco 9100 Installation and operating instructions

Nemco

Nemco 9100 Installation and operating instructions

Officine Gullo PVS4 Instructions for installation and use

Officine Gullo

Officine Gullo PVS4 Instructions for installation and use

Jenn-Air 8112P341-60 user guide

Jenn-Air

Jenn-Air 8112P341-60 user guide

KitchenAid Architect K6CP462K installation instructions

KitchenAid

KitchenAid Architect K6CP462K installation instructions

Frigidaire FGC26C3A Factory parts catalog

Frigidaire

Frigidaire FGC26C3A Factory parts catalog

True MD-2B user guide

True

True MD-2B user guide

emerio HP-114482.4 instruction manual

emerio

emerio HP-114482.4 instruction manual

Frigidaire FEF312BSA Wiring diagram

Frigidaire

Frigidaire FEF312BSA Wiring diagram

Samsung NA36N6555T Series quick guide

Samsung

Samsung NA36N6555T Series quick guide

KitchenAid KECC501GBL3 parts list

KitchenAid

KitchenAid KECC501GBL3 parts list

Frigidaire CGIF3036TD use & care

Frigidaire

Frigidaire CGIF3036TD use & care

K&H CK-7206K instruction manual

K&H

K&H CK-7206K instruction manual

KitchenAid KFGS366VSS00 parts manual

KitchenAid

KitchenAid KFGS366VSS00 parts manual

Electrolux E46GC67ESS - 46" Sealed Burner Gas Cooktop Specifications

Electrolux

Electrolux E46GC67ESS - 46" Sealed Burner Gas Cooktop Specifications

NEFF T2766 User instructions

NEFF

NEFF T2766 User instructions

Bosch AutoChef NET 8654 UC installation instructions

Bosch

Bosch AutoChef NET 8654 UC installation instructions

Electrolux EHGF93CX user manual

Electrolux

Electrolux EHGF93CX user manual

manuals.online logo
manuals.online logoBrands
  • About & Mission
  • Contact us
  • Privacy Policy
  • Terms and Conditions

Copyright 2025 Manuals.Online. All Rights Reserved.