manuals.online logo
Brands
  1. Home
  2. •
  3. Brands
  4. •
  5. Kenmore
  6. •
  7. Dryer
  8. •
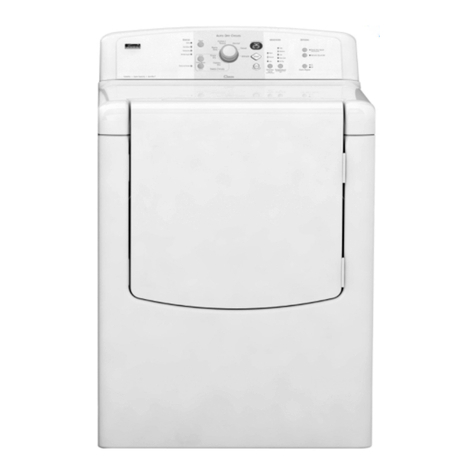
  9. Kenmore Advantage 74681 User manual

Kenmore Advantage 74681 User manual

m
!
S_ AIIS =o==o,==.v°o,===
l l
!
i
I
I
I
!
i
!
I
!
I
!
!
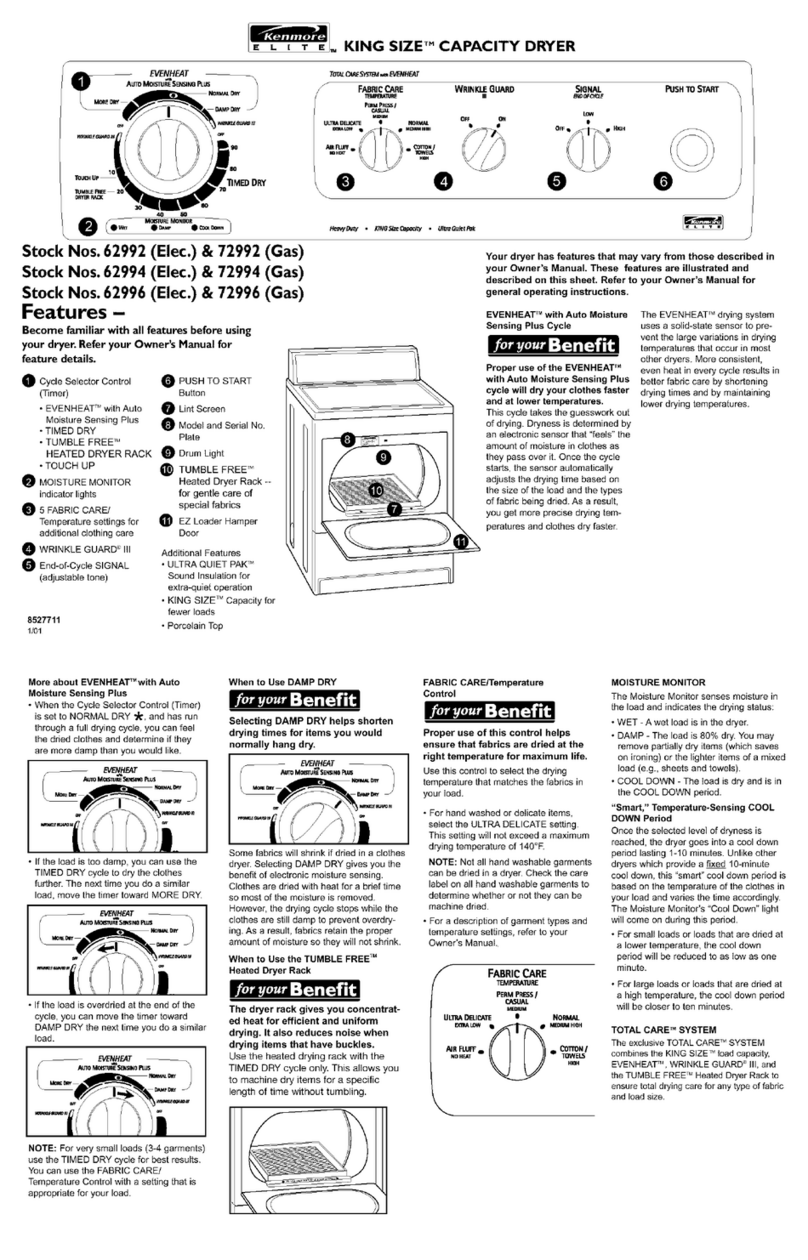
END-OF-CYCLE
SIGNAL FEATURE
OPERATING STATUS
KEYS
BUNT SCREEN
I _F_'Y DOOR
swrrcH
l_ PERFORMANCE
GUIDELABEL
O MODEL NO. PLATE
,i
If you need SERVICE or PARTS for your Kenmore dryer:
Be ready to give your Sears Service Department the model number, sedal number and date of
purchase. Write in below. The plate IM with model and serial numbers is located behind the
dryer door.
.1=10. M
MODEL NO. SERIAL NO. IDATE OF PURCHASE
ELECTRIC
MODEL 64681
GAS
MODEL 74681
How to dry a load of laundry
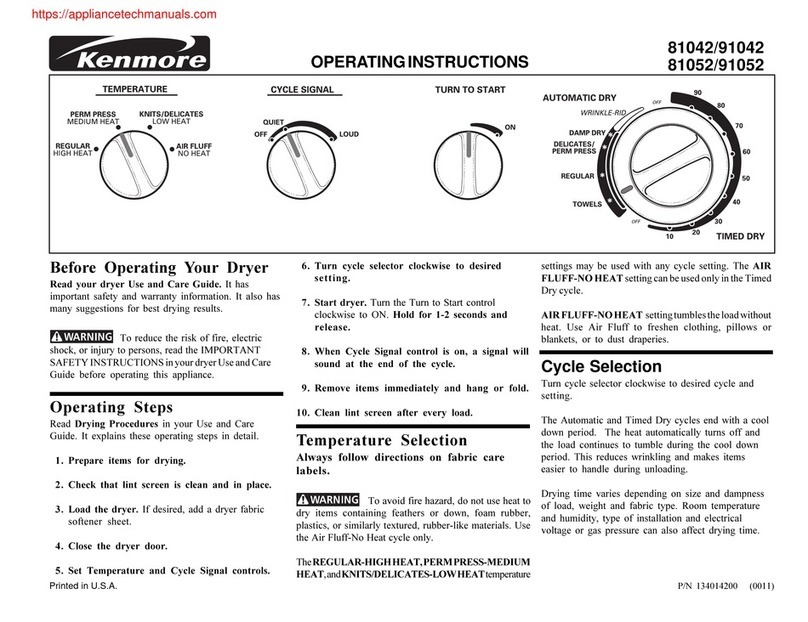
b_ Clean lint screen before each load. (_ Set Cycle Selector Control I!
thePUtdoor.laundryinto dryer and shut _) PUsh the Start Control Il! to start
your dryer.
--_ Remove load when dry.
t-_ I r-2_ I_Qmwz lmP
Ill Cycle Selector Control
Use this control to select the proper drying method for the type of
items in the load. The control can be set for Automatic or Timed
Drying, TouchUp or Air. You can turnthe control at any time to
make drying time longer or shorteror you can turnthe control to
an OFF position to shut the dryer off.
OPERATING STATUS KEYS
Color coordinated keys indicate in which portion of thecycle the
dryer is operating.
Ill End-of-Cycle Signal
This signal buzzes to tell you the drying cycle is over. The dryer
should be unloaded as soon as the cycle is over to get the best
wrinkle free results.
During Wrinkle Guard Ithe buzzer will sound every 5 minutes.
El Start Control
Use this control to startthe dryer after cycle is selected. Be sure
the door is closed.
Opening the door stops the dryer. It will not start again until you
close the door and push the START control. Be sure the Cycle
Selector Control is on a dry setting.
Part No. 3392333
CYCLE SELECTOR CONTROL
AUTO DRY I Normal/Permanent Press
Cycle
Use this cycle for most loads of sturdy clothes or synthetic, permanent
press items. Clothes are dried at high heat followed by a 10 minute
(approx.) cooldown.
When the dryness selected is reached the dryer goes into cooldown then
a buzzer sounds. If you do not unload the dryer, it goes into Wrinkle Guard
I automatically.
•Set the Cycle Selector Control to the (_) which is good for most fabrics.
You can set the control for MORE DRY if clothes are still damp at the
end of the cycle or LESS DRY for clothes that are too dry or are to be
ironed.
• Push the Start Control.
AUTO DRY I Knit/Deficate Cycle
Use this cycle for most loads of knitted, delicate orsheer fabrics. Clothes
are dried atlow heat followed by a 5 minute (approx.) cooldown.
When dryness selected is reached, the dryer goes into cooldown then tunas
off and a buzzer sounds.
•Set the Cycle Selector Control to the (:g) which is good for most fabrics.
You can set the control for MORE DRY if clothes are still damp at the
end of the cycle or LESS DRY for clothes that are too dry or are to be
ironed.
•Push the Start Control.
This cycle gives the best drying in the shortest time. Drying time varies
according to type of fabric, size of load and dryness setting. Dryness is
determined by thermostats that react to the amount of moisture in the air
exhausted from thedryer. Moist airindicates clothes are still damp, dry air
indicates moisture hasbeen removed.
AIR DRY Cycle
Use this cycle to get up to 20 minutes of drying time in room temperature
air. Use this setting for items that will not tolerate heat, such as plastics,
foam rubber, etc. and for airing and fluffing items such as pillows.
• Do not dry these items with heat.
• Set the Cycle Selector Control for the number of minutes you want in the
Air Cycle.
•Push the Start Control.
TIMED DRY Cycle
Use this cycle to get up to 50 minutes of dryingtime athigh heat, followed
by a10minute (approx.) cooldown.
• Set the Cycle Selector Control to the amount of time you want in the
Timed Cycle.
• Push the Start Control.
TOUCH-UP Cycle
Use this cycle to "smooth" synthetic and permanent press clothes that are
clean butwrinkled from being crowded ina closet orsuitcase. This setting
provides about 15 minutes of tumbling at high heat followed by a 10-
minute (approx.) cooldown.
• Put just a few garments into the dryer.
•Set the Cycle Selector Control to TOUCH-UP.
• Push the StartControl.
•Remove clothesimmediately when tumbling stops.
SOFT-HEAT @
In the ALrIOMATIC and TIMED DRY Cycles, clothes are dried at the
selected temperature untilthe last few minutes of the cycle when the dryer
switches to low heat. This helps prevent overdrying.
Cooldown
Approximately five or ten minutes before the end of the AUTOMATIC and
TIMED DRY Cycles, clothes are tumbled without heat to help reduce
wrinkles and make clothes more comfortable to handle.
Wrinkle Guard I
Wrinkle Guard I helps keep permanent press items wrinkle free when you
cannot unload the dryer promptly at the end of the Automatic Cycle. If you
do not open the door at the end of the NORMAL/PERM PRESS AUTO
DRY I Cycle, Wrinkle Guard I will tumble the clothes without heat for 30
minutes unless you open the door sooner. During Wrinkle Guard I the End-
of-Cycle Signal will sound every 5 minutes.
FEATURES
il Lint Screen
Keep the lint screen clean. A lint-clogged screen will slow down the flow
of air. This makes drying time longer and wastes energy. Clean the lint
screen before each load as follows:
1. With dryer off, remove the screen by pulling straight up.
2. Roll the dry lint off the screen. Do not wet the screen or lint; wet lint is
hard to remove.
3. Replace the cleaned lint screen.
F'ue Hazard.
Do not use your dryer while the lint screen is removed.
It could cause overheating and possible damage to fabrics and dryer
parts or create a firehazard. Lint screen must be pushed firmly into
place. ii
NOTE: If lint screen gets clogged by detergent or fabric softener build-up,
remove and clean it with a nylon brush, hot water and liquid detergent.
Dry and replace screen.
Safety Door Switch
For safety, the switch shuts off dryer when door is opened. Dryer will not
start until door is closed and START ispushed. Be sure the Cycle Selector
Control is on a dry setting.
Performance Guide Label
Located inside the dryer door. Gives information on what to do if dryer
does not perform normally.
Model No. Hate
Shows model and serial numbers. Have these ready if you ever call for
service.
NOTE: If dryer drum is stained, clean it with adamp cloth and mild
detergent.
!
For more detailed drying times, rules for safe operation, fabric care, i
maintenance and installation information, refer to the LAUNDRY I
GUIDE and INSTALLATION INSTRUCTIONS you received with
your dryer.
i
Part No. 3392.333 Printed in U.S.A.

This manual suits for next models

1

Other Kenmore Dryer manuals

Kenmore 134199600H User manual

Kenmore

Kenmore 134199600H User manual

Kenmore 64612 User manual

Kenmore

Kenmore 64612 User manual

Kenmore 796.8156 Series User manual

Kenmore

Kenmore 796.8156 Series User manual

Kenmore Sensor smart C62062 User manual

Kenmore

Kenmore Sensor smart C62062 User manual

Kenmore 41779042990 User manual

Kenmore

Kenmore 41779042990 User manual

Kenmore 6002 User manual

Kenmore

Kenmore 6002 User manual

Kenmore 2696418100 Owner's manual

Kenmore

Kenmore 2696418100 Owner's manual

Kenmore 27" (69 cm) User manual

Kenmore

Kenmore 27" (69 cm) User manual

Kenmore C88102 User manual

Kenmore

Kenmore C88102 User manual

Kenmore 417.8110 Series User manual

Kenmore

Kenmore 417.8110 Series User manual

Kenmore 96478100 User manual

Kenmore

Kenmore 96478100 User manual

Kenmore 110. Series User manual

Kenmore

Kenmore 110. Series User manual

Kenmore 2696292100 (Elect.) Owner's manual

Kenmore

Kenmore 2696292100 (Elect.) Owner's manual

Kenmore 796.6142 Series User manual

Kenmore

Kenmore 796.6142 Series User manual

Kenmore 29" (73.7CM) User manual

Kenmore

Kenmore 29" (73.7CM) User manual

Kenmore ELITE SENSOR SMART User manual

Kenmore

Kenmore ELITE SENSOR SMART User manual

Kenmore 97271100 User manual

Kenmore

Kenmore 97271100 User manual

Kenmore 11070052990 Owner's manual

Kenmore

Kenmore 11070052990 Owner's manual

Kenmore Clothes Dryer User manual

Kenmore

Kenmore Clothes Dryer User manual

Kenmore 110.75132410 User manual

Kenmore

Kenmore 110.75132410 User manual

Kenmore 62932 User manual

Kenmore

Kenmore 62932 User manual

Kenmore 1992 96250100 User manual

Kenmore

Kenmore 1992 96250100 User manual

Kenmore 110.6813*410 User manual

Kenmore

Kenmore 110.6813*410 User manual

Kenmore 6800 User manual

Kenmore

Kenmore 6800 User manual

Popular Dryer manuals by other brands

SMC Networks IDG3 V4 X017 Series Operation manual

SMC Networks

SMC Networks IDG3 V4 X017 Series Operation manual

Beko B5T41024IW user manual

Beko

Beko B5T41024IW user manual

Maytag MGDB980BW0 installation instructions

Maytag

Maytag MGDB980BW0 installation instructions

Siemens WT47XM40 user manual

Siemens

Siemens WT47XM40 user manual

Smeg DT393PIT user manual

Smeg

Smeg DT393PIT user manual

Tesla WT10H90M user manual

Tesla

Tesla WT10H90M user manual

AEG LAVATHERM 8DEE84W user manual

AEG

AEG LAVATHERM 8DEE84W user manual

Samsung DV45H6300EG Features

Samsung

Samsung DV45H6300EG Features

Indesit IDCA G35 S instruction manual

Indesit

Indesit IDCA G35 S instruction manual

AEG T8DHC876C user manual

AEG

AEG T8DHC876C user manual

LG DL X420 Series owner's manual

LG

LG DL X420 Series owner's manual

Dexter Laundry DC50X2 manual

Dexter Laundry

Dexter Laundry DC50X2 manual

Zanussi ZWT 71401 WA user manual

Zanussi

Zanussi ZWT 71401 WA user manual

Candy CC2 67 Instruction book

Candy

Candy CC2 67 Instruction book

GE Profile Harmony PTDN800GM Dimensions and installation information

GE

GE Profile Harmony PTDN800GM Dimensions and installation information

Daewoo KUD-WG55S Service guide

Daewoo

Daewoo KUD-WG55S Service guide

Candy CDC 267E User instructions

Candy

Candy CDC 267E User instructions

Beko DF7414SX user manual

Beko

Beko DF7414SX user manual

manuals.online logo
manuals.online logoBrands
  • About & Mission
  • Contact us
  • Privacy Policy
  • Terms and Conditions

Copyright 2025 Manuals.Online. All Rights Reserved.