manuals.online logo
Brands
  1. Home
  2. •
  3. Brands
  4. •
  5. Kenmore
  6. •
  7. Grill
  8. •
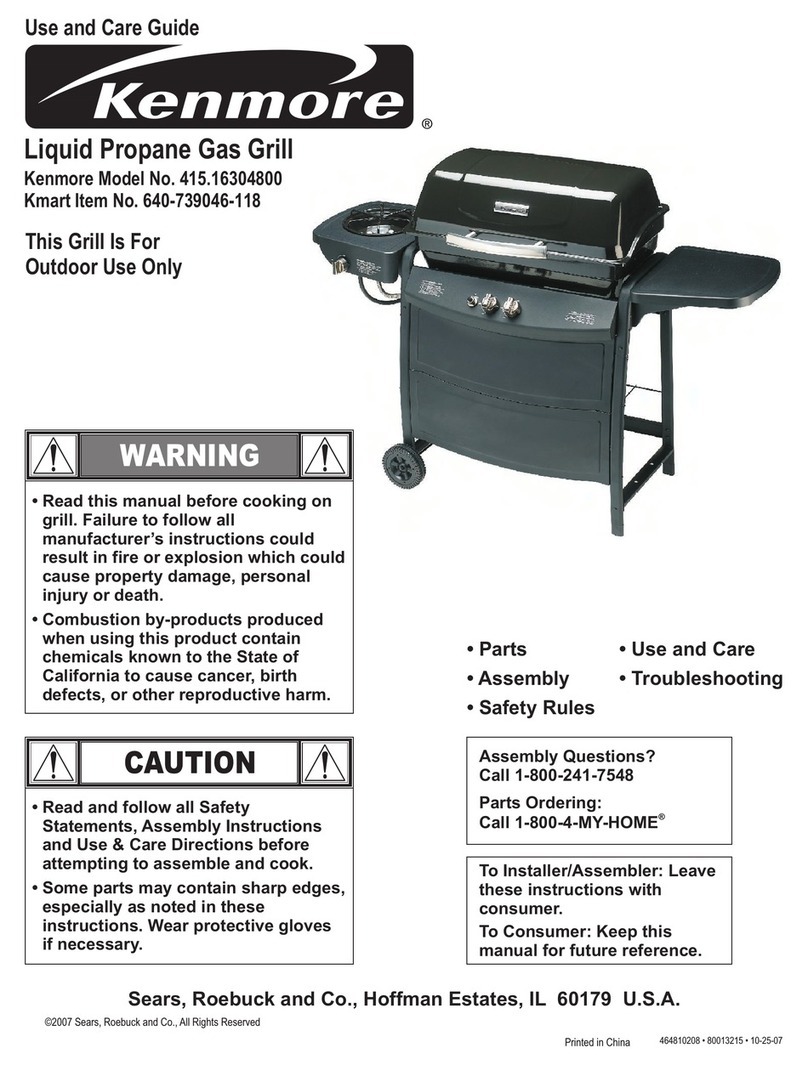
  9. Kenmore 141.157981 User manual

Kenmore 141.157981 User manual

This manual suits for next models

3

Other Kenmore Grill manuals

Kenmore 141.155401 User manual

Kenmore

Kenmore 141.155401 User manual

Kenmore 415.1612801 User manual

Kenmore

Kenmore 415.1612801 User manual

Kenmore ELITE 141.16691 User manual

Kenmore

Kenmore ELITE 141.16691 User manual

Kenmore 141.16223 User manual

Kenmore

Kenmore 141.16223 User manual

Kenmore 141.156400 User manual

Kenmore

Kenmore 141.156400 User manual

Kenmore 415.16123800 User manual

Kenmore

Kenmore 415.16123800 User manual

Kenmore 122.16435010 User manual

Kenmore

Kenmore 122.16435010 User manual

Kenmore 119.163018 User manual

Kenmore

Kenmore 119.163018 User manual

Kenmore C172-30424 User manual

Kenmore

Kenmore C172-30424 User manual

Kenmore 125.16642900 User manual

Kenmore

Kenmore 125.16642900 User manual

Kenmore 700 washer User manual

Kenmore

Kenmore 700 washer User manual

Kenmore 119.16148110 User manual

Kenmore

Kenmore 119.16148110 User manual

Kenmore 415.16645900 User manual

Kenmore

Kenmore 415.16645900 User manual

Kenmore 4t5.t6657900 User manual

Kenmore

Kenmore 4t5.t6657900 User manual

Kenmore 148.16656011 User manual

Kenmore

Kenmore 148.16656011 User manual

Kenmore 415.16117 User manual

Kenmore

Kenmore 415.16117 User manual

Kenmore PG-40611S0L User manual

Kenmore

Kenmore PG-40611S0L User manual

Kenmore 119.16149210 User manual

Kenmore

Kenmore 119.16149210 User manual

Kenmore 415.152063 User manual

Kenmore

Kenmore 415.152063 User manual

Kenmore 415.161110 User manual

Kenmore

Kenmore 415.161110 User manual

Kenmore PG-40409S0LB-COSG User manual

Kenmore

Kenmore PG-40409S0LB-COSG User manual

Kenmore 119.16161210 User manual

Kenmore

Kenmore 119.16161210 User manual

Kenmore 415.16644900 User manual

Kenmore

Kenmore 415.16644900 User manual

Kenmore 415.16537900 User manual

Kenmore

Kenmore 415.16537900 User manual

Popular Grill manuals by other brands

LMS BBQ08873P owner's manual

LMS

LMS BBQ08873P owner's manual

Cookworks LW-8010A Care & instruction manual

Cookworks

Cookworks LW-8010A Care & instruction manual

Campingaz CV Instructions for use

Campingaz

Campingaz CV Instructions for use

Metos XBL Series Installation and operation manual

Metos

Metos XBL Series Installation and operation manual

Fiesta ET34567 Use and care instructions

Fiesta

Fiesta ET34567 Use and care instructions

Mayer Barbecue BRENNA MKG-318A BASIC Assembly instructions

Mayer Barbecue

Mayer Barbecue BRENNA MKG-318A BASIC Assembly instructions

Landmann Avalon PTS Plus 5.1 Plus 12122 Assembly and operating manual

Landmann

Landmann Avalon PTS Plus 5.1 Plus 12122 Assembly and operating manual

Kenyon B70200 owner's manual

Kenyon

Kenyon B70200 owner's manual

Better Homes and Gardens GBC1486W owner's manual

Better Homes and Gardens

Better Homes and Gardens GBC1486W owner's manual

Orbegozo GR 2300 instruction manual

Orbegozo

Orbegozo GR 2300 instruction manual

bora PT11 Operating and installation instructions

bora

bora PT11 Operating and installation instructions

Klarstein 10031664 manual

Klarstein

Klarstein 10031664 manual

Garland MWE3W Installation and operation manual

Garland

Garland MWE3W Installation and operation manual

Char-Broil 463722714 Product guide

Char-Broil

Char-Broil 463722714 Product guide

MPM MOP-03 user manual

MPM

MPM MOP-03 user manual

Tucker Barbecues GTR Series Assembly, installation and operating instructions

Tucker Barbecues

Tucker Barbecues GTR Series Assembly, installation and operating instructions

Monogram ZGG540NCP1SS owner's manual

Monogram

Monogram ZGG540NCP1SS owner's manual

Equipex Sodir Savoy Operation manual

Equipex

Equipex Sodir Savoy Operation manual

manuals.online logo
manuals.online logoBrands
  • About & Mission
  • Contact us
  • Privacy Policy
  • Terms and Conditions

Copyright 2025 Manuals.Online. All Rights Reserved.

LiquidPropaneGasGrill
Modal 141.157_1
NaturalGasGrill
Mode!_4t.t 57991
TM
_WARNING:
Read _is Owner's Manua_ _efu_ly and be sure
your gas 8€_tis pro_riy assembled, insta_ed and
maintained. Failuretofol|owtheselnsb_u_t_s _d
result _ sedous bodily lnjuP_,andtor ptope_/dam-
age. This gas gt_llisintended for outdoo# use _y
and is not intend_ to be _nsta_ed in _
recreational vehicles or boats.
Note to Installer:
Leave this Owner's Manua_withthe consumer
at'tot deiive_ and/or _stallet_n,
NO_ to Consumer:
Leave _is; G_ne#s ;M_ua_ !na _nven_nL pl_
for future reference°
Manufacturer Customer Service He|piths:
t! the shippingbox is missi_ par_ or you have
questions about _ssambty, ca_!_e Custom.st Set.
vice Help_ine 8am -11prn CST, Monday _rou_
Sea_, R_b_ck and Co,,
Hoffman Estates, IL 60179 U,S,_
Warran_ 2
Safe_ instructions ........................................ 2:
P_-Assembly instructions..............................4
Parts Diag_m and Pad Lists ..................5
Assembly InsL_c-tiens ....................................... 8,
L_hting _nstru_ions ..................................... 14
Cooking fnstru_ions .................................._6
Cle_ning and Maintenance |n_ructions ....16
Frequently Asked Questions ..................... 19
C_king Guide and Recipes ................. 20
From the date of pure,base for _ designated tm_e
pef_s _isted below, _ars will replace the folilowing
gdl_parts free o{ charge if they are defec_JveIn maiedat
•Lifetime of Gd_i::Exterior Stainie_ Steel Parts;
_uminum Castings (e×cept: for paint loss)
3Ye_: Flame Tamers, Cooking Gdds, IBumers
•5Y_ts: _i OIhe_ Gdll Rafts (except _nitor baf_ery)
Th_s _rranty d_s not co_:
• Labor costs for _pairs
* Grill _it is used fo_ commerdat or renta_
_rpeses.
Replacement parts ate available by _n_cting the
nearest Seals Se_e C_ter,
_!s warran_ applies _ly when _e gril_ _ used
the Un_ States.
Th_s warranty gi_s you spe¢_c legaJ r_hts, and
you m_y a_so have other dghts _t_ 'va_ from
state te state,
Sears, Roebuck _nd Co,, _spt, 81TWA,
Hoffman Estates, II _79
F_tlure to compty with these ins_ctions
could teSu|| In afl_e or exp!osion which
could cause _!ous bodily inju_ _eath,
or property damage_
Gdfl Snst_IIaIIonCodes
This gas gritl must be inslatled in accordance
w{_ aU ]ocatcodes. _n areas wJthou_ toc_J_
_es, follow the infest edi[_ _ the, National
Fue! ,Gas Code ANS_ Z_3._. In Canada, ins_k
ta_ion must conf0_m _ standard C_tCGA
lb!49.1 or t-bt49.2 (l_stailation C_e for Gas
8ur!!rigAppliances a_ Eq_ipment)_nd all_I
c_es,
Proper Placement and Clean, rice of Grit|
Never use _r gas gnfl _na garage, porch, shed,
breezeway or any o_ enclosed _rea. Your gas grill
is to _ used outd_rs only, at least 24" from th_
back and s_e of any combust_Je surface. Yo_r
gas grJi_should not be pl_d under any surface
tha_ _l_ bum. Do no_ obstruct _e flow of venti_a_
t_'_ a_" a_und _e gas griJJ housing_
This ou_doo_gas gaff ts not in_nded to be ins_#ed In
or on Iveh_les andtor boats,
Correct LPG Cylinder Use
LPG gnH medeis ate designed for use w_th
s_nd_rd 20 lb. Liquid Propane Gas (LPG)
cylinder, no_ inc_u_ with gd_| box. Never
connect you_ gas grill _o an LPG cylinder that
exceeds this capacity. A ¢ylin_e_ of app_oxi-
matety 12 inches _n d_me_r by 18-I_ inches
high sh_ld be _e maximum s_e LPG _inder
used. We recommend buying an "OPD" gas
cyflnder _ich offers an Oveditl Preve#tion
Device. This safe_ryfeature preven_ the cylinder
From being ove_liied _ich can cause ma]f_Jnc-
tio_ of the LPG cylinder, r_u_tor and_o_ gdll.
The LPG cytinde_ must be consisted 8t_
marked in ac__,o_'da_ with s_ific4ations of the
U_S, Dept, of T_spottatJon (DOT), in Canada.
the LPG cylinder must meet the Canadian
Tr'anspe_i_ and Communicat_s (CTC)
specificat_ns. A_so be sure:
1. The LPG _indet has a shutoff v_ve, terrn_-
hating in _LPG s_pp_y cy{inder vane ouZeL
that is comp_t_ble with _Type _cytinder
connection _ev_. The LPG cyfinder must
a_se have a sefe_y relief device thal has a
di_r_ communir.,a_on wfd_ the vapor sp_e of
the _yfircJer.
2. The cyflnder supply system must be atrang_
for v_por withdr_L
3 The LPG cylinder used must have a coffer
to prote¢_ the c_4inder valve
2 ? Scans, Ree_k and Co.
Failure to compty w_th these ins|fuSions
coutd result in afire or explasion which
couJd cause serous bodt|y inju_, death,
or property damage_
• Never connect an unregulated LPG cy_inder
to your gas grl& The gas regulator assembly
supplied wiLh your gas griit is adjusted to
have an outlet _essure of 11" water Column
(W.C,) for connect_n to an LPG cylinder.
•OnWyuse the regulator and hOSe assembly
supp_d w_th your Ms _U. Replacement
regulators and ;hose assemblies must De
those specff_ed by SeaTs.
• Have your LPG cylinder fi_ted by a reptJta_le
pr_ane _s dealer and viisuat_yinspected
and re4:lUalifled at each fitting.
-Never BI the gas Gyl_de_ beyond 80% fu_l
H_e _r prc_pane gas dealer check the
re{ease valve after e_y [H_ing to _sure that
_t remains f_ee of del'ects.
A_ays keep LPG cylinders in an upright
!
Do not store (or use) gaso|ine or other flammable
vapors and liquids in the vic_ity of this gas gdH.
An LPG cytinder |ha! is not _nected for use
must not be stored in the vicinity of this or any
other gas grill.
• Do not subject the LPG ¢ytinder to e×cess_ve
heat.
Never store an LPG cylinder indoors, ff you
s_ore your gas gri!! _ the gaffe or _
Jnd_ _tion, always disconnecl _e LPG
c_inder first and st_e it safely ou_s_e_
•LPG cylinders must be store_ogtdoors _ a
wag-venerated area Disconnected LPG cylin-
ders mue! not be stored in a building,
gara_ o_ any o_ enctesed area.
-When _r gas gtrrrrrd_is not m use the gas
must be turned _ at _he LPG cylinder.
The regu_ato_ and hose assembly m_st be
inspe_ before e_h use of _grill if
there isexca_ive abrasion or wear or if the
hose is cut. itmust be replacedpriorto the
grillbeing _sed again.
,, Keep the gas regulator hose away from
hot gri_ surfaces and dr_pping grease.
Avo_ unn_ssary _sfing of hose. Visually
_nsp_t ho_e prior _ each use for cuts
cracks,excessive wear or other dama_.
If the hose appears damaged do no_ use
gas grille CaU Sears at %8004-MY-HOME
for a ,.Sears authorized replacement hose.
oNever light _ur gas gr#_ with the liid dosed
or before check_ng to insure the burner tubes
are fulJy seated over _e gas valw odfices,
• Never aJlow children I_ operate your grill,Do
not a4_owchildren_o p_ay near you; grill
IF YO_ SMELL GAS:
Shut _gas supply _ the grit.
*ExtJng#_h any open Qame
, O_ gdliiid.
- If _or c_|inues,, immed_ately¢_l!your
gas company or _ca_ fire department.
Fail,re to compiy wi_ _esa ins|ruPiahs
cog_d result tn a fi_'e er exp_on wh_h
co_JId _use _ti_s bod_y injury, dea#_
prope_ dama_°
Astrong gas smelt, _ the hmsing sound of
gas Indicates a serious problem _t,h _ur
gas g#_| _the LPG c_4it-_. Failure to
immediately follow _e st_s _ted below
could resuit _ a f_e or explosi_ _ich
could cause serious bedily injury, _th, or
p_ damage,
•Gat a_y fr_ the LPG c'_inder,
•De not try _ fix the prob_m you_elf.
• Call your f_e department. (Do not call
near the _G _inder because _r
_lephone is an eieckic_ device.)
CAUTION: _iders a_ sinai| ins_ occa-
sionally spin webs ar make nests in the
gr_l_burner tubes du_ng transit and ware-
housing_ These webs _n _ad to agas flow
ebseuci'_n .which _ufd result in a fire _n
and around the _mer iubes. This type of
_re is kno'_ as a "FLASH-BACK" and can
causa ser_s damage to your grill and
create an unsafe apera_ng cond_Lk)n for _e
user.
_though an Obs_ed burner tube is _t
•eon_y cau_ of "FLASH_BACK", _t _ 'the
mos_ common _use.
To reduce the chance of "FLASH-BAOK"_
you must clean the burnertu_ before
assembling _ur grill, and at laast _ca a
month in |ate summer _ eady fail _en
spi#ers are most active° _so perform th_s
_umer tuba c|_ning pt_3c_ure _ y",_Jrgrit!
h_ not _n us_ f_r _ extended period
time.
3

Be_ a stiff _, _a _ hanger
_weft) into a _a_! h_ _shown _ow
Run _e h_ _ro_h ]he _r _ and
_n_e the _seve_ times to _ve any
debr_so
2_ U_ a_le brush with a_xi_e ha_ Run
_ _h the bu_ tu_ a_ _side
the bume_ _| _mes, _mo_ _y de_s°
3_ _an _i_ h_ to _ air thigh each
_m_ _ t_. The fo_ air shou_ pass _.s
Or __ thigh the _Jcc_r' ar_ o_ the
The _on _f the _r tu_ _h mspe_
to t_ _is vi_,a!for safe
Che_ to e_re the o_;_ce is i_e _
Fig. 2o tf _e _J_ tu_ does _ _ over
the v_lve _, i_t_ the _m_ may
ca_ a_r fire.
F_u_ i_,_ BOX
// COTTER¸_
" Size 2_#iips r
Size 4 _lip_
ble _r_c,h
• Lor_lnose _iers
-_r,-e_ _.ch, _!1_6" size
_g_ves
,, Eye
Hog5
H005
_7
H_
H005
P0239A
_gA
_0A
PS0_
U4"xtF2" Ph|||ips Head _ 4
_/4" Nut 4
3t8" V'vllee! 2
2
2
I/4_1_ Phillips Head S_ 3
1/4" Nut 3
1/4"x_ _i_li_ Head Screw 7
1/4" Nut 7
I/4"x1_" _iHips Head _ 4
_/4" NUt 4
_m Phillips Head Screw
1/4"x5/8" Pa _H
Ph_ll_ He_ Scow
_|_lips Head Screw
_|ips Head
1/4"xl/2"
t/4"x_/2"
4
!
!
4
4
4
8
2
2
1
4
2
_/4"_4" Phillips H_ Screw
U4" Lock Nut:
U4"x3/4" Pl_ii_lps _
Door Ha_le
Magnetic Door StQp
Battery
Flare Tamer Spacer
114"×_t2" _WJPS Head Screw
irL_all B_om Sl'_|f To Ca_ Legs
l_l _ee_s To Ca_ Legs
|n_l! Rea_ Panel To Cart
install Top Pa_ a_ B_ S_lf To Ca_
l_stall _ Stops To Cart
V_stall C_r Hand_ To Doors
|_1! _fs To: Cart
Inst_ll Tank H_ To Cart
install Tank _ To C_
Re_ Df_,ve_ From Bal_ Pulled Out T_ Fa,-
Ins_a|l G_t| Head To Car_
ln_l| S_e Shelves To C_rt
_Ins_ll T@ F_ _rs
Inst_ll To Cart
tn_l To Electric Ig_ltor
Instal| To _Side Par_
ir_all Rear _ _ To Cact
/_-_| Size a_ _J_J_tity _ Each _rdw_e P_e:
ii ........................................
FJ_r_ Tame_
5
4_ i_6¸
REF# DESCRIPTION PART# QTY _F# DESCRIPTION P_T# QW
&
4_
&
&
7:
8_
9,
t0.
1t.
12.
16.
18:
19,
23
24.
2&
2&
31.
32.
33
36.
37.
39;
Lk_- Po_e_ln, G_ph_e
Ud $_ Paae_.Left
Ud St_ _nel - PJgh_
Name P_te
L_ H_e
Warm_ _k
Cast iron _ki_ G_
Stainless Stee_ Flame Tamer
Gas Col_r Box w/Electrode
_nition W_reSe_t
£a_ _ Left
Par_e_-R_ht
Pane{ -Raa_
Par_{ _Frortt
Gas Valve _sembty
-LP°G_
-N.G.
MaPJf_
E_c_¢ IgOr
_a_oi Panel
_n_Ol Knob
Top Pa_e! of Cab_r_el
Storage B_n
G_e_seD_lnl_ Tray
L_r HeatShield
insert_ate- Stain|ass Steel
Rear Paae_
BoOm S_;f o{Cabot
Side Shaft
Side Burr Body
Cart Legs -Castor
_rt Legs - Whoa{ :S_e
Drawer-Stai_le_ Stoat
C_
F_
_52A
_45B
P04_
P0237C
P15098
PI648B
P2207C
Pt#3_
_1_
P2528B
P0728E
_727E
P0732A
PO?31A
P2939B
P3297C
P3_7E
P5027C
P_
P294_B
p_
P_
P_l_
P2706D
_17C
F_z945A
PI_31B
P4325A
PI040A
P_31_
P__37B
F%573A
_32A
_78A
P4_IA
P51('_A
P4324A
!
1
1
1
3
6
3
1
!
1
6
I
1
1
7
I
1
1
!
1
2
1
I
1
2
1
I
2
2
2
41.
42, Wheel Hub * G_e
43. Wheel - _ph_
44 Tank Hook (LP_G. enlyj
45. T_nk }J_r (LP.G _y)
_, AA Battery
47. Magnetic Door S_p
_. Door Handle
49, FJame Ta_ Spacer
50 Pot S_Jppen
51, Si_e 8u_r _y - It_r_r
5&
54_
56
Regu_tor ann H_se (L,P,G. o#fy) P3632E
B_met Aseemb4ty
Co_ae_n Tube
Ad_r
Gas Valve Assembty
- L.P.G.
-N_G-
57. _r _uffet (N.G. en_/)
58. Rear W_t_ Shield
59. G_,easeShield
_o NaG. 12" Nose K_
51. Gas VaLveBracks_
62. Rair_Shield
P5113C
_106D
P4029A
P40_B
_gA
P0239A
PBOC6A
P2323B
_A
PI_
P398_
P3996A
P3298A
P3_
PB0C7A
F37_SA
P_5A
P4775C
H_r_v_ P_k (conten_ page 5) PS_D
if _ur S_ipping bOX _s mtssLq£ pa_s e_ _J
M_y _ro_ F'dd_y, 1;-888-:3_7-7642
1
2
2
I
1
2
2
4
I
1
1
1
1
6
1
2
1
6
1
!
have
CST,
FO__e rep_|r o_ _sp|acemeat parts you need:
C_i 6 am -_1 pm CST, 7days a week
To make sure y_ _ _e co_ repiacem_t
pa_s for _ur Kenmore _lite gas gri& plaase
refer to _ part numbers on th_ pa_,
fa_!e_ng in_ormaao_ is r_ui_; to assu_e y_
receive the _ec_ p_:
1. G_ M_e[ Num_f {S_ AGA _ab_ on gri|0
2, Part N_m_r
3. Pa_ Description
4, Quartet of pad_ ne_ed
]m_rtant: Keep _[s C_g_e¢s t_u_ for convener
refej'T_ and for _A _epiac,ement.
_m_rtant: U_ on_y Sears auth_z_ p_. The
use _ any pa_ _at is not Sears authodzed _n
dangerous and _li also vo_ _r pfed_t
warrant.
_fore your g_ griH_ _ _ _r'_s
|i_ to che_ t_ a|! _ha_ _n
ir_l_led. |n_ grill a_ _pad5 f_ da_
as you proe,e_ _r_ ,a_e or _e y_r
gd_l _f _ a_Ps dam_ed, ff you have q_stions
during the pro_ _l! 1-888-3_7o7642,
_m- 1;1pro CST, _ay _ro_ F_.
CAIN;
this gas g¢_L h_ _ anothe_ person
_hand,in9 some of _e la_er, heart _,
_ialLy t_e gril! h_
Fi_m I OP.A_ ¸ _L
R_ve al| cart parts° P_re, a_ gril! he_
f_m carton. A_ble the gas gril| on a
work _e to avc_ gri!|
Refer _parts _st a_ hardwa_ pa¢_ |Itust_ions
to help yoJJ a_m_ _Jr grill
1_ P_on _om _e|_ (P_s L;_ _|em _i)
with _front v_ic_l le_e faci_ d_.
_f_ _ Cart: Legs to tt'_ _om
Shelf, make _Pe _ 2t'_s for _ Step
are |oca_ed in tJ_ ftor_. _ Fig= i. Ins_l!
Cart Si_e on the left _ of
the Bo_gm Shelf0 _ the D_ Channel
faci_ in, 'The _ deg_ I_ _sides and
_ of Bottom S_f m_ _ _ _e _e
of the Side _an_ for _r fit. _
u_ng _of the 1/4"x_t2" _i_lips head Screws
a_ n_s o Install t_ C_r_ ee!
Side 'to the ot_ s_ of _ttom Sh_
usi_ the same-stz_ _.,r_ and m._.
2 In_! Rea_ P_ _ol_ _ S_ Pa_ by _ing
3of the 1/4,x1_" Philti_ he_ _and m,fs.
3o_ _ 2 Cabots i_ Castor Se_ (see
_m _ C_rt _). T_ the
th_ castor stem _ _nd, _ until
stops, _hten _ _ OpeP_ed ii/t_" _h,
Figure 3
_L
Si_, _inse_r_;__ _1 _ through
v_eel _nd _ _e on _ cad _ _
in Fig. _Put _ng _er and 3_ _"nut o_|o
bolt _t_e_ secu_ _ng a s_e 4 I_lips
t. _ _ or _1 will e_
turn freely. Snap V_1_ H_ o_o _ _o
5,. P_ion T_ Pa,_ (Parts _ _tem #24}
_s front vertj_l _facing up Before
|n_al|_ t_ Top PaF_L make _m _ 2holes
for the Door Stop are located in the
R_ Top Panel into position, _the
degree I_p on _ouL_ of Rear Panel, See
Fig; 3. _ firmly u_ 7 of the 114"_1/_
Phl|l_ head _a_'M n_ provided. 8
_nstatl Ooor Stops to Bottom _eif _ Top
Pan_ _Cabir_° See Fig. 4. _re _rm_
_ng 4 of the 1/4"x!_ _iHi_ head
and n_o
2o R_e _white mm _ the
_eel _. _ a _ }-Iand_ to
F_ DOor _ using 2 _ _ M4x6mm
¢arefu_ _ _ _ch _
3, _n l_!l_ _e Fro_ _, make _
of me ca_ L_o
4. in_l eitP_ F_ _ _ inse_i_ t/4"x5/8"
patt-th_aded bolt through the lower door bolt
_e of t_ Fr"_ _a_ _nto I[L_ tapped
ho|e of the _-n Sh_f. T_ht_ _._u_o
Next, a_n the upper door bolt h_ of F_
Door _.h t_ tapped hole _n the Top _i
Cabin. !nse_ 1]4"x_ pa_t-th_ bol_
and tigL_en _re_y_
5. R_at t:h_ _ Io inslail tt_ _r F_ _.
:H_ To _vel The GflU _ _ _ Dr._omLineJJp
_#_ the top _e of the _n_ d_ dO_-_
|_ne_p you_gnll _d r_5 to _ leveled. Th_ step
isoft_ requir_ after mitia! _:_ and when
yeur g_il h_ _ _ve_ to anew _ion. To
level _|1 ca_ u_ _t 1/_6" _pen-end
_nch to ur_screwthe C_o_s
ft_ _r Ca_or _a*,s (see bottom _ _e C_rt
L_} _it the _n_ doors _r_ al_. S_e F_.
So
F|_u_ 4
FWd_ S
HA._
_bIi_ The Tank Hook and _[i _r
Attach the LPG Tank Hook and Tank He_f
to the whee_ of g_|! as _ _n Fig. 6.
A_n t_e tapped holes of _pa_ _h the
_es on Side Panel. Se_JJrefi_iy
l!4_xlt2 " Phi|lips he_d _ _¢_dad°
2_ install 2 of the I/4"x_F£ Ph_l_ps head
to the rear of t_ _r T_ack
3_
4_
SI_ the _i_o the D_ Tracks until
it _o_. See Fig, 7.
_n_all 2of the 1/4"xl/2 _ Phill_ _
to tl_ _o| the D_ Track This im_
ta_ step p_v_ the d_ frown I_i_
pulled e_de Lhe t_cks _Fig, ?_
inst.|ling The _ll Head
11. Now tt'_atyou've assembi_ the gd|| _n y_u
ca_ |nstal{ the p_-_assembl_,t G_II Head
See fig. 8, To red_ the wet0ht of the G_I!
Head, we sugg_ you Open the GdH Lid a_
re_e t_ pac_,d Even
the com_s removed, t'_ step requ_ 2
_e to lin and _ion |_ GdU _onto
grill _rL Be sum to al_ _e 2ho_es
I_eneath the I_ang _on each _of
Gdli Head _the 2holes on e_
of ca_. R_ise Gr_l_L_ _ _se_ 4of
the _!4"x3_" PI_iUipshead scn_s _ _k
nuts and _ghten securely.
2F_ the _ s_e of g_! he_, i_ the
G_ _ng Tr_ See Fig. 8.
3_ Cen|e_ _G_a_e Re_pta_e _der Gma_
Ora_nir_ T_. _e FIg. _,
4_ Insbll Rear _ Sh_id _ween _
S_e Pane_ _ _r_g 2 of the 1/4"×_"
Philli_ he_ _Fcovid_. _e dra_
Figu_
F_um7
G_E _CEPT_
BOWL _ _L
G_
TRAY
\