6 7
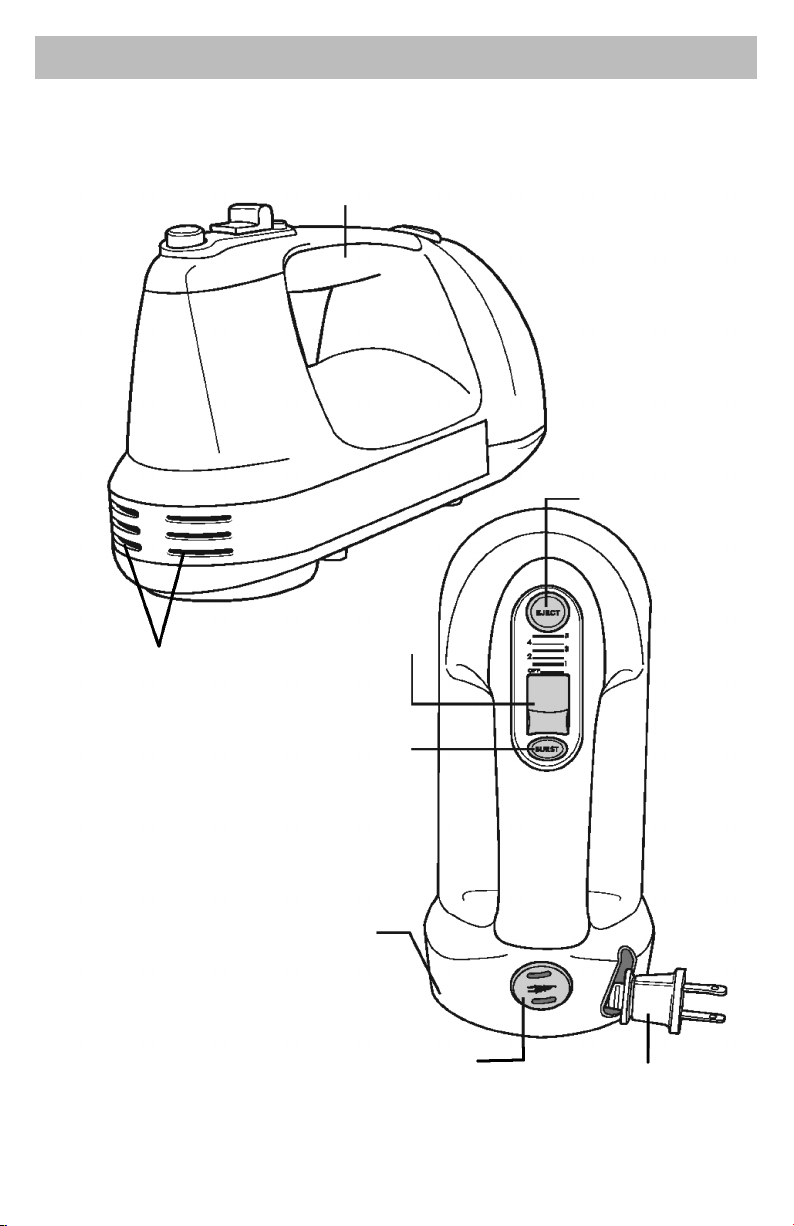
OPERATING YOUR HAND MIXER
red indicator
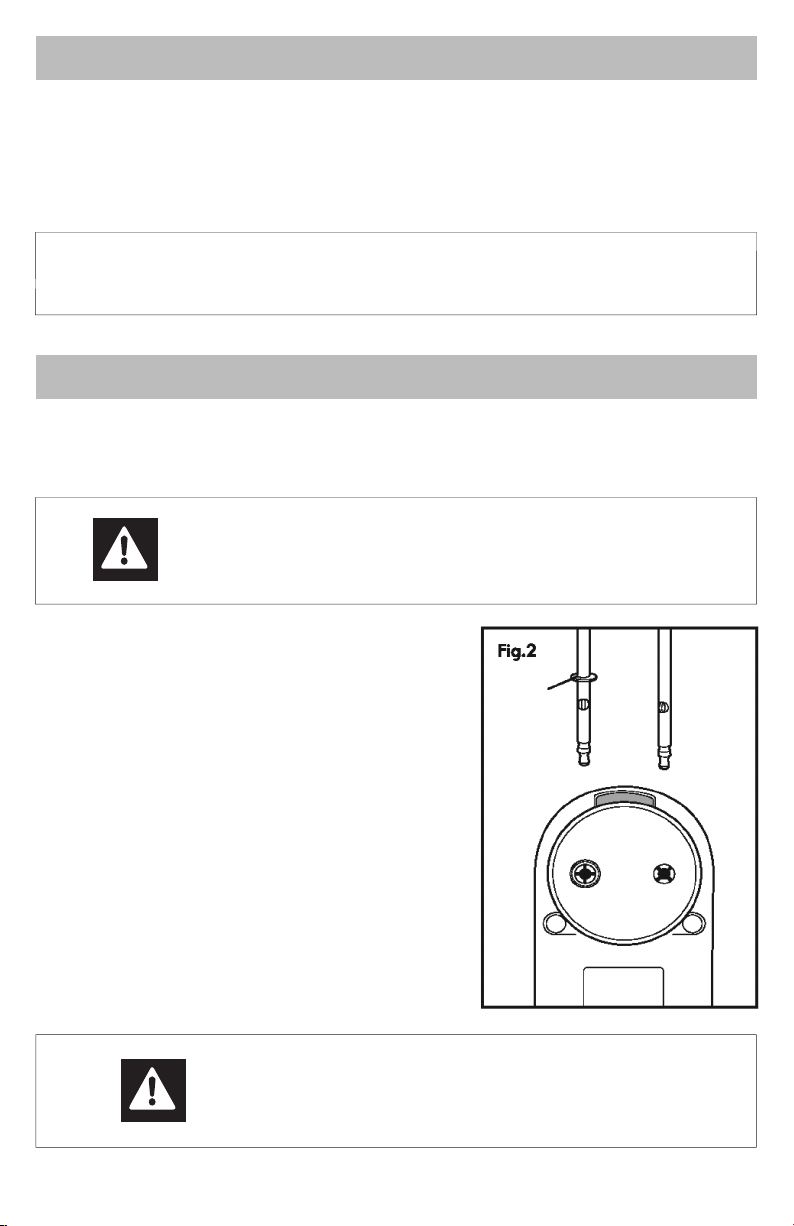
2. Any accessory with a collar, like the liquid blending rod, inserts into the larger opening in the
mixer. Align the anges with the slots and push to lock into place.
ALTERNATE CORD RETRACTION METHOD
On the cord retraction button there are two shallow slots that are spaced apart the same distance
as the blades of the electrical plug.
You may position the tips of the plug blades into the button slots and use the plug to push down
the button for a controlled and safe retraction of the cord.
BURST OF SPEED
(See g. 1 on page 3)
For additional power at any speed, press and hold down the Burst of Speed Button. As soon as
you let go of the button the mixer goes back to whatever speed the mixer is set for.
RETRACTABLE CORD
Mixer has a retractable cord for ease in storing.
To withdraw cord, push and hold in the retrac-
tor button and pull out cord to desired length.
If you pull the cord out too far, you will see a
red indicator on cord (see g 3). Do not pull
past the red indicator or you could damage
the cord.
To safely retract the cord, hold the unplugged
cord end with one hand and press the cord
retractor button with the other hand. Guide
the cord safely and evenly into the mixer, if the
cord gets hung up while relocating, release
button and press again until the cord is fully
retracted.
CAUTION - Do not allow children to use the cord retraction feature,
as the cord end may cause injury.
BOWL REST
The mixer is designed so that it can rest on the side of the bowl while you add ingredients or
check a recipe. To use, TURN MIXER OFF then set the mixer on the edge of the bowl.
NEVER use the bowl rest when the mixer is running.
DO NOT use the bowl rest on small or plastic bowls that could tip over.
NOTE - Do not use the burst of speed button for more than two minutes at a time
or the motor may overheat.
OPERATING YOUR HAND MIXER
TO REMOVE ACCESSORIES
When mixing is completed, slide the mixer’s Speed Control Switch back to the O position.
Unplug mixer from electric outlet, push the Beater Ejector button to remove accessory (s) and set
the mixer down on its heel.
MIXER TIPS AND TECHNIQUES
Your Hand mixer is designed to mix cookie doughs and cake batters, mash potatoes, and whip
heavy cream and egg whites. With the dough hooks and liquid blender rod, the mixer can also
knead yeast bread doughs and blend smoothies, milkshakes, soups and sauces.
Once items to be mixed are in a container, insert mixer with correct accessories down into
container. Plug mixer into electrical outlet, and slide Speed Control Switch forward with your
thumb. One is the slowest speed, and ve is the fastest.
Use a large mixing bowl so that the ingredients speed out for easier mixing. Butter and margarine
should be at room temperature. And our one cup at a time, mixing thoroughly after each
addition. Chips and nuts should be stirred in by hand.
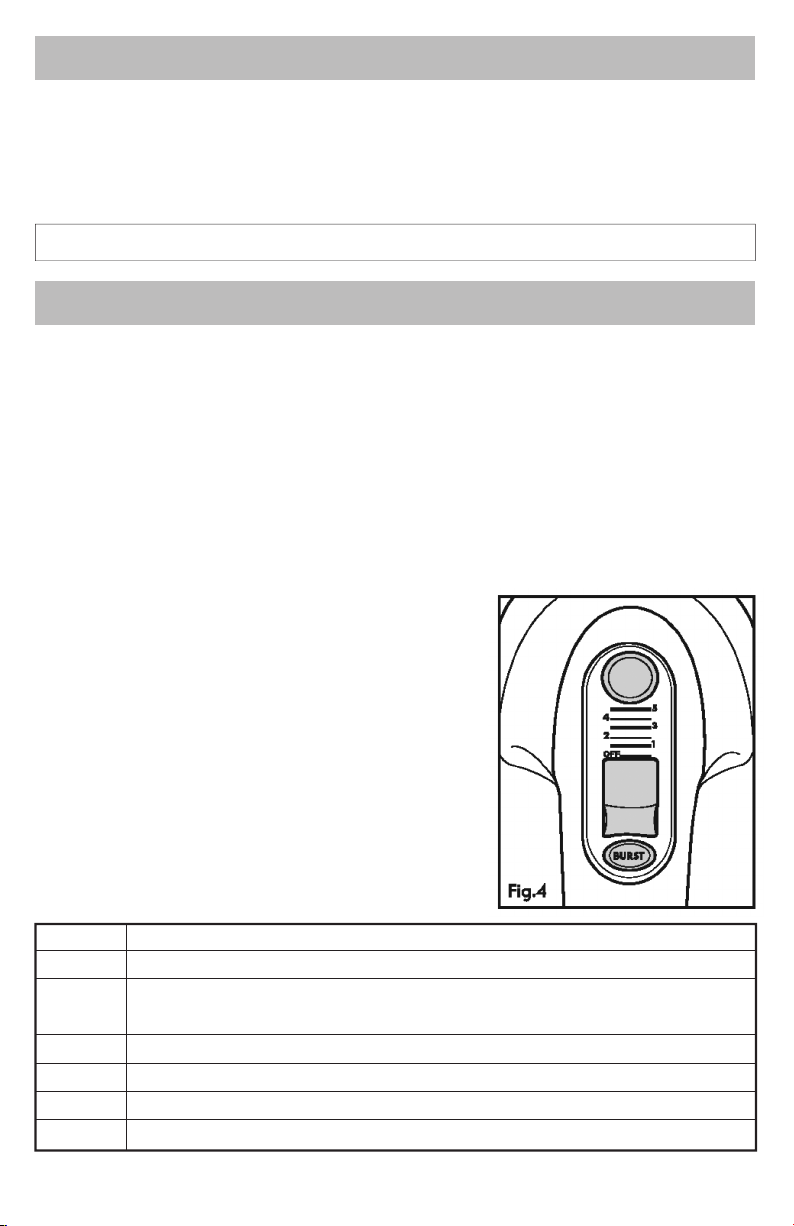
SPEED FUNCTION
OFF O- Ready for eject
1 Low speed for folding or mixing in dry ingredients,
and for muns and quick breads
2 To cream butter and sugar; most cookie doughs
3 MEDIUM speed for most packaged cake mixes
4 Frosting and mashed potatoes; kneading dough
5 HIGH speed for beating egg whites, kneading dough, whipping cream
GENERAL MIXING GUIDE
The following mixing guide is a suggestion for selecting the
best mixing speed for you purpose. Begin on speed 1 and
increase to desired speed spending on the consistency
called for in recipe (See g 4).
NOTE - NEVER push the ejector button while the mixer is running.