Before use
AWARNING
To
prevent injury or fire, take
the
following
precautions:
•
To
prevent ashort circuit, never
put
or leave any
metallic objects (such
as
coins or rneta! lools) insiue
the unit.
How to reset your unit
•Ifthis unit or the connected unit fails
to
operate
properly,
press
the
Reset
button. The
unit
returns to
factory settings when the
Reset
button
is
pressed.
t=:"\
t:::::::::\
r:::='\
IlJ)
~
r::::='\
~
~~~
~~~
oegB
[KENWOOD
J
r
~
8
('12~')(4~'1.)@J
Reset
button
Cleaning the Unit
Ifthe faceplate
of
this unit
is
stained, wipe it
with
a
dry soft cloth such
as
asilicon cloth.
Ifthe faceplate
is
stained badly, wipe the stain
off
with
acloth moistened with neutral cleaner, then wipe it
again with aclean soft dry cloth.
~
•Applying spray cleaner directly
to
the
unit may affect its
mechanical parts. Wiping the faceplate
with
ahard cloth
or
using avolatile liquid such
as
thinner or alcohol may scratch
the surface or
erase
printed characters.
About remote controls
Maximum
of
3remote controls
(KCA-RC1
07MR;
optional accessory)
can
be connected
to
this unit.
For
details on
how
to
use
the remote control, refer to the
operation manual attached
to
it.
When connecting the remote control
to
this unit, you
should register the remote controllD.
For
details, refer
to
<Remote
controllD
setup> (page
20).
•Ifyou experience problems during installation,
consult your Kenwood dealer.
•When you purchase optional accessories, check with
your Kenwood dealer
to
make
sure
that they work
with your model and
in
your
area.
•Characters that conform
to
ISO
8859-1
can
be
displayed.
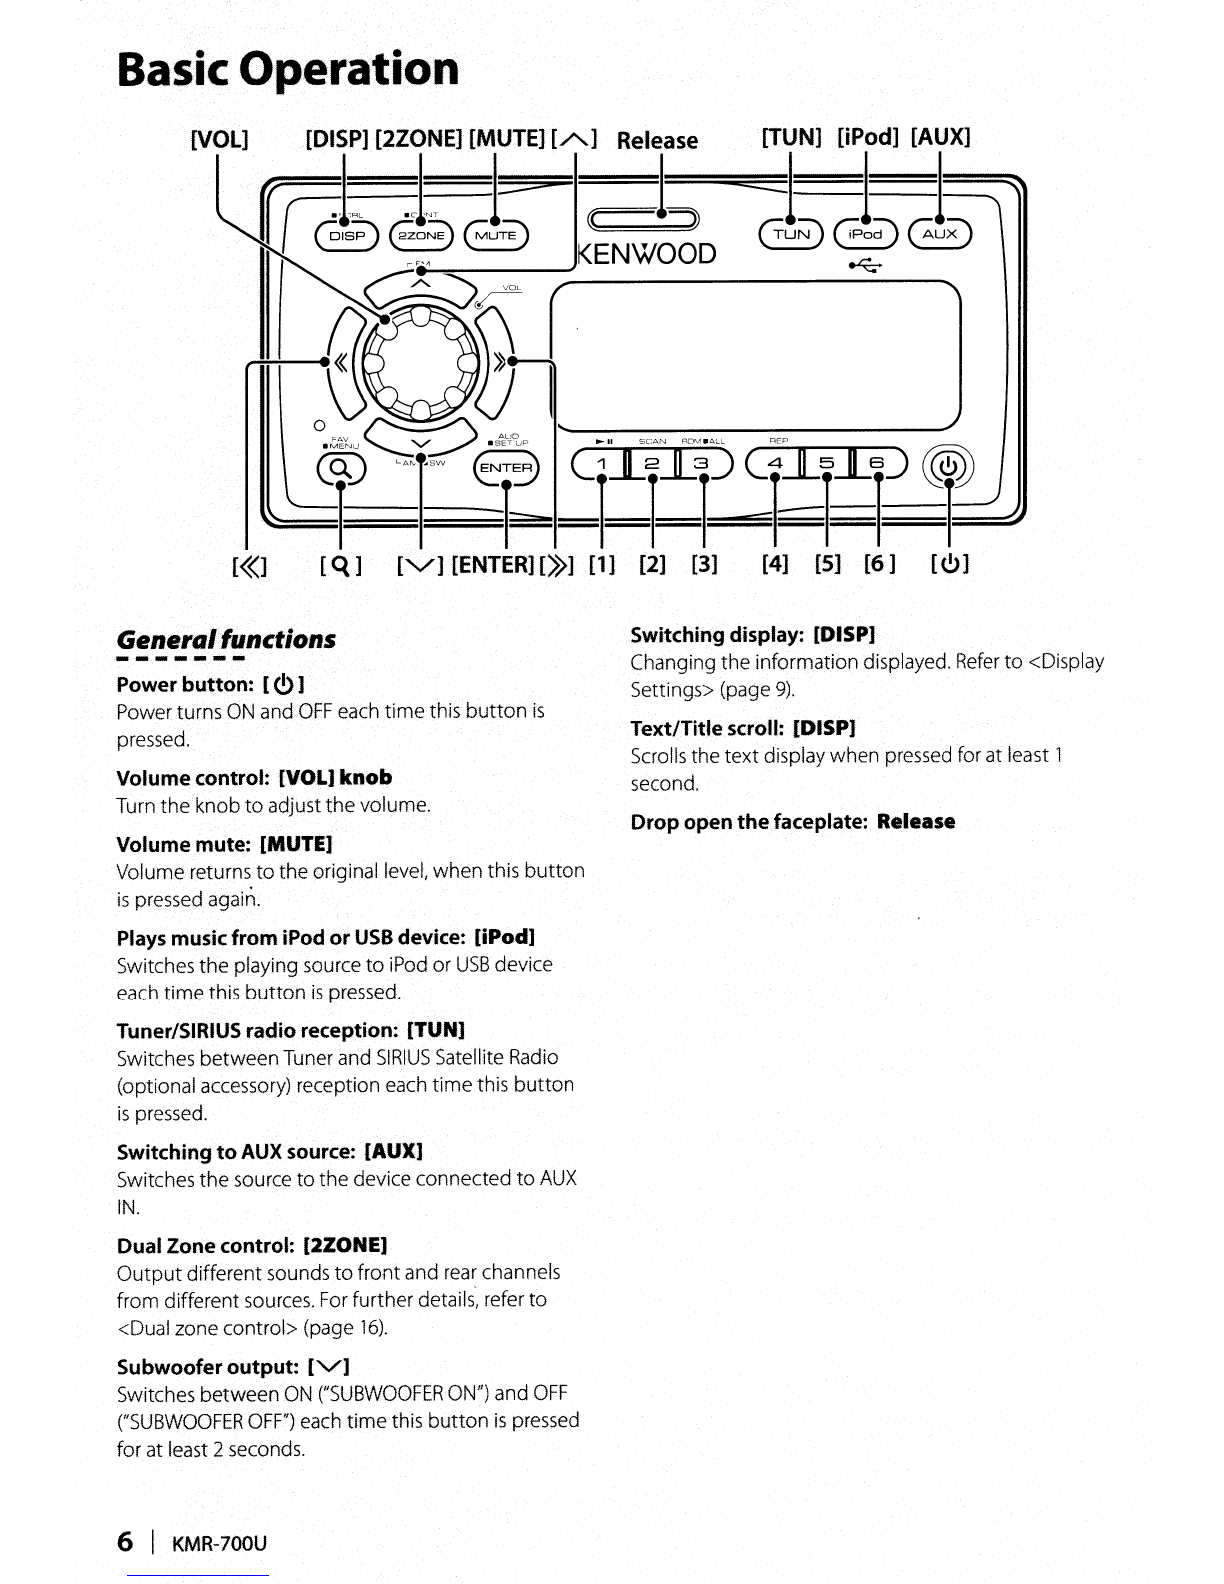
•
In
this document, the description indicator will light
means astatus
is
displayed.
Refer
to
<Display Type
Selection> (page
9)
for the details
of
the status
display
•The illustrations
of
the display and the panel
appearing
in
this manual
are
examples used
to
explain more clearly
how
the controls
are
used.
Therefore, what appears on the display
in
the
illustrations may differ from
what
appears on the
display on the actual equipment, and some
of
the
illustrations on the display may be inapplicable.
•Do
not
disassemble the product. The faceplate
of
the main unit
has
awater resistant rating
of
IPX5.lf
the facepanel
is
disassembled
the
integrity
of
the
IPX5
can
be comprimised.
•
Use
this unit with the faceplate closed, except when
connecting iPod or
USB
device.
IPX5
waterproof
feature
is
only provided when the faceplate
is
closed.
English
I3