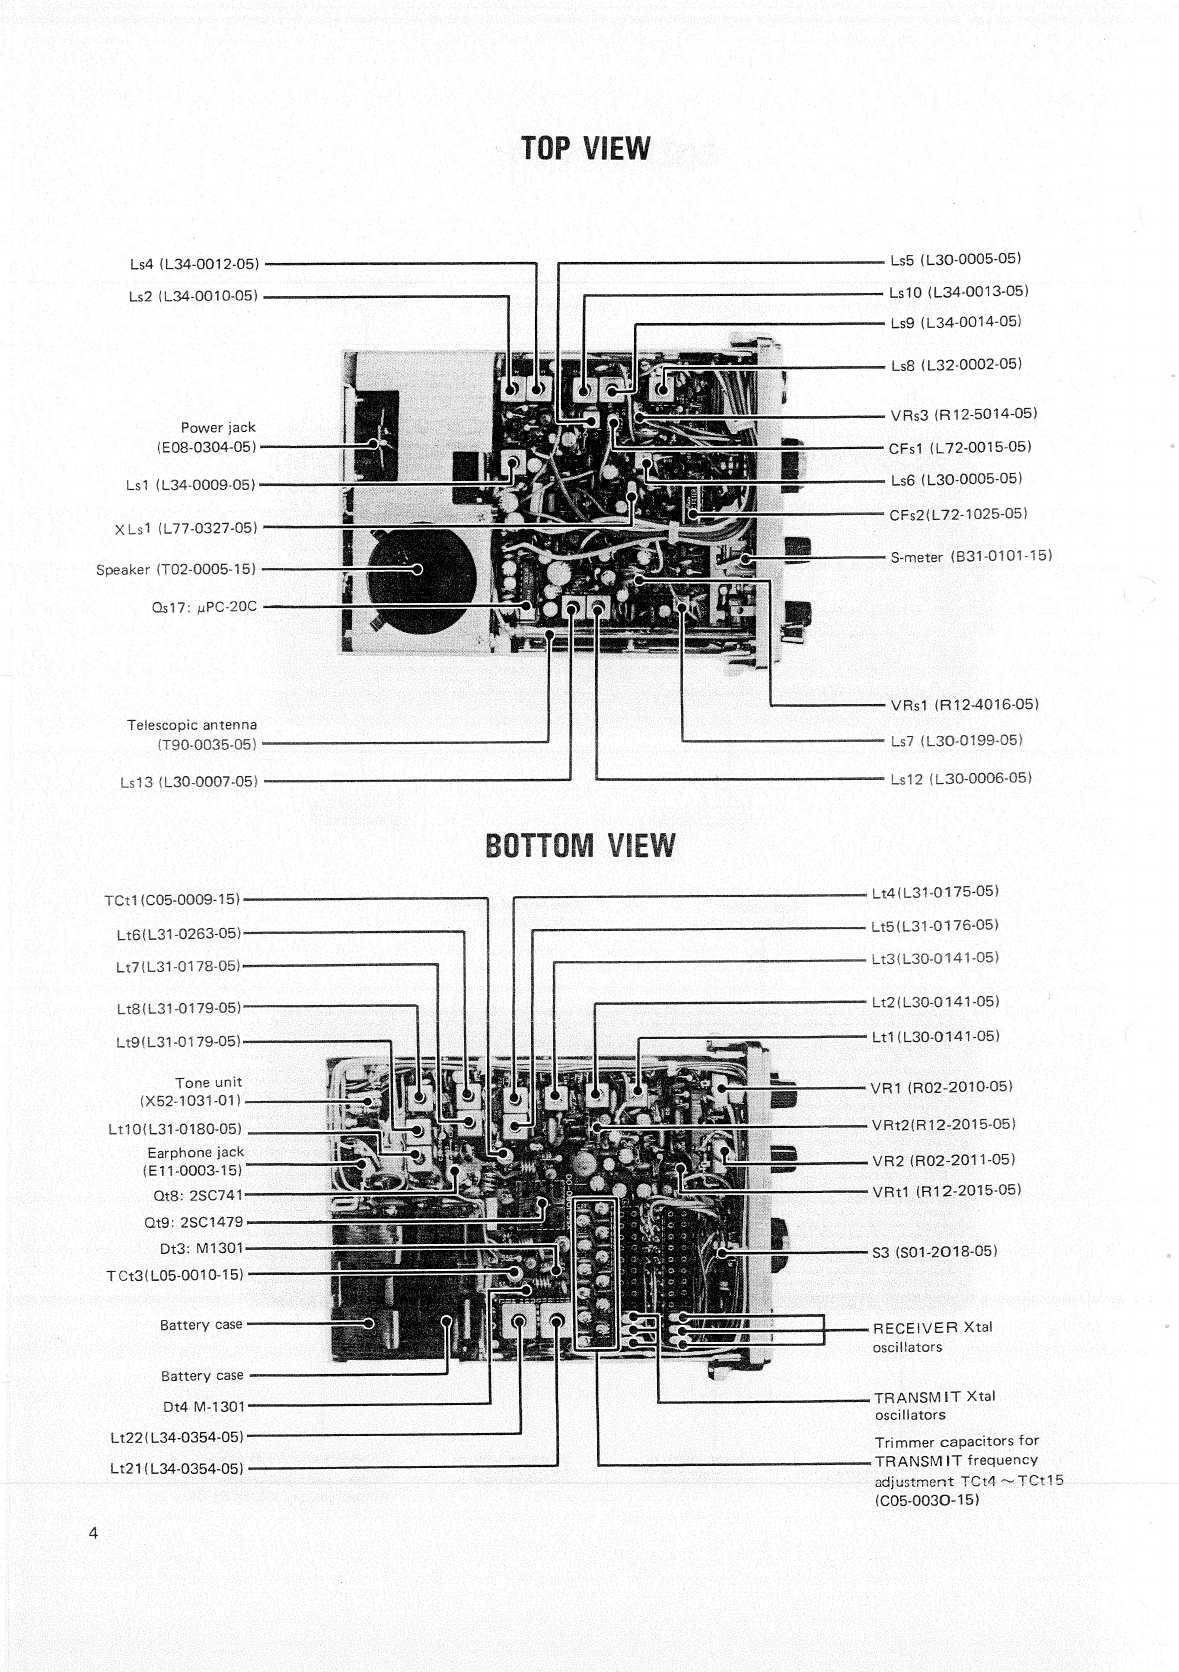
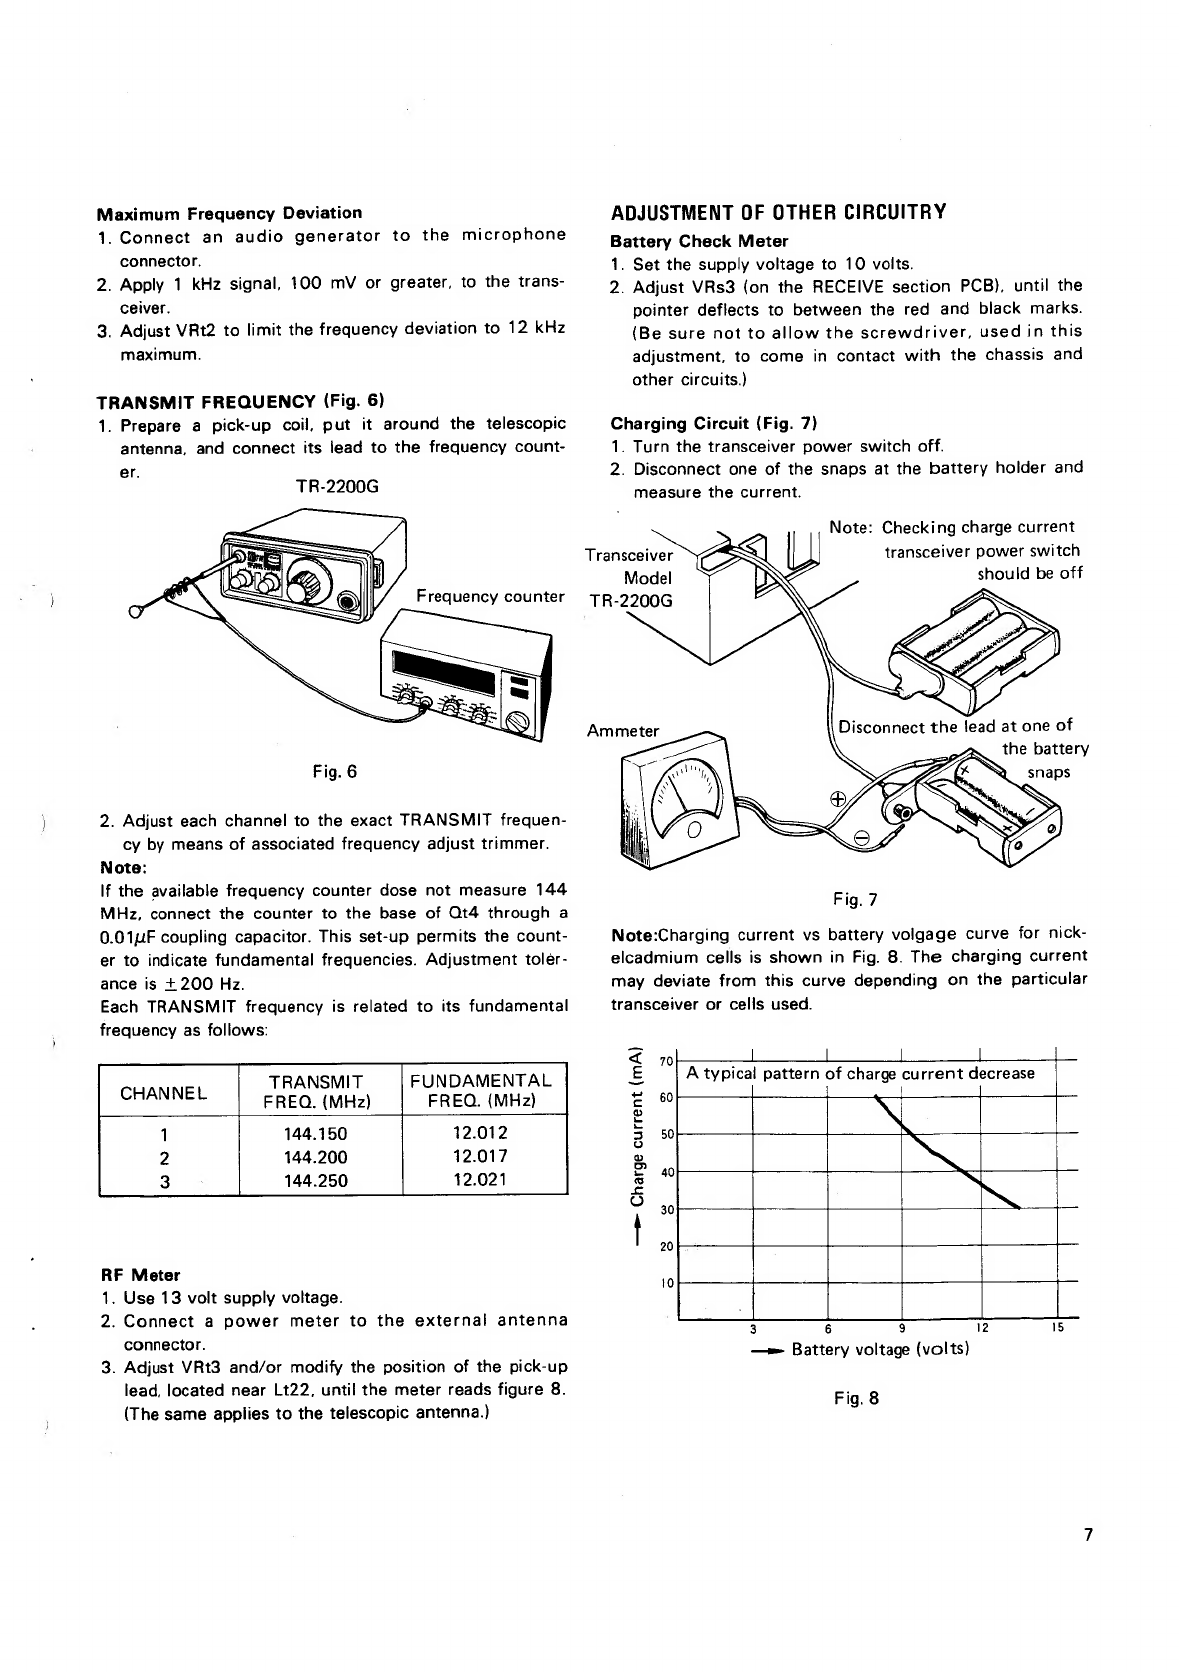
Kenwood TR-2200G User manual
Other Kenwood Receiver manuals

Kenwood
Kenwood VR-605 User manual

Kenwood
Kenwood KMR-M408BT User manual

Kenwood
Kenwood DTF-1 User manual

Kenwood
Kenwood SLG-7 User manual

Kenwood
Kenwood KRF-X7775D User manual

Kenwood
Kenwood TH-D7A User manual

Kenwood
Kenwood B60-4611-00 Use and maintenance manual

Kenwood
Kenwood VR-50RS User manual

Kenwood
Kenwood KIV-700 User manual

Kenwood
Kenwood DDX6706S User manual

Kenwood
Kenwood Super Eleven User manual

Kenwood
Kenwood RZ-1 User manual

Kenwood
Kenwood KRC-15RG User manual

Kenwood
Kenwood VR 3080 - Dolby Digital Receiver User manual

Kenwood
Kenwood KR-V6070 User manual

Kenwood
Kenwood KMM-BT502DAB User manual

Kenwood
Kenwood VR-6070 User manual

Kenwood
Kenwood KMM-BT522HD User manual

Kenwood
Kenwood KMM-BT332 User manual

Kenwood
Kenwood GTM 10 Assembly instructions