manuals.online logo
Brands
  1. Home
  2. •
  3. Brands
  4. •
  5. Kenwood
  6. •
  7. Two-way Radio
  8. •
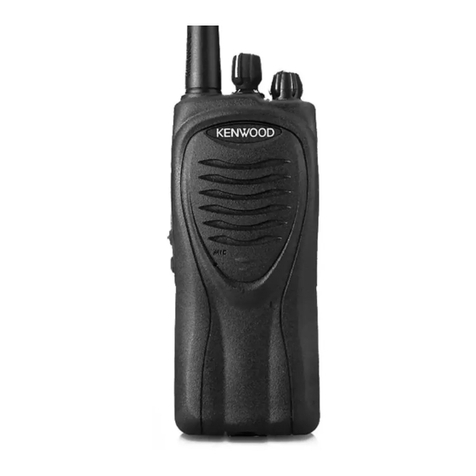
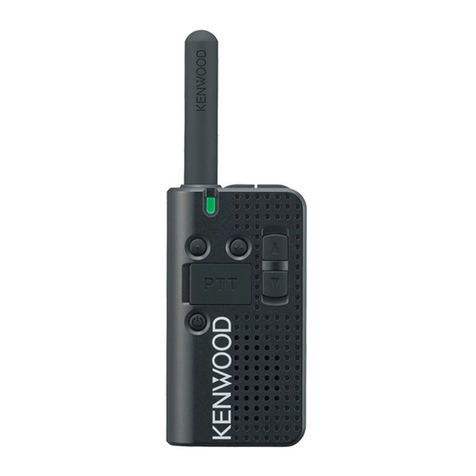
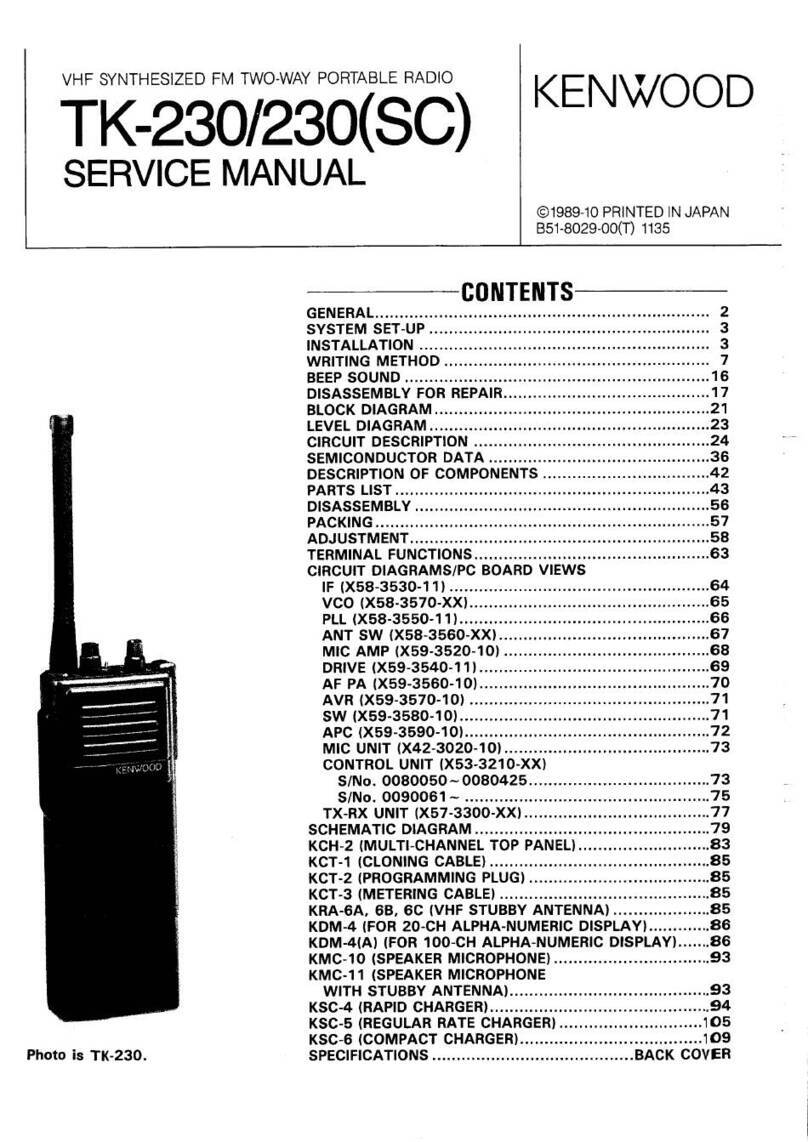
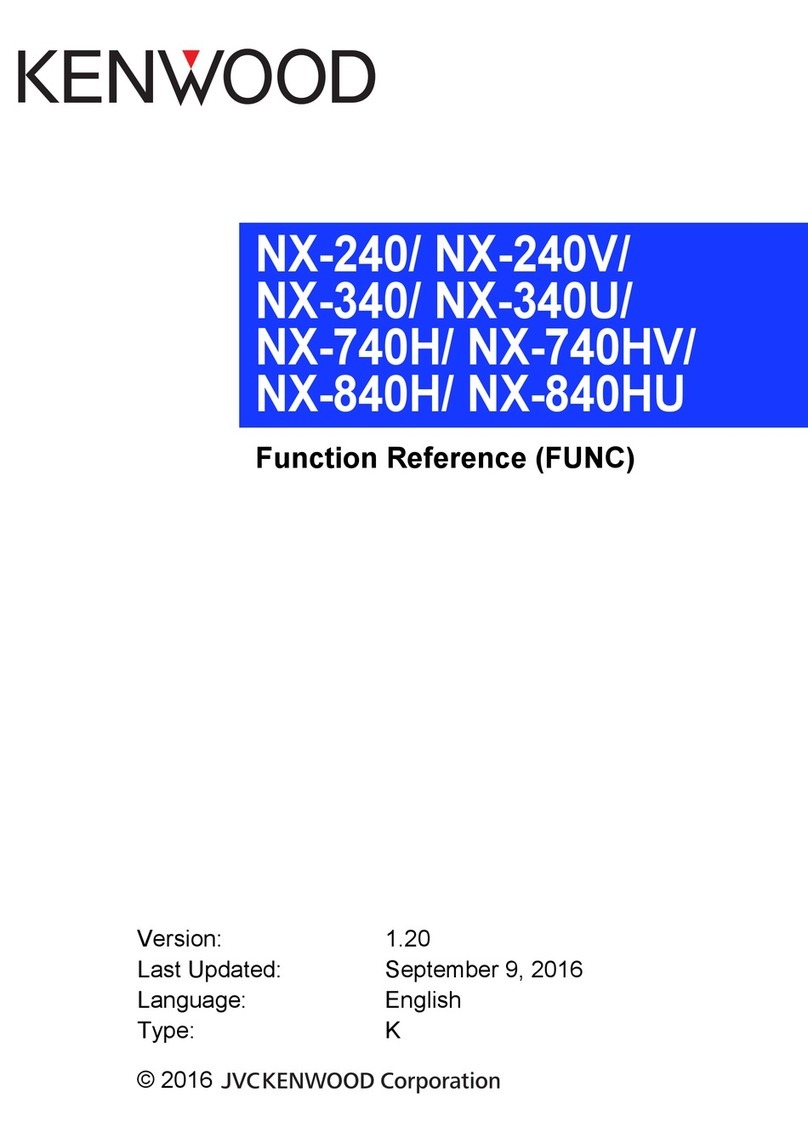
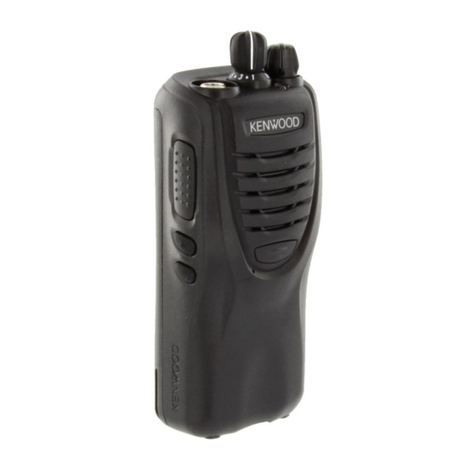
  9. Kenwood ProTalk NX-240V16P User manual

Kenwood ProTalk NX-240V16P User manual

NX-240V16P/NX-340U16P
®
DIGITAL
Operating Manual
FCC License Information
Your KENWOOD transceiver operates on communications frequencies which are subject to FCC (Federal
Communications Commission) Rules & Regulations. FCC Rules require that all operators using Private Land Mobile
radio frequencies obtain a radio license before operating their equipment. Application for license must be made on
FCC form 601, schedules D and H, and Remittance form 159.
FAX: Forms can be obtained by fax from the FCC Fax-On-Demand system. Call 1-202-418-0177 from your fax
machine and request document number 000601 for the form, schedules, and instructions.
MAIL: Forms can be ordered by telephone, and will be sent to you by first class mail. Call the FCC Forms Hotline at
1-800-418-FORM (1-800-418-3676).
INTERNET: Form 601 and instructions can be downloaded from the FCC Forms website at
http://www.fcc.gov/formpage.html
Before filling out your Form 601 application Technical Data section, you must decide on which frequencies you will
operate. See the frequency tables below.
QUESTIONS? Call the FCC for license application questions at 1-888-CALL-FCC (1-888-225-5322).
CHANNEL SETUP MODE
This transceiver allows you to reprogram each of the channels with different frequencies and QT (Quiet Talk)/ DQT
(Digital Quiet Talk)/ RAN (Radio Access Number) settings. The table below lists the default channel settings for
Analog and Digital modes. The transceiver comes in ANALOG MODE for both zones.
NX-240V16P
ANALOG MODE DIGITAL MODE
Zone
Type
Channel
Number
Table
Number
Frequency
(MHz)
QT
(Hz)
Zone
Type
Channel
Number
Table
Number
Frequency
(MHz) RAN
Analog
1 (1) 151.6250 67.0
Digital
(NXDN)
1 (1) 151.6250 1
2 (1) 151.6250 77.0 2 (1) 151.6250 2
3 (1) 151.6250 88.5 3 (1) 151.6250 3
4 (1) 151.6250 179.9 4 (1) 151.6250 4
5 (1) 151.6250 100.0 5 (1) 151.6250 5
6 (2) 151.9550 67.0 6 (2) 151.9550 1
7 (2) 151.9550 82.5 7 (2) 151.9550 2
8 (2) 151.9550 94.8 8 (2) 151.9550 3
9 (2) 151.9550 179.9 9 (2) 151.9550 4
10 (2) 151.9550 100.0 10 (2) 151.9550 5
11 (20) 154.4900 67.0 11 (20) 154.4900 1
12 (21) 154.5150 67.0 12 (21) 154.5150 1
13 (10) 151.5125 67.0 13 (10) 151.5125 1
14 (12) 151.6850 67.0 14 (12) 151.6850 1
15 (5) 151.7000 67.0 15 (5) 151.7000 1
16 (6) 151.7600 67.0 16 (6) 151.7600 1
NX-340U16P
ANALOG MODE DIGITAL MODE
Zone
Type
Channel
Number
Table
Number
Frequency
(MHz)
QT
(Hz)
Zone
Type
Channel
Number
Table
Number
Frequency
(MHz) RAN
Analog
1 (1) 464.5000 67.0
Digital
(NXDN)
1 (1) 464.5000 1
2 (1) 464.5000 77.0 2 (1) 464.5000 2
3 (1) 464.5000 88.5 3 (1) 464.5000 3
4 (1) 464.5000 179.9 4 (1) 464.5000 4
5 (1) 464.5000 100.0 5 (1) 464.5000 5
6 (2) 464.5500 67.0 6 (2) 464.5500 1
7 (2) 464.5500 82.5 7 (2) 464.5500 2
8 (2) 464.5500 94.8 8 (2) 464.5500 3
9 (2) 464.5500 179.9 9 (2) 464.5500 4
10 (2) 464.5500 100.0 10 (2) 464.5500 5
11 (22) 461.3625 74.4 11 (22) 461.3625 1
12 (30) 464.4875 79.7 12 (30) 464.4875 1
13 (32) 464.5375 85.4 13 (32) 464.5375 1
14 (34) 466.0375 91.5 14 (34) 466.0375 1
15 (36) 466.0875 97.4 15 (36) 466.0875 1
16 (38) 466.1375 103.5 16 (38) 466.1375 1
SELF PROGRAMMING MODE
•TO CHANGE THE OPERATING FREQUENCIES OF CHANNELS
[1] With the transceiver power OFF, press and hold the PTT switch
and Side 1 key while turning the transceiver power ON.
Continue to hold the PTT switch and Side 1 key until the LED lights
orange and the transceiver announces “Self.”
[2] Release the PTT switch and Side 1 key.
• The transceiver announces “Zone #” that you were operating.
• Pressing the Side 1 key or Side 2 key will toggle between Zone 1
and Zone 2.
• Press the PTT switch to choose the Zone that you want to modify.
• Then, the transceiver announces “Analog” or “Digital” whichever
the selected zone was operating.
• Pressing the Side 1 key or Side 2 key will toggle between “Analog”
and “Digital.”
• Press the PTT switch to choose the mode that you want to operate
in the selected zone.
• Upon choosing the mode (above [2]), the transceiver announces
Zone#, Channel#, and “Channel.”
[3] Rotate the Channel selector to your desired channel#.
To change the frequency of the selected channel, Press the PTT
switch.
To change the QT or DQT, press the Side 1 or 2 key to toggle
between “Channel”, “QT”, and “DQT”. [If the channel is in ANALOG
Zone] and press the PTT.
To change the RAN or NXDN ID*, press the Side 1 or 2 to toggle
between “Channel”, “RAN”, and “NXDN ID,” [If the channel is in
DIGITAL Zone] and press the PTT.
[4] Press the Side 1 / Side 2 key to increment/ decrement the table number,
to select a frequency, QT/DQT/RAN, and NXDN ID.
• Press and hold the Side 1 or Side 2 key to increment / decrement
the number by 5 at a time.
[5] Press the PTT switch to save the setting.
• A beep will sound.
• Repeat steps [3] to [5] to set up another channel.
[6] Turn the transceiver power OFF and then ON again to activate the
new settings.
Note: The transceiver will automatically return to normal operation if no action is performed for 20 seconds.
“Self”
Zone Selection
Choose a
Zone
by side keys
Select by PTT
M
o
d
e Selection
Choose
Analog
or
Digital by side keys
Select by PTT
Channel
Selection
Select a channel
to be set up.
•
Channel
Table
• QT/DQT/RAN
•
NXDN (Digital) ID
Select by PTT
[ANALOG]
Channel, QT, DQT
[DIGITAL]
Channel, RAN, NXDN ID
VHF Frequency Selection Table
Channel Setup
Number
Frequency
(MHz)
Channel Setup
Number
Frequency
(MHz)
Channel Setup
Number
Frequency
(MHz)
Channel Setup
Number
Frequency
(MHz)
(01) 151.625000 (08) 151.835000 (15) 151.775000 (22) 154.527500
(02) 151.955000 (09) 151.805000 (16) 151.865000 (23) 154.540000
(03) 152.885000 (10) 151.512500 (17) 151.895000 (24) 153.005000
(04) 152.915000 (11) 151.655000 (18) 151.925000 (25) 154.547500
(05) 151.700000 (12) 151.685000 (19) 152.900000 (26) 158.400000
(06) 151.760000 (13) 151.715000 (20) 154.490000 (27) 158.407500
(07) 152.945000 (14) 151.745000 (21) 154.515000
UHF Frequency Selection Table
Channel Setup
Number
Frequency
(MHZ)
Channel Setup
Number
Frequency
(MHZ)
Channel Setup
Number
Frequency
(MHZ)
Channel Setup
Number
Frequency
(MHZ)
(01) 464.500000 (26) 462.837500 (51) 467.887500 (76) 452.762500
(02) 464.550000 (27) 462.862500 (52) 467.912500 (77) 452.862500
(03) 467.762500 (28) 462.887500 (53) 469.487500 (78) 456.187500
(04) 467.812500 (29) 462.912500 (54) 469.512500 (79) 456.237500
(05) 467.850000 (30) 464.487500 (55) 469.537500 (80) 456.287500
(06) 467.875000 (31) 464.512500 (56) 469.562500 (81) 468.212500
(07) 467.900000 (32) 464.537500 (57) 462.187500 (82) 468.262500
(08) 467.925000 (33) 464.562500 (58) 462.462500 (83) 468.312500
(09) 461.037500 (34) 466.037500 (59) 462.487500 (84) 468.362500
(10) 461.062500 (35) 466.062500 (60) 462.512500 (85) 468.412500
(11) 461.087500 (36) 466.087500 (61) 467.187500 (86) 468.462500
(12) 461.112500 (37) 466.112500 (62) 467.462500 (87) 468.512500
(13) 461.137500 (38) 466.137500 (63) 467.487500 (88) 468.562500
(14) 461.162500 (39) 466.162500 (64) 467.512500 (89) 468.612500
(15) 461.187500 (40) 466.187500 (65) 451.187500 (90) 468.662500
(16) 461.212500 (41) 466.212500 (66) 451.237500 (91) 456.337500
(17) 461.237500 (42) 466.237500 (67) 451.287500 (92) 456.437500
(18) 461.262500 (43) 466.262500 (68) 451.337500 (93) 456.537500
(19) 461.287500 (44) 466.287500 (69) 451.437500 (94) 456.637500
(20) 461.312500 (45) 466.312500 (70) 451.537500 (95) 457.312500
(21) 461.337500 (46) 466.337500 (71) 451.637500 (96) 457.412500
(22) 461.362500 (47) 466.362500 (72) 452.312500 (97) 457.512500
(23) 462.762500 (48) 467.787500 (73) 452.537500 (98) 457.762500
(24) 462.787500 (49) 467.837500 (74) 452.412500 (99) 457.862500
(25) 462.812500 (50) 467.862500 (75) 452.512500
QT (0 is OFF)
No.
QT
No.
QT
No.
QT
No.
QT
No.
QT
(001) 67.0 (010) 94.8 (019) 127.3 (028) 173.8 (037) 241.8
(002) 71.9 (011) 97.4 (020) 131.8 (029) 179.9 (038) 250.3
(003) 74.4 (012) 100.0 (021) 136.5 (030) 186.2 (039) 69.3
(004) 77.0 (013) 103.5 (022) 141.3 (031) 192.8 (040) CUSTOM
(005) 79.7 (014) 107.2 (023) 146.2 (032) 203.5 (041) CUSTOM
(006) 82.5 (015) 110.9 (024) 151.4 (033) 210.7 (042) CUSTOM
(007) 85.4 (016) 114.8 (025) 156.7 (034) 218.1 (043) CUSTOM
(008) 88.5 (017) 118.8 (026) 162.2 (035) 225.7 (044) CUSTOM
(009) 91.5 (018) 123.0 (027) 167.9 (036) 233.6 (045) CUSTOM
DQT (0 is OFF)
No.
DQT
No.
DQT
No.
DQT
No.
DQT
No.
DQT
No.
DQT
No.
DQT
(001) D023N (026) D162N (051) D411N (076) D703N (101) D116I (126) D311I (151) D606I
(002) D025N (027) D165N (052) D412N (077) D712N (102) D125I (127) D315I (152) D612I
(003) D026N (028) D172N (053) D413N (078) D723N (103) D131I (128) D331I (153) D624I
(004) D031N (029) D174N (054) D423N (079) D731N (104) D132I (129) D343I (154) D627I
(005) D032N (030) D205N (055) D431N (080) D732N (105) D134I (130) D346I (155) D631I
(006) D043N (031) D223N (056) D432N (081) D734N (106) D143I (131) D351I (156) D632I
(007) D047N (032) D226N (057) D445N (082) D743N (107) D152I (132) D364I (157) D654I
(008) D051N (033) D243N (058) D464N (083) D754N (108) D155I (133) D365I (158) D662I
(009) D054N (034) D244N (059) D465N (084) D645N (109) D156I (134) D371I (159) D664I
(010) D065N (035) D245N (060) D466N (085) D023I (110) D162I (135) D411I (160) D703I
(011) D071N (036) D251N (061) D503N (086) D025I (111) D165I (136) D412I (161) D712I
(012) D072N (037) D261N (062) D506N (087) D026I (112) D172I (137) D413I (162) D723I
(013) D073N (038) D263N (063) D516N (088) D031I (113) D174I (138) D423I (163) D731I
(014) D074N (039) D265N (064) D532N (089) D032I (114) D205I (139) D431I (164) D732I
(015) D114N (040) D271N (065) D546N (090) D043I (115) D223I (140) D432I (165) D734I
(016) D115N (041) D306N (066) D565N (091) D047I (116) D226I (141) D445I (166) D743I
(017) D116N (042) D311N (067) D606N (092) D051I (117) D243I (142) D464I (167) D754I
(018) D125N (043) D315N (068) D612N (093) D054I (118) D244I (143) D465I (168) D645I
(019) D131N (044) D331N (069) D624N (094) D065I (119) D245I (144) D466I (169) CUSTOM
(020) D132N (045) D343N (070) D627N (095) D071I (120) D251I (145) D503I (170) CUSTOM
(021) D134N (046) D346N (071) D631N (096) D072I (121) D261I (146) D506I (171) CUSTOM
(022) D143N (047) D351N (072) D632N (097) D073I (122) D263I (147) D516I (172) CUSTOM
(023) D152N (048) D364N (073) D654N (098) D074I (123) D265I (148) D532I (173) CUSTOM
(024) D155N (049) D365N (074) D662N (099) D114I (124) D271I (149) D546I (174) CUSTOM
(025) D156N (050) D371N (075) D664N (100) D115I (125) D306I (150) D565I
RAN (0 is OFF)
No.
RAN
No.
RAN
No.
RAN
No.
RAN
No.
RAN
No.
RAN
No.
RAN
No.
RAN
No.
RAN
(01) 01 (08) 08 (15) 15 (22) 22 (29) 29 (36) 36 (43) 43 (50) 50 (57) 57
(02) 02 (09) 09 (16) 16 (23) 23 (30) 30 (37) 37 (44) 44 (51) 51 (58) 58
(03) 03 (10) 10 (17) 17 (24) 24 (31) 31 (38) 38 (45) 45 (52) 52 (59) 59
(04) 04 (11) 11 (18) 18 (25) 25 (32) 32 (39) 39 (46) 46 (53) 53 (60) 60
(05) 05 (12) 12 (19) 19 (26) 26 (33) 33 (40) 40 (47) 47 (54) 54 (61) 61
(06) 06 (13) 13 (20) 20 (27) 27 (34) 34 (41) 41 (48) 48 (55) 55 (62) 62
(07) 07 (14) 14 (21) 21 (28) 28 (35) 35 (42) 42 (49) 49 (56) 56 (63) 63
*NXDN ID
(Blank or 1 to 65519)
NXDN ID (Own unit ID) allows you to configure an identification code consisting of a number from 1 to 65,519 for each transceiver. It
can be used to identify the transceiver in an NXDN System (Conventional).
CHANNEL CONFIRMATION MODE
To confirm your channel settings:
[1] With the transceiver power OFF, press and hold the PTT switch while
turning the transceiver power ON.
• Continue to hold the PTT switch until the LED lights
orange and the transceiver announces “Confirm”.
[2] Release the PTT switch.
• Transceiver announces “Zone 1 Analog (or Digital)”.
[3] Pressing the Side 1 key or Side 2 key will toggle between “Zone 1”
and “Zone 2”. Select a zone by pressing the PTT switch.
[4] Rotate the Channel selector to your desired channel.
• Transceiver announces the channel table number, tone number,
scrambler and VOX settings of the selected channel.
[5] Turn the transceiver power OFF and then ON again to return to
normal operation.
Note: The transceiver will automatically return to normal operation if no action is performed for 20 seconds.
VOX GAIN LEVEL SETUP MODE
To change the VOX Gain level:
[1] With the transceiver power OFF, press and hold the Side 1 key
while turning the transceiver power ON.
• Continue to hold the Side 1 key until the LED lights
orange and the transceiver beeps.
[2] Release the Side 1 key.
• Transceiver announces the current VOX Gain Level (OFF, 1~10).
OFF: a double beep
1: the least sensitive
10: the most sensitive
[3]
Press the Side 1 key: Increment VOX gain level by 1.
(this will adjust the VOX gain level of the radio)
Press the Side 2 key: Turn VOX ON (a single beep)/OFF (a double beep).
(this will change the ON/OFF setting for the current channel of the current zone)
•
To change channel: Rotate the Channel selector
•
To change zone: Hold the Side 2 key
Press the PTT switch: Confirm the VOX Gain Level.
[4] Turn the transceiver power OFF and then ON again to return to normal operation.
Note: The transceiver will automatically return to normal operation if no action is performed for 20 seconds.
“
Confirm
”
Select a
channel to get
a confirmation
Select by PTT
Change the Zone
A beep
Confirm VOX level
Press:
Change VOX level
Press:
VOX ON/OFF
Hold:
Change Zone
Change channel for VOX
ON/OFF per channel
KEY ASSIGNMENT MODE
This transceiver allows you to reprogram the Side 1 and 2 keys with any of the functions listed in the table below.
Each key can be configured to have two functions by a Press and a Hold. (some features cannot be assigned as
a Press or a Hold function.
Table
Number Function Name Descriptions Side 1 Key Side 2 Key
Press Hold Press Hold
(00) None
No Function
○
○○
○
○
○○
○
○
○○
○
○
○○
○
(01) Calling Alert
Transmits a Calling Alert Tone upon a press of the Calling Alert key.
This function cannot be assigned as a Hold function.
If "Calling Alert" is selected from the Press dropdown list, None will
automatically be configured in the Hold dropdown list, and this
configuration cannot be changed.
○
○○
○
--
○
○○
○
--
(02) CW Message
Sends the configured CW Message.
This function can be configured if a message is configured for CW
Message in the CW ID window.
○
○○
○
○
○○
○
○
○○
○
○
○○
○
(03) Key Lock
Toggles the Key Lock between enabled and disabled. While Key
Lock is enabled, key functions will be disabled.
Turning the transceiver OFF and ON again will disable the Key Lock,
and key functions can be used.
Following are keys that are enabled even if the Key Lock is enabled:
•
PTT switch
•
Key Lock
•
Key Lock with Status Memory
•
Super Lock
•
Squelch Off
•
Squelch Off Momentary
•
Monitor
•
Monitor Momentary
•
Selector
○
○○
○
○
○○
○
○
○○
○
○
○○
○
(04) Key Lock with Status Memory
The Same function as the key lock, however, turning the transceiver
OFF and ON again will NOT disable the Key Lock, and keys remain
locked.
○
○○
○
○
○○
○
○
○○
○
○
○○
○
(05) Monitor
Toggles the Monitor between enabled and disabled.
While Monitor
is disabled, the transceiver allows a carrier to open the squelch
regardless of configuration for signaling.
○
○○
○
○
○○
○
○
○○
○
○
○○
○
(06) Monitor Momentary
While this key is pressed and held, the transceiver is disabled from
monitoring the configured signaling and the squelch is opened upon
detection of a carrier.
This function cannot be assigned as a Hold function.
If "Monitor Momentary" is selected from the Press dropdown list,
None will automatically be configured in the Hold dropdown list, and
this configuration cannot be changed.
○
○○
○
--
○
○○
○
--
(07) Scan
Switches the Scan On or Off.
○
○○
○
○
○○
○
○
○○
○
○
○○
○
(08) Scan Temporary Delete
Temporarily deletes a channel added to the scanning sequence from
the sequence.
If a channel for which Scan Add is enabled is selected and if a Scan
Temporary Delete key is pressed while scan pauses, the channel will
be deleted from the scanning sequence.
Status of channel deleted from the scanning sequence by this
function cannot be retained in the transceiver. Reactivating the scan
by pressing the Scan key returns the transceiver to the original state.
○
○○
○
○
○○
○
○
○○
○
○
○○
○
(09) Scrambler/Encryption
Enables or disables the Scrambler/Encryption.
○
○○
○
○
○○
○
○
○○
○
○
○○
○
(10) Squelch Off
Toggles the Squelch Off between enabled and disabled.
○
○○
○
○
○○
○
○
○○
○
○
○○
○
(11) Squelch Off Momentary
While this key is pressed and held, the squelch is open and the
transceiver unmutes the speaker.
This function cannot be assigned as a Hold function.
If "Squelch Off Momentary" is selected from the Press dropdown list,
"None" will automatically be configured in the Hold dropdown list,
and this configuration cannot be changed.
○
○○
○
--
○
○○
○
--
(12) Super Lock
Pressing and holding this key for 4 sec activates the Super Lock
function. Super Lock is the function to prevent accidental operation
of the transceiver. Even if the transceiver is turned OFF and ON
again, the Super Lock status will be retained. To deactivate Super
Lock, turn OFF the transceiver, and press and hold the Side 2 key
while turning ON the transceiver. Once an LED lights orange,
release the Side 2 key within 2 sec.
This function cannot be assigned as a Press function.
If "Super Lock" is selected from the Hold dropdown list, None will
automatically be configured in the Press dropdown list, and 4.0 s will
automatically be configured in the Hold Delay exit box, and these
configurations cannot be changed.
Following keys can still be used while Super Lock mode is On.
•
PTT switch
•
Squelch Off
•
Squelch Off Momentary
•
Monitor
•
Monitor Momentary
--
○
○○
○
--
○
○○
○
(13) Low Transmit Power
Toggles the Transmit Power of the transceiver between High and
Low.
○
○○
○
○
○○
○
○
○○
○
○
○○
○
(14) RX/TX Frequency Scan
Switches the RX/TX Frequency Scan On or Off for a channel with
Repeater Mode enabled and RX/TX Frequency Scan enabled.
○
○○
○
○
○○
○
○
○○
○
○
○○
○
(15) Zone Down
Decreases the Zone number in steps of 1.
○
○○
○
○
○○
○
○
○○
○
○
○○
○
(16) Zone Up
Increases the Zone number in steps of 1.
○
○○
○
○
○○
○
○
○○
○
○
○○
○
To change the functions of the Side 1 and Side 2 keys:
[1] With the transceiver power OFF, press and hold the Side 1 and Side 2 keys
while turning the transceiver power ON.
• Continue to hold the Side 1 and Side 2 keys until the LED lights orange
and the transceiver announces “Setup”.
[2] Release the keys, and the transceiver will announce “Table Zero”.
[3] Press the Side 1 or Side 2 to increment / decrement the table number and
press the PTT Switch to select the function that you want to assign to a key
(either the Side 1 or the Side 2, a press or a hold).
[4]
•
Press the Side 1 key to assign the function selected in the above [3]
to the Side 1 key press.
•
Hold the Side 1 key to assign the function to the Side 1 key hold.
•
Press the Side 2 key to assign the function to the Side 2 key press.
•
Hold the Side 2 key to assign the function to the Side 2 key hold.
[5] Beeps will sound at the completion of [4] key assignment.
You will need to repeat [3] and [4] to assign more functions to press/hold key.
[6] Turn the transceiver power OFF and then ON again to activate the new settings.
Note: The transceiver will automatically return to normal operation if no action is performed for 20 seconds.
ALL RESET MODE
At some point in time, you may desire to reset the transceiver settings to their default values. This function
will reset all channels to their default analog frequencies and QT/DQT, the VOX function to its default status,
and all keys to their default functions.
To reset the transceiver:
[1] With the transceiver power OFF, press and hold the PTT switch, the Side 1 key, and the Side 2 key
while turning the transceiver power ON.
• Continue to hold the keys for 2 seconds, until the LED lights orange.
[2] Release the keys.
• The keys must be released within 1 second after the LED lights orange,
otherwise All Reset Mode will cancel.
• The transceiver announces “Confirm” and returns to normal operation
in the default settings.
“
Setup
”
“
Table
Zero
”
“Table #”
Select
“Side 1 or 2”
“Press or Hold”
“
Confirm
”

This manual suits for next models

1

Other Kenwood Two-way Radio manuals

Kenwood FreeTalk WX UBZ-GM14 User manual

Kenwood

Kenwood FreeTalk WX UBZ-GM14 User manual

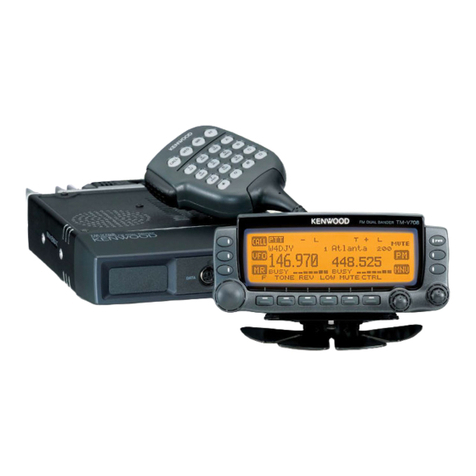
Kenwood TM-V708A User manual

Kenwood

Kenwood TM-V708A User manual

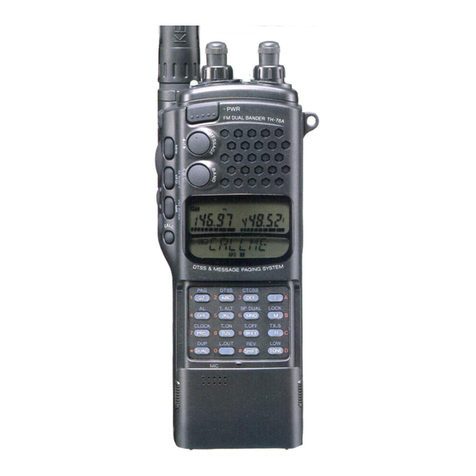
Kenwood TH-78A User manual

Kenwood

Kenwood TH-78A User manual

Kenwood TK-260G User manual

Kenwood

Kenwood TK-260G User manual

Kenwood TK-7160 Owner's manual

Kenwood

Kenwood TK-7160 Owner's manual

Kenwood TK-3202-3 User manual

Kenwood

Kenwood TK-3202-3 User manual

Kenwood TK-3302 User manual

Kenwood

Kenwood TK-3302 User manual

Kenwood TK-705D User manual

Kenwood

Kenwood TK-705D User manual

Kenwood TK-3202-1 User manual

Kenwood

Kenwood TK-3202-1 User manual

Kenwood TH-75A/E User manual

Kenwood

Kenwood TH-75A/E User manual

Kenwood NEXEDGE NX-240 Parts list manual

Kenwood

Kenwood NEXEDGE NX-240 Parts list manual

Kenwood ProTalk DIGITAL TK-3701D User manual

Kenwood

Kenwood ProTalk DIGITAL TK-3701D User manual

Kenwood TM-V7E User manual

Kenwood

Kenwood TM-V7E User manual

Kenwood TK-2302-1 User manual

Kenwood

Kenwood TK-2302-1 User manual

Kenwood TM-V71A User manual

Kenwood

Kenwood TM-V71A User manual

Kenwood TH-75A/E User manual

Kenwood

Kenwood TH-75A/E User manual

Kenwood TK-3207 User manual

Kenwood

Kenwood TK-3207 User manual

Kenwood TH-79E User manual

Kenwood

Kenwood TH-79E User manual

Kenwood NX-300K User manual

Kenwood

Kenwood NX-300K User manual

Kenwood TK-2170 SERIES Operating manual

Kenwood

Kenwood TK-2170 SERIES Operating manual

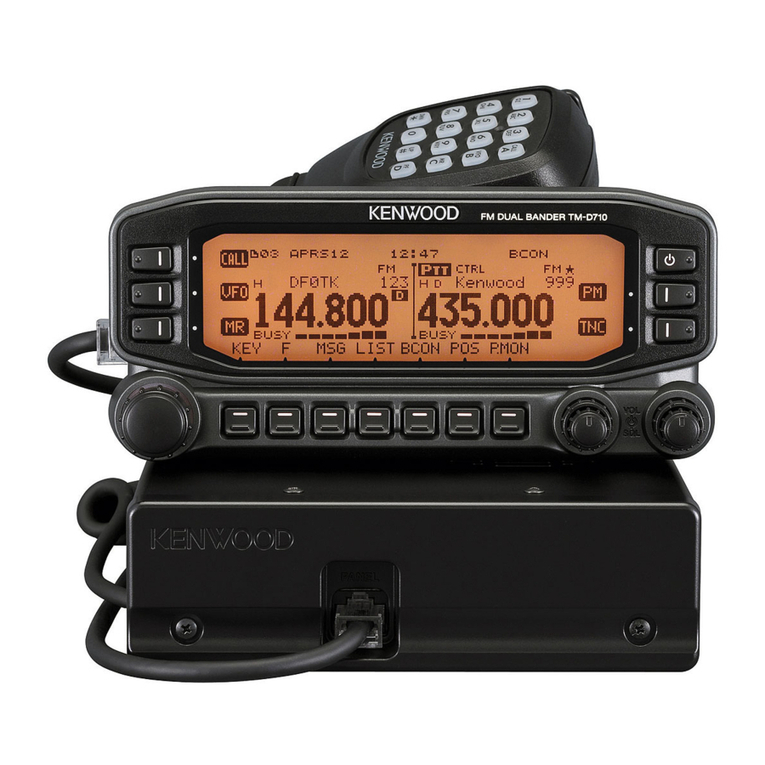
Kenwood TM-D710A User manual

Kenwood

Kenwood TM-D710A User manual

Kenwood TK-230 User manual

Kenwood

Kenwood TK-230 User manual

Kenwood TH-55AT7E User manual

Kenwood

Kenwood TH-55AT7E User manual

Kenwood TK-705 User manual

Kenwood

Kenwood TK-705 User manual

Popular Two-way Radio manuals by other brands

FAYOGOO TWIN SET user manual

FAYOGOO

FAYOGOO TWIN SET user manual

Cobra ACXT1035R FLT owner's manual

Cobra

Cobra ACXT1035R FLT owner's manual

Northfield Telecommunications AWR991 user manual

Northfield Telecommunications

Northfield Telecommunications AWR991 user manual

Shenzhen Unison UT308 owner's manual

Shenzhen Unison

Shenzhen Unison UT308 owner's manual

Anysecu WP-67 user manual

Anysecu

Anysecu WP-67 user manual

AINA PTT quick guide

AINA

AINA PTT quick guide

RCA Prodigi RDR1520 Series quick start guide

RCA

RCA Prodigi RDR1520 Series quick start guide

Motorola T80 owner's manual

Motorola

Motorola T80 owner's manual

Motorola ASTRO APX 6000XE Series user manual

Motorola

Motorola ASTRO APX 6000XE Series user manual

Freetalker 4913 operating instructions

Freetalker

Freetalker 4913 operating instructions

Motorola APX 8000H 2.5 user guide

Motorola

Motorola APX 8000H 2.5 user guide

Motorola RDU2080d - RDX Series On-Site UHF 2 Watt 8 Channel Two Way Business... user guide

Motorola

Motorola RDU2080d - RDX Series On-Site UHF 2 Watt 8 Channel Two Way Business... user guide

SHENZHEN CHANGTAIWEI ELECTRONIC VT-8 user manual

SHENZHEN CHANGTAIWEI ELECTRONIC

SHENZHEN CHANGTAIWEI ELECTRONIC VT-8 user manual

Cobra 18 WX ST operating instructions

Cobra

Cobra 18 WX ST operating instructions

Steren RAD-500 instruction manual

Steren

Steren RAD-500 instruction manual

Wintec LP-4502E user manual

Wintec

Wintec LP-4502E user manual

Cobra MT148 K user guide

Cobra

Cobra MT148 K user guide

Cobra MICROTALK CXR725C owner's manual

Cobra

Cobra MICROTALK CXR725C owner's manual

manuals.online logo
manuals.online logoBrands
  • About & Mission
  • Contact us
  • Privacy Policy
  • Terms and Conditions

Copyright 2025 Manuals.Online. All Rights Reserved.