manuals.online logo
Brands
  1. Home
  2. •
  3. Brands
  4. •
  5. KERN Optics
  6. •
  7. Measuring Instrument
  8. •
  9. KERN Optics ORA 4 FA User manual

KERN Optics ORA 4 FA User manual

1
2
3 ORA_4FB-BA-d-1410
1Technische Daten
Mo d e l le
KE R N
Messbereic h
und
S k alen
S k alen
teilu ng
Ge na uig k eit
Abmessungen
Produkt
Nettogewicht
O R A 4 F B
EG: 50°C –
0°C G13
PG: 50°C –
0°C G11/12
CW:40°C –
0 °C
BF: 1,10 –
1,40kg/l
1 °C
1 °C
5 °C
0,01kg/l
160x40x40mm
0,140kg
B
1. Technical data
Modell
KERN
Measuring range
and Scales
Scale
graduations
Accuracy
Dimensions
Product
Net weight
ORA 4 FA/FB
EG: -50°C – 0°C G13
PG: -50°C – 0°C
G11/12
CW: -40°C – 0°C
BF: 1,10 – 1,40 kg/l
1°C
1°C
5°C
0,01 kg/l
160x40x40mm 0,140kg
Operating manual
Analogue refractometer
KERN & Sohn GmbH
Ziegelei 1
D-72336 Balingen
E-Mail: info@kern-sohn.com
Tel: +49-[0]7433-9933-0
Fax: +49-[0]7433-9933-149
Internet: www.kern-sohn.com
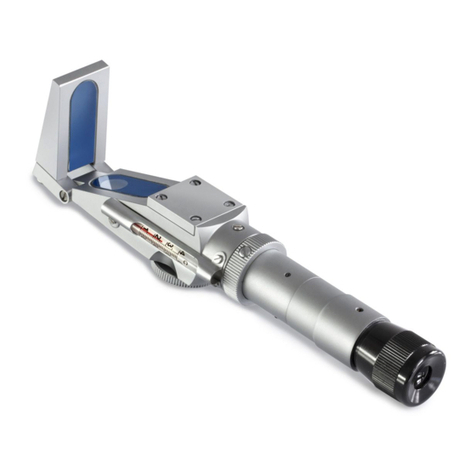
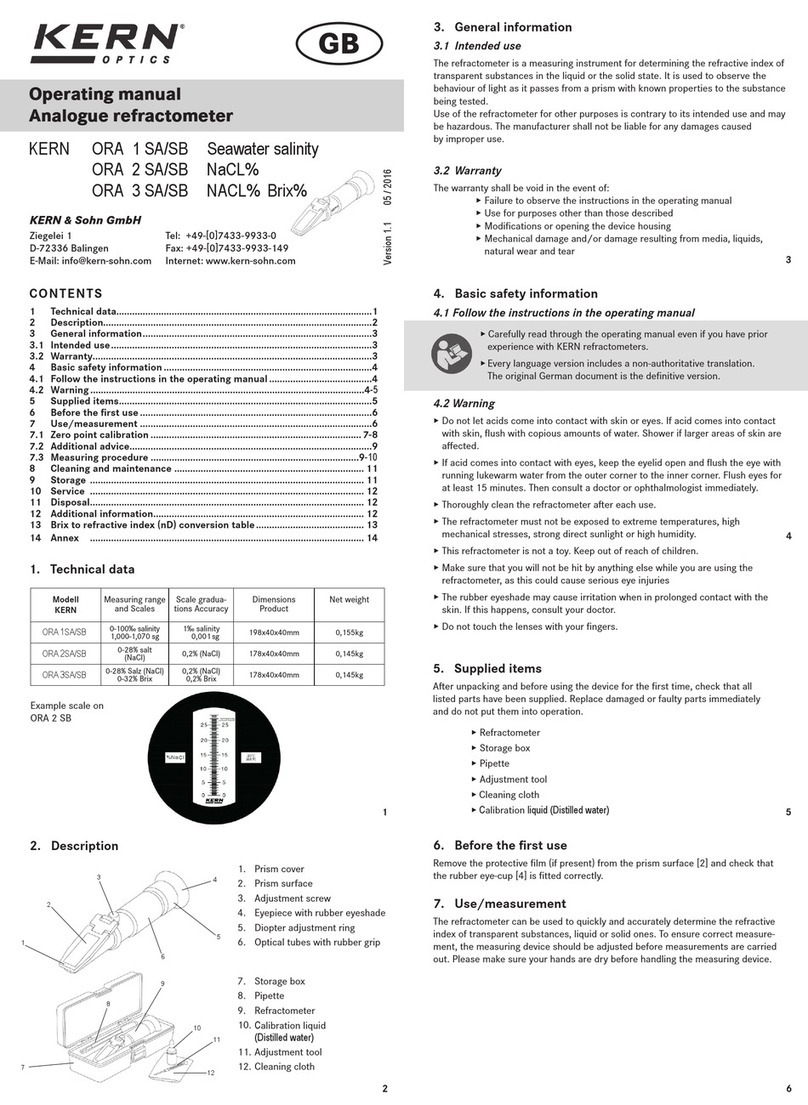
2. Description
1. Prism cover
2. Prism surface
3. Adjustment screw
4. Eyepiece with rubber eyeshade
5. Diopter adjustment ring
6. Optical tubes with rubber grip
ORA_4FB-BA-d-1410
KERN & Sohn GmbH
Ziegelei 1
D-72336 Balingen
E-Mail: info@kern-sohn.com
Tel: +49-[0]7433-9933-0
Fax: +49-[0]7433-9933-149
Internet: www.kern-sohn.com
Betriebsanleitung
Analoges Refraktometer
KERN ORA 4 FB Analog Antifrost
VW Standard
Version 1.0
12/2014
ORA-BA-d-1410
Example scale on
ORA 4 FB
ORA_4FB-BA-d-1410 4
2Gerätebeschreibung
1. Prismenabdeckung
2. Prismenfläche
3. Justierschraube
4. Okular mit Gummi-Augenmuschel
5. Einstellring des Diopters
6. Optische Röhre mit Gummigriff
7. Aufbewahrungsbox
8. Pipette
9. Refraktometer
10. Destilliertes Wasser / Kalibrierflüssigkeit
11. Justierwerkzeug
12. Reinigungstuch
2
4
5
3
6
1
12
11
10
9
8
7
CONTENTS
1 Technical data.................................................................................................1
2 Description......................................................................................................2
3 General information.......................................................................................3
3.1 Intended use ...................................................................................................3
3.2 Warranty..........................................................................................................3
4 Basic safety information ...............................................................................4
4.1 Follow the instructions in the operating manual .......................................4
4.2 Warning ....................................................................................................... 4-5
5 Supplied items................................................................................................5
6 Before the first use ........................................................................................6
7 Use/measurement.........................................................................................6
7.1 Zero point calibration ................................................................................ 7-8
7.2 Additional advice............................................................................................9
7.3 Measuring procedure for antifreeze testing ......................................... 9-10
7.4 Measuring procedure for windscreen wiper water testing.................... 10
7.5 Measuring procedure for determining battery acid density.................. 11
8 Cleaning and maintenance......................................................................... 12
9 Storage ......................................................................................................... 13
10 Service.......................................................................................................... 13
11 Disposal........................................................................................................ 13
12 Additional information................................................................................ 13
KERN ORA 4 FA/FB Analogue Antifreeze
VW Standard
GB
Version 1.1 05 / 2016
7. Storage box
8. Pipette
9. Refractometer
10. Calibration liquid
(Distilled water)
11. Adjustment tool
12. Cleaning cloth
6
5
3
4
3. General information
3.1 Intended use
The refractometer is a measuring instrument for determining the refractive index of
transparent substances in the liquid or the solid state. It is used to observe the
behaviour of light as it passes from a prism with known properties to the substance
being tested.
Use of the refractometer for other purposes is contrary to its intended use and may
be hazardous. The manufacturer shall not be liable for any damages caused
by improper use.
3.2 Warranty
The warranty shall be void in the event of:
▸ Failure to observe the instructions in the operating manual
▸ Use for purposes other than those described
▸ Modifications or opening the device housing
▸ Mechanical damage and/or damage resulting from media, liquids,
natural wear and tear
4. Basic safety information
4.1 Follow the instructions in the operating manual
▸ Carefully read through the operating manual even if you have prior
experience with KERN refractometers.
▸ Every language version includes a non-authoritative translation.
The original German document is the definitive version.
4.2 Warning
▸ Do not let acids come into contact with skin or eyes. If acid comes into contact
with skin, flush with copious amounts of water. Shower if larger areas of skin are
affected.
▸ If acid comes into contact with eyes, keep the eyelid open and flush the eye with
running lukewarm water from the outer corner to the inner corner. Flush eyes for
at least 15 minutes. Then consult a doctor or ophthalmologist immediately.
▸ Thoroughly clean the refractometer aer each use.
▸ The refractometer must not be exposed to extreme temperatures, high
mechanical stresses, strong direct sunlight or high humidity.
▸ This refractometer is not a toy. Keep out of reach of children.
▸ Make sure that you will not be hit by anything else while you are using the
refractometer, as this could cause serious eye injuries
▸ The rubber eyeshade may cause irritation when in prolonged contact with the
skin. If this happens, consult your doctor.
▸ Do not touch the lenses with your fingers.
6. Before the first use
Remove the protective film (if present)from the prism surface [2]and check that
the rubber eye-cup [4]is fitted correctly.
7. Use/measurement
The refractometer can be used to quickly and accurately determine the refractive
index of transparent substances, liquid or solid ones. To ensure correct measure-
ment, the measuring device should be adjusted before measurements are carried
out. Please make sure your hands are dry before handling the measuring device.
5. Supplied items
Aer unpacking and before using the device for the first time, check that all
listed parts have been supplied. Replace damaged or faulty parts immediately
and do not put them into operation.
▸ Refractometer
▸ Storage box
▸ Pipette
▸ Adjustment tool
▸ Cleaning cloth
▸ Calibration liquid (Distilled water)
Manual_ORA-U_V1
7
14
8
9
10
12
13
7.1 Zero point calibration
▸ Hold up the refractometer against a sufficiently bright light source and look through
the eyepiece [5], holding the rubber eyeshade [4]closely against your eye/glasses.
▸ Rotate the eyepiece [5]to adjust it for your eyesight, until you can see the scale
sharply.
▸ Open the prism cover [1].
▸ Thoroughly clean the prism [2]and the underside of the prism cover [1]using a so
cloth or soft paper (with alcohol if necessary)and wipe dry.
▸ Now apply a few drops of the calibration liquid [10]onto the prism surface [2].
▸ Close the prism cover [1]. The amount of fluid should be sufficient to moisten most
of the prism surface. There should not be any air bubbles between the measuring
prism [2]and prism cover [1].
▸ Wait about 30 seconds to allow the temperatures of the fluid and prism to
equalise.
▸ Look through the eyepiece [4]while pointing the refractometer‘s prism surface [2]
at a bright light source.
▸ Through the eyepiece [4], you will see a bright and a blue field. The boundary line
between them shows the measured value on the scale which is also visible
through the eyepiece [4].
▸ Use the supplied adjustment tool [11]to turn the adjustment screw [3]behind
the prism surface [2](under the rubber cap), and adjust the scale so that the
measuring device is optimally set up by moving the boundary line upwards or downwards.
Calibration value ORA 4FA/4FB: 0 °C EG / PG / CW
▸ Repeat step 4 (cleaning).
Important!
The ambient/room temperature and the sample temperature influ-ence
the refractometer measuring result. The scales of the refractometer
models, which have "FB" in its name, are designed for an ambient
7.2 Additional advice
It is important that the samples being measured are representative samples. For
samples that evaporate easily, measurements should be carried out quickly. The
samples should be at the same temperature as the measuring instrument in order
to achieve an accurate result.
9
11 ORA_1SB_2SB_3SB-BA-e-1510
13 Brix to refractive index (nD) conversion table
Data from "ICUMSA" International Commission for Uniform Methods
of Sugar Analysis, at 20 °C and 589 nm wavelength.
8. Cleaning and maintenance
Clean the refractometer using a so, lint-free cloth moistened with either water
or, if necessary, alcohol. Do not use any aggressive or abrasive cleaning agents.
Never immerse the device in water or hold it under running water. Never handle the
device with wet or damp hands.
Never touch the measuring prism [2]with hard tools made from plastic, wood,
rubber, metal, glass etc. Hard objects can quickly damage the relatively so prism
glass, resulting in measurement errors.
The refractometer is maintenance-free.
Cleaning should be carried out immediately before and aer each use of the refrac-
tometer to maximise its life and optimise measurement results.
9. Storage
Store the refractometer in a dry, non-corrosive environment, preferably
between 10 °C and 30 °C.
10. Service
Aer reading this operating manual, if you have any questions about setting up
or using the refractometer, or if any unexpected problem occurs, please contact
your dealer. The device housing may only be opened by trained service technicians
authorised by KERN.
11. Disposal
The packaging consists of environmentally friendly materials which can be disposed
of via local recycling facilities.
The device and storage box should be disposed of by the operator in accordance
with applicable national or regional regulations at the place of use.
12. Additional information
The product may differ slightly from the illustrations. Avoid exposing the refracto-
meter to direct sunlight. Never bring the refractometer into contact with solvents.
!
ORA_1SB_2SB_3SB-BA-e-1510
14 Annex
Table 1: International Temperature Correction Table for°Brix (% sugargradient)
temperature of +20 °C! If the measurements are carried out at a temperature other than +20 °C,
the results must be correspondingly corrected.
Refractometer models, which have "FA" in its name, are equipped with an automatic
temperature compensation (ATC). Between +10°C and +30°C measurement differences due to
temperature changes are automatically compensated.
7.3 Measuring procedure for antifreeze testing
▸ Open the prism cover [1]and use the supplied pipette [8]to apply a few drops of
the sample coolant [8]onto the prism surface [2], then close the prism cover [1].
Spread the liquid evenly by pressing down on the prism cover [1]and eliminate any
air bubbles present.
▸ Close the prism cover [1]and view the measurement scale through the eyepiece
[4]. Point the prism surface [2]of the refractometer at a bright light source while
doing this.
▸ Rotate the adjustment ring [5]on the eyepiece [4]to adjust the focus.
▸ The boundary line will move on the measurement scale depending on the anti-
freeze concentration. This light/dark boundary on the antifreeze scale [B]directly
indicates the freezing point of the antifreeze mixture in °C. The figures show the
measured value for propylene* (G13) and the measured value for ethylene**
(G11/G12). If the antifreeze used in not known or it is a mixture of both, the
propylene scale must always be used. Only then can sufficient coolant antifreeze
protection be reliably guaranteed.
▸ The measurement result is not influenced by the temperature of the coolant.
▸ Carefully clean the supplied pipette [8]and the refractometer aer carrying out the
measurement.
7.4 Measuring procedure for windscreen wiper water testing
▸ The measuring procedure is identical to that for antifreeze testing.
▸ The measured value can be read off the windscreen wiper water testing scale [C]in
°C and provides a guide value, because the composition of the individual antifreeze
agent varies.
▸ Carefully clean the supplied pipette [8]and the refractometer aer carrying out the
measurement.
!
7.5 Measuring procedure for determining battery acid density
▸ Instead of antifreeze solution, place some battery acid on the prism surface [2]
using the pipette [10].
▸ Using the light/dark boundary on the measuring scale for determining battery
acid density [A]„- / +“, read off the acid density in g/cm³ (kg/l).
▸ The scale [A]is divided into three regions for determining the charge condition.
RECHARGE = replace/recharge (<1.20 g/cm³);
Charge ~50%
FAIR = acceptable (1.20 to 1.25 g/cm³);
Charge ~75%
GOOD = good (>1.25 g/cm³);
Charge ~100%
* Propylenes are preferentially used as antifreezes in the European region.
** Ethylenes are preferentially used as antifreezes outside of the European region.
Important!
Aer every measurement, use a lint-free, absorbent cloth to remo-
ve the fluids from the prism surface [2]and prism cover [1]. Then
carefully clean the prism and prism cover using a cloth moistened
with water or if necessary alcohol, and dry both parts using a so,
dry and lint-free cloth. Avoid rubbing the prism [2].
11

This manual suits for next models

1

Other KERN Optics Measuring Instrument manuals

KERN Optics ORA 80 BE User manual

KERN Optics

KERN Optics ORA 80 BE User manual

KERN Optics ORT 1RS User manual

KERN Optics

KERN Optics ORT 1RS User manual

KERN Optics ORA 2SA User manual

KERN Optics

KERN Optics ORA 2SA User manual

KERN Optics ORA 1SA User manual

KERN Optics

KERN Optics ORA 1SA User manual

KERN Optics ORA 90 BE User manual

KERN Optics

KERN Optics ORA 90 BE User manual

Popular Measuring Instrument manuals by other brands

Dakota Digital DGS-3 quick guide

Dakota Digital

Dakota Digital DGS-3 quick guide

Skil 1928 Original instructions

Skil

Skil 1928 Original instructions

geo-FENNEL FHM 10 user manual

geo-FENNEL

geo-FENNEL FHM 10 user manual

Airport Lighting L-880 owner's manual

Airport Lighting

Airport Lighting L-880 owner's manual

Kimo MP Series user manual

Kimo

Kimo MP Series user manual

SATO KEIRYOKI 7820-00 instruction manual

SATO KEIRYOKI

SATO KEIRYOKI 7820-00 instruction manual

Digifly VL 100 RACER manual

Digifly

Digifly VL 100 RACER manual

Newport INFINITY INFCR Operator's manual

Newport

Newport INFINITY INFCR Operator's manual

Pulsar NOVA user manual

Pulsar

Pulsar NOVA user manual

Rachio Wireless Flow Meter user manual

Rachio

Rachio Wireless Flow Meter user manual

ISOIL ISOMAG MV110 Operating and maintenance manual

ISOIL

ISOIL ISOMAG MV110 Operating and maintenance manual

MTP MTP 3100 instruction sheet

MTP

MTP MTP 3100 instruction sheet

Agilent Technologies Cary Eclipse user guide

Agilent Technologies

Agilent Technologies Cary Eclipse user guide

Graco ProControl 1KE Plus Instructions-parts list

Graco

Graco ProControl 1KE Plus Instructions-parts list

Hanna Instruments HI 717 instructions

Hanna Instruments

Hanna Instruments HI 717 instructions

GPI FM-100 Series owner's manual

GPI

GPI FM-100 Series owner's manual

Pfeuffer GTM 800 Installation and operating instructions

Pfeuffer

Pfeuffer GTM 800 Installation and operating instructions

Sonel LMW-100 manual

Sonel

Sonel LMW-100 manual

manuals.online logo
manuals.online logoBrands
  • About & Mission
  • Contact us
  • Privacy Policy
  • Terms and Conditions

Copyright 2025 Manuals.Online. All Rights Reserved.