17/03/2023, 07:41 Thermostat - User Manual Niko Home Control II - Niko Guide
https://guide.niko.eu/display/UMNI/Thermostat 1/1
Pages / User manual Niko Home Control II
Thermostat
With the thermostat, you can regulate the temperature in a room. You can choose from three week
programmes: two for the heating function and one for the cooling function. In addition, you also have
the choice of five fixed temperature settings: DAY, NIGHT, ECO, COOL and OFF. These pre-
configured programmes and temperatures can be modified. The temperature can also be manually
increased or lowered.
This chapter will guide you through the various control possibilities of the thermostat.
Start screen
Modifying the current temperature for a certain length of time
Choose one of the pre-programmed week programmes or temperature levels
Eco-save mode
Changing the settings
Space language
17/03/2023, 07:41 Start screen - User Manual Niko Home Control II - Niko Guide
https://guide.niko.eu/display/UMNI/Start+screen 1/1
Pages / User manual Niko Home Control II / Thermostat
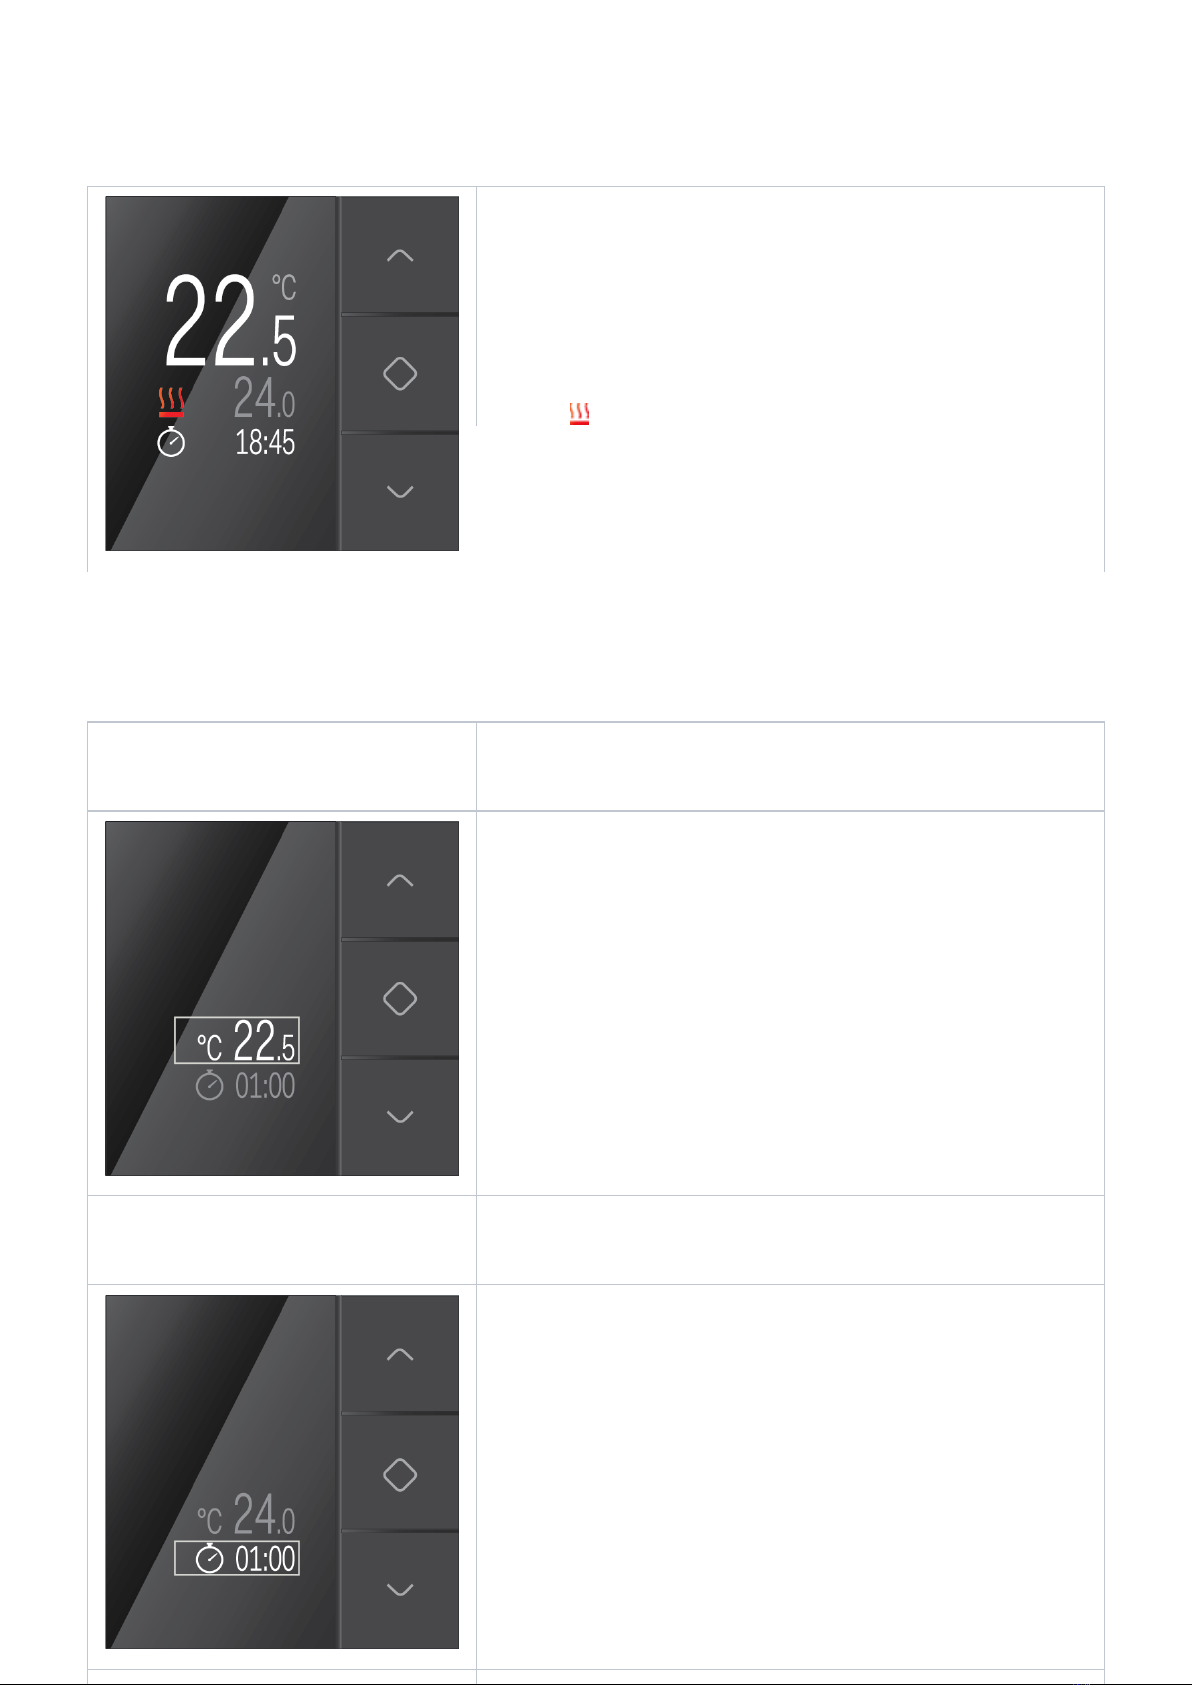
Start screen
Touch one of the buttons to light up the display. When not
in use, the display is dimmed to reduce energy
consumption. The following screen will appear: The top line
indicates the current temperature in the room, with the
desired temperature below. If the desired temperature is
higher than the current temperature, the following will
appear on the screen: the heating is on. If you have
selected a cooling programme, it will indicate that the
cooling installation has been activated. On the bottom line,
the active programme or the selected temperature level is
indicated. If this programme or temperature level is
manually overwritten temporarily, a clock will also be shown
(see next section). In the bottom right you can see the time.
Space language
17/03/2023, 07:42 Modifying the current temperature for a certain length of time - User Manual Niko Home Control II - Niko Guide
https://guide.niko.eu/display/UMNI/Modifying+the+current+temperature+for+a+certain+length+of+time 1/2
Pages / User manual Niko Home Control II / Thermostat
Modifying the current temperature for a certain
length of time
1. Touch one of the buttons to light up the display, if
necessary. The start screen will appear.
2. Press the top or bottom button. The following screen will
appear.
3. Press the top or bottom button until you have reached
the desired temperature.
4. Press the middle button to confirm the modified
temperature. You will automatically go to the bottom line.
Here you can select the time slot during which you want
this temperature to be maintained. The standard setting is
one hour.
5. Press the top or bottom button if you want to extend or
shorten the time respectively. You can modify the time in
steps of 15 minutes. The maximum adjustable time is 23
hours and 45 minutes.
Space language