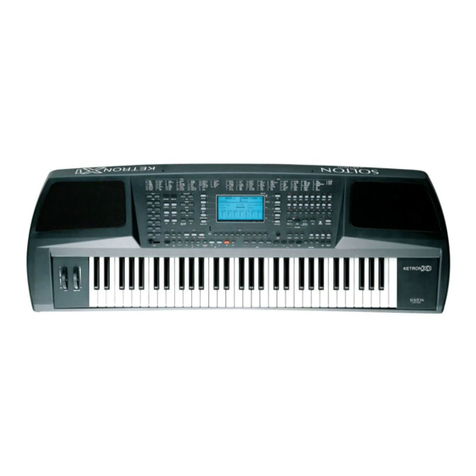
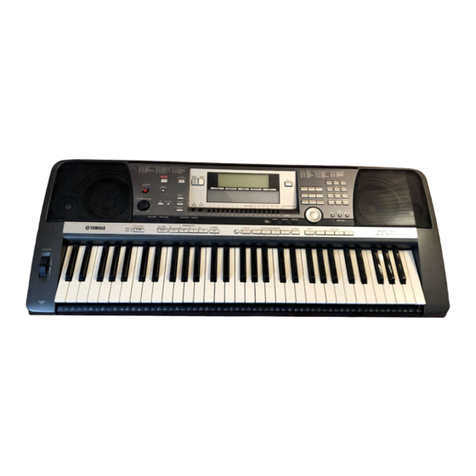
KETRON SD5 User manual

______________________________________
Istruzioni per l’installazione degli accessori
Accessories installation guide
______________________________________

SD5
Istruzioni per l’apertura dello strumento
Instrument opening up instructions
Eseguire le operazioni adagiando lo strumento sopra un panno morbido per proteggere la verniciatura da eventuali
graffiature.
Rest the instrument on a soft cloth to avoid scratching the paintwork while the operations are being accomplished.
A- Togliere le viti per l’apertura del coperchio
- Remove the screws to release the cover
Fig. 1
Fig. 2
stiera
remove keyboard screws
opo aver tolto le viti di fissaggio, alzare di qualche centimetro il coperchio. rument
ar scorrere indietro il coperchio fino a quando fuoriesce dalla tastiera ed alzare sul
the front edge up slide the cover back to clear the keyboard.
uotare il coperchio facendo attenzione a non sollecitare il cavo di collegamento
r to rest on a flat surface taking care not to disconnect any of the
B-Non togliere viti per l’apertura dei box altoparlanti
- Don’t remove speaker box screws
F- Non togliere le viti per l’apertura del finetasto
sinistro
- Don’t remove the screws to release the left cheek
K- Non togliere le viti per lo smontaggio della ta
- Don’t
D
After removing the screws carefully turn over while holding the edges of the inst
and lift the cover a few centimetres.
F
davanti.
While holding
R
Fig. 3
con il fondo
Turn the cove
cables connecting the 2 parts.

SD3
Istruzioni per l’apertura dello strumento
Instrument opening up instructions
Eseguire le operazioni adagiando lo strumento sopra un panno morbido per proteggere la verniciatura da eventuali
graffiature.
Rest the instrument on a soft cloth to avoid scratching the paintwork while the operations are being accomplished.
Svitare le 15 viti evidenziate in figura 3
Figura 3 Unscrew all 15 screw as showed on picture 3
Dopo aver tolto le viti di fissaggio, alzare di qualche centimetro il coperchio e
ruotarlo in alto facendo attenzione a non sollecitare il cavo di collegamento
con il fondo come da figura 2
Figura 2
After removed all screws lift shortly upper lid than rotate carefully in order to
avoid any cable rip suited on the bottom as showed on picture 2
AVVERTENZA: Tutte le indicazioni ed i disegni riportati, possono subire modifiche senza preavviso.
WARNING :All information , draws or else , can be modified without notice .

VOCALIZER (Cod. 9VO004)
Fig. 2
Fig. 1
Fig. 3
Fig. 4
Togliere le viti indicate con la lettera “F” per l’apertura del finetasto sinistro.
In figura 1 è rappresentato lo strumento “aperto” e la zona di intervento per l’inserimento del dispositivo.
- Scollegare il connettore presente sulla schedina prese microfono e cuffia PB353 (fig. 2 punto 1), ed inserirlo nel connettore
sinistro della scheda VOCALIZER (fig. 3 punto 2).
- Inserire il cavetto di collegamento della scheda VOCALIZER (fig. 3 punto 3) nel precedente connettore della schedina
prese microfono e cuffia.
- Fissare la scheda VOCALIZER sulle colonnine in plastica presenti sul finetasto dello strumento con le apposite 4 viti
autofilettanti. (fig. 4)
- Rimettere il finetasto sinistro ed il coperchio in posizione originaria.
- Eseguire una verifica di funzionamento seguendo le indicazioni riportate nel manuale di istruzioni.
- Richiudere lo strumento seguendo la procedura inversa a quella indicata per l’apertura, facendo attenzione ad inserire le
viti di diversa lunghezza (F e A), negli alloggiamenti contrassegnati.
Remove the screws marked “F” to release the left cheek.
Drawing 1 illustrates the instrument with the cover open and a circle to indicate the area where the device is to be fitted.
- Lift the left cheek panel and disconnect the cable and connector fitted to the headphones/microphones board PB353 (fig. 2
point 1). Fit this cable and connector into the connector of the VOCALIZER board (fig. 3 point 2).
- Fit the supplied VOCALIZER cable into the headphone/microphone board socket vacated in the previous step (fig. 3 point
3) with the opposite end connected to the remaining socket on the VOCALIZER board..
- Fix the VOCALIZER board to the plastic lugs moulted into the underside of the left hand cheek panel with the 4 self-
tapping screws supplied with the VOCALIZER kit (fig. 4).
- Replace the left cheek and carefully slide the top cover back to it’s original position.
- Test the VOCALIZER by following the instructions provided in the owners manual.
- Once tested invert the instrument and replace all the screws taking care to use the correct length of screws (F and A) in
their correct locations as previously indicated.

HARD DISK (Cod. 9HD004)
Fig. 2
Fig. 1
Fig. 3 Fig. 4
In figura 1 è rappresentato lo strumento “aperto” e la zona di intervento per l’ inserimento del dispositivo.
L’alloggiamento dell’HARD-DISK è situato nella parte centrale dello strumento e sotto la scheda PB355, che pertanto andrà
rimossa.
- Rimuovere le 4 viti di fissaggio della scheda controller PB355 (fig. 2).
- Ruotare la scheda controller all’indietro, senza togliere i cavi di collegamento.
- Fissare la staffa di supporto, già assemblata con l’hard-disk utilizzando le 4 viti e rondelle in dotazione (fig. 3).
- Riposizionare la scheda controller ed inserire il connettore, proveniente dall’hard-disk, nella scheda controller (fig. 4).
- Avvitare la molla in dotazione per il bloccaggio del connettore della piattina dell’hard-disk con le 4 viti tolte in precedenza.
- Rimettere il coperchio in posizione originaria.
- Accendere lo strumento e premere il tasto “DISK ON”; comparirà sul display la scritta: HARD [01 FOLDER_01]; ciò indica
la corretta installazione dell’hard disk.
- Richiudere lo strumento seguendo la procedura inversa a quella indicata per l’apertura, facendo attenzione ad inserire le
viti di diversa lunghezza (A), negli alloggiamenti contrassegnati.
Drawing 1 illustrates the “open” instrument and the area in which the device is to be fitted.
The placement for the HARD DISK is situated in the central part of the instrument and below the printed board PB355,
which will therefore need to be removed.
- Remove the 4 securing screws from the PB355 controller board (fig. 2).
- Move the controller board out of the way without removing connecting wires.
- Fix the supporting bracket that is already assembled with the hard disk using the 4 screws and washers which are
provided (fig. 3).
- Reposition the controller board and insert the connector at the end of the cable attached to the hard disk into the connector
socket on the controller board (fig. 4).
- Tighten the retaining clip provided to fix the connector of the hard disk wire with the 4 screws previously removed.
- Replace the cover in the original position.
- Turn the instrument on and press the “DISK ON” key; the following message will appear on the display: HARD [01
FOLDER_01]; which means that the hard disk has been installed correctly.
- Close the instrument up again following the opening procedure backwards, being careful to insert the self-tapping screws
of various lengths (A), in the marked placements.

HARD DISK FOR SD3 (Cod. 9HD0043)
Figura 2
Figura 1
Figura 3
In figura 1 è rappresentato lo strumento “aperto” e la zona di intervento per l’inserimento del dispositivo e l’alloggiamento
dell’HARD-DISK, che è situato nella parte avanti e sinistra dello strumento.
Eseguire le seguenti fasi:
- Inserire l’HARD DISK con il cavo piatto collegato nella posizione indicata nella figura 2 ed avvitare le 2 viti in dotazione
per fissarlo.
- Inserire l’altra estremità del cavo piatto nel connettore del controller come da figura 3.
- Rimettere il coperchio in posizione originaria.
- Accendere lo strumento e premere il tasto “DISK” ; comparirà sul display la scritta: “HARD [01 FOLDER_01]” ad indicare
la corretta installazione dell’hard disk.
- Richiudere lo strumento seguendo la procedura inversa a quella indicata per l’apertura, prestando attenzione ad inserire le
giuste viti nelle posizioni appropriate.
Drawing 1 illustrates the “open” instrument and the area in which the device is to be fitted; Hard Disk slot is located on front
left of module .
Please follows this step by step guide:
- Insert Hard Disk flat cable as indicated on picture 2 than lock it using equipment pair screw .
- Insert the opposite side of cable on controller connector as showed on picture 3.
- Turn down cover on original position.
- Turn off Module and press “DISK” button; display will show : “HARD [01 FOLDER_01]” message which mean a
successfully installation procedure
- By following inverse procedure fix all moved parts using all equipped screws on related position.

A
SONG COMPOSER
T
IME
FOLDER 1: INSTRUMENTAL
A
TASTE OF HONEY Marlow 2'58"
A
LSO SPRACH ZARATHUSTRA R. Strauss 1'39"
A
ND I LOVE HER Lennon 2'15"
A
NONIMO VENEZIANO Cipriani 2'17"
A
RIA SULLA 4° CORDA J.S.Bach 4'58"
BESAME MUCHO Velazquez 2'36"
CABARET Kander 2'42"
CHANSON D’AMOUR Wayne 2'38"
DOCTOR ZIVAGO Jarre 2'47"
EL CHOCLO Villoldo 3'09"
EL CONDOR PASA Robles 2'20"
HELLO DOLLY Herman 2'23"
I’LL NEVER FALL IN LOVE AGAIN Bacharacha 2'36"
JAZZ BAND Gualdi 2'38"
LA VIE EN ROSE Louiguy 3'25"
LOVE STORY F.Lai 2'25"
MAME Herman 2'34"
MARCH MENDELSSHON F.Mendelsshon 2'01"
MARCH WAGNER R.Wagner 2'44"
MIDNIGHT COWBOY Neil 2'38"
PERFIDIA Dominguez 2'11"
RAINDROPS KEEP FALLIN’ OF MY HEAD Bacharacha 2'24"
RONDO’ VENEZIANO Reverberi 3'07"
SLEEP WALK Farina 2'46"
SO WHTH’S NEW Pisano 2'39"
STRANGER IN THE NIGHT Kaempfert 1'42"
THE BIG COUNTRY Ross 3'52"
THE GIRL FROM IPANEMA Jobim 5'13"
THIS GUY’S IN LOVE WITH YOU Bacharacha 2'51"
WILD CAT Coleman Leigh 2'25"
YOU ARE SO BEAUTIFUL Preston 2'51"
FOLDER 2: INTERNATIONAL
BAKER STREET G. Rafferty 6'01"
BLUE EYES E. John Osborne 3'30"
CAN’T STOP THINKING OF YOU (COSE DELLA VIT E. Ramazzotti 4'49"
EASY L. Richie 4'20"
EUROPA C. Santana T. Coster 5'11"
EVERYBODY NEEDS SOMEBODY TO LOVE Vexler Berns Burke 3'20"
FEELINGS
A
. Morris 4'29"
GEORGIA ON MY MIND H. Carmichael 3'32"
HEY JUDE J. Lennon P. McCartney 5'58"
HOT STUFF P. Bellotte H. Faltermeyer K. Forsey 4'03"
I WILL ALWAYS LOVE YOU D. Parton 4'02"
IMAGINE J. Lennon 3'06"
JUST THE WAY YOU ARE B. Joel 3'52"
LET’S TWIST AGAIN K. Mann D. Appell 2'06"
LONG TRAIN RUNNIN’ T. Johnston 3'07"
LOVE LETTERS IN THE SAND J. F. Coots N. Kenn
y
2'35"
MY HEART WILL GO ON J. Horner W. Jennings 4'55"
MY WAY P. Anka C. Francois J. Revaux G. Thibault 4'28"
NEW YORK NEW YORK F. Ebb J. Kander 2'57"
ONLY YOU B. Ram A. Rand 2'29"
ROCK AROUND THE CLOCK M. C. Freedman J. De Knight 2'11"
SEE YOU LATER ALLIGATOR R. Guidry 2'37"
SEX BOMB E. Rennalls 3'29"
STAND BY ME E. King M. Stoller J. Leiber 2'54"
THE SHOW MUST GO ON F. Mercury B. May 4'13"
WHAT A WONDERFUL WORLD G. D. Weiss G. Douglas 2'16"
WHEN A MAN LOVES A WOMAN C. Lewis A. Wright 4'08"
YOU’RE THE FIRST THE LAST MY EVERYTHING B. White T. Sepe P. Sterling 3'15"
FOLDER 3: ITALIAN FOLK
LA 128 Flamigni Giraldi 2'32"
33 GALLINE Garino,Bignotti,Costanzo 3'30''
A
DRIANO Foschini, Sangiorgi 3'31''
A
GGUANTA LA MEL
A
Drudi Cicognani 3'24''
A
GUARDIENTE Bagutti,Lamberti,Pergoli 3'19''
A
L CONTRARIO Foschini, Donini, Antonelli, Zaffini 3'29"

SONG COMPOSER
T
IME
A
LLA FIORITA (Mazurka) Borghesi 3'15"
A
NNA (Polka) Totti 3'15"
A
RGENTANGO Mangani,Carpineti 2'59''
A
RTISTA E POET
A
Nanni,Di Maria,Lambertini 3'10''
BACHATA FATAL Castro 3'02''
BAILA Y TOC
A
Olmi,Peraza,Antonelli 5'29''
BALLO DEL TACCO E PUNT
A
Mancini Tomassini Zavattoni 3'36''
BELLA MOSSA (Polka) Borghesi 3'30"
BISBETICA (Mazurka) Nicolucci 3'15"
BONITO Palazzi Pescari Bibiani 3'25"
CALICE AMARO Ungarelli,Bagutti,Soave 4'14''
CANZONE ANTICA Lamberti Bagutti 4'13"
CANZONE MI
A
Bagutti,Lamberti,Cortellini 4'45''
CAPELLI NERI Denti,Bignotti,Negri 3'30''
CARINITO Ghinassi 2'52''
CARNEVALE DI VENEZIA (Valzer) Paganini 3'52"
CARO PAPA’ Lamberti,Bagutti Pergoli 3'48''
CARO TANGO Castellina 3'04''
CELEBRE MAZURKA VARIATA (Mazurka) Migliavacca 3'15"
CESARINA (Mazurka) Pezzolo 2'57"
CHE NOTTE MAGIC
A
Mancini,Donini,Antonelli 3'52''
CHI S’ACCONTENTA GODE Donini,Antonelli,Zaffini 3'22''
CHIACCHIERONA Bergamini Ragusa 2'55''
CORAZON Mancini Tomassini Grigioni 2'59"
CUBA CHA CHA CHA Russo Viazzoli 2'48"
CUBANO Bibiani Pescari 3'12"
DA COSA NASCE COSA M.Riccardi. P.Antonelli 3'23''
DELIZIOSA Castellina 2'03"
DINAMICA POLCA Bergamini Sparaventi Tagliavini 2'50"
DISPERATA (Polka) Rossi 3'01"
DJ FOX Berardi 3'05"
DOLCI BACI Donini,Antonelli 4'28''
EL CHICO Sternini Minotti Ciabatta Comandini 3'33"
EL COCCOBELLO DEL AMOR Castro 3'10"
ELISIR Donini,Antonelli 3'47''
ERNESTO Riccardi Antonelli 3'31"
ESTE MOMENTO Bagutti Castellari Tanzi 4'23"
FISA LOCA Riccardi Antonelli 3'14"
FOLLE SENTIMENTO Castellina 2'48''
FOLLIA D’AMORE
A
ntonelli Mancini 4'33"
FOX DEI DESIDERI Donini Antonelli 3'46"
GITANO Castellina 2'32"
GLI AMICI DELLA NOTTE Giraldi, Ferrini 2'46''
I RAGAZZI DELLA TERZA ETA’ Castellari Bagutti Tanzi 4'14''
IL CAMPANELLO Castellina 2'27''
IL MIO CONCERTO Mancini,Donini,Antonelli 4'02''
IL POSTINO PASQUALINO Molinari Bertelli Bignotti Cadenazzi 3'18"
IL RE DELLA PISTA Bagutti Lamberti Cortellini 3'57"
IL SOLDATO Bagutti, Lamberti,Pergoli 4'25''
IL VALZERONE Castellina 3'35''
KALISCIA Venturini Iannetta 3'11"
L’UBRIACONA (Polka) Marani 2'51"
LA CAVALLINA Castellina 3'29"
LA CUMPARSITA (Tango) Rodriguez 3'50"
LA GALLINA Flamigni Giraldi 3'26"
LA NOTTE V
A
Mariani,Bignotti,Giulianini 3'37''
LA POLKISSIMA (Polka) Tassinari 3'00"
LA TANGENZIALE (Polka) Borghesi 2'37"
LA TUA LUCE Mancini,Donini,Antonelli,Zaffini 4'34''
L'AIUTINO Bagutti,Lamberti,Cortellini 3'17"
L'EQUILIBRISTA Sbrolini Mancini Donini 2'07"
LULU’ Donini Antonelli Zaffini 4'00''
LUNA MESSICAN
A
Giraldi,Ferrini 3'10''
LUNGOMARE Graziani Mancini Donini Succi 3'12"
MADONNA LUNA Bagutti,Lamberti 4'16''
MALIZIOSO Costa Bagutti 3'33"
MASCOTTE (Mazurka) Casadei 3'08"
MASTER FO
X
Borghesi Foschini 2'50''

SONG COMPOSER
T
IME
MAZURCA ITALIANA Riccardi Antonelli Ferretti 3'29"
MEGA MAMBO Donini Antonelli 3'48''
MENEAITO DEL MARITO Guardia,Nasca,Orsini,Salvatore 3'07''
MENEAITO ITALIANO Mari,Donini,Antonelli 3'12''
MERAVIGLIOSO (Valzer) Marani 3'15''
MILIONARIA Lamberti Bagutti 2'44"
MILLE RICORDI Bagutti Lamberti Castellari 3'26"
MIRKO (Valzer) Casadei 3'16''
MUSICA RUFFIANA Riccardi Antonelli 4'06"
NON C’E’ PACE TRA GLI ULIVI (Valzer) Casadei 3'34''
PASSEGGIARE Riccardi Antonelli 3'39"
POLVERE Micheletti Galletti 3'38''
RECUERDOS Barbini Bisciano Salvatore Bartoli Bibiani Orsini 3'02"
ROMANTICO SA
X
Mancini Donini Sparaventi 4'18''
ROMANTICO SOGNATORE Chiapponi,Bagutti,Lamberti 4'24''
SANTA MONIC
A
Castellina 3'11''
SAX CUBALTO Lamberti,Bagutti 3'38''
SE PERDO TE Di Maria,Lambertini 3'37''
SE SON ROSE… M.Riccardi. P.Antonelli 4'28''
SIVIGLI
A
M.Riccardi. P.Antonelli 3'47''
SOMBRERO Patuelli,Giraldi 2'44''
SPACCAFIS
A
Castellina 3'05''
SPERANZE PERDUTE (Valzer) Cassai 3'47''
SUPERSONICA (Polka) Marani 3'35"
TARANTELLA ALL’ITALIAN
A
Mancini,Donini,Antonelli 3'09''
TARANTELLA CAMPAGNOLA Soscia Ferrini Castagnoli Lega 2'08"
TARANTELLA DELLE ORE Riccardi Antonelli 3'33"
TARANTELLA TRICOLORE Tomassini,Mancini,Antonelli 3'22''
TEX Tenaglia Ciabatta D’Alessandro 3'44"
TRAMONTO (Valzer) Casadei 3'07''
TUTTO PEPE Castellina 2'22''
ZERBINO (Valzer) Venturi 3'19''
ZINGARO Castellina 3'20''
FOLDER 4: ITALIAN HITS
29 SETTEMBRE L. Battisti Mogol 2'31"
4 MARZO 1943 L. Dalla 3'50''
A
PPLAUSI L. Beretta C. Cavallaro 3'19"
CON LE MANI Zucchero Fornaciari 4'46''
DOMANI E’ UN ALTRO GIORNO Calabrese J. Chesnut 3'16"
I GIARDINI DI MARZO L. Battisti Mogol 5'29''
I’TE VURRIA VASA’ V. Russo E. Di Capua 3'45"
IL CIELO IN UNA STANZA G. Paoli 3'28"
INSIEME L. Battisti Mogol 4'13''
IO VAGABONDO Salerno Dattoli 4'39"
L’EMOZIONE NON HA VOCE G. Bella 4'12''
L’ISOLA DI WIGHT R. Vincent M. Delpech A. Salerno 4'02"
L’ORA DELL’AMORE K. Reid G. Brooker 3'31"
LA DONNA CANNONE F. De Gregori 4'49''
LA MIA BANDA SUONA IL ROCK I. Fossati 3'49''
LUNA ROSSA V. De Crescenzo Vian 3'15"
MALAFEMMENA
A
. De Curtis 3'10"
MARGHERITA R. Cocciante 4'19''
MI RITORNI IN MENTE L. Battisti Mogol 3'58''
MILLE GIORNI DI TE E DI ME C. Baglioni 5'42''
NON SON DEGNO DI TE F. Migliacci B. Zambrini 3'17''
PAZZA IDEA Dossena Monti Ullu Gigli 5'12"
QUELLA CAREZZA DELLA SERA De Scalzi Di Palo D’Adamo Belleno 4'15"
QUESTO PICCOLO GRANDE AMORE C. Baglioni 5'58''
ROMA NUN FA’ LA STUPIDA STASERA Garinei Giovannini Trovajoli 3'15"
ROSE ROSSE E. Polito G. Bigazzi 3'14"
SARA
A
. Venditti 4'18''
TU CHE M’HAI PRESO IL CUOR Lehar Rastelli Panzeri 2'33"
UN BACIO A MEZZANOTTE Garinei Giovannini Kramer 2'24"
UNA CAREZZA IN UN PUGNO L. Beretta M. Del Prete G. Santercole 3'08''
UNA ROTONDA SUL MARE F. Migliacci P. Faleni 3'33"
VITA SPERICOLATA V. Rossi T. Ferro 4'46''
FOLDER 5: LATIN
BAILAMOS P. Barry M. Taylor 3'31''

SONG COMPOSER
T
IME
CORAZON ESPINADO F. Olvera 4'21''
DEMASIADO CORASON De Ville 3'27''
EL TALISMAN
A
rbelo 3'34''
ESPANA CANI Marquina 4'06''
GUANTANAMERA Fernandez Diaz 5'11''
LA BANANA J. P. Mottier L. Missir 3'24''
LA BILIRUBBINA Guerra 4'01''
LA COLEGIALA Leon 3'01''
LA GOTA FRIA Vives 3'49''
MAMBO N. 8 P.Prado 4'26''
MAMBO N.5 (A LITTLE BIT OF......) P. Prado L. Bega Zippy 3'32''
MENEAITO BEEP BEEP Bruhn 4'22''
MI CHICO LATINO G. Halliwell A. Watkins P. Wilson 3'11''
OYE COMO VA Tito Puente 4'20''
QUIZAS QUIZAS QUIZAS Farres 2'52''
REINA DEL SWING Los Rosarios 4'47''
SALOME’ Estèfano 4'14"
TICO TICO
A
breu 3'50''
FOLDER 6: REMI
X
ANNI 60:
UN RAGAZZO DI STRADA Nisa N. Mantz A. Tucker 1'09"
CUORE MATTO
A
mbrosino Savio 2'07"
DONNA FELICITA’ Vecchioni Lo Vecchio Pareti 1'30"
IO HO IN MENTE TE S. Fricker Mogol 2'27"
CHA CHA CHA MIX:
PEPITO A. Truscott C. Taylor 1'22"
TORERO R. Carosone Nisa 1'05"
QUANDO M'INNAMORO M. Panzeri R. Livraghi D. Pace 1'05"
IL PULLOVER F. Migliacci G. Meccia 1'17"
DISCO ANNI 70 (DONNA):
DON’T LEAVE ME THIS WAY K. Gamble L. Huff C. Gilbert 1'32"
I WILL SURVIVE D. Fekaris F. Perren 1'32"
NEVER CAN SAY GOODBYE C. Davis 1'38"
CAN’T TAKE MY EYES OFF OF YOU B. Crewe B. Gaudio 2'22"
DISCO ANNI 70 (UOMO):
CELEBRATION R. Bell & Kool and The Gang 1'53"
THAT’S THE WAY (I LIKE IT) H. W. Casey R. Finch 1'34"
I’M YOUR BOOGIE MAN H. W. Casey R. Finch 1'30"
YOU SHOULD BE DANCIN’ B. R. & M. Gibb 1'48"
DISCO MIX 01:
NESSUNO MI PUO’ GIUDICARE M. Panzeri D. Pace 1'37"
LA BAMBOLA F. Migliacci B. Zambrini R. Cini 1'29"
BANG BANG S. Bono 1'32"
CIAO-CIAO T. Hatch V. Pallavicini 1'57"
DISCO MIX 02:
LA PELLE NERA N. Ferrer 1'40"
SONO TREMENDO Ciotti M. & G. Capuano 1'02"
STASERA MI BUTTO
A
murri Canfora 1'29"
HULLY GULLY DONNA:
RAGAZZO TRISTE G. Boncompagni S. Bono 2'21"
IL MARE D’INVERNO E. Ruggeri 2'03"
DEDICATO I. Fossati 1'52"
HULLY GULLY UOMO:
MA CHI SE NE IMPORTA F. Migliacci C. Mattone 2'35"
UN' AVVENTURA L. Battisti Mogol 2'07"
BELINDA F. Migliacci C. Andrews 1'38"
LATIN DANCE:
LA COPA DE LA VIDA R. Rosa D. Child L. Gomez Escoba
r
2'48"
KALIMBA DE LUNA T. Esposisto G. Di Franco R. Licastro M. Malavasi 2'31"
MARIA I. Blake K. C. Porter L. Gomez Escobar 2'15"
TIC TIC-TAC MACARENA MIX
:
TIC TIC TAC Braulino Lima 2'10"
MACARENA
A
. R. Mouge R. Ruiz 2'18"
TWIST MIX
:
RENATO Testa Cortez 1'11"
IL BALLO DEL MATTONE Verde Canfora 1'32"
IL GEGHEGE’ Wertmuller Canfora 1'21"
IL BALLO DI SIMONE Chiprut Irref 1'23"

VIDEO INTERFACE (Cod. 9AC134)
Fig. 1
In figura è rappresentata la scheda video interface completa dei cavi
di collegamento.
Cables must be attached to the video interface as shown here.
Fig. 2
Svitare il piastrino “D”.
Disinserire il cavo piatto “C” dal connettore “E”.
Remove the metal plate marked “D” keep the screws safe.
Disconnect the cable “C” from connector “E”.
Fig. 3
Inserire il cavo “B” della scheda video nel connettore “E”.
Inserire il cavo “C” sul connettore della scheda video.
Fissare il piastrino “A” con le viti svitate precedentemente dal
piastrino “D” (fig. 2).
Insert cable “B” (form the video board) into connector “E”.
Insert cable “C” into the free connector on the video board.
Fix plate “A” in the space vacated by plate “D” with the screws saved
from the previous step (fig. 2).
Fig. 4
Fissare la scheda nei 2 punti evidenziati dalle frecce con le viti in
dotazione alla scheda.
Richiudere lo strumento seguendo la procedura inversa a quella
indicata per l’apertura, facendo attenzione ad inserire le viti di
diversa lunghezza (F e A), negli alloggiamenti contrassegnati.
Attached the video board with the 2 screws provided at the positions
indicated by arrows.
Close the case cover by reversing the opening procedure.
Take care that the that the correct size screws (F and A) are used in
their marked positions.

COLLEGAMENTO
La scheda video si presenta all’esterno con una presa VGA che permette il collegamento a televisore o a monitor.
Per il collegamento al televisore sono previsti 3tipi di cavo:
1) SuperVHS (solo per televisori dotati di sistema S-VHS).
2) Video composito Rca.
3) Scart.
I 3 cavi hanno una lunghezza di 2,70 metri secondo la vigente regolamentazione nel campo delle norme di protezione per
simili dispositivi.
CONNECTION
The video interface has a VGA socket on the outside which allows you to connect the instrument to a television or monitor.
There are 3 different cables to make the connection to the television:
1) SuperVHS (only for televisions which are provided with an S-VHS system).
2) Rca Video composite.
3) Scart Video.
The 3 cables are 2,70 metres long in accordance with current rules and regulations in the field of protection for similar
devices.
SETTAGGIO
Una volta effettuato il collegamento occorre predisporre correttamente televisore e strumento nel modo seguente :
1) Selezionare sul televisore il Canale AV (Audio - Video).
2) Premere sullo strumento il tasto F3 - UTILITY.
3) Premere PAGE > per passare alla seconda pagina.
4) La funzione F2 – VIDEO permette di selezionare tramite i due tasti VALUE< > tutte le varie opzioni previste :
•PAL : sistema televisivo europeo.
•NTSC : sistema televisivo americano.
•SVHS Pal : sistema Super VHS europeo.
•SVHS Ntsc : sistema Super VHS americano.
•MONITOR : computer VGA monitor.
•OFF : esclusione della scheda Video.
Se il collegamento è corretto lo schermo visualizza la scritta KETRON. L’attivazione del modo Song Play di Midifiles dotati
di testo fa visualizzare sullo schermo le parole del brano (anche se lo strumento è in posizione Lyric Off e se non si è
nella funzione Mirror).
SETTING UP
Once you have connected the video interface, you have to setup the television set and instrument correctly, as follows:
1) Select the AV (Audio - Video) channel on the television.
2) Press button F3 - UTILITY on the instrument.
3) Press PAGE > to go at the second page..
4) The function F2 - VIDEO allows you to use the buttons VALUE< > to select the different video options available:
•PAL : European television system.
•NTSC : American television system.
•SVHS Pal : European Super VHS system.
•SVHS Ntsc : American Super VHS system.
•MONITOR : VGA computer monitor.
•OFF : turns the video interface off.
The words KETRON will appear on the display; which means that the video interface has been installed correctly. If you
play Midifiles provided with text in Song Play mode, the lyrics will appear on the display (even if the instrument is set to
Lyric Off mode and Mirror function is off).
NOTE
La selezione del sistema televisivo può essere memorizzata con la funzione Power On Setup:
¾Premere Save/Enter.
¾Premere F3 - Power On Setup.
¾Premere F10
NOTE
The functions can be stored on Power On Setup:
¾Press Save/Enter.
¾Press F3 - Power On Setup.
¾Press
F10.

FLASH RAM 2Mbytes patterns expansion (Cod. 9AC116)
Fig. 1
Fig. 2
Fig. 3
NOTE: tutti i patterns esistenti nella memoria saranno cancellati; procedere quindi con la copia degli stessi su hard disk o
floppy prima di installare la FLASH.
In figura 1 è rappresentato lo strumento “aperto” e la zona di intervento per l’inserimento del dispositivo.
- Liberare dalle viti che lo fissano, il telaio in metallo indicato dalla freccia di fig. 1, e posizionarlo come raffigurato in fig. 2.
- Appoggiare la scheda FLASH, con la scritta PB356 diritta, sopra i 2 connettori indicati nella zona evidenziata, facendo
attenzione a far corrispondere esattamente i connettori del modulo con quelli della scheda madre (fig. 3).
- Premere quindi a fondo il modulo FLASH verso il basso.
- Rimettere il telaio ed il coperchio nella posizione originaria.
- Accendere lo strumento e verificare che sul display compaia la scritta “WARNING!!!FLASH FORMATTING” solo la prima
volta che si accende; ciò segnala la formattazione e quindi il riconoscimento della FLASH RAM.
- Procedere alla chiusura dello strumento seguendo la procedura inversa a quella indicata per l’apertura, facendo attenzione
ad inserire le viti autofilettanti negli alloggiamenti contrassegnati.
NOTE: any existing patterns in the pattern memory will be erased, make sure you have copies on your hard or floppy disk
before fitting the FLASH; if not make backups before installing the FLASH.
Drawing 1 illustrates the “open” instrument and the area in which the device is to be fitted.
- Remove the screws of the metal loom as per arrow in the drawing 1 and move it as per drawing 2.
- Put the FLASH board, with the writing PB356 straight, in the 2 connectors indicated in the area pointed out, making sure that
the connectors of the FLASH board perfectly match up to those of the mother board (fig. 3).
- Completely press the FLASH board downwards.
- Replace the metal loom and the cover in the original position.
- Turn the instrument on; the following message should appear on the display “WARNING!!!FLASH FORMATTING” only the
first time that it is turned on; which advises the formatting procedure and the FLASH RAM has been acknowledged.
- Close the instrument up again following the opening procedure backwards, being careful to insert the self-tapping screws of
various lengths (F and A), in the marked placements.

VEGA 117
Notes

VEGA 117
Notes

KETRON s.r.l. - 60131 Ancona - ITALY - Via Giuseppe Taliercio, 7
Other manuals for SD5
2
This manual suits for next models
1
Table of contents
Other KETRON Electronic Keyboard manuals

KETRON
KETRON EVENT61 User manual

KETRON
KETRON SD9 General instructions

KETRON
KETRON XD3 User manual

KETRON
KETRON SX3000 Installation guide

KETRON
KETRON Audya User manual

KETRON
KETRON SD9 User manual

KETRON
KETRON SD5 User manual

KETRON
KETRON SD5 User manual

KETRON
KETRON SD7 User manual

KETRON
KETRON SD60 User manual