page 4 page 1
Kewaunee Table Shelving — Assembly Instructions 04/20 Kewaunee Table Shelving — Assembly Instructions 04/20
Assembly Instructions
Kewaunee Table Shelving
Do not attempt to assemble this product if you do not understand these instructions or you have
any doubts about the safety of the installation. Please call a qualified technician. Check carefully
for missing, damaged, or defective parts. Improper installation may cause damage or serious
injury. Do not use this product for any purpose that is not explicitly specified in this manual and do
not exceed weight capacity. The manufacturer and distributor cannot be liable for damage or injury
caused my improper mounting, incorrect assembly or inappropriate use.
NOTE: Shelving Uprights are packaged separately from Shelves.
You will need both Shelving Uprights and Shelves for a complete
shelving assembly.
200 lbs
90.7 kg
DO NOT EXCEED WEIGHT CAPACITY
Failure to do so may result in serious injury
WARNING
!
PER SHELF
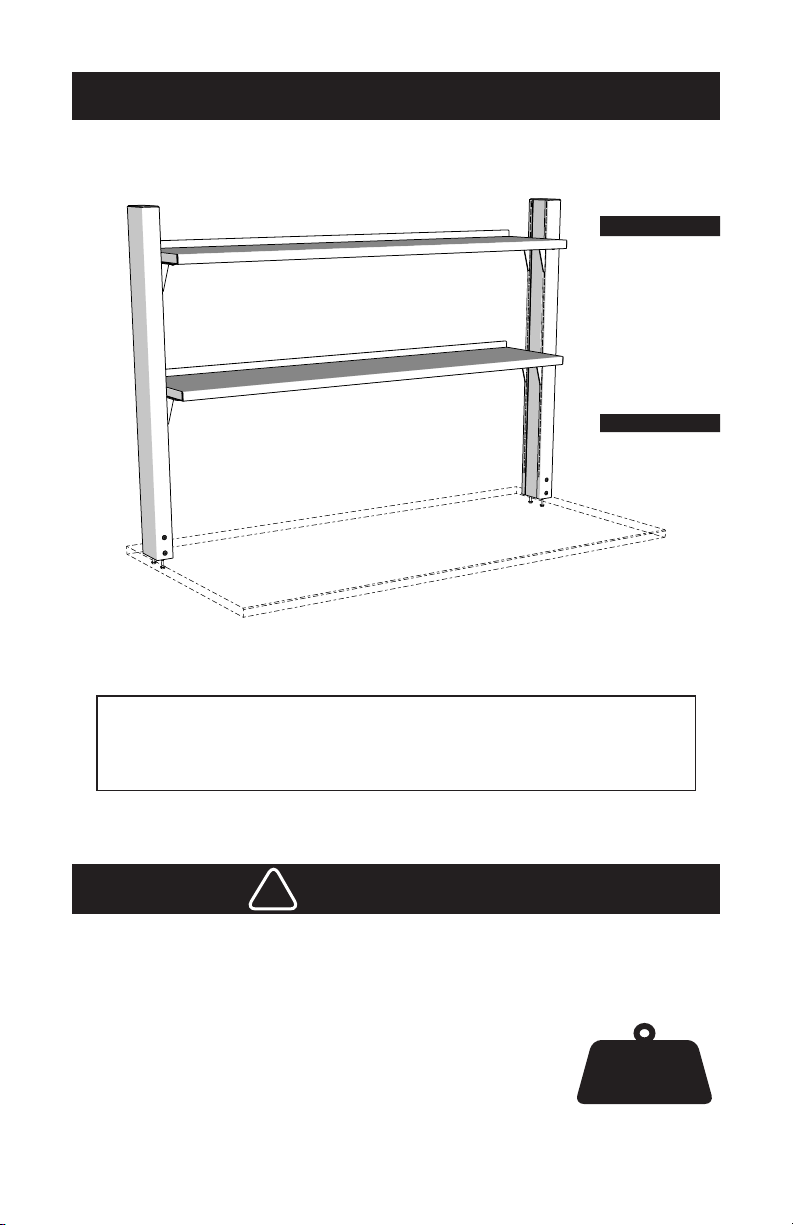
Assembly Instructions — Shelves
Step 1 Attach Shelf Brackets to Uprights
Step 2 Bolt Shelf Brackets and Lip to Shelf
1a. Insert Left Hand & Right Hand Shelf Brackets
into Shelving Uprights at desired height as shown,
twisting into place and sliding downward to fully seat
in slots.
2a. Place Shelf in place on Shelf Brackets. Attach using
(8) 1/4"-20 x 1/2" Flanged Button Head Socket Cap
Screws and (8) 1/4"-20 Flanged Locknuts.
2b. If Shelf Lip is required, attach to either front or back
edge of Shelf using (3) 1/4"-20 x 1/2" Flanged Button
Head Socket Cap Screws and (3) 1/4"-20 Flanged
Locknuts.
Note: Shelf Lips may be attached to Shelf before installing
Shelf.
Left Hand Shelf Bracket
Right Hand Shelf Bracket
Shelving Upright
Shelf Lip
1/4"-20 Flanged
Locking Nut
1/4"-20 x 1/2"
Flanged Cap Screw
SCAN QR CODE for
INSTRUCTION VIDEOS
Installation Manual Part No. 930091
Shelves
DCLT01B1236
DCLT01B1248
DCLT01B1260
DCLT01B1272
DCLT01B1536
DCLT01B1548
DCLT01B1560
DCLT01B1572
Uprights
DCLT01SU40


