Installation Instructions
The KD-HDMIWPTX can receive power from either the HDMI connection or via the
supplied power adapter. When using the HDMI cable to deliver power to the unit,
performance is subject to the following factors:
Ability of the HDMI source to deliver the required power over distance
Quality of the HDMI cable.
1. Find a safe and convenient location for the KD-HDMIWPTX unit.
Before permanently securing the unit or final installation of cabling
behind walls or ceilings, test for proper operation of the unit and the
cables in your system.
2. Power.
In order to insure the best possible performance from the KD-HDMIWPTX, use
only the original Key Digital power supply. If you are using the supplied power
adapter, plug it into the power input jack on the side of the unit. You should see
the “Power” LED illuminate. (see Fig. 1)
3. Connections.
Plug in the HDMI source cable to the “Input” port on the front of the KD-
HDMIWPTX. If you are not using the supplied power adapter, the “Power” LED
should illuminate upon plugging in the HDMI input cable if your HDMI source is
powered on.
If it is necessary to use a separate PCM feed from the source, connect it to the
PCM input port on the front of the KD-HDMIWPTX.
Plug in the CAT5 cables to the output ports on the back of the KD-HDMIWPTX.
At this point, if both your source and destination (KD-CAT5XHDMI, KD-CAT5XCAT5)
devices are powered on, you should see the green “Power” LED and the blue
“HPD” LED lit.
The HDMI CAT5 signal is split into ‘Data’ and ‘Control’ outputs. Verify that these
outputs feed the corresponding ‘Data’ and ‘Control’ inputs on the receiving device.
The CAT5 outputs can feed either the KD-HDMIWPRX or KD-CAT5XHDMI*
(receiver) to convert back to HDMI. Additionally, they can feed the KD-CAT5XCAT5,
which is a CAT5 extender, to make longer CAT5 runs more reliable.
* Note that when used with the KD-CAT5XHDMI, the PCM input port of the KD-HDMIWPTX is not available on
the receiving KD-CAT5XHDMI
➔
➔
➔
➔
➔
➔
➔
➔
➔
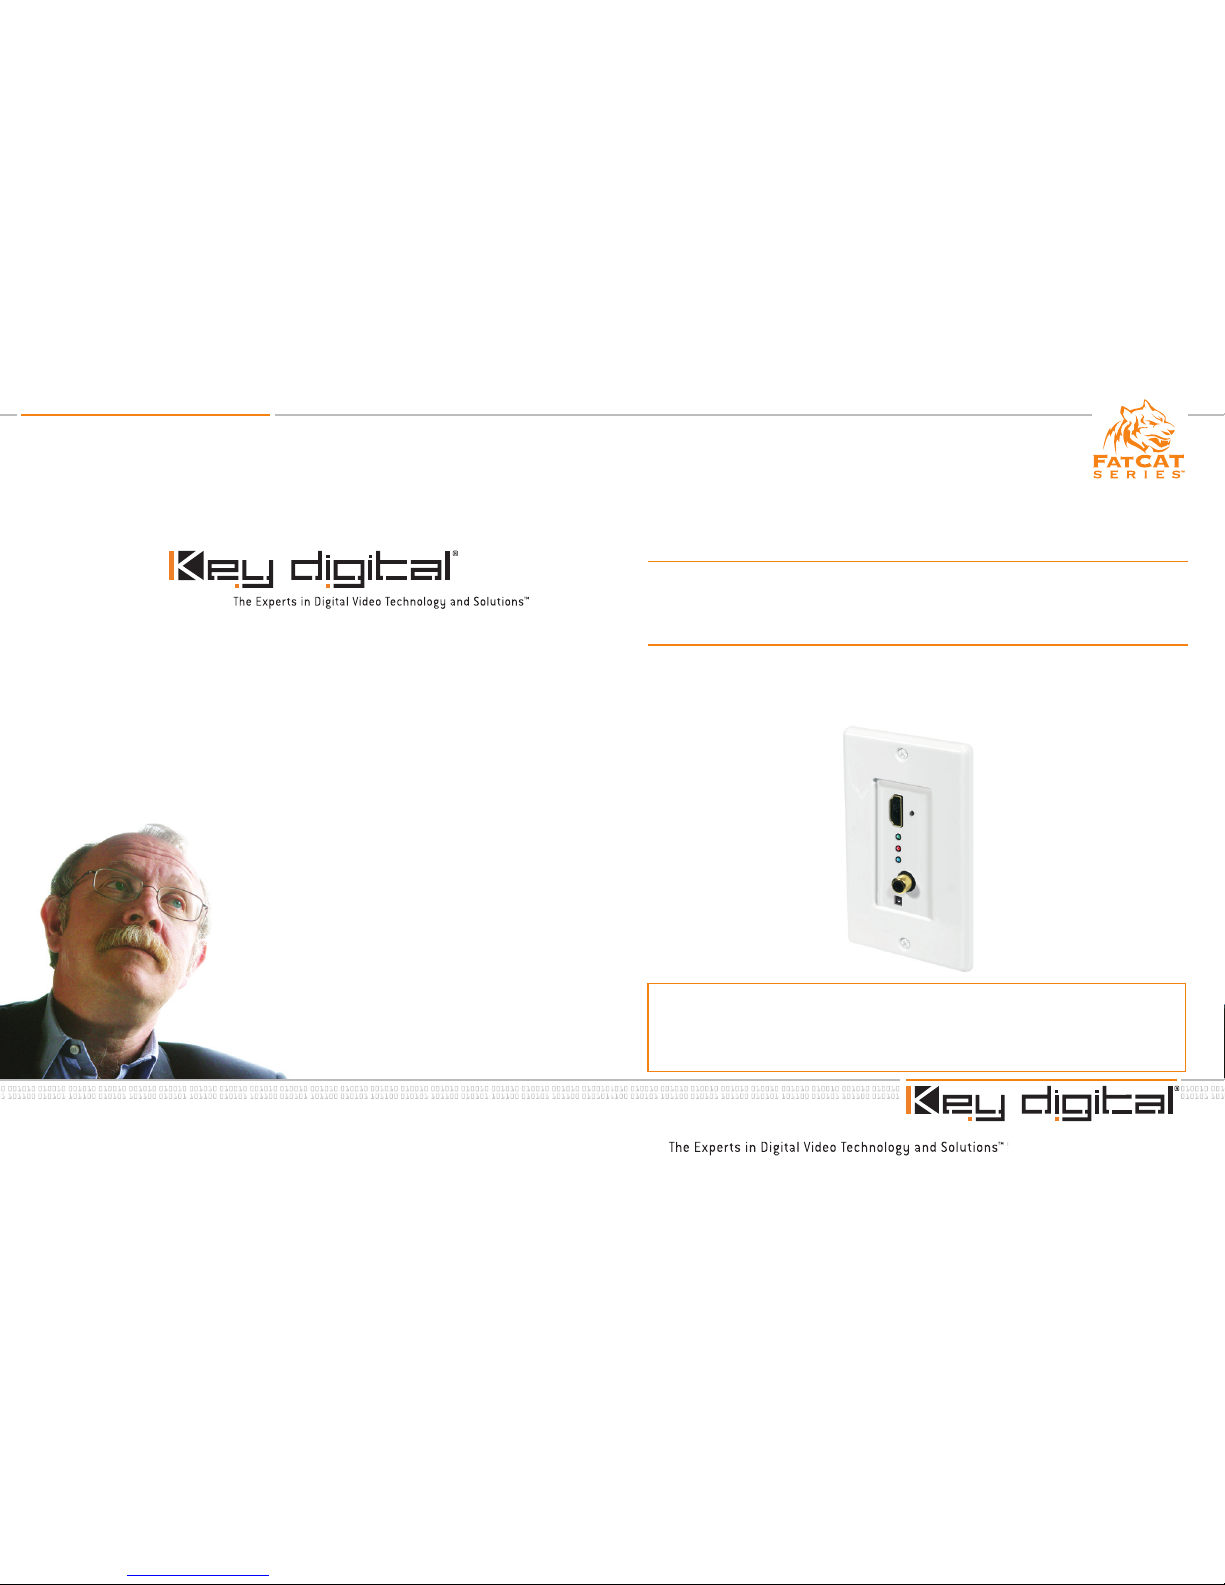
CAT5 Output on back
Figure 1
HDMI Input
Green LED: Power Indicator
Red LED: Stable input video
signal present
Blue LED: Valid Source/Synch
DVD/TV connection indicator
PCM Input
Power Jack
When a stable signal is established between your source and destination,
the red “Equalizer Active” LED will light. If this red LED indicator is blinking or
not illuminated, try shortening HDMI or CAT5 cable lengths or lowering the
resolution of the video signal.