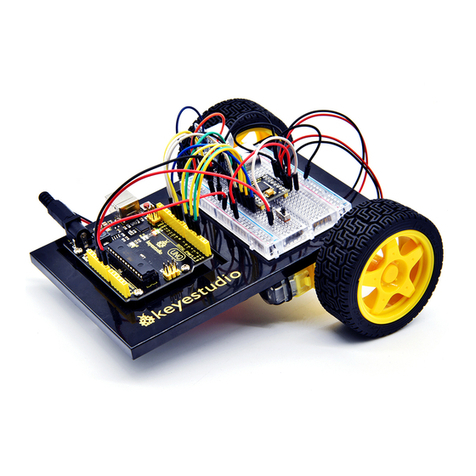
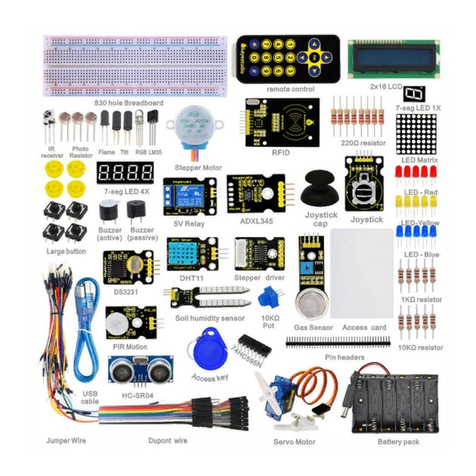
Keyestudio EASY PLUG Ultimate Starter Kit User manual

keyestudio
www.keyestudio.com
EASY PLUG Ultimate Starter Kit For Arduino STEM EDU

CONTENT
1. Kit Description.................................................................................................................................................1
2. Kit List.............................................................................................................................................................. 1
3. Getting Started with Mixly............................................................................................................................ 6
1) Introduction for Mixly............................................................................................................................6
2) Interface Functions of Mixly.................................................................................................................6
2.1. System Functions........................................................................................................................6
2.2. In/Out Block................................................................................................................................ 9
2.3. Control Block............................................................................................................................. 14
2.4. Math Block................................................................................................................................. 20
2.5. Text Block.................................................................................................................................. 25
2.6. List Block....................................................................................................................................28
2.7. Logic Block................................................................................................................................. 31
2.8. Variable Block............................................................................................................................34
2.9. SerialPort Block......................................................................................................................... 37
2.10. Communicate Block............................................................................................................... 43
2.11. Sensor Block............................................................................................................................47
2.12. Actuator Block.........................................................................................................................50
2.13. Monitor Block.......................................................................................................................... 53
2.14. Functions Block.......................................................................................................................57
4. Installing Arduino Software........................................................................................................................ 62
5. Let’s Get Started With Your Projects........................................................................................................ 73
Project 1: Hello World..............................................................................................................................73
How To Get Started With Mixly Projects...............................................................................................81
Project 2: LED Light................................................................................................................................. 90
Project 3: Knocking................................................................................................................................ 102
Project 4: How much light.................................................................................................................... 106
Project 5: Buzzer clicking...................................................................................................................... 113
Project 6: Capacitive touch...................................................................................................................116
Project 7: Fire extinguishing.................................................................................................................124
Project 8: There’s flame........................................................................................................................127
Project 9: Avoiding obstacles............................................................................................................... 133
Project 10: Servo....................................................................................................................................141
Project 11: Slide Position...................................................................................................................... 148
Project 12: RGB...................................................................................................................................... 157
Project 13: Someone is in this area!................................................................................................... 162
Project 14: Joystick................................................................................................................................ 171
Project 15: Ambient Light..................................................................................................................... 179
Project 16: Hello, kaka!......................................................................................................................... 188
Project 17: I’m thirsty............................................................................................................................193
Project 18: Is there gas leakage?........................................................................................................200
Project 19: Ultrasonic ranging..............................................................................................................207

Project 20: What’s the temperature....................................................................................................215
Project 21: What time is it?.................................................................................................................. 224
Project 22: I receive a signal................................................................................................................227
6. Resources....................................................................................................................................................234
7. Our Tutorial................................................................................................................................................. 235
8. About keyestudio....................................................................................................................................... 235
9. Customer Service....................................................................................................................................... 236

1
1. Kit Description
The keyestudio EASY PLUG ultimate starter kit is based on Mixly blocks coding,
very easy to use and flexible.
This kit includes everything you need to complete Mixly projects that will
teach you how to control and read external sensors and displays, sound
control, learn Mixly Blocks programming, and much more.
These boards and modules are the best to start learning and tinkering with
electronics and coding.
The Starter Kit includes a user guide with 22 tutorials that will walk you
through the basics up to complex projects.
Although you have a few or even no electronics related knowledge, you can
use this kit to realize your creative ideas as long as you want to.
After using this kit you’ll have the know-how to start creating your own
amazing experiments. Share your own creative works with your intimate
family, friends or classmates.
Let’s get started right now!
2.Kit List
No.
Component
Quantity
Picture
1
EASY plug Control Board V2.0
1
2
EASY plug Green LED Module
1

2
3
EASY plug Yellow LED Module
1
4
EASY plug Red LED Module
1
5
EASY plug Passive Buzzer Module
1
6
EASY plug Photocell Sensor
1
7
EASY plug Soil Humidity Sensor
1
8
EASY plug Analog Gas Sensor
1
9
EASY plug TEMT6000 Ambient Light
Sensor
1
10
EASY plug slide potentiometer
module
1

3
11
EASY plug Capacitive Touch Sensor
1
12
EASY plug Knock Sensor
1
13
EASY plug Flame Sensor Module
1
14
EASY plug PIR Motion Sensor
1
15
EASY plug
DS18B20 Temperature Sensor
1
16
EASY plug IR Receiver Module
1
17
EASY plug Infrared Obstacle Detector
Sensor
1
18
EASY plug DS3231 Clock Module
1
19
EASY plug Joystick Module
1

4
20
EASY plug SR01 Ultrasonic Module
1
21
EASY plug OLED Module
1
22
EASY plug L9110 Fan Motor Module
1
23
EASY plug Servo Module
1
24
Keyestudio 9G blue Micro Servo 90°
1
25
EASY plug 2812 2x2 full-color RGB
Module
1
26
200mm blue RJ11 cable
5
27
300mm blue RJ11 cable
3

5
28
USB cable
1

6
3.Getting Started with Mixly
1) Introduction for Mixly
Mixly is a free open-source graphical Arduino programming software, based on Google’s Blockly
graphical programming framework, and developed by Mixly Team@ BNU.
It is a free open-source graphical programming tool for creative electronic development; a complete
support ecosystem for creative e-education; a stage for maker educators to realize their dreams.
Although there is an Ardublock graphical programming software launched by Arduino official, Ardublock
is not perfect enough, and many common functions cannot be realized.
2) Interface Functions of Mixly
2.1. System Functions
Look at the main interface of Mixly, it includes five parts, that is, Blocks selection, code edit, text code
(hidden), system function and message prompt area. Shown below.

7

8
Some common functions:
Through this interface, you can complete the code compile、upload、save and manage. It support four
remove methods: drag it left out code window, or drag to Recycle Bin, delete key, or right-click to delete
block. It supports four languages: English、Español (Spanish)、中文简体(Chinese Simplified)、中文繁体
(Chinese Traditional).

9
2.2. In/Out Block

10
NO.
BLOCK ICON
DEFINITION
1
Returns HIGH or LOW voltage
2
Write digital value to a specific Port.
Digital Output: set the HIGH or LOW output for
IO pins
3
Returns a digital value of a specific Port.
Digital IO Read Pin, generally used to read the
HIGH or LOW level detected by Digital sensor
4
Write analog value between 2 and 255 to a
specific Port.
Analog Output: set the Analog value output by
Analog IO pins (0~255).

11
5
Returns value between 0 and 1023 of a specific
Port.
Analog IO Read Pin, generally used to read the
Analog value detected by Analog sensor.
6
External Interrupts function, with three trigger
interrupt modes RISING, FALLING, CHANGE.
7
Detachs interrupt to a specific Port.
Turn off the given interrupt function.
8
Set the IO pins as Output or Input state

12
9
Read the continuous time of HIGH or LOW pulse
from IO pins
( generally used for ultrasonic ranging)
10
Read a pulse (either HIGH or LOW) on a pin
within a time set in timeout.
11
Set the ShiftOut data pin, clock pin. Output the
data needed from the bitOrder MSBFIRST or
LSBFIRST (Most Significant Bit First, or, Least
Significant Bit First).
Generally used for controlling the 74HC595 CHIP.
12
This is the function interface under Normal mode.
If select Advanced mode, the functions will be
more.

13
For example:
Connect your Arduino Uno board, then follow the steps below to light the Pin13 led on Arduino UNO.

14
2.3. Control Block

15
NO.
BLOCK ICON
DEFINITION
1
Initialization (run only once)
2
End the program, means the program will stop
running when use this block.
3
Delay function, click to select ms or us
(pause the program for the amount of time (in
milliseconds) specified as parameter. There are
1000 milliseconds in a second.)

16
4
if_do function (first evaluate a value be true or
false, if a value is true, then do some statement.
You can click the blue gear icon to select the else
if block or else block.)
5
switch function. You can click the blue gear icon
to select the case block or default block. (used to
evaluate several programs then execute the
corresponding function matched with program.)
6
Equal to for statement.

17
7
Awhile loop statement.
8
break function, used to exit from the containing
loop.
9
millis() function, returns the system running
time since the program started.
(The unit can be ms (milliseconds) or μs
(microsecond)).
Table of contents
Other Keyestudio Microcontroller manuals