Keyscan KS-NAS-120 A1 User manual

1
KS-NAS-120
Quick installation guide
KeyScanInc.©2013KeyScanInc.Allrightsreserved.
www.keyscan.com

2
ProductRegistration,WarrantyandFree30dayssupport:
InordertoactivateyournewproductwarrantyyoumustregistertheproductontheKeyScanwebsite
athttp://www.keyscan.com,clickonthe<Support><WarrantyActivation>menuandfillintherequired
details.
Theproductmustbeactivatedwithin30daysofproductpurchasing.
Theproductactivationentitleyoualsoforfree30daysproductinstallationandinstructionsupport.
Pleasekeeptheproductpurchasingpaymentreceiptsinceitwillberequiredtoclaimyourwarrantyand
supportoptions.
Boxcontent:
This“QuickInstallationGuide”document
AKSNASunit.
Powercable.
WiFiantena
Keys.
KSNAS120‐i7ksnas120‐A1
Iftheproductpurchasedconfigurationincludesharddrivesthedrivesplatesshouldbepopulated
accordingtothepurchasedconfiguration.Thecompletepurchasedconfigurationdetailsshouldbe
declaredontheproductreceipt/invoice.
Otherwisethedrivestraysareempty.

3
Introduction:
Theksnas‐120cancomeinmultipleconfigurations,thisdocumentcoverstwoconfigurations,the
configurationscanbechanged,thisdocumentistheinitialinstallationinstructionsitisnotaninventory
listofyoursystemconfigurationandthegivenconfigurationsareonlyforthepurposeofexampleon
settingthesystem.
KSNAS‐120A1:anAMDC60DualCoreprocessorbasedsystemwith4GBDRAM,1RJ45WiredGB
networks,1Wirelessnetwork,1VGA+1DVIconnection,3Audio,1PS/2KB/Mouse,6USB2/1.1
KSNAS‐120I7:anInteli7QuadCoreprocessorbasedsystemwith8GBDRAM,2RJ45WiredGB
networks,1Wirelessnetwork,1Bluetoothconnection,1eSATAconnection,2HDMI+1DVI‐I
connection,5Audio(Center/SubwooferSpeakerout,RearSpeakerOut,,Linein,Lineout,Micin),1PS/2
KB/Mouse,2USB3/2+4USB2/1.1,1OpticalS/PDIFOutconnection
KSNAS‐120A1productfrontpanel:

4
KSNAS‐120I7productbackpanel:
KSNAS120‐I7
KSNAS‐120A1productbackpanel:
KSNAS120‐A1

5
KSNAS‐120productinstallationprocess:
Fortheinstallationprocessyoumaychoosetodo“full‐system”installationor“headless”installation.
A“Full‐System”installationiswhereyouconnecttotheKSNASboxacomputermonitor(notincluded
inthepurchasedpackage)acomputerkeyboard(notincluded)andacomputermouse(notincluded).
ThefullsysteminstallationletsyouworkdirectlyontheKSNASserverutilizingitsuserfriendlywindows
desktopuserinterface(NotaMicrosoftWindows).
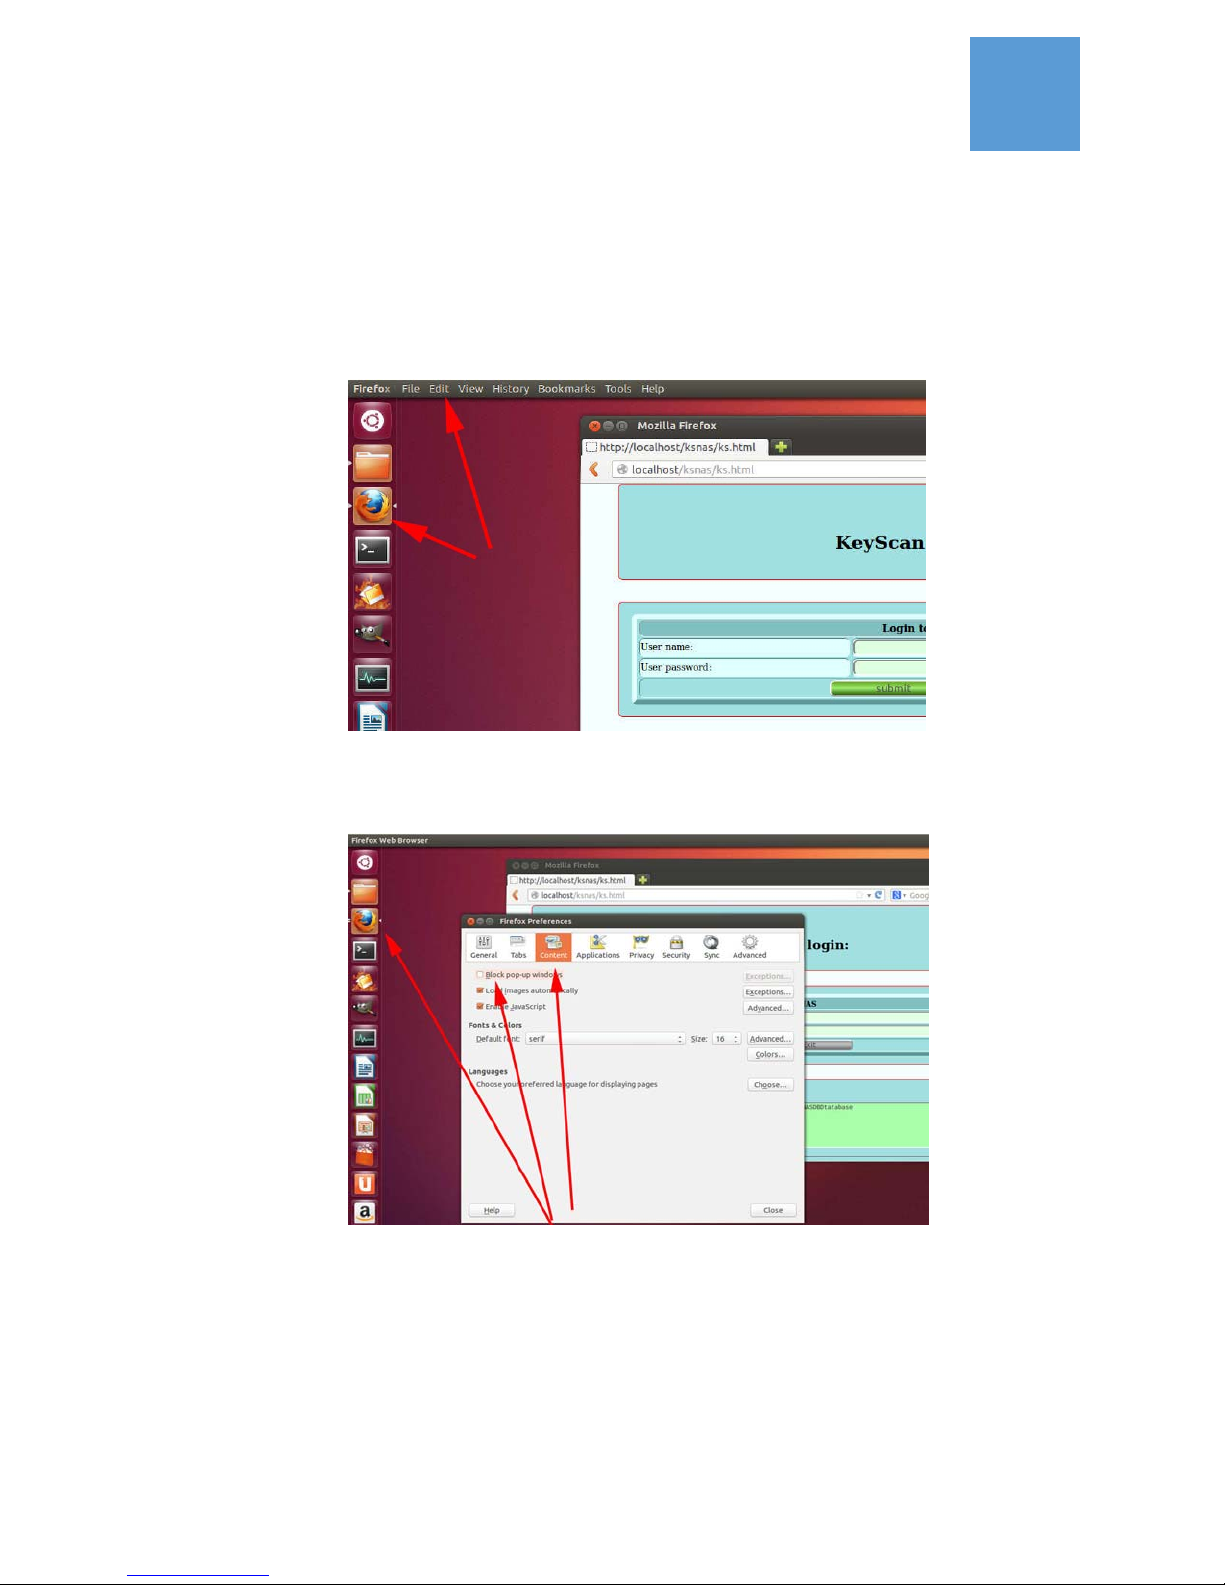
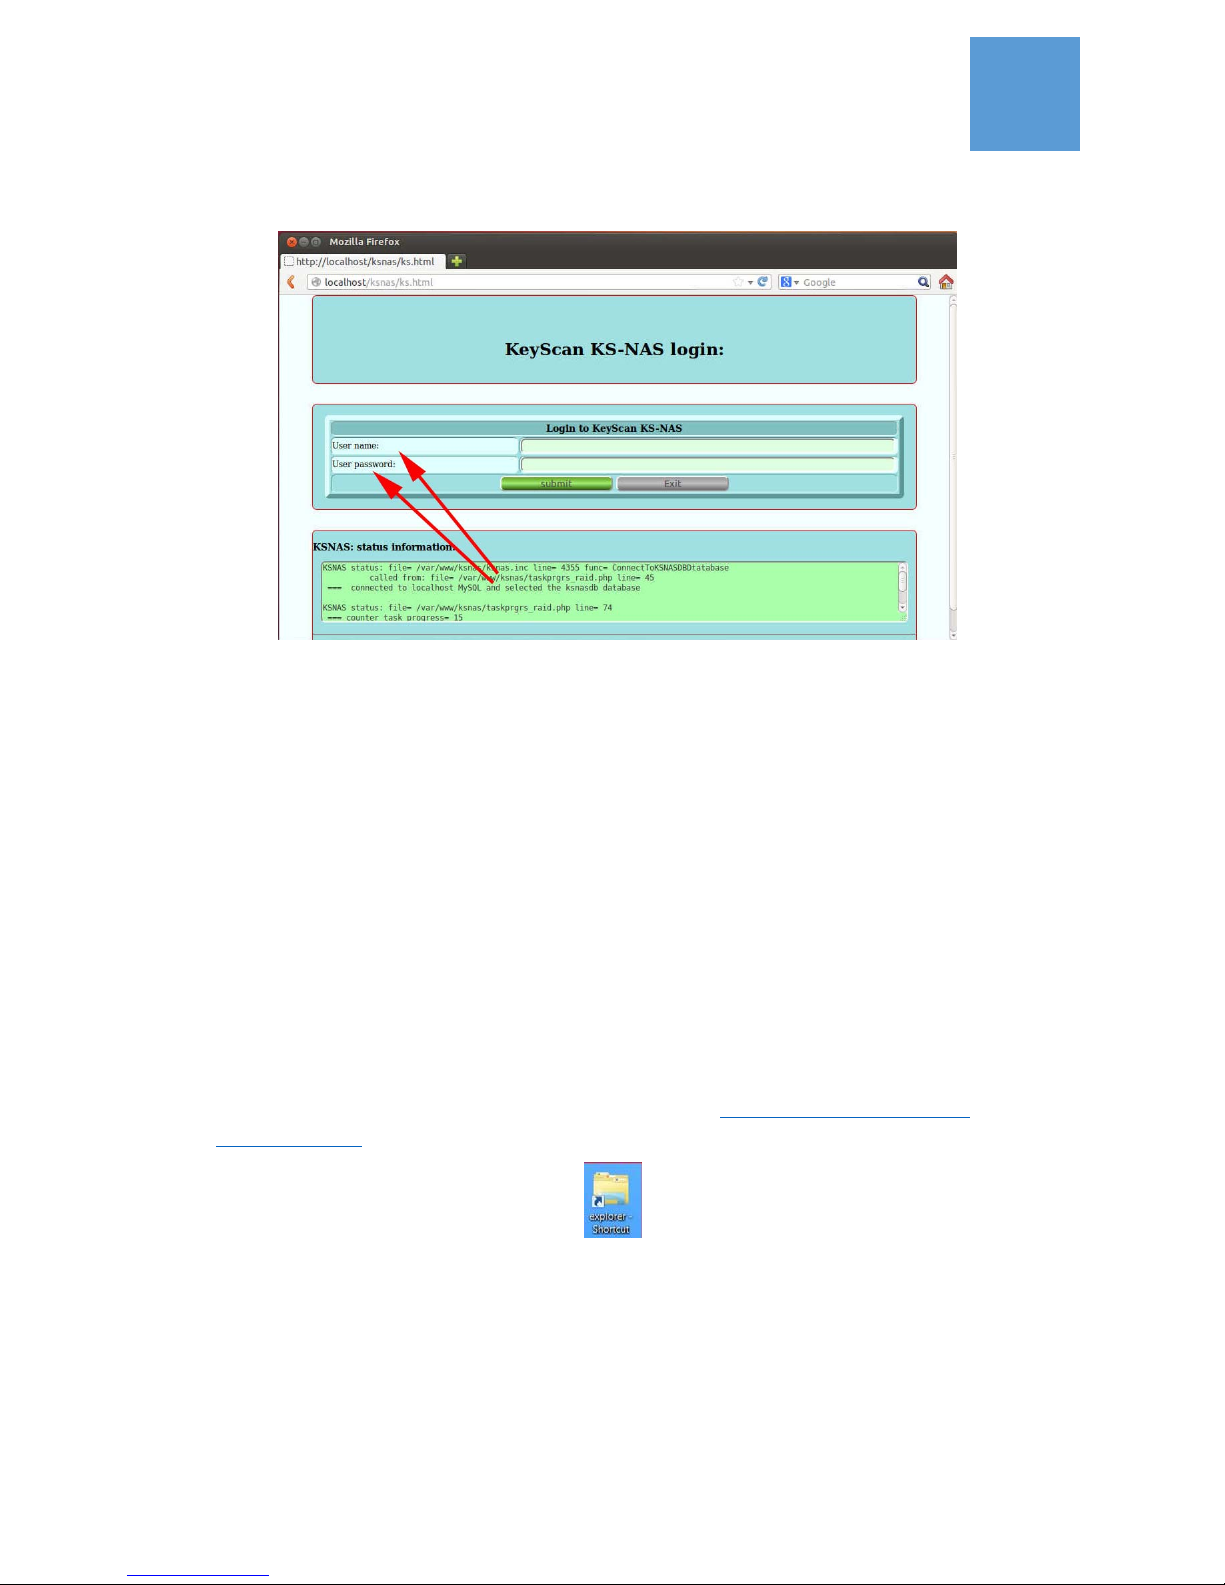
A“Headless”installationdoesnotrequiremonitor,keyboardandmouseconnectionandtheKSNAS
setupandcontrolisdonethroughaweb‐browserfromanothersystemusingFirefoxInternetBrowser,
availablefreefordownloadat‐http://www.mozilla.org/en‐US/firefox/new/,youshoulduseonlythe
FirefoxbrowserforsettingupandconnectingtotheKSNAS120webbasedcontrolprogram.
Theabove2methods:Full‐System&Headlessareinterchangeableyoucanalwaysswitchbetween
themordobothatthesametimemeaning:havemonitor,keyboardandmouseconnectedandworking
locallyontheKSNASdesktopandatthesametimeconnecttoitfromanothercomputeroverthe
networkusingFirefoxInternetBrowser.
Systemsetupsteps:
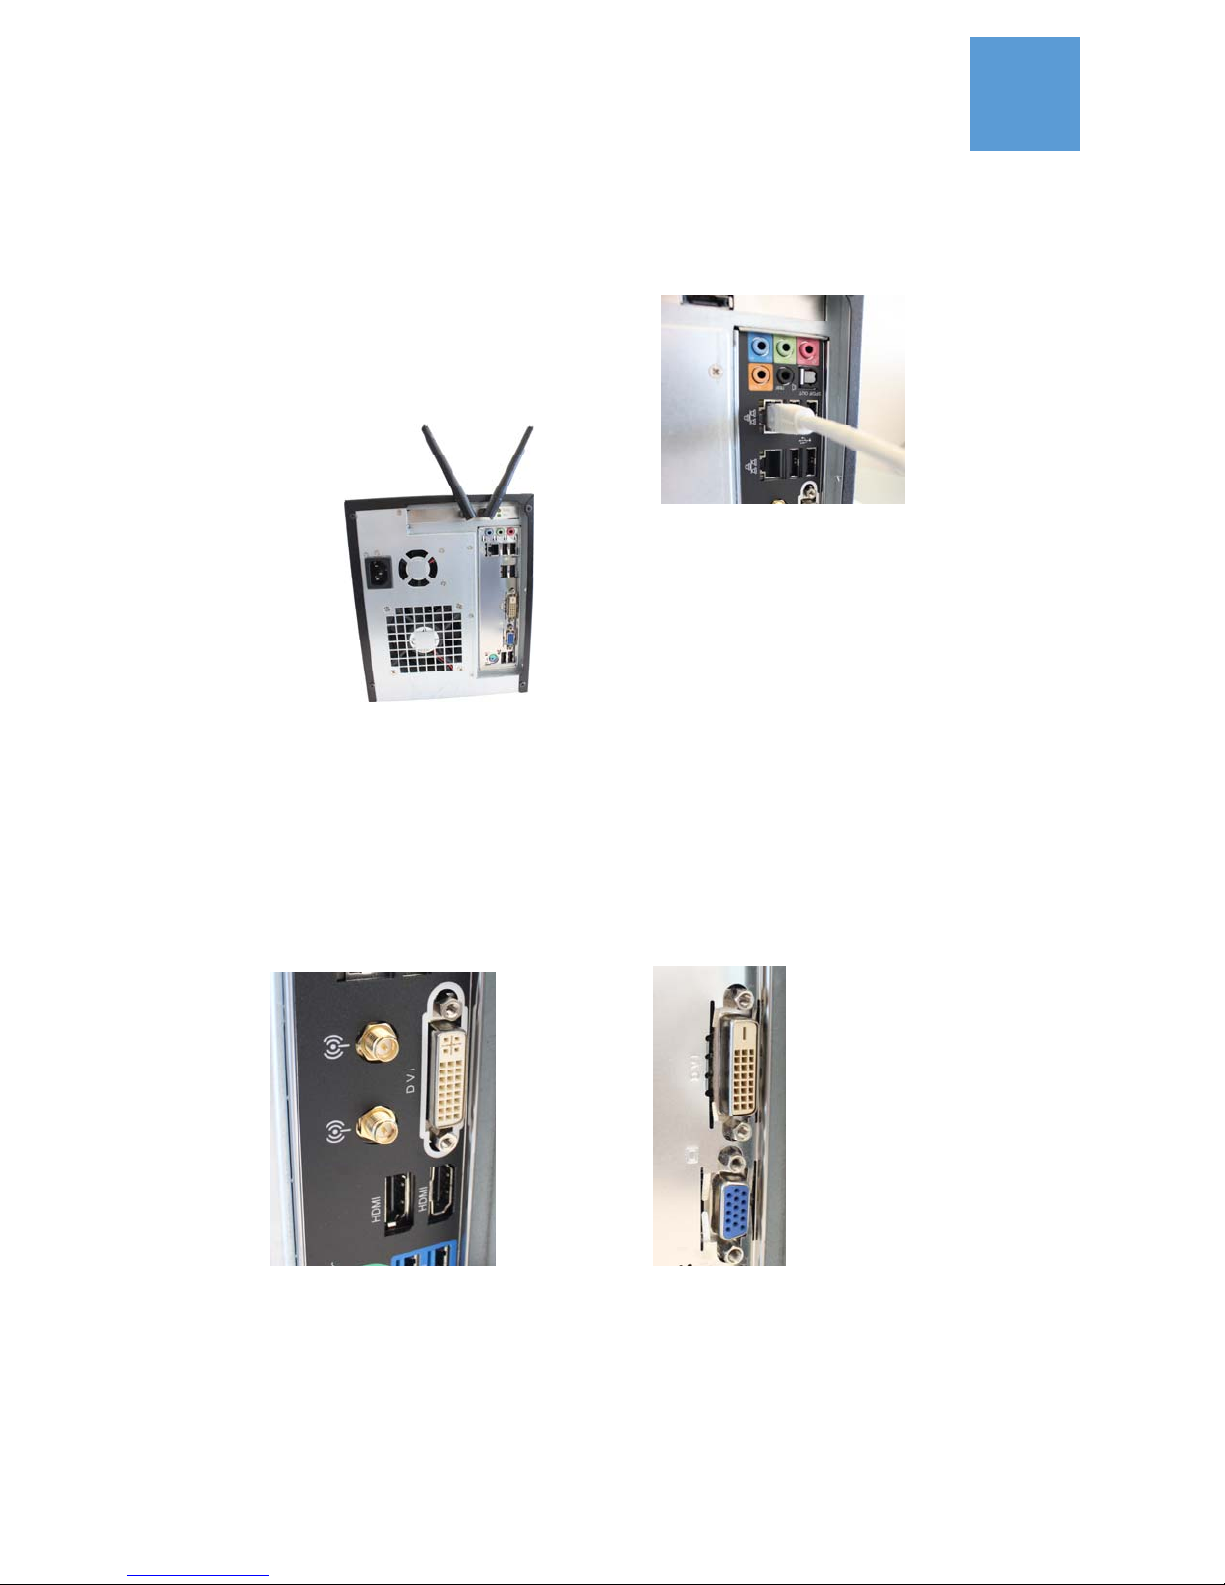
1. Aspecialnoteonpowerconnection:
a. ItisstronglyrecommendedthatyouconnecttheKSNAStothepoweroutletthrougha
surgeprotectionorUPSunit(notincluded)itwillreducethechanceforsystemfailure
duetopowerissuesandextendthelifeoftheKSNASandtheinstalledharddrives!
Youmayfindexamplesforsurgeprotectionproductsat‐
http://www.cyberpowersystems.com/products/surge‐protectors/office‐pro‐surge.html
YoumayfindexampleforUPSproductsat‐
http://www.cyberpowersystems.com/products/ups‐systems/soho‐ups.html
A300‐600VAproductsaregoodfortheKSNASifitistheonlydeviceconnected.
b. WhenconnectingtheKSNASpowercordconnectitfirsttotheKSNASandthentothe
poweroutlet(ortheUPSorPowersurgeprotection).
2. Removethe4drivesplatesfromthesystem,whenyoustartthesystemfor
thefirsttimethedrivesplatesshouldberemoved.
3. ConnectpowercabletotheKSNASproductandtoapoweroutlet.

6
4. ConnectnetworkcablefromyournetworkhuborroutertotheKSNAS,ifyourKSNASmodelhas
2wirednetworkconnectionconnectthecabletothetopconnectionandleavethebottomone
unconnected.
5. Connecttheantenna
6. Fora“Headless”installationgotostep#23.
7. Fora“Full‐System”installationdothefollowingsteps:
8. <Full‐System>Connectacomputermonitor(notincluded)toeitherHDMIorDVIconnectionon
theKSNASboxbackpanelandmakesurethatthemonitormodeonyourmonitorissettoeither
HDMIorDVIaccordingtotheconnectiontotheNASbox,somemonitorsaresetautomatically
andsomerequiremanualselectiononthemonitorsettingdisplay.
KSNAS120‐I7KSNAS120‐A1
9. <Full‐System>Connectacomputerkeyboard(notincluded)toanyoftheUSBportsontheback
paneloftheKSNASbox.

7
10. <Full‐System>Connectacomputermouse(notincluded)toanyoftheUSBportsontheback
paneloftheKSNASbox.
KSNAS120‐I7KSNAS120‐A1
11. <Full‐System>Youmayalsoconnectspeakersandmicrophone(notincluded)totheback
connectionpaneloftheKSNASbox.
KSNAS120‐I7KSNAS120‐A1
12. <Full‐System>PressthepowerbuttonontheKSNASboxfrontpanel.Thisisthetopleftbutton
outof6buttonsonthetoprightsideoftheKSNAS120LCDdisplaypanel.
13. <Full‐System>YoushouldseebluelightontheKSNASfrontpanelLCDdisplaywithsome
indicatorsregardingthesystemfunctions.

8
14. <Full‐System>Theboxfanmaystartloudinfullspeedbutshouldbecomesilentwithin2‐10
seconds.
15. <Full‐System>YoushouldseeonthemonitortheKSNASloginpage,thismaytake10to30
seconds,itmaybelongerforthefirsttimeyoustartthesystem.
16. <Full‐System>Forusernametype“ksuser”andforpasswordtype“kspw”
17. <Full‐System>Theinitialfirsttimeloginmaytake10‐30secondsandyoushouldgettheKSNAS
desktopforuserksuser.
18. <Full‐System>TheKSNASissetbydefaulttoconnectautomaticallytoyournetworkandget
initialnetworkdynamicaddressfromyourlocalnetworkDHCPserver.Ifeverythinggoeswell
youshouldseethenetworkconnectionindicationonthetoprightsideofthemonitor.
19. <Full‐System>ActivatetheKSNASbrowserbasedcontrolpanel:makeonemouseleftclickon
theFirefoxiconontheiconbarontheleftsideofthemonitor.
20. <FullSystem>Enablebrowserpop‐upwindows:

9
a. ClickonthetopbaroftheFirefoxbrowserframetoselectit
b. Movethemouseovertothetopbarofthedesktop(atthetopofthedisplay),oncethe
mousehoveroverityoushouldgettheretheFirefoxmenu
c. Rightclickon“Edit”andselect“Preferences”youshouldgetapopupwindowforFirefox
preferences.
TheFirefoxdesktopiconandtopbarmenu
d. Onthepopupwindowclick“Content”andunselectthe“Blockpop‐upwindows”.
TheFirefoxpreferenceswindow
21. <Full‐System>ActivatetheKSNAScontrolprogram:typeintheFirefoxbrowseraddressfieldthe
followingaddress‐“localhost/ksnas/ks.html”andclickreturn.

10
22. <Full‐System>YoushouldgettheKSNAScontrolprogramloginpage.
TheKSNAScontrolapplicationloginscreen
23. <Full‐System>SometimestheKSNASinternetserverisnotreadyyetandyoumaygetamessage
thatthepageisnotfound,wait10‐20secondsandtryagain.
24. Skipthenextstepsandcontinuetostep#32
25. For“Headless‐System”dothefollowingsteps:
26. <Headless‐System>AtthispointtheKSNASdeviceshouldbeconnectedtopowerandtothe
localnetworkandhaveitspoweron.
27. <Headless‐System>TheKSNASissetbydefaulttogetfromthelocalnetworkDHCPservera
dynamiclocalnetworkIPaddress,oncethisisdone(automaticallywithinfewsecondsof
connectionoftheKSNAStothelocalnetwork)youcanconnecttotheKSNASfromanyother
machineonthenetworkusingtheFirefoxbrowser,donotuseMicrosoftInternetExplorer,if
youdonothaveFirefoxyoucandownloaditfreefrom‐http://www.mozilla.org/en‐
US/firefox/new/
28. <Headless‐System>checkyournetworkdevicesfromanyPConyour
network:
activateMicrosoftFileExplorer
ontheleftpanclickonNetworkandwaittogetontherightpanthelistofdiscoverednetwork
devices,oneofthemshouldhavetheKSNASxxxnamewherexxxmaybeeitherblandora
number.

11
MicrosoftFile‐Browsertogetnetworkdevices
29. <Headless‐System>Incaseyoucan’tseetheKSNASxxxdevicefromthefileExplorertrytocheck
itdirectlyonyourDHCPserver,onsmallnetworkitmaybeintegratedaspartofyournetwork
modem/routerandyouneedtologintoyourroutertocheckit.AD‐LinkrouterDHCPpagewill
looklikethis‐
Example‐D‐LinkrouterDHCPaddressallocationpage

12
30. <Headless‐System>OnceyoufindoutyourKSNASnetworkdevicenameoritsassignedIP
addresswriteitdown,fortherestofthisdocumentweassumeyourKSNASnetworkdevice
nameis“ksnas1”
31. <Headless‐System>OnanyPConyournetworkopentheFirefoxInternetbrowser(if
neededinstallit)
EnablethePopupWindowfeaturebyselect“setting”onthebottombarmenuofFirefoxandon
the“Options”windowclickcontentandunselectthe“Blockpop‐upwindows”
Firefoxmainwindow,“setting”buttonand“options”window
32. <Headless‐System>youarenowreadytoconnecttotheKSNASbuilt‐insetupandcontrol
website.TypeontheFirefoxaddressfield‐http://ksnas1/ksnas/ks.htmlpleasenotethatthe
addressiscasesensitive!
Firefoxwebaddressinputfield
33. <Headless‐System>YoushouldgettheKSNASloginpage,enteruser=ksuserandpassword=
kspw(casesensitive).AndatthispointyoushouldbeloggedintotheKSNASsetupandcontrol
website(builtintotheKSNASserver).

13
KSNAScontrolapplicationloginscreen
34. ThefollowingstepsarecommonforbothFull&Headlesssystems
35. IfyouarenewtotheKSNASitisourrecommendationthatyousetitupinstages,takingthe
timetoknoweachfeatureyousetbeforeyoumovetothenextstep.Thisdocumentscopeis
onlytoinstalltheKSNASandgetittoconnecttoyournetwork,pleasecheckthe“Installation&
setupmanual”fordetailedinstructionsforfurthersettingoptions.
ThemanualisavailablefordownloadfromtheKeyScanwebsiteatwww.keyscan.com
Inaddition,afteryouregistertheproductwithKeyScanyouhavefree30dayssupportfor
questionsregardinginstallationandsettingoftheproduct.
36. Youmayproceedthesetupimplementingthefollowingsteps:
a. Updatethedefault“ksuser”passwordwithanewpasswordsincetheoriginalpassword
isstandardoverallKSNASshippedproducts.
b. Defineyourownusernamesandtheirpasswordsaswellascategorizingthemasadmin
oruser
c. Ifrequiredactivateyouradditionalnetworkinterface–thewirelessinterfaceand
dependingontheKSNASproductyoupurchasedoptionallyadditionalwirednetwork
interface.Youmaysettheinterface(s)asstaticIPaddressbutmustreservesuchsetting
alsoonyourrouter/DHCPserver.
d. Populatethehard‐drivetrayswithactualdrives.Pleaseshutdowntheserverwhenyou
pushapopulatedharddrivetrayinoroutoftheserver.Wedonotrecommendhot
driveswapping.

14
e. Oncethedrivestraysarepopulatedwithharddrivesyoucansetupyourstoragesystem.
Pleasebeawarethatsettingthestorageisalengthyprocess.SettingaRAIDdeviceor
Logical‐Volume(LVM)overRAIDmaytakethesystemfewhours,sobepatient.
f. TheKSNASletyoudoiteithermanuallyusingits“StorageManagement”toolor
automaticallyusingits“StorageWizard”tool.
TheKSNASstoragemanagementtool:

15
TheKSNASstoragewizardtool
g. TheKSNASimplementstheUNIXLogicalVolumeManagement(LVM)whichallowyou
greatflexibilityincontrolofyourstoragesystem,pleasegetmoredetailsfromthe
“Installation&setupmanual”.Thegeneralguidelineisthatyoucangetthemostoutof
theKSNASstoragesystemifyousetitmanuallyto4partitionspereachharddriveand
thenarrangethepartitionswithorwithoutRAIDasphysicaldevicesfortheLogical‐
Volumestoragelayer,insucharrangementyoumaykeepsomeofthepartitionsorRAID
devicesasideandattachthemtothelogicallevelonlywhenyouneedmorespace.
h. SetupstoragesharingusingiSCSI,NTFS,SAMBAprotocolsorthewebinterfaceusingthe
webbrowserbasedfilemanagerapplication.
TheKSNASwebbasedfilebrowsertool

16
i. Setupstoragesyncingusingthebuilt‐inOwnCloudapplication.
TheKSNASOwnCloudSynctool
j. Setupotherserversandapplications.
37. Fortheuser‐manualwithdetailedsetupyoushouldregisteryourproductwithKeyScanand
downloadtheproductusermanualathttp://www.keyscan.com
38. Ifyouneedsupportyoucancallforfreesupportasmanytimeasyouneedwithin30daysofthe
purchaseoftheKSNASproduct.PleasekeepinmindthattheKeyScansupportteamisthereto
helpyouwiththeKSNASproductbuttheyarenotareplacementfornetworkmaintenance,your
networkshouldbesetupproperlysotheKSNAScanconnecttoit.
39. ToactivatetheKSNASproductwarrantyyoumustregistertheproductwithKeyScanwithin30
daysfromthedatetheproducthasbeenpurchased,theproductregistrationisalsorequiredin
ordertoactivateyourfree30dayssupportoption.
40. Forsupportcontact[email protected]andprovidetheserialnumberofyourproduct,
whenandwhereithasbeenpurchased,contactinformationandpreferredtimetocallyou.
KeyScansupporthoursare9:00amto5:00pmeasterntime.
This manual suits for next models
1
Table of contents
Popular Network Storage Server manuals by other brands

Supero
Supero SBB 937R-E2JB user manual

Sony
Sony BSV-M1 - StorStation NAS Server operating instructions

TRENDnet
TRENDnet TS-U100 - NAS Server - USB user guide

Western Digital
Western Digital WDH1NC10000N - My Book World Edition NAS... user manual

HP
HP J3278B - SureStore CD-ROM Server/Tower 7 NAS... user guide

Acer
Acer Aspire easyStore H340 Manuel d'utilisation