Table of contents
Other Keystone Digital Camera manuals
Keystone
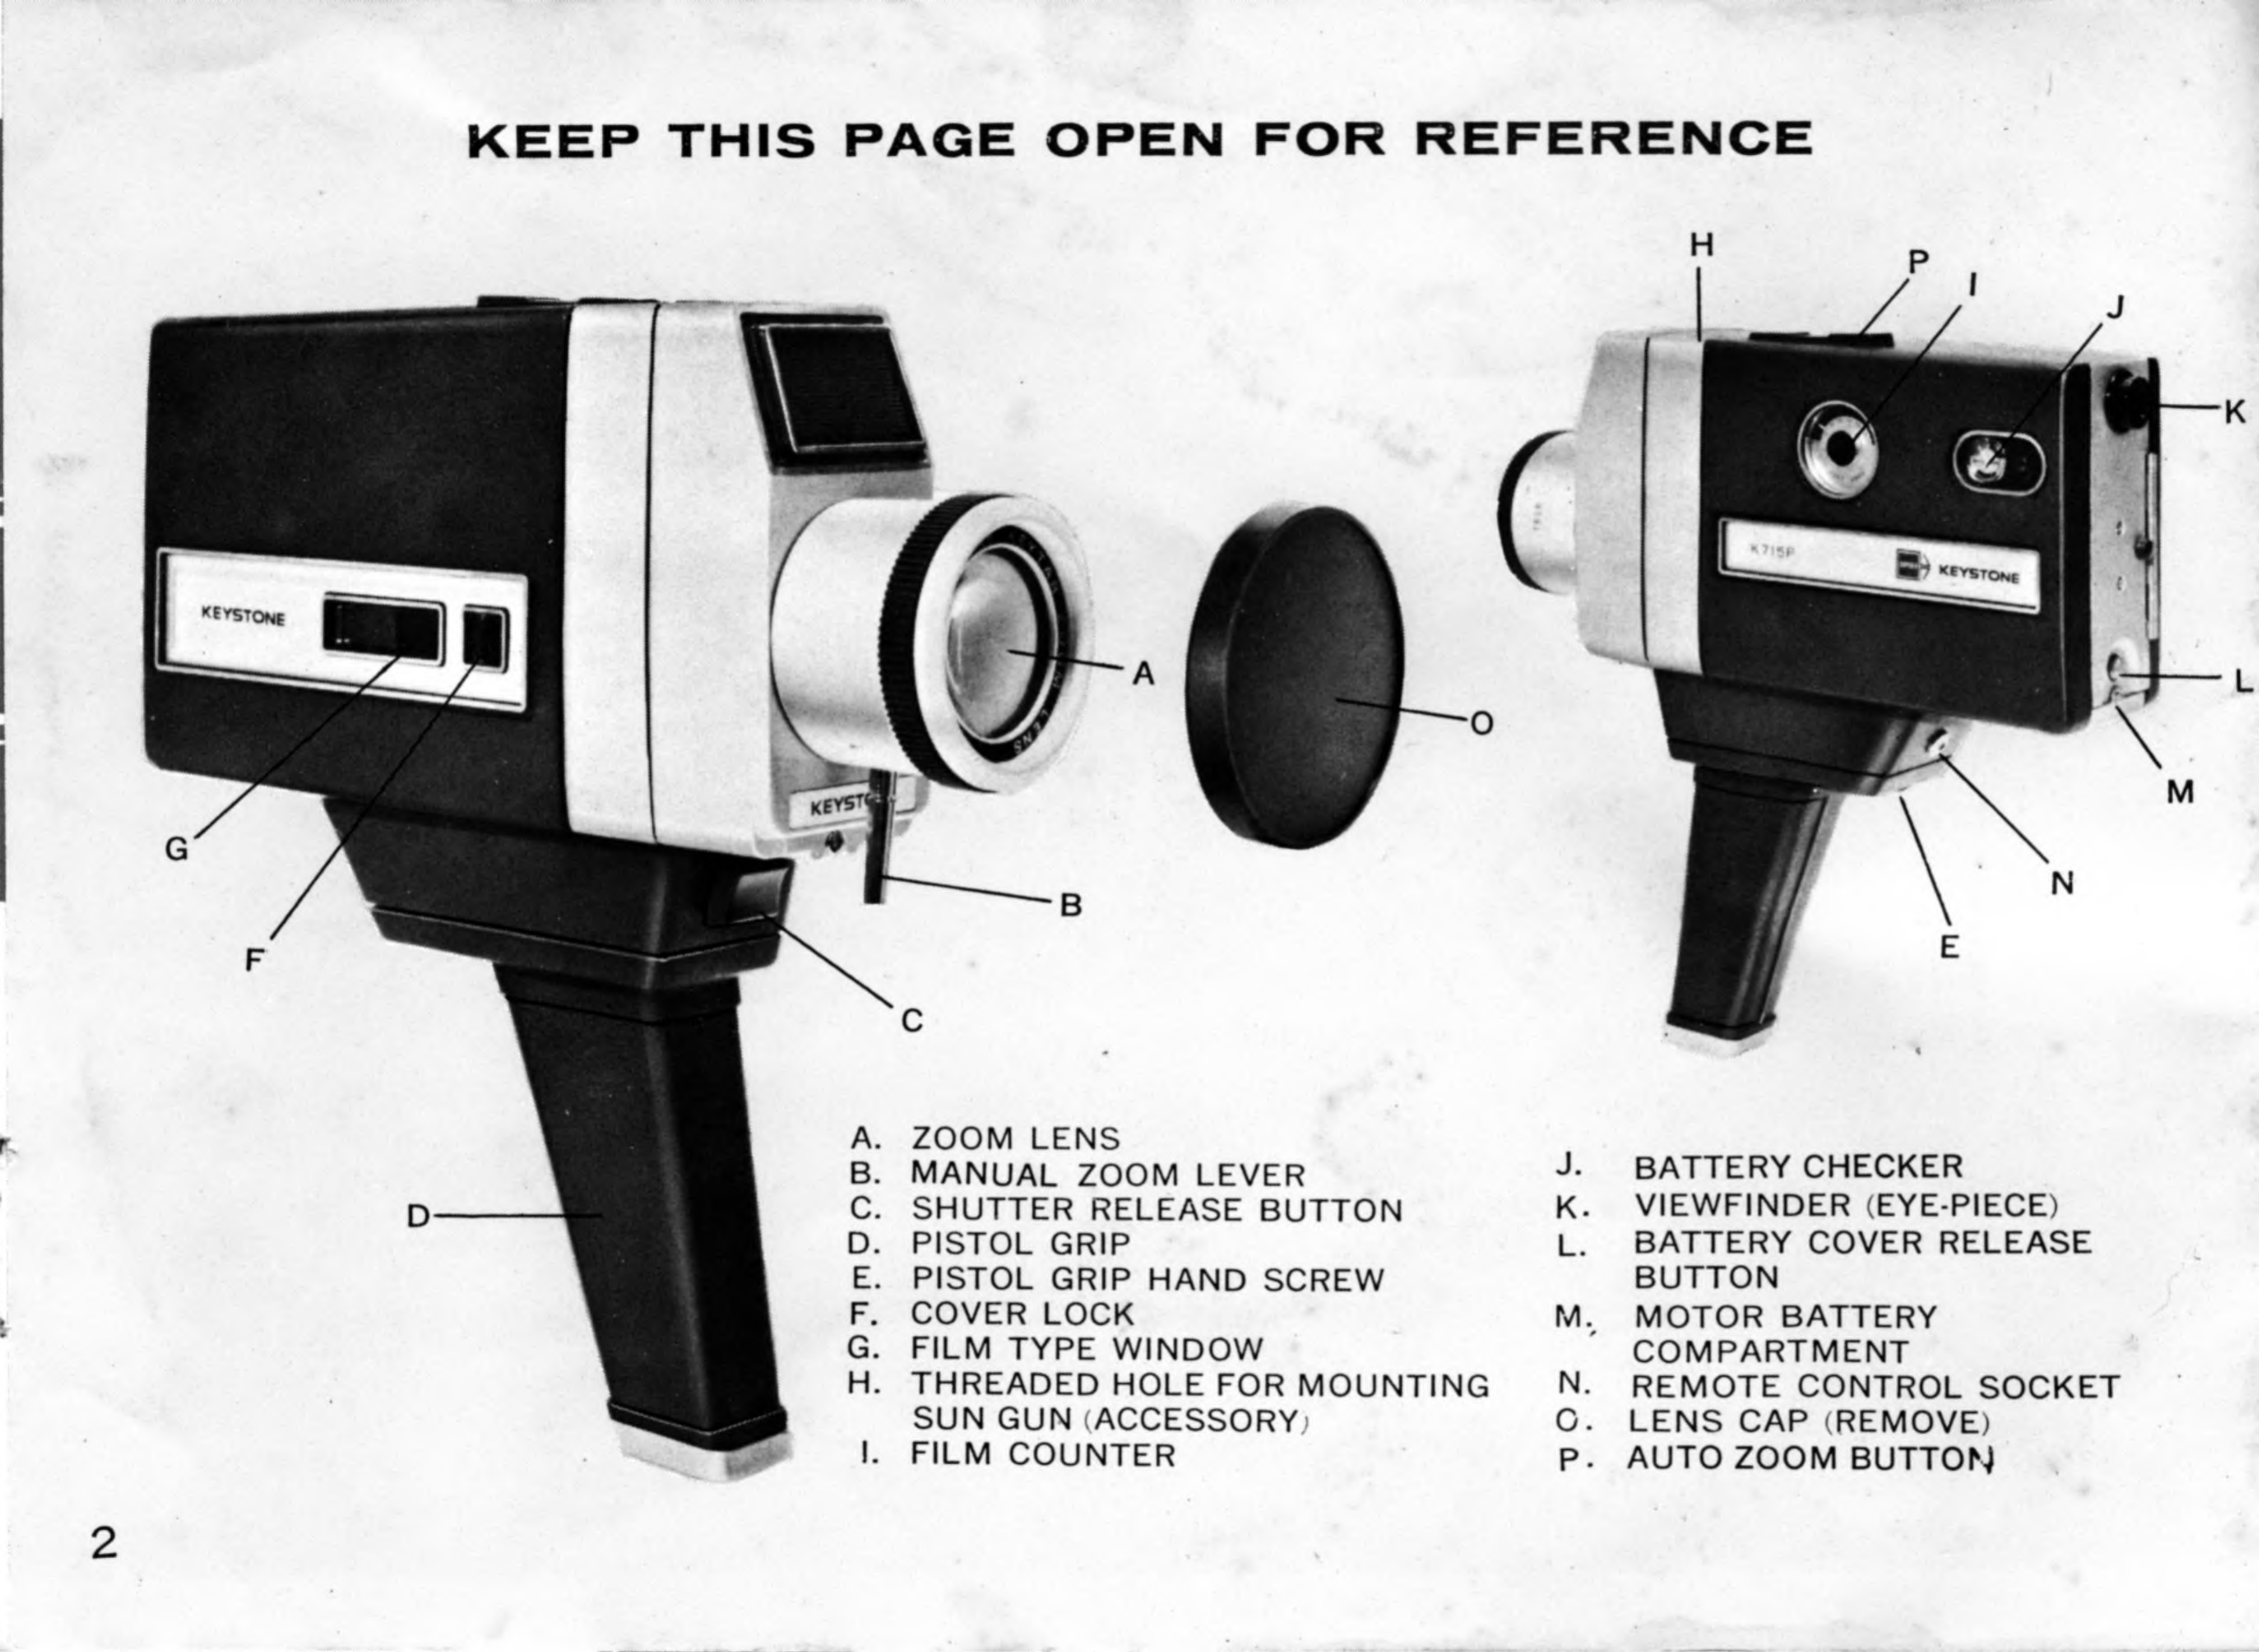
Keystone K-7 ZOOM User manual
GE
GE C1440W null
GE E1680W null
GE J1470S null
Konica Minolta
Konica Minolta DIMAGE X1 9979-2801-80/12984 null
Epson
Epson r-d1 - Rangefinder Digital Camera null
GE J1456W null
Mercury
Mercury 350K user manual
Pentax
Pentax Optio LS 465 operating manual
Sanyo
Sanyo VPC-S1085 instruction manual
GE SMART A1255 user manual
Point Grey
Point Grey Gazelle Getting started
Nikon
Nikon COOLPIX A Reference manual
Pentax P-5 manual
BlazeVideo
BlazeVideo A280 instruction manual
Sony
Sony MCA-20 manual
Sony Alpha DSLR-A290 instruction manual
ATIK Cameras
ATIK Cameras One user manual