Kia EV6 2022 User manual

Features & Functions
Guide

WELCOME TO THE KIA FAMILY!
Your new Kia vehicle has been designed, engineered and manufactured to provide you with years of comfortable and dependable driving. Kia is
committed to quality, innovation, safety and — above all — your satisfaction.
USING THIS FEATURES & FUNCTIONS GUIDE
The information contained in this guide is a brief overview of the operation and features of your new Kia vehicle.
This Features & Functions Guide and the specic operational and safety information it provides are not a substitute for your Owner’s Manual. In
the interest of your safety and that of the vehicle’s occupants, and to help you avoid risks that may result in death or serious injury, Kia reminds
you to carefully read the Owner’s Manual in order to fully familiarize yourself with the important information and safety warnings it contains.
While Kia endeavors to ensure that the information contained in this guide is accurate at the time of printing, Kia may change vehicle specications
without notice in advance of or after the fact and assumes no liability in connection with such changes.
VIDEOS AND QR CODES
Kia provides a number of video resources to assist you with becoming familiar with the features and functions found in your Kia vehicle. You can
access these resources by snapping the QR Codes with your mobile device using the built-in QR Code Reader or a downloaded QR Code Reader App.
After opening the QR Code Reader App on your mobile device, the app will utilize your device’s camera. Center the code in the camera viewing area
— with some apps, as soon as the app recognizes the code, it will launch the corresponding video.
With other apps, you will have to snap or “take a picture” of the code. The app will then launch the corresponding video.
For operation specics, refer to the instructions that come with the QR Code Reader App. You can also view the videos
by visiting the following website: www.youtube.com/KiaFeatureVideos
If you’re having trouble scanning codes, check the following:
• The code should be centered and focused in your mobile
device’s camera screen
• Consider moving your device closer to or farther away from
the code
• The code should be well lit, without signicant shadow
• Avoid scanning from a signicant angle
• Conrm that the device’s app supports 2D QR Code scanning
• Try another QR Code Reader App; not all apps are created equal
After scanning, you may experience a “connection error” message
or a “connecting” message with no subsequent response. These
messages typically indicate that your device is having trouble
connecting to the Internet
QUICK TIPS
Refer to the inside front cover for
more information on QR codes.
www.youtube.com/KiaFeatureVideos
Your New Kia
Important Care Tips
Video
QR CODES

Refer to the inside front cover for more information on QR codes.
www.youtube.com/KiaFeatureVideos
Matte Paint Care
Video
Navigation System
Important Tips Video
Your New Kia Important
Care Tips Video
Vehicle Cameras
Important Tips Video
QR CODES
As you get to know your new Kia, you can explore this booklet to better
understand how to operate its many features and systems. You can nd the
complete Table of Contents on the next two pages, but rst, be sure to review
the following to better understand some of your Kia’s most used features:
1 Smart Key with Remote Start / Remote Smart Parking Assist (RSPA) . . . 59
2 Power Adjustable Driver’s Seat / Front Seat Headrest Adjustment . . . . 56
3 Seat Warmers* / Ventilated Seats* . . . . . . . . . . . . . . . . . . . . . . . 55
4 Folding Rear Seats . . . . . . . . . . . . . . . . . . . . . . . . . . . . . . . . 57
5 Windshield Wipers & Washers . . . . . . . . . . . . . . . . . . . . . . . . . . 43
6 Smart Cruise Control (SCC) . . . . . . . . . . . . . . . . . . . . . . . . . . 30
7 Normal Maintenance Schedule . . . . . . . . . . . . . . . . . . . .Back Cover
8 Vehicle Settings - Infotainment System . . . . . . . . . . . . . . . . . . . . 11
9
Bluetooth
®
Wireless Technology . . . . . . . . . . . . . . . . . . . . . 44-45
10 Kia Connect Activation / Kia Connect Assistance . . . . . . . . . . . . . . . 47
11 Kia Access App Download . . . . . . . . . . . . . . . . . . . . . . . . . . . 48
12 Kia Access App Features Guide . . . . . . . . . . . . . . . . . . . . . . . . 48
13 Kia Connect with Smart Navigation . . . . . . . . . . . . . . . . . . . . . . 49
14 Android Auto™ / Apple CarPlay® Setup . . . . . . . . . . . . . . . . . . . . . 46
Driving while distracted can result in a loss of vehicle control
that may lead to an accident, severe personal injury and death.
The driver’s primary responsibility is in the safe and legal
operation of a vehicle, and handheld devices, other equipment
or vehicle systems which take the driver’s eyes, attention and
focus away from the safe operation of a vehicle or that are not
permissible by law should never be used during operation of
the vehicle.
www.kia.com
Consumer Affairs – Roadside Assistance†12:
1-800-333-4KIA (800-333-4542)
Always check the Owner’s Manual for complete
operating information and safety warnings.
ALWAYS CHECK THE OWNER’S MANUAL FOR COMPLETE OPERATING INFORMATION AND SAFETY WARNINGS. †LEGAL DISCLAIMERS ON BACK INSIDE COVER | *IF EQUIPPED
GETTING STARTED
1

2*IF EQUIPPED
EV6 FEATURES & FUNCTIONS GUIDE
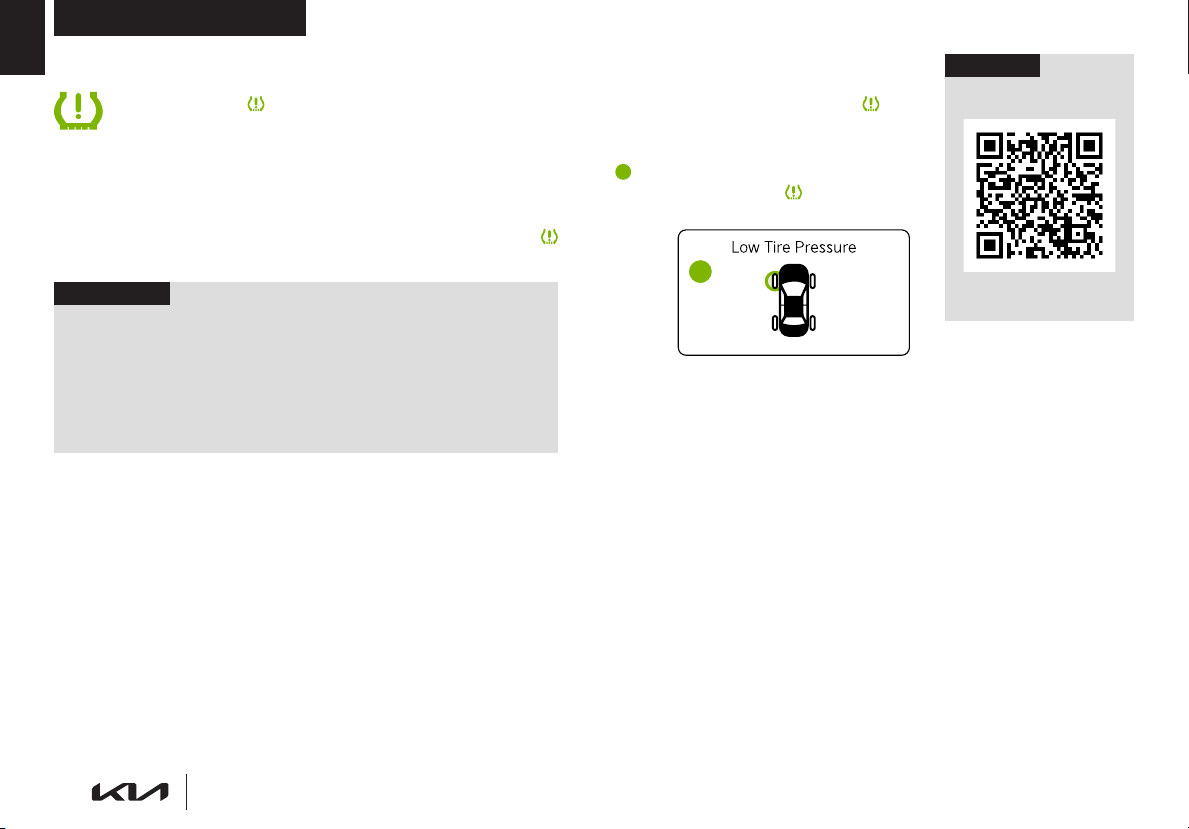
VIDEOS & QR CODES . . Inside Front Cover
INSTRUMENT CLUSTER
EV Instrument Cluster Overview ................. 03
Distance to Empty (DTE) / Range ................ 03
Indicators & Warning Lights ...................... 04
Electric Vehicle (EV) Indicators ................... 05
Energy Consumption ............................ 05
Charge Warning Messages on
Instrument Panel LCD ......................... 06
Tire Pressure Monitoring System (TPMS) ......... 08
Drive Mode Integrated Control System ........... 09
VEHICLE SETTINGS
LCD Instrument Cluster Modes .................. 10
Trip Modes / Trip Computer ...................... 10
Vehicle Settings – Infotainment System ........... 11
Service Interval Mode ........................... 12
ELECTRIC VEHICLE (EV) FEATURES
Charging Connector - Auto/Lock Mode. . . . . . . . . . . 13
Scheduled Charging ............................. 13
Charging Your EV ............................... 14
EV Charge Transfer / Vehicle to Load (V2L) ....... 16
EV Mode - Infotainment System ................. 17
Regenerative Braking with Paddle Switches ...... 18
ADVANCED DRIVER ASSISTANCE
SYSTEMS (ADAS)
Blind-Spot Collision-Avoidance Assist (BCA) ...... 20
Rear Cross-Traffic Collision-Avoidance Assist ..... 21
Lane Keeping Assist (LKA) ....................... 22
Blind-Spot View Monitor (BVM)*. . . . . . . . . . . . . . . . . . 23
Safe Exit Assist (SEA) ............................ 23
Lane Following Assist (LFA) ...................... 24
Intelligent Speed Limit Assist (ISLA) .............. 25
Forward Collision-Avoidance Assist (FCA) ........ 26
Highway Driving Assist (HDA) .................... 28
Reverse/Forward* Parking Distance
Warning (PDW) ............................... 29
Smart Cruise Control (SCC) ...................... 30
ADVANCED DRIVER ASSISTANCE
SYSTEMS (ADAS) c o n t i n u e d
Navigation-based Smart Cruise Control (NSCC) . . 31
Driver Attention Warning (DAW) ................. 32
Leading Vehicle Departure Alert (LVDA) .......... 33
Remote Smart Parking Assist (RSPA)* ............34
Rear View Monitor (RVM) ........................ 35
Augmented Reality Head-Up Display (HUD)* ..... 36
3D Surround View Monitor (SVM)* ............... 37
Reverse Parking Collision-Avoidance Assist (PCA)* 38
DRIVER’S PANEL
Instrument Cluster Illumination Control ........... 39
Electronic Stability Control (ESC) ................. 39
Hill-Start Assist Control (HAC). . . . . . . . . . . . . . . . . . . . 39
Power Button ................................... 40
Power Windows, Window Lock
& Central Door Lock ........................... 41
Electronic Child Safety Lock System* ............. 41
Automatic Door Lock/Unlock .................... 41
Power/Heated Outside Mirrors ................... 41
Power Folding Outside Mirrors* .................. 41
STEERING WHEEL CONTROLS
Headlights & High Beams ........................ 42
High Beam Assist (HBA) ......................... 42
Turn Signals ..................................... 42
Windshield Wipers & Washers .................... 43
Tilt/Telescoping Steering Wheel .................. 43
INFOTAINMENT SYSTEMS
Bluetooth®
Wireless Technology .................44
Audio Controls ..................................45
Android Auto™ / Apple CarPlay® Setup ........... 46
Kia Connect Activation .......................... 47
Kia Connect Assistance* ......................... 47
Kia Access App Download ....................... 48
Kia Access App Features Guide .................. 48
Kia Connect with Smart Navigation .............. 49
CENTER PANEL
Digital Clock .................................... 50
Multimedia USB Ports & Power Outlets ........... 50
USB-C Charger Ports* ........................... 50
Wireless Smartphone Charging System .......... 51
Automatic Climate Control ....................... 52
Rotary Dial Shifter ............................... 53
Heated Steering Wheel* ......................... 53
Electronic Parking Brake (EPB) / Auto Hold ....... 54
Seat Warmers / Ventilated Seats* ................ 55
SEATING
Infotainment System Seat Settings* .............. 55
Front Seat Headrest Adjustment ................. 56
Power Adjustable Driver’s Seat ................... 56
Folding Rear Seats .............................. 57
Rear Occupant Alert (ROA) with Door Monitoring . 57
OTHER KEY FEATURES
Hood Release Lever and Latch ................... 58
Sunvisor ........................................ 58
Exterior Flush Door Handle Operation ............ 58
Smart Key with Remote Start /
Remote Smart Parking Assist (RSPA)* .......... 59
Double-Turn Lock/Unlock All .................... 59
Smart Power Liftgate* ...........................60
Manual Liftgate* / Liftgate Release Button ........ 61
Cargo Cover Storage ............................ 61
Map/Room Lamps .............................. 62
Sunroof Operation .............................. 62
Child-Protector Rear Door Lock* ................. 63
Tire Mobility Kit ................................. 63
SAFETY FEATURES
Occupant Detection System (ODS) /
Passenger Airbag Off Indicator ................ 64
Seat Belts ....................................... 64
MAINTENANCE CHART ......... Back Cover
LEGAL DISCLAIMERS . . Inside Back Cover
TABLE OF CONTENTS

Refer to the inside front cover for
more information on QR codes.
www.youtube.com/KiaFeatureVideos
EV Instrument Cluster
Overview Video
EV Distance to Empty
(DTE) Video
QR CODES
A POWER (PWR) - Energy consumption rate
B CHARGE (CHG) - Charge status of the
regenerative brakes
C Battery State of Charge (SOC) gauge
D Speedometer
E Distance to Empty / Range
F Reduction gear shift indicator
G Odometer
H Regenerative braking level indicator
I EV energy economy
Distance to Empty (DTE) or Range E is the estimated distance an EV can be driven with the remaining electric energy until the
battery reaches zero. DTE can vary depending on the selected drive mode, current driving conditions, trafc, driving patterns, air
conditioner or heater use, and how much cargo you are carrying.
EV Instrument Cluster Overview
Distance to Empty (DTE) / Range
Your vehicle’s instrument cluster & indicator light locations may differ from those in the illustrations. For more information on the instrument cluster, the
LCD Warning Messages and the function of all indicator and warning lights, please refer to section 5 of the Owner’s Manual.
Illustrations are for demonstration purposes only. Some indicators and warning lights may not appear in illustrations. On the vehicle, they may appear in
the LCD.
3
*IF EQUIPPEDALWAYS CHECK THE OWNER’S MANUAL FOR COMPLETE OPERATING INFORMATION AND SAFETY WARNINGS.
REMINDERS:
• If DTE displays “Zero Miles,” you need to charge the vehicle immediately
• Most electric vehicles can drive an additional two to ve miles depending on
driving conditions
• Distance to empty may depend on many factors such as the charge amount
of the high voltage battery, weather, temperature, durability of the battery,
geographical features, and driving style
•Operating the climate control system may reduce the Distance to Empty
•When decelerating or driving downhill, regenerative braking charges the high voltage
battery which minimizes energy loss and increases the Distance to Empty or Range
•When you set a destination via the on-board navigation system, DTE is calculated based
on the route selected. By setting a nal destination, DTE accuracy improves. By knowing
the nal location, the vehicle can better predict the amount of battery energy it will need to
reach that destination
•When operating the climate control, use the DRIVER ONLY function to conserve energy
•In cold weather, use scheduled heating to reduce the amount of energy consumption
•In the EV Settings, select WINTER MODE to increase the battery temperature in cold weather
QUICK TIPS
CHG
PWR
EPB
100 kWh/100m 6202 m
ABS
0 20 40 60
0mph
0KMH
268m
268m
96%Lv1
READY
P
INSTRUMENT CLUSTER
INSTRUMENT
CLUSTER
F
HC
D
E
A G
B
I

4 *IF EQUIPPED
EV6 FEATURES & FUNCTIONS GUIDE
Indicators & Warning Lights
High Beam Indicator Light
AUTO
High Beam Assist Indicator Light
Low Beam Indicator Light
Light ON Indicator
Master Warning Light
Forward Safety Warning Indicator
Lane Safety Indicator*
Electronic Brakeforce Distribution (EBD) System
Warning Lights (Two separate indicators on
Instrument Cluster lit at same time)
Immobilizer Indicator*
READY Indicator
ECO
ECO Mode Indicator
SPORT
SPORT Mode Indicator
SNOW
SNOW Mode Indicator
EV Service Warning Light
Charging System Warning Light
Seat Belt Warning Light
Low Tire Pressure Light / Tire Pressure Monitoring
System (TPMS) Malfunction Indicator*
Electronic Stability Control (ESC) Indicator / ESC
Malfunction Indicator
Electronic Stability Control (ESC) OFF Indicator
Parking Brake & Brake Fluid Warning Light
Electronic Power Steering (EPS) Warning Indicator
Airbag Warning Light
Anti-lock Braking System (ABS) Warning Light
Cruise Indicator*
AUTO
HOLD AUTO HOLD Indicator Light
(red color)
(yellow color)
Regenerative Brake Warning Indicator (Two separate
indicators on Instrument Cluster lit at same time)
LED Headlamp Warning Light
Charging Cable Connection Indicator
Power Down Warning Light
High Voltage Battery Low Level Warning Light
12V Battery
EPB Electronic Parking Brake (EPB)
Icy Road Warning Indicator Light*
All-Wheel Drive (AWD) Warning Light*
Highway Lane Change Assist Indicator Light*
Your vehicle’s instrument cluster & indicator light locations may
differ from those in the illustrations. For more information on the
instrument cluster, the LCD Warning Messages and the function
of all indicator and warning lights, please refer to section 5 of the
Owner’s Manual.
This illustration is for demonstration purposes only.
Some indicators and warning lights may not appear in illustration.
On the vehicle, they may appear in the LCD.
CHG
PWR
EPB
100 kWh/100m 6202 m
ABS
0 20 40 60
0mph
0KMH
268m
268m
96%Lv1
READY
P
A
B
A Distance to Empty / Range
B CHARGE (CHG) - Charge status of the
regenerative brakes
INSTRUMENT CLUSTER
INSTRUMENT
CLUSTER

5
*IF EQUIPPEDALWAYS CHECK THE OWNER’S MANUAL FOR COMPLETE OPERATING INFORMATION AND SAFETY WARNINGS.
Refer to the inside front cover for
more information on QR codes.
www.youtube.com/KiaFeatureVideos
EV Energy Consumption
Video
Tips for Economical
Driving Video
QR CODE
Ready indicator light – Illuminates
when the vehicle is ready to drive.
When the ready indicator light
is blinking, a malfunction has
occurred. Have an authorized Kia
dealer address the concern as soon
as possible.
EV Service warning light –
Illuminates when there is a
malfunction related to the electric
vehicle control system. Have an
authorized Kia dealer address the
concern as soon as possible.
Power down warning light –
Illuminates when the vehicle’s speed
and performance are limited for the
safety of the electric vehicle.
Charging indicator light – Shows
the charging status of the high-
voltage battery. When charging,
the green indicator turns on.
The indicator turns off when not
charging.
High-voltage battery low level
warning light – Illuminates when
the high-voltage battery charge
level is insufcient.
Regenerative brake warning lights
(when both indicators are lit) –
Illuminates when the regenerative
brake system is not functioning
correctly.
A State of Charge (SOC) gauge
The State of Charge gauge displays the
high-voltage battery charge status.
B Power / Charge Gauge
The Power / Charge gauge provides
information on the energy consumption
rate of the vehicle and the charge status
of the regenerative brakes.
•POWER – Shows the energy
consumption rate of the vehicle
when driving uphill or accelerating.
The more electric energy used, the
higher the gauge level
•CHARGE – Shows the charging
status of the battery when it is being
charged by the regenerative brakes.
The more electric energy charged,
the lower the gauge level
C Distance to Empty (DTE)
DTE is the estimated distance the
vehicle can be driven with the remaining
high-voltage battery level. The DTE will
vary according to the selected drive
mode and Climate Control settings.
For more information, refer to the
Owner’s Manual.
Energy Consumption
There are several factors that
contribute to your electric vehicle’s
energy consumption, including
maintenance of your vehicle,
driving style, weather, durability
of the battery and environmental
conditions.
Below are tips to help reduce
energy consumption:
•Use Scheduled Climate settings
to preheat the vehicle before
driving
•In EV Settings, select the Winter
Mode charge settings
•Keep your vehicle in good
condition with regular
maintenance
•Don’t “ride” the brake pedal
•Drive at a moderate speed,
accelerating smoothly and at a
moderate rate
•Use the climate control system
less often. Use the Driver Only setting
•Keep tires inated to the recommended pressure
•Travel lightly, without carrying unnecessary weight in
your vehicle
•Ensure wheels are aligned correctly
•Avoid placing large or heavy items on roof racks
•Avoid hilly, winding or poorly maintained roads
For more information, refer to section 1 of the Owner’s Manual.
Electric Vehicle (EV) Indicators
READY
INSTRUMENT CLUSTER
INSTRUMENT
CLUSTER

6*IF EQUIPPED
EV6 FEATURES & FUNCTIONS GUIDE
Low Battery Warning – When the high-voltage
battery level reaches 8% or less, this warning
message appears on the LCD and the warning
indicator light on the instrument cluster
illuminates. Charge the high-voltage battery
immediately.
Power limited due to low EV battery
temperature. Charge battery – When the outside
temperature is low and you turn the vehicle on
or off, this warning message may appear on the
LCD. If the battery level is low and the vehicle is
parked outside for a long time, vehicle power may
be limited. Charging battery before driving helps
increase power.
Stop vehicle and check power supply – When
there is a failure in the power supply system, this
warning message appears on the LCD. Park
the vehicle in a safe location and have it towed to
the nearest Kia dealer for inspection.
EV Battery Overheated! Stop Vehicle – When the
high-voltage battery temperature is too high, this
warning message will appear on the LCD. Stop the
vehicle and turn off the Power button so that the
battery temperature decreases.
Charge immediately. Power limited – When
the high-voltage battery level reaches 3% or
less, this warning message appears on the LCD,
the warning indicator light on the instrument
cluster illuminates and the power down warning
light turns ON simultaneously.
The vehicle’s power will be reduced to minimize
the energy consumption of the high-voltage
battery. Charge the high-voltage battery
immediately.
Power limited – This warning message appears
when the vehicle’s power is limited for the
following reasons:
1. When the high-voltage battery is below a
certain level, or voltage is decreasing
2. When the temperature of the motor or high-
voltage battery is too high or too low
3. When there is a problem with the cooling system
or a failure that may interrupt normal driving
Charge Warning Messages on Instrument Panel LCD
REMINDERS:
• When these warning messages are displayed, do not
accelerate or start the vehicle suddenly
• All stored driving information (except Odometer and
Range) is reset if the battery is disconnected
Low EV Battery EV Battery Overheated!
Stop Vehicle
Power limited
due to low EV battery
temperature.
Charge battery
Stop vehicle and
check power supply
Charge immediately.
Power limited
Power limited
Not all warnings and messages are displayed. These
illustrations are for demonstration purposes only. Some
messages may appear differently. See section 1 in the
Owner’s Manual for more information.
INSTRUMENT CLUSTER
INSTRUMENT
CLUSTER

7
*IF EQUIPPEDALWAYS CHECK THE OWNER’S MANUAL FOR COMPLETE OPERATING INFORMATION AND SAFETY WARNINGS.
Unplug vehicle to start –
When starting the vehicle while
the charging connector is still
connected, this warning message
will appear. Remove the charging
connector and then start the
vehicle.
Charge Warning Messages on Instrument Panel LCD (Continued)
Unplug vehicle to start Charging Stopped.
Check the AC charger
Remaining Time
10 h 18m (90%)
Check
regenerative brakes
Charging Stopped.
Check the DC charger
Charging Stopped. Check the AC/DC charger – When
there is a problem with the external AC or DC charger,
when the AC charger stops charging or when the
charging cable is damaged, this message will appear.
Check whether there is a problem with the charger or
cable. If no problem is found, see an authorized Kia
dealer for further assistance.
Remaining Time –
Displays the remaining
time to charge the battery
to the selected target
battery charge level,
current SOC and the
charge voltage level.
Check Regenerative
Brakes – Displays when the
regenerative brake system
does not work properly. In
this case, have your vehicle
inspected by an authorized
Kia dealer.
Charging Stopped. Check the cable
connector – When the charging connector is
not correctly connected to the charging inlet or
the charging connector lock release button is
pressed, this message will appear. If this occurs,
separate the charging connector and re-connect
it. Check whether there is any problem (external
damage, foreign substances, etc.) with the charging
connector and charging inlet. If the problem
continues, see an authorized Kia dealer
for assistance.
Illustrations are for demonstration purposes only. Some messages may appear differently. See section 1 in the Owner’s Manual for more information.
REMINDERS:
• When these warning messages are displayed, do not
accelerate or start the vehicle suddenly
• All stored driving information (except Odometer and
Range) is reset if the battery is disconnected
Charging Stopped.
Check the cable connector
Charging Door Open
OPEN
Charging Door Open – When
starting the vehicle while the
charging door is still open, this
warning message will appear.
Close the charging door after
charging is complete and then
start the vehicle.
30%
INSTRUMENT CLUSTER
INSTRUMENT
CLUSTER

8†LEGAL DISCLAIMERS ON BACK INSIDE COVER | *IF EQUIPPED
EV6 FEATURES & FUNCTIONS GUIDE
Refer to the inside front cover for
more information on QR codes.
www.youtube.com/KiaFeatureVideos
Tire Pressure Monitoring
System Video
QR CODE
The TPMS indicator functions as both Low Tire Pressure Light and TPMS Malfunction Indicator. The indicator will
illuminate if it detects one or more tires is signicantly underinated, the vehicle has a spare tire installed without TPMS
or the outside temperature becomes signicantly lower.
The LCD screen in the instrument cluster will display the Low Tire Pressure indicator A showing which tire(s) is underinated.
Inate tire(s) to specications using an accurate digital tire pressure gauge to turn off Low Tire Pressure Light . See front
driver’s door jamb for PSI specication.
When there is a problem with the TPMS, the TPMS Malfunction Indicator will
blink for approximately one minute and then illuminate — see dealer for service.
25
36
36
PSI36
REMINDERS:
• Check the recommended tire pressure label located on the left side of driver's door
jamb, visible when the door is open
• Consult your dealer for service if Low Tire Pressure Light remains illuminated after
inating your tire(s)
Personal electronic devices
(such as laptops, wireless
chargers, remote start systems,
etc.) may interfere with TPMS
system, which may cause the
Malfunction Warning Indicator
to illuminate.
For more information, refer to
section 7 in the Owner’s Manual.
A
Tire Pressure Monitoring System (TPMS)†21
•Even with TPMS, tire pressure should be checked manually at least once a
month. Only adjust tire pressure on “cold tires” that have been sitting for 3 hours
or more, and tires that are not hot in temperature from direct sunlight or heat
•For proper maintenance and optimal EV economy, maintain recommended
tire ination pressures and stay within the load limits and weight distribution
recommended for your vehicle
•In winter or cold weather, the TPMS light may illuminate if the tire pressure was
adjusted to the recommended tire ination pressure during warm weather
QUICK TIPS
INSTRUMENT CLUSTER
INSTRUMENT
CLUSTER

Refer to the inside front cover for
more information on QR codes.
www.youtube.com/KiaFeatureVideos
9
*IF EQUIPPEDALWAYS CHECK THE OWNER’S MANUAL FOR COMPLETE OPERATING INFORMATION AND SAFETY WARNINGS.
Drive Mode Integrated
Control Video
QR CODE
For more information on driving modes, refer to section 6 in the
Owner’s Manual or contact your local dealership.
Drive Mode Integrated Control System
There are four distinct driving modes. Press the Drive Mode button
A to select the desired mode.
ECO – This mode can help enhance electric energy efciency by
managing battery usage. The acceleration response may be slightly
reduced in this mode. ECO mode automatically changes the vehicle to
2WD or AWD depending on the road conditions
NORMAL – This mode balances drivability and efciency. Normal
mode automatically changes the vehicle to 2WD or AWD depending on
the road conditions
SPORT – This mode provides enhanced acceleration and
dynamic drivability. The electric energy efciency may decrease
in this mode
SNOW - Press and hold the Drive Mode button to enter Snow mode.
Snow mode automatically changes the vehicle to 2WD or AWD
depending on the road conditions
An indicator in the instrument cluster will illuminate to show which
drive mode you have selected (no indicator will appear for the
NORMAL mode).
(Button located bottom left center of steering wheel)
•To help reduce energy consumption:
-Drive at a moderate speed, accelerating smoothly and at a
moderate rate
-Keep tires inated to the recommended pressure and wheels
aligned properly
QUICK TIPS
DRIVE
MODE
DRIVE
MODE
DRIVE
MODE
DRIVE
MODE
A
ECO NORMAL
SPORTSNOW
INSTRUMENT CLUSTER
INSTRUMENT
CLUSTER

10 *IF EQUIPPED
EV6 FEATURES & FUNCTIONS GUIDE
Refer to the inside front cover for
more information on QR codes.
www.youtube.com/KiaFeatureVideos
Steering Wheel Controls
Video
EV Instrument Cluster
Overview Video
QR CODE
Trip Modes / Trip Computer
The Trip Computer is a driver information system
that displays information related to driving, such
as average and instant accumulated info, drive
info, driving style and energy ow. It appears on
the display when the Power button is in the ON
position.
To cycle through the instrument cluster modes B,
press the Mode button A on the left side of the
Steering Wheel.
When in the Trip Computer mode , press the OK
button C up/down to cycle through the screens.
When displaying information screens, press and
hold the OK button C to reset to zero.
LCD Instrument Cluster Modes
Press the Mode button A on the left side of the Steering Wheel
to scroll through different LCD Instrument Cluster Modes.
Driving Assist: Displays information for Smart Cruise
Control, Driving Convenience, Speed Limit, Warning
Timing, Warning Volume, Driver Attention Warning,
Forward Safety, Lane Safety, Blind-Spot Safety,
Parking Safety
Trip Computer Mode: Displays drive info, after recharging
info and accumulated info for trip distance, average energy
consumption, total driving time as well as energy ow info
Turn-by-Turn Mode*: Displays the route guidance,
destination info
Information Mode: Displays the tire pressure information
Master Warning Mode: Displays warning messages
related to the vehicle when a function is not operating
normally
Your vehicle’s steering wheel buttons may differ from those in the illustrations.
For more information, refer to section 5 in the Owner’s Manual.
Driving while distracted is dangerous and should be avoided. Drivers should
remain attentive to driving and always exercise caution when using the
steering-wheel-mounted controls while driving.
For more information, refer to section 5 in the
Owner’s Manual.
REMINDERS:
• Appearance of Trip Computer display may differ
as equipped
• All stored driving information (except Odometer
and Range) is reset if the battery is disconnected
DRIVE INFO
僅 Tripmeter
僅 Average Energy Consumption
僅 Timer
AFTER RECHARGING INFO
僅 Tripmeter
僅 Average Energy Consumption
僅 Timer
ACCUMULATED INFO
僅 Tripmeter
僅 Average Energy Consumption
僅 Timer
ENERGY FLOW
Accumulated Info
Trip
Average
Timer
247.5
15.7
17:42
mi
MPG
h
(Buttons located on left side of Steering Wheel)
OK
OK OK
OK
MODE MODE MODE
OK OK
MODE MODE MODE
OK OK OK
MODE MODE MODE
OK OK OK
MODE MODE MODE
B
A
C
VEHICLE SETTINGS
VEHICLE
SETTINGS

11
*IF EQUIPPEDALWAYS CHECK THE OWNER’S MANUAL FOR COMPLETE OPERATING INFORMATION AND SAFETY WARNINGS.
Refer to the inside front cover for
more information on QR codes.
www.youtube.com/KiaFeatureVideos
Vehicle Settings - EV
Infotainment System
Video
Ambient, Mood & Theme
Lighting Video
QR CODES
Vehicle Settings - Infotainment System
To enter the Vehicle Settings mode in the Infotainment System, press and hold the Mode button A, or press the SETUP key/
button, when the vehicle is at a standstill, Rotary Dial Shifter Knob in Park, and while the Power button is in the ON position. Then
select VEHICLE to the Vehicle Settings menu.
Driving Convenience:
•Smart Cruise Control
•Forward Safety
•Parking Safety
•Driver Attention Warning
•Blind-Spot Safety
•Speed Limit
•Lane Safety
Drive Mode:
•Brake Mode
•Climate Control ECO Mode
ECO Vehicle:
•Smart Regeneration System
•Charging Connector Locking Mode
•Charging Voice Prompts
Active Sound Design:
•Largest, Moderate, Smallest,
Change/ Off
•Advanced Settings
Head-Up Display:
•Display Mode
•Display Control
•AR Matching Adjustment
•Content Selection
Cluster:
•Cluster Theme Selection
•Service Interval
•Reset Fuel Economy
•Content Selection
•Welcome Sound
Climate:
•Recirculate Air
•Automatic Ventilation
•Defog/Defrost Options
Seat:
•Seat Position Change Alert
•Seating Easy Access
Lights:
•Ambient Light
•One-Touch Turn Signal
•Headlight Delay
•High Beam Assist
Door:
•Auto Lock
•Auto Unlock
•Approach Unlock
•2-Press Unlock
•Power Liftgate
•Power Liftgate Opening Speed
•Power Liftgate Opening Height
•Smart Liftgate
•Remote Window Control
Convenience:
•Rear Occupant Alert
•Welcome Mirror/Light
•Wireless Charging System
•High Beam Assist
Driving while distracted is
dangerous and should be
avoided. Do not attempt to
change vehicle system settings
while driving.
For more information, refer to
section 5 in the Owner’s Manual.
Screen illustration is for
demonstration purposes only.
(Buttons located on left side of Steering Wheel)
OK
OK
OK
OK
MODE MODE MODE
OK OK
MODE MODE MODE
OK OK OK
MODE MODE MODE
OK OK OK
MODE MODE MODE
A
Driver
Assistance
DriveMode
ECO Vehicle
Active Sound
Design
Head-Up Display
10:51
AM Tue, Oct. 26
Vehicle Settings
Driving
Convenience
Forward Safety Speed Limit
Lane Safety
Blind-Spot SafetyParking Safety
Driver Attention
Warning
Smart Cruise Control
VEHICLE SETTINGS
VEHICLE
SETTINGS

12 *IF EQUIPPED
EV6 FEATURES & FUNCTIONS GUIDE
Refer to the inside front cover for
more information on QR codes.
www.youtube.com/KiaFeatureVideos
Steering Wheel Controls
Video
QR CODES
Driving while distracted is
dangerous and should be
avoided. Do not attempt to
change vehicle system settings
while driving.
For more information, refer to
section 5 in the Owner’s Manual.
(Buttons located on left side of Steering Wheel)
(Message on Cluster Display)
OK
OK OK
OK
MODE MODE MODE
OK OK
MODE MODE MODE
OK OK OK
MODE MODE MODE
OK OK OK
MODE MODE MODE
A
B
900mi/30day
Service Interval
VEHICLE SETTINGS
VEHICLE
SETTINGS
Service Interval Mode
To enter Service Interval mode, press and hold the Mode button A, on the
Steering Wheel or press the SETUP key on the infotainment system or the
SETUP button on the screen. Select VEHICLE, then CLUSTER. Select SERVICE
INTERVAL. The system will display the number of miles remaining until next
service is due, as well as type of service.
When service is required, the following will be displayed: Service Required
To reset the Service Interval mode system, press and hold the OK button B for
more than 1 second.
To turn the Service In message off, go to User Settings.
Service Interval Setting
To set the service interval when in User Settings mode:
•Press the OK button B up/down and scroll to Service Interval.
Press the OK button B to enter
•Press the OK button B up/down and toggle to ON, then press the OK
button B again. Then press the OK button B to scroll and select the
desired miles or months for your next service
•Press the OK button B again

13
*IF EQUIPPEDALWAYS CHECK THE OWNER’S MANUAL FOR COMPLETE OPERATING INFORMATION AND SAFETY WARNINGS.
Refer to the inside front cover for
more information on QR codes.
www.youtube.com/KiaFeatureVideos
EV Charging & Connector
Video
EV Scheduled Charging
Video
QR CODES
(Buttons located on left side of
Steering Wheel)
(Cover is located on right side
panel inside the liftgate)
OK
OK
OK
OK
MODE MODE MODE
OK OK
MODE MODE MODE
OK OK OK
MODE MODE MODE
OK OK OK
MODE MODE MODE
A
B
C
D
Scheduled ChargingCharging Connector - Auto/Lock Mode
Charging times can be set through the Infotainment
System Vehicle Settings. Select EV, then CHARGING
AND CLIMATE. You can also use the Scheduled
Charging* feature on the Kia Connect app.
The Kia Connect app can help you nd the nearest
charging station, and also displays charging status and
Scheduled Charging information. On your smartphone,
go to an app store or marketplace to download the Kia
Connect app.
REMINDER: When Scheduled Charging is set and the charger
is plugged in, charging of the electric vehicle will not begin until
the time and date set.
Deactivate Scheduled Charging - Depress the
Charging button D to temporarily disable the
scheduled charging feature when immediate charging
is required.
The Charging Connector can be set to be locked or unlocked while
in the charging inlet and charging. To select the locking mode, go
to the Vehicle Settings mode in the Infotainment System. Press the
Mode button A on the left side of the Steering Wheel or press
the SETUP key on the infotainment system or the SETUP button on
the screen. Select VEHICLE, then ECO VEHICLE. Select CHARGING
CONNECTOR LOCK.
Emergency Release - If the charging connector is not unlocking,
then use the emergency release lever inside the trunk. Turn
the Emergency Release cover to open B and remove. Pull the
Emergency Release lever C to unlock the changing connector.
REMINDERS:
• For more detail and/or subsequent steps in charging your vehicle, including safety precautions
that should be taken, please see section 1 in the Owner’s Manual
• Scheduled charging may not be available at public chargers
ELECTRIC VEHICLE (EV) FEATURES
ELECTRIC
VEHICLE (EV)
FEATURES
•If in lock mode & the doors are
unlocked, the charging connector
unlocks, but if the charging cable is
not disconnected within 10 seconds,
the connector will automatically
locked again
•If the charging connector is unlocked
but all the doors are locked again,
immediately, the connector will
automatically lock again
•If charging does not work, disconnect
the connector and try charging again
QUICK TIPS
When you press the Deactivate Scheduled Charging button
the reserved charging setting will temporarily disable, and
start immediate charging mode. If you need to completely
deactivate the scheduled charge setting, change the setting
in the Infotainment System’s Vehicle Settings or the Kia
Connect smartphone app.
QUICK TIP

14 *IF EQUIPPED
EV6 FEATURES & FUNCTIONS GUIDE
Refer to the inside front cover for
more information on QR codes.
www.youtube.com/KiaFeatureVideos
Charging Your Electric
Vehicle Video
QR CODE
EV Charging & Connector
Video
Level 2 Charging – “Normal” Charge (AC)
A Level 2 or “normal” 240-volt/50-amp charger is the recommended charging system for your EV. This type of
charger uses 240 volts of electricity and takes approximately 8.5 hours for a full charge. This charger may be able
to be installed at your home by a qualied electrician or can be found at a public charging station.
REMINDER: The shape of the charger and how to use the charger may be different for each manufacturer. Please see section 1 in
the Owner’s Manual for more information.
Level 3 Charging* – “Quick” Charge (DC)
A Level 3 or “quick” DC fast charger is usually found at public charging stations. This type of DC charge
may charge an EV in as little as 60 minutes to about an 80% charge. An ultra fast DC charger charge time from
10-80% on a 350kW charger is approximately 18 minutes.
REMINDER: Kia does not recommend primarily charging with a DC charger because it can reduce the lifespan of the battery.
Charging Your EV
REMINDER: For more detail and/or subsequent steps
in charging your vehicle, including safety precautions that
should be taken, please see section 1 in the Owner’s Manual.
ELECTRIC VEHICLE (EV) FEATURES
ELECTRIC
VEHICLE (EV)
FEATURES
A Level 2 or “normal” 240-volt/32-amp charger is
recommended for regular charging of the vehicle.
QUICK TIP

15
*IF EQUIPPEDALWAYS CHECK THE OWNER’S MANUAL FOR COMPLETE OPERATING INFORMATION AND SAFETY WARNINGS.
ELECTRIC VEHICLE (EV) FEATURES
ELECTRIC
VEHICLE (EV)
FEATURES
OPEN
OFF
HOLD
OPEN
OFF
HOLD
OPEN
OFF
HOLD
OPEN
OFF
HOLD
(Trickle / normal charge shown)
(Panel located on left side of Steering Wheel)
Charging Your EV (Continued)
To charge your EV using a charger:
•Ensure scheduled charging is not set
•Press the brake pedal and engage the parking brake
•Turn off all switches, turn the Rotary Dial Shifter Knob to P (Park), and turn off
the vehicle
•To open the charge port door, press the left edge of the charge port door A
or press the Charging Door Open button B on the Driver’s Panel inside (the
charging door can be opened when the vehicle is unlocked)
•Hold the charging connector handle and connect it to the vehicle’s charging inlet
C by pushing the connector until you hear a clicking sound
•Charging begins automatically (Ensure the charge indicator light is
illuminated red on your instrument cluster, indicating the vehicle is charging,
and ensure scheduled charging is not set)
Checking the Charging Status
The charging status can be checked by viewing the charging status indicator D
next to the charging inlet or on the dash panel. The lights will progressively become
lit as the vehicle approaches a full charge.
REMINDER: For more detail and/or subsequent steps in charging your vehicle, including safety
precautions that should be taken, please see section 1 of the Owner’s Manual.
C
A
B
D

16 *IF EQUIPPED
EV6 FEATURES & FUNCTIONS GUIDE
ELECTRIC VEHICLE (EV) FEATURES
ELECTRIC
VEHICLE (EV)
FEATURES
Refer to the inside front cover for
more information on QR codes.
www.youtube.com/KiaFeatureVideos
EV Charge Transfer /
Vehicle to Load (V2L)
Video
QR CODE
EV Charge Transfer / Vehicle to Load (V2L) allows you to use the vehicle’s
high voltage battery to power electrical devices like home appliances or
other electronic devices. V2L can also be used to charge items like electric
bikes or another electric vehicle.
If equipped, there are two ports in the interior and exterior. The interior
port A is under the rear seat and the other is the charging port for your EV.
If your EV’s high-voltage battery discharges to the limit set, the system will
automatically stop supply to the ports. Set your EV’s battery discharge limit
in the Infotainment System’s Settings. Press the EV button onscreen. Select
VEHICLE TO LOAD (V2L), and EV CHARGE TRANSFER SETTINGS.
Interior Port - The EV Power button needs to be on to operate the port.
Use the Smart Key fob mechanical key to unlock the power outlet cover B.
Check the indicators on the port to ensure power is on.
Exterior Port - Open the cover of the V2L connector C and connect your
appliance or electronic device. Connect the V2L connector to the charging
inlet on the EV, and press the button D on the connector.
REMINDER: Maximum wattage is 1.9 kW, or 1,900 watts.
Refer to section 1 in the Owner’s Manual for more information.
EV Charge Transfer / Vehicle to Load (V2L)*
OPEN
OFF
HOLD
(Trickle / normal charge shown)
A
B
A
D
C

17
*IF EQUIPPEDALWAYS CHECK THE OWNER’S MANUAL FOR COMPLETE OPERATING INFORMATION AND SAFETY WARNINGS.
10:51AM Tue, Oct. 26
490m
445m
459m
IRVINE CO OFC/JBC
2855 02
Next Departure
Departure Time must be set first to use
Scheduled Charging/Climate Control.
Electric Vehicle
Driving
Convenience
Forward Safety Speed Limit
Lane Safety
Blind-Spot SafetyParking Safety
Driver Attention
Warning
Smart Cruise Control
Battery
Scheduled Charging and Climate EV Charge Transfer
V2L
On
Off
Off Off
96%
EV Mode - Infotainment System
EV Mode on the Infotainment system screen allows you to navigate several menus that include information on available
range, energy information, next departure setting, charging and climate info, vehicle-to-load (V2L) setting, nearby charging
stations and EV settings.
EV Mode - Press the EV button on the Infotainment System screen to access the EV Mode
Available Range - Displays the available driving distance according to the vehicle’s current location and charge amount.
The projected available driving distance is marked in red on the map
The estimated range is based on a number of factors and assumes optimal driving conditions, efcient driving habits and a
straight road. Actual range will vary with options, driving conditions, driving habits, vehicle maintenance, charging practice,
battery age, weather, temperature and your vehicle’s condition. Battery capacity will decrease with time and use. For more
information on range, please see www.fueleconomy.gov
Energy Information – Displays battery charge information and electrical power consumption
Next Departure - Displays the date and time set for the next battery charge
Vehicle to Load (V2L) - Displays the battery discharge limit when powering external equipment and devices
EV Settings – Allows the user to change the Winter mode, warning and EV Route settings
See section 1 of the Owner’s
Manual or the Car Infotainment
System’s Quick Reference Guide
for more detailed information
on screens.
Illustration is for demonstration
purposes only.
Some items may appear
different or vary in illustrations.
ELECTRIC VEHICLE (EV) FEATURES
ELECTRIC
VEHICLE (EV)
FEATURES
Refer to the inside front cover for
more information on QR codes.
www.youtube.com/KiaFeatureVideos
EV Mode - Infotainment
System Video
QR CODE

18 *IF EQUIPPED
EV6 FEATURES & FUNCTIONS GUIDE
ELECTRIC VEHICLE (EV) FEATURES
ELECTRIC
VEHICLE (EV)
FEATURES
Refer to the inside front cover for
more information on QR codes.
www.youtube.com/KiaFeatureVideos
Regenerative Braking -
Paddle Switches, Drive
Mode Video
Regenerative Braking -
i-Pedal Video
QR CODE
Each of the different Drive Modes allows the
regenerative braking level to be set at the driver’s
preference.
QUICK TIP
(Indicator on lower left corner of Instrument display)
Regenerative Braking with Paddle Switches
The regenerative braking system charges the battery when coasting or
when you use the brakes to stop the vehicle. Use the paddle switches to
adjust the regenerative braking level from 0 to 3 during decelerating or
braking. The level will be displayed on the instrument cluster A.
•Pull the left paddle switch B to increase regenerative braking and
deceleration
•Pull the right paddle switch C to decrease regenerative braking and
deceleration
The paddle shifters do not operate when:
•Both paddle shifters are pulled at the same time
•The vehicle is decelerating by depressing the brake pedal
•Smart Cruise Control (SCC) is active
i-Pedal
i-Pedal driving controls the vehicle speed by the accelerator pedal, both
acceleration and deceleration. To activate i-Pedal:
•Pull the left side paddle switch B to Level 3 regenerative braking
(see indicator on Instrument Cluster)
•Then pull the left side paddle switch B once again when the
regenerative braking level is set to Level 3
The i-Pedal indicator symbol will be illuminated on the instrument cluster.
+
-
96%Lv1
READY
+
-
96%Lv1
READY
For more information on regenerative braking, i-pedal
driving or the Smart Regeneration System, please
refer to section 6 in the Owner’s Manual.
A
B C
REMINDER: The driver’s seat belt must be fastened to operate i-pedal driving.
Do not solely rely on i-pedal driving to stop the vehicle, as it may not be able to stop
the vehicle depending on vehicle and road conditions. Always use pedal braking when
necessary. Pay attention to the road condition ahead and apply the brake if necessary.
+
-
96%Lv1
READY
+
-
96%Lv1
READY
Other manuals for EV6 2022
2
Table of contents
Other Kia Automobile manuals

Kia
Kia SEPHIA 2000 User manual

Kia
Kia niro plug-in hybrid 2018 Parts list manual

Kia
Kia 2011 RIO User manual

Kia
Kia sedona 2015 User manual

Kia
Kia Niro HEV User manual

Kia
Kia Optima hybrid 2012 Quick setup guide

Kia
Kia 2014 Sportage User manual

Kia
Kia Stinger 2019 Assembly instructions

Kia
Kia Optima 2018 User manual

Kia
Kia SEDONA 2018 Parts list manual