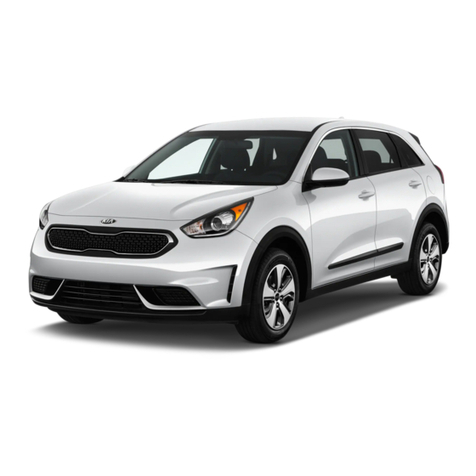
Kia niro hybrid 2021 Parts list manual


GETTING TO KNOW YOUR NIRO PLUG-IN HYBRID
Welcome to the Kia Family!
Your new Kia vehicle has been designed, engineered and manufactured to provide you with years of comfortable and dependable driving.
Kia is committed to quality, innovation, safety and — above all — your satisfaction.
Using This Guide
The information contained in this guide is a brief overview that will help you become familiar with the operation and features of your new Kia
vehicle. The flipbook format facilitates information access, while the detailed illustrations help to ensure the instructions are easy to follow.
This Features & Functions Guide, and the specific operational and safety information it provides, is not a substitute for your Owner’s Manual.
In the interest of your safety and that of the vehicle’s occupants, and to help you avoid risks that may result in death or serious injury, Kia
reminds you to carefully read your Owner’s Manual in order to fully familiarize yourself with the important information it contains.
While Kia endeavors to ensure that the information contained in this guide is accurate at the time of printing, Kia may change vehicle
specifications without notice in advance or after the fact, and assumes no liability in connection with such changes.
www.kia.com
Consumer - Roadside Assistance†13
1-800-333-4KIA (4542)
See Back Pages for Vehicle
Maintenance Schedule
Always check the Owner’s Manual for complete
operating information and safety warnings. †LEGAL DISCLAIMERS ON BACK INSIDE COVER

GETTING STARTED
As you get to know your new Kia, you can explore this booklet to better understand how to operate its many features and systems.
You can find the complete Table of Contents on the next two pages, but first, be sure to review the following to better understand
some of your Kia’s most used features:
1Smart Key / Remote Start* . . . . . . . . . . . . . . . . . . . . . . . . . . . . 55
2Front Seat Headrest Adjustment / Power Adjustable Driver’s Seat* . . . . . . 51-52
3Seat Warmers* . . . . . . . . . . . . . . . . . . . . . . . . . . . . . . . . . . 50
4Folding Rear Seats . . . . . . . . . . . . . . . . . . . . . . . . . . . . . . . . 53
5Windshield Wipers & Washers . . . . . . . . . . . . . . . . . . . . . . . . . . 34
6Smart Cruise Control (SCC)* . . . . . . . . . . . . . . . . . . . . . . . . . . . 24
7Normal Maintenance Schedule . . . . . . . . . . . . . . . . . . . . . . Back Cover
8User Settings – Instrument Cluster . . . . . . . . . . . . . . . . . . . . . . . . 09
9Bluetooth®Wireless Technology . . . . . . . . . . . . . . . . . . . . . . . 36-37
10 UVO link Activation* / UVO Assistance* . . . . . . . . . . . . . . . . . . . . . . 39
11 Standard Audio System - Value* . . . . . . . . . . . . . . . . . . . . . . . . . 41
12 Standard Audio System - Value with UVO link* . . . . . . . . . . . . . . . . . . 42
13 UVO link . . . . . . . . . . . . . . . . . . . . . . . . . . . . . . . . . . . . . 43
14 UVO link with Navigation*. . . . . . . . . . . . . . . . . . . . . . . . . . . . . 44
15 Android Auto™/ Apple CarPlay®Setup . . . . . . . . . . . . . . . . . . . . . . 38
Driving while distracted can result in a loss of vehicle
control that may lead to an accident, severe personal
injury and death. The driver’s primary responsibility is in
the safe and legal operation of a vehicle, and handheld
devices, other equipment or vehicle systems which take
the driver’s eyes, attention and focus away from the safe
operation of a vehicle or that are not permissible by law
should never be used during operation of the vehicle.
www.kia.com
Consumer Affairs - Roadside Assistance†18:
1-800-333-4KIA (800-333-4542)
*IF EQUIPPED
NIRO HYBRID / PLUG-IN HYBRID FEATURES & FUNCTIONS GUIDE
Always check the Owner’s Manual for complete operating information and safety warnings.
1

TABLE OF CONTENTS
VIDEOS & QR CODES.....Inside Front Cover
INSTRUMENT CLUSTER
Instrument Cluster Overview ................ 03
Indicators & Warning Lights ................. 04
Tire Pressure Monitoring System (TPMS) ....... 05
Hybrid / Plug-In Hybrid Indicators at Startup..... 06
Hybrid / Plug-In Hybrid Modes ............... 06
Sport/ECO Modes ......................... 07
Fuel Economy ............................ 07
VEHICLE SETTINGS
Trip Modes / Trip Computer.................. 08
LCD Instrument Cluster Modes* .............. 08
User Settings - Instrument Cluster ............ 09
Vehicle Settings* - Audio Head Unit ............10
Service Interval Mode .......................11
HYBRID / PLUG-IN HYBRID SYSTEM
Plug-In Hybrid Display* ......................12
Instrument Cluster - Energy Flow ..............13
Emergency Starting* (Hybrid only) .............15
Charging the Plug-In Hybrid Vehicle ............16
Charging Connector Auto/Lock Mode ...........18
Scheduled Charging* (Plug-In Hybrid only) .......18
ADVANCED DRIVER ASSISTANCE
SYSTEMS (ADAS)
Forward Collision-Avoidance Assist (FCA)* .......19
Lane Keeping Assist (LKA)* ................. 20
Blind-Spot Collision Warning (BCW)* .......... 22
Driver Attention Warning (DAW)* ............. 22
Leading Vehicle Departure Alert (LVDA)*........ 23
Cruise Control............................ 23
Smart Cruise Control (SCC) with Stop & Go*..... 24
Navigation-based Smart Cruise Control - Curve
(NSCC-C)* ............................. 25
Lane Following Assist (LFA)*................. 26
Highway Driving Assist (HDA)* ............... 27
Rear View Monitor (RVM)*................... 28
ADVANCED DRIVER ASSISTANCE
SYSTEMS (ADAS) CONTINUED
Rear Cross-Traffic Collision Warning (RCCW)* ... 28
Reverse Parking Distance Warning (PDW)*...... 29
DRIVER’S PANEL
Instrument Cluster Control .................. 30
Electronic Stability Control (ESC) ............. 30
Hill-Start Assist Control (HAC) ............... 30
Reverse Parking Aid Function* ............... 31
Engine Start/Stop Button ................... 31
Power Windows, Window Lock & Central Door Lock 32
Manual Folding Mirrors* .................... 32
Automatic Door Lock/Unlock ................ 32
Power/Heated Outside Mirrors*. . . . . . . . . . . . . . . 32
Power Folding Outside Mirrors* .............. 32
STEERING WHEEL CONTROLS
Headlights & High Beams ................... 33
Turn Signals & Fog Lights* .................. 33
Heated Steering Wheel Button*............... 34
Windshield / Rear Wipers & Washers .......... 34
Tilt/Telescoping Steering Wheel .............. 35
AUDIO SYSTEMS
Bluetooth®Wireless Technology .............. 36
Audio Controls ........................... 37
Android Auto™/ Apple CarPlay®Setup* ........ 38
UVO link Activation* / UVO Assistance*......... 39
Kia Access with UVO link App Download........ 40
Kia Access with UVO link App Features Guide.... 40
Standard Audio System - Value* ...............41
Standard Audio System* - Value with UVO link ... 42
UVO link*................................ 43
UVO link with Navigation* ................... 44
CENTER PANEL
Digital Clock ............................. 45
Multimedia USB Port, Charger Ports / AC Inverter* 45
Wireless Smartphone Charging System*........ 46
CENTER PANEL CONTINUED
Automatic Climate Control .................. 47
Automatic Gear Shift with Sportmatic®Shifting .. 48
Dual Clutch Transmission ................... 48
Paddle Shifters* .......................... 48
Electric Parking Brake (EPB)* ................ 49
Auto Hold*............................... 49
Seat Warmers / Ventilated Seats* ............. 50
SEATING
Driver Position Memory System*. . . . . . . . . . . . . . 51
Front Seat Headrest Adjustment .............. 51
Rear Occupant Alert (ROA) with Door Monitoring . 51
Power Adjustable Driver’s Seat* .............. 52
6-Way Manual Adjustable Driver’s Seat*........ 52
Folding Rear Seats ........................ 53
OTHER KEY FEATURES
Remote Keyless Entry (Folding Key)* .......... 54
Smart Key / Remote Start* .................. 55
Double-Turn Lock/Unlock All................. 55
Map/Room Lamps. . . . . . . . . . . . . . . . . . . . . . . . . 56
Sunroof Operation* ........................ 56
Hood Release Lever and Latch ............... 57
Fuel Filler Lid ............................ 57
Fuel Cap / Malfunction Indicator .............. 57
Sunvisor ................................ 57
Liftgate Release Button* .................... 58
High Voltage Battery Air Intake ............... 58
Child-Protector Rear Door Locks.............. 59
Tire Mobility Kit........................... 59
SAFETY FEATURES
Occupant Detection System (ODS) /
Passenger Airbag Off Indicator ............... 60
Seat Belts ............................... 60
MAINTENANCE SCHEDULE ..... Back Cover
LEGAL DISCLAIMERS....Inside Back Cover
*IF EQUIPPED
2NIRO HYBRID / PLUG-IN HYBRID FEATURES & FUNCTIONS GUIDE
ALWAYS CHECK THE OWNER’S MANUAL FOR COMPLETE OPERATING INFORMATION AND SAFETY WARNINGS. *IF EQUIPPED 3
FH
CHARGE
POWER
ECO
E
EPB
120
miles
L
AUTO
AHybrid / Plug-In Hybrid system gauge
BFuel gauge
CSpeedometer
DWarning and indicator lights
ELCD display (including Trip computer)
FHybrid / Plug-In Hybrid Battery SOC
(State of Charge) gauge
GDistance to empty
Instrument Cluster Overview
Your vehicle’s instrument cluster & indicator light locations may differ from those in the illustrations.
For more information on the instrument cluster, the LCD Warning Messages and the function of all
indicator and warning lights, please refer to section 4 of the Owner’s Manual.
This illustration is for demonstration purposes only. Some indicators and warning lights may not
appear in illustration. On the vehicle, they may appear in the LCD.
A
F B
C
D
G
D DE
INSTRUMENT
CLUSTER
INSTRUMENT CLUSTER
(Type B shown)

*IF EQUIPPED
4NIRO HYBRID / PLUG-IN HYBRID FEATURES & FUNCTIONS GUIDE
Indicators & Warning Lights
High Beam Indicator
Light ON Indicator
Front Fog Light Indicator*
Master Warning Indicator
FCA/FCW Indicator*
Lane Keeping Assist (LKA) Indicator
Electronic Brake Force (EBD) System Warning Indicator
(Two separate indicators on Instrument Cluster
lit at same time)
Immobilizer Indicator*
READY Indicator
EV EV Mode Indicator
ECO Indicator
SPORT Mode Indicator
Hybrid System Warning Indicator
Engine Coolant Temperature Warning
Engine Oil Pressure Warning Indicator
Charging System Warning Indicator
Seat Belt Warning Indicator
Malfunction Indicator
Low Tire Pressure Light / Tire Pressure Monitoring
System (TPMS) Malfunction Indicator
Electronic Stability Control (ESC) Indicator / ESC
Malfunction Indicator
Electronic Stability Control (ESC) OFF Indicator
Parking Brake & Brake Fluid Warning Indicator
Electronic Power Steering (EPS) Warning Indicator
Airbag Warning Indicator
Parking Brake Indicator
Anti-lock Braking System (ABS) Warning Indicator
Low Fuel Level Warning Indicator
Cruise Indicator*
Trunk Open Warning Indicator
Door Ajar Warning Indicator
(red color)
(yellow color)
Regenerative Brake Warning Indicator (Two separate
indicators on Instrument Cluster lit at same time)
SET Cruise SET Indicator
❄Icy Road Warning Indicator
LED Headlamp Warning Indicator*
Charging Cable Connection Indicator (Plug-In Hybrid)*
Your vehicle’s instrument cluster & indicator light
locations may differ from those in the illustrations. For
more information on the instrument cluster, the LCD
Warning Messages and the function of all indicator
and warning lights, please refer to section 4 of the
Owner’s Manual.
This illustration is for demonstration purposes
only. Some indicators and warning lights may not
appear in illustration. On the vehicle, they may
appear in the LCD.
220
20020
20 120
140
40 100
60 80
18040
16060
14080
120100
E
F
AUTO
120
miles
INSTRUMENT CLUSTER
INSTRUMENT
CLUSTER
(Type A shown)

ALWAYS CHECK THE OWNER’S MANUAL FOR COMPLETE OPERATING INFORMATION AND SAFETY WARNINGS. *IF EQUIPPED †LEGAL DISCLAIMERS ON BACK INSIDE COVER 5
25
36
36
36
Tire Pressure Monitoring System (TPMS)†21
The TPMS indicator functions as both Low Tire Pressure Light
and TPMS Malfunction Indicator. The indicator will illuminate
if it detects one or more tires is significantly underinflated, the vehicle has
a spare tire installed without TPMS or the outside temperature becomes
significantly lower.
The LCD screen in the instrument cluster will display the Low Tire Pressure
indicator Ashowing which tires are underinflated. Inflate tire(s) to
specifications using an accurate digital tire pressure gauge to turn off Low
Tire Pressure Light . See front driver’s door jamb for PSI specification.
When there is a problem with the TPMS, the TPMS Malfunction Indicator
will blink for approximately one minute then illuminate – See dealer
for service.
•Even with TPMS, tire pressure should be checked manually at least once a
month. Only adjust tire pressure on “cold tires” that have been sitting for 20
minutes, and tires that are not hot in temperature from direct sunlight or heat
•For proper maintenance and optimal fuel economy, maintain recommended
tire inflation pressures and stay within the load limits and weight distribution
recommended for your vehicle
•In winter or cold weather, the TPMS light may illuminate if the tire pressure was
adjusted to the recommended tire inflation pressure during warm weather
QUICK TIP
REMINDERS:
• Check the recommended tire pressure label located on the left side of driver's door jamb,
visible when the door is open
• Consult your dealer for service if Low Tire Pressure Light remains illuminated after inflating
your tire(s)
Personal electronic devices (such as laptops, wireless chargers, remote start systems, etc.) may
interfere with TPMS system, which may cause the Malfunction Warning Indicator (Check Engine
Light) to illuminate.
For more information, refer to
section 6 of the Owner’s Manual.
Refer to the inside front cover for
more information on QR codes.
www.youtube.com/KiaFeatureVideos
QR CODES
Tire Pressure Monitoring
System Video
A
INSTRUMENT
CLUSTER
INSTRUMENT CLUSTER

*IF EQUIPPED
6NIRO HYBRID / PLUG-IN HYBRID FEATURES & FUNCTIONS GUIDE
220
20020
20 120
140
40 100
60 80
18040
16060
14080
120100
E
F
AUTO
120
miles
Hybrid/Plug-In Hybrid Indicators at Startup
AHybrid System Gauge —Indicates how economically the vehicle is
being driven.
•CHARGE (Blue zone): High-efficiency range
•ECO (Green zone): Normal-efficiency range
•POWER (Grey zone): Low-efficiency range
BEV Mode —Illuminates when the electric motor is powering the vehicle.
CReady —Illuminates when the hybrid system is operational. Even if the
engine is off, the vehicle can be driven.
DState of Charge (SOC) —Displays the hybrid battery charge status.
Hybrid/Plug-In Hybrid Modes
To change the Plug-In Hybrid Mode, press the EV/HEV button E(PHEV only);
switch between Electric (EV) mode and Hybrid (HEV) mode each time the
button is pressed. The LCD on the Instrument Cluster will display the following
messages:
•EV Electric Mode - Charge Depleting: The high-voltage
(hybrid) battery is being used to drive the vehicle.
•HEV Hybrid mode - Charge Sustaining: The high-voltage (hybrid)
battery and gasoline engine are being used to drive the vehicle.
REMINDER: Avoid starting or driving the vehicle when the fuel tank is empty. As the engine will be incapable
of charging the high-voltage hybrid battery, the battery will lose its charge and may be damaged.
EV
HEV
INSTRUMENT CLUSTER
(Type A cluster shown)
For more information, refer to the Owner’s Manual.
INSTRUMENT
CLUSTER
AB
C
D
E

ALWAYS CHECK THE OWNER’S MANUAL FOR COMPLETE OPERATING INFORMATION AND SAFETY WARNINGS. *IF EQUIPPED 7
INSTRUMENT
CLUSTER
Fuel Economy
There are several factors that contribute
to your vehicle’s fuel economy, such as
maintenance of your vehicle, driving style,
environmental conditions, vehicle weight
and vehicle aerodynamics. Below are
some tips on how to help improve fuel
economy:
•Keep your vehicle in good condition
with regular maintenance
•Don’t let the engine idle longer than
necessary
•Drive at a moderate speed, accelerating
smoothly and at a moderate rate
•Keep tires inflated to the recommended
pressure
•Travel lightly, without carrying
unnecessary weight in your vehicles
•Avoid placing large or heavy items on
roof racks
•Avoid hilly, winding or poorly maintained roads
When the Instrument Cluster LCD screen is in the Trip Computer mode,
the screen displays fuel economy information related to the driving
range and average fuel economy.
To change modes, go to User Settings in the LCD Instrument Cluster
modes.
Average Fuel Consumption - Calculates average fuel consumption
from the distance driven and amount of fuel injected into the engine /
total fuel used.
(Hybrid screen shown)
Refer to the inside front cover for
more information on QR codes.
www.youtube.com/KiaFeatureVideos
QR CODES
Fuel Economy Video
Sport/ECO Modes
The shift modes can be changed Abetween SPORT and ECO by moving the
shift lever from D to the left gate and back:
(D) - ECO Mode
(S) - Sport Mode - When shift lever is moved into the left gate from (D). If
shift lever is not moved through the gears, then the vehicle will shift
automatically. Sport Mode changes the Niro’s shift points and steering feel,
and makes it more fun to drive
The LCD screen Bon the instrument cluster will display the mode the vehicle is in.
ECO Mode (Active ECO)
Active ECO is designed to help improve fuel economy by controlling several
vehicle components. When in ECO Mode, it is designed to optimize drivetrain
operations, such as engine power and transmission, to help improve fuel
economy in a variety of conditions.
(Located in Instrument Cluster)
mi
To help improve your fuel economy:
•Drive at a moderate speed,
accelerating smoothly and at a
moderate rate
•Keep tires inflated to the
recommended pressure
•Be sure the wheels are properly
aligned
QUICK TIPS
Refer to section 5 in the
Owner’s Manual for more
information.
ECOSPORT
ECO
Sport
REMINDER: Steering
effort may be slightly
increased in Sport mode.
A
AB
Refer to Section 4 in the Owner’s
Manual for more information.
INSTRUMENT CLUSTER
Fuel Economy
Average 16.8 MPG

*IF EQUIPPED
8NIRO HYBRID / PLUG-IN HYBRID FEATURES & FUNCTIONS GUIDE
Trip Modes / Trip Computer
The Trip Computer is a driver information system that
displays information related to driving. It appears on the
display when the Engine Start/Stop button is in the ON
position.
To cycle through the Trip modes, press the Mode button A.
When in the Trip Computer mode , press the Select/
Reset (OK) button Bto cycle through the screens. When
displaying ACCUMULATED INFO, DRIVE INFO, DRIVING
STYLE or FUEL ECONOMY screens, press and hold the OK
button Bto reset to zero.
For more information, refer to section 4
of the Owner’s Manual.
REMINDERS:
•Appearance of Trip Computer display
may differ as equipped
•All stored driving information (except
Odometer and Range) is reset if the
battery is disconnected
Refer to the inside front cover for
more information on QR codes.
www.youtube.com/KiaFeatureVideos
QR CODES
Instrument Cluster’s
LCD Display Video
ACCUMULATED INFO
•Tripmeter
•Average MPG
•Timer
RANGE (Plug-In Hybrid)
•Electric
•Gasoline
FUEL ECONOMY
•Average MPG
•Instant MPG
DRIVE INFO
•Tripmeter
•Average MPG
•Timer
DIGITAL SPEEDOMETER*
DRIVING STYLE
ENERGY FLOW
ENGINE TEMPERATURE
LCD Instrument Cluster Modes*
Press Mode button Ato scroll through different LCD
Instrument Cluster Modes.
Trip Computer Mode: Displays driving
information for tripmeter, fuel economy, MPH,
energy flow, etc
Turn-by-Turn Mode*: Displays route guidance
and destination info
Assist Mode: Displays information on Smart
Cruise Control (SCC), Lane Safety, Lane Following
Assist*, Driver Attention Warning (DAW) and
others
User Settings Mode: Change settings of Driving
Assist, Doors, Lights, Sound, Convenience,
Service Interval and others
Master Warning: Displays warning messages
related to the vehicle when one or more systems
is not operating normally
Your vehicle’s steering wheel
buttons may differ from those in
the illustrations.
Driving while distracted is
dangerous and should be avoided.
Drivers should remain attentive
to driving and always exercise
caution when using the steering
wheel mounted controls while
driving.
For more information, refer to
section 4 of the Owner’s Manual.
(Buttons located on Steering Wheel – Type A shown)
MODE
RES
CRUISE
CANCEL
OK
SET
MODE
RES
CRUISE
CANCEL
OK
SET
MODE
B
A
VEHICLE
SETTINGS
VEHICLE SETTINGS

ALWAYS CHECK THE OWNER’S MANUAL FOR COMPLETE OPERATING INFORMATION AND SAFETY WARNINGS. *IF EQUIPPED 9
User Settings - Instrument Cluster
To enter the User Settings mode in the LCD Instrument Cluster Modes, ensure that the vehicle is
at a standstill, put the shift lever in Park, and place the Engine Start/Stop button or Key in the ON
position. Then press the Mode button Aand select User Settings .
You can navigate the selections on the display by pressing the OK button Bup/down and then
select the item by pressing the OK button Bagain.
Driving Assistance*:
•Smart Cruise Control (SCC) Reaction
•Driving Assist
•Driver Attention Warning (DAW)*
•Warning Timing
•Forward Safety
•Lane Safety
•Blind-Spot Safety
•Parking Safety
Door:
•Automatically Lock & Unlock
Lights:
•One-Touch Turn Signal
•Ambient Light Brightness
•Ambient Light Color
•Headlamp Delay
•High Beam Assist
Sound:
•Parking Distance Warning/Volume
Convenience:
•Seat Easy Access*
•Welcome Mirror/Light*
•Wireless Charging System*
•Wiper/Light Display*
•Auto Rear Wiper
•Gear Position Pop-Up*
•Coasting Guide*
•Start Coasting*
•Icy Road Warning*
Service Interval:
•Enable Service Interval
•Adjust Interval
•Reset
Other features:
•Aux. Battery Saver+*
•Fuel Economy Reset*
•Speed Unit*
•Fuel Economy Unit*
•Temperature Unit*
•Tire Pressure Unit*
Language
•Language: Set the language
Reset
•Choosing reset will restore defaults
for all User Settings menus
(Buttons located on Steering Wheel – Type B)
MODE
RES
CRUISE
CANCEL
OK
SET
MODE
RES
CRUISE
CANCEL
OK
SET
MODE
A
B
Refer to the inside front cover for
more information on QR codes.
www.youtube.com/KiaFeatureVideos
QR CODES
Vehicle & User Settings
Video
Ambient, Mood & Theme
Lighting Video
Refer to Section 4 in the Owner’s
Manual for more information.
VEHICLE SETTINGS
VEHICLE
SETTINGS

*IF EQUIPPED
10 NIRO HYBRID / PLUG-IN HYBRID FEATURES & FUNCTIONS GUIDE
Vehicle Settings*- Audio Head Unit
To enter the Vehicle Settings mode in the audio head unit A, press the SETUP key on the audio
head unit. Then press VEHICLE , which will take you to Vehicle Settings. Use the touchscreen
to navigate through the menus.
12:00 AM Jan. 1
Menu
Vehicle Settings
Driving Convenience
Drive Mode
Climate
Lights
Driver
Assistance
Warning Timing
Late
Warning Volume
Off
Driver Attention Warning
A
Vehicle Settings:
Driver Assistance:
•Driving Convenience*
•Warning Time*
•Warning Volume*
•Driver Attention Warning*
•Forward Safety*
•Lane Safety*
•Blind-Spot Safety*
•Parking Safety*
•Drive Mode
•Drive Mode Alert*
Climate*:
•Recirculate Air*
•Automatic Ventilation*
•Defog/Defrost Options*
•Climate Features*
Lights*:
•Ambient Light*
•One Touch Turn Signal*
•Headlight Display*
•High Beam Assist*
Door*:
•Auto Lock*
•Auto Unlock*
•Walk-Away Lock*
•Two-Press Unlock*
•Smart Trunk*
Cluster*:
•Service Interval*
•Energy Consumption Reset*
•Content Selection*
•Cluster Voice Guidance Volume*
•Welcome Sound*
•Theme Selection*
Convenience*:
•Rear Occupant Alert*
•Welcome Mirror Light*
•Wireless Charging System*
•Vehicle Auto-Shut Off*
Seat*:
•Seat Position Change Alert*
•Smart Posture Care*
•Heated/Ventilated Features*
•Seat Easy Access*
•Rear Seat Heating Control*
Reset:
•Reset Vehicle Settings to Factory Defaults
Refer to the inside front cover for
more information on QR codes.
www.youtube.com/KiaFeatureVideos
QR CODES
LCD Display:
Maintenance Video
Refer to Section 4 in the Owner’s
Manual for more information.
VEHICLE
SETTINGS
VEHICLE SETTINGS

ALWAYS CHECK THE OWNER’S MANUAL FOR COMPLETE OPERATING INFORMATION AND SAFETY WARNINGS. *IF EQUIPPED 11
Service Interval Mode
To enter Service Interval mode, press the Mode button A, User Settings , then scroll
to Service Mode and press the OK button B. System will display the number of miles
remaining until next service is due, as well as the type of service.
When service is required, the following will be displayed:
Service Required
To reset the Service Interval mode system, press and hold the OK button Bfor more than
1 second. To turn Service Interval OFF, go to User Settings.
Service Interval Setting
To set the Service Interval when in User Settings mode:
•Press the OK button Bup/down and scroll to Service Interval. Press the OK button B
to enter
•Press the OK button Bup/down and toggle to ON, then press the OK button Bagain. Then
press the OK button Bto scroll and select the desired miles or months for your next service
•Press the OK button Bagain
Service in
Off
0000 mi.
Service Required
0000 mi.
(Buttons located on Steering Wheel – Type B)
MODE
RES
CRUISE
CANCEL
OK
SET
MODE
RES
CRUISE
CANCEL
OK
SET
MODE
A
B
Refer to the inside front cover for
more information on QR codes.
www.youtube.com/KiaFeatureVideos
QR CODES
Fuel Economy Video
Refer to Section 4 in the Owner’s
Manual for more information.
VEHICLE
SETTINGS
VEHICLE SETTINGS

*IF EQUIPPED
12 NIRO HYBRID / PLUG-IN HYBRID FEATURES & FUNCTIONS GUIDE
Plug-In Hybrid Display*
The audio head unit screen provides information on economical operation and Plug-In Hybrid* system modes. To enter the Plug-In Hybrid display mode,
press the ALL MENUS button on the Home screen. Then select one of the menus A- EV Range, Energy Information, Charge Management, ECO Driving,
Energy Flow (Systems with Navigation only). Some examples are below:
Energy Flow - Displays the current flow of power
between the main powertrain components.
ECO Level - The more economically you drive, the more
the ECO Level increases.
Plug-In Hybrid System Home Screen - Range, Energy
Info, Charge Management, ECO Driving, Energy Flow
A
Fuel Economy - Displays the average fuel economy
over the duration of a trip.
EV Range
217 mi
Energy Information
85 %
Charge Management
Next Departure
Jan | Wed | 1:00 AM
On
ECO Driving
Energy Flow
Plug-In Hybrid
Hybrid Ready
Energy Flow
Wheels
Engine Electric Motor Battery
Fuel Economy
History
Eco Driving Eco Driving
Fuel Economy
Fuel Economy
History
Fuel Economy
Hybrid Fuel Economy
05-06-2019
05-04-2019
05-03-2019
05-02-2019
05-01-2019
27 mi 13.2 mpg
12.9 mpg
13.6 mpg
Driving dates, distances and
fuel economy for the past
30 drives in the History are
displayed.
12.3 mpg
13.6 mpg
22 mi
14 mi
7 mi
18 mi
75
50
25
MPG
Electric Motor Use
75
50
25
MPG
Now 510 15 20 25 30 35 40 45 50 55 60
EV Range
217 mi
Energy Information
85 %
Charge Management
Next Departure
Jan | Wed | 1:00 AM
On
ECO Driving
Energy Flow
Plug-In Hybrid
Hybrid Ready
Energy Flow
Wheels
Engine Electric Motor Battery
Fuel Economy
History
Eco Driving
Eco Driving
Fuel Economy
Fuel Economy
History
Fuel Economy
Hybrid Fuel Economy
05-06-2019
05-04-2019
05-03-2019
05-02-2019
05-01-2019
27 mi 13.2 mpg
12.9 mpg
13.6 mpg
Driving dates, distances and
fuel economy for the past
30 drives in the History are
displayed.
12.3 mpg
13.6 mpg
22 mi
14 mi
7 mi
18 mi
75
50
25
MPG
Electric Motor Use
75
50
25
MPG
Now 510 15 20 25 30 35 40 45 50 55 60
EV Range
217 mi
Energy Information
85 %
Charge Management
Next Departure
Jan | Wed | 1:00 AM
On
ECO Driving
Energy Flow
Plug-In Hybrid
Hybrid Ready
Energy Flow
Wheels
Engine Electric Motor Battery
Fuel Economy
History
Eco Driving Eco Driving
Fuel Economy
Fuel Economy
History
Fuel Economy
Hybrid Fuel Economy
05-06-2019
05-04-2019
05-03-2019
05-02-2019
05-01-2019
27 mi 13.2 mpg
12.9 mpg
13.6 mpg
Driving dates, distances and
fuel economy for the past
30 drives in the History are
displayed.
12.3 mpg
13.6 mpg
22 mi
14 mi
7 mi
18 mi
75
50
25
MPG
Electric Motor Use
75
50
25
MPG
Now 510 15 20 25 30 35 40 45 50 55 60
EV Range
217 mi
Energy Information
85 %
Charge Management
Next Departure
Jan | Wed | 1:00 AM
On
ECO Driving
Energy Flow
Plug-In Hybrid
Hybrid Ready
Energy Flow
Wheels
Engine Electric Motor Battery
Fuel Economy
History
Eco Driving
Eco Driving
Fuel Economy
Fuel Economy
History
Fuel Economy
Hybrid Fuel Economy
05-06-2019
05-04-2019
05-03-2019
05-02-2019
05-01-2019
27 mi 13.2 mpg
12.9 mpg
13.6 mpg
Driving dates, distances and
fuel economy for the past
30 drives in the History are
displayed.
12.3 mpg
13.6 mpg
22 mi
14 mi
7 mi
18 mi
75
50
25
MPG
Electric Motor Use
75
50
25
MPG
Now 510 15 20 25 30 35 40 45 50 55 60
The images shown are for illustration purposes only. Not all available displays
are shown. Screens may vary.
For more information, refer to the Owner’s Manual or the Car Infotainment
System Quick Reference Guide.
HYBRID / PLUG-IN HYBRID SYSTEM
HYBRID / PLUG-IN
HYBRID SYSTEM

ALWAYS CHECK THE OWNER’S MANUAL FOR COMPLETE OPERATING INFORMATION AND SAFETY WARNINGS. *IF EQUIPPED 13
Plug-In Hybrid displays shown. The images shown are for illustration purposes only. Not all available
displays are shown. Screens may vary.
For more information, refer to the Owner’s Manual.
Instrument Cluster - Energy Flow
The instrument cluster LCD screen displays the following plug-in hybrid system modes to inform the driver of its
status. To change modes, go to User Settings in the LCD Instrument Cluster modes.
mi
mi
mi
mi
EV Propulsion - The electric motor is moving
the vehicle.
Engine-Only Propulsion - The engine is moving
your vehicle.
Power Assist - Both the electric motor AND the
engine are moving the vehicle.
Engine Generation - While the vehicle is stopped,
the engine is charging the hybrid battery.
HYBRID / PLUG-IN HYBRID SYSTEM
HYBRID / PLUG-IN
HYBRID SYSTEM

*IF EQUIPPED
14 NIRO HYBRID / PLUG-IN HYBRID FEATURES & FUNCTIONS GUIDE
Plug-In Hybrid displays shown. The images shown are for illustration purposes only. Not all available displays are shown. Screens may vary.
For more information, refer to the Owner’s Manual.
Instrument Cluster - Energy Flow
The instrument cluster LCD screen displays the following plug-in hybrid system modes to inform the driver of its
status. To change modes, go to User Settings in the LCD Instrument Cluster modes.
Vehicle Stop - The vehicle’s hybrid system is
standing by.
Engine Generation/Regeneration - The engine
and the regenerative braking system are both
recharging the hybrid battery.
mi
mi
mi
mi
Power Reserve - While the engine powers the
vehicle, it is also recharging the hybrid battery.
Engine Brake/Regeneration - The regenerative
braking system is recharging the hybrid battery.
HYBRID / PLUG-IN HYBRID SYSTEM
HYBRID / PLUG-IN
HYBRID SYSTEM

ALWAYS CHECK THE OWNER’S MANUAL FOR COMPLETE OPERATING INFORMATION AND SAFETY WARNINGS. *IF EQUIPPED 15
HYBRID / PLUG-IN HYBRID SYSTEM
HYBRID / PLUG-IN
HYBRID SYSTEM
Emergency Starting*(Hybrid only)
Before Jump-Starting:
1. If the vehicle appears to have a dead battery, first press the 12V Battery Reset
button A. Then immediately start the vehicle by pressing the brake and turning the
ignition on or pressing the Engine Start/Stop button
2. If the vehicle does not start after completing the above steps, then jump-start the vehicle
(as described below)
REMINDERS:
•After starting, idle or drive the vehicle for more than 30 minutes to help charge the 12V battery
•If the vehicle does not start immediately after pressing the 12V Battery Reset button A, then the power of the
12V battery is automatically disconnected to save any additional discharge
•Repeated use of the 12V Battery Reset button may cause over discharge which will prevent the vehicle from starting
Jump-Starting:
1. Remove the fusebox cover Bunder the front hood
2. The {+} jump start terminal Cis located in the fuse box; the suitable ground point Dis
located in the engine compartment (See Owner’s Manual for detailed description)
3. Connect cables coming from the battery booster source in the following order and
disconnect in reverse order:
•Connect the {+} clamp of your jumper cable to the {+} jump start terminal C
•Connect the {-} clamp of your jumper cable to the suitable ground point D
4. Then immediately start the vehicle by pressing the brake and turning the
ignition on or pressing the Engine Start/Stop button
REMINDER: Jump-starting your vehicle can be dangerous if done incorrectly. Follow the above jump-starting
procedures to avoid harm to yourself or damage to your vehicle and any of its components. You should also
consult your Owner's Manual for further detailed instructions for jump-starting your vehicle. If in doubt,
we strongly recommend that you have a competent technician or towing service jump-start your vehicle.
For more information on Emergency Starting, please refer to section 6 of the Owner’s Manual.
(Located in Driver's Panel to the left of Steering Wheel)
(Niro engine compartment shown, right side)
B
C
D
A

*IF EQUIPPED
16 NIRO HYBRID / PLUG-IN HYBRID FEATURES & FUNCTIONS GUIDE
Refer to the inside front cover for
more information on QR codes.
www.youtube.com/KiaFeatureVideos
QR CODES
Niro EV Charging –
Connecting &
Disconnecting Video
Charging the Plug-In Hybrid Vehicle (Plug-In Hybrid Only)
Level 1 Charging – “Trickle” Charge
A Level 1 or “trickle” charger is the most common type of charging system for a Plug-In Hybrid. This type of
charger uses 110 volts of household electricity and takes up to 9 hours for a full charge.
Trickle Charger Indicators:
A120VAC plug
BPower – When the charger and AC plug is
plugged in and functioning normally, the
indicator will turn green. Indicator is red if plug
temperature sensor warning is present
CCharge – Indicates that the vehicle is charging
DFault – Indicates charge failure
ECharge Level – Indicates the level of charge:
L (8A), M (10A), or H (12A)
FICCB – In-Cable Control Box
REMINDER: Do not use an extension cord. Plug trickle charger directly into wall socket. Do not charge to a receptacle that is old,
damaged, corroded or cracked.
Level 2 Charging – “Normal” Charge
A Level 2 or “normal” 240-volt charger is the recommended charging system for the Plug-In Hybrid.
This type of charger uses 240 volts of electricity and takes approximately 2.5-3 hours for a full charge
(Based on Kia Motors Corporation testing with SAE J1772 charger performed at 3.3kW). This charger
may be able to be installed at your home or found at a public charging station.
REMINDER: Shape of charger and how to use the charger may be different for each manufacturer.
Please see Owner’s Manual for more information.
A Level 2 or “normal” 240-volt charger is recommended for regular charging of the vehicle.
QUICK TIP
REMINDER: For more detail and/or subsequent steps in charging your vehicle, please see the Owner's Manual.
HYBRID / PLUG-IN HYBRID SYSTEM
HYBRID / PLUG-IN
HYBRID SYSTEM
POWER
A
CHARGE
FAULT
!
LEVEL
L M H
C
D
E
F
B

ALWAYS CHECK THE OWNER’S MANUAL FOR COMPLETE OPERATING INFORMATION AND SAFETY WARNINGS. *IF EQUIPPED 17
Refer to the inside front cover for
more information on QR codes.
www.youtube.com/KiaFeatureVideos
QR CODES
Niro EV Charging –
Connecting &
Disconnecting Video
HYBRID / PLUG-IN HYBRID SYSTEM
HYBRID / PLUG-IN
HYBRID SYSTEM
POWER
CHARGE
FAULT
REMINDER: For more detail and/or subsequent steps in charging your vehicle, please see
the Owner’s Manual.
Charging the Plug-In Hybrid Vehicle (Continued)
To charge the Plug-In Hybrid vehicle using a normal/trickle charger:
1. Connect the ICCB Aplug to an electrical outlet
2. Check if the power light (green) Bon the ICCB turns on
3. Press the brake pedal and engage the parking brake
4. Turn off all switches, put the shift lever in P (Park), and turn off
the vehicle
5. Open the charging door Eby pressing the charging door
(Ensure doors are unlocked)
6. Remove any dust or water on the charging connector and charging inlet F
7. Hold the charging connector handle Gand connect it to the vehicle’s
charging inlet Fby pushing the connector until you hear a clicking sound
8. Charging begins automatically (Ensure the charge indicator light is
illuminated on your instrument cluster, indicating the vehicle is charging)
Checking the Charging Status
The charging status can be checked by viewing the charging status indicator
on the dash panel. The lights will progressively become lit as the vehicle
approaches a full charge.
After charging has started, the light turns green and the estimated charging
time is displayed on the Instrument Cluster LCD Hfor about 1 minute. It is also
displayed when the driver’s door is opened with charging in progress. When
fully charged, the light turns off.
Remaining charge time
6h 14m
50%
E
F
G
H

*IF EQUIPPED
18 NIRO HYBRID / PLUG-IN HYBRID FEATURES & FUNCTIONS GUIDE
AUTO OFF
(Buttons are located left of the Steering Wheel)
A B
Refer to the inside front cover for
more information on QR codes.
www.youtube.com/KiaFeatureVideos
QR CODES
Niro EV Charging –
Connecting &
Disconnecting Video
Scheduled Charging* (Plug-In Hybrid Only)Charging Connector Auto/Lock Mode
(Plug-In Hybrid Only) Charging time can be set in the Plug-In Hybrid audio system
home screen, under charge management, or using the Kia
Access with UVO link app.
Charging with the UVO link Smartphone App:
The UVO link smartphone app can help you find the nearest
charging station and displays charging-status and the
Scheduled Charging information. On your Smartphone, go
to an app store or marketplace to download the UVO link
Smartphone app.
REMINDER: When Scheduled Charging is set and the charger is plugged
in, charging will not begin until the set time & date are met to complete the
charging. The green charge indicator on top of the dash will temporary flash ON/
OFF to show that scheduled/reserve charging is set.
Deactivate Scheduled Charging - Depress the Deactivate
Scheduled Charging button Bto disable the scheduled
charging feature when immediate charging is required.
The Charging Connector can be set to be locked or
unlocked while in the charging inlet. Press the AUTO
button A(LED lit) for the connector to lock while
charging and unlock automatically when charging is
complete.
When the AUTO button Ais not pressed (LED not
lit), the mode will be set to LOCK. The connector will be
locked when charging and remain locked until all doors
are unlocked.
REMINDER: For more detail and/or subsequent steps in charging your
vehicle, please see the Owner’s Manual.
When you press the Deactivate Scheduled Charging button
the reserved charging setting will temporarily disable, and start
immediate charging mode. If you need to completely deactivate
the scheduled charge setting, change the setting from the audio
control unit.
QUICK TIP
• If the auto/lock mode is set to lock and the vehicle is
unlocked but charging cable is not disconnected within 10
seconds, the connector will be automatically locked again
• If charging connector is unlocked but all doors are locked
again, immediately, the connector will be automatically
locked again
QUICK TIPS
HYBRID / PLUG-IN HYBRID SYSTEM
HYBRID / PLUG-IN
HYBRID SYSTEM
This manual suits for next models
1
Table of contents
Other Kia Automobile manuals

Kia
Kia Magentis 2002 User manual

Kia
Kia Spectra 2003 User manual

Kia
Kia Carnival 2023 User manual

Kia
Kia Opirus 2007 User manual

Kia
Kia Sportage User manual

Kia
Kia Forte 2015 User manual

Kia
Kia Automobile User manual

Kia
Kia Spectra Parts list manual

Kia
Kia Stinger Parts list manual

Kia
Kia Optima 2018 User manual