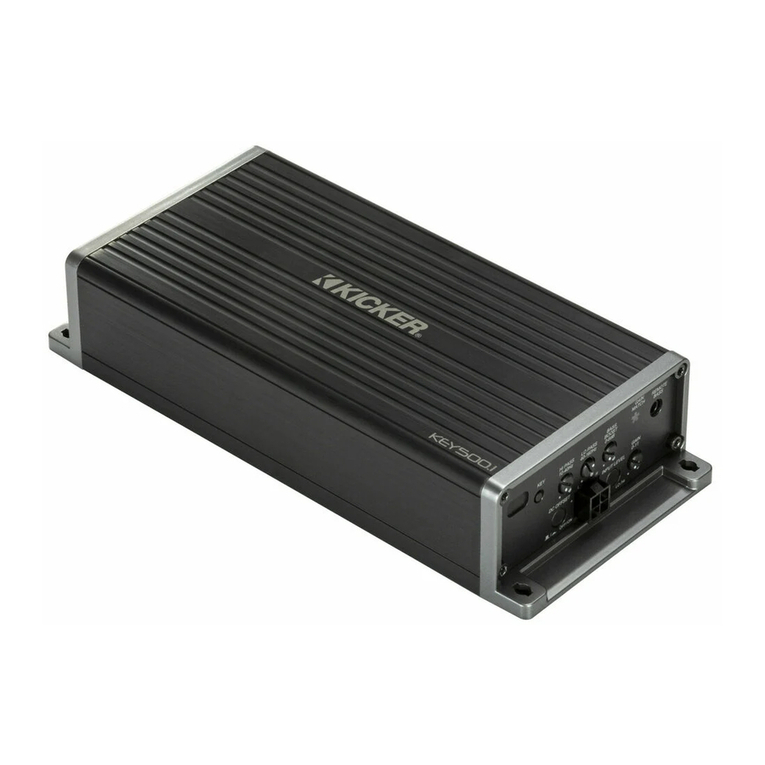
KEY Auto Setup: Once the KEY has been wired and mounted, visit https://www.kicker.com/test-tones or the KEY500.1 product page and download both the
“Key500.1 Gain Match” and the “Key500.1 Sweep” tracks, then proceed with the following steps:
Gain Match: Turn the source unit up to about 3/4 volume or just before the output starts to clip. (if the source unit goes to 30, turn it to 23). Press and hold the KEY button
for 3 seconds until the gain match LED flashes quickly 3 times. Start the “Key500.1 Gain Match” track (The amplifier mutes its outputs during the Setup process so there will
be no sound from the amplifier during setup). With the gain knob all the way down, slowly turn the input gain up (clockwise) until you see the Gain Match LED light up, then
turn it down until the LED no longer flashes. Once the gain has been set, stop the Gain Match track and quickly press the KEY button to exit Gain Match Mode.
KEY Algorithm: You are now ready to start running the KEY algorithm. Press and hold the KEY button for 5 seconds until the Gain Match LED goes solid, then release the
button. Start the “Key500.1 Sweep” track. While the KEY algorithm is running the Gain match LED will flash slowly. This process will take about 1.5 minutes. After the sweep
track finishes, pause the audio. The Gain match LED will go dark while it is calculating the corrections. This takes about 30 seconds. If the algorithm runs through
successfully the Gain Match LED will begin to flash rapidly for 1.5 seconds. If the algorithm fails, the Gain Match LED will go solid. In the event of a failure you will need to
short press the KEY button to exit the KEY Setup. See the manual for trouble shooting guide if the algorithm fails.
After the algorithm has been run successfully you can do a single button press of the Key button to A/B the Key audio output in original and corrected form. A single flash
indicates corrections are ON, and a double flash indicates corrections are OFF. To reset the KEY algorithm, press and hold programming button 10 seconds. The Gain
Match LED will flash 5 times indicating the KEY Algorithm has been reset.
+
LR
−
KEY HI PASS
10-40Hz
DC OFFSET INPUT LEVEL
GAIN
0-11
REMOTE
BASS
GAIN
MATCH
LO PASS
40-160Hz
BASS
BOOST
0-6dB
ONOFF//HILO //
Configuración automática de KEY: Una vez que haya conectado e instalado el KEY, visite https://www.kicker.com/test-tones o la página del producto KEY500.1, descargue las pistas "Key500.1 Gain Match" y "Key500.1
Sweep". Luego, ejecute los siguientes pasos:
Sincronización de ganancia: Suba el volumen de la unidad fuente hasta aproximadamente 3/4 o antes de que la salida empiece a recortarse (si la unidad fuente llega a 30, súbala a 23). Mantenga presionado el botón KEY durante 3
segundos hasta que el LED de sincronización de ganancia parpadee rápido 3 veces. Inicie la pista "Key500.1 Gain Match" (El amplificador silencia sus salidas durante el proceso de Configuración, de modo que no emitirá sonidos durante la
configuración). Con el botón de ganancia totalmente hacia abajo, gire la perilla de entrada de ganancia hacia arriba (en el sentido de las agujas del reloj) hasta que el LED de sincronización de ganancia se encienda. Luego, gírela hacia abajo
hasta que el LED ya no parpadee. Cuando se haya configurado la ganancia, detenga la pista Sincronización de ganancia y presione rápidamente el botón KEY para salir del modo de Sincronización de ganancia.
Algoritmo KEY: Ahora está listo para comenzar a ejecutar el algoritmo KEY. Mantenga presionado el botón KEY durante 5 segundos hasta que el LED de Sincronización de ganancia deje de parpadear. Luego, suelte el botón. Inicie la pista
"Key500.1 Sweep". Mientras el algoritmo KEY se esté ejecutando, el LED de Sincronización de ganancia parpadeará lentamente. Este proceso llevará alrededor de un minuto y medio. Cuando el barrido finalice, pausa la pista de audio. El LED de
Sincronización de ganancia se oscurecerá mientras calcule las correcciones. Esto demora aproximadamente 30 segundos. Si el algoritmo se ejecuta exitosamente, el LED de Sincronización de ganancia comenzará a parpadear rápidamente
durante un segundo y medio. Si el algoritmo falla, el LED de Sincronización de ganancia dejará de parpadear. Si se produce una falla, deberá presionar el botón KEY durante un tiempo corto para salir de la Configuración del KEY. Si el algoritmo
falla, consulte el manual para obtener la guía de resolución de problemas.
Cuando el algoritmo se haya ejecutado exitosamente, puede presionar el botón Key una vez para comparar la salida de sonido del Key entre su configuración original y la corregida. Si parpadea una vez, indica que las correcciones están
activadas, si parpadea dos veces, indica que las correcciones están desactivadas. Para restablecer el algoritmo KEY, mantenga presionado el botón de programación durante 10 segundos. El LED de Sincronización de ganancia parpadeará 5
veces, lo que indica que el algoritmo KEY se ha restablecido.
Auto-configuration du KEY : Une fois le KEY installé et branché, rendez-vous à l'adresse https://www.kicker.com/test-tones ou consultez la fiche produit KEY500.1 pour télécharger les pistes « Key500.1 Gain Match » et « Key500.1
Sweep , puis suivez les étapes suivantes :
Correspondance de gain : réglez l'unité source à environ 3/4 du volume maximal ou juste avant écrêtage de la sortie (si l'unité source va jusqu'à 30, réglez-la à 23). Appuyez sur le bouton KEY pendant 3 secondes jusqu'à ce que la LED de
correspondance de gain clignote rapidement 3 fois. Démarrez la piste « Key500.1 Gain Match » (l'amplificateur met ses sorties en sourdine pendant le processus de configuration, aucun son ne sortira donc de l'amplificateur pendant la
configuration). Une fois le bouton du gain d'entrée descendu jusqu'en bas, tournez le gain d'entrée (dans le sens des aiguilles d'une montre) jusqu'à ce que la LED de correspondance de gain s'allume, puis tournez-le jusqu'à ce que la LED arrête
de clignoter. Une fois le gain configuré, arrêtez la piste Gain Match et appuyez rapidement sur le bouton KEY pour quitter le mode de correspondance de gain.
Algorithme KEY : vous êtes maintenant prêt(e) à exécuter l'algorithme KEY. Appuyez sur le bouton KEY pendant 5 secondes jusqu'à ce que la LED de correspondance de gain reste fixe, puis relâchez le bouton. Démarrez la piste « Key500.1
Sweep ». Pendant que l'algorithme KEY s'exécute, la LED de correspondance de gain clignote lentement. Ce processus prendra environ 1 minute et 30 secondes. Une fois le balayage terminé, mettre en pause la piste audiola. Les LED de
correspondance de gain s'éteindra pendant le calcul des corrections. Cela prend environ 30 secondes. Si l'algorithme s'exécute avec succès, la LED de correspondance de gain commencera à clignoter rapidement pendant 1,5 seconde. Si
l'algorithme échoue, la LED de correspondance de gain deviendra fixe. En cas d'échec, vous devrez appuyer brièvement sur le bouton KEY pour quitter la configuration KEY. Consultez le guide de dépannage du manuel en cas d'échec de
l'algorithme.
Une fois que l'algorithme a été exécuté avec succès, vous pouvez appuyer une fois sur le bouton KEY pour activer la sortie audio Key A/B dans sa forme originale et corrigée. Un seul clignotement indique que les corrections sont appliquées et
deux clignotements indiquent que les corrections ne sont pas appliquées. Pour réinitialiser l'algorithme KEY, appuyez sur le bouton de programmation pendant 10 secondes. La LED de correspondance de gain clignotera 5 fois, indiquant que
l'algorithme KEY a été réinitialisé.
KEY-Autosetup: Sobald der KEY verdrahtet und montiert ist, besuchen Sie bitte https://www.kicker.com/test-tones oder die KEY500.1-Produktseite und laden Sie die Tracks „Key500.1 Gain Match“ und „Key500.1 Sweep“ herunter. Fahren
Sie dann mit den folgenden Schritten fort:
Gain Match: Drehen Sie das Ausgangsgerät auf ca. 3/4 der Lautstärke oder bis kurz vor Einsetzen der Übersteuerung auf. (falls das Ausgangsgerät bis 30 geht, stellen Sie es auf 23 ein) Halten Sie die KEY-Taste 3 Sekunden lang gedrückt, bis
die Gain-Match-LED dreimal schnell blinkt. Starten Sie den Track „Key500.1 Gain Match“ (Der Verstärker ist während der Einrichtung stummgeschaltet. Das bedeutet, dass während der Einrichtung kein Ton vom Verstärker kommt). Drehen sie den
Verstärkungsregler von ganz unten langsam nach oben (im Uhrzeigersinn), bis die Gain-Match-LED aufleuchtet. Drehen Sie ihn dann wieder nach unten, bis die LED nicht mehr blinkt. Sobald Sie die Verstärkung eingestellt haben, stoppen Sie den
Gain-Match-Track und drücken Sie schnell die KEY-Taste, um den Gain-Match-Modus zu verlassen.
KEY-Algorithmus: Jetzt sind Sie bereit, den KEY-Algorithmus laufen zu lassen. Halten Sie die Taste 5 Sekunden lang gedrückt, bis die Gain-Match-LED durchgehend leuchtet, und lassen Sie die Taste dann los. Starten Sie den Track „Key500.1
Sweep“. Während der KEY-Algorithmus läuft, blinkt die Gain-Match-LED langsam. Dieser Prozess wird ungefähr anderthalb Minuten dauern. Sobald der Sweep abgeschlossen ist, unterbrechen sie die audiospur. Verdunkelt sich die
Gain-Match-LED, während die Korrekturen berechnet werden. Das dauert ca. 30 Sekunden. Falls der Algorithmus erfolgreich durchlaufen wurde, beginnt die Gain-Match-LED für 1,5 Sekunden schnell zu blinken. Falls der Algorithmus fehlschlägt,
wird die Gain-Match-LED durchgehend leuchten. Im Falle eines Fehlschlags müssen Sie die KEY-Taste kurz drücken, um das KEY Setup zu verlassen. Im Handbuch finden Sie eine Anleitung zur Fehlerbehebung, falls der Algorithmus fehlschlägt.
Nachdem der Algorithmus erfolgreich durchlaufen wurde, können Sie die Key-Taste einmal drücken, um einen A/B-Test zum Vergleich des Key-Audioausgangs in der ursprünglichen mit der korrigierten Form durchzuführen. Ein einfaches Blinken
zeigt an, dass die Korrekturen AKTIVIERT sind, und ein doppeltes Blinken zeigt an, dass die Korrekturen DEAKTIVIERT sind. Um den KEY-Algorithmus zurückzusetzen, halten Sie die Programmiertaste 10 Sekunden lang gedrückt. Mit dem
fünfmaligen Blinken der Gain-Match-LED wird angezeigt, dass der KEY-Algorithmus zurückgesetzt wurde.
