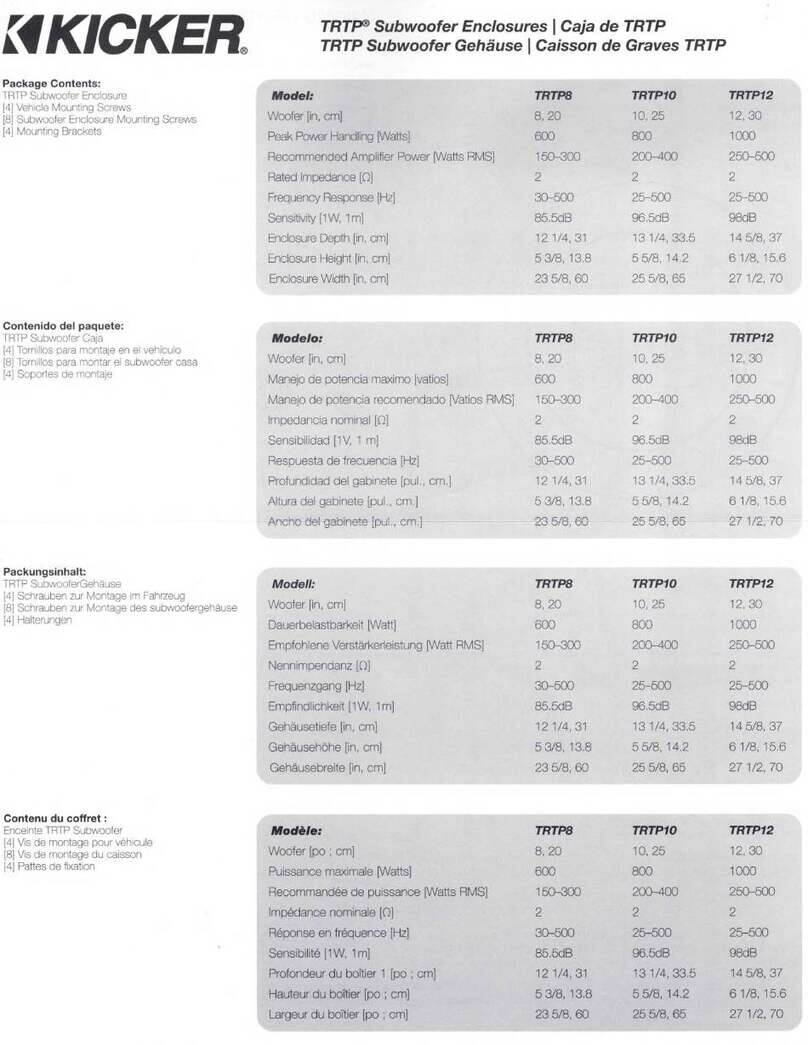
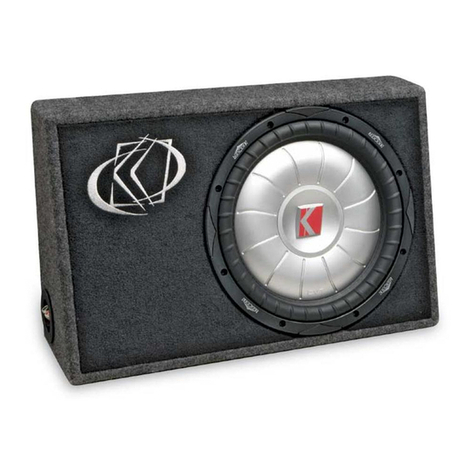
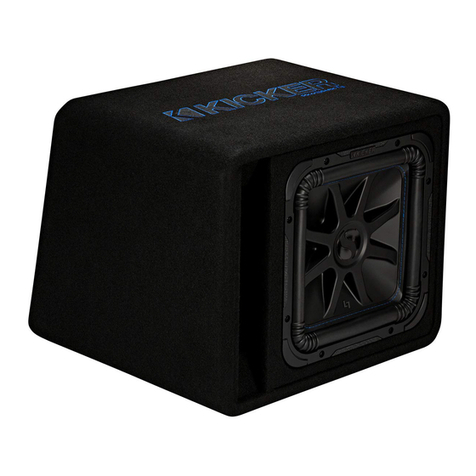
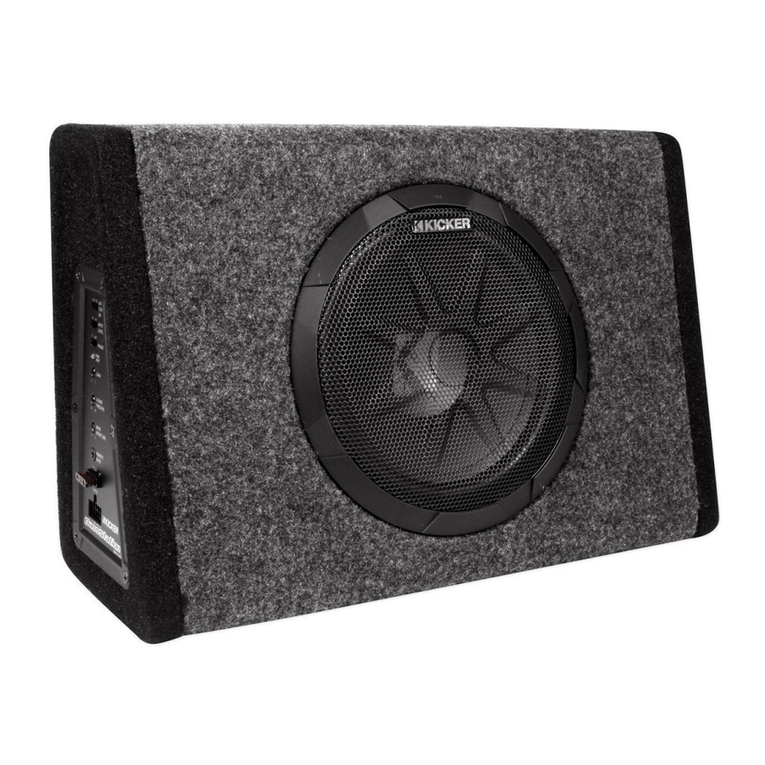
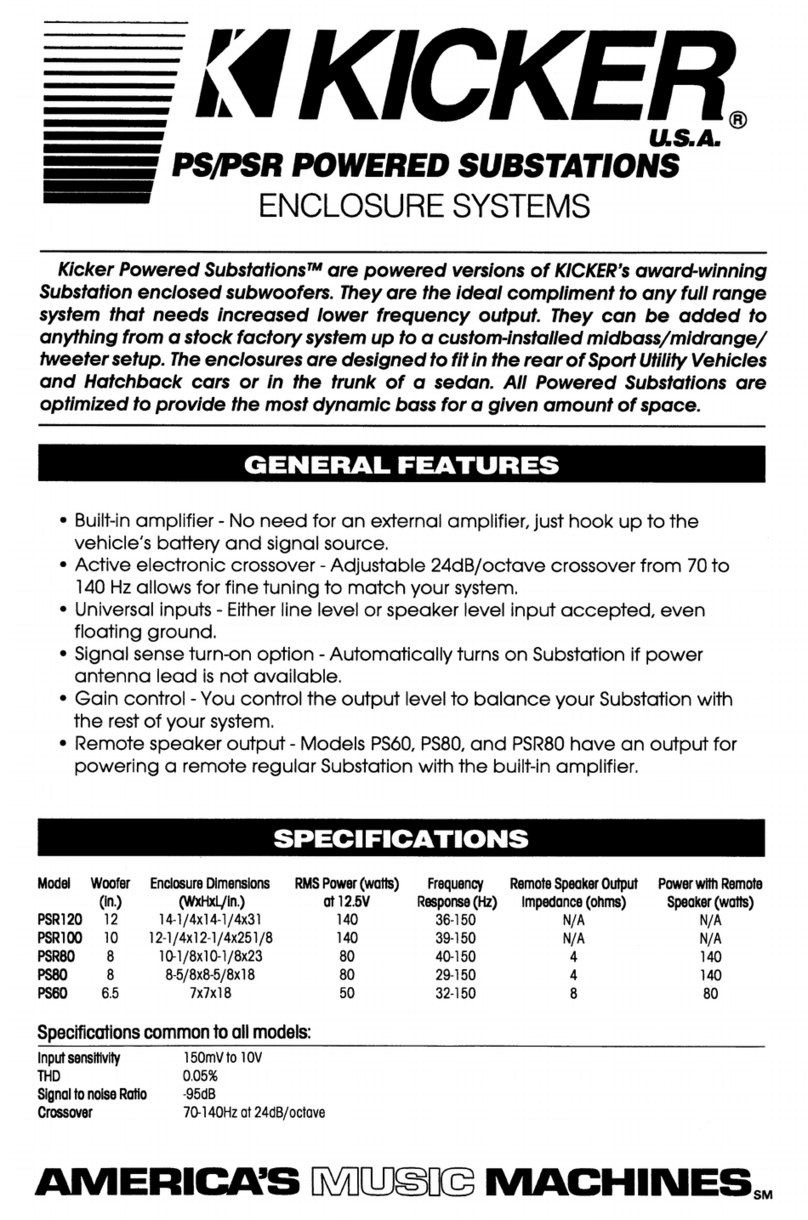
Kicker SKM10 User manual

SKM10
SKM SUBWOOFER
ENCLOSURE
English Version
Versión Español
Caja de Subwoofer SKM
Manual del Propietario
Deutsch
SKM Tieftöner Gehäuse
Benutzerhandbuch
Française
Caisson de Graves SKM
Manuel d’utilisation
KM
LIVIN’ LOUD

2
SKM Subwoofer Enclosure
Owner’s Manual
The SKM sealed enclosure combines KICKER’s award winning subwoofers with computer-modeled and
human fine-tuned enclosures to offer a level of bass performance never before thought possible from a
commercially available, ready-to-install marine subwoofer system. The SKM enclosure is available with a
pre-loaded 10 inch KM subwoofer. The enclosure features a dual draining system to evacuate moisture
away from the front of the speaker.
CHECK THE LOAD
The SKM subwoofer enclosure is internally wired for a 4 ohm load at the speaker-wire connection
terminal. Please check to see if your amplifier is optimized to drive this load.
LOCATION AND ORIENTATION
The location and orientation of your enclosure will affect the quality and quantity of the bass. Designed for
use in marine and open-air vessels, this enclosure offers you several mounting options.
If the enclosure is to be mounted deep in a
cubbyhole or storage space inside the vessel, it
works best to point the woofer toward the opening
of the compartment. Conversely, if the enclosure is
going to be mounted closer to the opening of the
cubbyhole or storage space, pointing the woofer
toward the rear of the compartment will give you the
best results.
If it is more convenient to mount the enclosure along a side wall or under the steering wheel, experiment
by firing the subwoofer away from the wall, and then by firing the subwoofer into the wall. Under the
steering wheel, the SKM
enclosure makes a nice foot
rest.
Boat construction varies, as
does the size and shape of
storage areas incorporated
into each boat design.
Testing the firing direction of
the subwoofer in any location
may yield better sounding
bass; it is worth the time to
experiment.
Authorized KICKER Dealer:
Purchase Date:
Enclosure Model Number:
Enclosure Serial Number:
SKM10
Subwoofer
firing into the
floor
Subwoofer firing
away from the
floor

3
MOUNTING
After determining the best mounting location, and subwoofer firing position, carefully check the areas
where the mounting brackets will be placed. Make sure the mounting screws will not puncture the fuel
cell, wiring, or interfere with any mechanical parts on the underside of the mounting surface.
Decide if you want the mounting flange positioned under the enclosure or exposed. Attach the two
mounting brackets to the sides of the SKM enclosure using the supplied stainless steel machine screws.
Pre-drill the mounting screw
holes using a 7/64” (2.5mm) bit,
and attach the SKM enclosure
to the boat, by fastening the
supplied stainless steel course-
threaded screws into the mounting
bracket flange and into the
boat’s structure. If the supplied
hardware is not applicable to your
installation, some other means of
securely attaching the enclosure
to the vessel must be used.
SAFETY WARNING
To avoid potential injury, or possible death, from forward movement of the enclosure during abrupt stops
or accidents, the enclosure must be properly installed and securely fastened to your vehicle. You are
solely responsible for securely fastening the enclosure in your vehicle.
WIRING
Remove the cover for the speaker terminal cup, plug your
subwoofer speaker wire into the terminals, using the red
connector as positive and the black connector as negative.
Connect the other end of the wire to your subwoofer
amplifier in accordance with its owner’s manual. Replace
the cover for the speaker terminal cup, by snapping it into
place..
MODEL: SKM10
Nominal Impedance [Zn] | ohms [per enclosure] 4
Power Handling* | Watts Peak [RMS] 300 [150]
Enclosure Depth | in [cm] 8 5/16 [21.1]
Enclosure Height | in [cm] 16 1/16 [40.8]
Enclosure Width | in [cm] 23 15/16 [60.8]
Note: The use of a subsonic filter will significantly increase power handling. The power handling specification in this chart
is calculated using a 25Hz, 24dB/octave subsonic filter. Kicker Marine speakers use the highest level of magnetic shielding
available to minimize compass and gauge deviation in your dash. Kicker Marine speakers meet or exceed industry standards
for environmental humidity and corrosion, and for material degradation due to UV exposure.
_
SPKR + SPKR -
Mounting Flange exposed Mounting Flange tucked
under the enclosure
Speaker
Terminal Cup
Cover
*Power Handling Watts RMS without subsonic filter: SKM10-125

4
Caja de SKM Subwoofer
Manual del Propietario
Las cajas selladas de la serie SKM combinan os galardonados subwoofers de Kicker con cajas afinadas
por seres humanos y diseñadas por computadora para ofrecer un rendimiento de bajos que nunca antes
se había imaginado que fuera posible obtener de un sistema de subwoofer comercialmente disponible y
listo para instalar. Las cajas de la Serie SKM vienen con un Kicker KM de 10 (25 cm) plg. incorporado de
antemano. La caja tiene un sistema doble que desagua para evacuar la humedad lejos de la frente del
altavoz.
VERIFICA LOS OHMIOS
Esta SKM caja tiene cableado interno para producir una carga de 4 ohmios en las terminales de conexión
de cable de altavoz. Asegúrese de que su amplificador puede manejar esta carga.
UBICACIÓN Y ORIENTACIÓN
La ubicación y orientación de la caja afecta la calidad y la cantidad de los bajos. Las cajas han sido
diseñadas para vehículos tipo marino y ofrecen varias opciones de montaje.
Si la caja se monta en un compartimiento de
almacenamiento, señale el altavoz hacia la apertura
del compartimiento de almacenamiento. Por el
contrario, si la caja se montará más cerca a la
apertura del compartimiento de almacenamiento,
señalando el altavoz hacia el trasero del
compartimiento de almacenamiento produce los
mejores resultados.
Cuándo es más conveniente montar la caja en una pared lateral o bajo el volante, el experimento
apuntando el altavoz para sonidos graves lejos de la pared, y entonces apuntando el altavoz para
sonidos graves en la
pared. Bajo el volante,
el cerco de SKM hace
un descanso agradable
de pie.
La construcción del
barco varía, como hace
el tamaño y la forma
de compartimientos
de almacenamiento
incorporaron en el diseño
del barco. Probar la
dirección que apunta
del altavoz en cualquier
ubicación puede rendir
sonando mejor bajo;
vale el tiempo de
experimentar.
Distribuidor autorizado de Kicker:
Fecha de compra:
Número de modelo de la caja:
Número de serie de la caja:
SKM10
El altavoz que
apunta en el piso. El altavoz que
apunta lejos del
piso.

5
MONTAR
Después de determinar la mejor posición de montaje, y el altavoz que apunta, verifique cuidadosamente
los lugares donde van a ir los soportes de montaje. Asegúrese de que los tornillos de montaje no van a
perforar el tanque de gasolina, el cableado, etc., o a interferir con los componentes mecánicos debajo de
la superficie de montaje escogida.
Decida si usted quiere los soportes metido bajo la caja o expuesto. Conecte los dos soportes que
montan a los lados de la caja de SKM que utiliza los tornillos inoxidables suministrados de máquina de
acero.
Taladre agujeros piloto con una
broca de 7/64 de plg. (2.5 mm) y
conecta la caja de SKM al barco,
abrochando el acero inoxidable
suministrado los tornillos curso-
enhebrados en el soporte y en
la estructura del barco. Si los
tornillos que se suministran no
sirven para su instalación, debe
fijar firmemente la caja al vehículo
de alguna otra manera. Usted
es únicamente responsable de
abrochar la caja en su vehículo.
ADVERTENCIA DE SEGURIDAD
Para evitar posibles lesiones o muerte causadas por el desplazamiento hacia adelante de la caja cuando
el vehículo se detiene abruptamente o en caso de accidente, la caja debe instalarse correctamente y
fijarse firmemente al vehículo. Usted es únicamente responsable
de abrochar la caja en su vehículo.
CABLEADO
Quite el altavoz la cubierta terminal, enchufe el cable de altavoz
del subwoofer en las terminales. Use el conector rojo como
positivo y el negro como negativo. Enchufe el otro extremo de
este cable en el amplificador del subwoofer de acuerdo con las
instrucciones del manual del propietario. Reemplace la cubierta
para la terminal del altavoz, chasqueandolo en lugar.
MODELO: SKM10
Impedancia nominal [Zn] | ohmios [por caja] 4
Procesamiento máximo de potencia | vatios pico [RMS] 300 [150]
Profundidad de la caja | plg. [cm] 8 5/16 [21.1]
Altura de la caja | plg. [cm] 16 1/16 [40.8]
Anchura de la caja | plg. [cm] 23 15/16 [60.8]
Nota: El uso de un filtro subsónico aumentará significativamente el procesamiento de potencia. Las especificaciones de
procesamiento de potencia que aparecen en la tabla anterior se calculan utilizando un filtro subsónico de 25 Hz y 24 dB/
octava. Todas las especificaciones y rendimiento de las cifras están sujetos a cambios. Por favor visite www.kicker.com para
obtener la información más reciente. Para obtener el mejor rendimiento de su nuevo Subwoofer Kicker, recomendamos usar
accesorios y cableado genuinos de Kicker. Los altavoces Kicker marinos tienen proteger magnético y aminoran la desviación
de brújula y calibrador. Los altavoces Kicker marinos encuentran o exceden los estándares de la industria para la humedad
y la corrosión ambientales, y para la degradación material debido a la exposición de ultravioleta.
_
SPKR + SPKR -
Los soportes expuesto Los soportes
metido bajo la caja
El altavoz
la cubierta
terminal
Garantía Comuníquese con su concesionario
o distribuidor Kicker internacional para obtener
infor ación sobre procedimientos específicos
relacionados con las normas de garantía de su país.

6
SKM Subwoofer
Gehäuse Handbuch
Geschlossene Gehäuse der SKM-Serie kombinieren die preisgekrönten Subwoofer von KICKER mit durch
Computermodelle entworfenen und von Experten verfeinerten Gehäusen und bieten ein Bassniveau, das
bisher für ein kommerziell verfügbares, installationsbereites Marine-Subwoofer-System nicht vorstellbar
war. Die Gehäuse der SKM-Serie sind mit einem bereits eingebauten 25 cm KM Subwoofer erhältlich.
PRÜFEN DIE IMPEDANZ
The SKM subwoofer enclosure is internally wired for a 4 ohm load at the speaker-wire connection
terminal. Please check to see if your amplifier is optimized to drive this load.
POSITION UND AUSRICHTUNG
Die Position und Ausrichtung Ihres Gehäuses beeinflusst die Qualität und Quantität der Basswiedergabe.
Diese Gehäuse sind für den Einbau in Marine und Freilüftenfahrzeugen und besitzt mehrere
Einbauoptionen.
Wenn das SKM Gehäuse ganz hinten im
Speicherplatz eingebaut wird, sollte der Tieftöner nach
vorne gerichtet sein. Wenn andererseits das Gehäuse
näher im Speicherplatz eingebaut wird, erzielt man
die beste Leistung, wenn der Tieftöner nach hinten
gerichtet ist.
Wenn es einfacher ist, das Gehäuse an einer
Seitenwand oder unter dem Steuerrad zu montieren,
experimentieren Sie durch Zielen des Subwoofer
weg von der Wand (vom oder Boden), und dann durch Zielen des Subwoofer zur Wand (oder zum
Boden). Unter dem Steuerrad
macht das SKM Subwoofer
Gehäuse einen geilen Fußrest.
Bootkonstruktion ändert sich,
als die Größe und die Gestalt
des Speicherplatz eingetragen
in jede Bootsbauart macht.
Experimentieren mit der
Richtung vom Lautsprecher in
irgendeinem Ort kann besser
ertönend Bass ergeben.
EINBAU
Nachdem Sie die beste
Einbauposition gewählt
haben, prüfen Sie sorgfältig
die Stellen, an denen
Montagehalterungen
angebracht werden sollen.
Authorisierter KICKER Händler:
Einkaufsdatum:
Gehäuse Modell Nummer:
Gehäuse Serien Nummer:
SKM10
Unter dem
Steuerrad am
Boden Einbau
Unter dem
Steuerrad am
Boden Einbau

7
Vergewissern Sie sich, dass die Montageschrauben keine Benzintanks, Kabel usw. anbohren oder
Mechanismen an der Unterseite der Einbauoberfläche stören würden.
Wollen Sie die Schraubbefestigung unter dem Gehäuse oder in der ausgesetzten Position befestigen?
Siehe Abbildungen 5 und 6. Befestigen Sie die zwei Schraubbestigungen mit den beiliegenden
Edelstähle-Maschinenschrauben an die Seiten des SKM Gehäuses.
Bohren Sie die Löcher mit einem 2,5-mm-Bohrer vor, und befestigen Sie das SKM Gehäuse an das
Boot mit den beiliegenden Edelstähle-Schrauben in die Schraubbesfestigungen in die Struktur des
Boots. Wenn die beiliegenden Befestigungselemente nicht für Ihre Installation passen, muss eine andere
Methode zur sicheren Befestigung des Gehäuses am Fahrzeug verwendet werden. Sie sind allein
verantwortlich für das Gehäuse in Ihrem Fahrzeug zu befestigen.
SICHERHEITS WARNUNG
Um eine mögliche Verletzung
oder Todesfolge durch eine
Vorwärtsbewegung des Gehäuses
beim abrupten Anhalten oder
bei Unfällen zu vermeiden, muss
dieses Gehäuse korrekt
installiert und sicher an Ihrem
Fahrzeug befestigt werden. Sie
sind allein verantwortlich für das
Gehäuse in Ihrem Fahrzeug zu
befestigen.
VERKABELUNG
Nehmen Sie die Decke des Lautsprecherterminals heraus, schließen
Sie die Subwoofer-Lautsprecherkabel an die Terminals an. Die roten
Anschlüsse sind positiv und die schwarzen negativ. Schließen Sie das
andere Ende der Kabel am Subwoofer-Verstärker an und folgen Sie
dabei dem Handbuch für den Verstärker. Schnappen Sie die Decke
des Lautsprecherterminals ein.
MODELL: SKM10
Nominal Impedance [Zn] | ohms [per enclosure] 4
Power Handling* Watts | Peak [RMS] 300 [150]
Enclosure Depth | in [cm] 8 5/16 [21,1]
Enclosure Height | in [cm] 16 1/16 [40,8]
Enclosure Width | in [cm] 23 15/16 [60,8]
_
SPKR + SPKR -
Schraubbefestigung in der
ausgesetzten Position
Schraubbefestigung unter
dem Gehäuse
Decke des
Lautsprecherterminals
Garantie Nehmen Sie mit Ihren internationalen Kicker-
Fachhändler oder Vertrieb Kontakt auf, um Details über
die Garantieleistungen in Ihrem Land zu erfahren.
Die Verwendung eines Subsonic-Filters steigert die Belastbarkeit deutlich. Die Belastungswerte in dieser Tabelle basieren
auf der Verwendung eines Subsonic-Filters (25 Hz, 24 dB pro Oktave). Änderungen an Spezifikationen und Leistungswerten
vorbehalten. Sie finden die aktuellsten Informationen bei kicker.com. Anmerkung: Um die besten Ergebnisse zu erzielen,
benutzen Sie nur Originalzubehörteile und Kabel von KICKER. KM Marine-Lautsprecher benutzen magnetische Beschützung
und minimieren Kompass und Messgerätabweichung in Ihrem Marinefahrzeug. KM Marine-Lautsprecher treffen sich oder
überschreiten Industrienstandards für Umweltfeuchtigkeit und Korrosion, und für materiellen Abbau auf Grund Ultraviolett
Aussetzung.

8
Manuel du Caisson de
Graves SKM
Les caissons clos SKM, associant les haut-parleurs d’extrêmes graves KM de KICKER au palmarès
éloquent à des caissons modélisés par ordinateur et accordés avec précision à l’oreille, offrent un rendu
des graves auparavant inconcevable pour un caisson de graves du commerce prêt à être installé. Les
caissons SKM sont équipés d’un haut-parleur KM de 25 centimètres pré-chargé. Le caisson a un
système drainant double pour évacuer l’humidité loin du devant de l’haut-parleur.
VÉRIFIEZ CHARGE COMPATIBLE
Le câblage interne du caisson en fait une charge de 4 ohms au niveau des bornes de raccordement des
fils du haut-parleur. Vérifiez que cette charge est compatible avec l’amplificateur.
L’EMPLACEMENT ET L’ORIENTATION
L’emplacement et l’orientation du caisson affectent la qualité et l’intensité des graves. Conçu pour une
utilisation dans les véhicules de type marin, le caisson peut être monté de plusieurs façons.
Si le caisson va être montée profondément dans
un espace de stockage dans le vaisseau, il travaille
mieux à indiquer l’haut-parleur vers l’ouverture
de l’espace de stockage. Réciproquement, si le
caisson va être montée plus près à l’ouverture de
l’espace de stockage, indiquant l’haut-parleur vers
l’arrière de l’espace de stockage vous donnera
les meilleurs résultats. S’il est plus pratique de
monter le caisson sur le côté ou sous le volant de
direction, l’expérience en visant l’haut-parleur loin
du mur, et alors en visant l’haut-parleur dans le
mur. Sous le volant de direction, le caisson de SKM fait un repos de pied agréable.
La construction de bateau
varie, comme fait la taille et la
forme d’espace de stockage
dans le bateau. L’essai de la
direction visant de l’haut-
parleur dans n’importe quel
emplacement peut produire
le meilleur basse de sondage
; c’est la valeur que le temps
pour expérimenter.
MONTER
Après avoir déterminé
la meilleure position de
montage, et haut-parleur
vise la position, inspectez
soigneusement les
emplacements prévus pour
Distributeur Kicker agréé :
Date d’achat :
Numéro de modèle du caisson :
Numéro de série du caisson :
SKM10
l’haut-parleur vise
dans le plancher l’haut-parleur
visant loin du
plancher

9
les pattes de montage. Vérifiez que les vis de montage ne risquent pas de percer le réservoir d’essence,
ou le câblage, ni de gêner le fonctionnement de pièces mécaniques sous la surface de montage.
Décider si vous voulez les pattes de montage sous la clôture ou exposé. Attacher les deux pattes de
montage aux côtés de le caisson de SKM utilisant les vis de machine d’acier inoxydable fournies.
Percez les trous à l’aide d’un foret
de 2,5 mm et attacher le caisson
de SKM au bateau, en attachant
l’acier inoxydable les fourni vis
cours-enfilés dans les pattes de
montage et dans la structure du
bateau. Si les accessoires de
fixation fournis ne conviennent
pas pour votre installation, fixez
solidement le caisson au véhicule
d’une autre façon. Vous êtes
uniquement responsable d’attacher
le caisson dans votre véhicule.
AVERTISSEMENT DE SÛRETÉ
Ce caisson doit être correctement installé et solidement fixé
au véhicule afin d’éviter tout risque de blessure, voire de mort
résultant d’un déplacement du caisson vers l’avant en cas
d’arrêt brutal ou d’accident. Vous êtes uniquement responsable
d’attacher le caisson dans votre véhicule.
CÂBLAGE
Enlever la couverture pour les terminaux d’haut-parleur,
raccordez vos fils d’haut-parleur dans les terminaux, le fil positif à
la borne rouge et le fil négatif à la borne
noire. Raccordez l’autre extrémité de
chaque fil à l’amplificateur d’extrêmes graves
conformément au manuel d’utilisation de
l’amplificateur. Remplacer la couverture pour
les terminaux d’haut-parleur, en lui appuyant
à sa place.
MODEL: SKM10
Impédance nominale [Zn] | ohms [par caisson] 4
Puissance admissible | watts, crête [efficace] 300 [150]
Profondeur du caisson | in [cm] 8 5/16 [21,1]
Hauteur du caisson | in [cm] 16 1/16 [40,8]
Largeur du caisson | in [cm] 23 15/16 [60,8]
Remarque : L’utilisation d’un filtre subsonique permet d’augmenter fortement la puissance admissible. Les valeurs de
puissance admissible indiquées dans ce tableau ont été calculées pour un filtre subsonique de 25 Hz à 24 dB par octave.
Toutes les caractéristiques techniques et données de fonctionnement sont susceptibles de modifications sans préavis.
Pour obtenir les documents les plus récents, visitez le site kicker.com. Afin de réaliser le meilleur résultat de votre nouveau
Subwoofer Kicker, nous vous conseillons de n’utiliser que des accessoires et câblage authentiques de Kicker. Les Kicker
KM haut-parleurs utilisent le plus haut niveau de protéger magnétique disponible pour minimiser la déviation de compas
et jauge. Les Kicker KM haut-parleurs rencontrent ou dépassent les normes d’industrie pour l’humidité et la corrosion
écologique, et pour la dégradation matérielle en raison de l’exposition ULTRAVIOLETE.
_
SPKR + SPKR -
l’haut-parleur
couverture
terminaux
patte de montage a exposé patte de montage sous le caisson

10
P.O. Box 459 • Stillwater, Oklahoma 74076 • USA • (405) 624–8510
11SKM10-B-20110125
ACOUSTICS LIMITED WARRANTY
KICKER warrants this product to be free from defects in material and workmanship under normal use for a period of
THREE (3) MONTHS from date of original purchase with receipt. When purchased from an Authorized KICKER Dealer it
is warranted for ONE (1) YEAR from date of original purchase with receipt. In all cases you must have the original receipt.
Should service be necessary under this warranty for any reason due to manufacturing defect or malfunction during the
warranty period, KICKER will repair or replace (at its discretion) the defective merchandise with equivalent merchandise
at no charge. Warranty replacements may have cosmetic scratches and blemishes. Discontinued products may be
replaced with more current equivalent products. This warranty is valid only for the original purchaser and is not extended
to owners of the product subsequent to the original purchaser. Any applicable implied warranties are limited in duration
to a period of the express warranty as provided herein beginning with the date of the original purchase at retail, and no
warranties, whether express or implied, shall apply to this product thereafter. Some states do not allow limitations on
implied warranties; therefore these exclusions may not apply to you. This warranty gives you specific legal rights; however
you may have other rights that vary from state to state.
WHAT TO DO IF YOU NEED WARRANTY OR SERVICE:
Defective merchandise should be returned to your local Authorized Stillwater Designs (KICKER) Dealer for warranty
service. Assistance in locating an Authorized Dealer can be found at www.kicker.com or by contacting Stillwater
Designs directly. You can confirm that a dealer is authorized by asking to see a current authorized dealer window decal.
If it becomes necessary for you to return defective merchandise directly to Stillwater Designs (KICKER), call the KICKER
Customer Service Department at (405) 624-8510 for a Return Merchandise Authorization (RMA) number. Package only
the defective items in a package that will prevent shipping damage, and return to:
Stillwater Designs, 3100 North Husband St, Stillwater, OK 74075
The RMA number must be clearly marked on the outside of the package. Please return only defective components. The
return of functioning items increases your return freight charges. Non-defective items will be returned freightcollect to you.
For example, if a subwoofer is defective, only return the defective subwoofer, not the entire enclosure. Include a copy
of the original receipt with the purchase date clearly visible, and a “proof-of-purchase” statement listing the Customer’s
name, Dealer’s name and invoice number, and product purchased. Warranty expiration on items without proof-of-
purchase will be determined from the type of sale and manufacturing date code. Freight must be prepaid; items sent
freight-collect, or COD, will be refused.
WHAT IS NOT COVERED?
This warranty is valid only if the product is used for the purpose for which it was designed. It does not cover:
o Damage due to improper installation
o Subsequent damage to other components
o Damage caused by exposure to moisture, excessive heat, chemical cleaners, and/or UV radiation
o Damage through negligence, misuse, accident or abuse. Repeated returns for the same damage may be
considered abuse
o Any cost or expense related to the removal or reinstallation of product
o Speakers damaged due to amplifier clipping or distortion
o Items previously repaired or modified by any unauthorized repair facility
o Return shipping on non-defective items
o Products with tampered or missing barcode labels
o Products returned without a Return Merchandise Authorization (RMA) number
o Freight Damage
o The cost of shipping product to KICKER
o Service performed by anyone other than KICKER
HOW LONG WILL IT TAKE?
KICKER strives to maintain a goal of 1 week service for all acoustics (subwoofers, midrange drivers, tweeters,
crossovers, etc) returns. Delays may be incurred if lack of replacement inventory or parts is encountered. Failure to
follow these steps may void your warranty. Any questions can be directed to the KICKER Customer Service Department
at (405) 624-8510. Contact your International KICKER dealer or distributor concerning specific procedures for your
country’s warranty policies.
Note: All specifications and performance figures are subject to change. Please visit www.kicker.com for the most
current information.

11
National Marine
National Marine
Manufacturers Association
MEMBER OF
MEMBER OF
INTERNATIONAL WARRANTY
Contact your International KICKER dealer or distributor concerning specific procedures for your country’s warranty policies.
WARNING: KICKER products are capable of producing sound levels that can permanently damage your hearing! Turning up a
system to a level that has audible distortion is more damaging to your ears than listening to an undistorted system at the same
volume level. The threshold of pain is always an indicator that the sound level is too loud and may permanently damage your
hearing. Please use common sense when controlling volume.
GARANTÍA INTERNACIONAL Versión Español
Comuníquese con su concesionario o distribuidor KICKER internacional para obtener infor ación sobre procedimientos específicos
relacionados con las normas de garantía de su país.
ADVERTENCIA: Los excitadores KICKER son capaces de producir niveles de sonido que pueden dañar permanentemente
el oído. Subir el volumen del sistema hasta un nivel que produzca distorsión es más dañino para el oído que escuchar un
sistema sin distorsión al mismo volumen. El dolor es siempre una indicación de que el sonido es muy fuerte y que puede dañar
permanentemente el oído. Sea precavido cuando controle el volumen.
La frase “combustible para vivir la vida Livin’ Loud™ a todo volumen” se refiere al entusiasmo por la vida que la marca KICKER
de estéreos de automóvil representa y a la recomendación a nuestros clientes de que vivan lo mejor posible (“a todo volumen”)
en todo sentido. La línea de altavoces y amplificadores KICKER es la mejor del mercado de audio de automóviles y por lo tanto
representa el “combustible” para vivir a todo volumen en el área de “estéreos de automóvil” de la vida de nuestros clientes.
Recomendamos a todos nuestros clientes que obedezcan todas las reglas y reglamentos locales sobre ruido en cuanto a los
niveles legales y apropiados de audición fuera del vehículo.
INTERNATIONALE GARANTIE Deutsche Version
Nehmen Sie mit Ihren internationalen KICKER-Fachhändler oder Vertrieb Kontakt auf, um Details über die Garantieleistungen in
Ihrem Land zu erfahren.
WARNUNG: KICKER-Treiber können einen Schallpegel erzeugen, der zu permanenten Gehörschäden führen kann! Wenn Sie ein
System auf einen Pegel stellen, der hörbare Verzerrungen erzeugt, schadet das Ihren Ohren mehr, als ein nicht verzerrtes System
auf dem gleichen Lautstärkepegel. Die Schmerzschwelle ist immer eine Anzeige dafür, dass der Schallpegel zu laut ist und zu
permanenten Gehörschäden führen kann. Seien Sie bei der Lautstärkeeinstellung bitte vernünftig!
Der Slogan “Treibstoff für Livin’ Loud” bezieht sich auf die mit den KICKER-Autostereosystemen assoziierte Lebensfreude und die
Tatsache, dass wir unsere Kunden ermutigen, in allen Aspekten ihres Lebens nach dem Besten (“Livin’ Loud”) zu streben. Die
Lautsprecher und Verstärker von KICKER sind auf dem Markt für Auto-Soundsysteme führend und stellen somit den “Treibstoff”
für das Autostereoerlebnis unserer Kunden dar. Wir empfehlen allen unseren Kunden, sich bezüglich der zugelassenen und
passenden Lautstärkepegel außerhalb des Autos an die örtlichen Lärmvorschriften zu halten.
GARANTIE INTERNATIONALE Version Française
Pour connaître les procédures propres à la politique de garantie de votre pays, contactez votre revendeur ou distributeur
International KICKER.
AVERTISSEMENT: Les haut-parleurs KICKER ont la capacité de produire des niveaux sonores pouvant endommager l’ouïe de
façon irréversible ! L’augmentation du volume d’un système jusqu’à un niveau présentant une distorsion audible endommage
davantage l’ouïe que l’écoute d’un système sans distorsion au même volume. Le seuil de la douleur est toujours le signe que le
niveau sonore est trop élevé et risque d’endommager l’ouïe de façon irréversible. Réglez le volume en faisant prevue de bon sens!
L’expression “ carburant pour vivre plein pot “ fait référence au dynamisme de la marque KICKER d’équipements audio pour
véhicules et a pour but d’encourager nos clients à faire le maximum (“ vivre plein pot “) dans tous les aspects de leur vie. Les
haut-parleurs et amplificateurs KICKER sont les meilleurs dans le domaine des équipements audio et représentent donc pour nos
client le “ carburant pour vivre plein pot “ dans l’aspect “ installation audio de véhicule “ de leur vie. Nous encourageons tous nos
clients à respecter toutes les lois et réglementations locales relatives aux niveaux sonores acceptables à l’extérieur des véhicules.

©2011 Stillwater Designs
Other manuals for SKM10
1
Table of contents
Languages:
Other Kicker Enclosure manuals

Kicker
Kicker Q-CLASS L7 Series User manual

Kicker
Kicker Bass Station PT250 User manual

Kicker
Kicker SOLO-BARIC DS12L7 User manual

Kicker
Kicker PS80 User manual

Kicker
Kicker DL712 User manual

Kicker
Kicker KSR100 User manual

Kicker
Kicker KMTES8 User manual

Kicker
Kicker Hideaway HS10 User manual

Kicker
Kicker CWTB8 User manual

Kicker
Kicker Hideaway HS8 User manual

Kicker
Kicker SS600 User manual

Kicker
Kicker Comp DC10 User manual

Kicker
Kicker VES12 User manual

Kicker
Kicker KB6000 User manual

Kicker
Kicker KMTES User manual

Kicker
Kicker SS1000 User manual

Kicker
Kicker KS60 Series Service manual

Kicker
Kicker TCVT10 User manual

Kicker
Kicker L7T User manual

Kicker
Kicker TRTP8 User manual