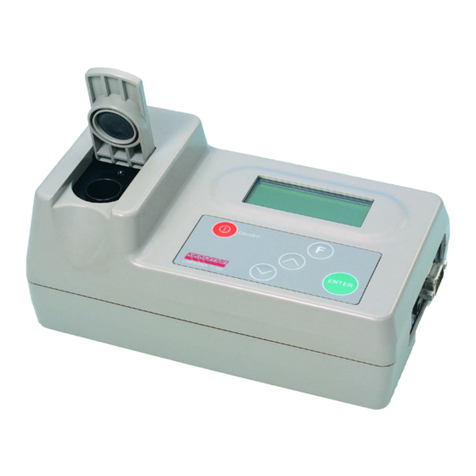
Kikkoman Lumitester Smart User manual

About Lumitester Smart
Ready-to-use application "Lumitester"
Instruction Manual
Easy to use.
Power ON
(press & hold)
Insert the reagent
START
It assists setup for the measurement target depending on the industry.
The measurement
result and
pass/fail at the
measurement
point can be
easily understood.
Lumitester Smart
Anyone can immediately start hygiene management.
Measure!
Start!
Recommended list of
measurement targets
in the kitchen
choice!Choice!
Thank you very much for purchasing our product.
This Instruction Manual must be read carefully to operate
this product safely and properly.
This Instruction Manual should be kept for future reference.
Measurer : User Name
Test date : 2019.01.23.09:00
Bench mark value 1 (Pass) 200
Bench mark value 2 (Caution) 400
Pass
kitchen knife
Result
Select the measurement
point and start
measurement with the
application.

The Application and PC Software
are easy to set up and use.
What was measured when, where,
and by whom can be managed in
combination with the
measurement data.
Pass rate of past measurement
data can be understood at a
glance.
Data are stored in the cloud
so there is no need to
worry about malfunction of
smart devices.
The inspection results are
saved in the cloud and
can be viewed from
multiple smart devices.
Grouping allows data
sharing by remote sites.
The measurement result is easy to see.
Data are stored in the cloud.
Measurement workow
Package contents
The trend history of the test point
is displayed to check the
improvement eect at a glance.
View!
Save!
1 Lumitester Smart
1 Strap 2 size AA alkaline
batteries
(for operation check)
3 cleaning brushes
1 USB cable
1 Quick manual
Pass
Start
kitchen knife
Swab Insert reagent Start measurement
Remove the cover
and place batteries
Prepare the
product
Swab test
User ID Pass rate
Factory A
Factory B
Factory C
Factory D
Factory E
Pass rate (Factory E)
Pass
Start
kitchen knife

1 2
Table of Contents
1. Names and Functions······································································3
1-1. Product ············································································································ 3
1-2. Display Unit···································································································· 4
1-3. Operation button························································································· 5
2. For safe and proper use ··································································6
3. Setup ································································································8
3-1. Prepare the product···················································································· 8
3-1-1. How to attach the strap ··································································· 8
3-1-2. How to use the stand········································································ 8
3-1-3. How to insert batteries····································································· 9
3-1-4. Bluetooth ON/OFF switching······················································· 10
3-2. Preparation for the Application and Software ································11
3-2-1. Application installation for connection to
smartphone/tablet (pairing) ························································12
3-2-2. PC software/driver installation for connection to PC··········15
4. Operation Method·········································································19
4-1. Prepare the reagent ·················································································· 19
4-2. Measurement procedure ········································································ 19
4-3. Measurement data check········································································23
5. Product Setup ················································································24
5-1. BLE Pairing Mode (Connection to 2nd or later
smartphone/tablet)··················································································· 25
5-2. Temperature Compensation (Temperature compensation
setting)···········································································································26
5-3. Self-Check (Self-diagnosis) ·····································································27
5-4. Switch Sensitivity (Switch sensitivity adjustment)·························29
5-5. Contrast (Display contrast adjustment)·············································29
5-6. Information (Product information)······················································30
5-7. Data Clear (Measurement data deletion)··········································30
5-8. Initialization (Restoration to factory setting) ···································31
6. Maintenance ··················································································32
6-1. Maintenance of the main body ····························································32
6-2. Maintenance of measurement chamber···········································32
6-3. Replacement of batteries········································································ 33
7. Troubleshooting············································································34
7-1. List of Error Codes······················································································35
7-2. Other problems and countermeasures··············································36
8. Specications·················································································37
9. External View ·················································································38
10. After-sales Service·······································································39

3 4
1Names and Functions 1-2. Display Unit
1-1. Product
Display Unit
Operation Unit
Power Button
Stand
Measurement
chamber
USB port
Measurement
chamber cover
Battery cover
Communication indicator
Connection indicator Bluetooth ON indicator
Reagent warning or measurement
chamber cover warning
Battery indicator
Measured value
Memory number
Temperature compensation
indicator
Measurement error indicator for temperature compensation enabled
Target
Bluetooth
USB
Display
BLE
USB
#0123
E
456789
BLE
USB
Battery indicator
Full
High
Medium
Low battery
Display
Display Instruction
Insert the reagent or close the measurement
chamber cover.
Remove the reagent.
Display Unit
Operation Unit
Power Button
Stand
Measurement
chamber
USB port
Measurement
chamber cover
Battery cover
Communication
indicator
Connection indicator
Bluetooth ON indicator
Battery indicator
Measured value
Memory number
Temperature
compensation indicator
Measurement error
indicator for
temperature
compensation
enabled
Reagent warning or
measurement
chamber cover
warning
Indicates communication with smartphone, tablet, and/or PC.
Indicates connection with smartphone,
tablet, and/or PC.
Indicates that the Bluetooth ON/OFF switch of the product is ON.
Displays the remaining battery level.
The measured value is displayed up to 6 digits with right
justication.
Shows the measured data number with # + 4 digits.
Indicates that the temperature compensation setting is ON.
If the temperature compensation is ON, the error code "E047" or
"E048" is displayed at the temperature 40°C or higher or 10°C or
lower, respectively, during measurement countdown, and the
measurement result without temperature compensation is
displayed with the error "E".
Indicates that you must close the measurement chamber cover,
or remove or insert the reagent.
Panel that displays the results of measurement, the
mode number, etc.
Refer to "1-2. Display Unit" (P4).
Panel for measurements or setting operation.
Refer to "1-3. Operation button" (P5).
Turns ON/OFF the power.
Displays the setup menu.
Used to set the product in an upright position.
Chamber where reagent is inserted.
Cover for the USB connector. Connector that is used
for PC connection.
Cover for measurement chamber.
Cover used to insert and remove batteries and switch
Bluetooth ON/OFF.

Organic
solvent
5 6
1-3. Operation button
Power button (side)
Turns ON/OFF the product’s power
or displays the setup menu.
Up/Down button
Used to select a setup item or
view past data.
START button
Starts measurement and
determines the input.
To adjust the sensitivity of the START and/or up/down buttons, refer to "5-4. Switch
sensitivity" (P29).
2For safe and proper use
Please read this section carefully beforehand to use the product correctly. The
warning messages listed here indicate important safety issues as well as failures and
malfunctions.
Do not disassemble or
remodel the product.
Fire, electric shock, or
failure may occur.
Do not expose the
instrument to water or
operate it with wet
hands.
Failure to do so may
cause electric shock or
malfunction.
Do not use batteries
other than the specied
ones (size AA alkaline
batteries or charged size
AA nickel-hydride
batteries).
It could cause re, injury,
or failure.
Remove the batteries
when the product is to
be stored for an
extended period of time.
Failure to do so may cause
liquid leak and burst.
Do not place the
product where it gets
hot (near the re, near
the heater, or under the
scorching sun).
Fire, burn, or failure
may occur.
Do not push nor rub
the display and
operation panel with
hard or sharp objects.
Injury or failure may
occur.
Do not apply organic
solvent to clean the
product.
Fire, electric shock, or
failure may occur.
Do not use nor store the
product exposed to
direct sunlight, dust,
and/or high
temperature/humidity.
Fire or failure may occur.
• As the START and up/down buttons adopt electrostatic capacity switches, they may
not react when operated by a wet hand or through a thick glove.
Caution
Failure to properly handle the product may lead to injuries or damages.
Caution
Indicates what must NOT be done to use the product.
Prohibited
Caution
This product is designed for ATP Swab Test. Do not use this product for any other use.
Please read carefully for proper usage of the product.

7 8
3Setup
• Do not swing the product holding the strap.
Failure to do so may cause malfunction or poor precision for measurements.
Attach the strap as shown below.
Do not apply too much
force to the stand
and/or measurement
chamber cover, or move
the product while they
are open. The stand
and/or the
measurement chamber
cover may be damaged.
Do not drop nor apply
excess impact.
Failure to do so may
cause malfunction or
poor precision for
measurements.
Perform measurement
in upright position.
Otherwise failure or low
measurement precision
may occur due to
reagent leakage.
Do not move the
product during
measurement.
Otherwise measurement
error may occur.
Be sure to remove the reagent after measurement.
Failure to do so may lead to liquid leak.
Do not use nor store the product in locations subject to
large variations in temperature.
Do not use nor store the product in locations directly
exposed to wind from air-conditioning equipment.
Allow the product to stand for 30 minutes or longer at
room temperature before use when the product is moved
from a hot or cold location.
Otherwise measurement error may occur.
[About disposal]
Conform to disposal regulations established by your local government when disposing
of the product and accessories.
3-1. Prepare the product
3-1-1. How to attach the strap
Press "PUSH" to deploy the stand.
To close the stand, press the lower end of the stand to the original position.
3-1-2. How to use the stand
Caution
• Do not hold the product while the stand is open.
Otherwise the stand may be damaged.
For proper use
Precautions for measurement
Caution

9 10
Battery holder and Bluetooth ON/OFF switch are located inside the battery cover.
The factory shipment setting of the Bluetooth ON/OFF switch is OFF.
To link the Application with a smartphone and/or a tablet, set the Bluetooth
ON/OFF switch ON.
Connection with a smartphone, tablet, and/or PC allows automatic
synchronization of time and date and timestamping of measurement data.
Press "PUSH" to deploy the stand.
Press the mark on the battery cover to remove the cover.
Insert two new size AA alkaline batteries or two charged size AA nickel-hydride
batteries, paying attention to polarities.
Attach the battery cover again.
3-1-3. How to insert batteries
3-1-4. Bluetooth ON/OFF switching
To open/close the battery cover
• Radio frequency bands and communication methods that can be used are dened for
each country. In some countries, registration of wireless devices may be mandatory.
Refer to the website below for countries where Bluetooth can be used.
http://biochemifa.kikkoman.co.jp/e/support/dl/smart
In a country not listed below, set the Bluetooth switch OFF.
• Bluetooth cannot be used to connect to a PC. Please use the provided USB cable.
Caution
Place the batteries
Replacement of batteries
5 seconds after remaining battery amount is displayed
with low battery, the power is automatically turned o.
Replace the batteries.
After removing the batteries, the clock count
continues for 60 seconds.
Please replace the batteries within 60 seconds.
If Bluetooth is not used, slide the Bluetooth ON/OFF switch to OFF.
The Bluetooth is OFF unless Bluetooth ON is indicated on the display unit.
• Do not mistake the polarities of batteries.
• Do not mix batteries of dierent manufacturers or models, or new and used batteries.
• Do not use an alkaline battery after its validity date has expired.
• Follow the instruction manual for the batteries used.
• Size AA batteries back up the clock of the product. In cases when the batteries are
dead or when the batteries are removed while the power is on, the clock may be
initialized. In this case, adjust the clock.
• Conform to disposal regulations established by local governments when disposing of
batteries.
• Remove the batteries when the product is to be stored for an extended period of time.
Failure to do so may cause liquid leak and burst.
ONOFF #0004
Caution
Bluetooth ON/OFF
switch
Battery holder

11 12
Connecting the product to a smartphone, tablet, and/or PC allows storage of
measurement data in the cloud for measurement evaluation, graph generation, and
sharing by multiple smart devices.
Connection to smartphone and/or tablet
Connection to PC
Pass/fail of
measurement data can
be easily understood
Pass rate of past
measurement data can be
understood at a glance
Sharing results by
multiple smart devices
using cloud
Installing the Application
Initial connection between smartphone and/or tablet and the product
3-2. Preparation for the Application and Software
3-2-1. Application installation for connection to
smartphone/tablet (pairing)
3-2-2. PC software/driver installation for connection to PC
What you can do with the Application and Software
3-2-1. Application installation for connection to smartphone/tablet
(pairing)
<Use Environment>
Supported OS and model (as of Sep. 2018)
Smartphone or tablet with Android 5.x or later, or iOS 10.x or later.
Turn ON the Bluetooth of the smartphone
or tablet.
Run the Application and follow the
instructions on the screen to set up.
On the device connection screen shown,
turn on the power of the product.
If you use the Application for the rst time,
please register.
If you have ID and password, type them in
to log in.
The application is free of charge.
Download the Application through QR code
or URL to the smartphone or table.
http://biochemifa.kikkoman.co.jp/e/
support/dl/smart
• Communication fee may be charged by downloading the application.
Caution
Enter your email address
Forgotpassword
Log in
Sign up
Enter your password
Measurer : User Name
Test date :2019.01.23.09:00
Bench mark value 1 (Pass) 200
Bench mark value 2 (Caution) 400
Pass
kitchen knife
Result User ID Pass rate
Factory A
Factory B
Factory C
Factory D
Factory E
Pass rate (Factory E)

Connect Lumitester
Select the Lumitester to connect. If the Lumitester was connected
before, you can select it from the list of completed pairings.To connect
a new Lumitester, update the unconnected Lumitesterand select one.
Paired Lumitester
#0004
BLE
13 14
Select the product's serial number on the
application screen.
It allows automatic synchronization of time
and date and timestamping of measurement
data.
When the connection is established, the
product displays BLE on the status indicator.
The Application displays the Home Screen
and the smartphone/tablet and the product
are ready to use.
• While the communication distance using Bluetooth technology is approximately
up to 10m, it may vary due to obstacles (e.g. human body, metal, wall) and/or
radio wave conditions.
• Bluetooth communication can be used with this product only with the dedicated
application.
For details of the Application, refer to Help.
To connect the 2nd and subsequent smartphones and/or tablets, refer to "5. Product
Setup" "5-1. BLE Pairing Mode (Connection to 2nd or later smartphone/tablet)"(
P25).
Caution
Connection between smartphone and/or tablet and the product
for the 2nd time onward
On the Application's Home Screen, open
the menu.
Select the icon to display the connection
screen with the product.
Press and hold the product's Power button
for a while.
When "Lumitester" is displayed, it is ready for
measurement after countdown.
When the connection is established, the
product displays BLE on the status indicator.
When the application displays the Home
Screen the smartphone/tablet and the
product are ready to use.
The Application screen shows the serial
numbers. Selecting a serial number of a
product you wish to connect starts
connection.
#0004
BLE
Connect Lumitester
Select the Lumitester to connect. If the Lumitester was connected
before, you can select it from the list of completed pairings.To connect
a new Lumitester, update the unconnected Lumitesterand select one.
Paired Lumitester

15 16
Download the ZIP le of Lumitester from our website or the following URL.
http://biochemifa.kikkoman.co.jp/e/support/dl/smart
Use your unzip application to deploy the ZIP le.
Run (double-click) "setup.exe".
The installer program starts.
Click "Next".
Check the installation destination folder (initial setting: Program Files). If you wish
to install the Software in a folder other than this, click "Browse" and specify the
installation destination, and click "OK". Click "Next".
Read the Software License Agreement, and click "I agree" then "Next".
When the installation is ready to start, click "Next".
When the installation is complete, click "Close".
The application icons are generated on the desktop and the Start menu.
Software Installation
Run the Software and follow the instructions on the screen to set up.
If you use the Application for the rst time, please register.
If you have ID and password, type them in to log in.
On the Home Screen, connect the product and your PC via the USB cable.
PC-product initial connection and driver installation
• If an unknown issuer warning appears during installation, click "OK" to proceed.
Caution
Preparation of Software installation
3-2-2. PC software/driver installation for connection to PC
If you have other programs running, close all of them.
If you are using other USB devices, disconnect all of them.
Do not connect the provided USB cable until instructed to do so.
If you have "Lumitester" already, uninstall it before installation.
<Use Environment>
Supported OS and model (as of Sep. 2018)
PC or tablet with Windows 7 (32-bit/64-bit) or Windows 10 (32-bit/64-bit)
installed.
• This Software allows data transfer data from the product to your PC and set up
various measurement conditions from your PC to the product. Do not use this
product for any other application.
• Insert the batteries to the product before connecting it with a PC. Without the
batteries, the product may not start up.
• Read the Instruction Manuals of your PC, before installing this Software.
• Disconnect the product from the PC before starting up or shutting down the
operating system. If you start-up, shut down, or restart your PC while the PC is
connected, the operating system may not start up or shut down properly, or the
product may not be recognized correctly.
• Connect the product with the PC by using the provided USB cable.
Since polarities may dier between USB cables, using a USB cable other than the
provided one may cause the malfunction of the product.
• This Software is designed to be used alone. Please note that if you use this
Software in conjunction with other applications, we cannot guarantee proper
operation.
• Do not disconnect the USB cable while data is being loaded or written. It may
result in malfunction or data corruption.
• Connect the product directly to the USB port of the PC. Using a USB hub may
cause incorrect operation.
• When connecting the product to the PC, use the USB port in which the USB driver
has been installed. It is necessary to install the USB driver for each USB port.
In rare cases, the product may not be recognized even after connection to a USB
port. In this case, disconnect the USB cable and then reconnect it.
Caution

17 18
#0004
USB
When the USB cable is connected, "USB"
appears on the full screen of the display
unit. You cannot operate any button at this
time.
The driver installation automatically starts.
When the connection is complete, the
screen displays the serial number of the
product on the display unit.
"Lumitester" is displayed and it is ready for
measurement after countdown.
The product displays USB on its status
indicator.
It allows automatic synchronization of time
and date and timestamping of measurement
data.
• For details of the software, refer to Help.
• Use the USB cable provided for the product.
• Insert the batteries before connecting the product with a PC.
• The display panel shows "USB" and key operation is disabled while the product is
connected to a PC. When you pull out the USB cable, the display "USB" is cleared
and the power is turned o.
• Close the USB cover securely when the USB cable is not connected.
Caution
USB
Re-connection to PC once connected
#0004
USB
Double-click "Lumitester.exe" to run the
Software.
Follow the instructions of the Software to
display the Home Screen.
On the login screen, type in your ID and
password to log in.
On the Home Screen, connect the product
and your PC via the USB cable.
When the connection is complete,
"Lumitester" is displayed and it is ready for
measurement after countdown.
The product displays USB on its status
indicator.

19 20
Take out the reagent from the refrigerator (2 to 8°C). Allow the reagent to stand at
room temperature.
4-1. Prepare the reagent
• Do not use cold reagent. Failure to do so may result in lower measured value.
Caution
4-2. Measurement procedure
When the buzzer sounds with the reagent warning blinking, open the
measurement chamber cover and remove the reagent.
When the buzzer sounds with the measurement chamber cover
warning blinking, close the measurement chamber cover.
Press and hold the product's Power button
for a while.
"Lumitester" is displayed and it is ready for
measurement after countdown.
Caution
4Operation Method
#0004
Lumitester 4
Remove the swab stick of the reagent.
Soak the cotton swab in tap water (washing
water) and swab the test target.
Put the swab stick back into the main tube.
And then put the tip of the tube on your
hand and push the swab stick downwards
to break the capsule in the tube.
Shake the whole reagent tube repeatedly so
that all remaining liquid in the capsule falls
into the reaction tube and dissolves the
reagent in the tube.
• If a disinfectant such as alcohol remains on the surface swabbed, it may interfere
with the measurement. In this case, clean the surface with water or remove the
disinfectant with paper towels before swabbing the surface.
Caution

21 22
Open the measurement chamber cover and
place the reagent in the chamber.
Remove the reagent from the measurement
chamber.
Close the measurement chamber cover and
press START.
The measurement starts. The measurement
result is displayed after countdown.
When the measurement is complete, press and hold the Power button to turn o
the power.
You can transfer measurement data from the product to a smartphone and/or
tablet to manage the measurement targets.
• The measurement range is 0 to 999999. If the measured value exceeds 999999,
999999 blinks on the display.
• Data numbers are #0001 to #2000. Data numbers are increased by one for every
measurement. When memory number surpasses #2000, the data number
becomes #0001 and the data are overwritten.
Caution
Caution
• If the signal is unstable during measurement, it may take a longer time.
• Perform measurement in upright position. Liquid leakage may occur and it may
cause malfunction or interfere with accurate measurement.
When the reagent warning blinks and the buzzer sounds after pressing
START button, no reagent has been placed in the measurement chamber.
In order to cancel the measurement, press START button again.
When the reagent warning blinks and the buzzer sounds after
measurement, the reagent has been placed in the measurement chamber.
Open the measurement chamber cover and remove the reagent.
When the buzzer sounds with the measurement chamber cover warning
blinking, close the measurement chamber cover.
• AUTO ZERO calibration is performed after the measurement is complete and the
measurement chamber cover is closed. In case of large variations in temperature,
allow an interval of 10 seconds or longer before starting the next measurement.
• When the product has not been operated for 10 minutes, the power is automatically
turned o.
• An error is notied by sound if the reagent is not removed from the measurement
chamber.
Be sure to remove the reagent after measurement. Failure to do so may cause
malfunction or interfere with accurate measurements.

23 24
Press Up or Down button to view past data.
Pressing the Up button shows data of the previous
memory number (old data). Pressing the Down
button shows data of the next memory number
(new data).
Press and hold the Power button. When
"Lumitester" is displayed and it is ready for
measurement after countdown.
4-3. Measurement data check
• The measurement data are automatically saved up to 2000 items and can be checked
by the product.
• Connection with a smartphone, tablet, and/or PC allows automatic loading of
measurement data to save in the cloud.
• After loading the data and selecting a measurement target for the measurement data,
pass/fail judgment of the data can be performed.
5 Product Setup
You can congure the product settings.
Press and hold the Power button for 5 seconds or longer and go to the setup
menu.
Pressing the Up or Down button switches the setting item.
Select a setup item and press START.
Pressing the Power button terminates the setup and the screen returns to the
measurement screen.
Setup Menu
• Normally memory data is not erased while the power is o. However, when the
measurement is continued with low battery level, or when the batteries are removed
while the power is on, the memory data may be erased. We are not responsible for
damage caused when memory data is erased.
If the number of data items exceed 2000, data are overwritten from the oldest one.
Use the Application or PC Software to save data to a smartphone, tablet, and/or PC, or
clear data as needed.
#0004
2017/11/20 13:15
#0003
1234
#0002
999999
Caution
BLE Pairing Mode
Connected 1
Temperature
Compensation
Initialization
No
Yes
(Temperature compensation setting)
(Self-diagnosis)
Connection to 2nd or later
smartphone/tablet (Restoration to factory setting)
Self-check
(Switch sensitivity adjustment)
Contrast
10
(Display contrast adjustment)
Switch
sensitivity
3
(Product information)
Information
1901 05313 0001S
Ver.FW100 BLE100
(Measurement data deletion)
Data Clear
No
Yes

25 26
BLE Pairing Mode
Connected 1
Press and hold the Power button for 5 seconds or
longer and display the Setup screen. Then press
Up/Down button to select "BLE Pairing Mode" and
press START.
The number after "Connected" indicates the
number of smartphones and tablets already
registered.
If the number is 8, you can select "All Clear" only.
After selecting, press START to show the screen
shown below.
Press Up/Down to select either "New Connection"
or "All Clear", and press START.
When "New Connection" is selected and START is
pressed, the screen shown below appears.
When the pairing is complete or countdown is
nished, the screen returns to the Setup screen.
The product displays BLE on its status indicator if a
smartphone or a tablet is connected.
5-1. BLE Pairing Mode (Connection to 2nd or later smartphone/tablet)
You can perform pairing between smartphone and/or tablet and the product.
Pairing can be performed for one product with up to 8 smartphones or tablets.
Note that you cannot connect to more than one smartphone or tablet at the same
time.
The reagent has a characteristic in which luminescence varies depending on the
temperature.
The temperature compensation is a function that corrects the temperature
characteristic of the reagent by measuring the temperature of the product.
The temperature compensation is OFF by default.
The range of the temperature compensation is +10 to +40°C.
5-2. Temperature Compensation (Temperature compensation setting)
Press and hold the Power button for 5 seconds
or longer and display the Setup screen. Then
press Up/Down button to select "Temperature
Compensation" and press START.
Select availability of temperature compensation
using Up/Down buttons, and then press START.
Selecting "On" displays the temperature
compensation status.
• Even if the temperature compensation is ON, the error code "E047" or "E048" is
displayed at the temperature 40°C or higher or 10°C or lower, respectively, during
measurement countdown, and the measurement result without temperature
compensation is displayed with the error "E".
• If the temperature compensation is ON, the measurement time at +10 to +13°C is 20
seconds.
Allow the product and reagent to stand for 30 minutes or longer at room temperature
before use.
Do not use the product in locations subject to large variations in temperature. Failure to
do so may cause poor precision for measurements.
When "All Clear" then "Yes" is selected, all the registered smartphones will be deleted. In this
case, you must delete the registration of the product on which you performed "All Clear".
BLE Pairing Mode
Please Connect
60
Temperature
Compensation
BLE Pairing Mode
Connected 1
New Connection
AllClear
Temperature
Compensation
On
Off
Temperature
Compensation
On
Off
Caution
Caution

27 28
Press and hold the Power button for 5 seconds or
longer and display the Setup screen. Then press
Up/Down button to select "Self-check" and press
START.
Press START to start the self-check.
The check result is displayed after countdown. If "OK"
is displayed, the result is normal. Press START to return
to the Setup screen.
If "NG" is displayed, clean the measurement chamber.
Press START to go to the Cleaning screen.
5-3. Self-Check (Self-diagnosis)
Keep the measurement chamber clean. Failure to do so may cause poor precision for
measurements.
The self-check is a function to conrm the degree of contamination in the
measurement chamber.
The temperature range of the self-check is +20 to +30°C.
To perform cleaning of the measurement
chamber, press START then "Yes".
If "No" is selected, the screen returns to the
Setup screen.
Open the measurement chamber cover if
closed.
Opening the measurement chamber cover
starts countdown and the interior of the
measurement chamber emits light.
Clean the measurement chamber.
Maintenance of measurement chamber
1. Thoroughly wipe the locations that emit light
in the measurement chamber with the
provided cleaning brush soaked with
ethanol.
2. Close the measurement chamber cover.
To make sure that the measurement chamber
is clean, start the self-check steps from
again.
• If the temperature error is displayed, self-check is aborted. Turn the power o once,
and allow the product to stand for 30 minutes or longer at room temperature before
self-check.
• If "NG" is still displayed even after cleaning, check the model and the serial number
axed inside the battery cover, and then contact the dealer or us.
• Do not pour ethanol into the measurement chamber.
• Do not apply ethanol to any part except for the measurement chamber.
• Do not use the product until it dries.
Self-check
Please START
Self-check
Self-check
10
Self-check
NG
Please Cleaning
Please Cleaning
Self-check
Please Cleaning
No
Yes
Caution
Caution

29 30
Press and hold the Power button for 5 seconds or
longer and display the Setup screen. Then press
Up/Down button to select "Switch sensitivity" and
press START.
Press Up/Down buttons to adjust the switch
sensitivity.The adjustment range is 1 to 10.
Pressing START adjusts the sensitivity and returns to
the Setup screen.
Press and hold the Power button for 5 seconds or
longer and display the Setup screen. Then press
Up/Down button to select "Contrast" and press START.
Press Up/Down buttons to adjust the contrast. The
adjustment range is 1 to 10.
Pressing START adjusts the sensitivity and returns to
the Setup screen.
5-4. Switch Sensitivity (Switch sensitivity adjustment)
You can adjust sensitivity of START and Up/Down buttons.
5-5. Contrast (Display contrast adjustment)
You can adjust the contrast of the display panel.
Press and hold the Power button for 5 seconds
or longer and display the Setup screen. Then
press Up/Down button to select "Information".
Press and hold the Power button for 5 seconds
or longer and display the Setup screen. Then
press Up/Down button to select "Data Clear"
and press START.
Select Yes using Up/Down buttons, and press
START. All the past measurement data will be
deleted.
5-6. Information (Product information)
You can view product serial number, Software version (Ver.FW), and Bluetooth software
version (BLE).
5-7. Data Clear (Measurement data deletion)
You can delete all data.
Data Clear
No
Yes
Switch
sensitivity
3
Switch
sensitivity
3
Information
1901 05313 0001S
Ver.FW100 BLE100
Contrast
10
Contrast
10
Data Clear
No
Yes

31 32
Press and hold the Power button for 5 seconds or
longer and display the Setup screen. Then press
Up/Down button to select "Initialization" and press
START.
Select Yes using Up/Down buttons, and press START.
5-8. Initialization (Restoration to factory setting)
Time and date, past measurement data, and Bluetooth registration are deleted and the
product is reset to the factory shipment status. The calibration data are reset to the
factory shipment status.
The time and date cannot be set with this product alone. To set the time and date, an
application-installed smartphone/tablet or software-installed computer must be
connected.
The time and date can then be set automatically.
6-2. Maintenance of measurement chamber
If the reagent is spilled in the measurement chamber, clean the measurement
chamber.
In addition, clean the measurement chamber approximately once every six
months.
Perform self-check as needed. For self-check, refer to "5-3 Self-Check" (P27).
Turn the power o.
Open the measurement chamber cover.
Thoroughly wipe the bottom and the side of the measurement chamber with
the provided cleaning brush soaked with ethanol.
Close the measurement chamber cover.
6 Maintenance
6-1. Maintenance of the main body
If the product becomes contaminated, wipe with a dry cloth or soft paper such as
tissue paper.
If the product becomes heavily contaminated, wipe with a soft cloth soaked with
rubbing alcohol or diluted mild detergent solution.
• Do not pour ethanol into the measurement chamber.
• Do not apply ethanol to any part except for the measurement chamber.
• Do not use the product until it dries.
• Do not spill liquids, reagents, organic solvents, etc. over the product.
If any liquid is spilled on the product, wipe the liquid o immediately, remove the
batteries, and allow the product to dry for 24 hours or longer indoors.
Initialization
No
Yes
Initialization
No
Yes
Caution
Caution

33 34
5 seconds after the remaining battery level displays
low battery, the power is automatically turned o.
Replace with new batteries.
The clock count continues for 60 seconds after
removing the batteries. Please replace the batteries
within 60 seconds.
Press "PUSH" to deploy the stand.
Remove the battery cover.
Insert two new size AA alkaline batteries
or two charged size AA nickel-hydride
batteries, paying attention to polarities.
Replace the battery cover.
6-3. Replacement of batteries 7 Troubleshooting
Error code displays for indicating operation mistakes and problems.
When abnormality is observed, turn o the power immediately,
and remove the batteries as soon as possible.
Disconnect the USB cable if being used, and then remove the
batteries.
When abnormality is observed such as malfunction, burning
smell, fuming etc., there is a danger of re and burst. Make sure
that fumes are extinguished, and contact the dealer or us. Never
repair the product by yourself, as this is very dangerous.
Warning
• Do not mistake the polarities of batteries.
• Do not mix batteries of dierent manufacturers or models, or new and used batteries.
• Do not use an alkaline battery after its validity date has expired.
• Follow the instruction manual for the batteries used.
• Size AA batteries back up the clock of the product. When the batteries are dead or
removed while the power is on, the clock may be initialized. In this case, adjust the
clock.
• Conform to disposal regulations established by local governments when disposing of
batteries.
• Remove the batteries when the product is to be stored for an extended period of time.
Failure to do so may cause liquid leak and burst.
Caution

35 36
Turn the power o. Allow the product to
stand for 30 minutes or longer at room
temperature before use when the
product is moved from a hot or cold
location.
Turn the power o. Allow the product to
stand for 30 minutes or longer at room
temperature before use when the
product is moved from a hot or cold
location.
Turn the power o once, and then turn it
on again.
Turn the power o. Allow the product to
stand for 30 minutes or longer at room
temperature before use when the
product is moved from a hot or cold
location.
Turn the power o once, and then turn it
on again.
If the same error is still displayed,
perform "5-7. Data Clear" (
P30).
Shows error in measurement that
might be caused under locations
subject to large variations in
temperature.
Error codes Details Countermeasures
E021 to 029
Measurement error
E031 to 039
Calibration error
E040 to 049
Temperature error
E051-059
Product error
Shows error in calibration that might
be caused under locations subject to
large variations in temperature.
Turn the power o, move the product to
a location not exposed to direct sunlight.
Shows error in calibration that might
be caused under locations such as
exposure to direct sunlight.
Turn the power o, and move the
product to a location not exposed to
direct sunlight.
Shows error in measurement that
might be caused under locations such
as exposure to direct sunlight.
Close the measurement chamber cover
securely.
Shows error in measurement that
might be caused under locations such
as loose closure of chamber cover.
Turn the power o, and move the
product to a location with a temperature
of +5 to +40°C. When temperature
compensation is ON, use the product
within the temperature range (+10 to
+40°C).
Close the measurement chamber cover
securely.
Shows error in temperature that might
be out of range.
Shows error in calibration that might
be caused under locations such as
loose closure of Chamber cover.
Shows error in product that might be
caused by malfunctions of electric
parts.
Shows error in temperature that might
be caused under locations subject to
large variations in temperature.
The details of Error codes and countermeasures are described below.
When the error code is still displayed after countermeasures are taken, check the model and
serial No. axed inside the battery cover, and contact the dealer or us.
E011 to 019
Memory error
Turn the power o immediately and remove
the reagent. Wipe o water with the cleaning
brush, and dry the product with the
operation panel turned upward and the
measurement chamber cover opened. Allow
the product to stand at room temperature for
approximately 24 hours. Refer to "6-2.
Maintenance of measurement chamber"
(P32).
Turn the power o immediately and wipe
away water from the product. Detach the
battery cover, remove the batteries, and dry
the product with the operation panel turned
upward and the measurement chamber
cover opened. Allow the product to stand at
room temperature for approximately 24
hours.
Exit the control software, and then
disconnect the USB cable.
Perform "6-2. Maintenance of measurement
chamber" (P32).
Reinsert the batteries again.
Insert new batteries. Refer to "6-3.
Replacement of batteries" (P33).
This is not a malfunction.
Details Possible causes Countermeasures
Batteries are drained.
When the product has not
been operated for 10 minutes,
the power is automatically
turned o.
The USB cable is connected.
Key operation is not accepted
while the product is connected
to a PC.
The product is not operating
normally due to a malfunction
of electronic parts.
The measurement chamber is
contaminated.
Water has entered the
measurement chamber.
The surface of the product was
exposed to water.
Water hazard.
Measured
values seemed
to be lower.
Power is
automatically
turned o.
Power cannot
be turned o.
Power cannot
be turned on.
Shows error in memory data that
might be caused by the removal of
batteries while memory data is written
or read.
*****
E011
E031
XX.X°C
E041
E051
#0004
E021
7-1. List of Error Codes
The details of problems, causes, and countermeasures other than those for error displays are
described below.
When the normal condition is not recovered after the countermeasure is taken, when any
problem other than these occurs, or when requesting repairs, check the model and the serial
No. axed inside the battery cover, and then contact the dealer or us.
7-2. Other problems and countermeasures
Batteries are not inserted.
Batteries are drained.
Insert new batteries. Refer to "6-3.
Replacement of batteries" (P33).
Table of contents
Other Kikkoman Measuring Instrument manuals
Popular Measuring Instrument manuals by other brands

Primes
Primes BM+ 60 Original instructions

AESSEAL
AESSEAL FLOWTRUE FTP-50-145 Installation, operation & maintenance manual

Cirrus Research
Cirrus Research Optimus+ VNK quick start guide

Endress+Hauser
Endress+Hauser dosimass technical information

LaserLiner
LaserLiner RollPilot D12 operating instructions

Rae
Rae ToxiRAE Pro user guide