KING P 225 Power Force User manual

Model No: P 225 Power Force
Elektrikli Süpürge
Vacuum Cleaner
Kullanma Kılavuzu / Instruction Manual
P 225
Power Force
Elektrikli Süpürge
Vacuum Cleaner
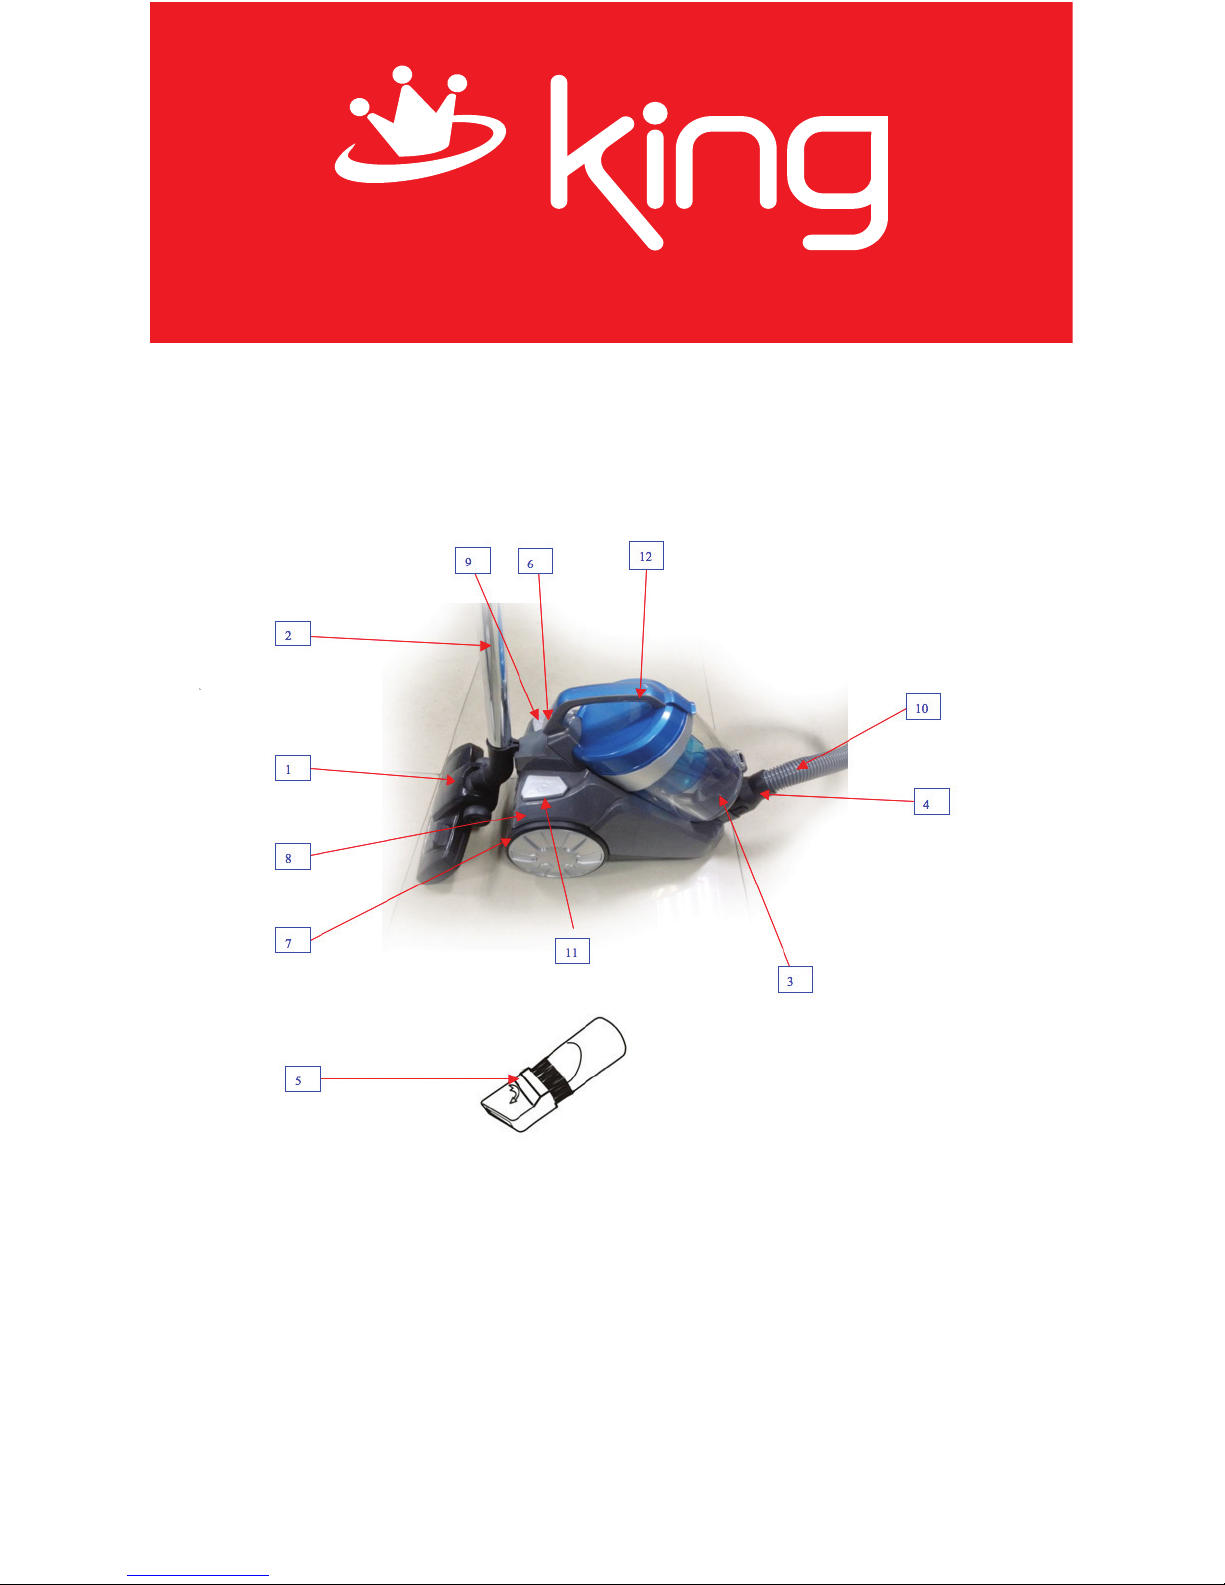
MAIN PARTS
1Brush tool
2Extending metal tube
3Dust chamber
4Hose connector
5Compressed brush
6Release button
7Back wheel
8Back wheel rubber
9Power button
10 Hose
11 Winding device button
12 Dust chamber and handle

SAFETY DIRECTION
1. For the first operation, it is advisable to read the manual carefully
before hand and keep it properly for future use.
2. Before the first operation, make sure the dust cup is properly installed.
3. Make sure the power supply is 220-240V 50Hz
4. Do not vacuum water and inflammable material
5. Do not vacuum burning material and ashes
6. Do not use the machine without a motor protection filter filled
7. Please change the dust cup/HEPA immediately when it is damaged.
8. Do not store or use the machine close to high temperature places
9. Do not let children use the machine in case of any danger
10. If abnormal noise, smell, smoke or any other failure or breakage was found
during the operation, you should turn off the switch and unplug it. Then contact
with your service center for repair. Do not repair it by yourself.
11. If the supply cord is damaged, it must be replaced by the manufactures or its
service agent or a similarly qualified person in order to avoid a hazard
HOW TO USE
ASSEMBLY BEFORE USE
Fig.1 shows the connection of the hose and the vacuum cleaner:
Put the hose connector in front of the vacuum cleaner .Then insert it into the inlet
hole and turn right. If you want to disassemble it, you can turn the hose connection
left and then pull it out.
Fig.2 shows the connection of the hose and the extending metal tube:
Hold the flexural connector of the hose and put it into the bigger hole of the tube.
Fig.3 shows the connection of the tube and the brush tool:
Put the metal tube into the hole of the brush and rotate it to fasten them.
Fig.4 shows how to check the winding of the power cord.
You can pull the power cord out of the machine and stop it when you see the
yellow mark. Make sure the red mark is not out. When your sweep is over, first turn

off the power, pull the plug out of the socket, and then push the winding device
button until the cord is completely in the machine.
Fig.5 shows the power button
Put the plug into the socket, push the power button to control the work of the
machine.
Fig.1 Fig.2
Fig.3 Fig.4
Fig.5

CLEANING OF THE DUST CHAMBER
The steps of the chamber cleaning:
1. As in Fig.6, hold the dust chamber and handle and push the release button.
2. As in Fig.7, take the dust chamber out of the machine.
3. As in Fig.8, put the dust chamber onto the rubbish bin, push the release button to
open the bottom of the dust chamber, and the dirt and dust will fall into the bin by
themself.
4. As in Fig.9, shut up the dust chamber for a circular use after your cleaning.
5. If the dust in the chamber is over the MAX line and you feel the suction force is
fallen down, please turn off the power and whirl the self-cleaning knob more than
two circles, so you will find the suction power return to the prime level.
Fig.6 Fig.7
Fig.8 Fig.9
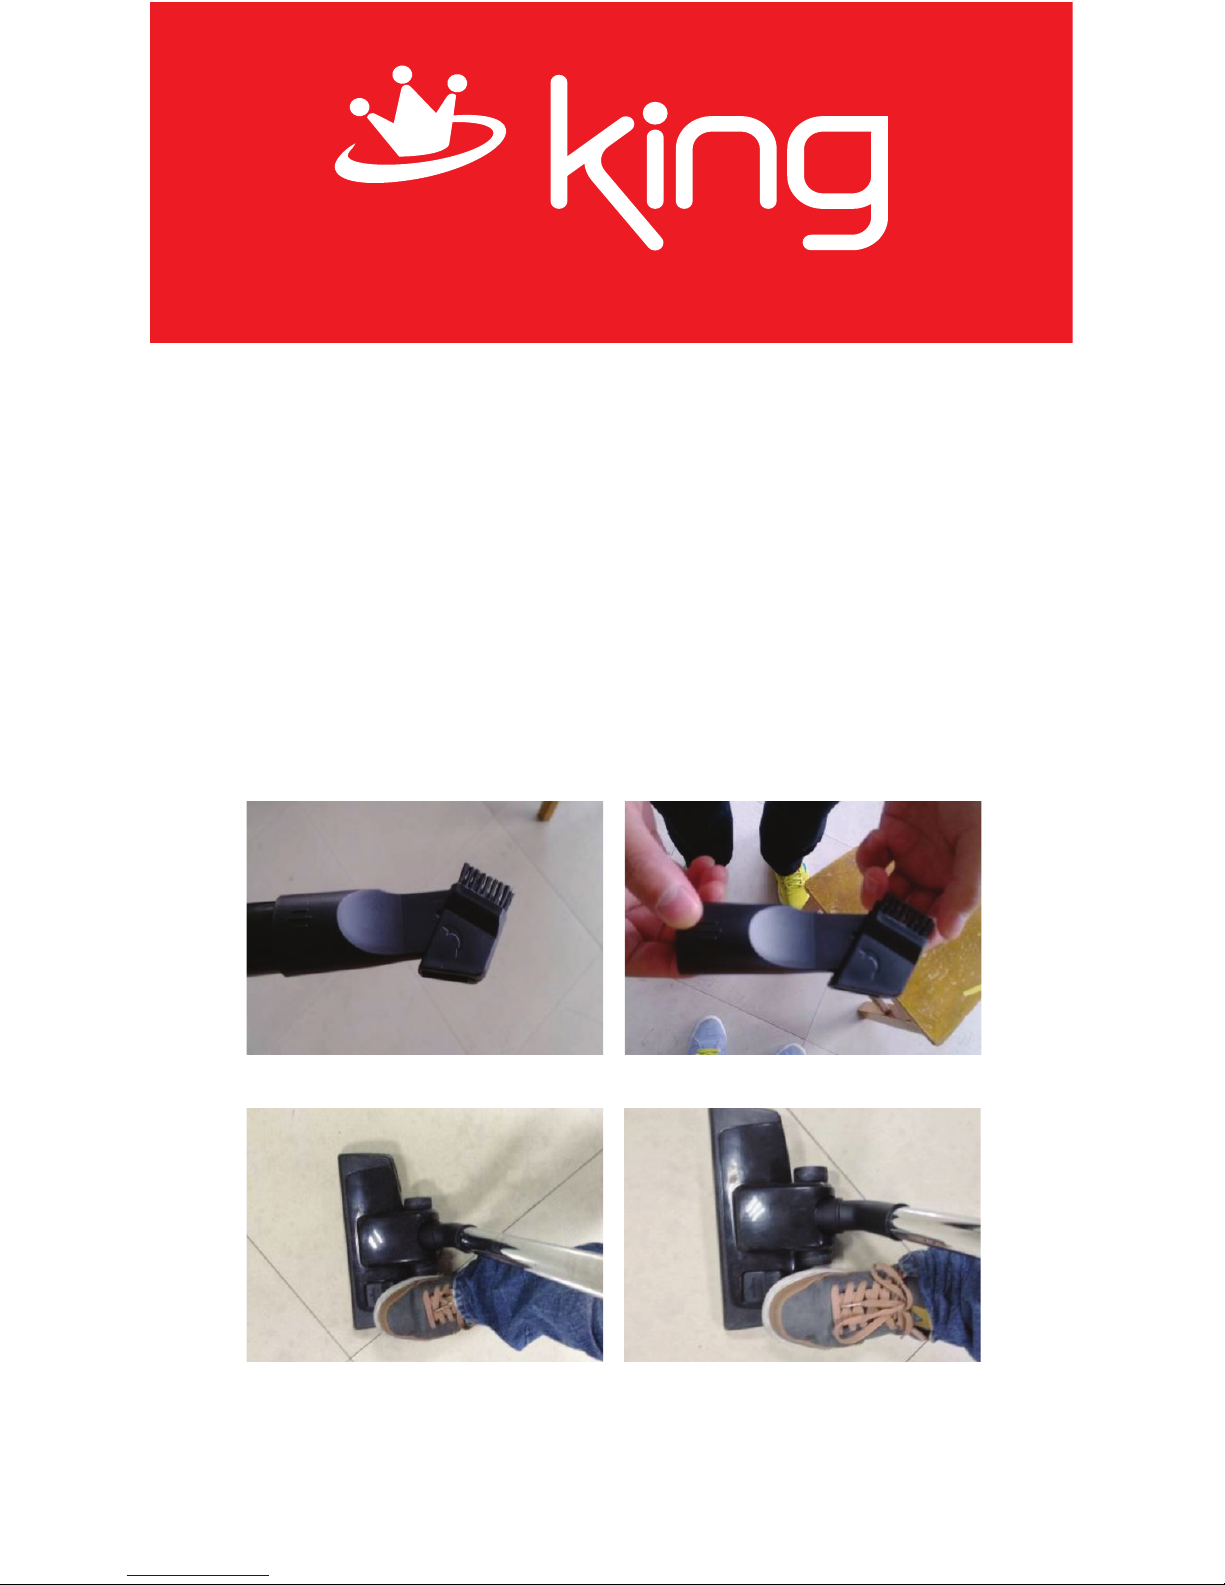
ATTACHMENTS
HOW TO USE THE ATTACHMENTS:
1. As in fig.10, you can use the compressed brush in the corner and the aperture.
2. As in fig.11, open the other side with bristles of the compressed brush as the
mark of an arrow to clean the sofa, the curtain and the dust on the ornaments.
3. As in fig.12, tread on the pedal of the brush tool to let the bristles out, and you
can clean the floor.
4. As in fig.13 , tread on the pedal of the brush tool again to put the bristles in, and
you can clean the carpet.
Fig.10 Fig.11
Fig.12 Fig.13

MAINTENANCE
HOW TO MAINTAIN
1. The filter should be cleaned twice a year, and when there is obvious dirt on the
filter, it is time.
2. You must fix the filter properly before running the vacuum cleaner.
3. The filter can't be cleaned in the washing machine or baked by the blower.
4. It will reduce the suction power and damge the motor if you use the wet filter.
5. Steps for maintenance:
1) As in fig.14, press the outlet lock to open the outlet board.
2) As in fig.15, get out the outlet filter.
3) As in fig.16, rotate the HEPA cover to separate it from the chamber cover
4) As in fig.17, get the HEPA cover
5) As in fig.18, get the HEPA and wash it.
6) Wash the HEPA cover, the HEPA assembly, the outlet sponge and the dust
chamber in the water without detergent and dry them before use.
7) Fix the HEPA assembly on the chamber cover and make sure three salient
cubes should be stuck in the grooves of the dust chamber.
8) Rotate the HEPA assembly in the direction of the mark on the chamber
cover.
9) Assemble the chamber cover assembly and the dust chamber according to
the mark outside.
10) Put the dust chamber assembly into the machine. And in this process, first
you should make the chamber in the right position and then press the handle
of the dust chamber, if there is a cluck it means the operation is successful.

Fig.14 Fig.15
Fig.16 Fig.17
Fig.18

PARÇALARI
1Yer fırçası
2Metal uzatma borusu
3Toz haznesi
4Hortum bağlantı yeri
5Küçük fırça
6Toz haznesi ayırma düğmesi
7Arka tekerlek
8Arka tekerlek koruyucu
9Çalıştırma düğmesi
10 Hortum
11 Kablo sarma düğmesi
12 Toz hazne kapağı ve tutma yeri

ÖNEMLİ EMNİYET TALİMATLARI
1. Cihazı ilk defa çalıştırmadan önce, bu kullanma kitapçığını dikkatlice okumanızı ve
gelecek kullanımlar için saklamanızı öneririz.
2. İlk defa çalıştırmadan önce toz haznesinin uygun bir şekilde yerine takıldığından
emin olunuz.
3. Prizin 220-240V 50Hz olduğundan emin olunuz.
4. Su ve patlayıcı maddeleri vakumlamayınız.
5. Yanan maddeleri ve külleri vakumlamayınız.
6. Cihazı üzerinde motor koruma filtresi takılı olmadan kullanmayınız.
7. Toz haznesi/HEPA hasara uğradığı zaman lütfen hemen değiştiriniz.
8. Cihazı yüksek ısı olan yerlerde muhafaza etmeyiniz veya kullanmayınız.
9. Herhangi bir tehlikeyle karşılaşmamaları için çocukların cihazı kullanmalarına izin
vermeyiniz.
10. Eğer çalışma esnasında anormal bir ses, koku, duman veya diğer hata ve
kırılmalar bulursanız, cihazı hemen kapatmalısınız ve fişini prizden çekmelisiniz.
Daha sonra tamiri için en yakın yetkili KING servisine başvurunuz. Kendiniz tamir
etmeye çalışmayınız.
11. Eğer ana kablosu hasara uğrarsa, en yakın yetkili KING servislerince yenisi ile
değiştirilmelidir.
KULLANIMI
KULLANIM ÖNCESİ MONTAJ
Şek.1 hortumun ve süpürgenin bağlantı şeklini gösterir:
Hortum bağlantı yerini süpürgenin ön tarafına koyunuz. Sonra giriş deliğinin içine
sokunuz ve sağa çeviriniz. Eğer ayırmak isterseniz, hortum bağlantı yerini sola
çeviriniz ve dışarı doğru çekiniz.
Şek.2 hortumun ve metal uzatma borusunun bağlantı şeklini gösterir:
Hortumun eğimli bağlantı yerini tutunuz ve metal borunun daha büyük olan deliğin
içine yerleştiriniz.
Fig.3 borunun ve yer fırçasının bağlantı şeklini gösterir: Metal boruyu fırçanın içine
yerleştiriniz ve bağlanması için çeviriniz.
Table of contents
Languages:
Other KING Vacuum Cleaner manuals


