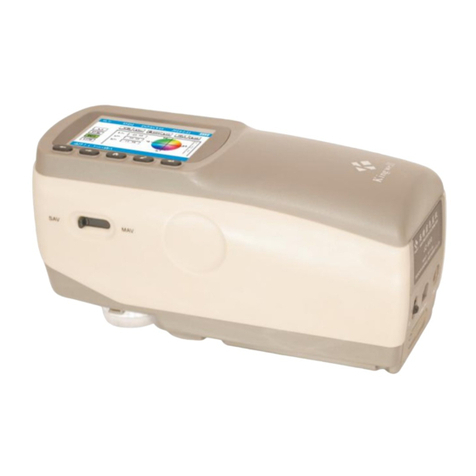
Kingwell JZ-300 User manual


1
CONTENTS
1. Summarize
1.1 Introduction ………………………………….. ……….. ……….. ……………...2
1.2 Feature ………………………………….. ……….. ……….. …. ………….......2
1.3 Range ..………………………….. ……….. ……….. ….. ……………………..2
1.4 Accessory ………………………………….. ……….. ……….. ……………….3
1.5 Condition …………………….. ……….. ……….. …. …. ……………………. 3
1.6 Note ………………………………….. ……….. ……….. …. …. ………….. . .3
2. Architectural feature and working principle
2.1 Architectural feature……………….. ………............................................... ..4
2.1.1 Instrument…………………………….. ……….. ……….. …………………… 4
2.1.2 Keyboard…………………………….. ……….. ……….. ….. ….. ……………4
2.2 Working principle …………………………….. ……….. ………………………5
3. Technical characteristic
4. Using the JZ-300
4.1 Turning the Power ON …………………………….. ……….. …………….. 6
4.2 Standard measured …………………………….. ……….. ……........ ……….. 7
4.3 Sample measured …………………………….. ……….. ……….. .. ………… 7
5. Function menu
5.1 Test mode …………………………….. ……….. ……... .. . ….. .. …………..8
5.1.1 Single mode …………………………….. ……….. ……….. .. ….. ................. 9
5.1.2 Average mode …………………………….. ……….. ……….. .. ….. ………… 9
5.2 Tolerance setup …………………………….. ……….. ……….. .. …………. .10
5.3 Color space…………………………….. ……….. ……….. .. ………..............11
5.4 PC communication …………………………….. ……….. ……….. .. .. …….. 11
5.5 Micro- printer …………………………….. ……….. ……….. .. .. . . .. .. ……..12
6. Other functions explaining
6.1 Stand by and wake up …………………………….. ……….. ……….. ...........12
6.2 Battery test …………………………….. ……….. ……….. .. .. ……….........12
6.3 Safety instruction …………………………….. ……….. ……….. .. .. ………..12
7. Software driver installation
7.1 Driver description …………………………….. ……….. …............................13
7.2 Connection theJZ-300…………………………….. ……….. ……….. .. .. …..13
7.3 USB installation …………………………….. ……….. ……….. .. .. ……….14
8. Software instructions
8.1 Driver description…………………………….. ……….. ……….. .. .. …… 15
8.2 Save and open…………………………….. ……….. ……….. .. .. …………..16
8.3 Standard managed …………………………………………………………..17
8.4 Tolerance judgment ..……………………………………………………………17
8.5 Print function ……………………………………………………………………. 17
8.6 Computer connection …………………………………………………………...17
9. Troubleshooting guide

2
1 Summarize
1.1 Introduction:
The JZ-300 is developed according to international CIE1931, 1976 and
other relevant standards and national standards, it is a new economic and
practical general colorimeter, we introduce the latest imported LED light source
and sensor from other countries, and it has stable, durable, the characteristics
of the economy.
The interface we design the menu type, because it is simple and easy to
understand. Our JZ-300 is not only widely used on Quality department about
the color difference, but also used on the school teaching, scientific research,
and color design.
1.2 Feature:
○Button & menu operation, easy to understand, reasonable price.
○Commonly used of two measurement modes: Lab&Lch, easy to switch mea-
surement.
○Automatically display the color difference between the sample and standard
sample, also display the color trend degree.
○The color difference software can analysis, exchange the color difference gr-
aph and data.
○The optional Micro-printer can output the color difference data in time.
1.3 Range:
Color matching in injection and quality control in production process
Color-difference detection and color-difference batch control in printing
process
Color-difference analysis of spray paint surface and electroplate surface
Color-difference of different areas of the metal treating surface
●Quality control in color difference in sample and the product
●Color difference inspection of batch products in outdoors
●On-line monitoring of color difference in production process

3
1.4 Accessory:
1.5 Condition:
●Operating temperature: 0 to 40°C,relative humidity 80% or less, no cond-
ensation
●Storage temperature:10 to 30°C, relative humidity 70% or less
●Do not store the JZ-300 in areas where with strong vibration, magnetic
field interference, corrosive medium and severe dust
1.6 Note:
□This instrument should use our own AC adapter and qualified AA battery
only, otherwise, the instrument may damage, battery leakage, fire and
even explosion.
□The instrument should not put on the high temperature environment lon-
gterm, this would cause instrument accuracy reduced and performance
fault.
□Do not use the JZ-300 in areas where dust, smoke, corrosive gases into
the instrument inside, it may cause the damage of instrument.
□Do not use the JZ-300 near equipment which produces a strong magnetic
field, it would cause data exception of instrument.
□The instrument belongs to precision instrument, other person is not allowed
to disassemble it except our company person, or if the instrument
damaged, we may not warranty it.
No.
Accessories name
Pieces
Remark
Standard
accessories
1
instrument
1
2
bag
1
3
AC adapter
1
4
USB cable
1
5
software
1
6
hard case
1
7
instruction
1
8
certificate
1
9
warranty card
1
Optional
accessory
10
micro-printer

4
2 Architectural feature and working principle
2.1 Architectural feature
2.1.1 Colorimeter
1 USB port 2 Micro- printer port
3 AC adapter port 4 Test key
5 Keyboard 6 Screen
7 On/off 8 Dust cap
2.1.2 Keyboard

5
2.2 Working principle
According to the light of tristimulus principle established by CIE, the
standard illuminant irradiates to the object surface, it would spread to the
micro-computer to calculation and analysis after the sensor receives the
reflected light information. The color space would display the digital color
data at the same time, and calculate the color difference between the sta-
ndard and sample, formula as follows:
△E* =[(△L*)2+(△a*)2+(△b*)2]1/2 △E*:The total color difference
△L* = L*Sample- L*Standard △L+ Whitish, △L- Blackish
△a* = a*Sample - a*Standard △a+ Reddish,△a- Greenish
△b* = b*Sample - b*Standard △b+Yellow, △b-Bluish
Basic judgment of Color-difference
Color-difference range
Basic judgment of Color-difference
0 - 0.25△E
Very small or none, exact match
0.25 - 0.5△E
Very small, acceptable match
0.5 -1.0△E
Small to middle, acceptable in some occasions
1.0 -2.0△E
Middle, acceptable in some specific occasions
2.0 -4.0△E
Large, acceptable in specific occasions
4.0△E
Very large, can not acceptable in most occasions

6
3 Technical characteristic
Technical parameters:
4 Using the JZ-300
Operating instruction of JZ-300(General colorimeter)
4.1 Turning the Power ON:
Insert 4 AA size batteries or connect the AC/DC adapter, and turn the
power ON in the side face, the JZ-350 would enter the operation interface after
a “ beep” tone, as shown below:
Illuminant/light system:
45/0
Measuring aperture:
Ø8mm
Display model:
L*a*b*、L*C*H*、∆E*ab、∆(L*a*b*)、∆(L*C*H*)
Operating language:
Chines or English
Measurement model:
Single mode, Average mode
Standard illuminant:
D65
Observe:
10°
Repeatability:
Standard deviation:within △E*ab:0.1
( When the white calibration plates is measured 30 times, and averaged)
Measurement spaceing
About 2 seconds
Power source:
4 AA-size battery or AC adapter
Operating temperature:
0-40℃(32-104℉);Relative humidity 85% or less
Size(WxHxD)
110 ×60 ×190mm
Weight
310g(Without batteries)
Standard Accessories
Bag, Protection cap, Software, AC adapter, USB cable,
Instrument, Hard case
Optional accessory
Micro-printer

7
4.2 Standard measured
When turn it on, the instrument would automatically enter the test interface,
the default mode, Illuminant and Color space is single mode, D65/10° and
L*a*b.
The measuring aperture should closely fit the measured object, then press
the ”Test” key to start standard test, as shown below:
4.3 Sample measured
Press the “Test” key to test sample after you enter the sample measured
interface, and it would show the color difference between the standard data
and sample data, if you have connected the micro-printer, press“ ▲”key to
print the current color difference.

8
5 Function menu
Press the “Menu” key to enter the function menu interface, four functions to
select, <<Test mode>>, <<Tolerance setup>>, <<Color space>>, <<PC
communication>>.
5.1 Test mode
Select the <<Test mode>> in Function menu and press “Enter” key to enter
the test mode interface, it has two modes to select: Single mode and Average
mode.

9
5.1.1 Single mode
It would enter the sampling test interface after you select the <<Single
mode>>, you can do sampling test directly, the default mode is Single mode.
5.1.2 Average mode
Now we are enter the average times interface, the Average mode is suitable
for testing uneven color and large areas surface. According to the actual
situation, we can press the arrow key to select the appropriate average times,
as shown below:

10
After select the desired average times, press the ”Enter” key to enter the
<<Average mode>> interface for testing.
Notes: The times and the sample measurement times is same, as shown
below:
5.2 Tolerance setup
Tolerance setup is setting the qualified color difference data, which should be
the maximum, allowable; after you setup, it would automatically determine if
the measured item is qualified or unqualified.
Select the <<Tolerance setup>>, press the “Enter” key to enter the tolerance
setup interface, the default data is 0.5, you can press arrow keys to adjust the
tolerance.

11
5.3 Color space selection
Here are two color spaces to select after you enter this interface, L*a*b,
L*c*h, you can choose the color space according to the situation, it would enter
the relevant color space test mode after you press ‘’Enter’’ key.
5.4 PC communication
The JZ-300 can connect the computer through our software, it would extend
more functions of the instrument.
Check the software instructions carefully about the function details of
the PC communication and computer connection.

12
5.5 Micro-printer to print
The Composite Key “▲” is the printer key, only the JZ-300 connects the
micro-printer and enters the test interface can you print out the test data, as
shown below:
Notes: We don’t provide the Micro-printer, you need purchase it in
addition.
6 Other functions explaining
6.1 Standby and wake up
In order to save the battery power, the JZ-300 would enter the standby state
of black screen if you don’t use it for 5 minutes. The instrument will wake up to
the previous interface for press any key.
6.2 Battery test
It would lead to the test data anomalies if the working battery has not
enough power , and the JZ-300 will automatically popup a prompt interface,
remind us to change the battery. Now we should change the battery
immediately, or it may affect the measure accuracy.
6.3 Safety instruction
If the JZ-300 would not use for a long time, disconnect the AC outlet to
prevent battery damage and corrosion the instrument. If it is DC power, also
need remove the battery, it may damage the JZ-300.

13
7 Software driver installation
7.1 Driver description
When you connect the computer for the first time, you must install the
JZ-300 USB driver provided by our company.
7.2 Connection the JZ-300
Enter the <<PC communication>> interface and select the PC
communication, it would appear the USB connection interface when you press
Enter key.
7.3 USB installation
□
1Put the CD to the CD-ROM, and the USB cable insert the USB port of
JZ-300, it would appear” Found new hardware”, as shown below,

14
□
2It would popup the dialog box.
□
3Click ‘’Next’’ to install, or install the specific location from the list.

15
□
4‘’Browse’’ to find the ‘’Drive file’’ in the CD-ROM directory, and click ‘’Next’’,
the installation wizard will automatically install the driver.
□
5Click ‘’Finish’’, the driver is installed.

16
8 Software instructions
8.1 Interface description
The main software interface has two parts: toolbar and 4 functions
1. Related information: you can set it in the software system, and it would
display it when you print.
2. Measurement interface: show the related data of the standard measured
and sample measured.
3. Batches of color-difference data sheet
4. Color-difference histogram: show the tolerance between the sample and
standard of every batch
8.2 Save and open
You can save the test data, and we have two saved formats to select:
1. Color-difference data file (*dat), you can callout the data in next
measurement.
2. Excel file(*.xls),you can edit and print it after you saved, but it can’t callout
again.
Notes: The file can only unfold after it saved.

17
8.3 Standard managed
Two measurement modes to choose: Single mode, Average mode
Single mode: suitable for measurement the color-difference comparison of one
position, uniform color
Average mode: suitable for measurement the large areas and the comparison
of uneven color
8.4 Tolerance judgment
We can set for the total color difference data of △E *ab, the numeric would
automatically determine whether the data meet the requirement according to
your tolerance range.

18
8.5 Print function
It would formation the measurement report after the data measurement
completed, and we have two output modes:
Single report: Output the color difference data of sample and standard in two
illuminant source modes.
Color-difference histogram: color-difference analysis of the summary report.
8.6 Computer connection
Click the button to check the connection between JZ-300 and computer.
Note: After the JZ-300 connected with the PC, press the ‘’Connect’’ can
communication with the computer, and you can press ‘’Connect’’ to
reconnection if it interrupt, no need to reopen the program.

1
9 Troubleshooting guide
Condition
Checkpoint
Recommended action
1、can not startup
A、no power of the battery
A、Change the battery.
B、wrong polarity
B、
Insert the correct polarity.
2、test data anomalies
A、
not close contact, or it m-
ay shake when measuring
A、Close contact of the obj-
ect surface, measuring sm-
oothly.
B、the object is too thin, or it
has other color in reverse
side
B、Pad the whiteboard rev-
erse side or pad some white
measurement.
C、uneven color of the obje-
ct, or color mixed
C、Avoid the uneven color
position, or take the average
measurement.
D、no power
D、Change the battery or
use the DC adapter
3、Crash of the JZ-300
A、the key pressed too fast
A、It need pause when
pressed the button.
Table of contents
Other Kingwell Measuring Instrument manuals
Popular Measuring Instrument manuals by other brands

Stocks AG
Stocks AG MM 117A Installation, Calibration and Operation

Geovent
Geovent Airbox Lite instruction manual

Colnatec
Colnatec Eon-LT Quick reference guide

Hydac
Hydac SMU 1000 operating manual

PCB Piezotronics
PCB Piezotronics 350B24 Installation and operating manual

BRUEL & KJAER
BRUEL & KJAER 4220 Instructions and applications