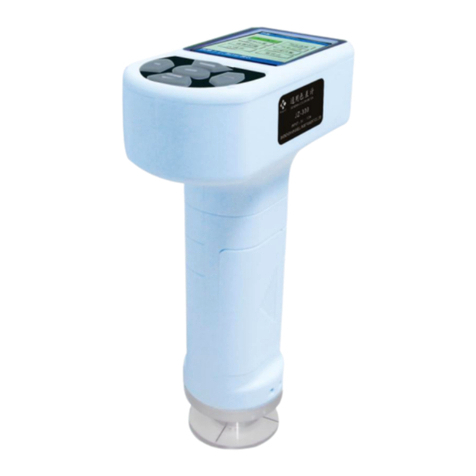
Kingwell 600 Series User manual

Instruction For Use
High
High Precision
Precision Colorimeter
Colorimeter
Professional
Professional color
color
and
and environmental
environmental testing
testing
instruments
instruments

1、Summarize
C O N T E N T S
1.1
Introduction……………… … … … … … … … … … … … … 1
1.2
Feature…… … … … … … … … … … … … … … … … … … …
1
1.3
Range……………… … … … … … … … … … … … ………
1
1.4 Accessory… … … … … … … … … … ………………………
2
1.5 Condition…………………………………………………… 2
1.6
Note… … … … … … … … … … … … … … … … … … … … …
2
2、Architectural feature and working principle
2.1 Architectural
feature… … … … … … … … … … … …… … … 3
2.2 Working principle…………………………………………… 4
3、Technical characteristic…………………………………… 5
4、How to use the instrument
4.1 Power on and calibration… … … … … … … … … … … … …
6
4.2 Standard measured………… … … … … … ………… ………
6
4.3 Sample measured…………………………………………… 7
5、Function menu
5.1 PC-USB……………………………………………………… 8
5.2 Tolerance………………………………… … …… … ………
8
5.3
Test……………… … … … … … … … … … … … …………

9
5.4 Time……………… … … … … … … … … … ………………
9
5.5 Rest……………………… … … … … … … … … … … ……
9
5.6 Menu……………………………… … … … … … … ………
10
5.7 Estimat
e… … … … … … … … … … … … … … … … ……… 10
5.8 Language……………… ………… … … … … … … … ……
11
6、Other function introduction
6.1 Standby and wake up………………………………………… 11

6.2 Power function……………………………………………… 11
6.3 Safety instruction…………………………………………… 11
6.4 Powder test tube……………………………… … … … … ……
11
7、USB connection & computer driver installation
7.1 Driver description…………………………… … …………… 12
7.2 Instrument
connection… … … … …… … … … … … … … … 12
7.3 USB
installation…… … ……… … … … … … … … … … … … 12
8、Troubleshooting guide……………… … … … … … ………
15

1
1. Summarize
600 series high precision colorimeter
JZ-600
High precision
1.1 Introduction:
JZ-610
Small-caliber
JZ-630
Large-caliber
JZ-650
Multifunction
This high precision colorimeter is developed and produced according to
the international standard of CIE and GB. By adopting the latest 8/d optical
configuration and equipped with sensor of high sensitivity. It has a high
reproducibility and stability. With related accessories, the instrument can
make accurate measurement for all kinds of shape surface, pulp and powder.
Now the colorimeter has more cost-effective and comprehensive functions.
1.2 Features
Professional streamline design which will better suit the body mechanics, it
also makes the instrument look more high-end and easier to operate.
We are the first supplier who adopts the small- large caliber measurement sh-
ift switch in China which will make the measurement data with different caliber
more advanced.
Comply with the international general color detection standard which will ful-
fill the demand of different industries.
The latest design with small-caliber can measure not only even smaller app-
earance but also arc-shaped appearance, which has solved the problem that
other domestic instruments can not measure the irregular appearance.
3200mAh Li-battery with large capacity ensures more convenient and reliable
operation for long time measurement.
Adopting Germany high sensitivity sensor and light source with high diffuse
reflection coating integrating sphere structure above 96% ,which ensures m-
ore precise measurement data.
Auxiliary accessories can also measure the objection with large grain, powder
and pulp.
Equipped computer software can realize more detailed color data communication.

2
1.3 Applied
Color matching in industry and quality control in production process.
Color-difference detection and color-difference bath control in production process.
Color-difference analysis of spray paint surface and electroplate surface.
Color-difference of different areas of the metal treating surface.
Quality control in color difference in sample and the standard.
Color difference inspection of batch products in outdoors.
On-line monitoring of color difference in production process.
Color analysis testing in other special industry etc.
1.4 Accessory
No.
Accessories
Pieces
Remark
Standard
accessories
1
instrument
1
2
calibration box
1
3
AC adapter
1
4
USB cable
1
5
software
1
6
hard case
1
7
instruction
1
8
certificate
1
9
warranty card
1
10
8MM objection cover
1
JZ-600, JZ-650
11
4MM objection cover
2
JZ-610,JZ-650
12
14MM objection cover
1
JZ-630
13
powder test tube
1
JZ-630
Optional
accessory
14
micro-printer
1
*
Note:
In the 600 series, only JZ-650 has 8MM and 4MM dual port, other models just have one.
1.5 Condition:
Operating temperature: 0 to 40°C,relative humidity 80% or less, no condensation.
Storage temperature:10 to 30°C, relative humidity 70% or less.
Do not store the instrument in areas where with strong vibration, magnetic field in-
terference, corrosive medium and severe dust.
1.6 Notes:
The instrument should use our own AC adapter and lithium battery only, other-
wise, the instrument may damage, battery leakage, fire and even explosion.

3
Lithium battery can not be squeezed and put into fire, otherwise it will be dan-
gers.Recharge the battery if necessary so as not to affect the test accuracy.
The instrument should not put on the high temperature environment long-term,
it would cause the instrument accuracy reduced and performance fault.
Do not use the instrument in areas where dust, smoke, corrosive gases into the
instrument inside, it may cause the damage of instrument.
Do not use the instrument near equipment which produces a strong magnetic
field, it would cause data exception of instrument.
The instrument belongs to precision instrument, other person is not allowed to
disassemble it except our company person, or if the instrument damaged, we
may not warranty it.
2. Architectural feature and working principle
2.1 Architectural feature
Host
189
USB Prt DC
7
2345612 10
11
13

4
Main parts
8MM
objection cover
4MM
objection cover
14MM
objection cover
Calibration box
11Zero correction
22White correction
2.2 2 Wo rking p rinciple
According to the light of tristimulus principle established by CIE, the standard
illuminant irradiates to the surface of the object, and then the light will be sensed
by the sensor by the diffuse of the internal integrating sphere, the information
of the reflected light received by the sensor will be transmitted to the micro-
computer for calculating and analyzing, at the same time the digital color data
will be shown according to the color space standard. And the color difference
between the standard and the sample will be calculated, formula as follows:

5
△E* =[(△L*)2 +(△a*)2+(△b*)2 ]1/2 △E*:The total color difference
△L* = L*Sample- L*Standard △L+ Whitish, △L- Blackish
△a* = a*Sample - a*Standard △a+ Reddish, △a- Greenish
△b* = b*Sample - b*Standard △b+ Yellow, △b- Bluish
Basic judgment of Color-difference
Color-difference range
Basic judgment of Color-difference
0 - 0.25△E
Very small or none, exact match
0.25 - 0.5△E
Very small, acceptable match
0.5 -1.0△E
Small to a middle, acceptable in some occasions
1.0 -2.0△E
Middle, acceptable in some specific occasions
2.0 -4.0△E
Large, acceptable in specific occasions
4.0△E
Very large, unacceptable in most occasions
Note: This standard will be different due to different industries, detail information
please refer to industry requirements, this standard is only for reference.
3. Technical characteristic
Technical parameter:
High precision JZ-600
Small-caliber JZ-610
Optical geometry
8/d, equipped with SCI and SCE Synchronous test mode
Measure caliber
8MM
4MM
Observer
2°& 10°
Sensor
Silicon photodiode array
System language
Simplified Chinese,Traditional Chinese, English
repeatability
Standard deviation △E﹡ab≤0.06( Using the standard whiteboard
to measure 30 times and take the average.)
Display
Value of chromatism, chromatic value, color space figure,
qualified/ unqualified determination color analysis
Observing light source
D65 D50 C A F2 F8 F11
Color space figure
L*a*b、L*c*h、Yxy、RGB
Color difference formula
△E*ab、△E*ch
Power source
Special 3200 mAh large-capacity lithium battery, AC adapter
Data storage
20000 groups
Dimension
196×71×93(L×W× H)
Weight
660g(including the calibration boards)
Connection
USB
Standard accessories
White/black calibration board, USB
cable, Φ8MM objection cover, AC
adapter, Li-on battery, software
White/black calibration board, USB
cable, Φ4MM objection cover, AC
adapter, Li-on battery, software
Optional accessories
Micro-printer

6
large-caliber JZ-630
Multifunction JZ-650
Optical geometry
8/d, equipped with SCI and SCE Synchronous test mode
Measure caliber
14MM
MAV:8MM SAV:4MM
Observer
2°& 10°
Sensor
Silicon photodiode array
System language
Simplified Chinese,Traditional Chinese, English
repeatability
Standard deviation △E﹡ab≤0.08( Using
the standard whiteboard to measure 30
times and take the average.)
Standard deviation △E﹡ab≤0.06( Using
the standard whiteboard to measure 30
times and take the average.)
Display
Value of chromatism, chromatic value, color space figure,
qualified/ unqualified determination color analysis
Observing light source
D65 D50 C A F2 F8 F11
Color space figure
L*a*b、L*c*h、Yxy、RGB
Color difference formula
△E﹡ab、△E﹡ch
Power source
Special 3200 mAh large-capacity lithium battery, AC adapter
Data storage
20000 groups
Dimension
196×71×93(L×W× H)
Weight
660g(including the calibration boards)
Connection
USB
Standard accessories
White/black calibration board, USB cable,
Φ14MM objection cover, powder test tube,
AC adapter, Li-on battery, software
White/black calibration board, USB cable,
Φ14MM/ Φ8MMobjection cover, AC ada-
pter, Li-on battery, software
Optional accessories
Micro-printer
4. How to use the instrument
4.1 Power on and calibration
After the power switch on the side of the instrument has been turned on, the
instrument will enter into the calibration interface, as shown below:
Note: To ensure the accuracy of the instrument, the test interface can only be
entered when the instrument has been started up and calibrated.
Open the lid calibration, put the instrument on the zero calibration box, press
the ‘test’ key, After the completion of the zero calibration, turn for the other side
to the white calibration, After that, the instrument will automatically enter the
test interface.

7
L*: 40.72
a*: 40.91 -
a
b*: 11.78
+b
+
a
-b
4.2 Standard measured
Press and hold the ‘Test’ key, target spot will appear in the instrument, the
instrument will enter into the state of measurement after the p o s i t i o n i s set.
After the instrument enters the test interface, the default is single measurement,
the top status bar displays the measure caliber of current instrument is 8MM,
the measuring condition is D65/SCI/10°, let the measurement hole being tightly
connected to the object and then press the ‘Test’ key to start the standard tests
as shown below:
Standard 8MM D65/SCI/10 2014-1-11
Lamp D65 Color Lab
Mode Eab T:1
Sample
Delet
e
Prin
Select↑↓, Enter
Note: If data needs to be automatically saved, it can be set in the menu. The
data can be deleted or printed by putting the Up key and Down key. For printing,
you must first connect the micro-printer. Lamp, color space, mode option to move
the cursor to the selected location, press ‘Enter ’ key, then appear orange, you
can adjust illuminant and color space.
4.3 Sample measured
After the measurement is completed, you can press the ‘ ’ key to confirm
the result and then enter the sample test.
Note: ‘T’ represents the standard number, ‘A’ represents the sample number
under the current standard. For example, T: 2 / A: 1 indicates that the numerical
value of the No. 1 sample under the No. 2 standard. You can adjust to the standard
and simple with keys and then press Enter to turn to the next page, check or bring
up the data.

8
5. Function menu
Press ‘ ’ key to enter the system menu interface, 8 functions to select:
<PC-USB>, <Tolerance>, <Test>, <Time>, <Rest>, <Menu>, <Estimate>,
<language>.
5.1 PC-USB
Select and enter into the interface of <PC-USB>, after the software is installed
and enter into the communication state, then PC software can be operated.

9
5.2 Tolerance
Tolerance setup is setting the qualified color difference data, which should be
the maximum, allowable when testing. After you setup, it would automatically
determine if the measured object is qualified or not.
Select the <tolerance>, and press the ‘Enter’ key to enter the tolerance setup
interface, the default value is 1.0, After tolerance has been adjusted by the fr-
ont and rear key keys, exit and save current settings.
5.3 Test
The average test is mainly used for those surfaces with the characteristic of
uneven color and rougher surface. After the average number is set, the instru-
ment will automatically calculate the average value of multiple measurements
and then objectively reflect the status of the current color surface. The average
number can be adjusted by the front and rear key.

10
5.4 Time
After entering <Time setup> interface, you can adjust and reset the time.
After exit, the reset can be automatically saved.
5.5 Rest
Formatting will clear all the saved data in the instrument, please be careful!

11
5.6 Menu
In the Angle of view, the measurement conditions can be reset, the instru-
ment defaults to SCI/10°. If you need auto save, confirm with the front and rear
key and then exit. In this way will the instrument automatically save the standards
and sample values.
5.7 Estimate
Enter the determinant setup, thus the qualified judgment can be turned on
or off. The conditions of qualified judgment should be determined according
to the tolerance limit.
The color fastness judgment is mainly used for the determination of color
fastness grade of textiles.
Note: The function of color fastness judgment is mainly applied to textile
goods. The implementation of standards is in accordance with GB/T250-2008,
ISO105/A02-1993, this function can only work in two models——JZ-630 and
JZ-650.

12
5.8 Language
There are Simplified Chinese, Traditional Chinese and English three languages
to select, it will be automatically saved when you confirm exit.
6. Other function introduction
6.1 Standby and wake up
In order to save the battery power, the instrument would enter the standby
state of black screen if you don’t use it for 5 minutes. The instrument will wake
up to the previous interface for press any key.
6.2 Power function
It would lead to the test data anomalies when the top right statue bar displays
the battery power incompletely, Now we should recharge immediately, or it may
affect the measure accuracy.
6.3 Safety instruction
If the instrument would not use for a long time, please remove the battery to
prevent battery damage and corrosion the instrument.
6.4 Powder test tube
When testing powder and pulp objects, Gently unscrew the rotate handle of
powder, pour the measured object in the test tube, be careful not to be too full,
then gently tighten and compacted the object. Objects can be measured when
putting one end of measured port on the instrument interface.
.Note: the test tube should be cleaned immediately after the test is completed.
The quartz glass in the test port should keep clean so as not to affect the mea-
surement results.

13
7. USB connection & computer driver installation
7.1 Driver description
When you connect the computer of the first time, you should install our own drive.
7.2 Instrument connection
Enter the <PC communication> interface and select the PC communication,
it would appear the USB connection interface when you press Enter key.
Note: The instrument must enter into “USB<----->”can connect communication
with it.
7.3 USB installation
1
Put the CD to the CD-ROM, and insert the USB cable to the instrument
Interface, it would appear‘Found new hardware’, as shown below:

14
2
It would popup the dialog box later.
3Click‘Next’ to install, or install the specified location from the list.

15
4
Click‘Browse’ to find the ‘Driver File’ in the CD-ROM directory, and click
‘Next’,the installation wizard will automatically install the driver.
5
Click ‘Finish’, the driver has finish the installation.

16
8. Troubleshooting guide
Condition
Checkpoint
Recommended action
1、can not startup
A、no power of the battery
A、Change a new battery
B、insert the wrong polarity
B、Insert the correct polarity
2、test data execption
A
、
not close contact, or it may
shake when you measured
A、Close contact of the
object surface, and
measuring smoothly
B、the object is too thin, or it
has other color in reverse
side
B
、
Pad the whiteboard
reverse side or pad
some white papers
C、uneven color of the object,
or color mixed
C
、
Avoid the uneven color
position, or select the
average measurement
D、no power of the battery
D、Change the battery or
use the DC adapter
3、System halted of the
Instrument
A、the key pressed too fast
A、It need pause when
pressed the button
This manual suits for next models
4
Table of contents
Other Kingwell Measuring Instrument manuals
Popular Measuring Instrument manuals by other brands

Stocks AG
Stocks AG MM 117A Installation, Calibration and Operation

Geovent
Geovent Airbox Lite instruction manual

Colnatec
Colnatec Eon-LT Quick reference guide

Hydac
Hydac SMU 1000 operating manual

PCB Piezotronics
PCB Piezotronics 350B24 Installation and operating manual

BRUEL & KJAER
BRUEL & KJAER 4220 Instructions and applications