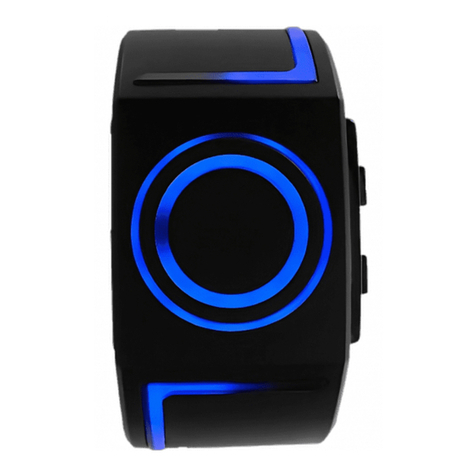
Kisai Zone User manual

Change the way you think about time

INSTRUCTION MANUAL
Button A
Button B

This watch uses an LCD “always on” display to show the time.
The digits are displayed in hexagonal shapes, starting with
the hours at the top, minutes in the center and second at the
bottom.
The hexagon on the right of the display shows fractions of
seconds.
Digits:
1 2 64 83 75 9 0
Example 2:
12:47:09
Example 1:
08:50:36
Hours: 08
Minutes: 50
Seconds: 36
fractions of seconds:
1. How to read the time
•
•
•

Example 2:
February 9th
2012
Example 3:
June 1st
2012
Example 1:
May 23rd 2012
You can illuminate the display for a short time with the EL
backlight by pressing button A.
This function works best at night time.
Press button B to display the date. The date icon indicates
that you are in date mode.
The date is displayed in the same way as the time, with
the month at the top, the date in the center and the year
at the bottom.
•The display will change back to time mode after a short time.
I. Turning on the backlight
II. How to read the date
2. Operating the basic functions
•
•
•
•
date
Year button B
month
button A
date indicator

Example 2:
alarm time: 07:15 AM
alarm off
Example 3:
alarm time: 03:45 PM
alarm on
Example 1:
alarm time: 06:20 AM
alarm off
Press button B twice to display the alarm time.
The alarm mode icon indicates that you are in alarm mode.
The alarm on/off icon indicates that the alarm is either on
or off.
The display will change back to time mode after a short
time.
III. How to check the alarm time
•
•
•
•
date
alarm on indicator
button B
month
button A
AM indicator
alarm indicator

The time icon and hour digits will flash when you are in
hour setting mode.
The AM/PM icon in setting mode indicates that you are
setting the time in AM or PM.
Press button B to increase the hours as required.
Hold button B to increase the hours more quickly.
Press and hold button A for 3 seconds to enter setting
mode.
Note: after 7 seconds of inactivity setting mode will deactivate.
hours blinking
PM indicator
time indicator
blinking
Example: 5:17 PM
hour setting
3. How to set the time and animation
I. Setting the hour
Press button A to confirm and move to minutes.
Note: after 7 seconds of inactivity setting mode will deactivate.
•
•
•
•
•
•
button B
button A

The time icon and the minute digits will flash when you are
in minute setting mode.
Press button B to increase the minutes as required.
Hold button B to increase the minutes more quickly.
The time icon and the seconds digits will flash when you
are in seconds setting mode.
Press button B to set the seconds to zero.
minutes blinking
seconds blinking
time indicator
blinking
time indicator
blinking
Example: 5:19 PM
hour setting
II. Setting the minutes
III. Setting the seconds
Press button A to confirm and move to seconds.
Note: after 7 seconds of inactivity setting mode will deactivate.
press button A to confirm and move to fractions of
seconds setting.
Note: after 7 seconds of inactivity setting mode will deactivate.
•
•
•
•
•
•
•
button B
button B
button A
button A

press button A to confirm and move to animation setting.
Note: after 7 seconds of inactivity setting mode will deactivate.
•
This watch has an animation feature. When set, the
animation will appear every 15 minutes between 6pm
to midnight and shows the hexagons move around the
screen.
Press button B to turn the animation on or off.
In setting mode, when the animation is on, the hexagons
move around the screen.
In setting mode, when the animation is off, all the
hexagons blink.
Press button A to confirm and exit setting mode.
You can choose to have fractions of seconds on or off
when the time is shown
Press button B to turn fractions of seconds on or off.
second fractions
animates (on)
time indicator
blinking
Hexagon
animating
Example: animation on
V. Setting the animation
IV. Turning fractions of seconds on / off
•
•
•
•
•
•
•
button B
button B
button A
button A

Press button B to display the date.
Press and hold button A for 3 seconds to enter date
setting mode.
Note: after 7 seconds of inactivity setting mode will deactivate.
4. How to set the date
I. Setting the year
I. Setting the month
The date icon and the year digits will flash when you are
in setting mode.
Press button B to increase the year as required.
Hold button B to increase the years more quickly.
The date icon and the month digits will flash when you are
in month setting mode.
Press button B to increase the month as required.
Hold button B to increase the month more quickly.
years blinking
date indicator
blinking
Example : 2012
years setting
Press button A to confirm and move to the month.
Note: after 7 seconds of inactivity setting mode will deactivate.
•
•
•
•
•
•
•
•
•
button B
button A

The date icon and the date digits will flash when you are
in date setting mode.
Press button B to increase the date as required.
Hold button B to increase the date more quickly.
month blinking
date blinking
date indicator
blinking
date indicator
blinking
Example : August
month setting
Example : August 20th
month setting
III. Setting the date
Press button A to confirm and move to date.
Note: after 7 seconds of inactivity setting mode will deactivate.
Press button A to confirm and exit setting mode.
Note: after 7 seconds of inactivity setting mode will deactivate.
•
•
•
•
•
button B
button B
button A
button A

Press button B twice to display the alarm time.
Note: after 7 seconds of inactivity setting mode will deactivate.
Hold button A for 3 seconds to enter alarm setting mode.
Note: after 7 seconds of inactivity setting mode will deactivate.
Press button A to turn the alarm on or off. The alarm icon
indicates that the alarm is on.
Example 2: alarm off
alarm on/off setting
Example 1: alarm on
alarm on/off setting
5. How to set the alarm time
I. Turning the alarm on or off
•
•
•
button B
alarm on
icon
button A

III. Setting the alarm minutes
The alarm icon and the hour digits will flash.
The AM / PM icon in setting mode indicates that you are
setting the alam time in AM or PM.
Press button B to increase the hour as required.
Hold button B to increase the hours more quickly.
The alarm icon and the minute digits will flash.
Press button B to increase the minutes as required.
Hold button B to increase the minutes more quickly.
Example: 07:00 am alarm on
Example: 07:09 am alarm on
II. Setting the alarm hour
press button A to confirm and move to alarm minutes.
Note: after 7 seconds of inactivity setting mode will desactivate.
Press button A to confirm and exit setting mode.
Note: after 7 seconds of inactivity setting mode will desactivate.
•
•
•
•
•
•
•
•
•
button B
button B
button A
button A
hours blinking
minutes blinking
alarm indicator
blinking
alarm indicator
blinking

This watch is covered by a 1 year warranty. This warranty
does not cover water damage, accidental damage, neglect
or unauthorized repair.
II. Warranty
This watch uses a CR2032 replaceable watch battery.
Battery lifetime will vary depending on use, but is
estimated to last for at least one year.
To maximize battery life you should limit use of the EL
backlight.
This watch is water resistant to 3ATM. Please do not use
the watch in the shower, for swimming or for other water
related activities.
8. User information
I. Battery
III. Caution
•
•
•
•
•

Case Materials
Case Dimensions
Maximum Fit
Wrist Size
Display
Water Resistance
Strap Materials
Finish
Weight
Battery
Stainless Steel
Stainless Steel
39 x 45.5 x 10.5 mm
210mm (approx.)
LCD with EL backlight
3ATM
brushed
140g
CR2025
SPECIFICATIONS

Table of contents
Other Kisai Watch manuals

Kisai
Kisai Blade User manual

Kisai
Kisai ADJUST User manual

Kisai
Kisai Radioactive User manual

Kisai
Kisai Satellite-X User manual

Kisai
Kisai MAZE User manual

Kisai
Kisai RPM User manual

Kisai
Kisai Seven User manual

Kisai
Kisai 3D Unlimited User manual

Kisai
Kisai OPTICAL ILLUSION User manual

Kisai
Kisai Xtal User manual